How to use Batch Actions in SaasAnt Transactions Desktop
August 29, 2025
Managing large volumes of transactions in QuickBooks Desktop can be time-consuming if you edit or delete them one by one. The Batch Action feature in SaasAnt Transactions Desktop is designed to solve this problem by allowing you to modify or remove multiple rows at once before importing them into QuickBooks.
This article will guide you through:
Editing transactions in bulk using Batch Actions
Deleting rows you don’t want to import
Practical use cases for Batch Actions
Answers to frequently asked questions
Editing Transactions in Bulk with Batch Actions
Step 1: Log in to QuickBooks Desktop
Step 2: Launch SaasAnt Transactions Desktop
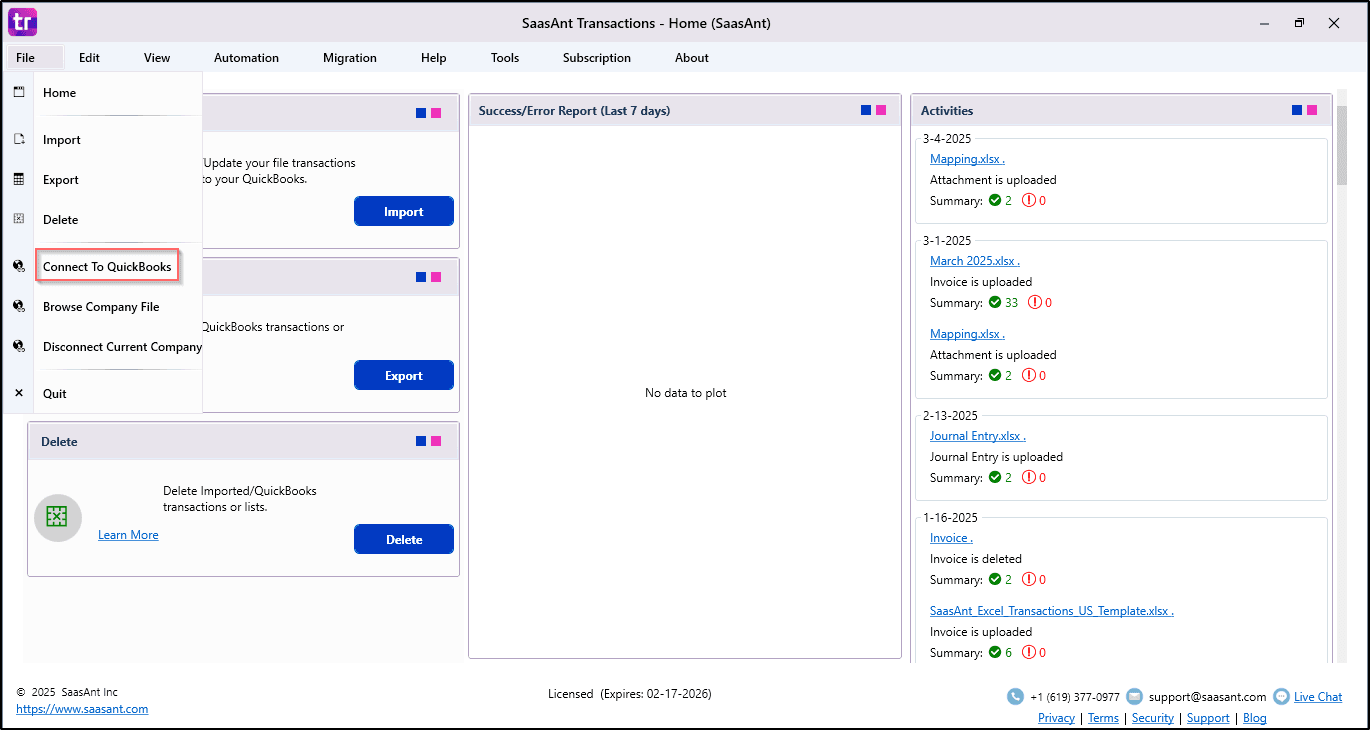
Step 3: Navigate to the File Menu tab.
Click Connect to QuickBooks to establish a secure connection between SaasAnt and your QuickBooks company file.
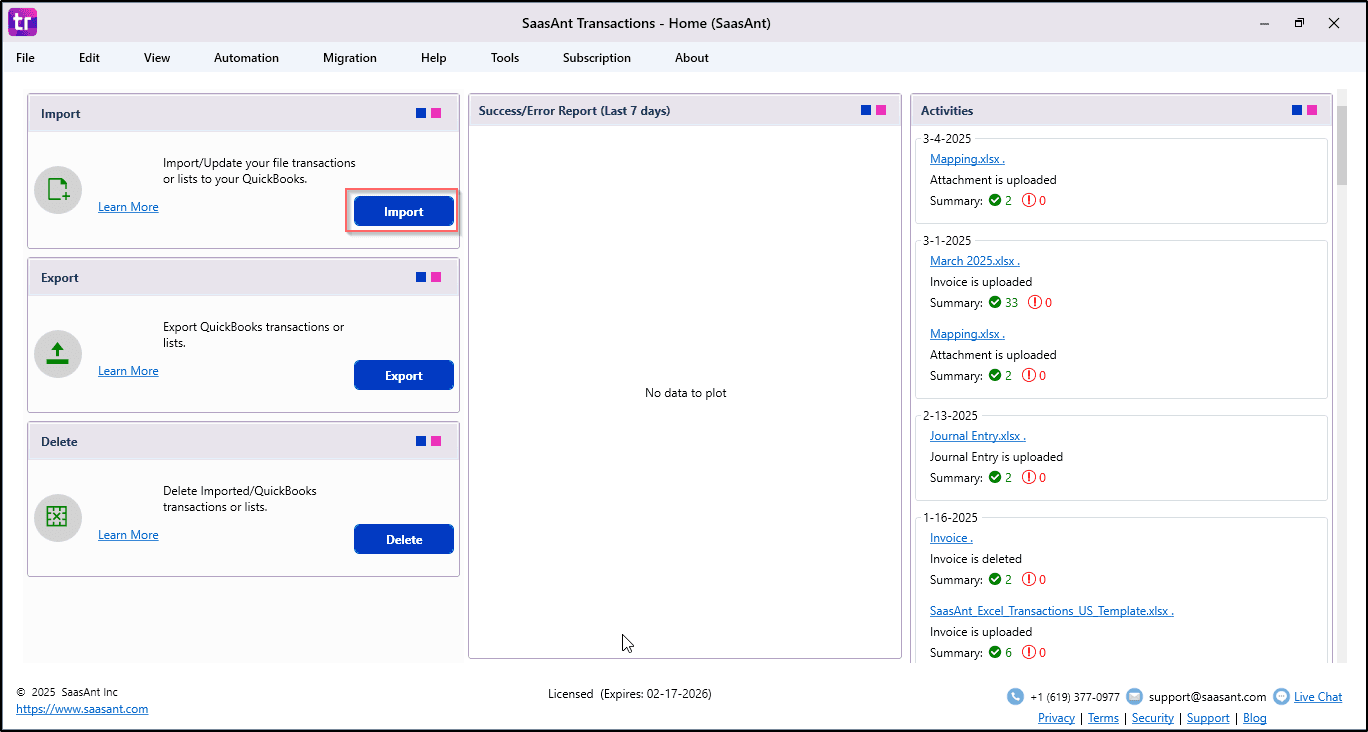
Step 4: Go to the Import Tab.
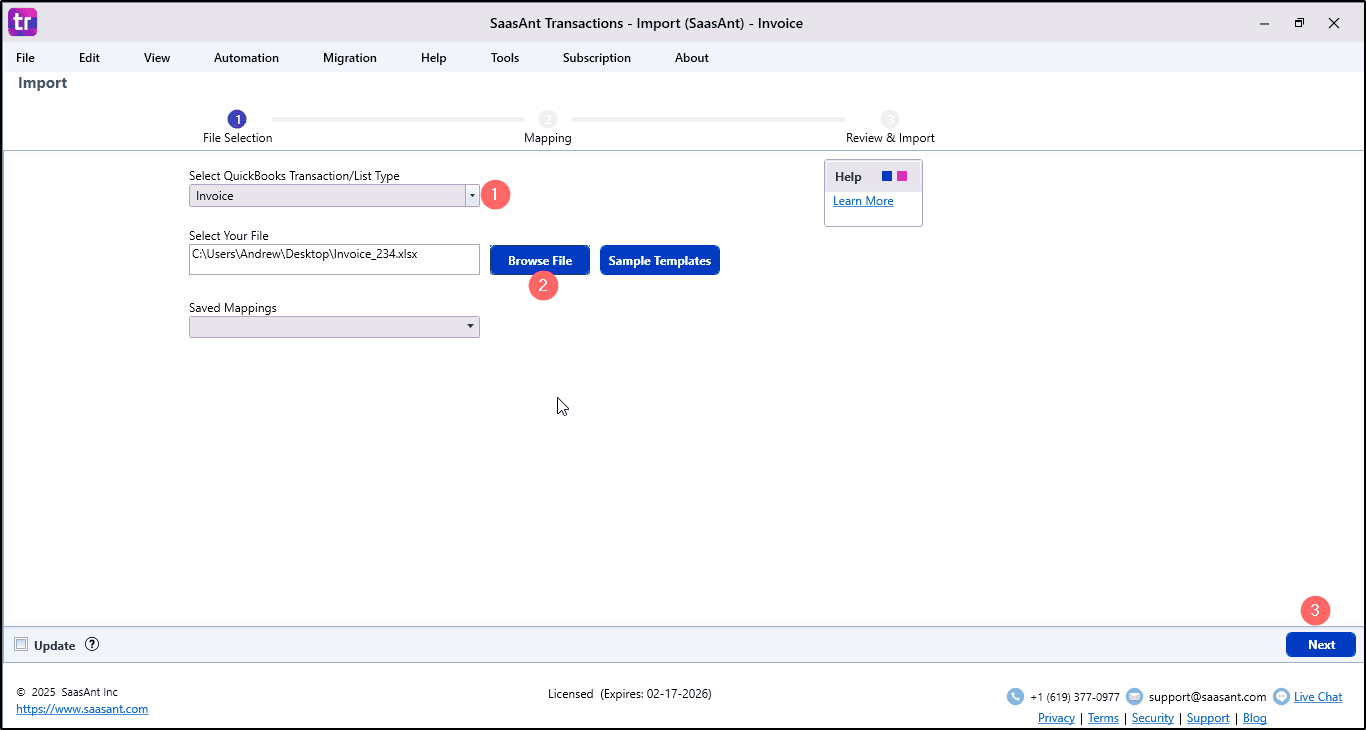
Select the Import Tab and choose the QuickBooks list or transaction type you are planning to work with, such as invoices, bills, journal entries, or customer/vendor lists.
Step 5: Review Uploaded Data
Once your data file is uploaded, you will see all records on the Review Screen. This is where you can inspect your data and apply bulk changes.
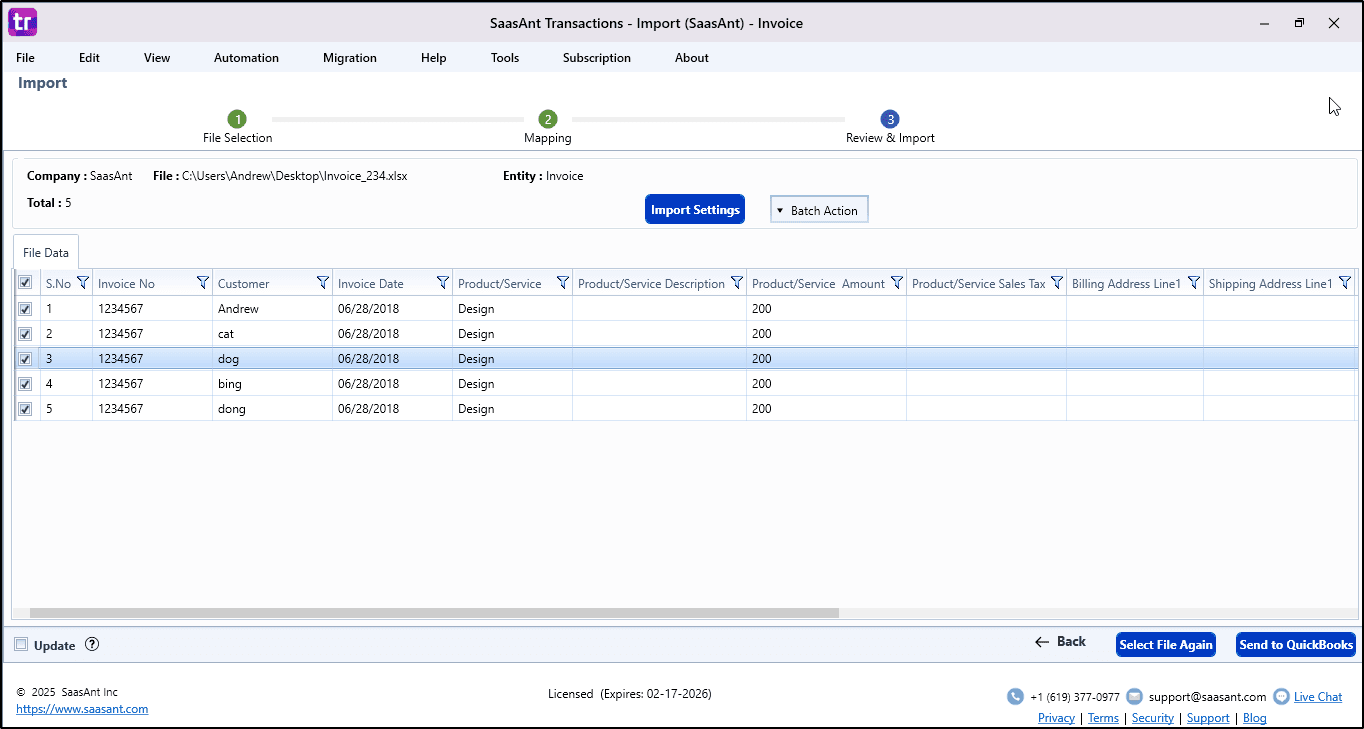
Step 6: Select the Batch Action dropdown.
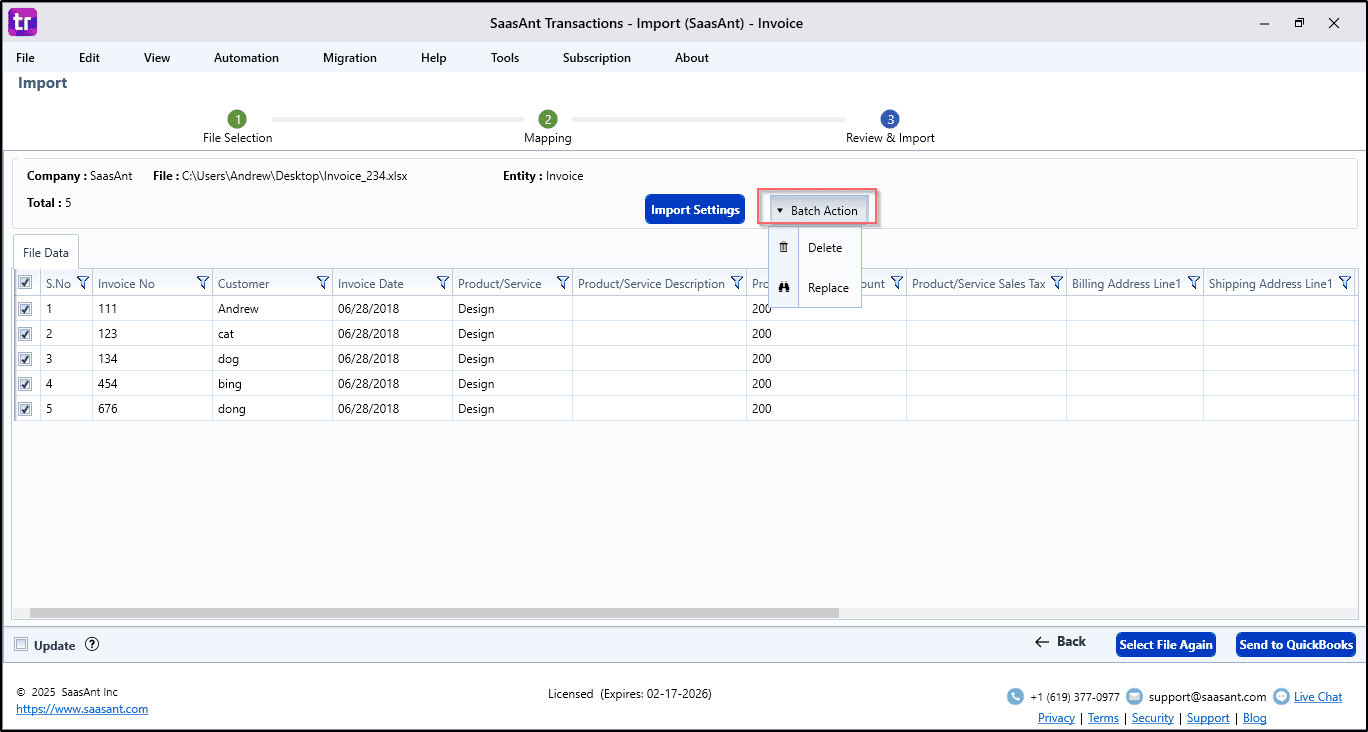
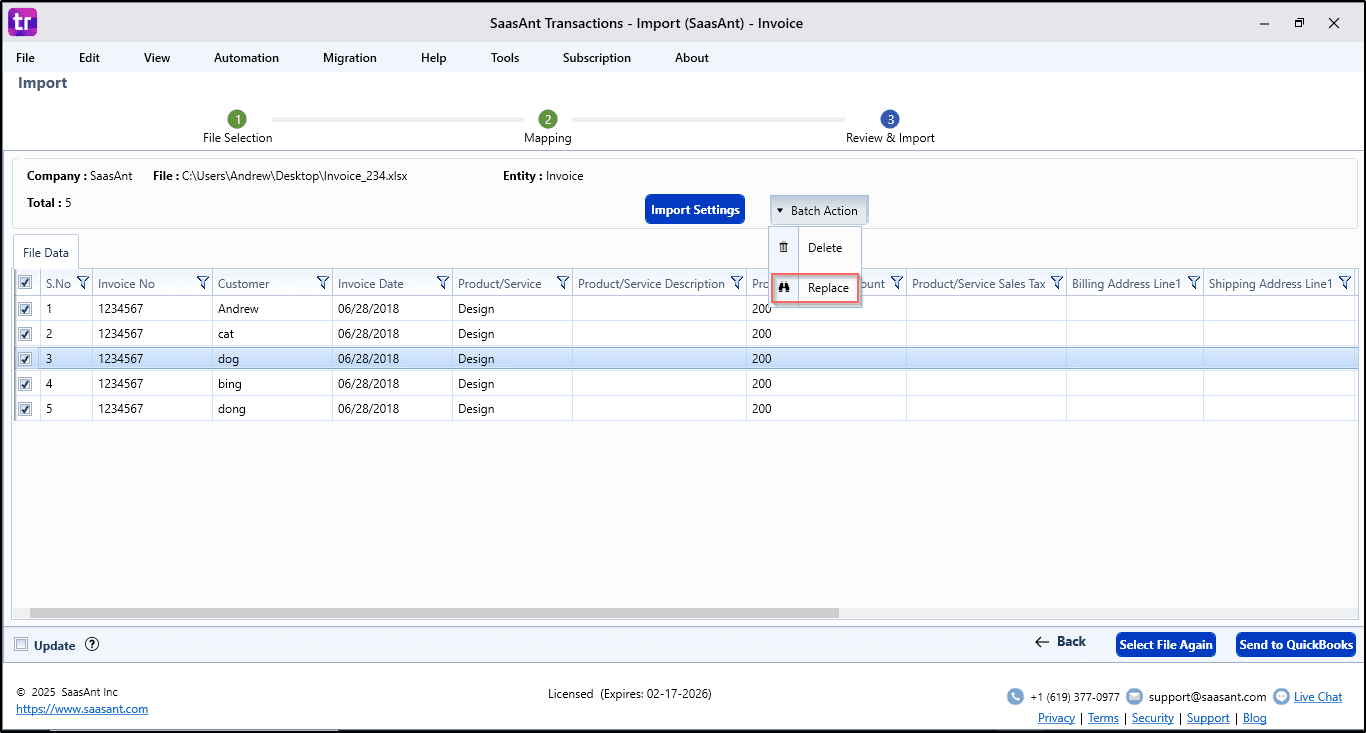
Step 7: Select the "Replace" option.
Step 8:
Select the column you want to update (for example, Invoice Number, Customer Name, Vendor Name, Account, or Amount). Enter the new value to replace across all selected rows.
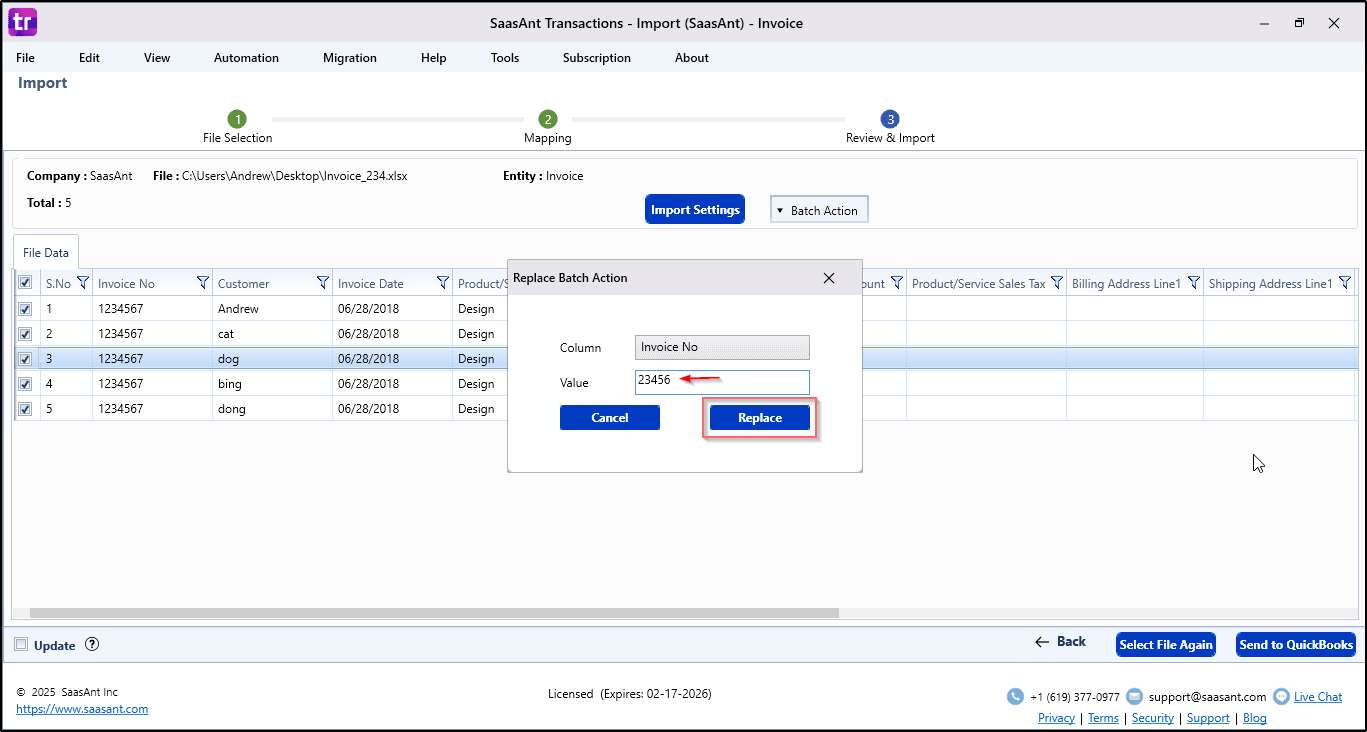
Example:
If you replace the Invoice Number column with 23456, every invoice in that column will automatically update to 23456 before importing into QuickBooks.
This feature ensures consistency across large datasets and saves time compared to manual editing row by row.
Deleting Transactions in Bulk with Batch Actions
Sometimes you may not want to import all rows in your file. With Batch Actions, you can quickly remove unnecessary transactions before they reach QuickBooks.
Step 1: Open the Review Screen
Upload your file and wait for all transactions to appear on the Review Screen.
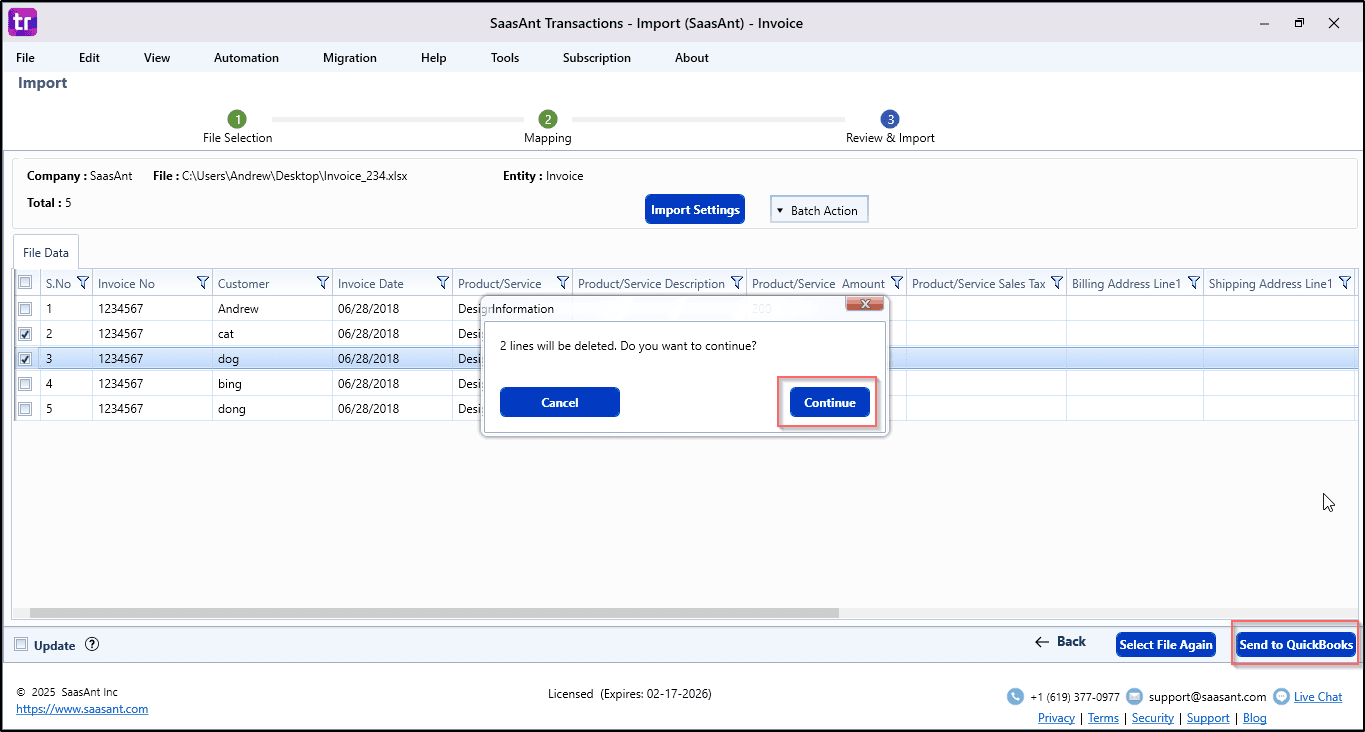
Step 2: Select Rows to Delete
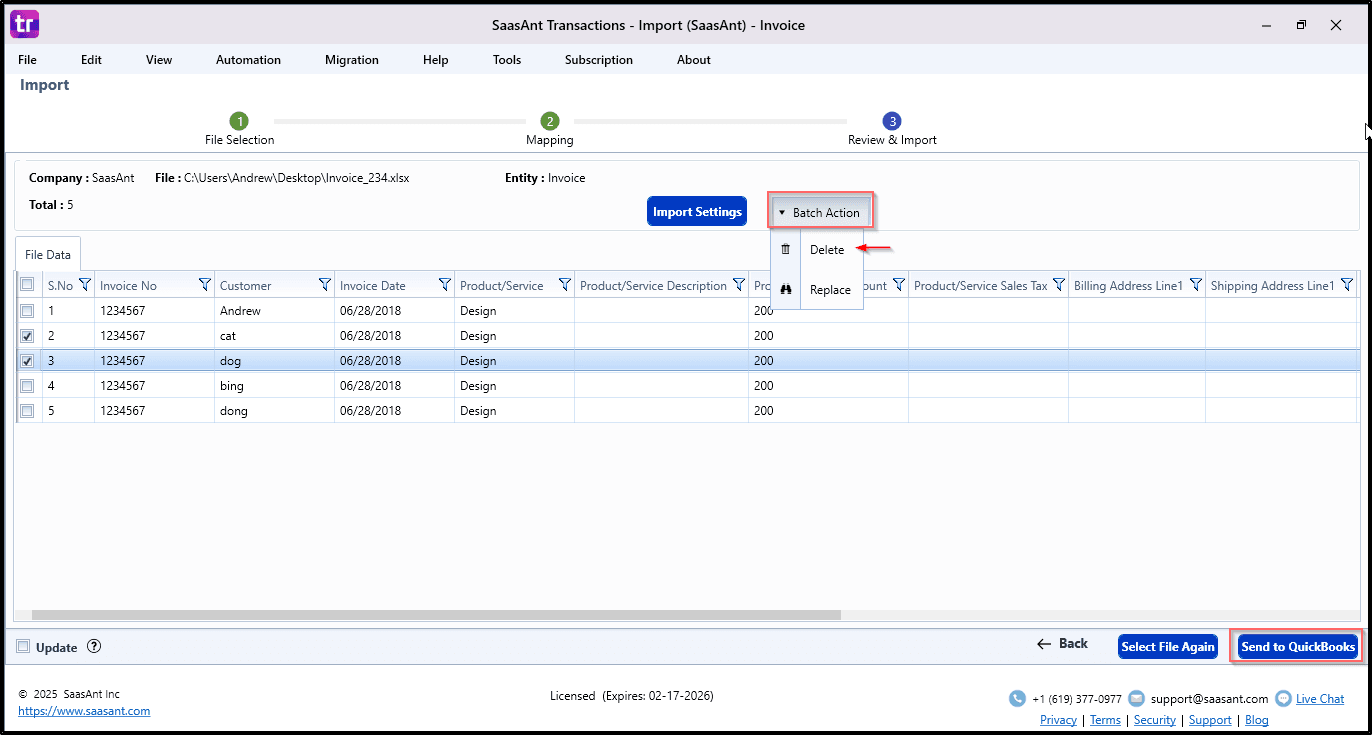
Step 3: Delete Selected Rows
A confirmation message will appear asking if you are sure you want to delete the selected rows.
Click Yes to confirm.
Note: The selected rows will now be removed from the batch and will not be imported into QuickBooks.
Practical Use Cases for Batch Actions
Data Cleanup Before Import:
Quickly remove duplicate or invalid transactions to ensure that only accurate data gets imported into QuickBooks.Bulk Corrections:
If an entire batch of transactions has the wrong vendor name, account, or invoice number, use the Replace option to correct them all in a single step.Error Handling:
If your data file has formatting errors or misaligned columns, you can correct them in bulk instead of editing line by line.Testing Imports:
When testing with sample data, Batch Action makes it easy to delete test rows and only proceed with actual business transactions.
Frequently Asked Questions (FAQs)
1. Can I undo a Batch Action once it’s applied?
No, Batch Actions take effect immediately on the review screen. If you need to undo the changes, you can re-upload your original data file.
2. Does Batch Action affect all rows or only the ones I select?
Replace Action: Affects all rows displayed on the review screen, unless you filter the data first.
Delete Action: Removes only the rows you have selected using the checkboxes.
3. What types of data can I modify with the Replace option?
You can modify any column shown in the review screen, including Invoice Number, Customer Name, Vendor Name, Account, and Amount fields.
4. Can Batch Actions be used after transactions are imported into QuickBooks?
No. Batch Actions are only available before the import. Once data has been imported, you must edit it directly in QuickBooks.
5. Will deleted rows be lost permanently?
Deleted rows are removed from the review screen only. Your original file remains unchanged, so you can re-upload it anytime to restore deleted data.
Need Help?
If you have any questions or need assistance with Batch Actions, please contact our support team at support@saasant.com. Our experts are available to guide you through the process and help you get the most out of SaasAnt Transactions Desktop and to learn more about the importing settings Click Here