How to Migrate Data to Ledger QuickBooks Online Company: Step-by-Step Guide
December 24, 2025
How Data Migration Works:
Migrating data from one QuickBooks Online company to Ledger account is made simple with SaasAnt Transactions, which is purpose-built for this workflow. You can start by exporting your QuickBooks Online data into a structured CSV file that includes key lists such as customers, vendors, and the chart of accounts, along with transaction records like journal entries.
Once the data is ready, you can upload it into the new QuickBooks Online company using SaasAnt Transactions Online. This provides accurate data transfer, custom field mapping, and complete control over bulk imports, especially helpful for large or complex files.
To complete the migration, you will need an active SaasAnt Transactions subscription connected to both the source and destination QuickBooks Online companies so you can export and import the data.
Why Use SaasAnt for QuickBooks Migration?
Handle bulk export and import with flexible, advanced field mapping.
Cover all key lists and transaction types needed for a clean move.
Minimize migration errors using built-in checks and validations.
Well-suited for complex migrations and multi-year historical data.
How Data Migration Works?
With SaasAnt, the migration flow stays simple:
Export your QuickBooks Online data to a structured CSV file using SaasAnt Transactions Online.
Import that CSV into QuickBooks Online with accurate field mapping using SaasAnt Transactions Online.
Review and confirm. Use the built-in review screens to validate your migrated data before you go live.
Note: You will need to purchase a SaasAnt subscription for both the QuickBooks account (export) and Online (import).
Supported Data Types:
Lists:
Chart of Accounts
Transactions:
All transactions are captured as a General Journal Report.
Note: During export, all transactions are recorded as Journal Entries.
Getting Started with the Migration.
To begin the migration, connect the SaasAnt Transactions Online application to your QuickBooks Online company.
Data Exported, What Next
Once you have exported the data from QuickBooks Online, the next step is to move it into the QuickBooks Online Ledger account using SaasAnt Transactions Online.
Before starting the transfer, make sure the SaasAnt Transactions app is connected to your QuickBooks Online account, then proceed to upload and import the exported file.
Getting started with SaasAnt Transactions Online
To use SaasAnt Transactions Online with QuickBooks Online, you first need to connect the app to your company.
Important: You must have admin access to your QuickBooks Online company to connect any third-party application.
How to connect QuickBooks Online with the SaasAnt application
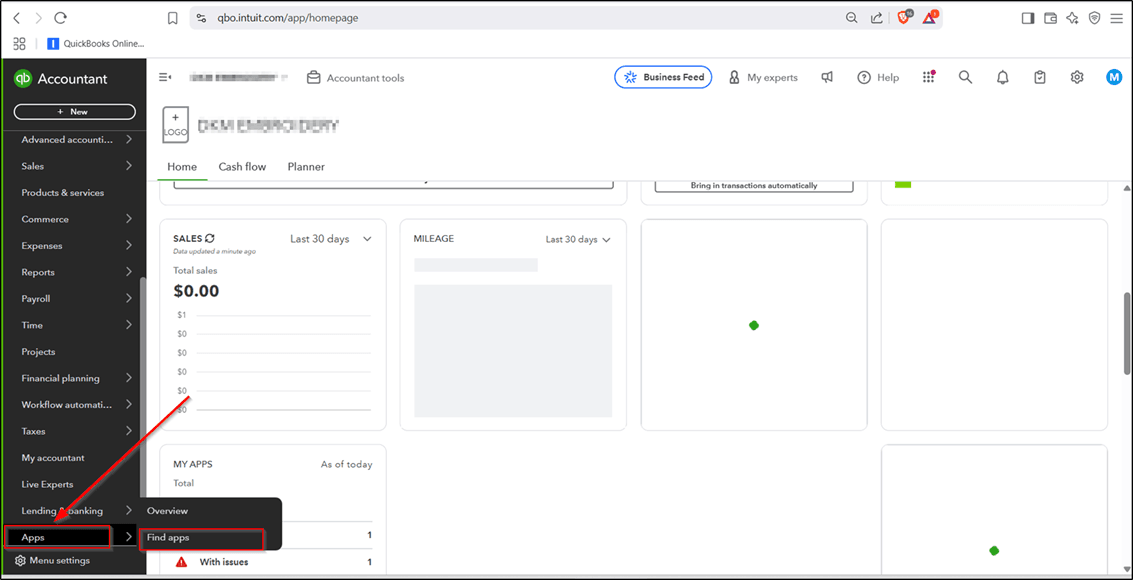
Sign in to your QuickBooks Online account.
From the left menu, click Apps.

Click Find Apps to search for and connect the SaasAnt Transactions app.
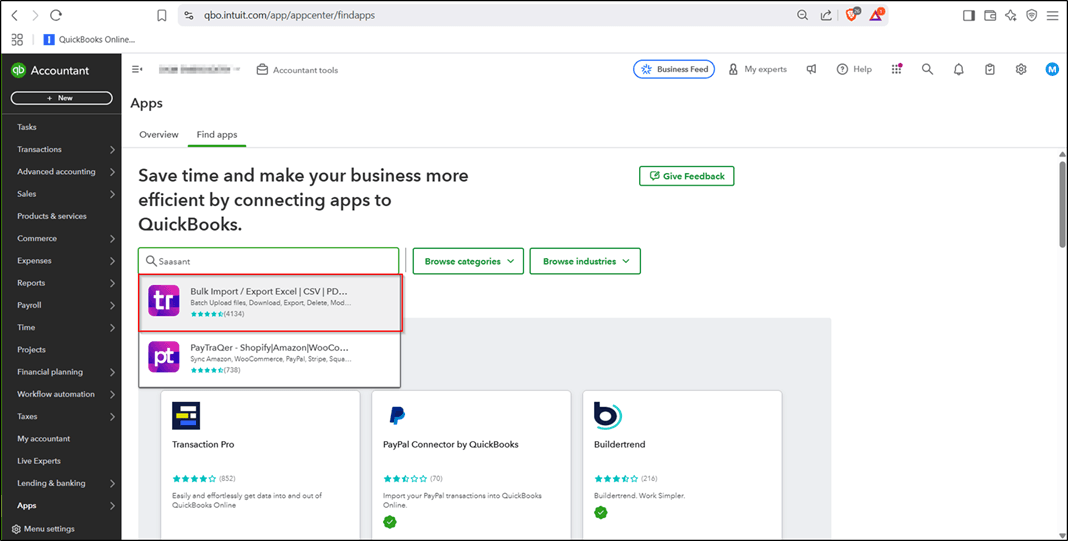
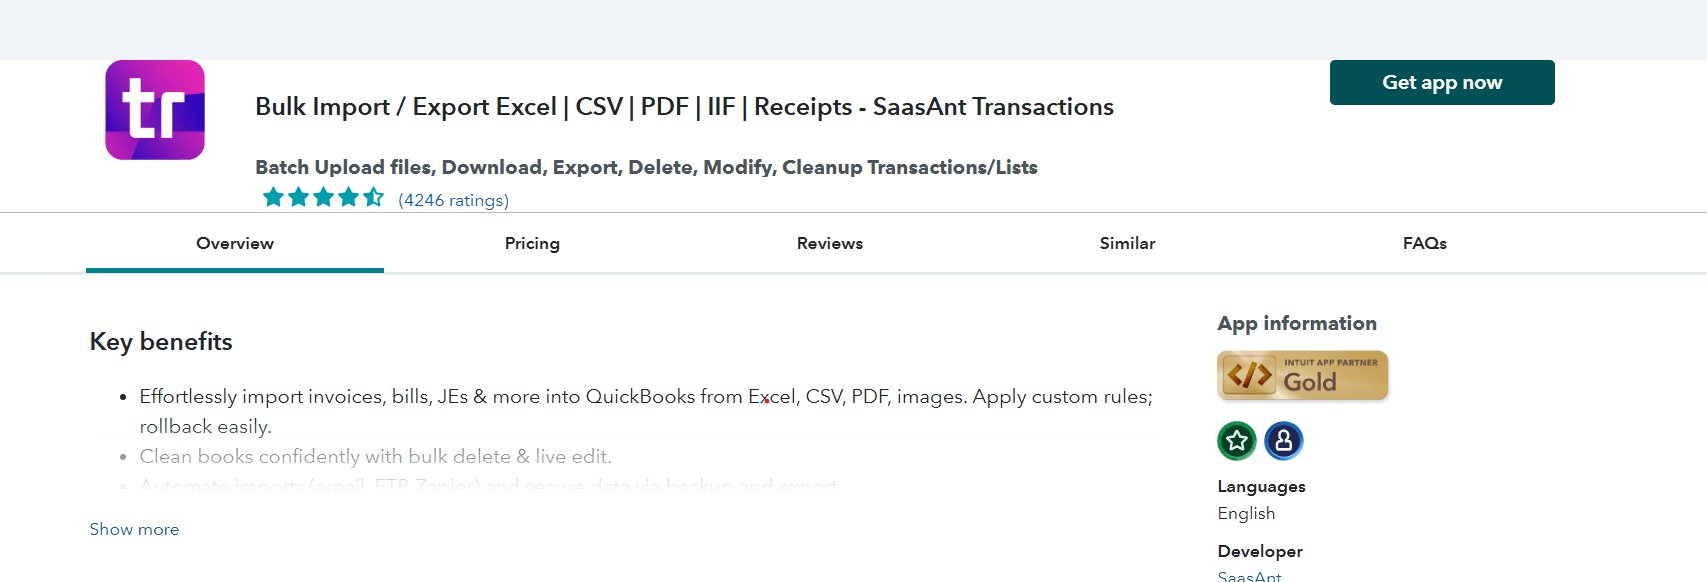
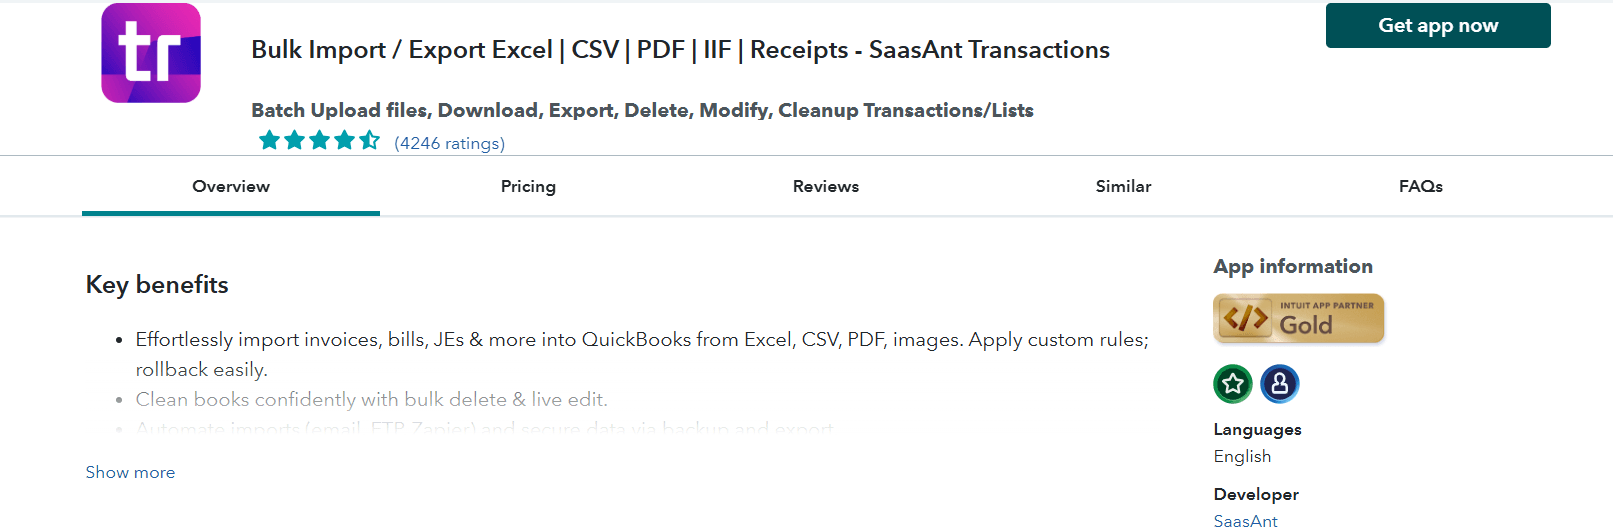
"Once the page loads, click on 'Get App Now' to connect the application.
Click on 'Connect' and authorize the application. Once done, QuickBooks Online and SaasAnt will be connected, and you’ll be directed to the home page.

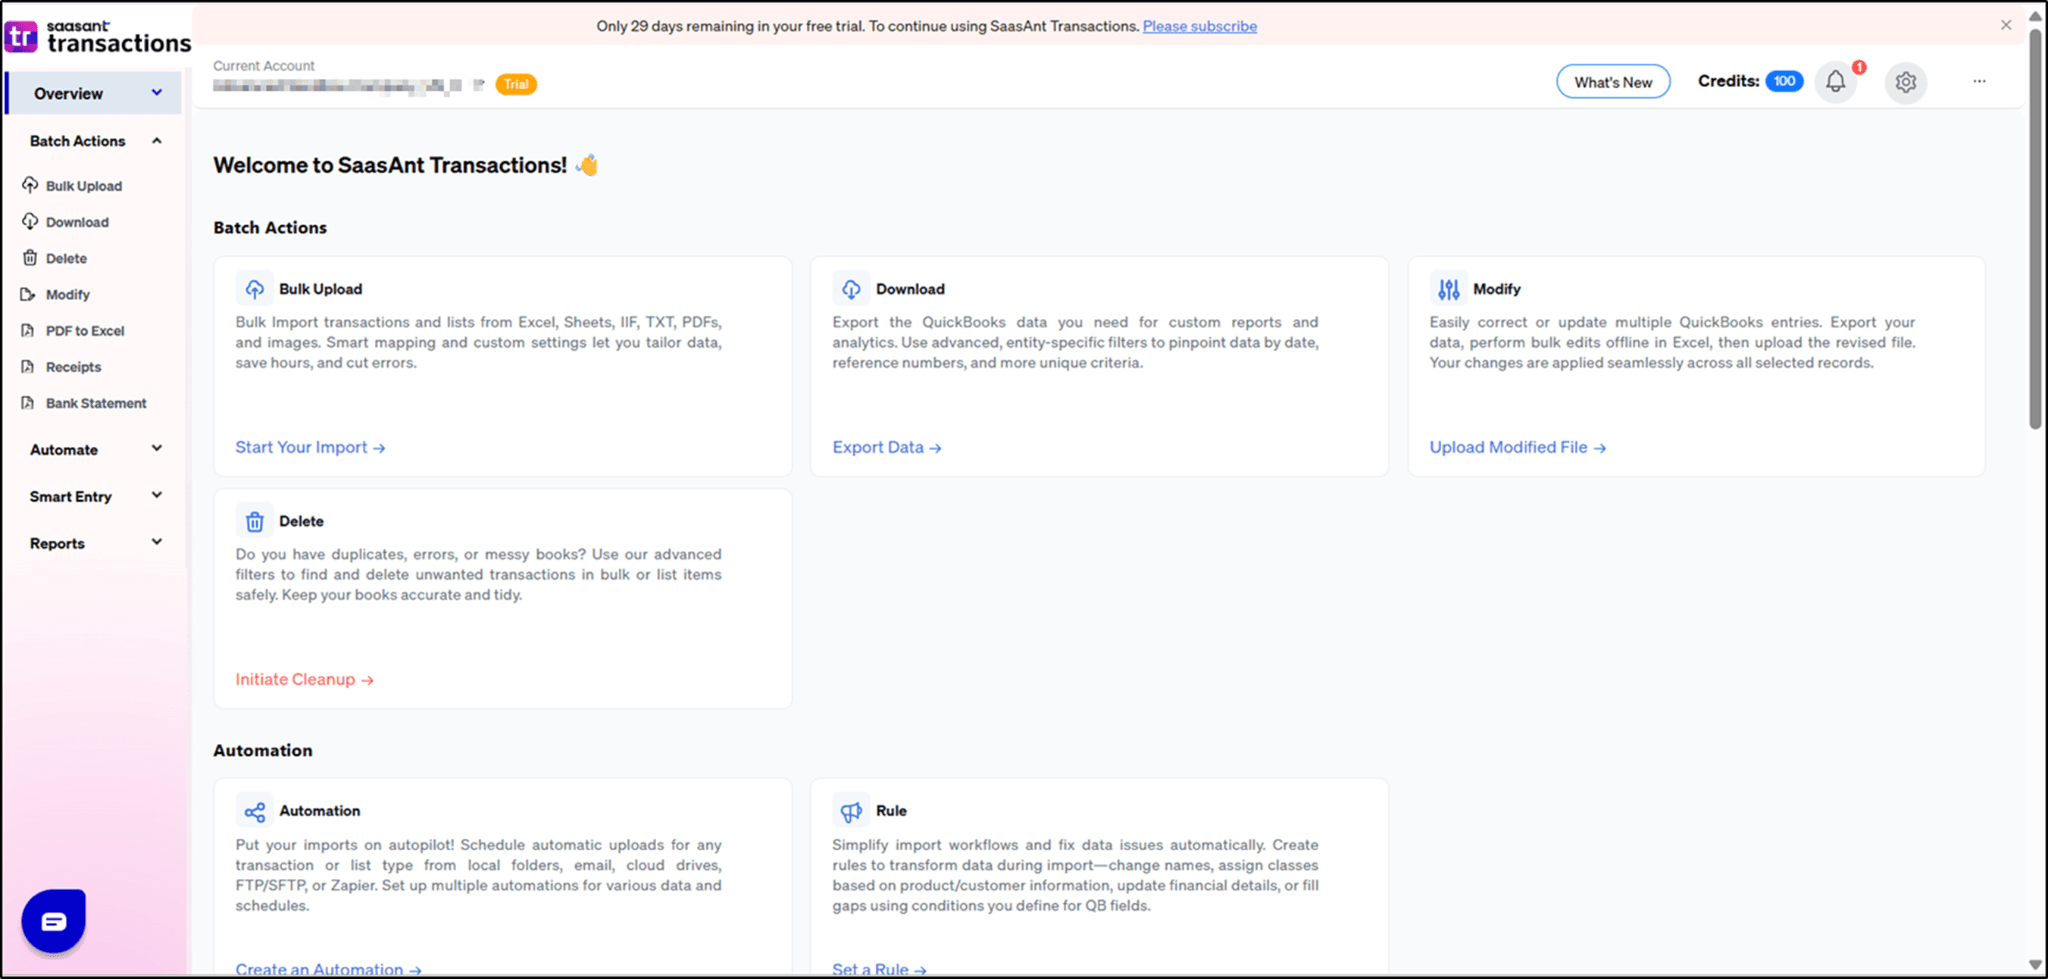
When the application is connected for the first time, a 30-day trial will begin.

How to subscribe to SaasAnt Transactions?
To continue with the data transfer, you will need an active SaasAnt Transactions subscription, as the trial version is limited to testing and evaluation.
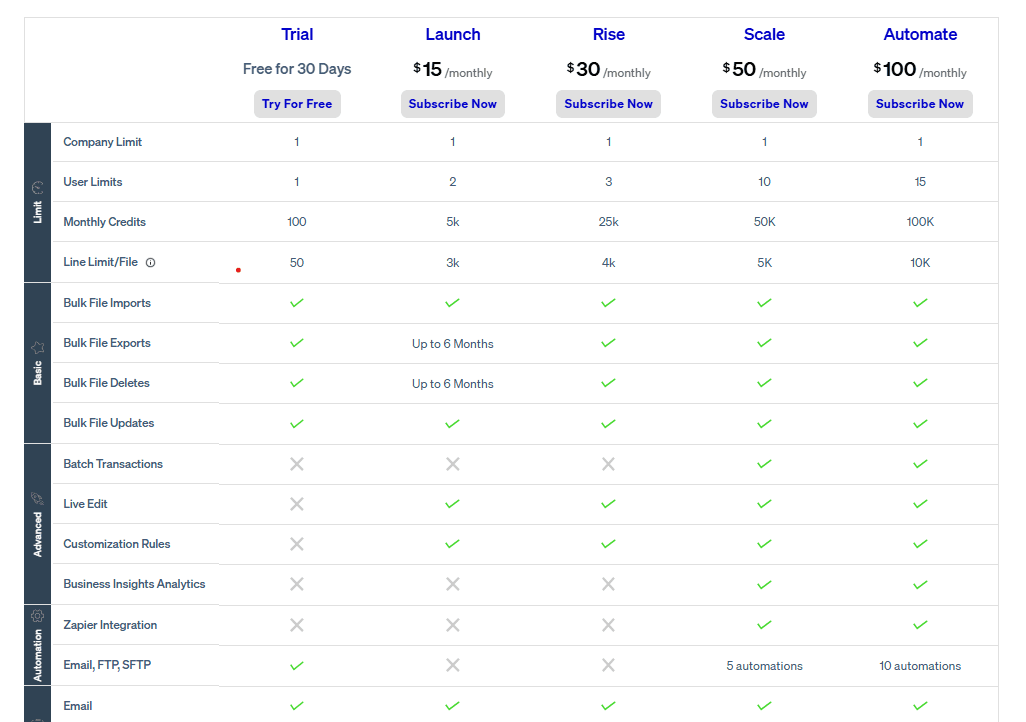
Please review the pricing details and choose the plan that best matches your data transfer and migration needs.
To subscribe, open the saasant online application, navigate to the gear, and click on plans.
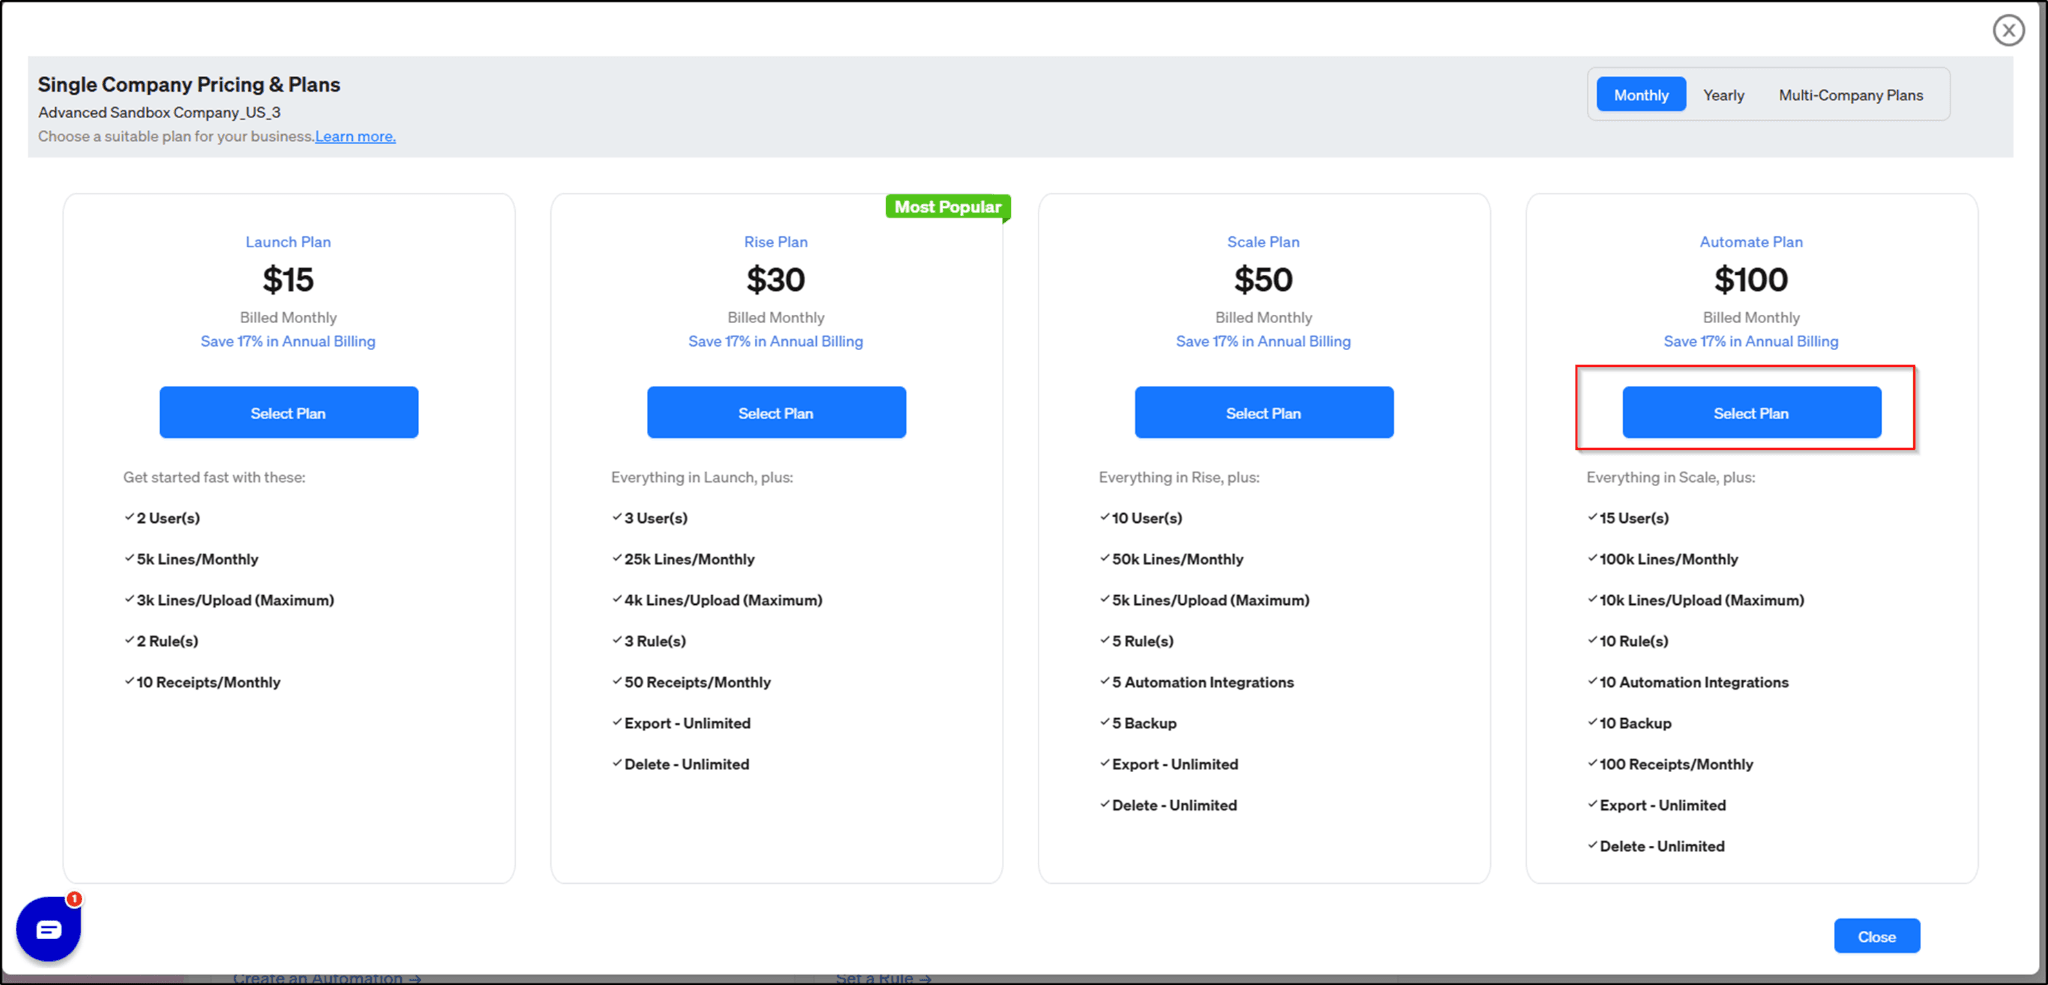
Click on 'Select Plan' to proceed with the payment. You’ll be redirected to the Stripe gateway to enter your card details and complete the purchase. Once the payment is successful, you’re ready to continue.
Pre-migration checklist:
Before you start the data migration, make sure these items are completed.
1. Currency alignment
Confirm that both QuickBooks Online companies are set to the same home currency.
2. Clean slate
The destination QuickBooks Online company should be empty, with no existing transactions or lists, so you avoid conflicts during migration.
3. Multi-currency settings
If your QuickBooks Online file uses multiple currencies:
Turn on multi-currency in QuickBooks Online.
Go to Settings → Account and Settings → Advanced → Currency and enable multi-currency.
4. Closed books date
Set the “Close the books” date to one day before your migration start date.
Example: If migration begins on January 1, 2023, set the close date to December 31, 2022.
Go to Settings → Account and Settings → Advanced → Accounting → Close the books to update this.
5. Duplicate journal entry warnings
To reduce the chance of duplicate journal numbers:
Go to Settings → Account and Settings → Advanced → Automation.
Turn on “Warn me if a duplicate journal number is used.”
Migration process order
Always export your data in the following sequence:
Chart of Accounts
Trial Balance
All other transactions (Journal Reports)
How to export data using the SaasAnt Transactions application
After logging in, select the "Download" Tab to download your transactions as Excel or CSV files in a few clicks, then choose "Let's Export."
Select Transaction Type and Date Range.
Choose the transaction type (e.g., "Journal Report") you want to export. Next is Select Date Type. In the Date type, you have three options. Search By Transaction Date.
Preview and export your desired transactions.
Finally, according to the date range, it will retrieve all the records, and you can download the data in either Excel or CSV format.
Once you have exported the data, you can now connect the second QuickBooks Online company to the SaasAnt Transactions Online application.
How to connect QuickBooks Online with the SaasAnt application
Sign in to your QuickBooks Online account.
From the left menu, click Apps.
Click Find Apps to search for and connect the SaasAnt Transactions app.

"Once the page loads, click on 'Get App Now' to connect the application.
Click on 'Connect' and authorize the application. Once done, QuickBooks Online and SaasAnt will be connected, and you’ll be directed to the home page.

When the application is connected for the first time, a 30-day trial will begin.
Migration process order
Always upload your data in the following sequence:
Chart of Accounts
Trial Balance
Journal Entry (Journal Report)
Let’s start with the upload.
Before transferring data from the Excel file to QuickBooks Online, please ensure the migration checklist is complete.
How to Upload a Chart of Accounts?
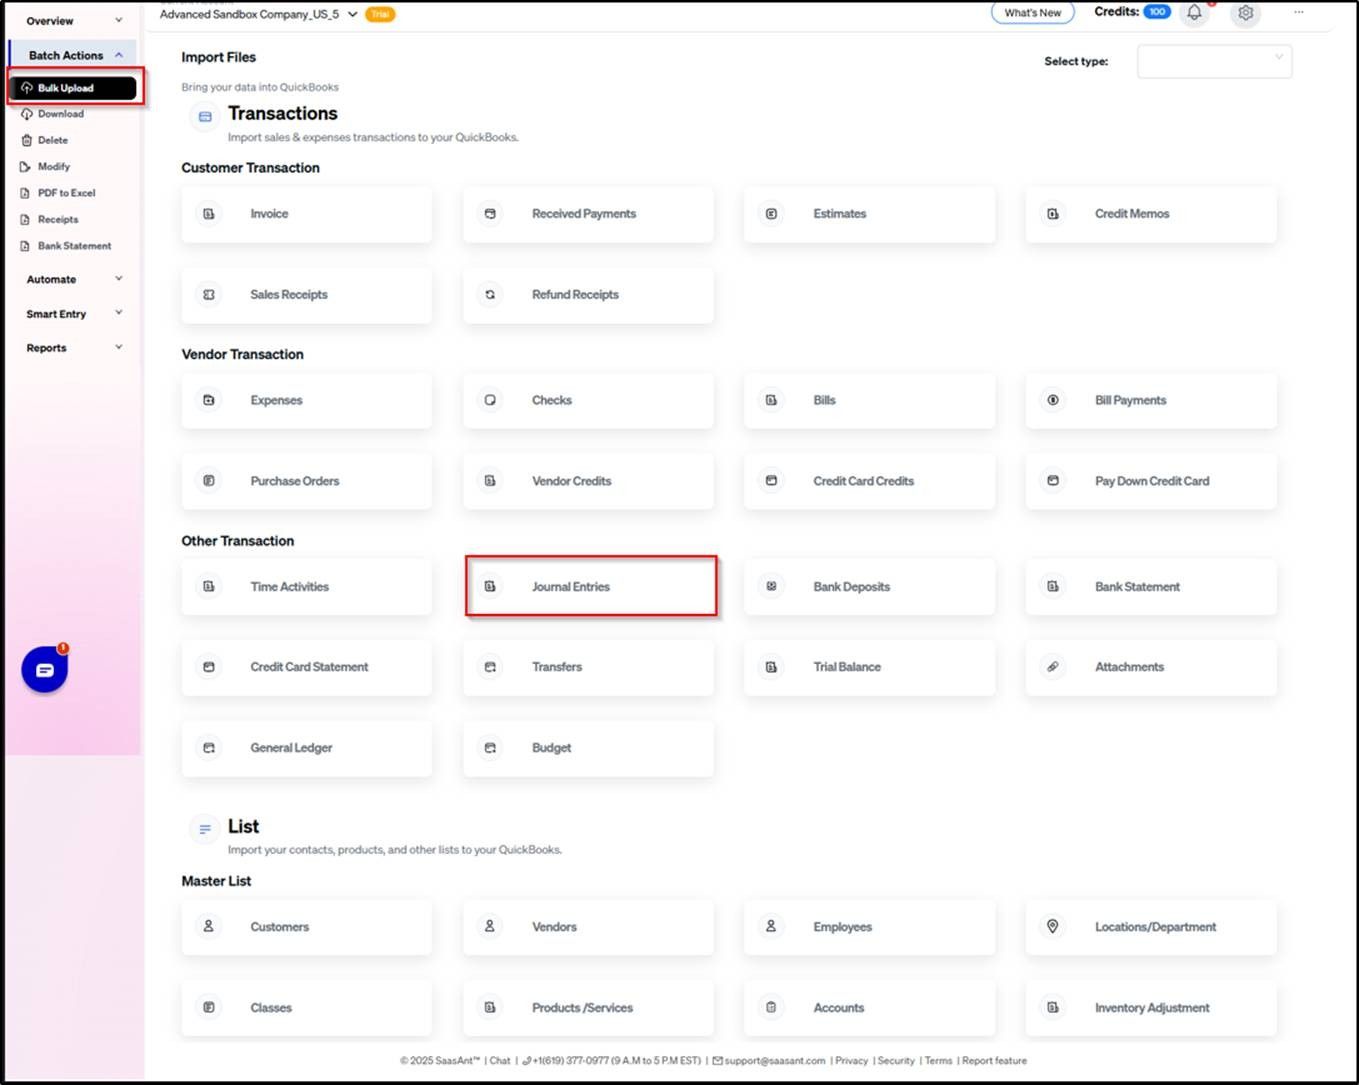
1. Click on Bulk Upload and select the QuickBooks entity as "Accounts".
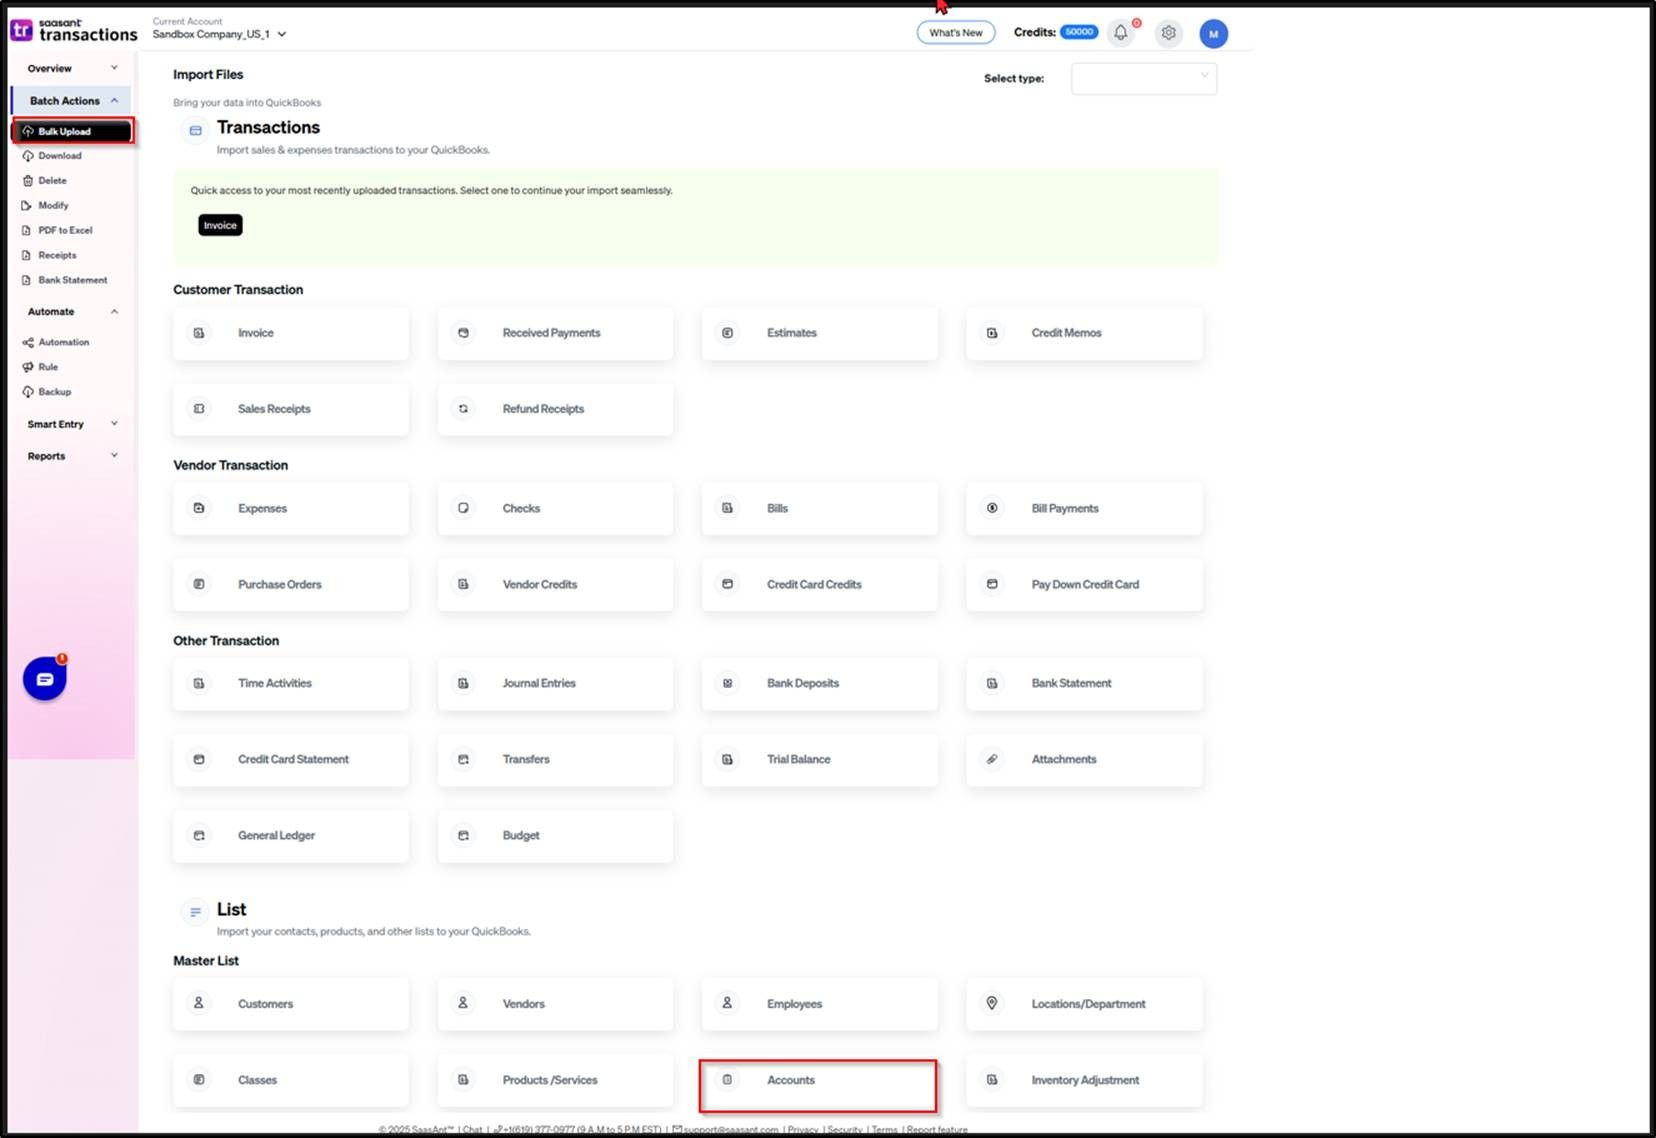
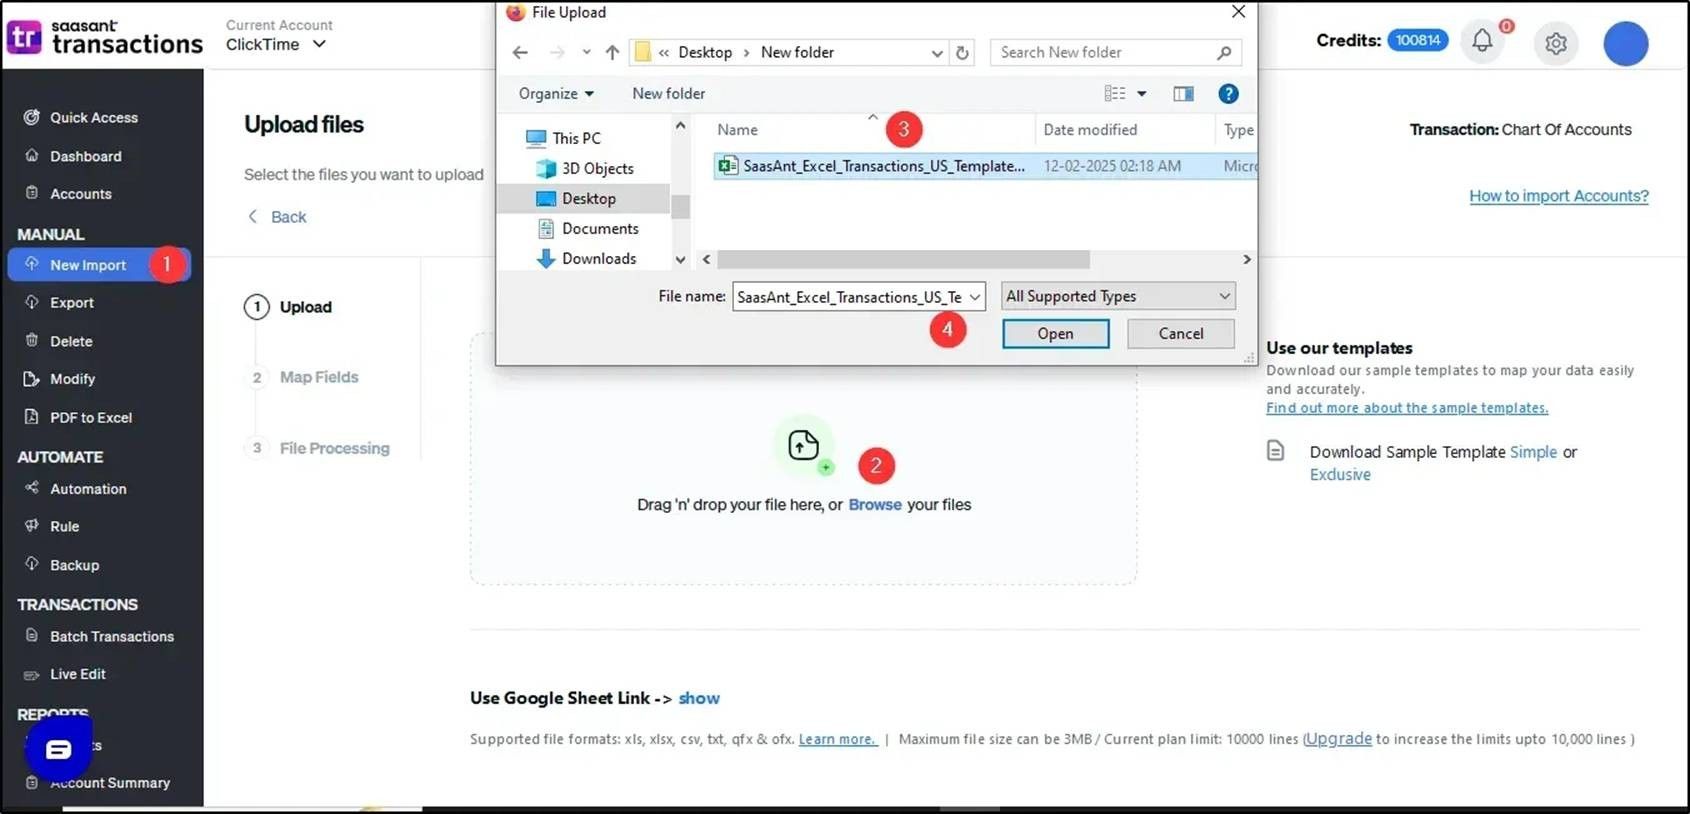
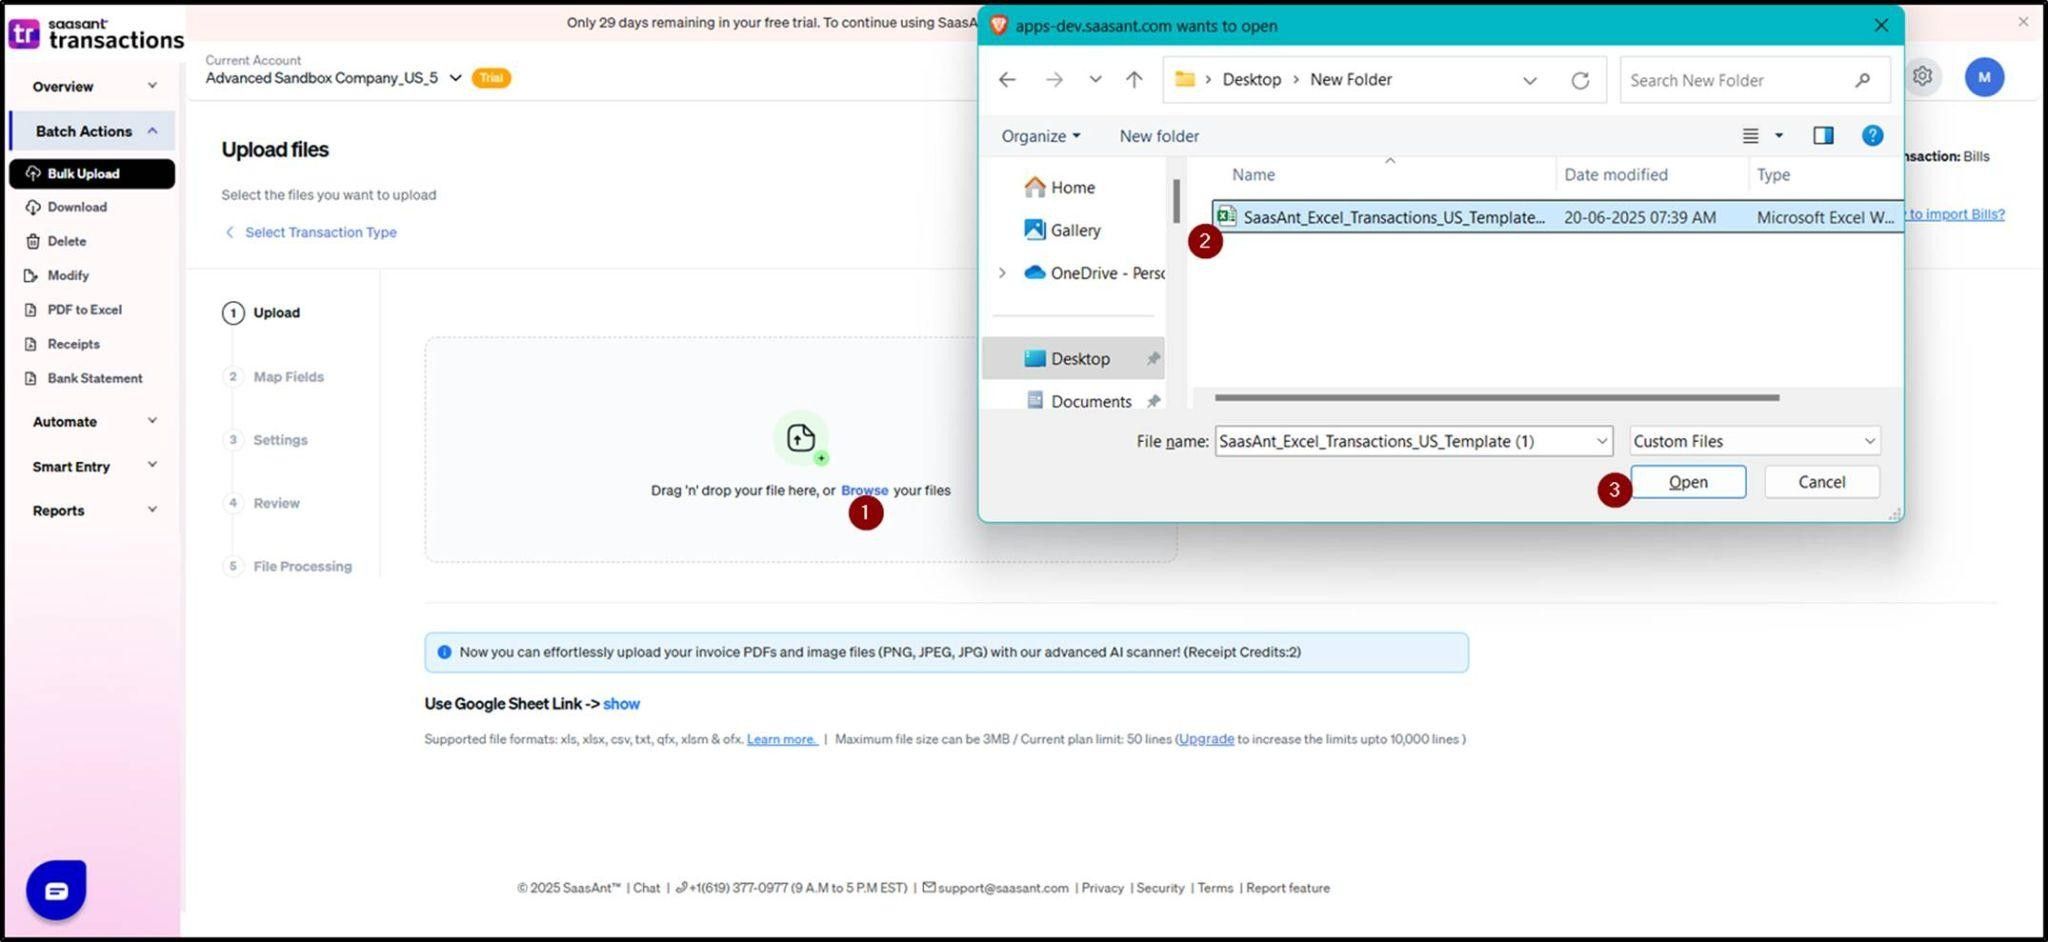
2. Select the file you need to upload.
3. On the Mapping screen, select the QuickBooks fields that correspond to the headers in your file to ensure accurate data. Once done, click Save and Continue to proceed.
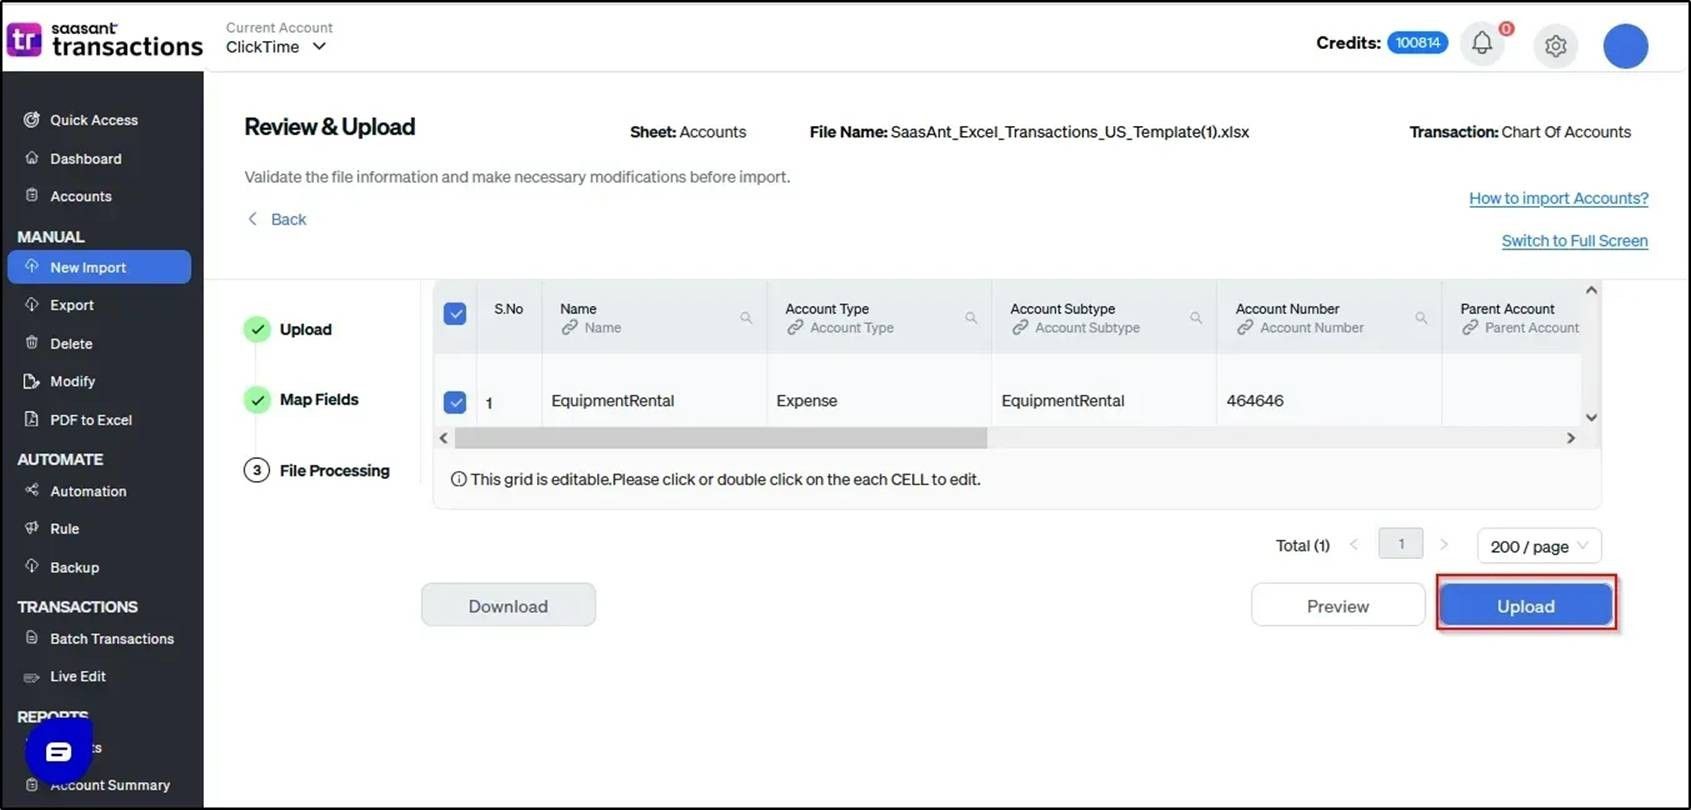
4. On the Review screen, select Preview to see how the data will be saved in QuickBooks Online. Once you have confirmed the preview, click Upload to continue.
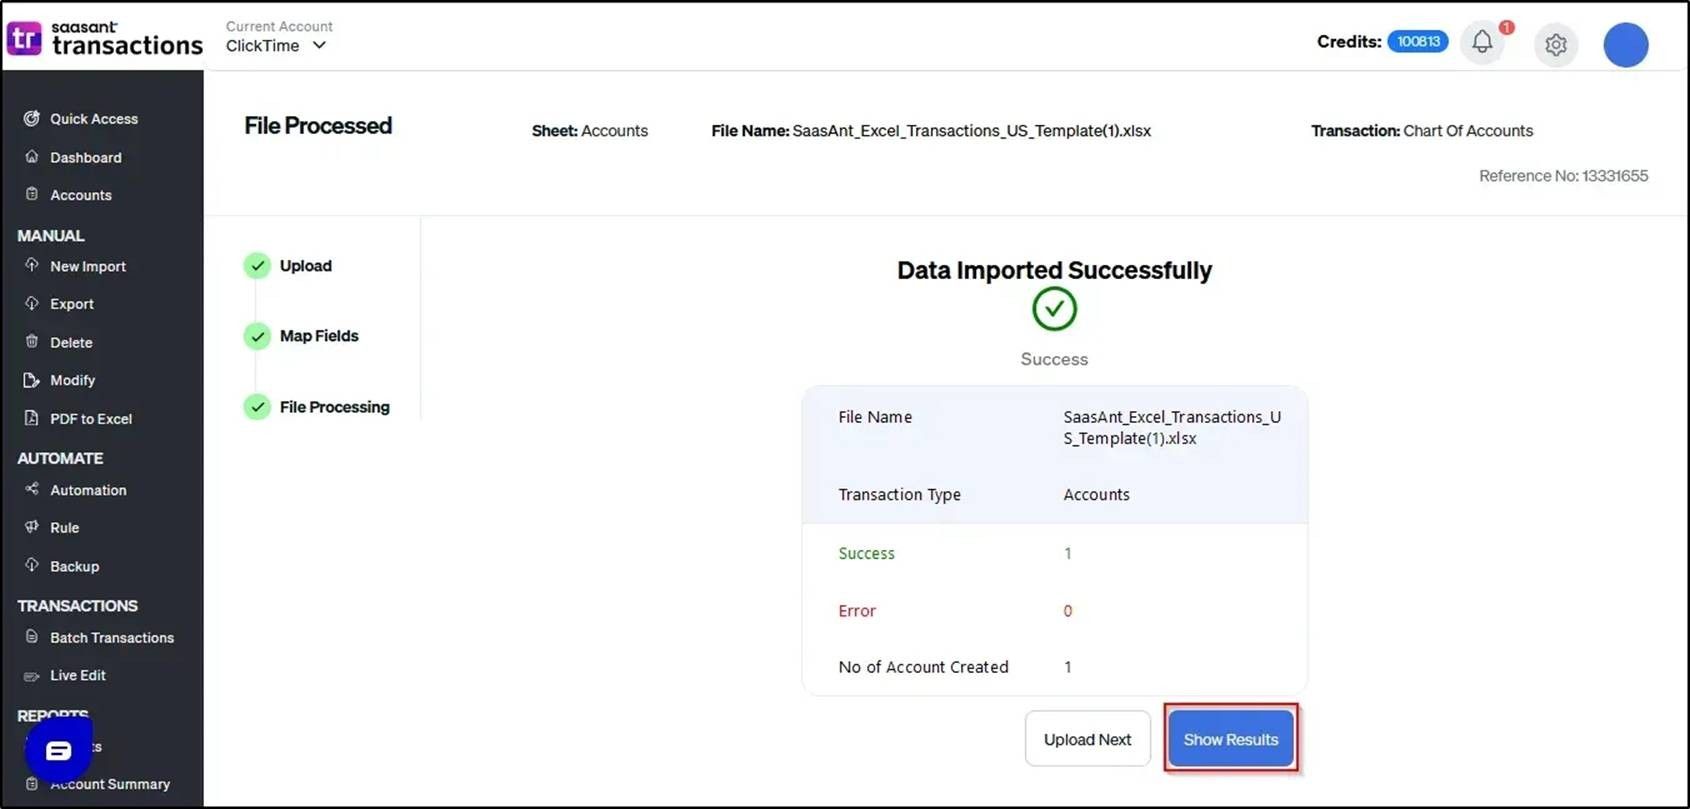
5. The data has been successfully imported into QuickBooks Online.
How to Upload a Journal Report?
1. Click on Bulk Upload and select the QuickBooks entity as "Journal Entries".
2. Select the file you need to upload.
3. On the Mapping screen, match the QuickBooks fields with the corresponding headers from the uploaded file to ensure accurate data creation in QuickBooks. Once the mapping is complete, click Save and Continue to proceed.
4. On the Review screen, click Preview to check how the data will be recorded in QuickBooks Online. Once we’ve finalized the preview, click Upload to proceed.
5. The data has been successfully imported into QuickBooks Online.
FAQ and Solutions
What are the common errors when importing the Chart of Accounts?
Reference Article: Chart of Accounts Import Guide
Common Errors & Solutions:
● "Another account is already using number [X]"
Solution: Use a unique account number.
● "The name supplied already exists."
Solution: Avoid duplicate account names.
● "Incorrect Date Format or Invalid enumeration."
Solution: Make sure the account type and detail type match QuickBooks-supported values.
● "Account used for reconciliation discrepancies cannot be a sub-account."
Solution: Use the parent account instead.
● "Subaccounts must have the same account type as their parent."
Solution: Ensure account types match between the parent and sub-account.
● "Only one Opening Balance Equity account allowed"
Solution: Change extra accounts to “Owner's Equity”.
What are the common errors when importing the Journal Reports?
Reference Article: Journal Entry Import Guide
Important Requirements:
● Debits and credits must balance to zero.
● Include customer names for Accounts Receivable entries.
● Include vendor names for Accounts Payable entries.
● Each entry requires both debit and credit rows.
Common Errors:
"No Account information found"
Solution: Ensure all accounts exist in QuickBooks Online Chart of Accounts with exact name matches.
Currency mismatch errors
Solution: For multi-currency entries, ensure account currency matches the associated customer/vendor currency.
"Only one foreign currency per transaction"
Solution: Limit journal entries to the home currency plus one foreign currency maximum.
Conclusion:
By following this guide, you can move data from one QuickBooks Online company to another using SaasAnt Transactions in a structured and accurate way. Always review your data before and after migration to keep it consistent and reduce the chance of errors.