How to Export Journal Entries from QuickBooks Online using SaasAnt
February 20, 2026
At a Glance
The Solution: Use SaasAnt's Download (Export) feature to extract Journal Entries into a clean Excel/CSV format.
The Key Benefit: Get a flat database file with every debit and credit line—essential for audit testing, period-end review, and identifying manual adjustments that affect financial statements.
Quick Steps: Quick Access Dashboard > Download (Export) > Select Journal Entries > Search > Download.
Video Tutorial for Exporting Journal Entries from QuickBooks Online using SaasAnt Transactions Online:
Getting Started
Install: Get SaasAnt Transactions from the QuickBooks App Store and start a free trial.
Connect: Securely authorize the connection to your QuickBooks Online company. We do not store your customer data; we simply process the transfer.

How to Export Journal Entries Step-by-Step
1. Navigate to Download (Export)
From the Quick Access dashboard, click the Download (Export) button listed in the main menu.
2. Select Entity
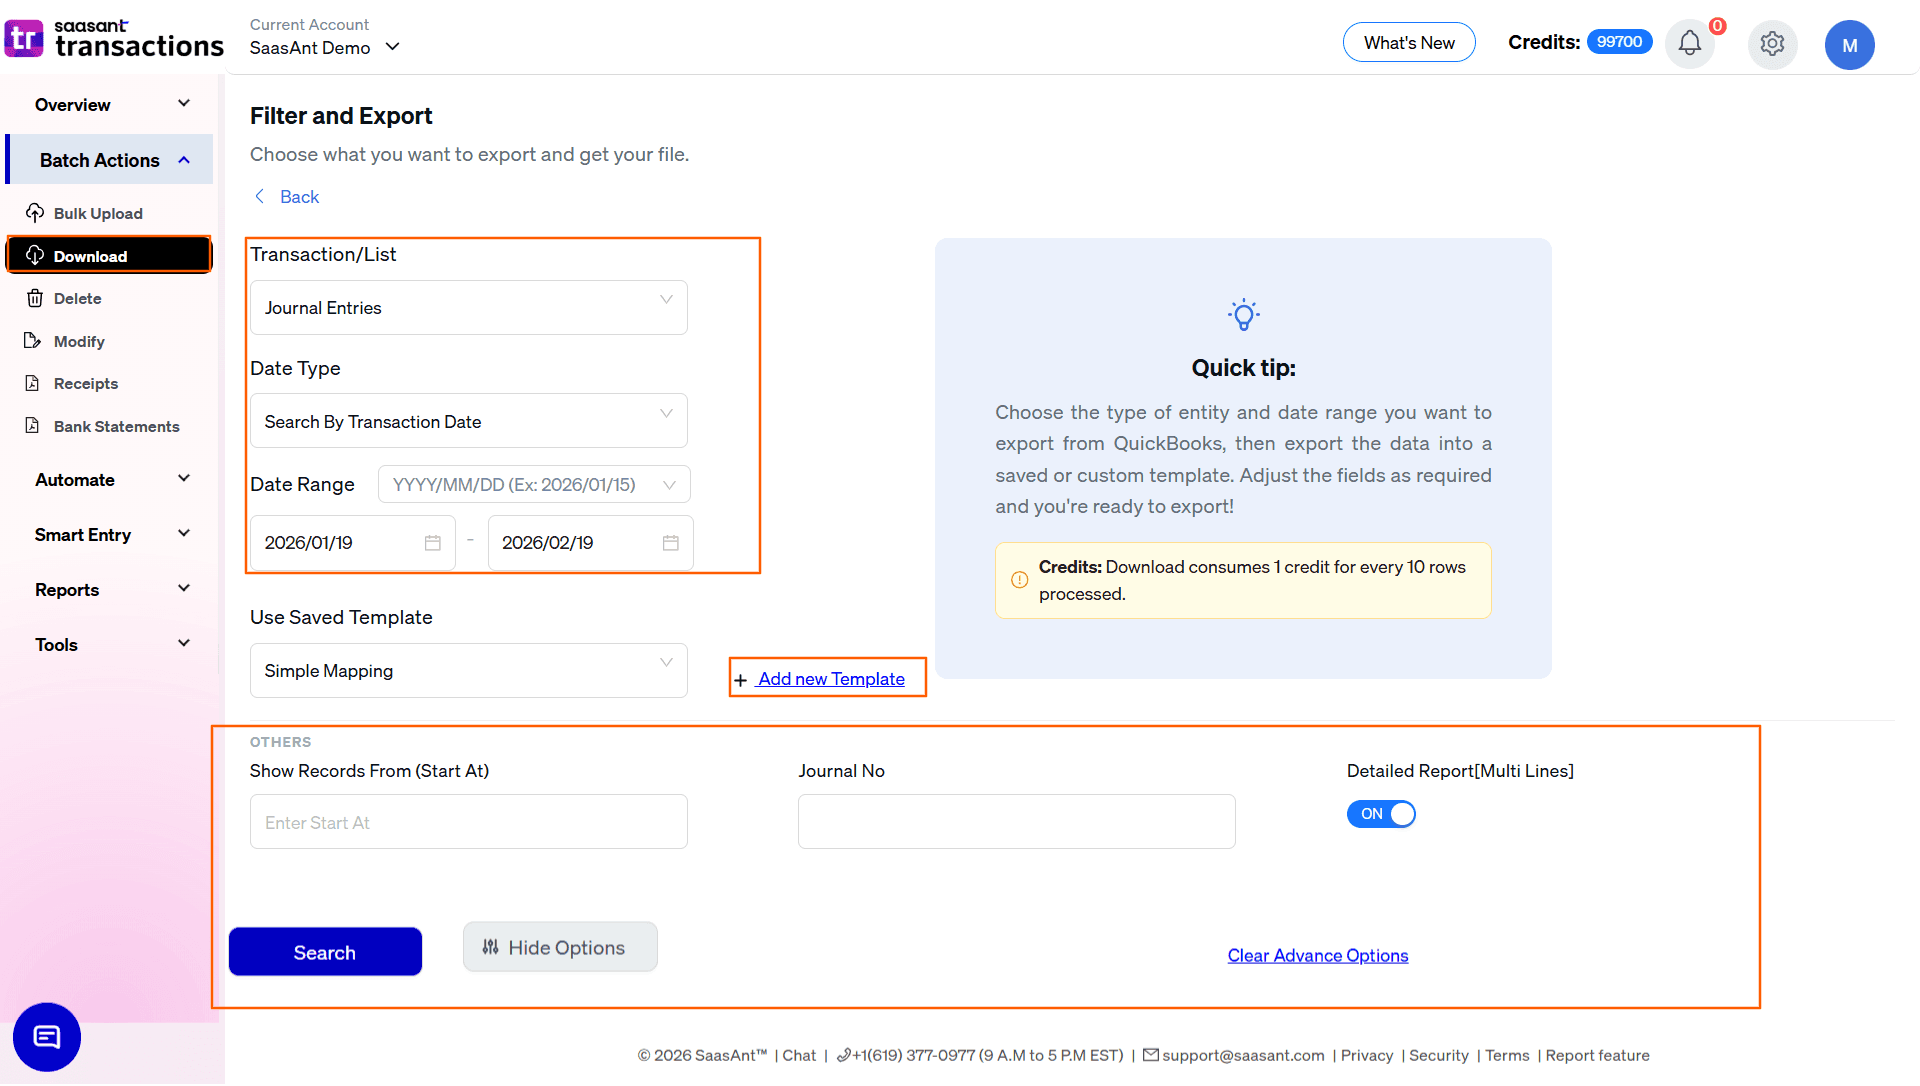
In the Transaction/List dropdown, select Journal Entries.
3. Select Date Strategy
Choose the date type that matches your goal:
Search By Transaction Date: (Standard) Exports based on the accounting date of the journal entry—the date it was posted to the general ledger. Use this for period-end close, trial balance preparation, and any financial reporting that requires entries to fall in the correct accounting period.
Search By Created Date: Exports based on when the journal entry was physically entered into QuickBooks. Use this for audit testing when you need to identify entries recorded after period-end—a common red flag for improper backdating.
Search By Last Updated Date: Exports based on when the entry was last modified. Use this to identify any retroactive corrections or edits made to posted journal entries.
4. Set Date Range & Format
Range: Enter your start and end dates.
Format: Use the dropdown inside the date box to pick your preferred format (e.g., MM/DD/YYYY).
5. Select Template
In the Use Saved Template dropdown, leave it as Simple Mapping for a standard export.
Tip: Create a custom template if you need it for your reporting workflow using the Add new template option.
6. Configure Filters & Search
Use the available filters to locate specific entries:
Journal No: Input a specific journal entry number to locate a single transaction for audit documentation or investigation.
Show Records From (Start At): Use this to chunk large exports. If you need to export 5,000 records, run 1–2,500 first, then run a second search starting at 2,501.
Click the blue Search button to preview results.
7. Review & Download
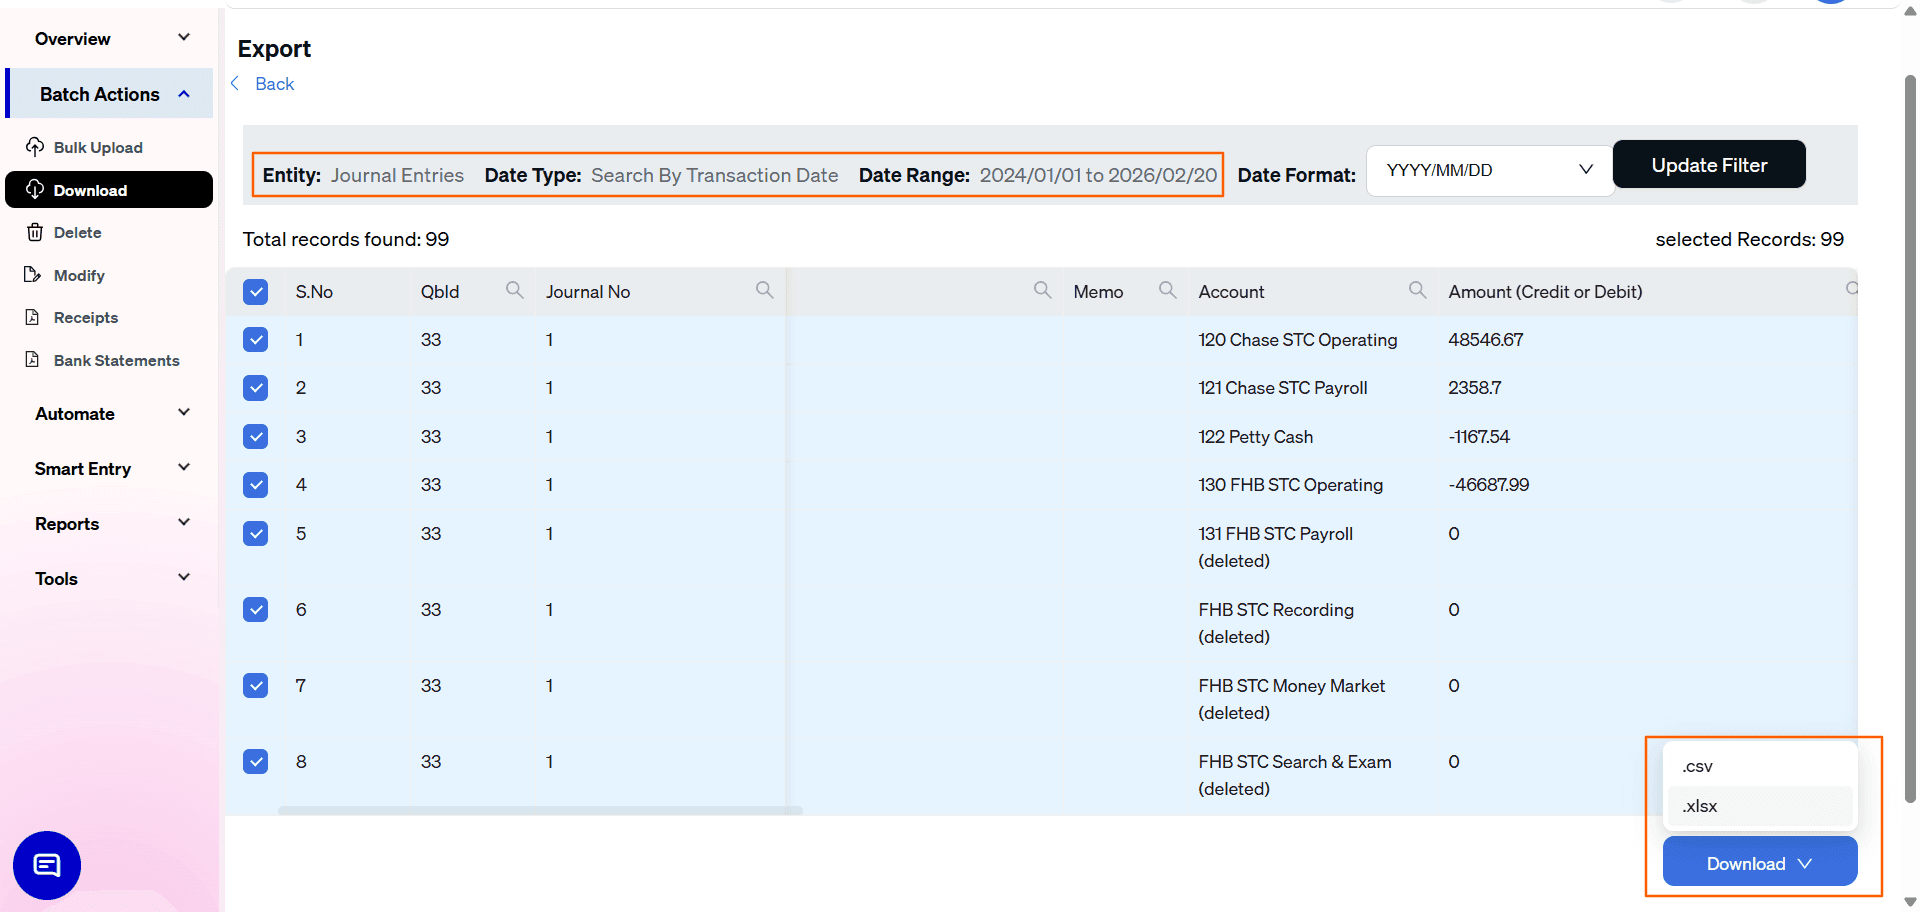
After clicking Search, the data preview grid will load:
Check Debit/Credit Lines: Verify that each Journal No appears with balanced debit and credit entries.
Check Dates: Scan the date column to confirm entries fall within your intended accounting period.
Total Records: Check "Total records found" to confirm the expected volume.
Select Format: Click the Download button at the bottom right, choose .xlsx (Excel) or .csv, and the file will download.
Automate with Backup
The steps above are for manual exports. If you need a regular snapshot of journal entries for monthly reporting packages or audit readiness, use the Backup module.
Set it and forget it: Schedule daily, weekly, or monthly exports.
Delivery: Have files automatically sent to email, FTP, or storage integrations without logging in.
Why export journal entries with SaasAnt?
Audit Testing: Export all manual journal entries for a period and isolate high-value or unusual entries that require supporting documentation during an audit.
Period-End Review: Use Search By Created Date with a date after your period close to identify any backdated entries that could affect a finalized trial balance.
Migration: Move your complete journal entry history to a new QuickBooks company file, preserving the general ledger integrity of all manual adjustments.
FAQ
Why use "Created Date" instead of "Transaction Date" for audits?
The transaction date is the accounting date assigned to the entry, which can be backdated. The Created Date is when it was actually entered into the system. For audit testing, comparing the two helps identify entries recorded after period close—a common area of scrutiny.
Can I use this file to migrate journal entries to another QBO company?
Yes. The export format is natively compatible with SaasAnt's Import feature for migration purposes.
Does the export distinguish between system-generated and manually created journal entries?
QuickBooks automatically creates journal entries for most transactions (invoices, payments, bills). The export includes all journal entries. To isolate only manually created ones, filter by Journal No ranges or look for entries without a linked source transaction in the exported data.