How to Export Build Assemblies from QuickBooks Desktop using SaasAnt Transactions Desktop
March 10, 2026
SaasAnt Transactions Desktop enables QuickBooks Desktop users to export build assemblies efficiently in bulk. This guide provides clear steps to export your build assemblies seamlessly.
Prerequisites
Ensure you have administrative access to QuickBooks Desktop and a stable internet connection for the initial setup. Verify that your QuickBooks company file is open and updated to the latest version.
Steps for Exporting Build Assemblies from QuickBooks Desktop
Step 1: Download, Install, and Connect SaasAnt
Before exporting build assemblies, set up the SaasAnt Transactions Desktop application.
Download: Visit the SaasAnt.com website and download the SaasAnt Transactions Desktop application.
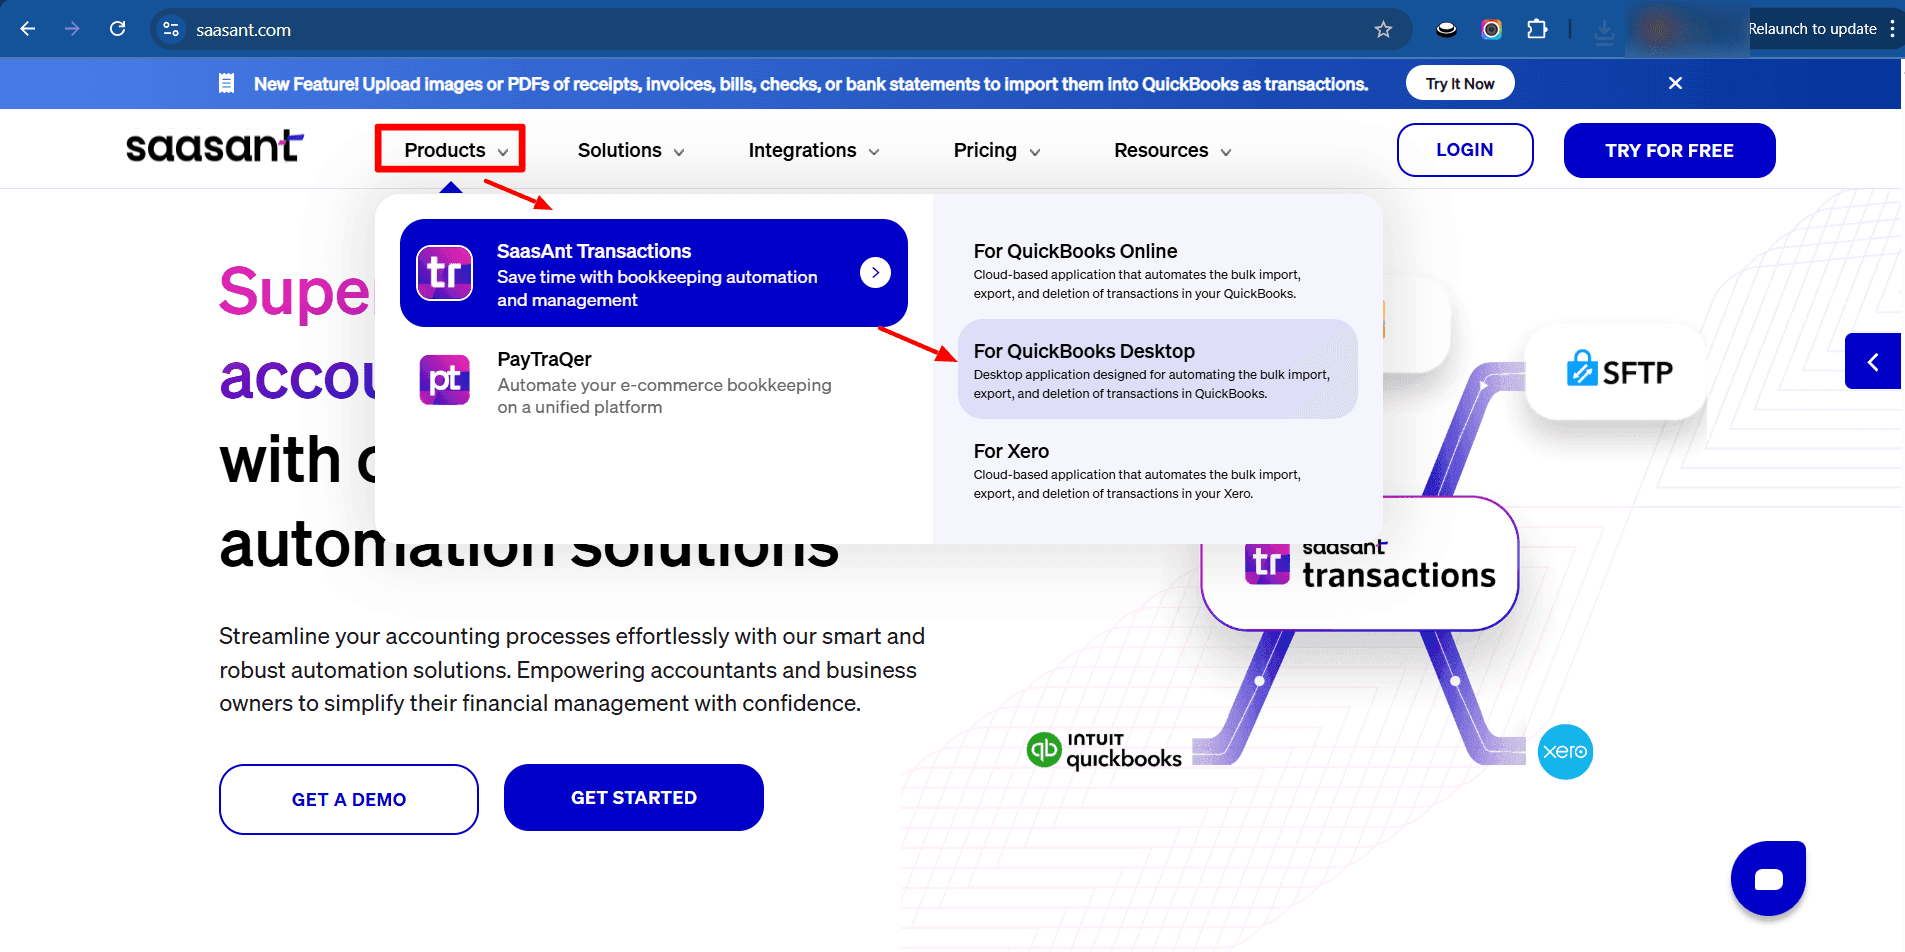
Install: Run the installer file and follow the prompts to complete installation on your computer.
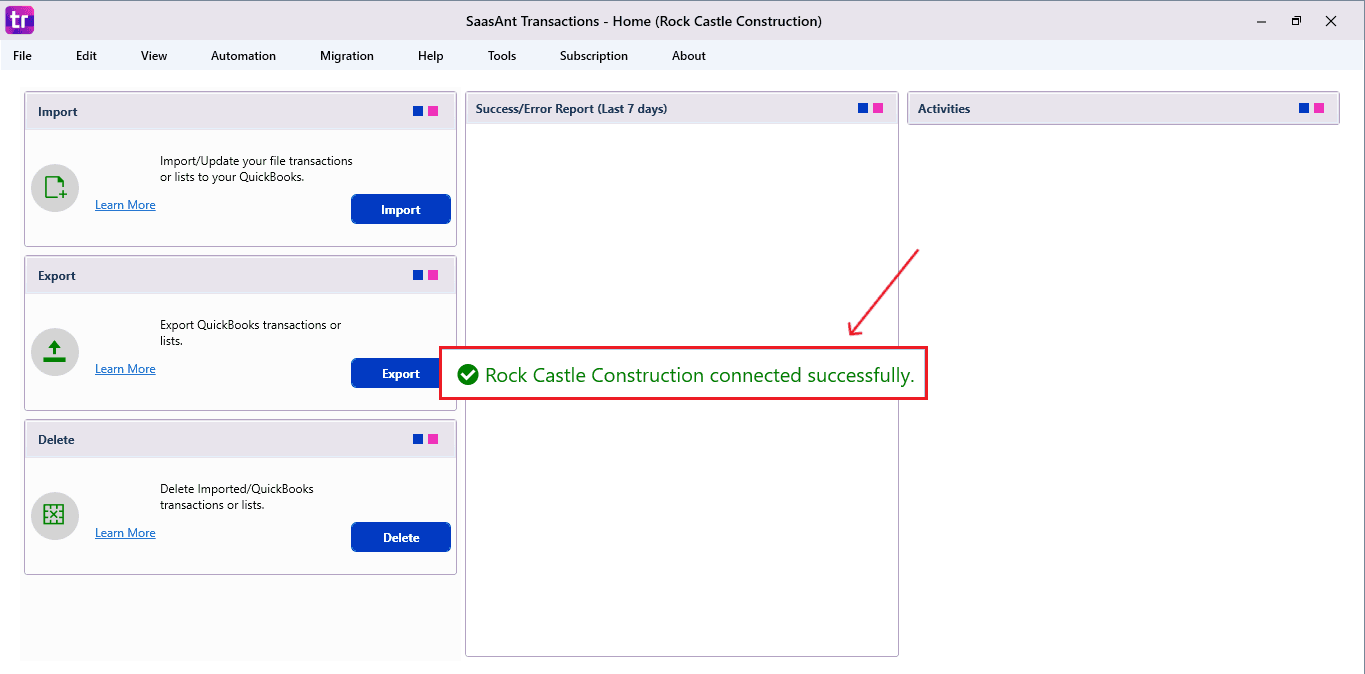
Connect: Launch the SaasAnt application, then connect it to your QuickBooks Desktop company file using the on-screen instructions to authorize data access.
Step 2: Configure Export Settings
Access the Export module in SaasAnt Transactions Desktop after connecting to QuickBooks.
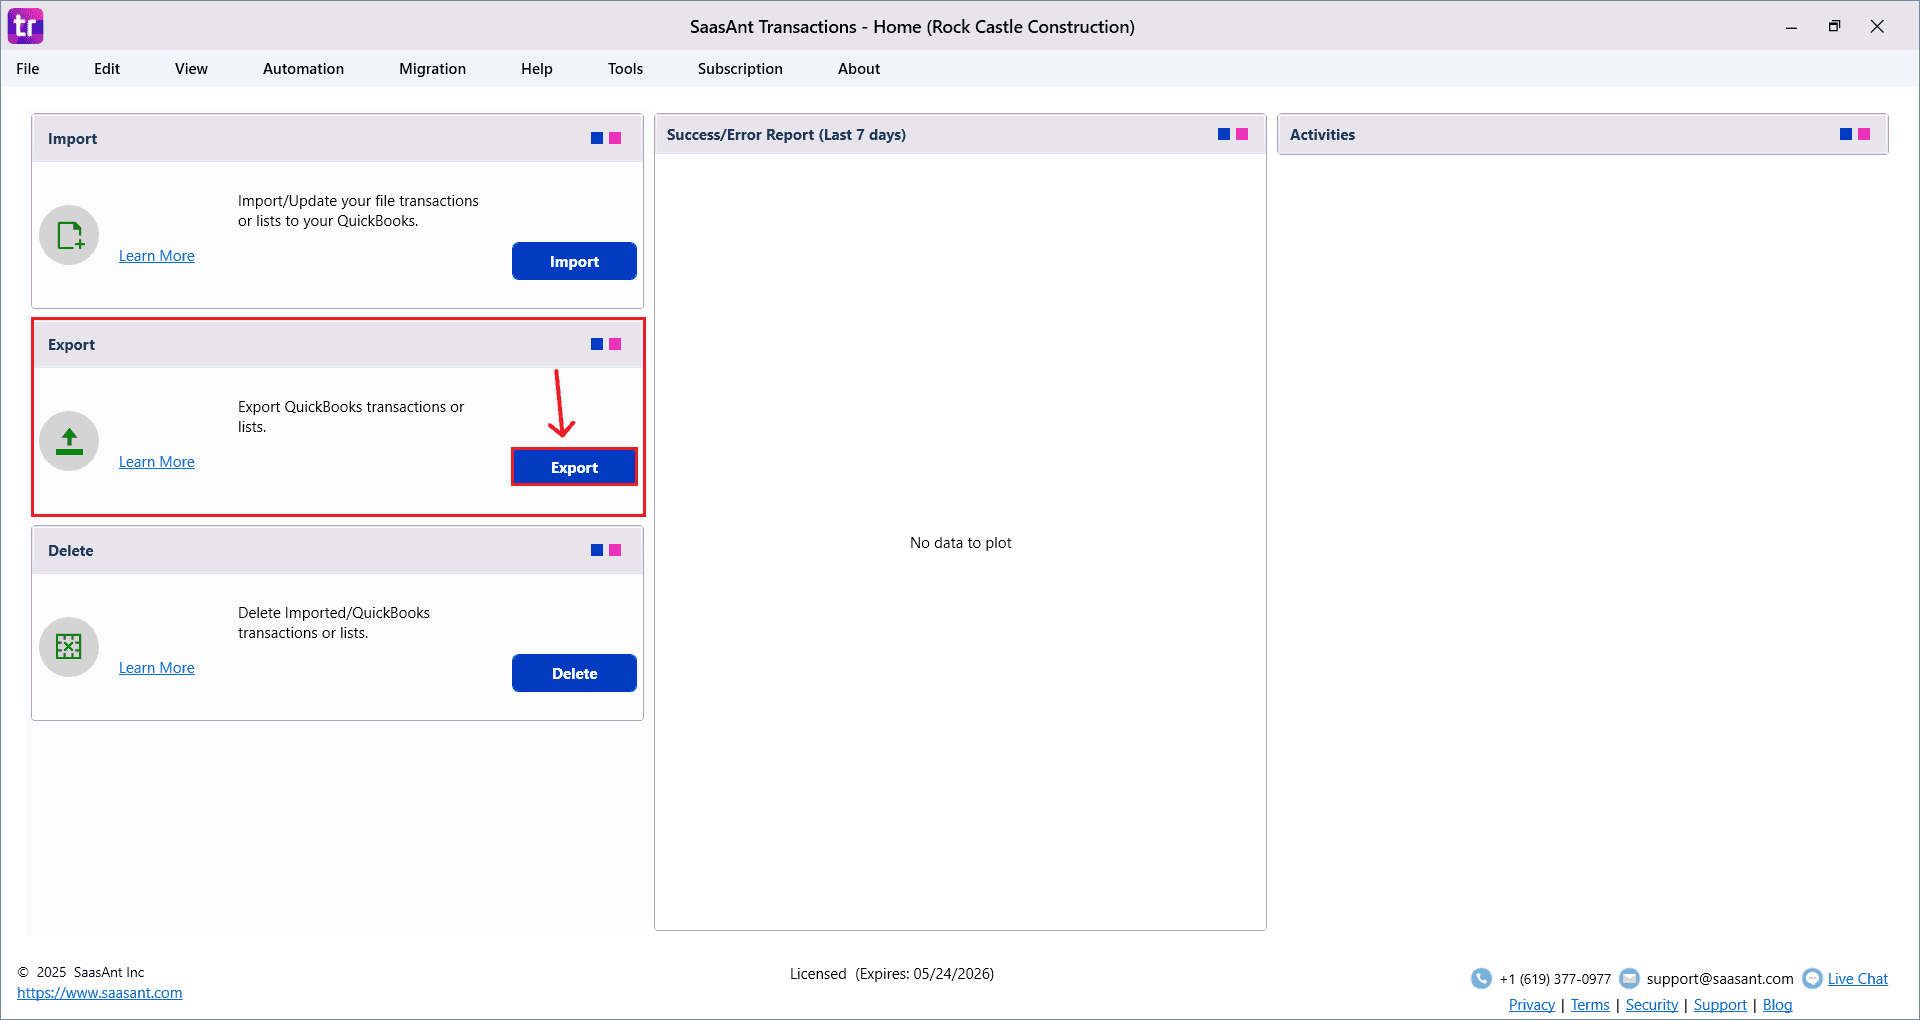
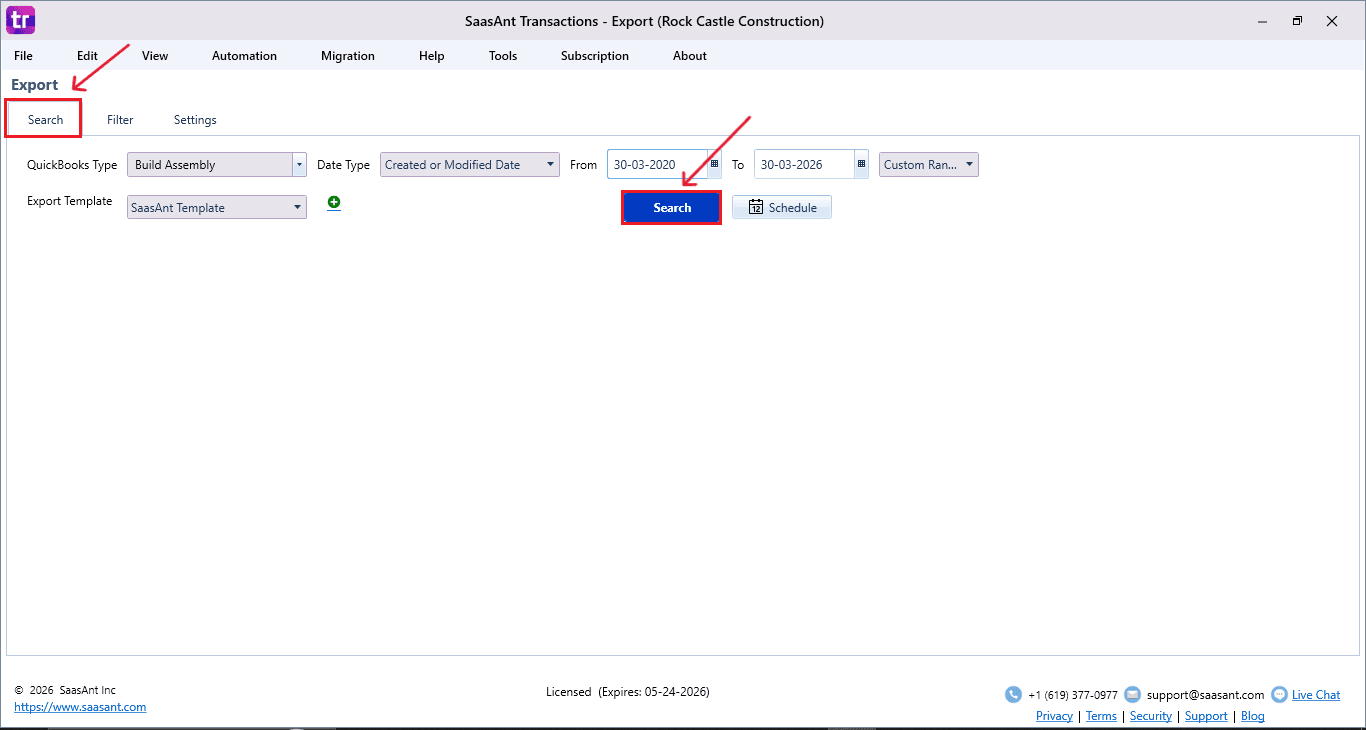
Select Build Assembly as the QuickBooks transaction type to focus on build assembly data.
Step 3: Set Date Range
Choose the date type with two options: Created/Modified Date or Transaction Date.
Created/Modified Date refers to when the build assembly was originally entered into QuickBooks or last edited.
Transaction Date is the business date on the build assembly itself.
Select a range using the custom date picker, or pick from quick options like Today, From yesterday, Last 7 days, Last 30 days, etc.
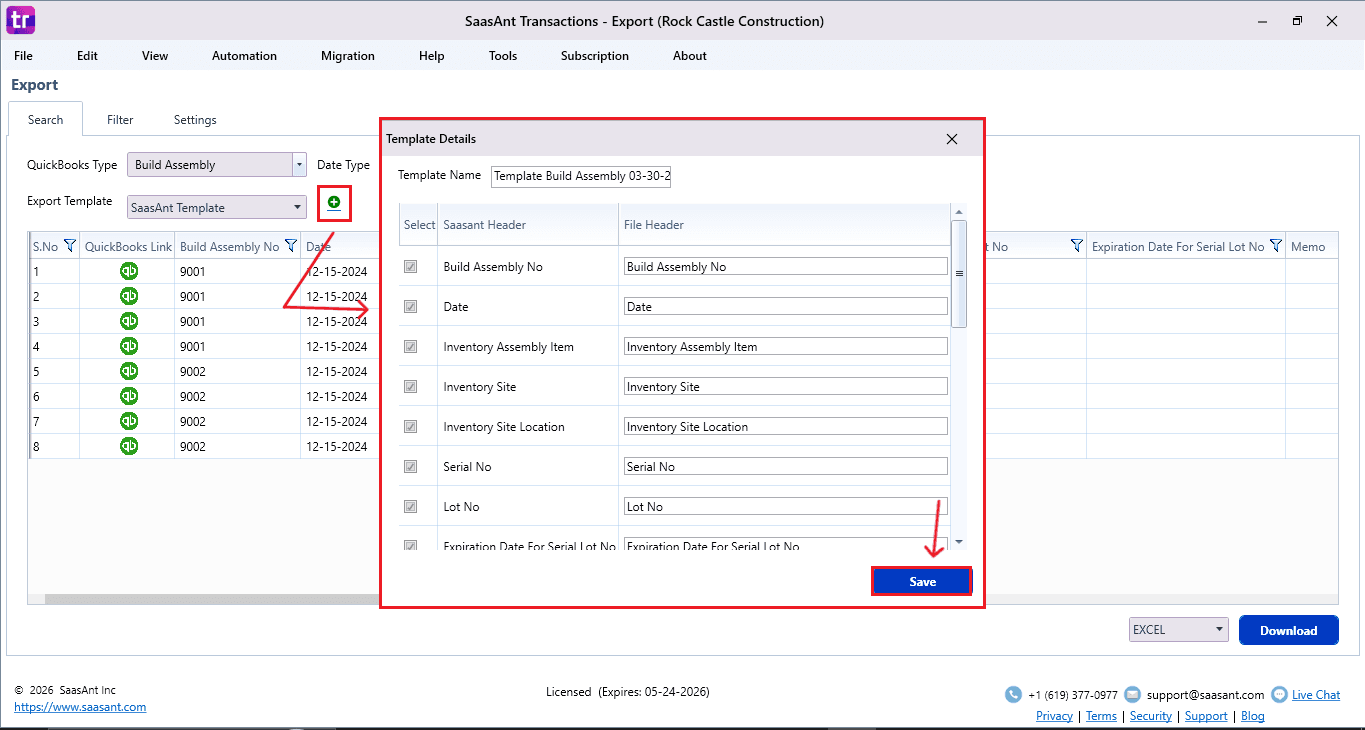
Step 4: Set Export Template
Use the default SaasAnt template for standard build assembly fields.
To customize, click the “+” icon, select desired fields (for example: reference number, build date, assembly item, quantity built, component items, quantity, cost, adjustment account, memo), name the template, and save it for reuse.
Step 5: Apply Filters (Optional)
Filters help you precisely target specific build assemblies, reducing the dataset for faster exports and better focus.
Is Pending: Use this to export builds based on their pending status.
All exports both pending and not pending builds.
Pending Only exports only builds that are still pending.
Not Pending Only exports builds that are not pending.
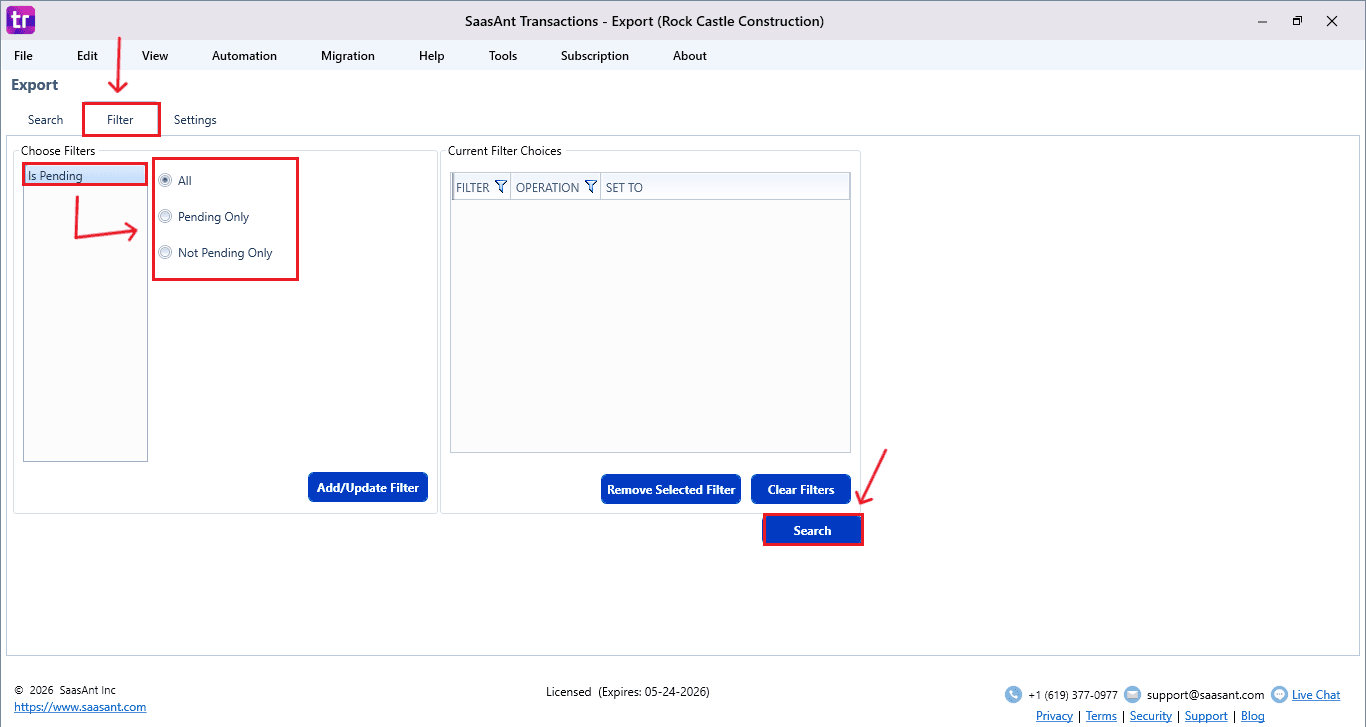
To apply the filter:
Choose Is Pending.
Select All, Pending Only, or Not Pending Only.
Click Add or Update Filter.
Your applied filters appear under Current Filter Choices.
To remove the filter, select it and click Remove Selected Filter.
To remove everything, click Clear Filters.
Step 6: Adjust Settings
Customize the export output via settings to match your reporting or integration needs.
Date Format: Switch between formats like MM/DD/YYYY or DD/MM/YYYY for compatibility with other systems.
Show Transaction Lines: Include detailed component lines for each build, not just the build header summary.
Show Account Numbers: Add numeric account codes alongside names for easier review and reconciliation.
Toggle settings on or off as needed.

Step 7: Run Search
Click Search to retrieve matching build assemblies based on your criteria. Review the preview before proceeding to export.
Step 8: Review and Download Results
SaasAnt displays build assemblies matching your date range, filters, and settings.
Select your preferred format: Excel for spreadsheets with formulas or CSV for simple data import elsewhere.
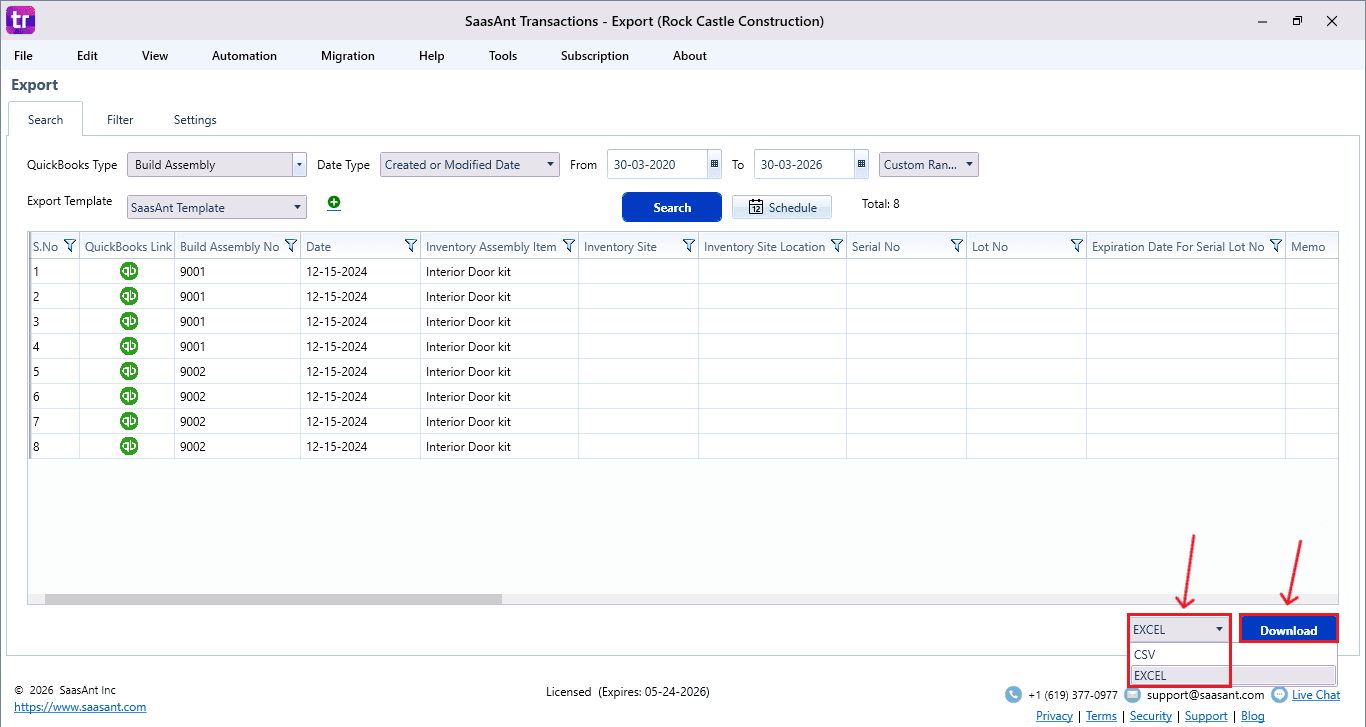
Click Download to export the file to your computer. Verify the downloaded file contains all expected build assembly data before use.
Step 9: Schedule Recurring Exports (Optional)
SaasAnt offers automated scheduling for regular build assembly exports without manual intervention.
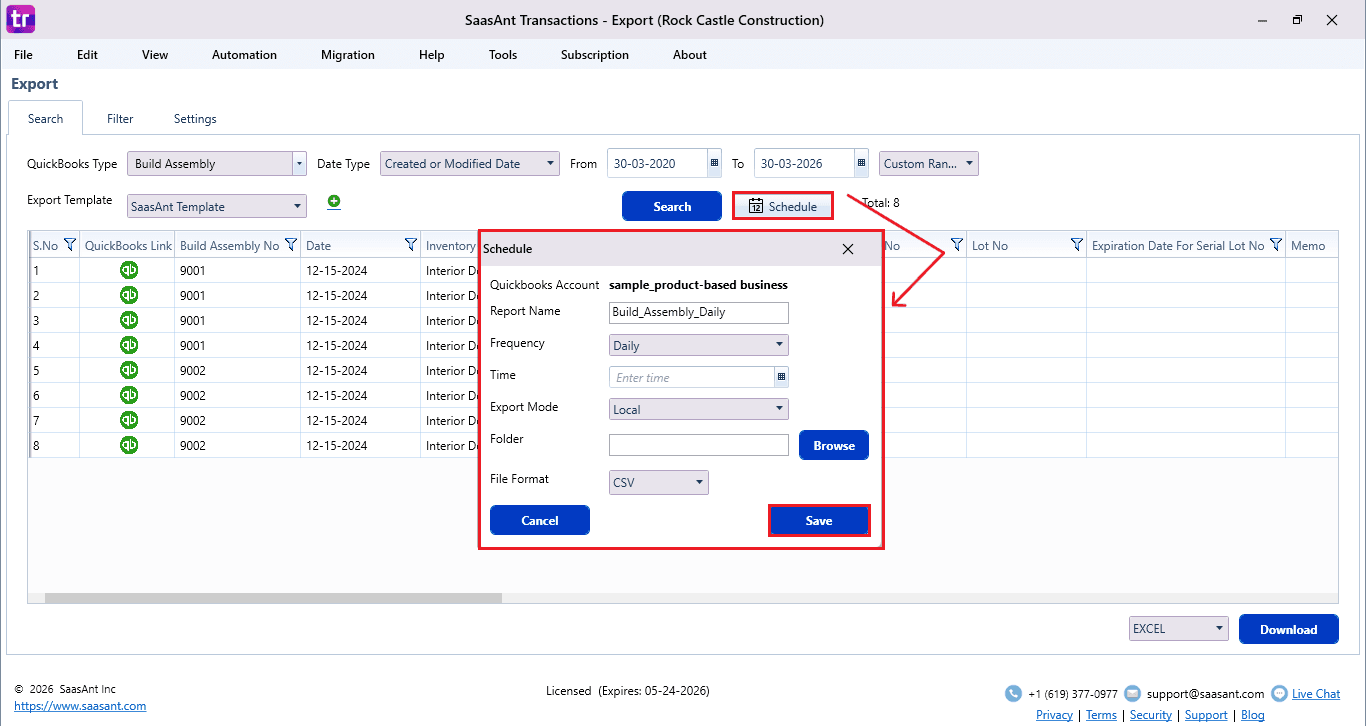
Provide a Report Name for easy identification.
Set Frequency as Daily, Weekly, Monthly, or use a Cron Expression for advanced scheduling.
Specify the export Time.
Choose Export Mode: Local folder, FTP or SFTP server, Email delivery, or Database connection.
Select the destination Folder and File Format (Excel or CSV).
Click Save to activate the schedule. Monitor scheduled jobs via the SaasAnt dashboard for status and logs.