How to Edit Expenses in QuickBooks Online Using SaasAnt
March 2, 2026
Edit expenses using Modify and Live Edit
Editing expenses one by one in QuickBooks Online can take time when you need to correct multiple records. This article explains how to update expenses using SaasAnt Transactions Online.
You can export expenses, update the required fields in a spreadsheet, and upload the file again using Modify. For smaller changes, you can use Live Edit to update records directly on screen.
Video Tutorial for Editing Expenses in QuickBooks Online using SaasAnt Transactions Online:
Method 1: Edit Expenses Using Modify
Use this method when you need to update multiple expense transactions at once.
Step 1: Open SaasAnt from QuickBooks Online
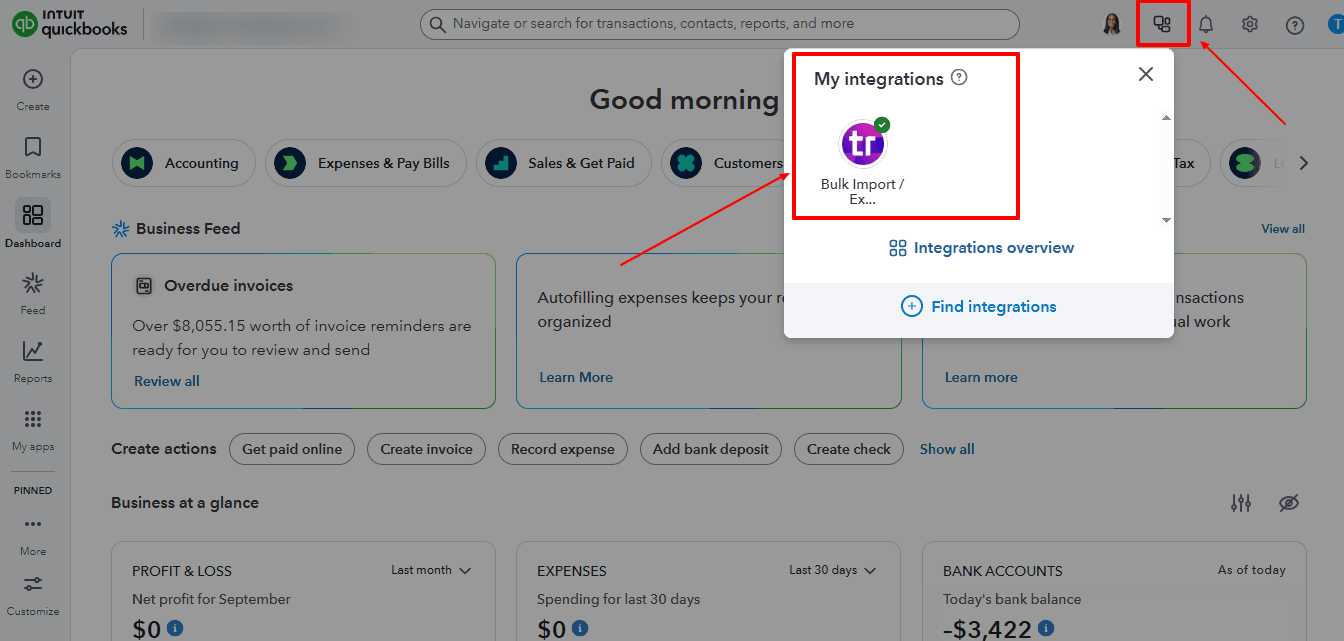
Sign in to your QuickBooks Online company. From the left menu, go to Apps. Search for SaasAnt Transactions Online if needed and open it from My Apps.
Step 2: Export Existing Expenses
In SaasAnt, go to Batch Actions → Download.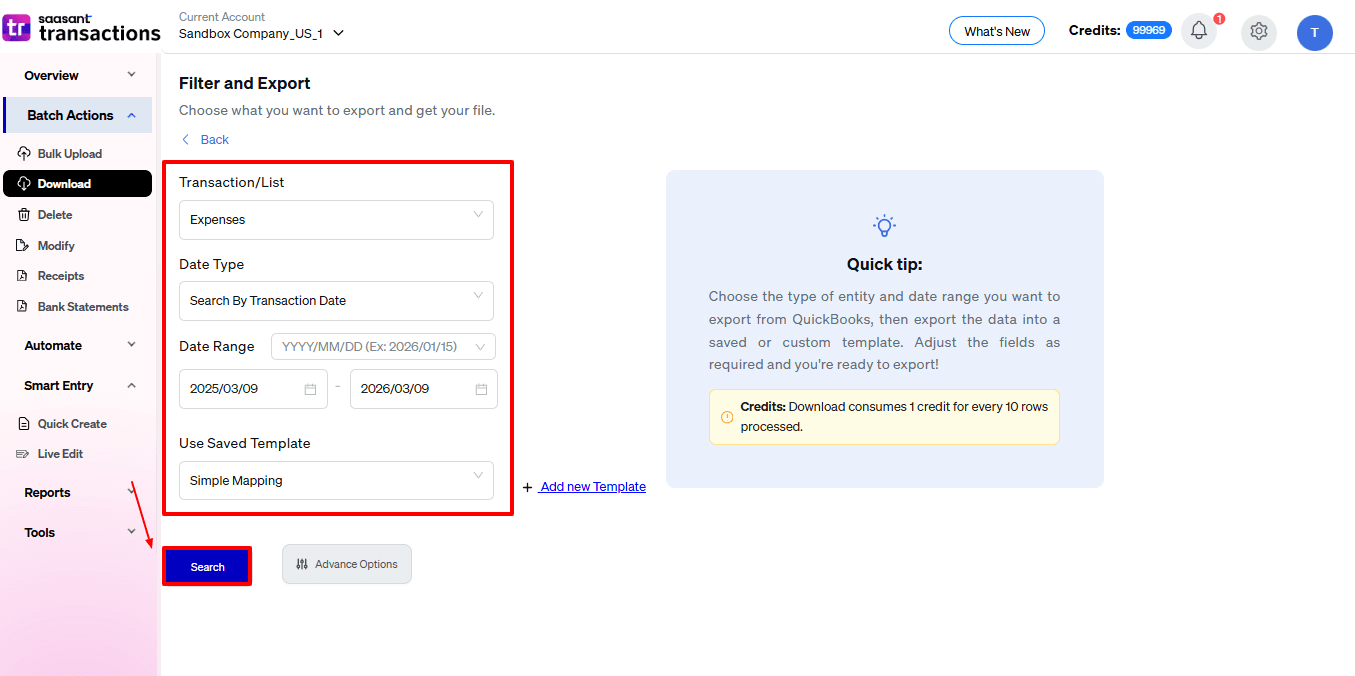
On the download screen, select:
Transaction/List: Expenses
Date Type: choose the date filter you want to use
Date Range: select the required period
Apply filters if needed, then click Search. Once the expenses appear in the grid, click Download and export the file in CSV or XLSX format.
Step 3: Edit the Spreadsheet
Open the exported file in Excel or another spreadsheet tool. Locate the expenses you want to update. Update only the fields you want to change. Do not modify the transaction identifiers or reference columns from the export, as they are used to match the existing transactions. Save the file in CSV or XLSX format.
Step 4: Upload the Modified File
Return to SaasAnt. Go to Batch Actions → Modify. Upload the edited file and continue. When prompted, choose Expenses as the transaction type.
Step 5: Map the Fields
On the mapping screen, match your spreadsheet columns with the corresponding QuickBooks fields. Verify the mapping carefully, especially for the fields you updated. Continue once the mapping is confirmed.
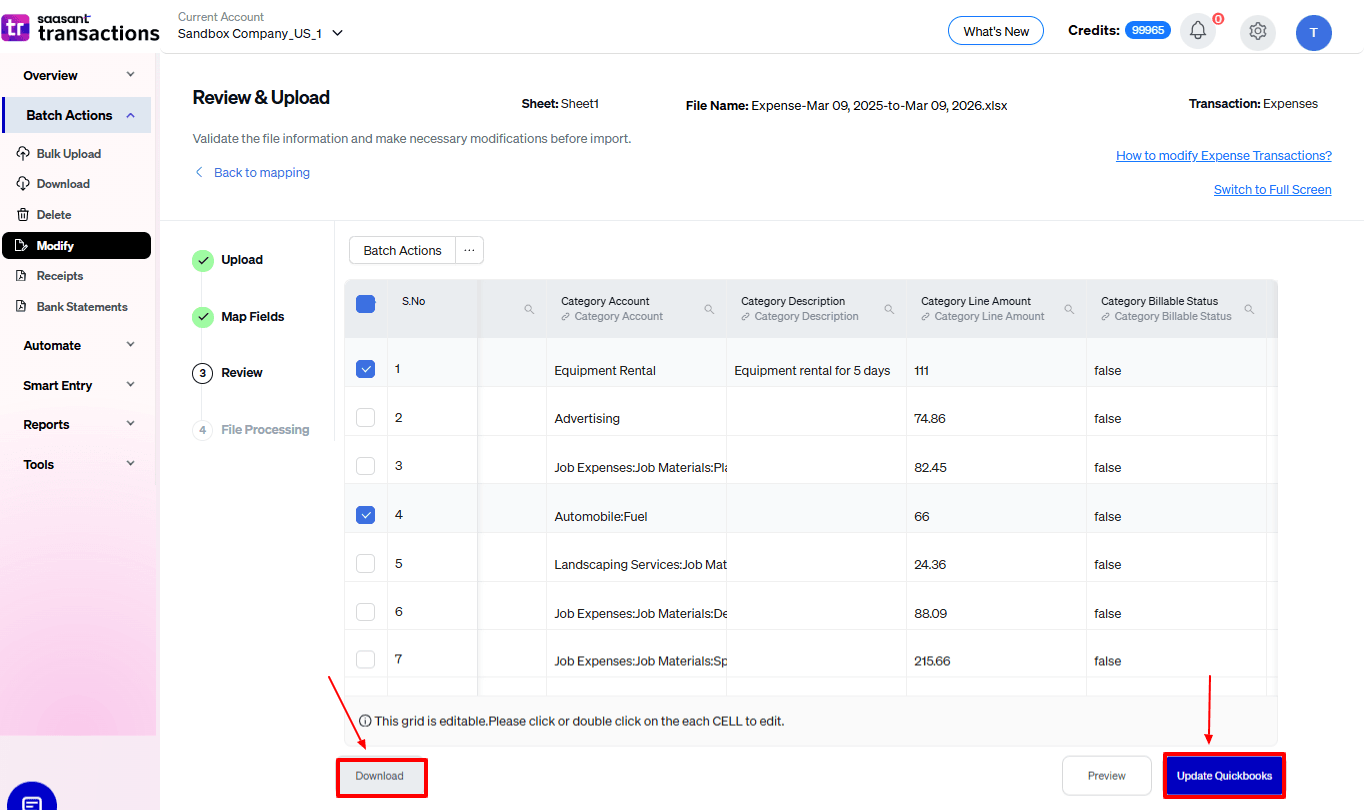
Step 6: Review the Data
Check the rows in the review grid. If needed, correct any values before submitting. Use the preview or validation option if available to confirm the changes. When everything looks correct, submit the update.
Step 7: Review the Results
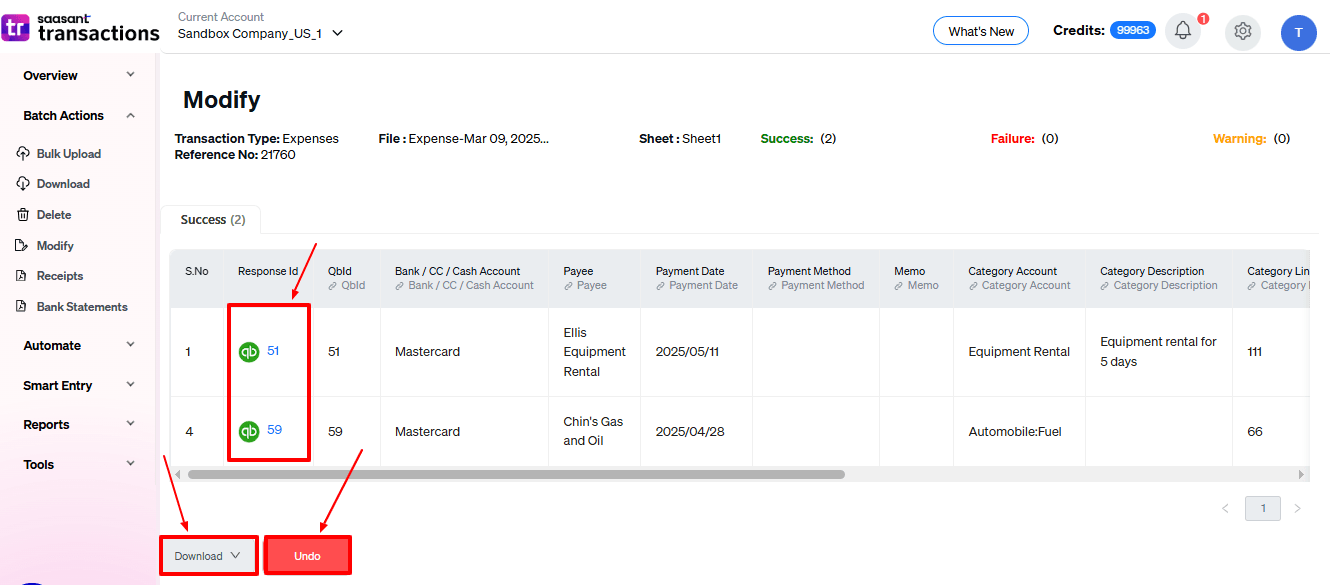
After processing completes, review the results summary. Successful rows will be shown in the success section. If any rows fail, review the error messages, correct the values in the file, and upload the failed rows again. You can also download the results log if needed.
Method 2: Edit Expenses Using Live Edit
Use Live Edit when you want to make small updates directly from the grid.
Step 1: Open Live Edit
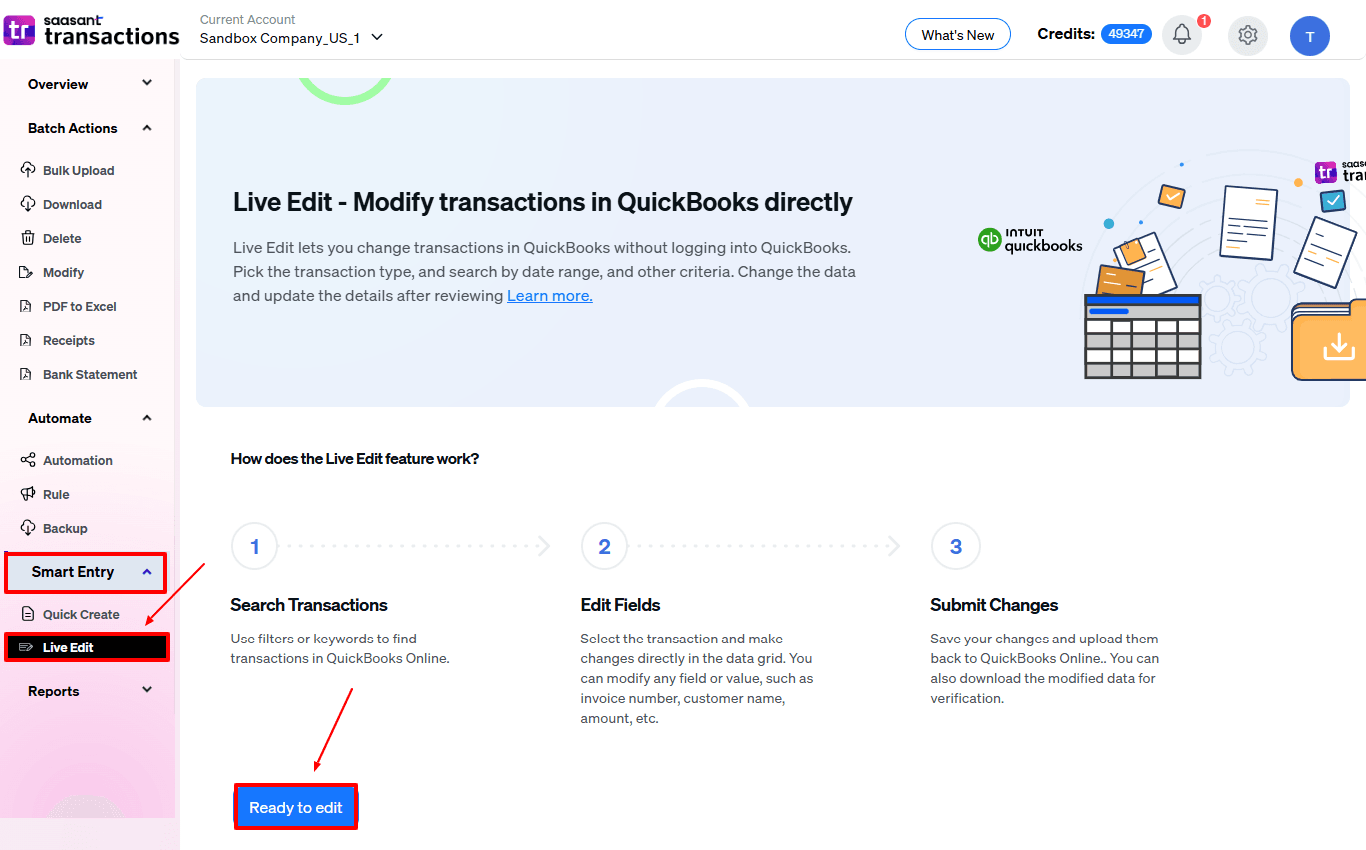
In SaasAnt, go to Smart Entry → Live Edit. Open the editing screen.
Step 2: Search for Expenses
Choose the following filters:
Transaction/List: Expenses
Date Type: select the required date filter
Date Range: choose the period you want to review Click Search to load the expenses.
Step 3: Update the Required Fields
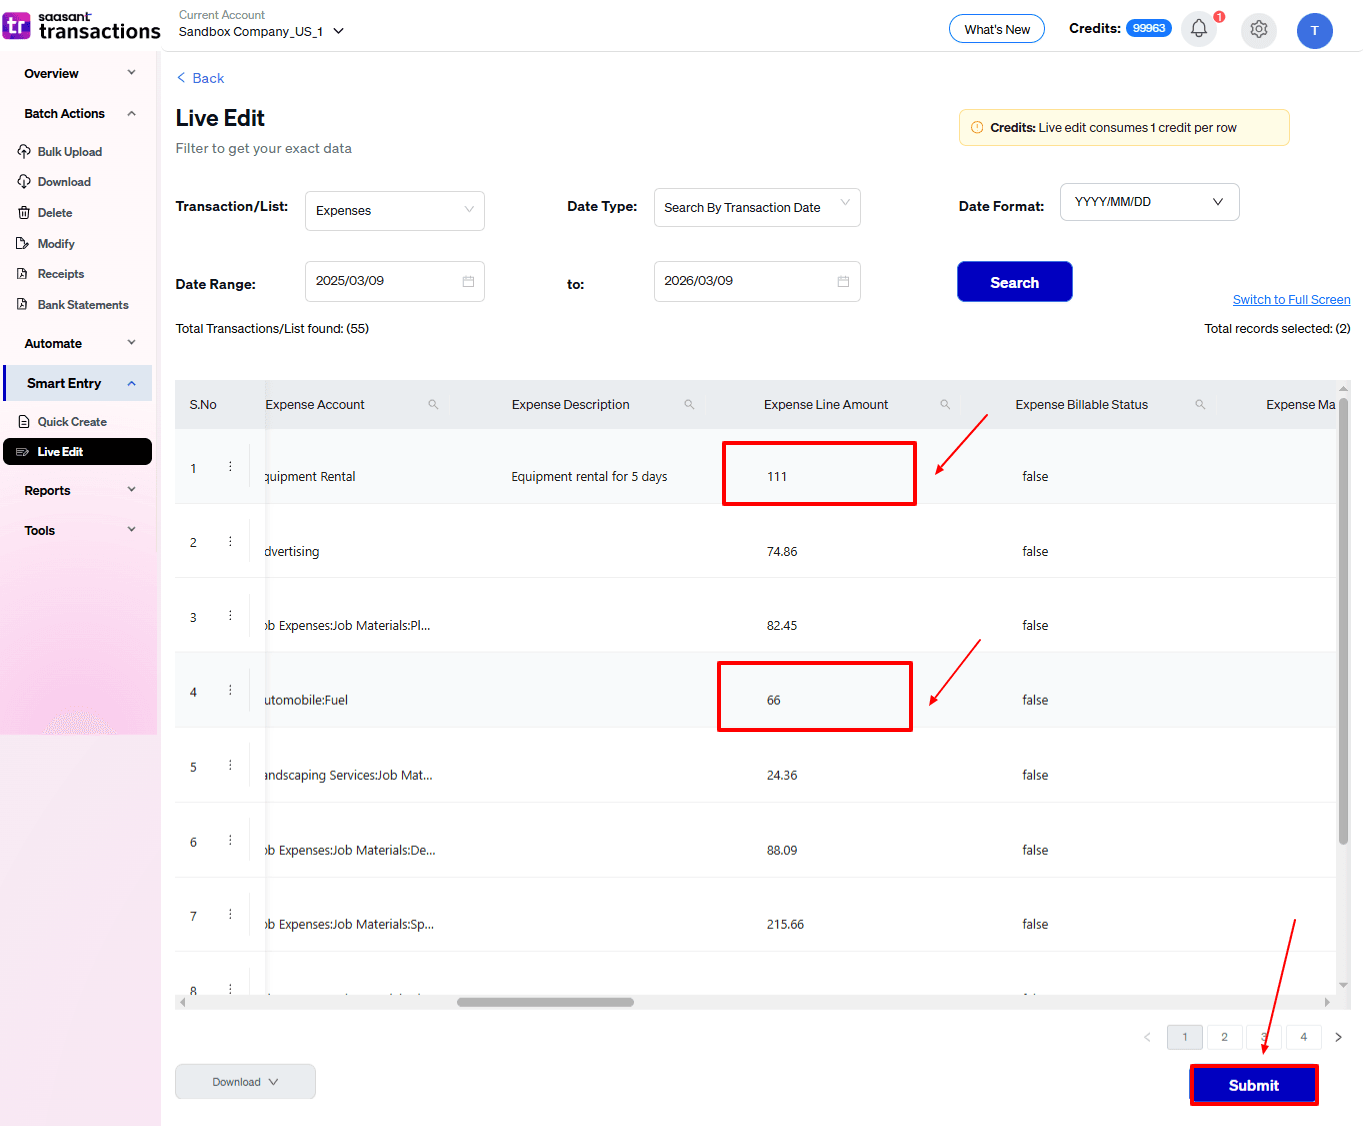
Locate the expenses you want to change. Edit the required values directly in the available cells.
Step 4: Submit the Changes
Review the updated rows. Click Submit to apply the changes to QuickBooks Online.