How to Edit Bills in QuickBooks Online Using SaasAnt
March 2, 2026
Editing bills one by one in QuickBooks Online is highly inefficient, especially when you need to update terms, correct vendor names, or adjust categories across a massive batch of historical accounts payable records. This article explains how to safely edit bills using SaasAnt. Transactions Online.
By exporting your bill transactions, adjusting the fields in a spreadsheet, and re-importing the updates, you can process large-scale corrections systematically. For minor, rapid adjustments, you can use the Live Edit feature. This strategy preserves your transaction links, reduces manual data entry, and keeps your vendor ledgers perfectly aligned.
Before you begin, remember that QuickBooks Online does not offer a native backup button on all plans. Always rely on SaasAnt’s Preview Mapping, Dry Run validation, and Undo/Rollback tools to ensure your changes are safe and reversible.
Method 1: Edit Bills Using Modify (Export → Spreadsheet → Re-Upload)
This method is ideal when you need to make structural updates across dozens or hundreds of bills—such as changing the expense category (Chart of Accounts), updating net terms, or assigning locations and classes to past vendor bills.
Step 1: Open SaasAnt from QuickBooks Online
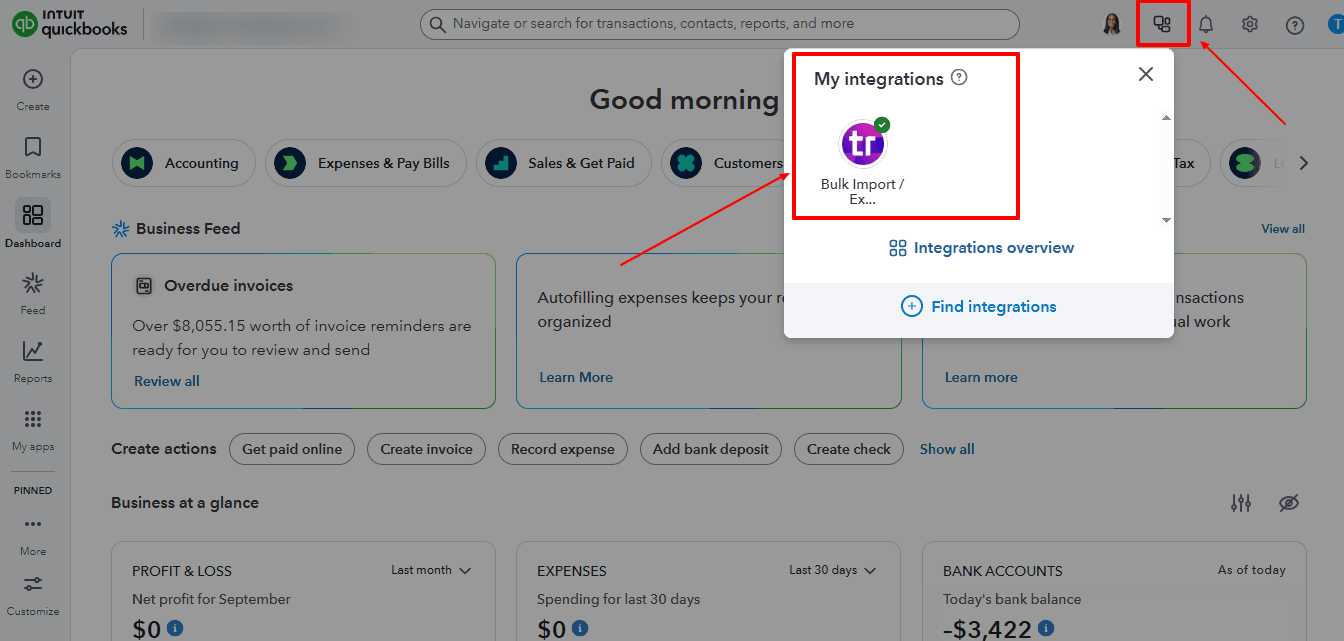
Sign in to your QuickBooks Online company file.
From the left menu bar, go to Apps.
Under Find apps, search for SaasAnt Transactions Online and authorize access if you haven't already.
Open the app from your My Apps tab to launch the SaasAnt dashboard.
Step 2: Export Existing Bills
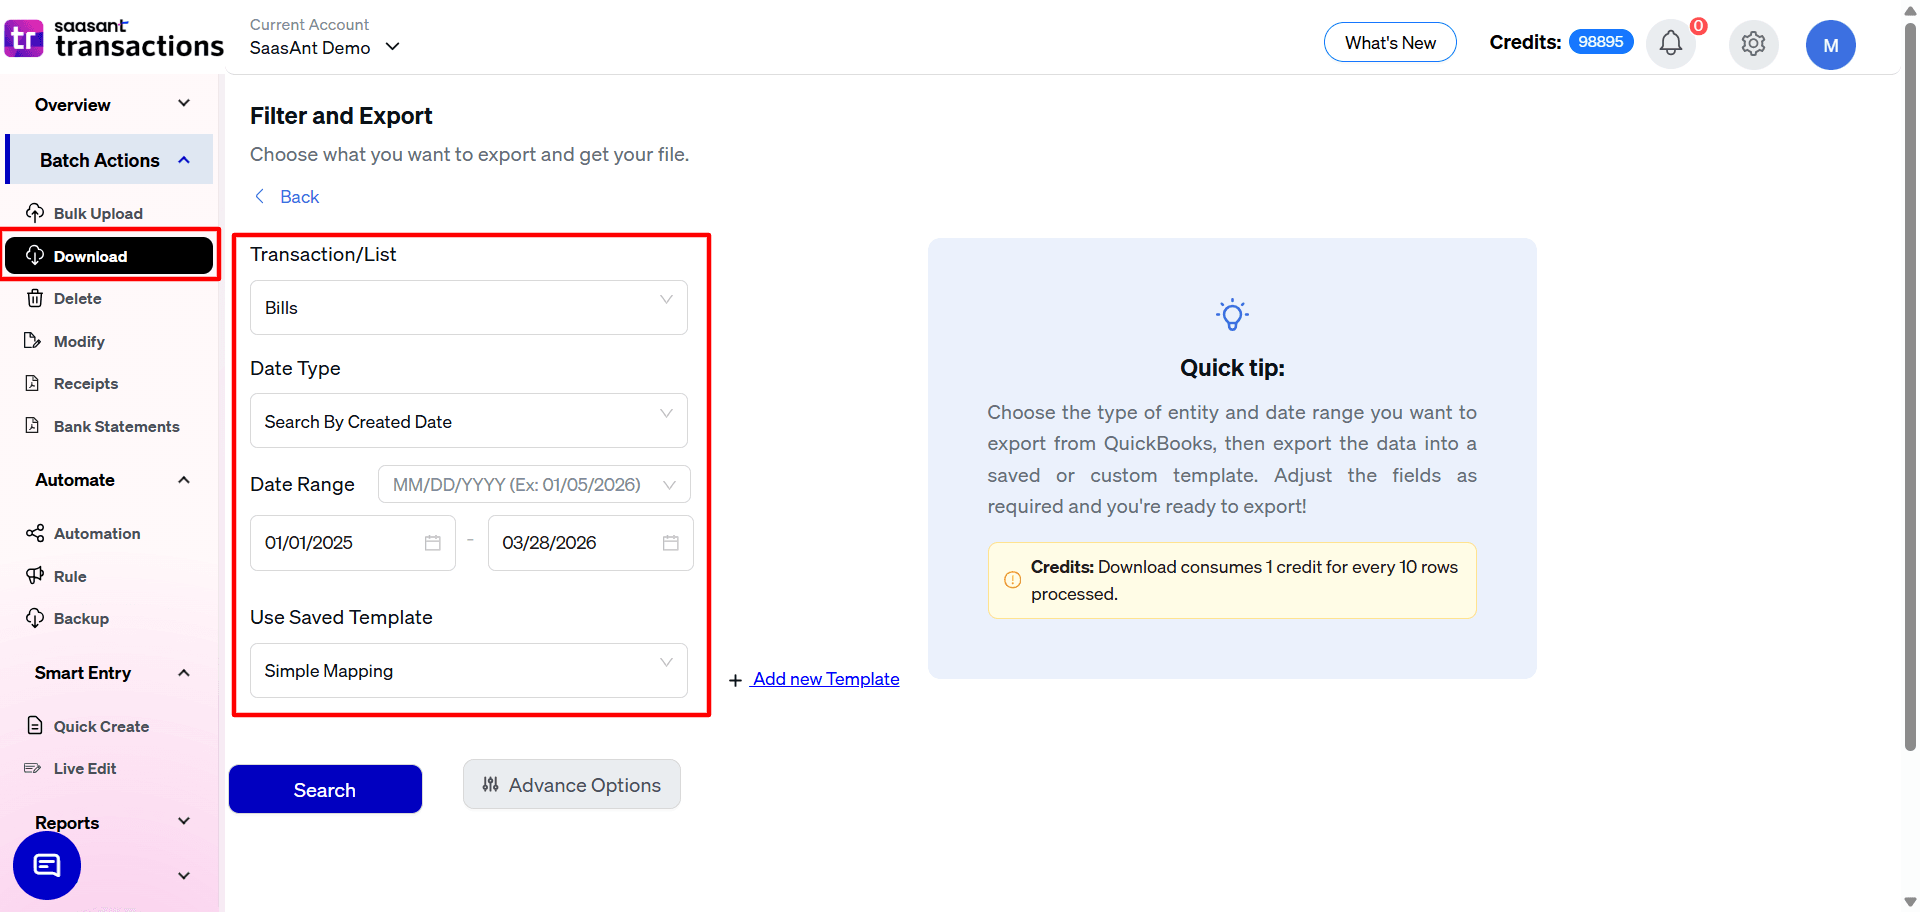
In SaasAnt, navigate to Batch Actions → Download.
On the Download transactions screen, select:
Transaction/List: choose Bills
Date Type: e.g., Search by Transaction Date
Date Range: set the period for the bills you want to modify
Optional filters: Vendor, AP Account, Amount range, etc.
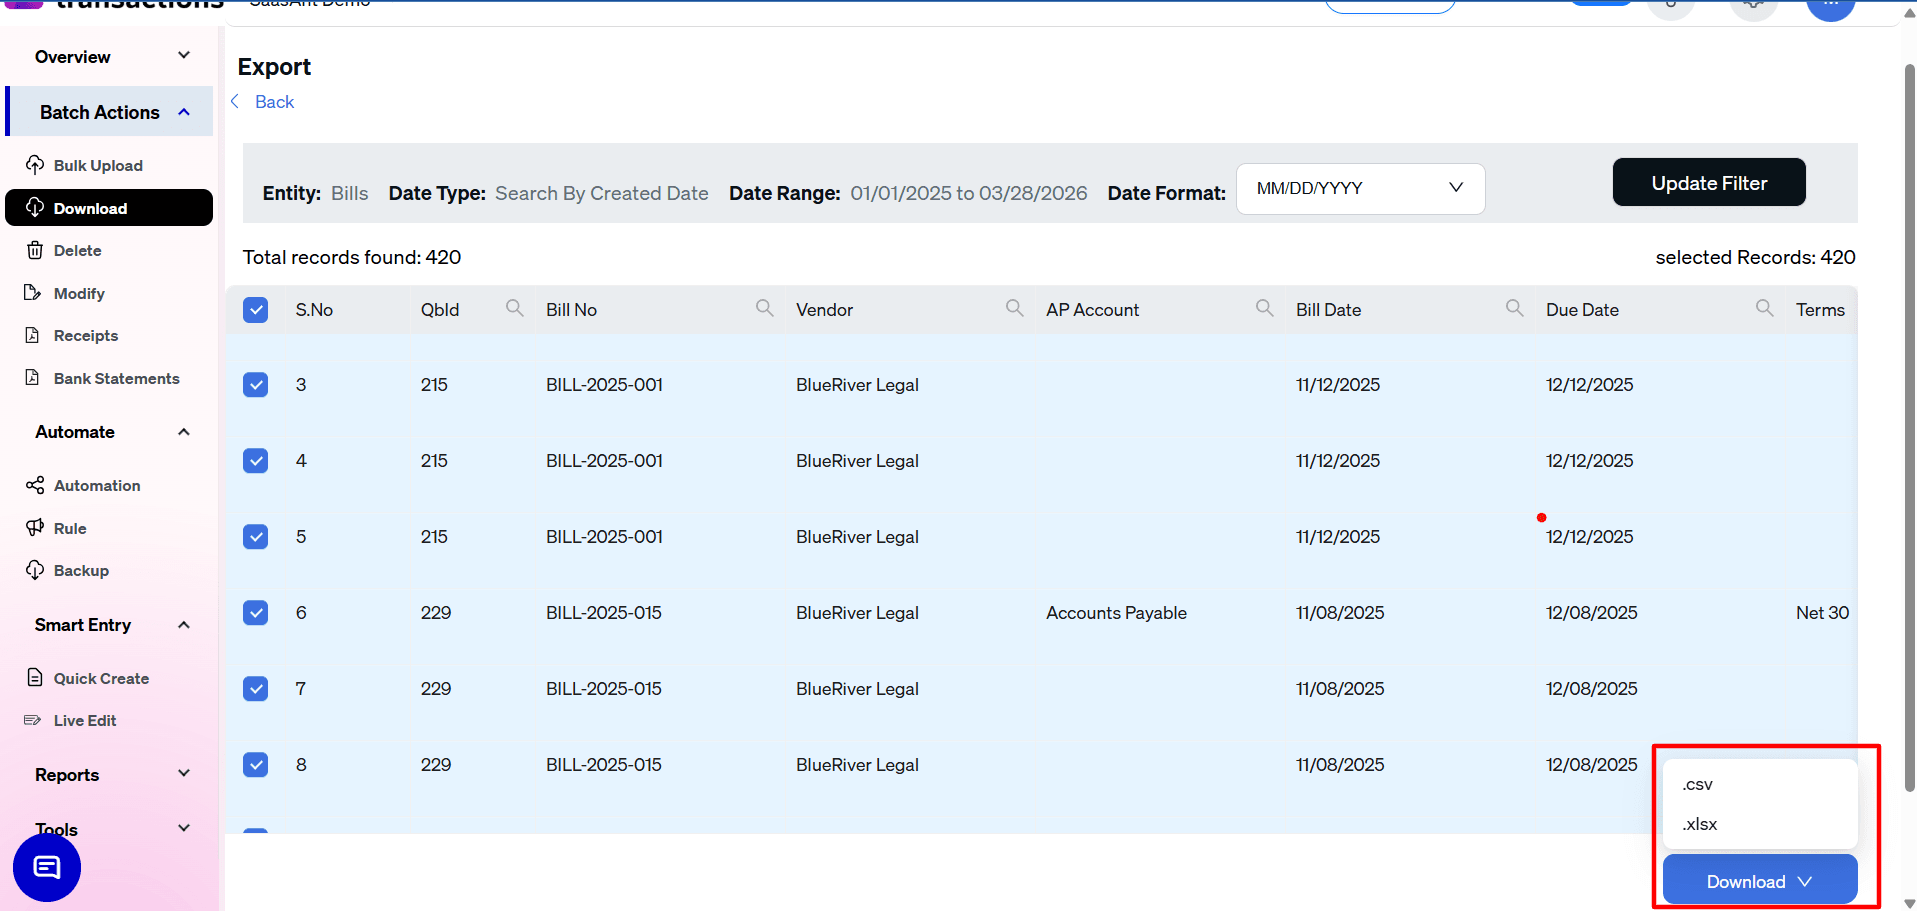
Click Search to fetch the matching bills into the grid.
At the bottom-right, click Download ▼ and choose .csv or .xlsx to export the file.
Step 3: Edit the Spreadsheet
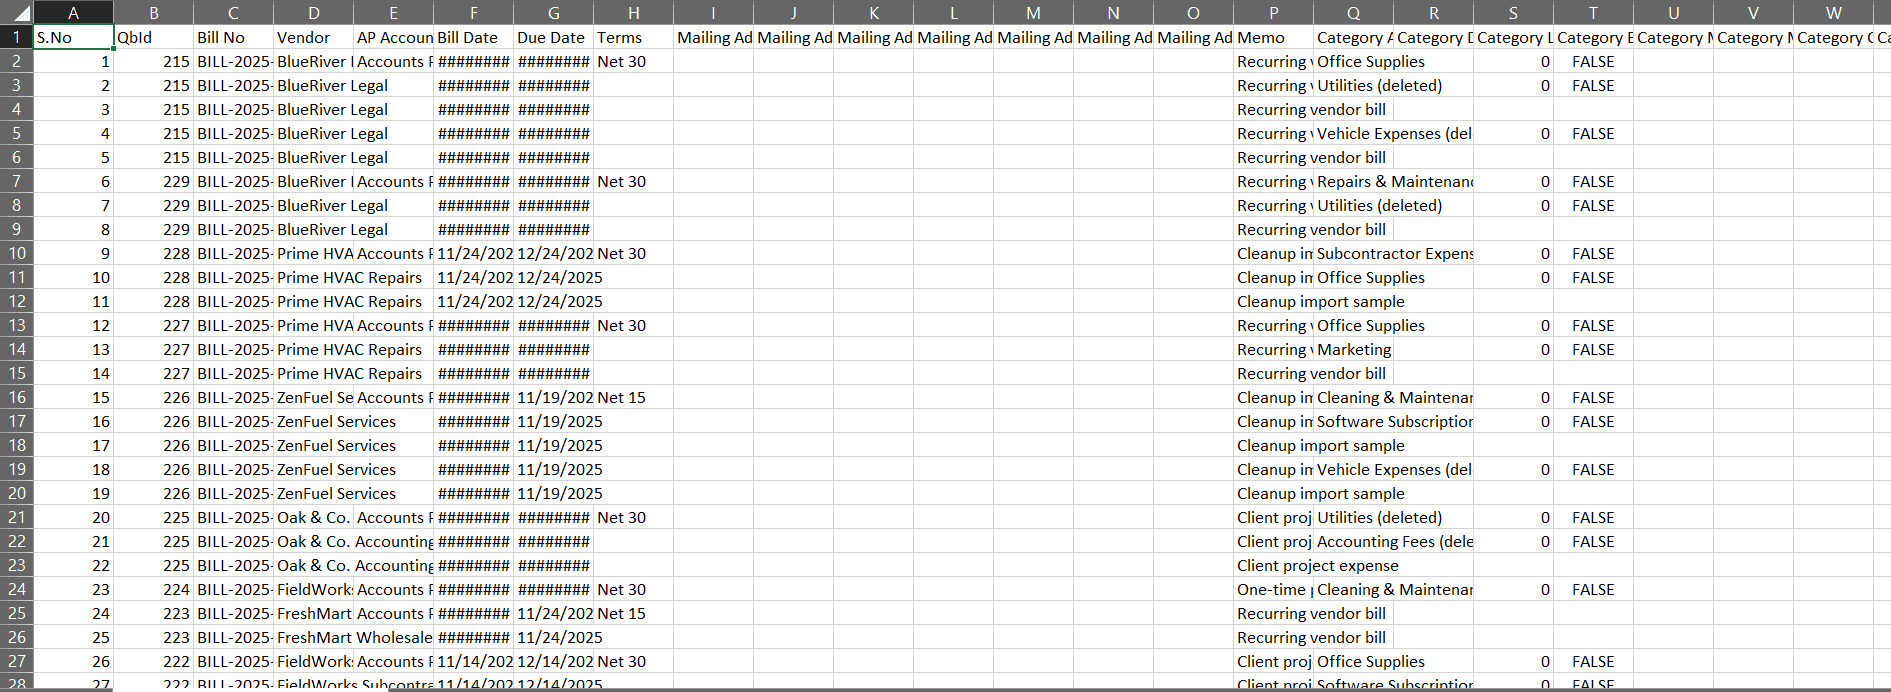
Open the downloaded file using Excel or Google Sheets.
Locate the bills you need to alter using the vendor name, bill date, or bill number.
Update only the necessary fields. Common bill edits include:
Vendor Name
Bill Date, Due Date, and Terms
Category Details (Chart of Accounts category, Description, Amount)
Item Details (Product/Service, Quantity, Rate)
Keep the original Bill No or internal reference column intact so SaasAnt knows exactly which transactions to overwrite in QuickBooks.
Save your completed file as a CSV or XLSX.
Step 4: Upload the Modified File
Return to SaasAnt.
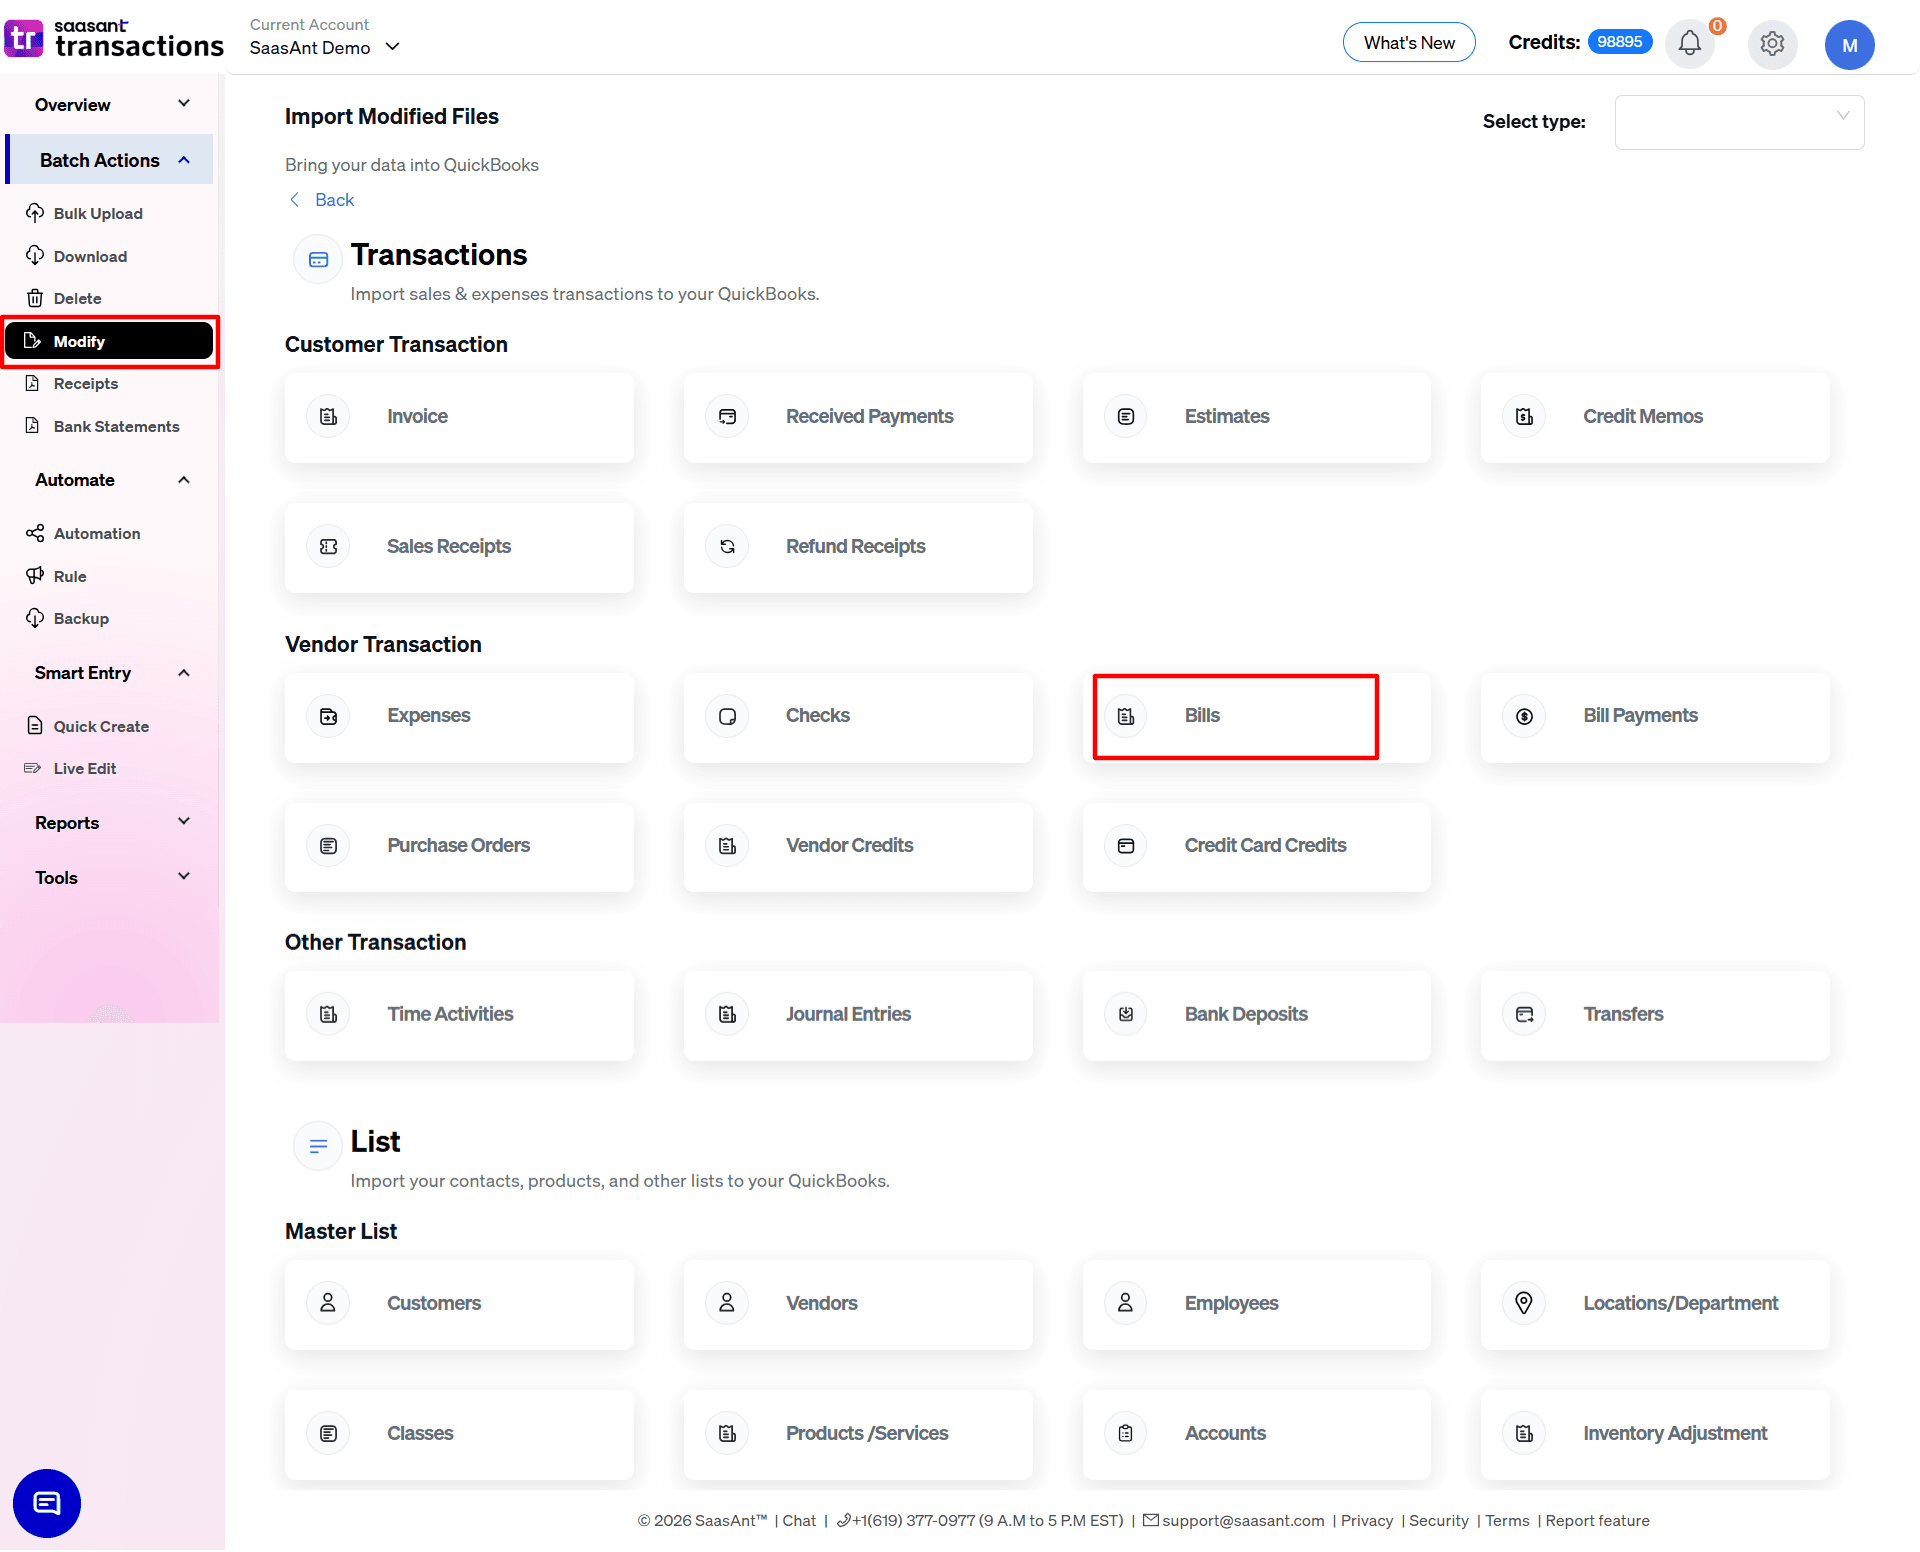
Go to Batch Actions → Modify.
Select Bills under the Vendor Transactions category if prompted, then click Continue.
On the Upload files screen, drag and drop your edited file or click Browse your files.
Step 5: Map QBO Fields Correctly
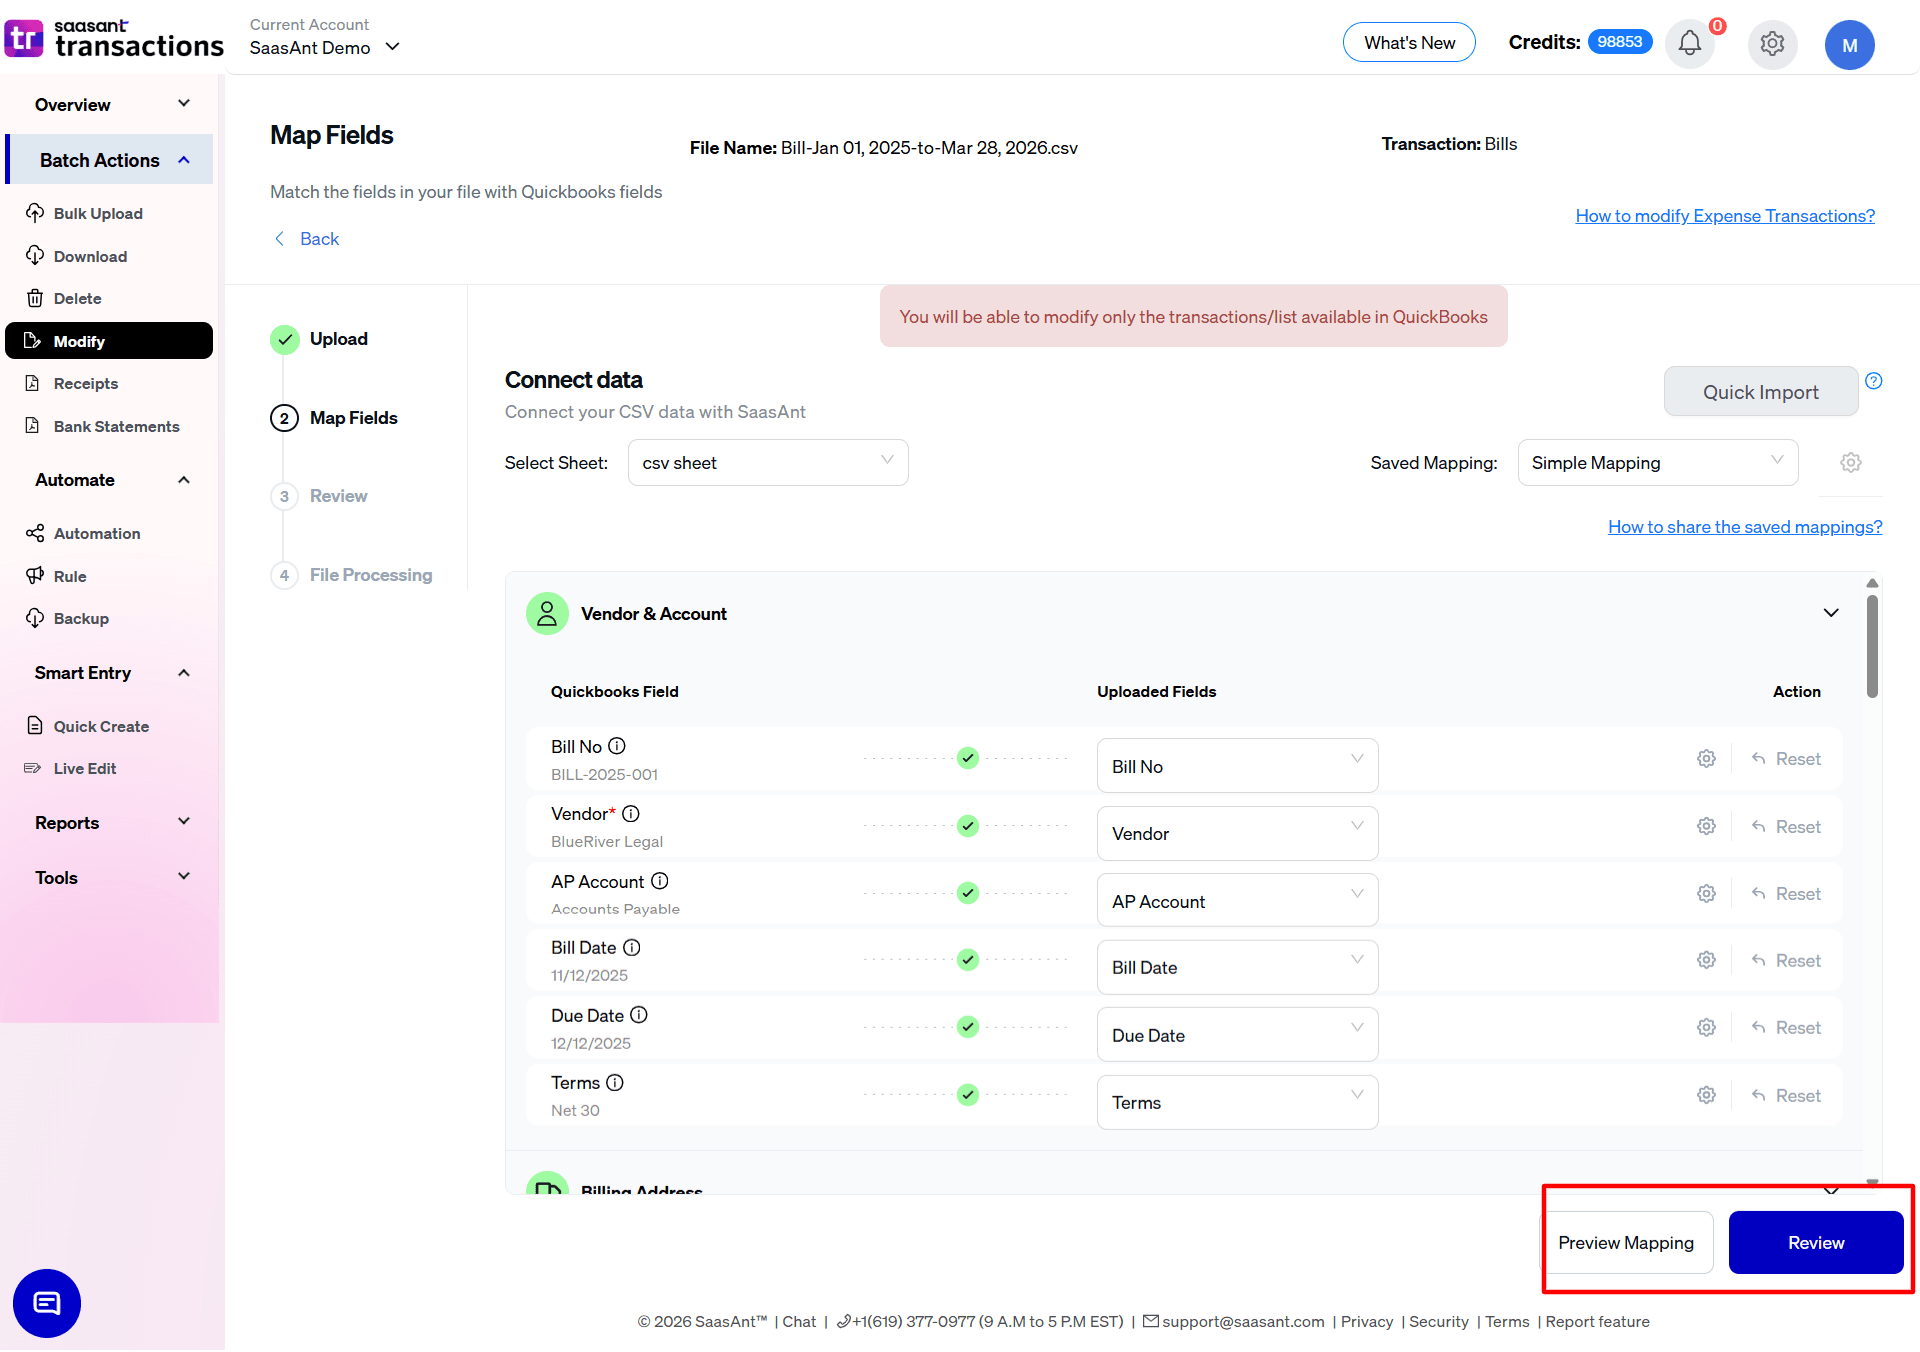
On the Map Fields screen, align your spreadsheet columns with the corresponding QuickBooks fields.
Ensure critical fields are mapped properly:
Bill Number
Vendor
Bill Date & Due Date
Category (Account), Description, and Amount
Click Preview Mapping to verify that your spreadsheet data aligns correctly with QBO fields.
Once confirmed, click Review.
Step 6: Review and Fine-Tune in the Grid
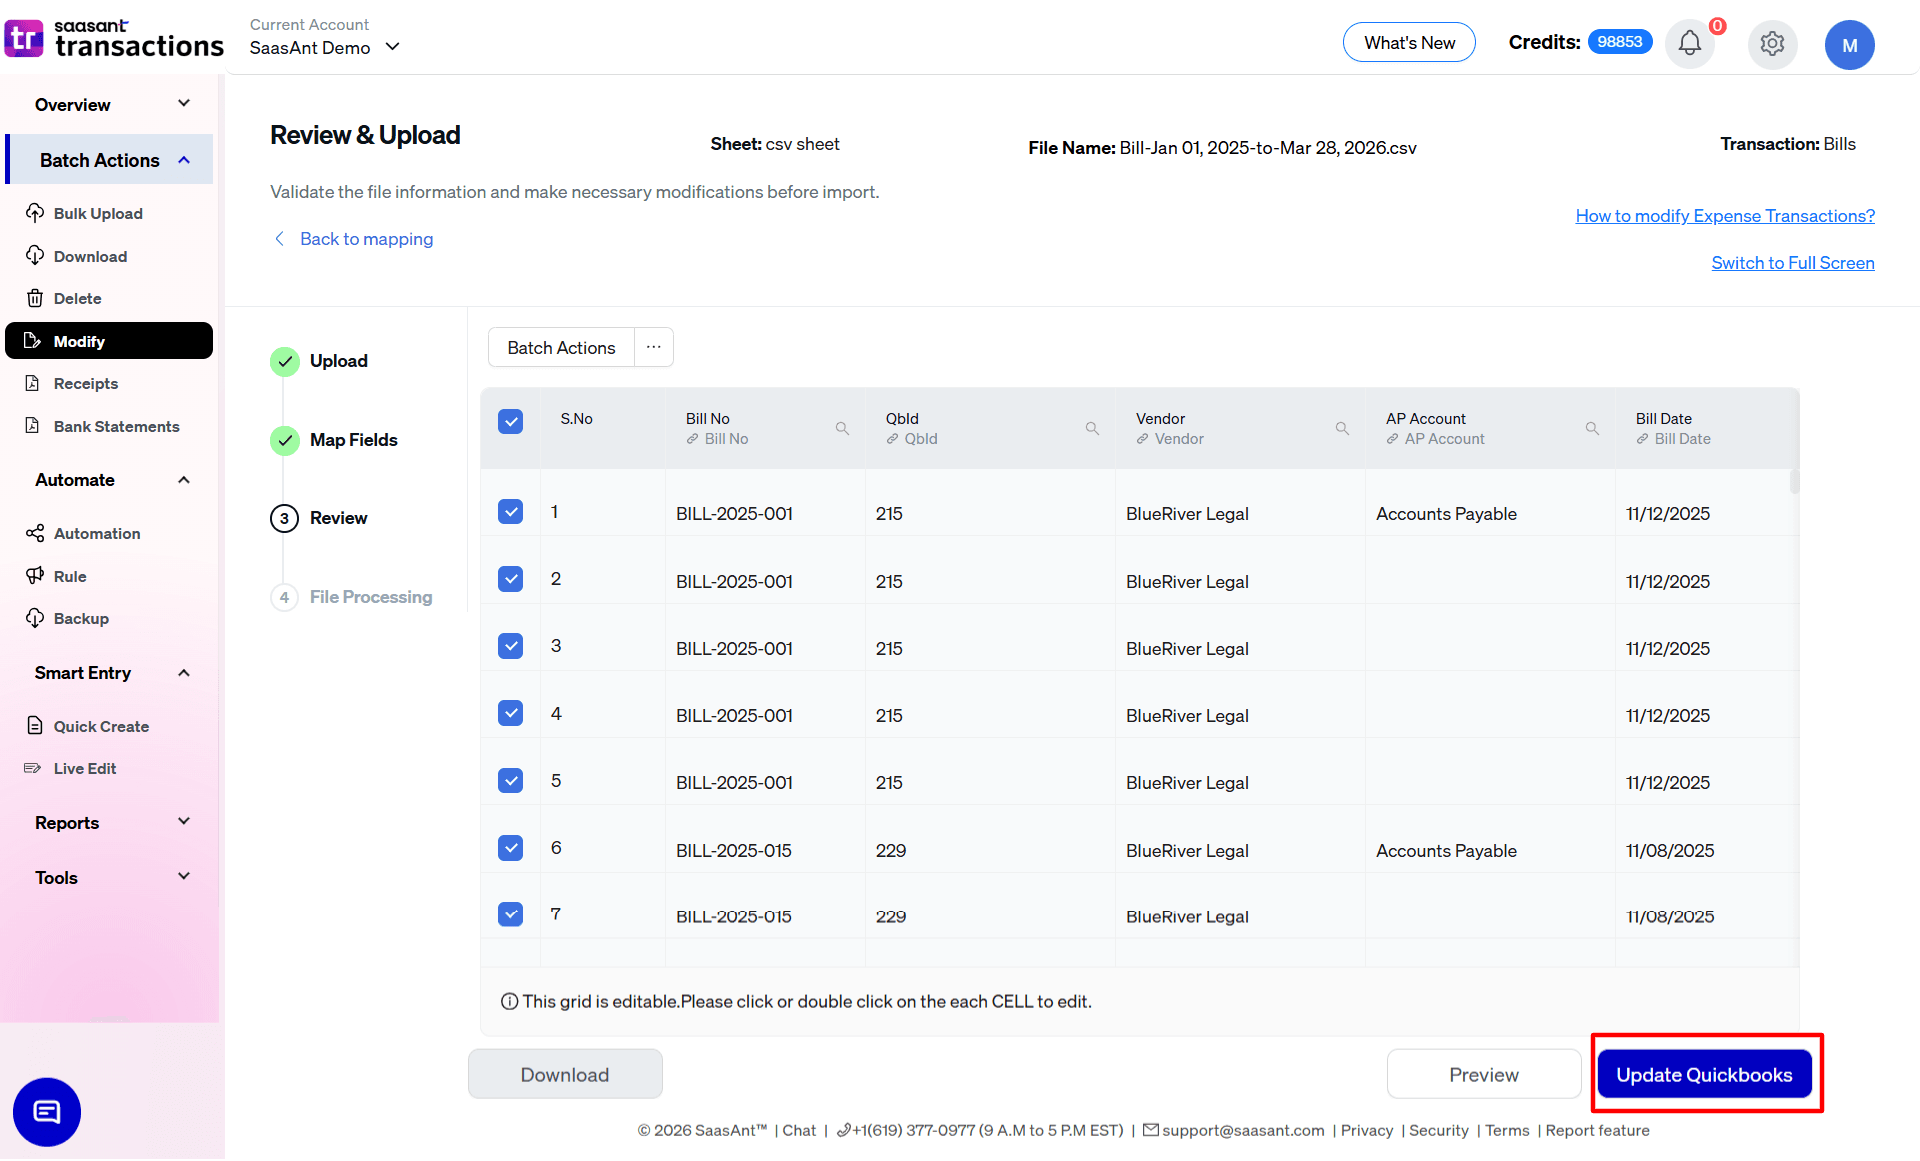
You will now see an editable grid displaying all the bill rows from your file.
Scan the data to ensure accuracy. You can double-click any cell to make last-minute typo corrections directly in the grid.
Optional: Use Preview (Dry Run) Mode to let SaasAnt validate the data without actively changing anything in your QuickBooks file yet.
Once satisfied, click Update QuickBooks.
Step 7: Check Results, Download Logs, and Undo if Needed
After processing, SaasAnt displays a summary of the import.
Click Show Results to view the Modify results screen.
On the Success tab, click the QuickBooks ID to view the live, updated bill in QBO. Use the Download ▼ button to save a permanent audit log of the changes.
Check the Error tab for any failed rows. You can often click an inline Fix button to correct an invalid account or vendor name and re-submit it immediately.
If you realize you made a mistake, click the Undo button to roll back the successful changes, restoring the original bill data in QuickBooks.
Method 2: Edit Bills Using Live Edit (On-Screen Bulk Edits)
The Live Edit feature allows you to change transaction data directly inside SaasAnt’s grid interface without creating, exporting, or importing a spreadsheet. It’s perfect for fast fixes, such as updating a due date or correcting a memo on a handful of bills.
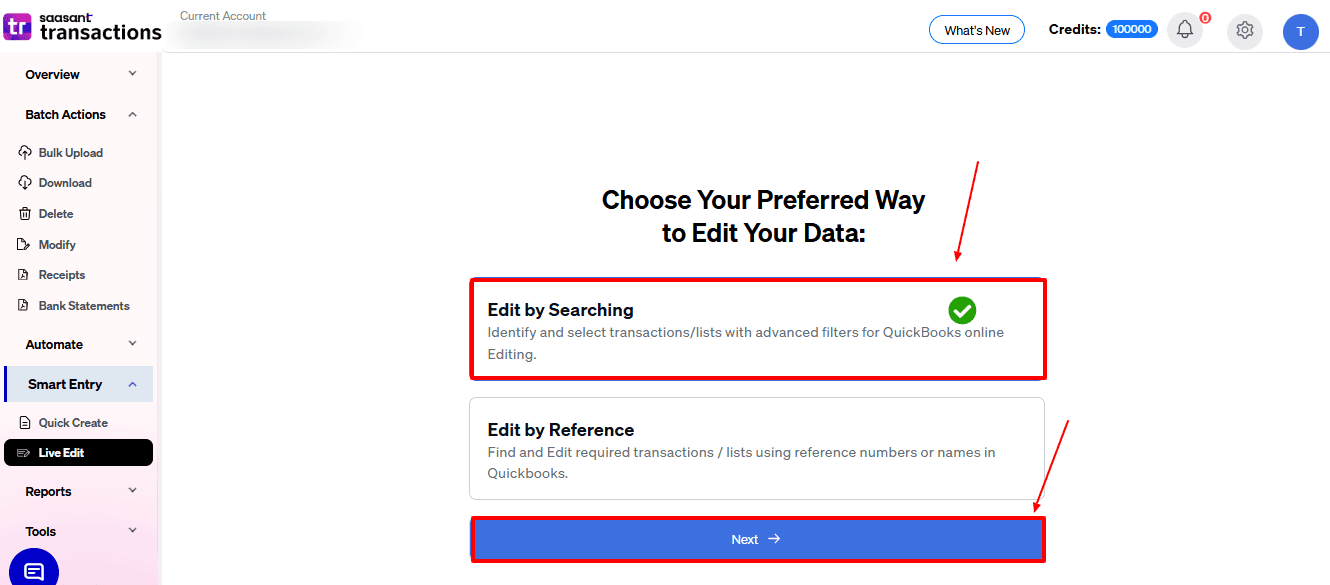
Step 1: Open Live Edit
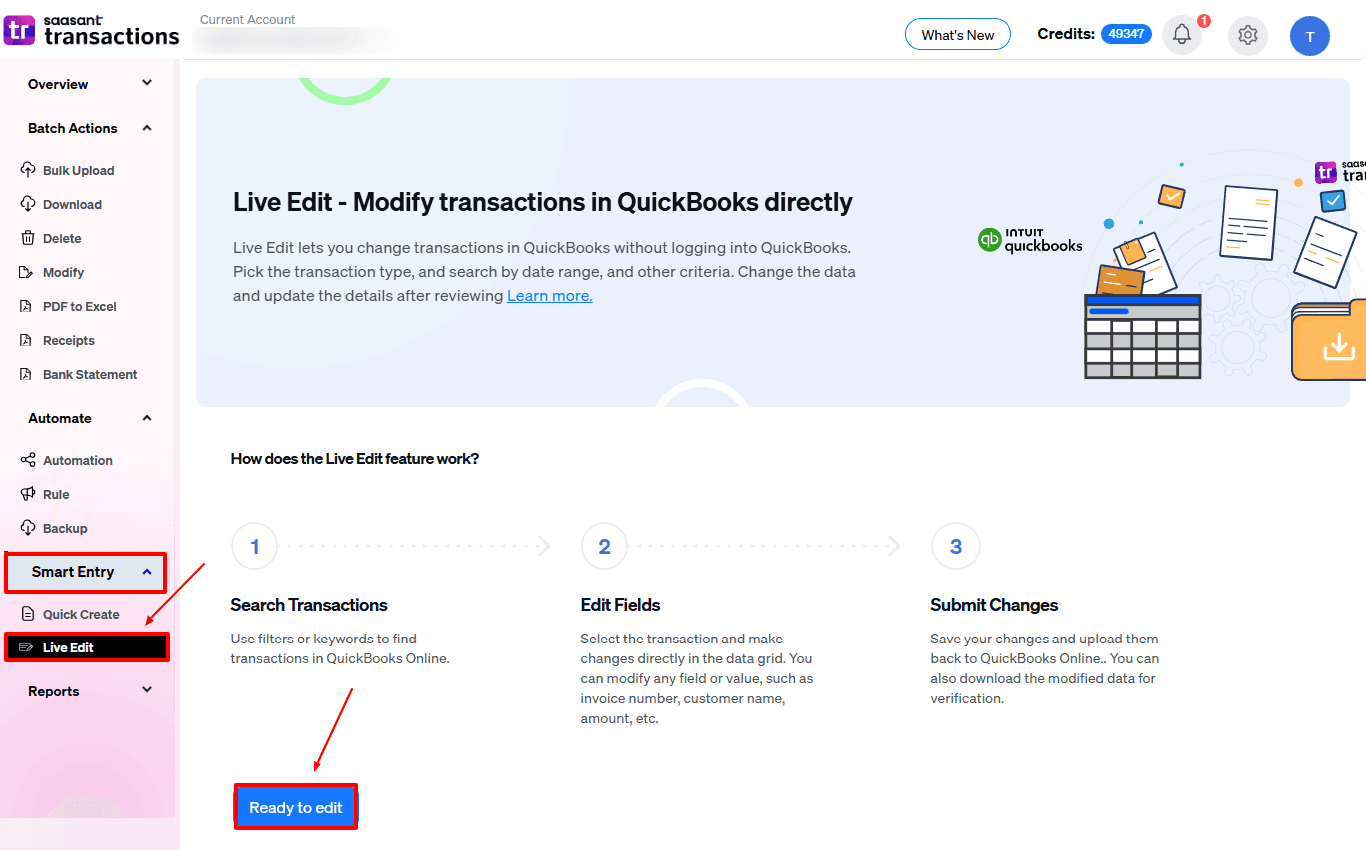
In SaasAnt, go to Smart Entry → Live Edit.
Choose the preferred way to edit the bills.
Step 2: Filter the Bills You Want to Edit
At the top of the Live Edit screen, set:
Transaction/List: choose Bills
Date Type: such as Search by Last Updated Date or Transaction Date
Date Range: the period for the bills you want to adjust
Date Format: ensure this matches your QBO settings (e.g., MM/DD/YYYY)
Click Search to pull the matching bills into the live grid.
Step 3: Edit Bill Fields in the Grid
Locate the specific bills you want to adjust.
Click directly into the grid cells to type in your revised values (such as changing a Vendor, Date, or Category).
You can edit multiple rows at once across the screen.
Step 4: Submit Changes Back to QBO
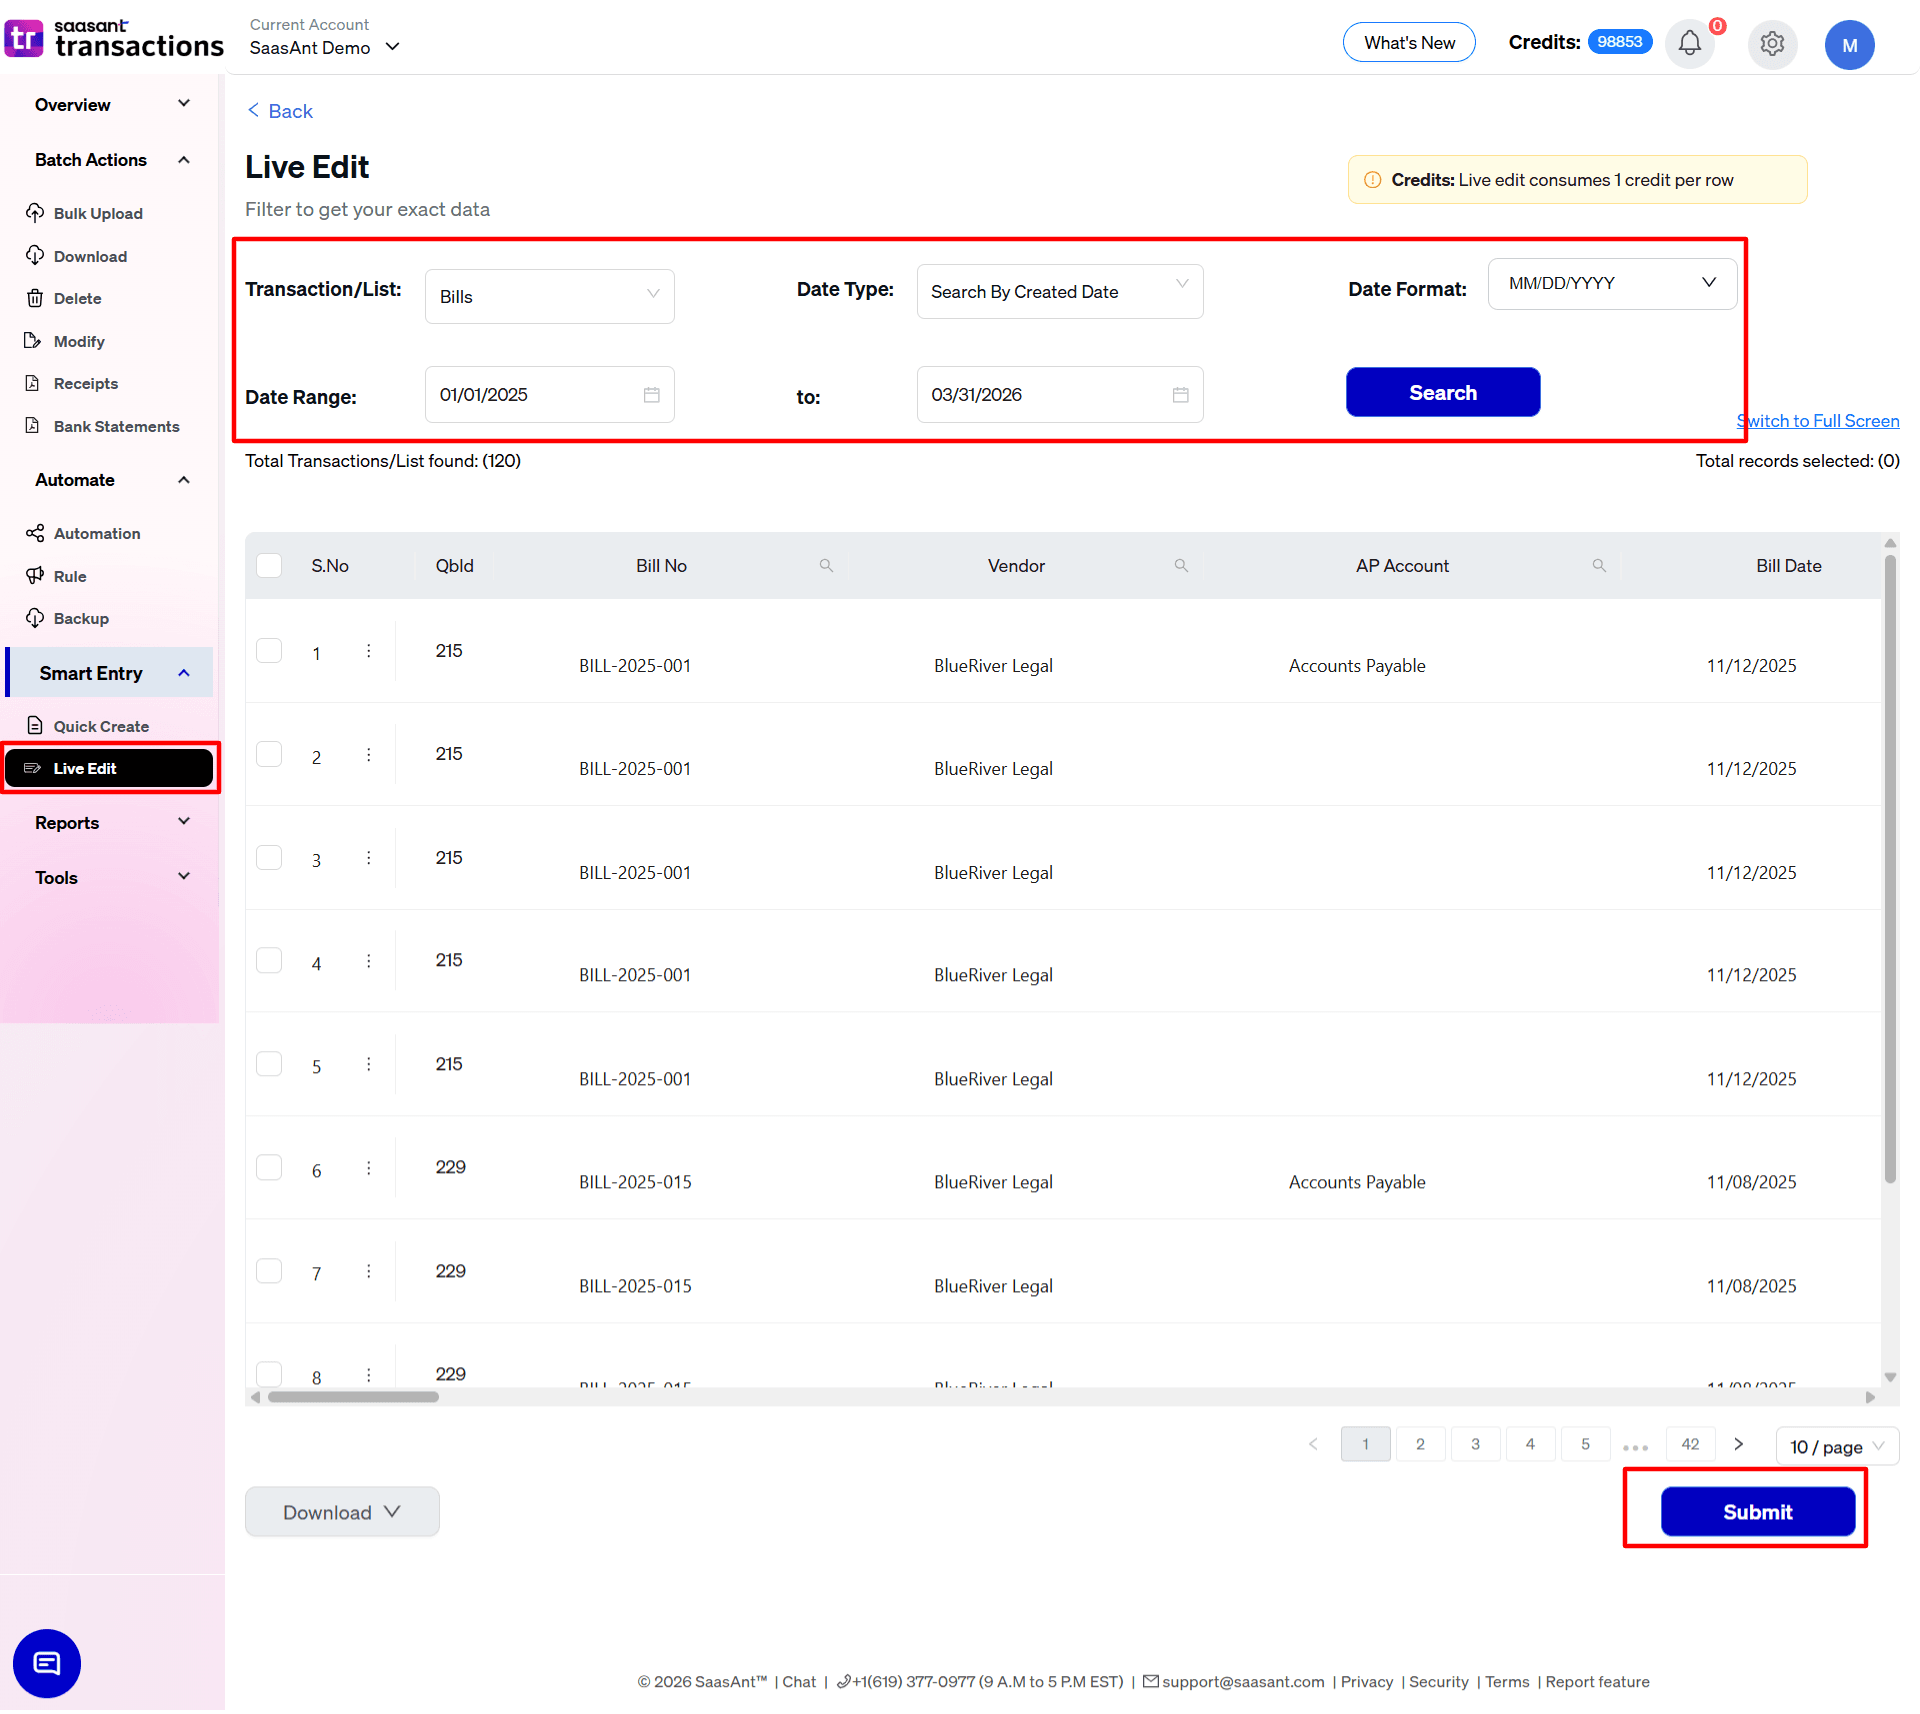
Review the updated grid to ensure everything is correct.
Click Submit to sync the updates directly with QuickBooks Online.