How To Delete Sales Receipts in QuickBooks Desktop
March 9, 2026
Use the SaasAnt Transactions Desktop to delete multiple Sales Receipts in QuickBooks Desktop, to remove duplicates, incorrect customer entries, or test data. This guide details prerequisites, secure connection setup, transaction searches, backup downloads, bulk deletions, and verification steps. It supports accountants in ensuring accurate revenue records without the hassle of repetitive manual deletions.
Prerequisites
QuickBooks Desktop is set up, and the company file is accessible.
Admin permissions for the company file are required.
SaasAnt Transactions Desktop is installed.
The company file must be opened in QuickBooks before you can connect.
How to Delete Sales Receipts in QuickBooks Desktop: Step-by-Step Guide
Step 1: Open the SaasAnt Transactions Desktop
Download the latest SaasAnt Transactions Desktop version.
Launch the SaasAnt Transactions Desktop, and connect to your QuickBooks company file.
Step 2: Connect to QuickBooks Desktop
Go to the File menu
Click Connect to QuickBooks, and allow access permission in QuickBooks when prompted.
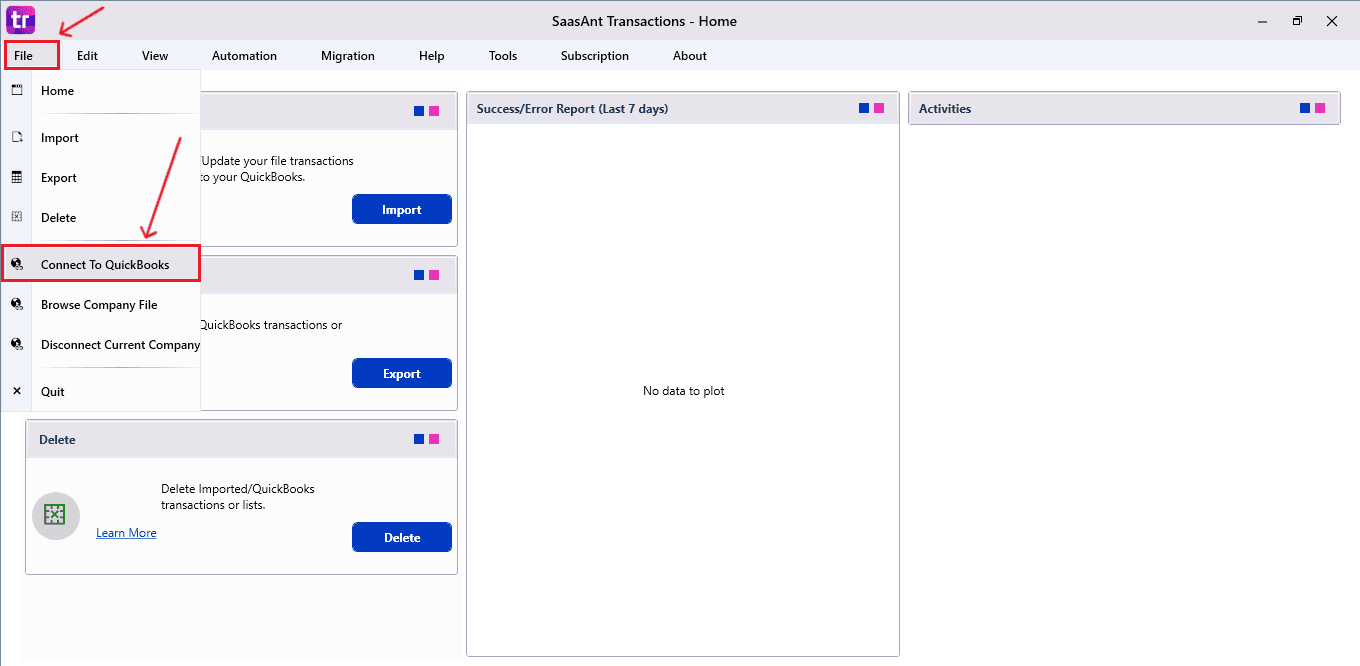
This secure link allows SaasAnt to read and adjust sales receipts transactions in the selected company file environment.
Step 3: Open Delete Module
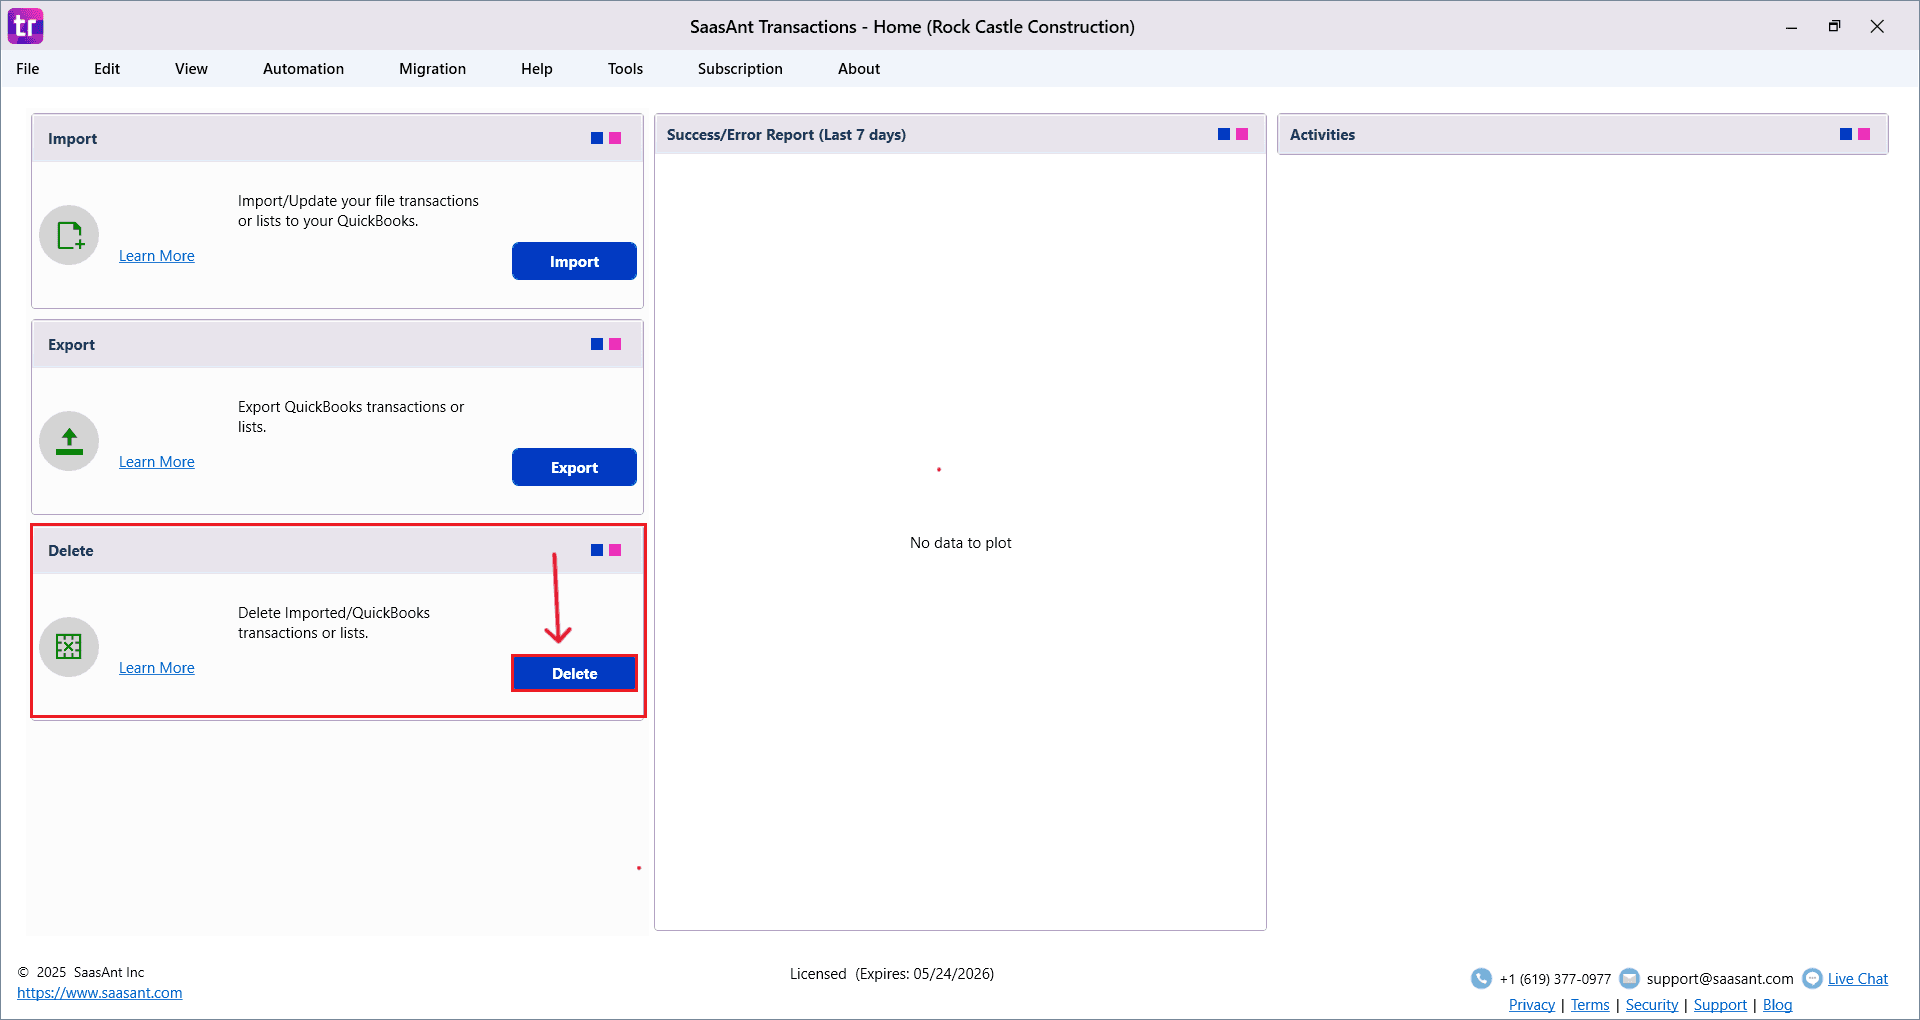
On the left panel dashboard, select Delete.
This section is meant for deleting transactions in bulk.
Step 4: Search Sales Receipts
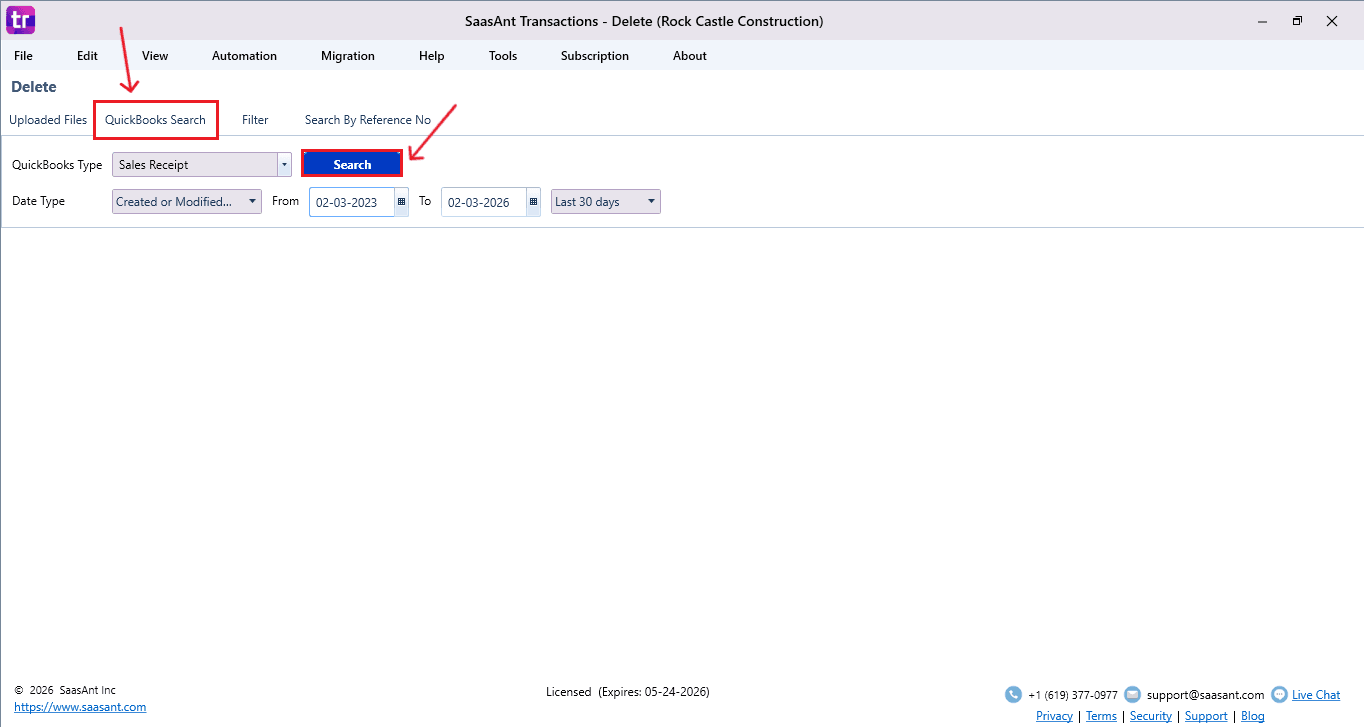
Choose QuickBooks Search
Set QuickBooks Type → Sales Receipts
Apply filters, including date range or transaction criteria, to refine results.
Click Search to get all sales receipts records that match for review and deletion.
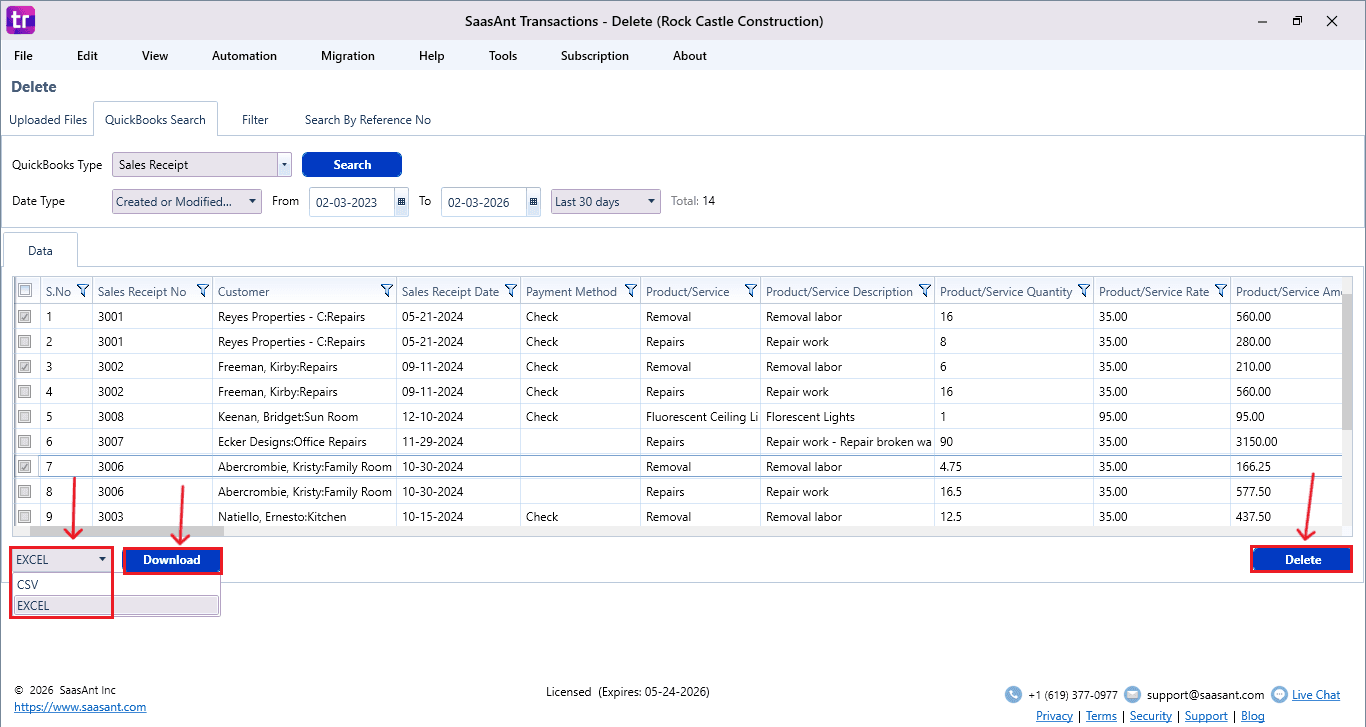
Step 5: Select the Sales Receipts to Delete
The matching Sales Receipts will show up in the results list
Review and select the required Sales Receipts with checkboxes
Click Download (at the bottom-left) to save a backup in Excel or CSV format.
Click Delete at the bottom right.
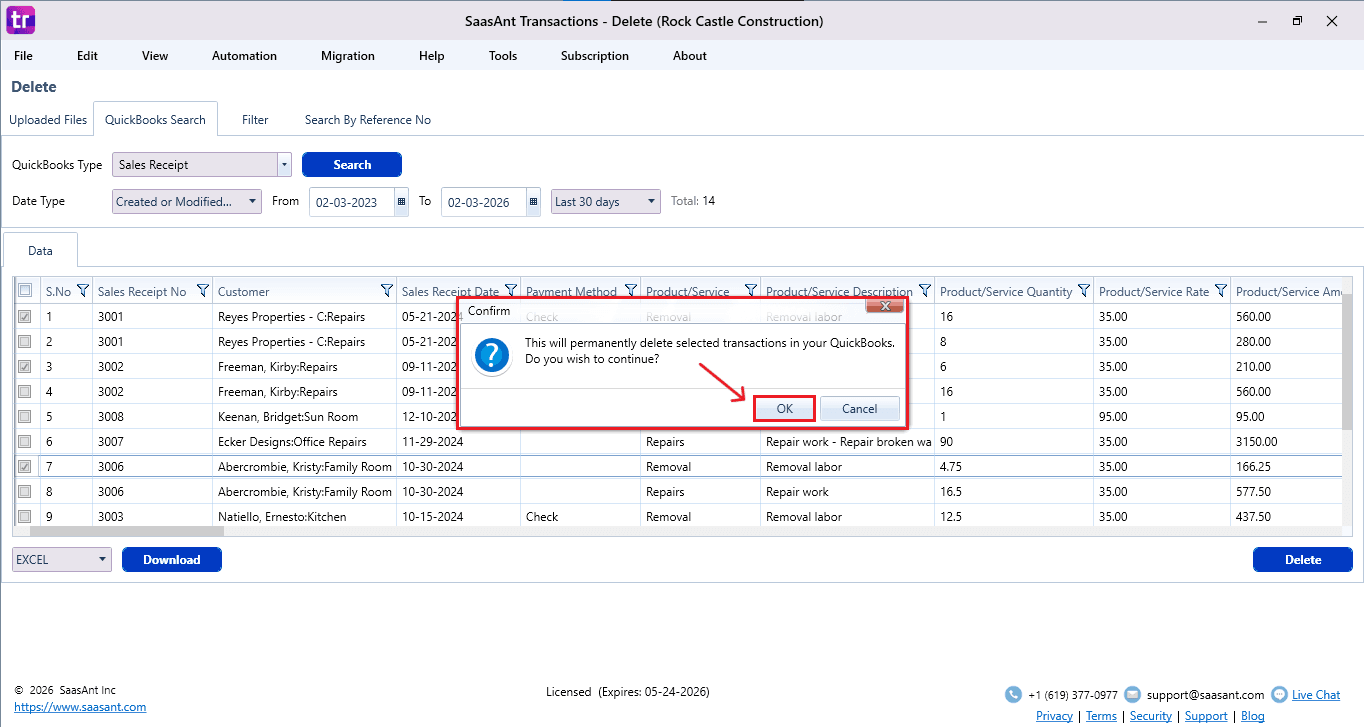
Step 6: Confirm Deletion
A confirmation pop-up appears; carefully review the count and details.
Click OK to proceed.
SaasAnt will permanently delete the selected sales receipts from the QuickBooks Desktop company file.
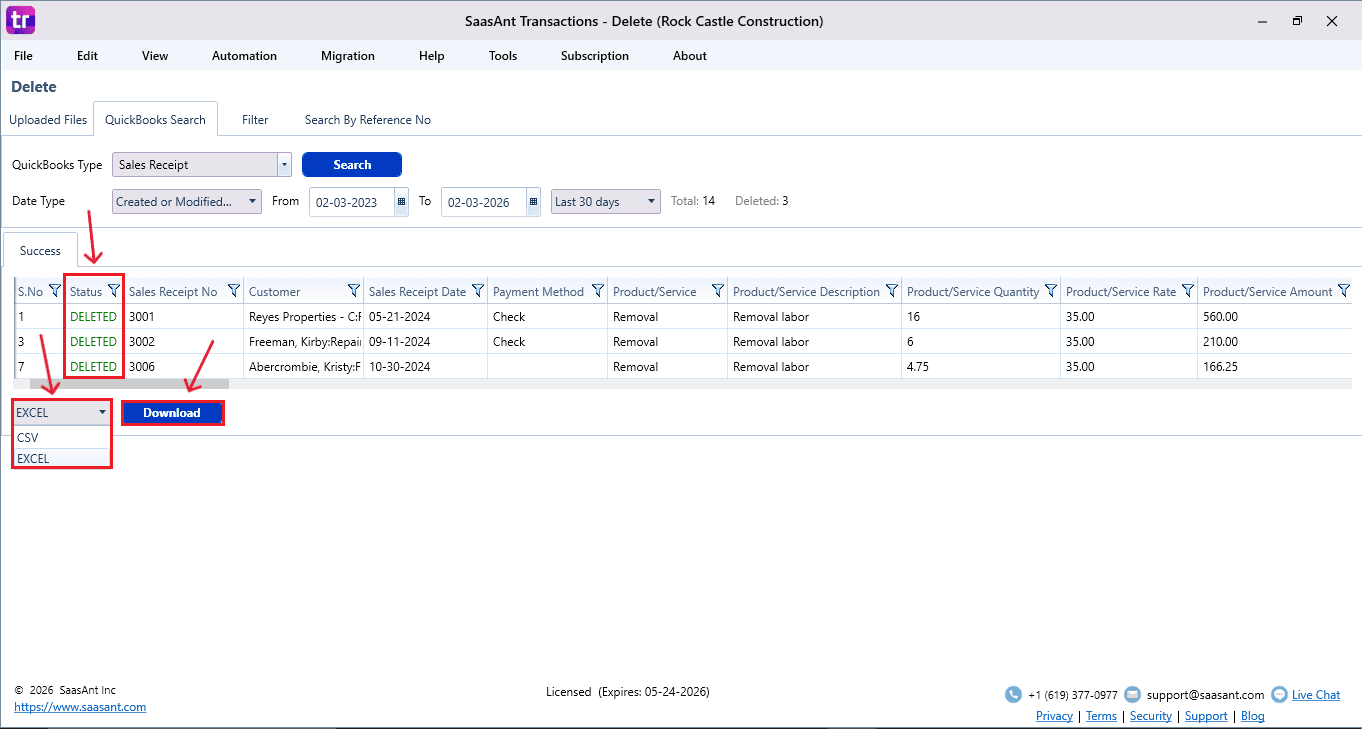
Step 7: View Deleted Sales Receipts
Deleted Sales Receipts appear in the SaasAnt dashboard
You can download the deleted records using the Download option in Excel or CSV format.
To verify:
Open QuickBooks Desktop → Customers → Customers Center → Transactions → Sales Receipts - confirm sales receipts are removed.
FAQ
1) Should the company file remain open during the process?
Yes, keep the QuickBooks company file open to ensure a secure connection and allow changes at the transaction level.
2) How do I connect SaasAnt to QuickBooks Desktop?
Go to the File menu, choose Connect to QuickBooks, and authorize access permissions in the QuickBooks authorization window.
3) Where can I access the bulk delete option?
Go to the left dashboard panel and choose the Delete module in SaasAnt.
4) Should I create a backup before deleting transactions?
Yes, click Download to save the chosen Sales Receipts as Excel or CSV for security.