Edit Invoices in QuickBooks Online using SaasAnt
February 26, 2026
Modifying invoices one by one in QuickBooks Online is slow and error‑prone when you have large volumes. SaasAnt Transactions Online lets you export invoices, bulk‑edit them in a spreadsheet, or change them directly on-screen, then push the updates back into QuickBooks in a controlled, auditable way.
This guide walks through two methods:
Method 1: Modify – export, edit in Excel/Sheets, and re‑upload
Method 2: Live Edit – filter and edit invoices directly in SaasAnt’s grid
Method 1: Edit Invoices Using Modify
This method is best when you need to update many fields across lots of invoices, such as changing prices, tax codes, terms, or descriptions in bulk.
Step 1: Open SaasAnt from QuickBooks Online
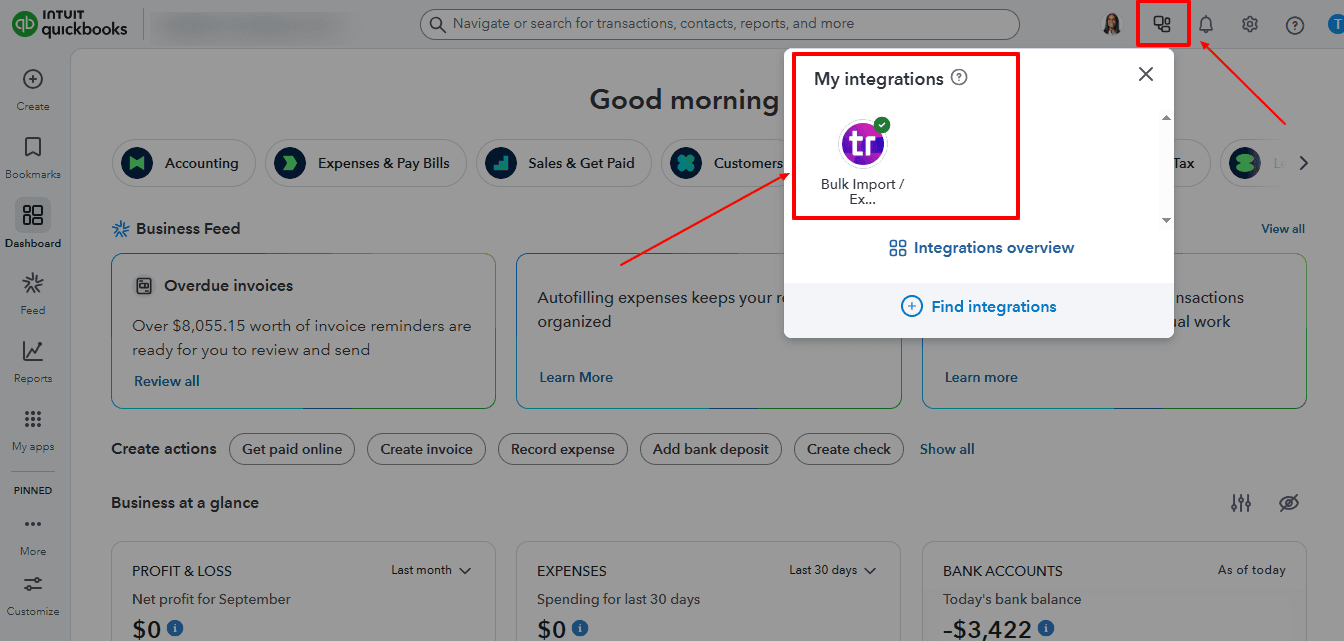
Sign in to your QuickBooks Online account.
From the left menu, go to Apps.
In Find apps, search for SaasAnt and install it if you haven’t already.
Once installed, open SaasAnt from My Apps to launch the SaasAnt Transactions dashboard.
Step 2: Export Existing Invoices
In SaasAnt Transactions, go to Batch Actions → Download.
On the Download transactions screen, select:
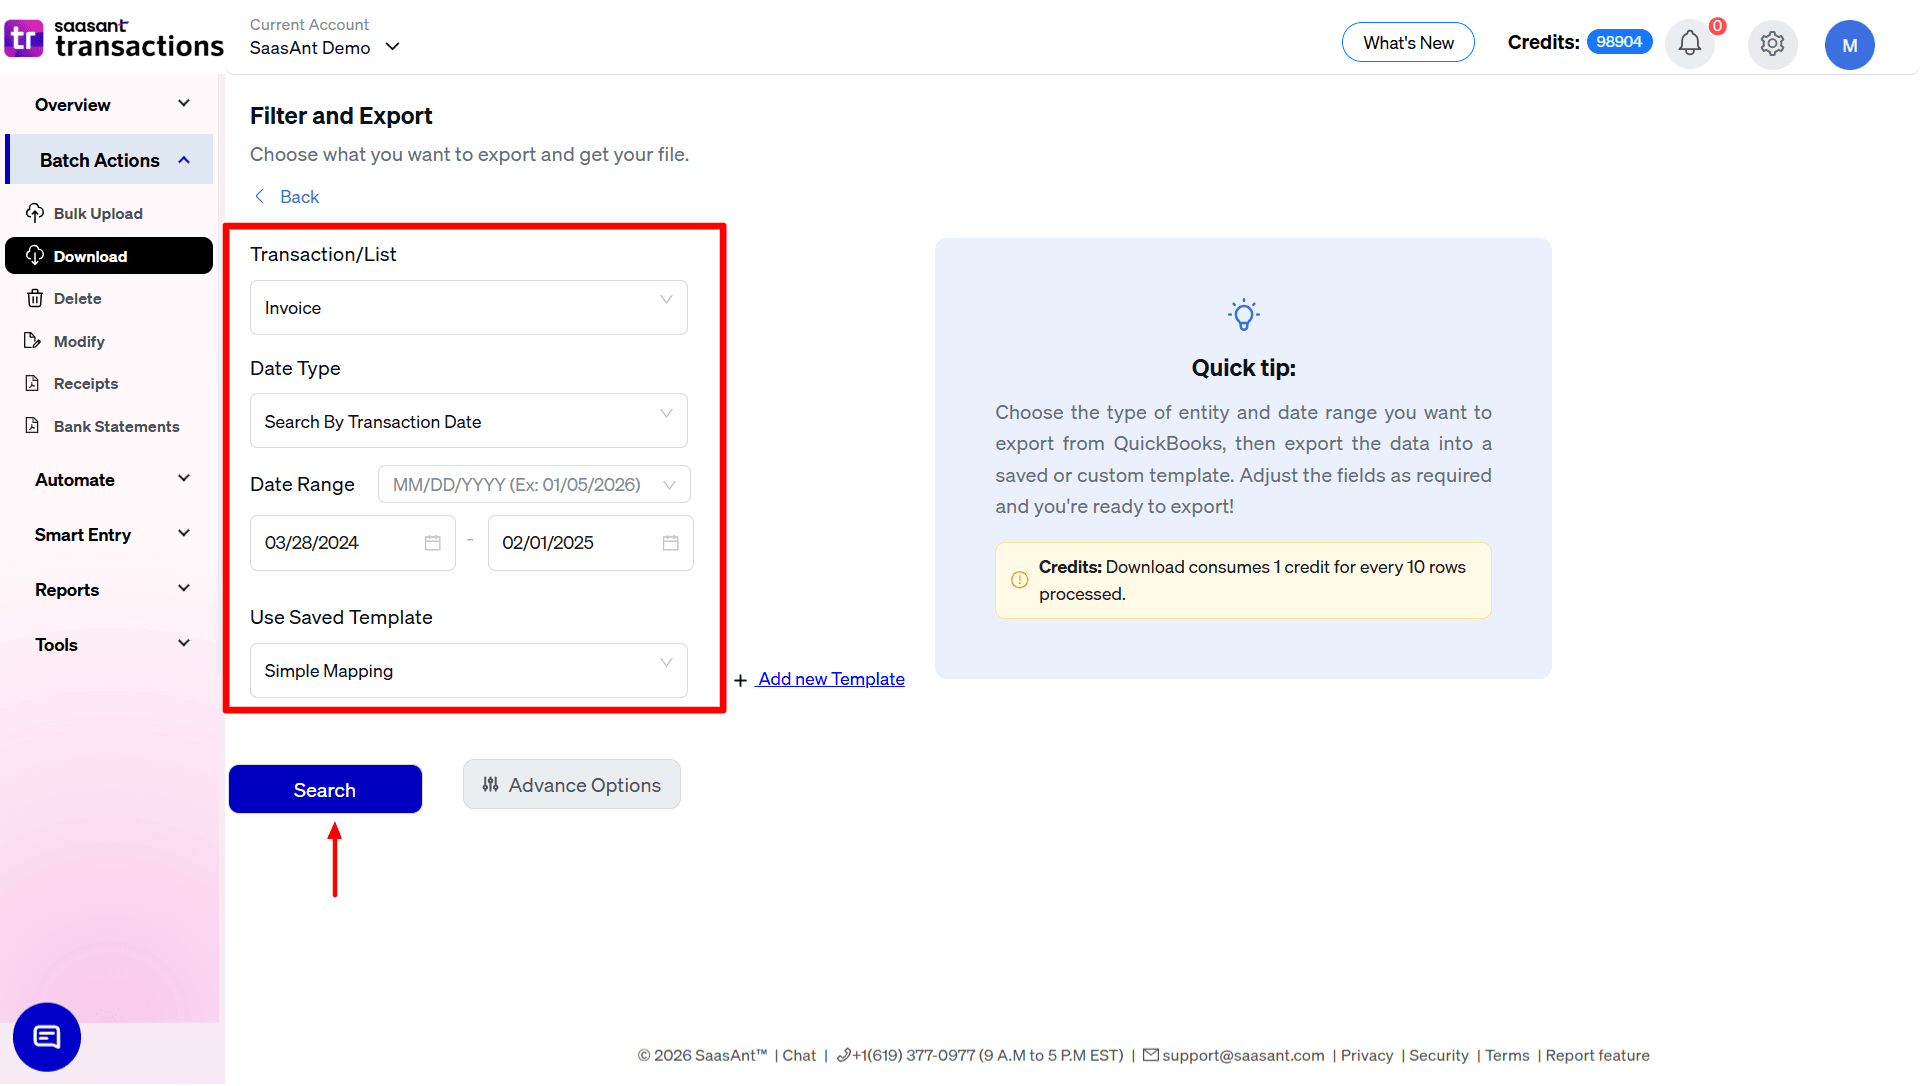
Transaction/List: choose Invoices
Date Type: for example, Search by Transaction Date
Date Range: set the period whose invoices you want to modify
Optional filters: Customer, Status, Amount range, Invoice No, etc.
Click Search to fetch the matching invoices into the grid.
4. At the bottom‑right, click Download ▼ and choose .csv or .xlsx to export the invoice data.
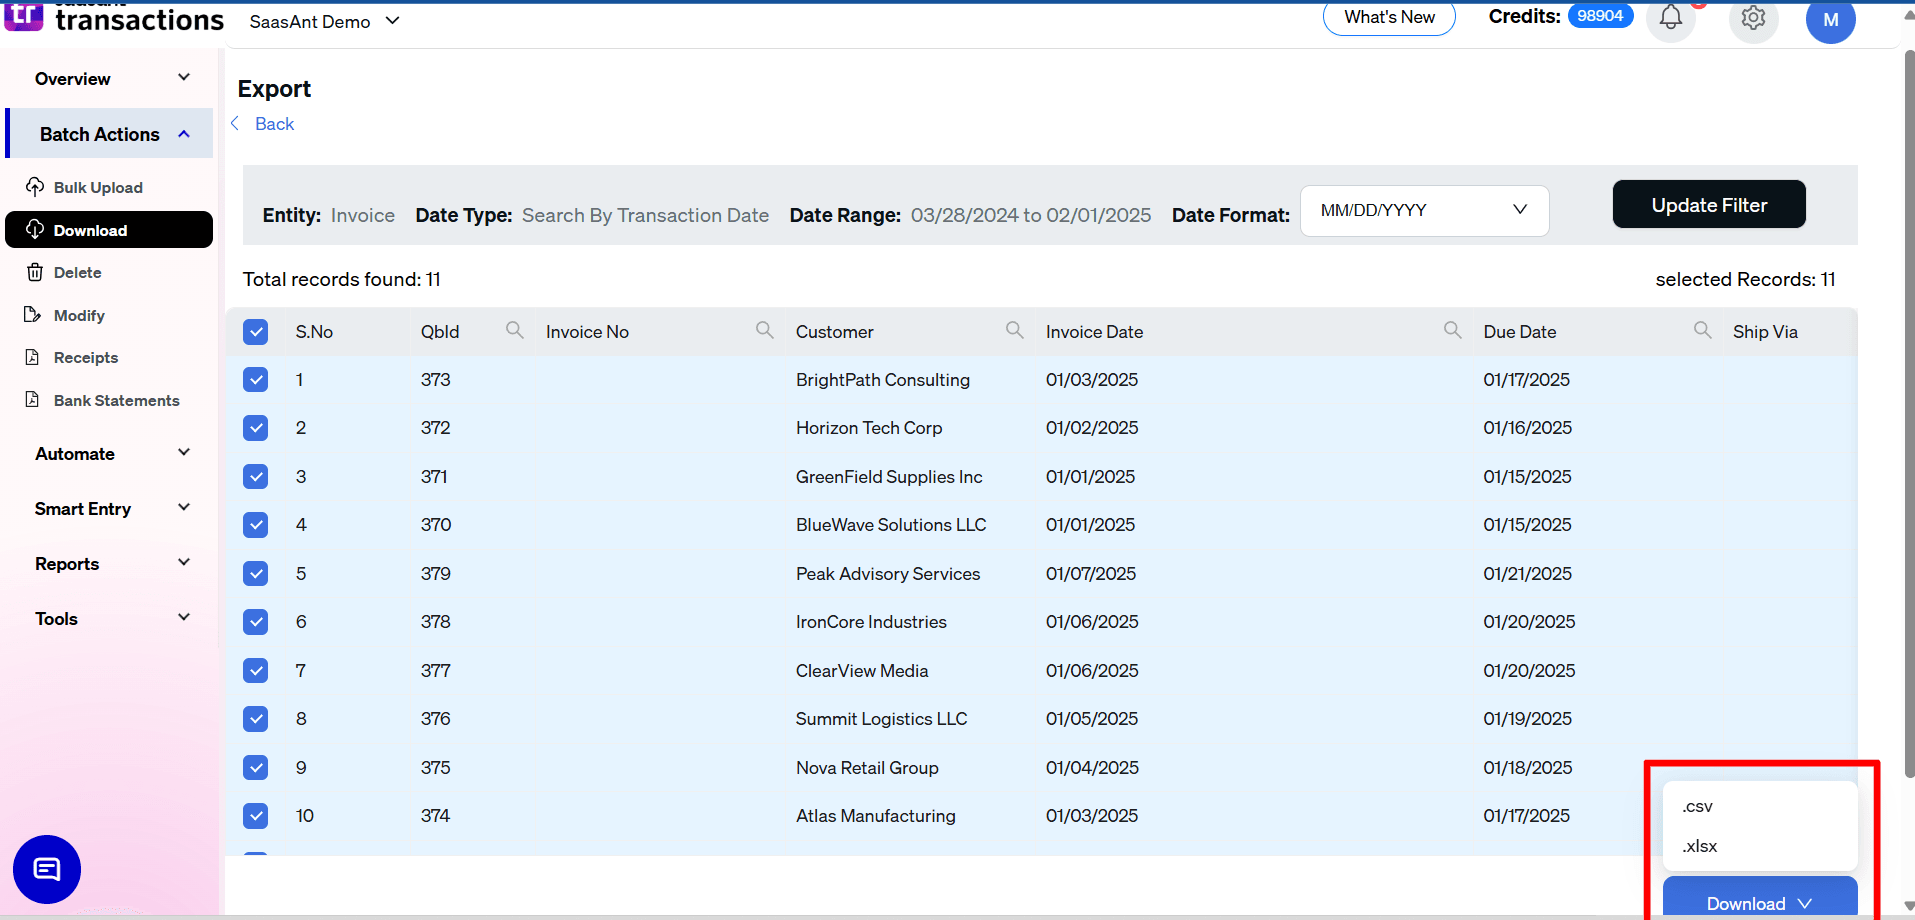
You now have a file that mirrors your QuickBooks invoice data and includes the reference number (Invoice No), which SaasAnt will use to locate and update the right transactions.
Step 3: Edit the Invoices in Excel or Google Sheets
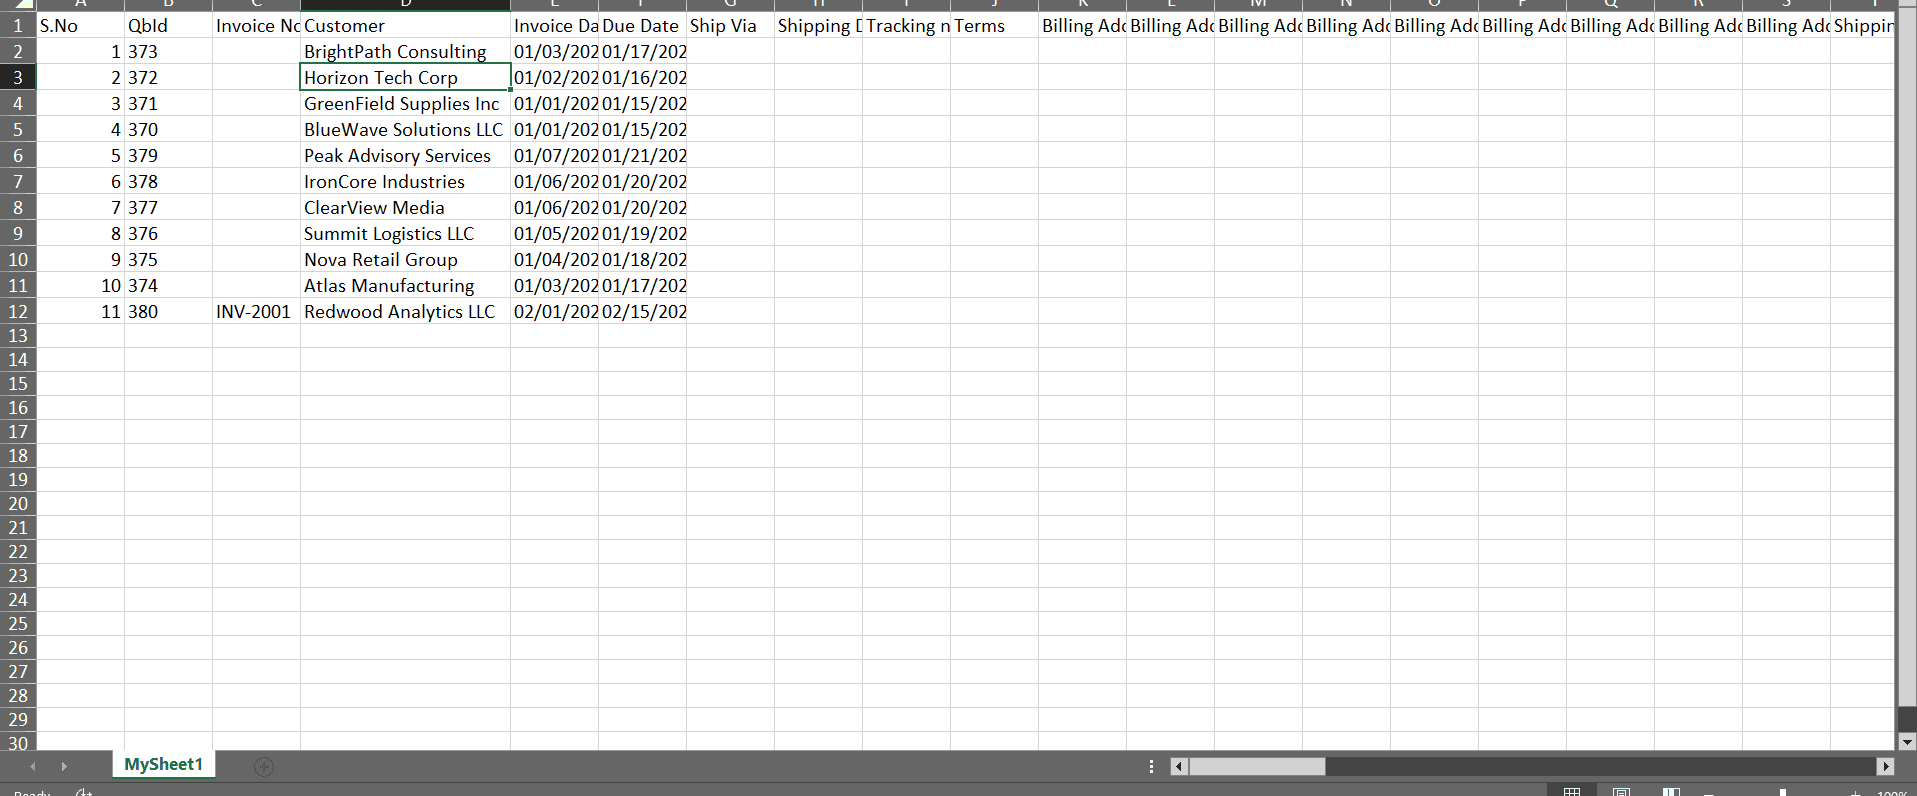
Open the exported file in Excel or Google Sheets.
Locate the invoices to change using Invoice No, Customer, Date, Amount, or any other column.
Update only the fields you intend to change, such as:
Invoice Date or Due Date
Terms, Location, Class
Product/Service, Description, Quantity, Rate, Tax code
Line‑level or header‑level amounts
Keep the Invoice No column intact so SaasAnt can match each row back to the correct transaction.
When you’re done, save the file as CSV or XLSX.
Step 4: Upload the Modified File via Modify
Return to SaasAnt Transactions.
Go to Batch Actions → Modify. Choose the transaction type as invoice.

On the Upload files screen, click Browse your files (or drag and drop) and select your edited invoice file.
SaasAnt now reads your file and moves you to the field mapping screen.
Step 5: Map Invoice Fields Correctly
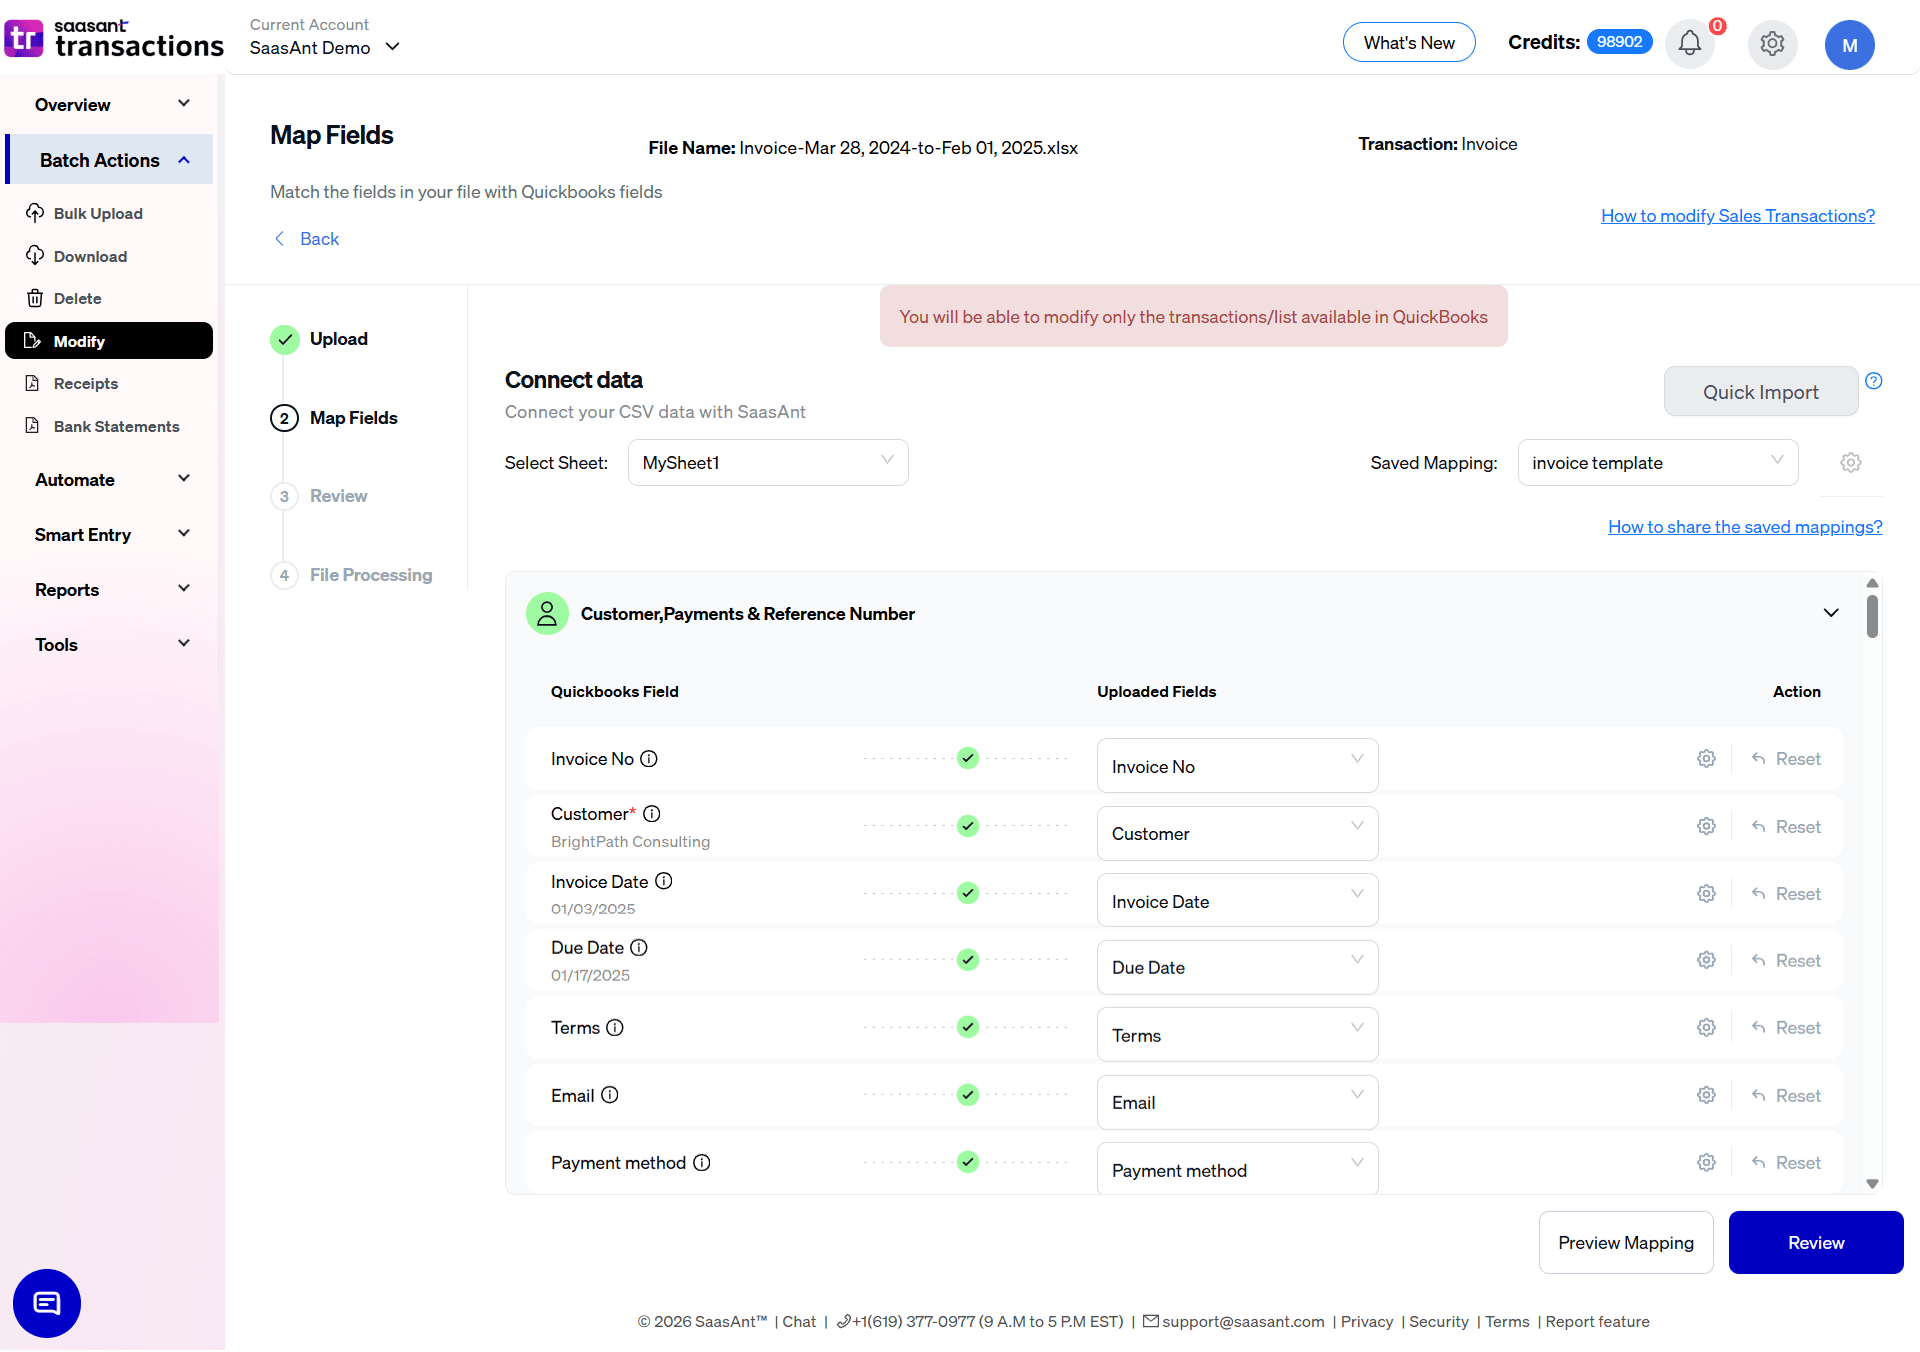
On the Map Fields screen, you’ll see QuickBooks Fields on the left and your file headers on the right.
Choose the correct header for important invoice fields, such as:
Invoice No
Customer
Invoice Date, Due Date, Terms
Location, Class (if used)
Product/Service, Description, Quantity, Rate, Tax code
Line Amount, Line Tax, etc.
Use Preview Mapping to verify that values from your file line up with the expected QuickBooks fields before proceeding.
If you frequently edit invoices, save this mapping as a template so you can reuse it later.
When mapping is complete, click Review.
Step 6: Review and Fine‑Tune in the Grid
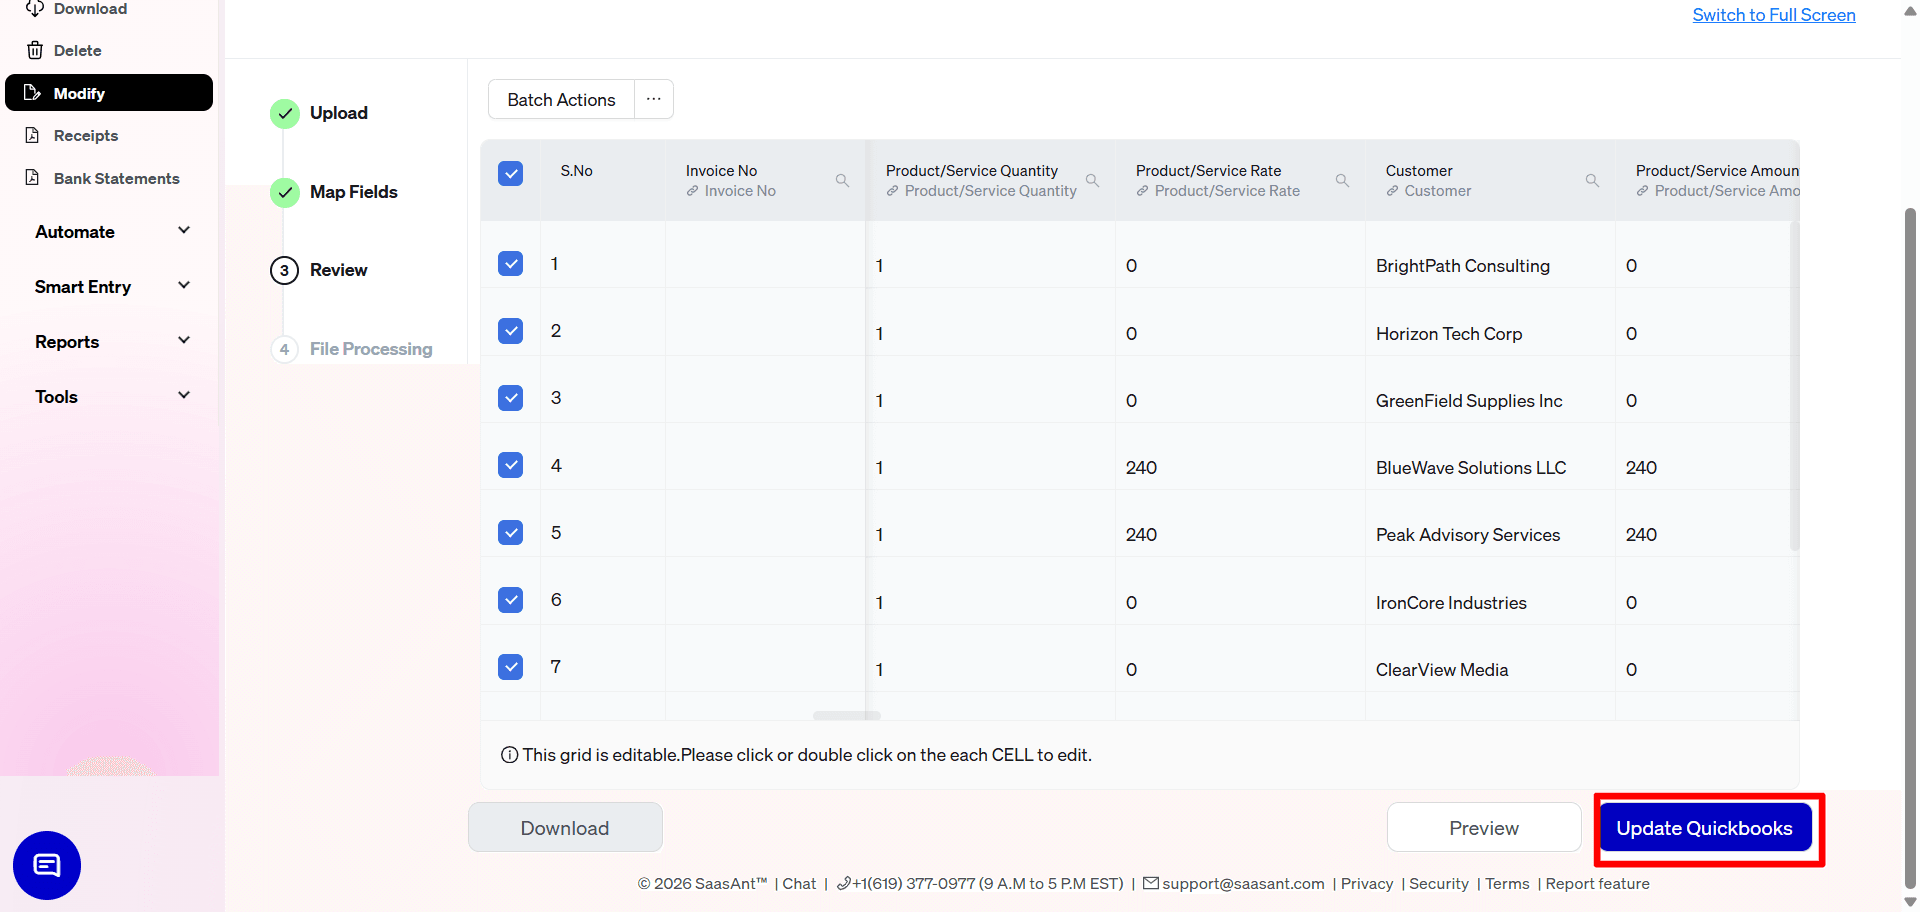
You now see an editable grid containing all invoice rows from your file.
Scan the columns to confirm that the values appear as expected for each invoice.
Make any last‑minute corrections directly in the grid by clicking or double‑clicking individual cells.
When satisfied, click Update QuickBooks.
SaasAnt processes the file, validates each row, and applies updates to the matched invoices in QuickBooks Online.
Step 7: Check Results, Download Logs, and Undo if Needed
After processing, you’ll see a summary screen showing successes and errors with a Show Results button.
Click Show Results to open the Modify results page.
Use the Success tab to:
Confirm how many invoices were updated
Click the QuickBooks ID link to open a specific invoice in QuickBooks
Use Download ▼ to export a copy of the successful rows as your audit log.
Use the Error tab to review failed rows. For many errors, SaasAnt provides a Fix button or inline suggestions (for example, to choose a valid account, customer, or product name), then lets you re‑submit those lines.
If you imported wrong values, click the Undo button to roll back the successful changes and restore the original invoice details in QuickBooks Online.
This complete Modify workflow is ideal for structured bulk corrections, such as price updates, tax changes, or historical cleanup across hundreds of invoices.
Method 2: Edit Invoices Using Live Edit (On‑Screen Bulk Edits)
The Live Edit feature lets you edit QuickBooks transactions directly inside SaasAnt’s grid without exporting or uploading a file.
It’s perfect for quick fixes and smaller‑scale updates (for example, correcting dates, memos, locations, or a few invoice amounts across a date range).
Step 1: Open Live Edit
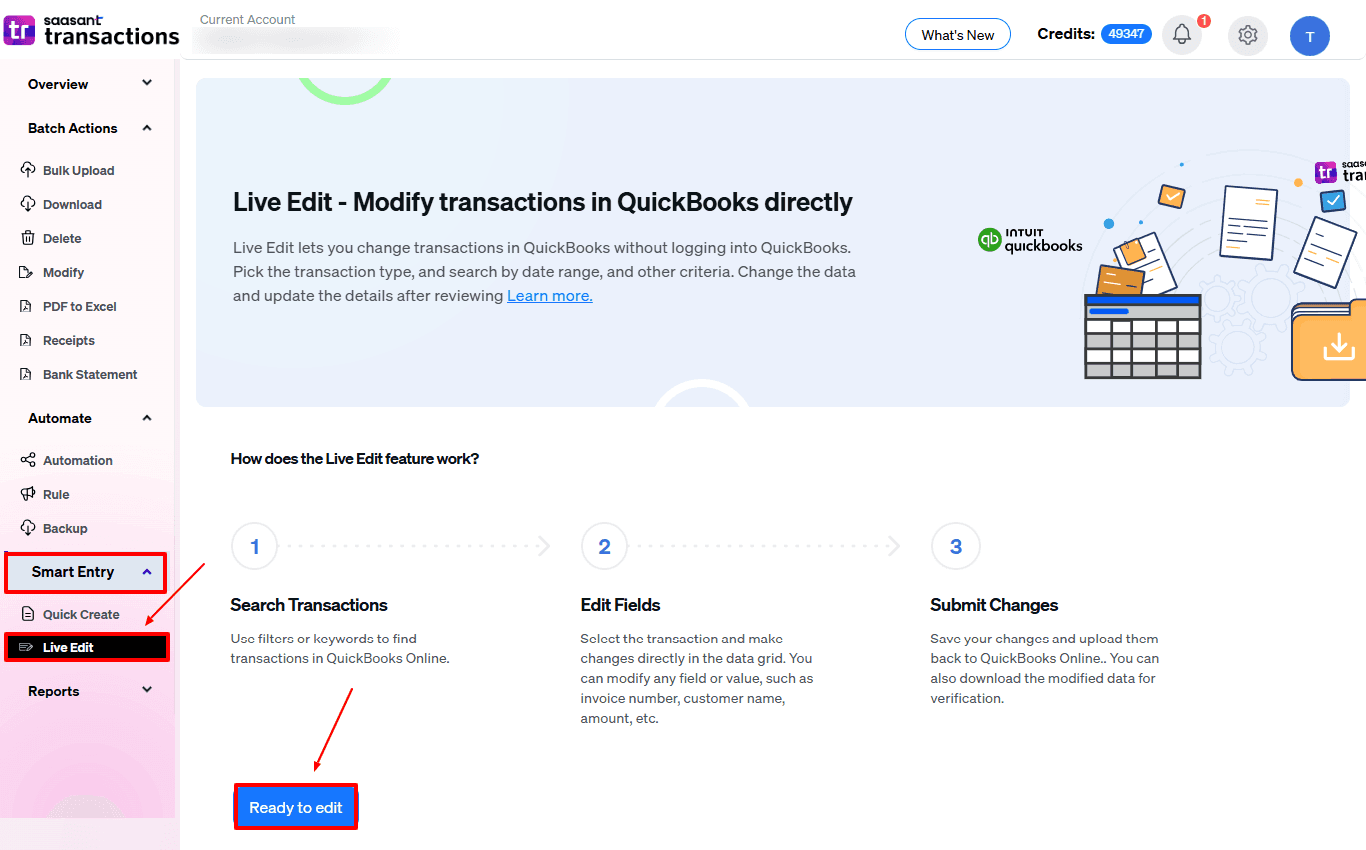
In SaasAnt Transactions, go to Smart Entry → Live Edit.
On the Live Edit introduction screen, you’ll see how it works:
Search Transactions
Edit Fields
Submit Changes
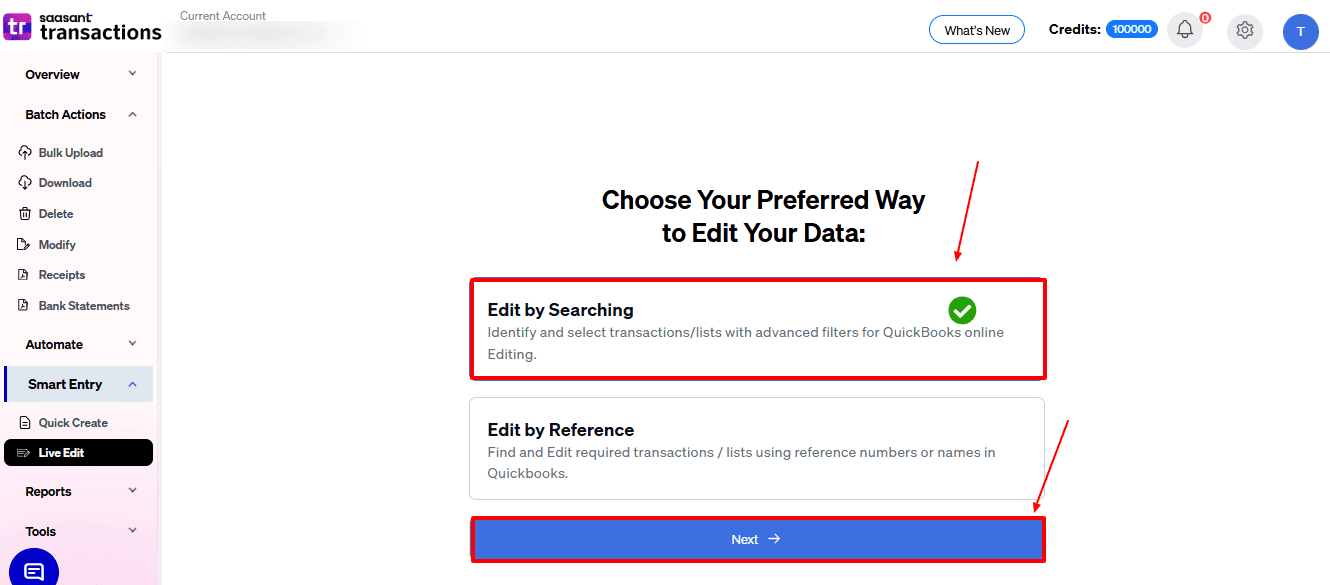
Click Ready to edit, then select Edit by searching to filter by date or other criteria. Select Edit by reference if you have specific reference numbers ready.
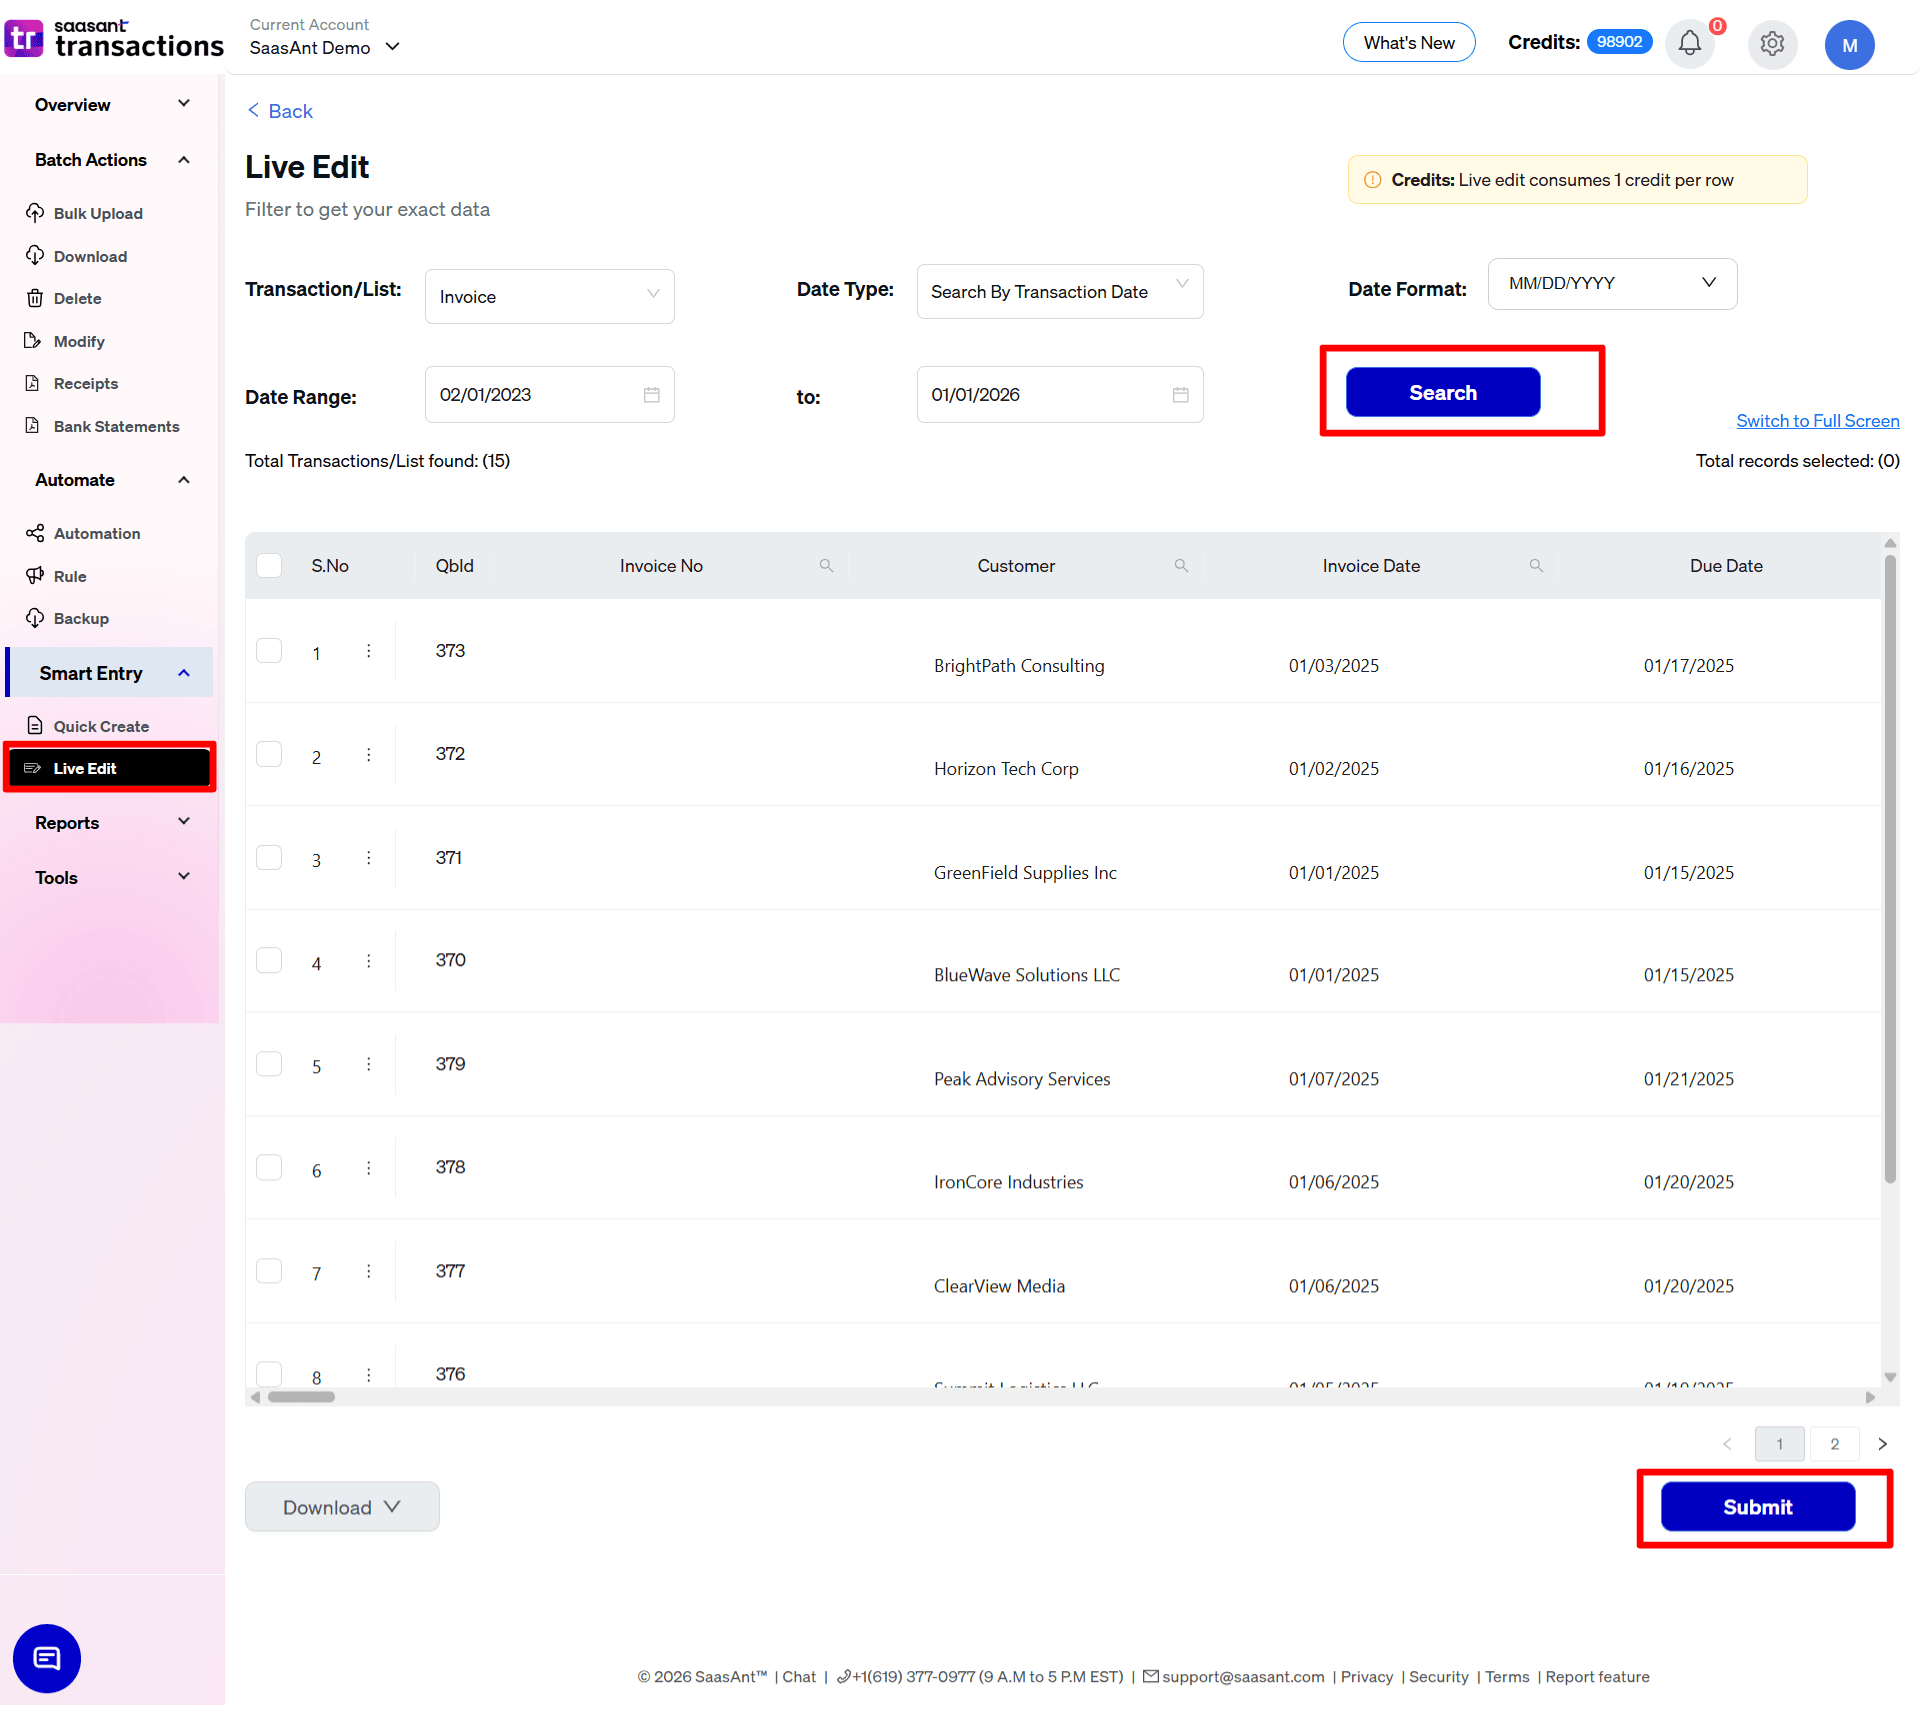
Step 2: Filter the Invoices You Want to Edit
At the top of the Live Edit screen, set:
Transaction/List: choose Invoices
Date Type: such as Search by Last Updated Date or Transaction Date
Date Range: the period whose invoices you want to adjust
Date Format: e.g., DD/MM/YYYY or MM/DD/YYYY to match your file and company settings
Optionally, use extra filters (Customer, Amount range, Status, etc.) if available, to narrow down the list.
Click Search. SaasAnt loads matching invoices into an editable grid. If you used 'Edit by reference number', you can paste the invoice reference number you want to edit and search.
Step 3: Edit Invoice Fields in the Grid
Use the grid to locate the invoices you want to change.
Modify values directly in the cells, such as:
Invoice Date or Due Date
Terms, Location, Class
Memo or Description fields
Amounts or tax‑related fields where supported
You can adjust multiple rows before saving, so it’s easy to make the same type of correction across many invoices at once.
Because Live Edit talks directly to QuickBooks, you don’t need to manage any CSV files for this method.
Step 4: Submit Changes Back to QuickBooks
After editing, review the grid to ensure values look correct.
Click Submit to push all edited invoices back into QuickBooks Online.
SaasAnt processes the changes and shows you a confirmation. You can download a summary of modified rows for your records when available.
Use Live Edit when you want speed and convenience for small–medium batches, and use Modify when you need full spreadsheet control, advanced formulas, or offline review before updating invoices.