How to Use SaasAnt Transaction Command Line Options to Import into QuickBooks Desktop
January 7, 2025
SaasAnt Transactions Console allows you to automate and streamline the data import process using command-line actions. This guide will walk you through the commands and procedures required to perform an import using the console successfully.
1. Location for the SaasAnt Transactions console app
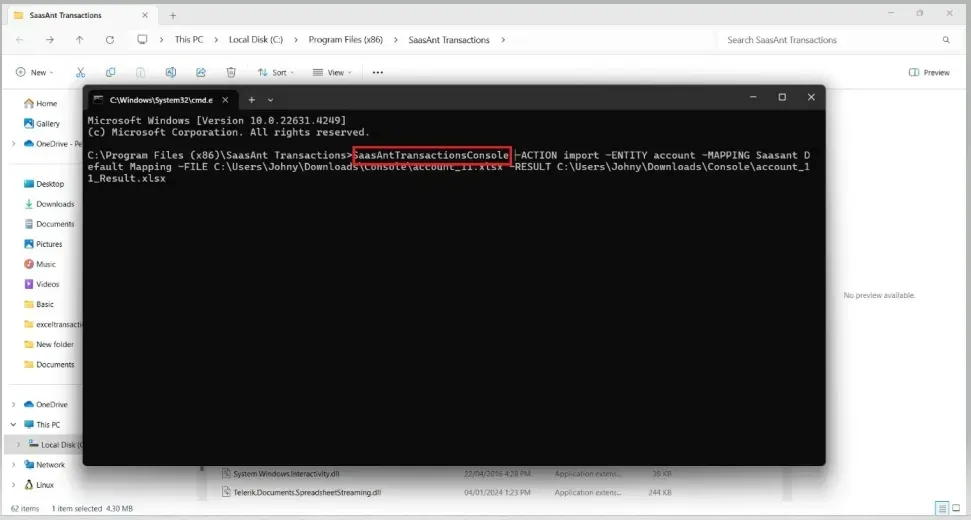
The console app is located in the same directory as SaasAnt Transactions:
Location Path:
C:\Program Files (x86)\SaasAnt Transactions
2. Command Structure Overview
Several commands must be provided to import data using the SaasAnt Transactions Console. Below is a breakdown of the available commands:
Command | Value | Description |
ACTION | import | This command defines the action type, always set to "import" for importing data. |
ENTITY | entity name | Specifies the imported entity, such as "invoice", "Bank Statement", etc. Possible Values: Invoice, Payments, JE, Expense, Check, List: Customer, vendors, Chart of accounts, product/service, etc. |
MAPPING | mapping name | Refers to the specific mapping, such as "Saasant Default Mapping", "Auto Default Mapping", or any custom-saved mapping name. |
DIR | directory path (optional) | Refers to the directory where the file to be imported is stored. This is optional but useful for locating files quickly. |
FILE | file name | Defines the file to be imported. Only the file name is required if the -DIR command has been used; otherwise, the full file path must be provided. |
SHEET | sheet index or sheet name (optional) | The sheet name or index (starting from 0) within the file to be imported. This is optional if the file contains only one sheet, but it is required if there are multiple sheets. |
RESULT | file path | Defines the file path where the import result will be saved, including any success or error messages. |
SETTINGS | txt file path (optional) | Refers to a text file with custom settings for the import. If this is not provided, the default user settings will be applied. |
3. Sample Command Example
Below is an example command that imports an "account" entity from a file and saves the results to a designated file:
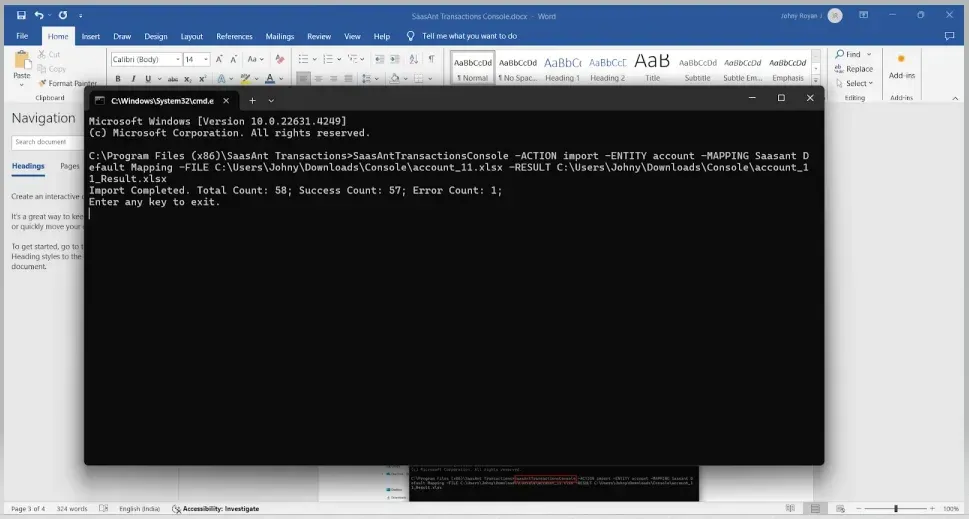
SaasAntTransactionsConsole.exe -ACTION import -ENTITY account -MAPPING Saasant Default Mapping -FILE C:\Users\Johny\Downloads\Console\account_11.xlsx -RESULT
C:\Users\Johny\Downloads\Console\account_11_Result.xlsx
4. How to use SaasAnt Transactions Console Application?
Open the SaasAnt Transactions Console Folder in Command Prompt and type the required command, as shown in the example above.
Press Enter to execute the command.
cd C:\Program Files (x86)\SaasAnt Transactions
SaasAntTransactionsConsole.exe -ACTION import -ENTITY account -MAPPING Saasant Default Mapping -FILE C:\Users\Johny\Downloads\Console\account_11.xlsx -RESULT

2) The result will be shown once the import is completed.

5. The result will be found in the result file: “C:\Users\Johny\Downloads\Console\account_11_Result.xlsx”
Use Cases for SaasAnt Transactions Console
The SaasAnt Transactions Console is a powerful tool that allows you to automate and customize data imports for various financial and business workflows. Below are some common use cases where the console can streamline operations:
Scenario:
A business needs to automate the import of customer invoices from various systems into QuickBooks at the end of each month to maintain accurate records.
Solution:
By configuring the SaasAnt Transactions Console, the business can use a command line to schedule monthly imports of invoices and map the fields automatically. This eliminates the need for manual data entry and reduces errors.
cd C:\Program Files (x86)\SaasAnt Transactions
SaasAntTransactionsConsole.exe -ACTION import -ENTITY invoice -MAPPING Saasant Default Mapping -FILE C:\Users\Johny\Downloads\Console\invoice_11.xlsx -RESULT
This guide outlines the essential commands and steps to import using SaasAnt Transactions Console successfully. Be sure to adjust file paths, mappings, and entities according to your specific use case.
For any further inquiries, please reach out to support@saasant.com.