How to Preview and Sync the Transactions in to Quickbooks Online
September 8, 2025
Syncing historical transactions into QuickBooks Online can be crucial for maintaining accurate financial records and gaining insights into your business's financial history. This guide will walk you through the process step-by-step to ensure a seamless transition of your past transactions into QuickBooks Online.
Step 1: Initial Connection:
Upon connecting your account in PayTraQer, PayTraQer will automatically retrieve your last 60 days' worth of transactions. These transactions will appear in the Transactions dashboard under the "Review" tab.
Step 2: Bringing Earlier Transactions:
If you need to bring in transactions beyond the last 60 days, follow these steps:
Download Historical Transactions: Click on the "Download Historical Transactions" button to initiate the retrieval of earlier transactions.
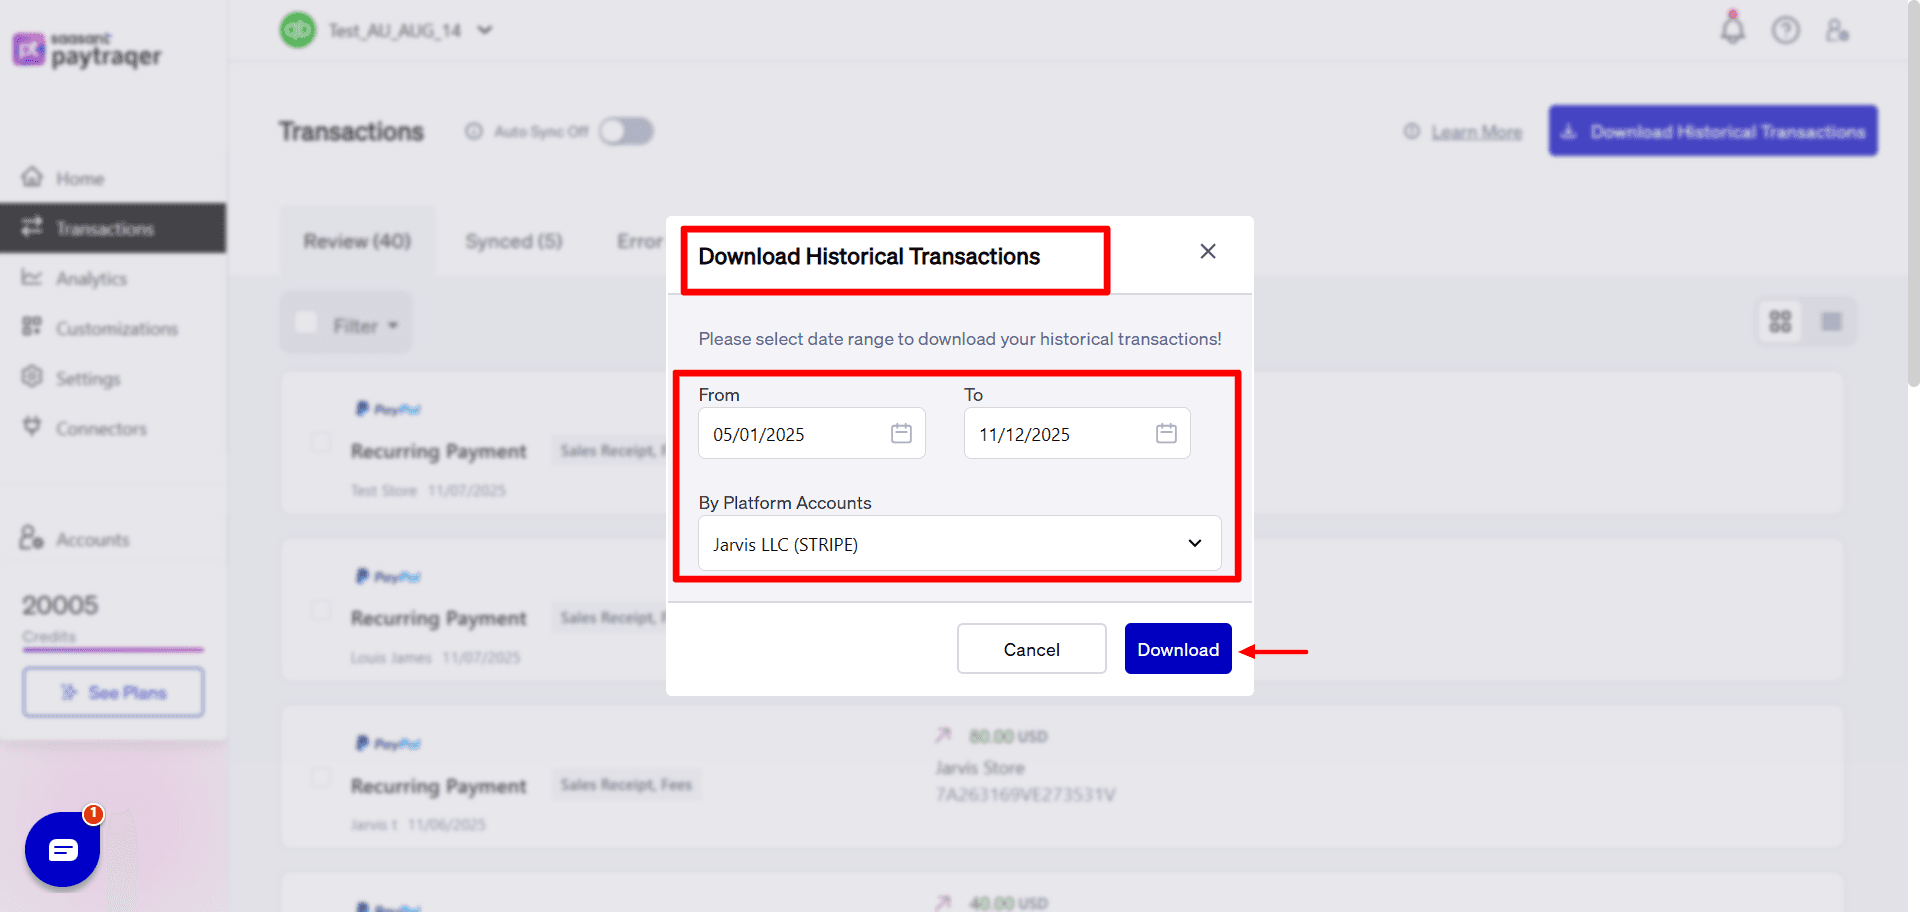
Locate Desired Transactions: Navigate to the "Review" tab in the Transactions dashboard.
Step 3: Review and Sync Transactions:
Once you've downloaded historical transactions, follow these steps to review and sync them:
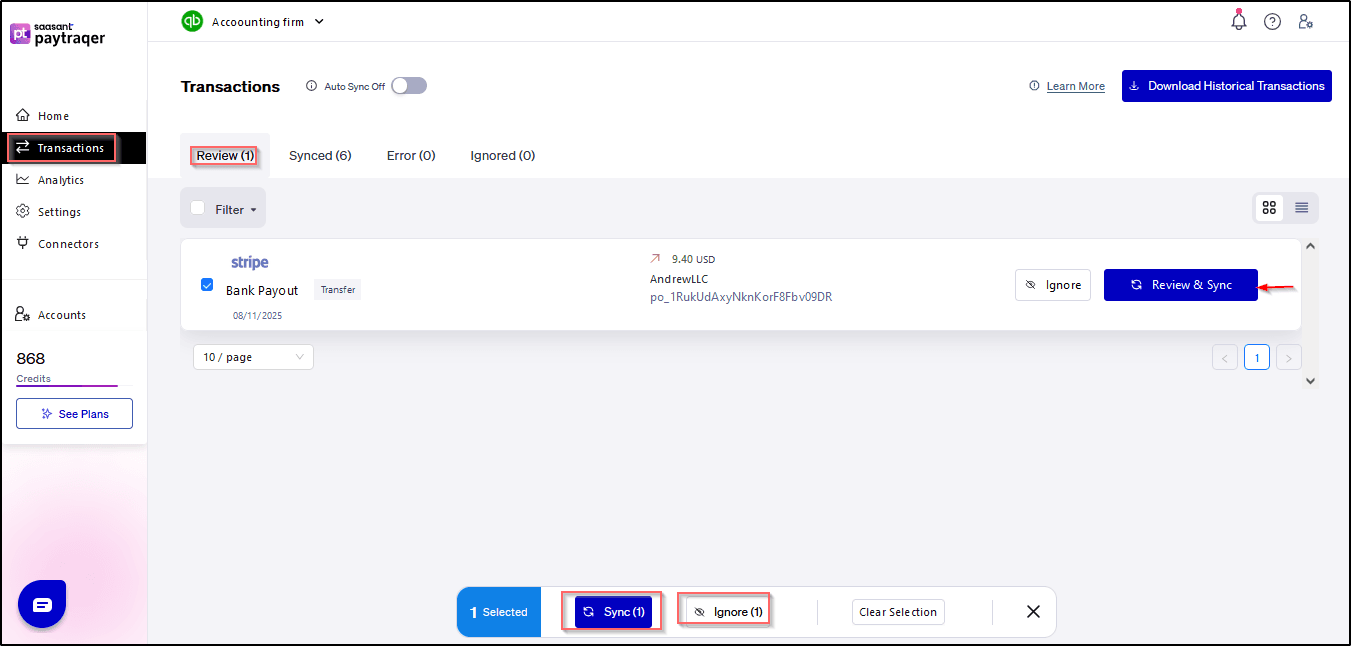
Select Transaction: Choose the transaction you want to review under the "Review" tab.
Review Transaction Details: Click on the "Preview and Sync" option to examine the transaction details thoroughly.
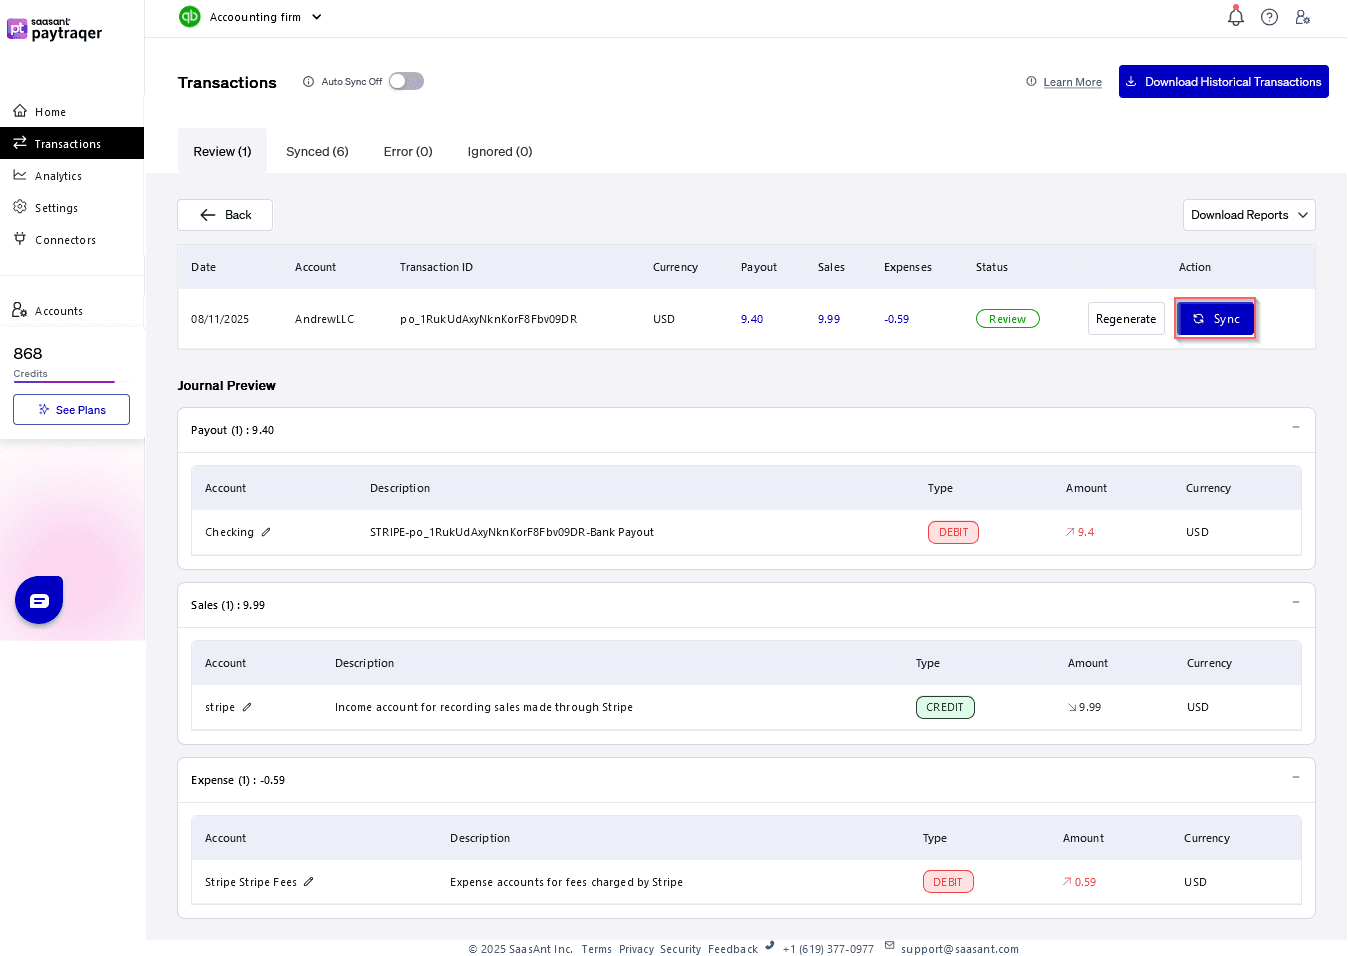
Step 4: Syncing Transactions
After reviewing the transaction details, proceed to sync the transaction to QuickBooks Online.
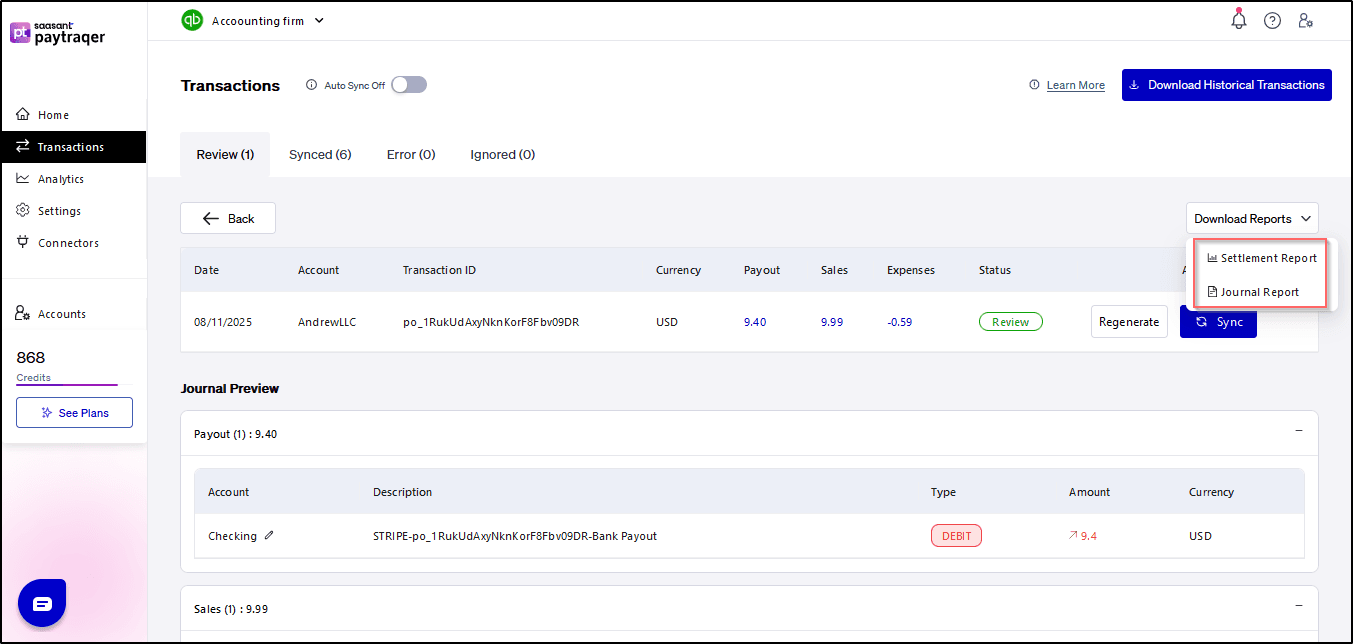
Download: Settlement report and Journal report.
Regenerate: The preview will be prepared again
Step 5: Accessing Synced Transactions.
Once transactions are synced, they will appear under the "Synced" tab in the Transactions dashboard. Here, you can:
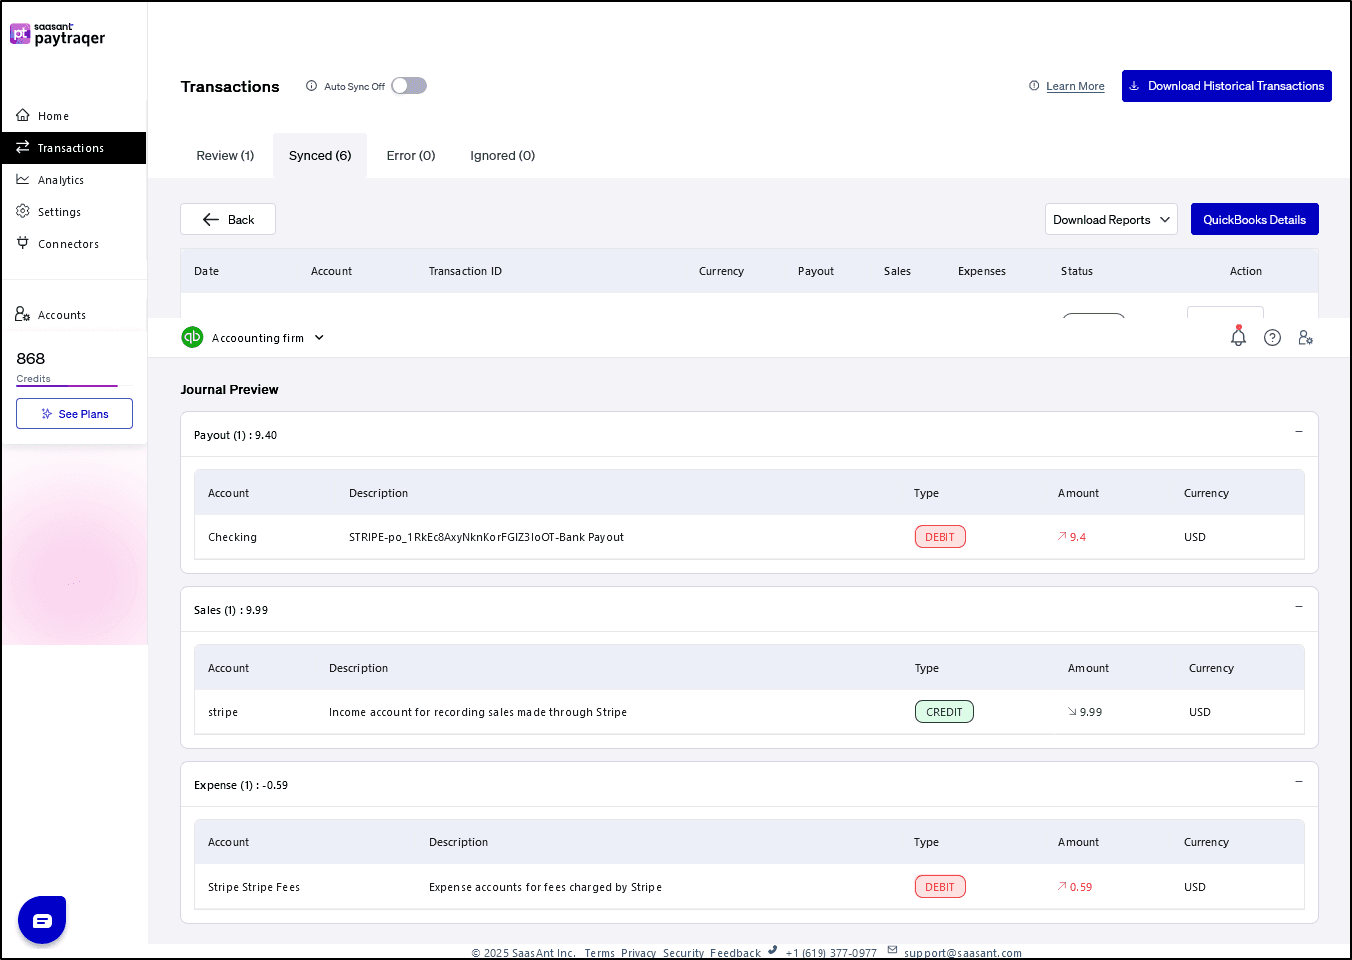
View Transaction Details: Click on the transaction and select the "Details" option to access comprehensive transaction information.
Open in QuickBooks: Easily access the transaction in QuickBooks Online for further analysis or editing.
You can also undo transactions
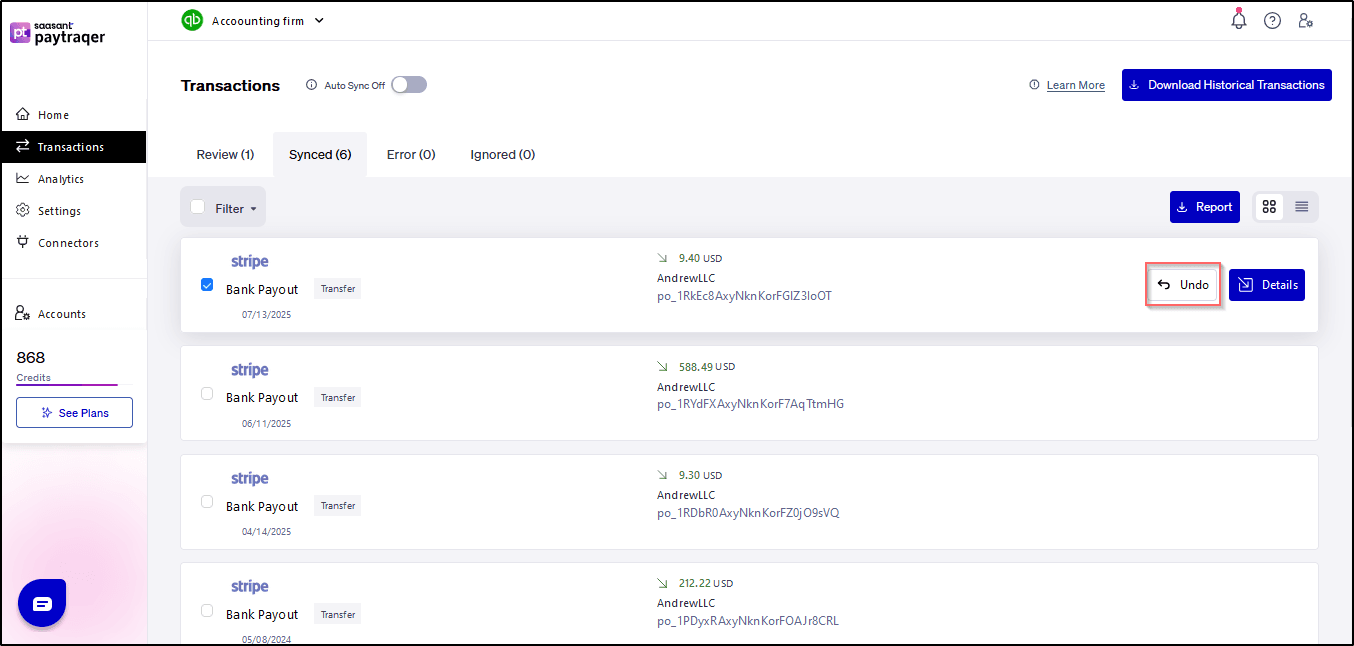
You will find synced details.
You can download the settlement report and also the Journal report.
Undo the synced transaction.
You will also find Payout, Sales, and Expense details.
Conclusion:
Syncing historical transactions into QuickBooks Online provides valuable insights into your business's financial history. By following these simple steps, you can ensure accuracy and completeness in your financial records, empowering better decision-making and financial management.
Related PayTraQer Articles:
1) Please refer to this article How to rollback/undo the Synced transaction in PayTraQer
2) Please refer to this article: Overview of PayTraQer Summary Sync Settings
3) Please refer to this article: How to configure general Settings in PayTraqer
4) Please refer to this article: PayTraQer - Sales Settings Configuration
5) Please refer to this article: Configuration of Tax Settings for Summary Sync in PayTraQer
6) Please refer to this article: Configuration of Fees and Expenses for Summary Sync in PayTraQer
7) Please refer to this article: Configuring Additional Settings for PayTraQer Summary Sync
8) Please refer to this article: Configuration of Payout Settings for Summary Sync in PayTraQer
9) Please refer to this article: Configuration of COGS Matching for PayTraqer Summary Sync
10) Please refer to this article: Configuring COGS Settings for PayTraqer Summary Sync
You can reach out to us at support@saasant.com if you are stuck somewhere.