Configuring Grouping for PayTraqer Summary Sync
November 20, 2025
Overview:
When you use summary sync in PayTraQer, multiple individual sales are combined into summary entries before posting to QuickBooks.
Sales grouping controls how those summaries are built, so you can see totals by product or by location without flooding QuickBooks with thousands of lines.
This article explains what sales grouping is and how to set up product based and location based grouping for summary sync.
1. What is sales grouping in PayTraQer
Sales grouping means organizing sales from your payment or e commerce platforms into logical groups before they are posted as summaries.
With grouping you can:
See revenue by product category or SKU
See revenue by country or state
Keep QuickBooks clean with fewer, meaningful summary entries
Grouping affects only summary sync preview and posting. It does not change individual transaction data in the source platform.
2. Open the grouping settings
Sign in to PayTraQer.
Go to Settings.
Open the Summary Sync / Grouping configuration screen for your connector.
You will see options for Product type grouping and Location grouping.
3. Product type grouping
Use Product type grouping when you want summaries by product instead of only one total per period.
What it does
Groups sales by product information that is already configured in your product or cost settings.
You can group by:
Sales by product categories, or
Sales by SKU
This helps you see performance by product line while still posting summaries.
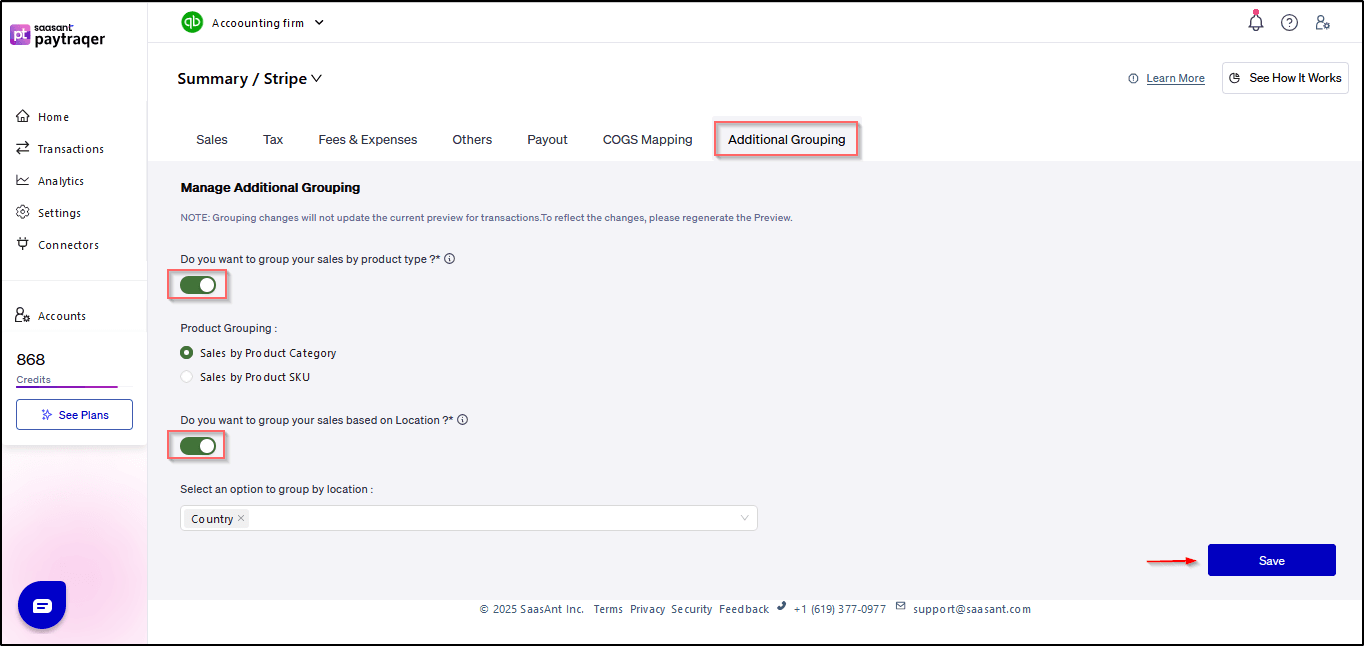
How to configure
In the Grouping section, turn on Product type grouping.
Choose one of:
Sales by product categories, or
Sales by SKU
Click Save.
Make sure your product categories or SKUs are already set up in your product or COGS configuration so the grouping has data to use.
4. Location grouping
Use Location grouping when you want summaries by customer location.
What it does
Groups sales based on the location coming from your payment or e commerce platform.
Creates separate summary entries for each selected location value.
You can group by:
Country, or
State (where this data is available)
How to configure
In the Grouping section, turn on Location grouping.
Choose the location field:
Country, or
State
Click Save.
This works best when your source platform sends consistent address or region data with each transaction.
5. Regenerate the preview after changes
Changing grouping settings does not update existing previews automatically.
After you change any grouping option:
Go back to the Summary preview screen.
Regenerate or refresh the preview for the date range you are working on.
Confirm that the new preview now shows summaries grouped by product type and/or location as configured.
If you skip this step, you may still see the older grouping in the preview.
6. Notes and best practices
Test grouping with a small date range first to confirm that the output matches your reporting needs.
Use product type grouping when you care more about product performance and margins.
Use location grouping when you report revenue by region or need to match external regional reports.
Avoid turning on more grouping than you need, since heavy grouping can increase the number of summary lines.
For more detail on how COGS, tax, fees, and payouts work with summary sync, refer to the related summary sync articles in the PayTraQer knowledge base.
Quick next steps
Turn on product or location grouping to match your reporting style.
Regenerate summary previews so new grouping rules apply correctly.
Review grouped summaries before posting them to QuickBooks.