Configuration of Fees and Expenses for Summary Sync in PayTraQer
November 20, 2025
Introduction:
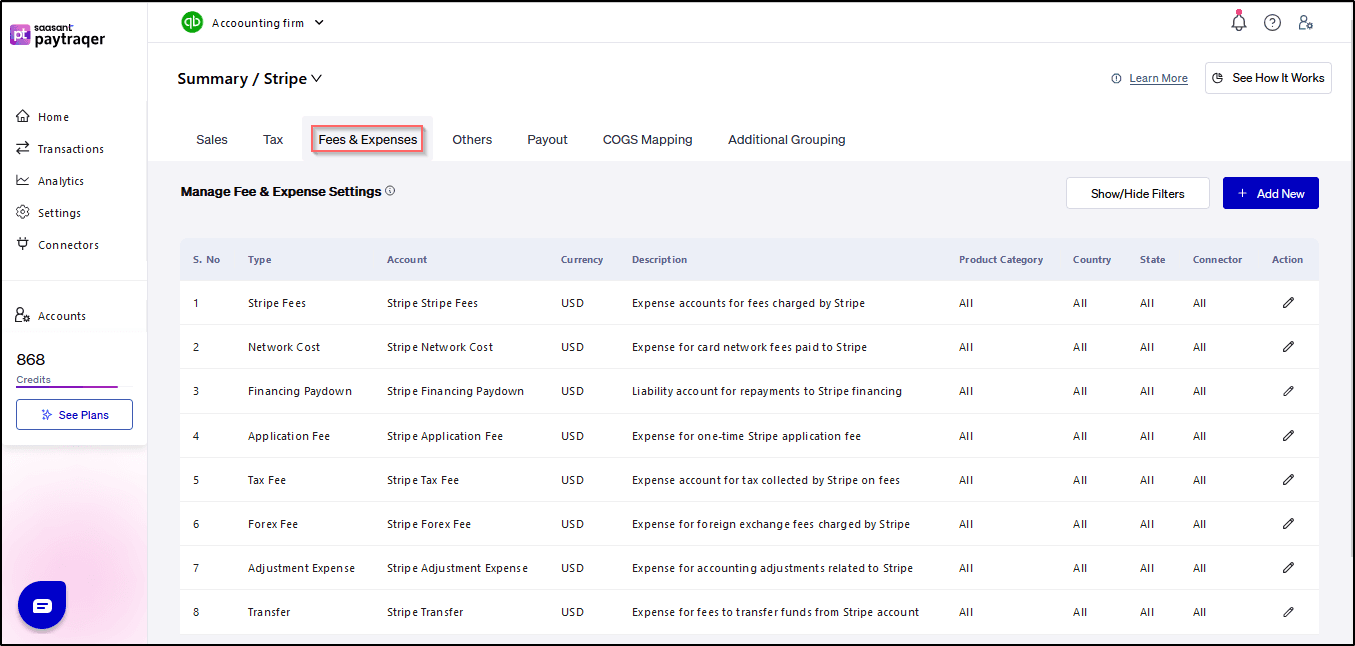
Fee settings in PayTraQer allow users to manage and categorize various fees and expenses associated with transactions across different payment channels. This article provides a step-by-step guide to accessing and configuring fees settings within PayTraQer, ensuring accurate recording and tracking of fees in QuickBooks Online.
To access the fee settings in PayTraQer, follow these simple steps:
Click the gear icon.
Select the Settings icon.
Click on Payment Processor (Stripe).
Choose Fee & Expense.
Overview of Fees Settings:
Fees settings in PayTraQer are standardized across all integrated payment channels, including Stripe, PayPal, and Square. While the illustration may showcase Stripe settings, it's important to note that the configurations discussed herein apply universally across all supported payment processors.
Managing Fees & Expenses Settings:
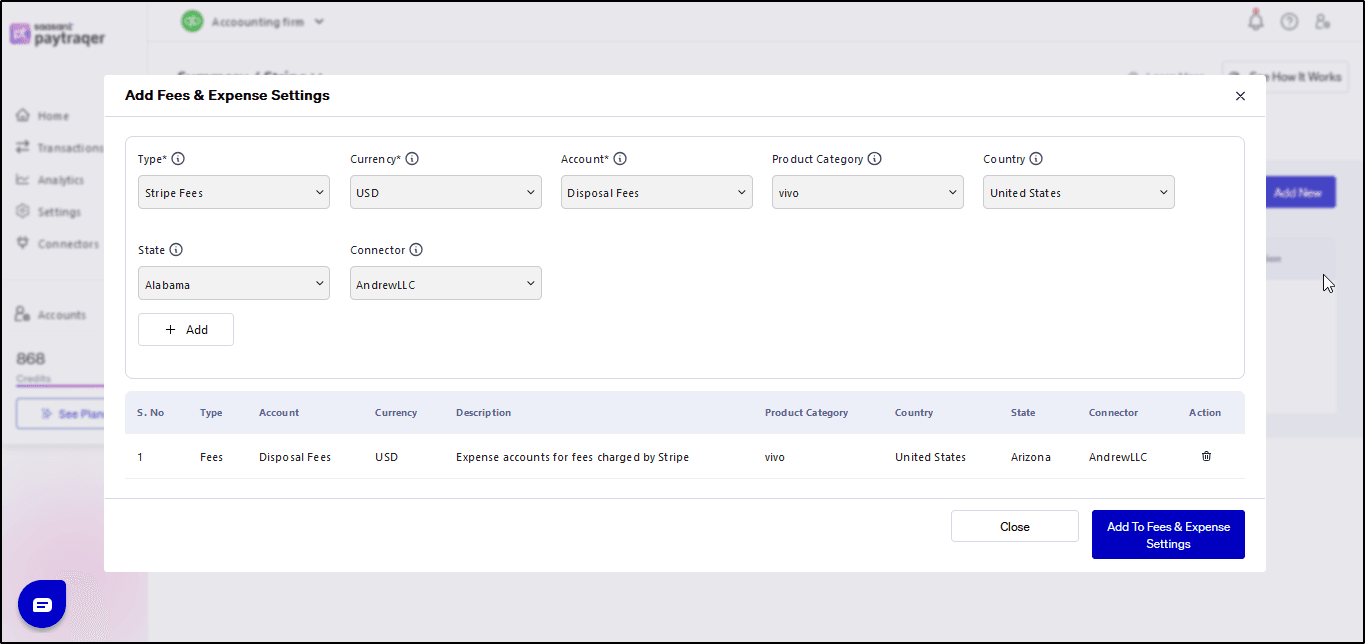
Within the fees settings, users can configure various parameters to categorize and record fees and expenses in QuickBooks Online:

1) Filter Type: Filter transactions by type, such as sales, discounts, refunds, etc., to categorize fees and expenses accurately.
2) QuickBooks Account: Utilize specific QuickBooks accounts for different fee and expense categories, ensuring precise accounting and tracking.
3) Country: Filter transactions by transaction location or country to align fee and expense settings with regional requirements and regulations.
4) Add: Configure how a specific type of Stripe fee or expense should be recorded in QuickBooks

Conclusion:
Configuring fees settings in PayTraQer is crucial for accurately recording and tracking various fees and expenses associated with transactions. By accessing and setting up fees settings, users can ensure precise accounting and reporting in QuickBooks Online, enhancing overall financial management efficiency.
Related PayTraQer Articles:
1) Please refer to this article: Configuring Additional Settings for PayTraQer Summary Sync
2) Please refer to this article: Configuration of Payout Settings for Summary Sync in PayTraQer
3) Please refer to this article: Configuration of COGS Matching for PayTraqer Summary Sync
4) Please refer to this article: Configuring COGS Settings for PayTraqer Summary Sync
5) Please refer to this article: Configuring Grouping for PayTraqer Summary Sync
6) Please refer to this article: How to configure general Settings in PayTraqer
7) Please refer to this article: How to Preview and Sync the Transactions into QuickBooks Online
8) Please refer to this article: PayTraQer Consolidated Summary Sync Dashboard Guide
9) Please refer to this article: How to setup PayTraQer for Summary Sync (sales summary
You can reach out to us at support@saasant.com if you are stuck somewhere