How to setup PayTraQer for Summary Sync (sales summary)
November 20, 2025
PayTraQer connects your QuickBooks Online company with payment processors and e commerce platforms such as PayPal, Stripe, Square, Shopify, Amazon, and eBay etc.,
With Summary Sync, PayTraQer:
Combines many individual sales into clean summary entries
Syncs payouts and net deposits into QuickBooks
Keeps your books easier to read and reconcile
This article explains how to:
Connect PayTraQer to QuickBooks Online
Turn on Summary Sync (Sales Summary)
Connect your payment and e commerce channels
Configure key summary sync settings so you can use it effectively
This article focuses only on Summary Sync. For detailed, one by one sync, see the itemized sync guides.
1. Prerequisites
Before you start, make sure you have:
Active payment / e commerce accounts
QuickBooks Online company with admin access
A valid QuickBooks Online subscription
Master Admin or Accountant level access to install apps and connect data
2. Install PayTraQer from QuickBooks Online
Sign in to QuickBooks Online.
Click Apps in the left menu.
Click Find Apps.
In the search bar, type PayTraQer.
Select PayTraQer from the results.
Click Get app now.
When the QuickBooks permission screen appears, click Connect to authorize PayTraQer.
After this, your QuickBooks Online company is linked to PayTraQer.

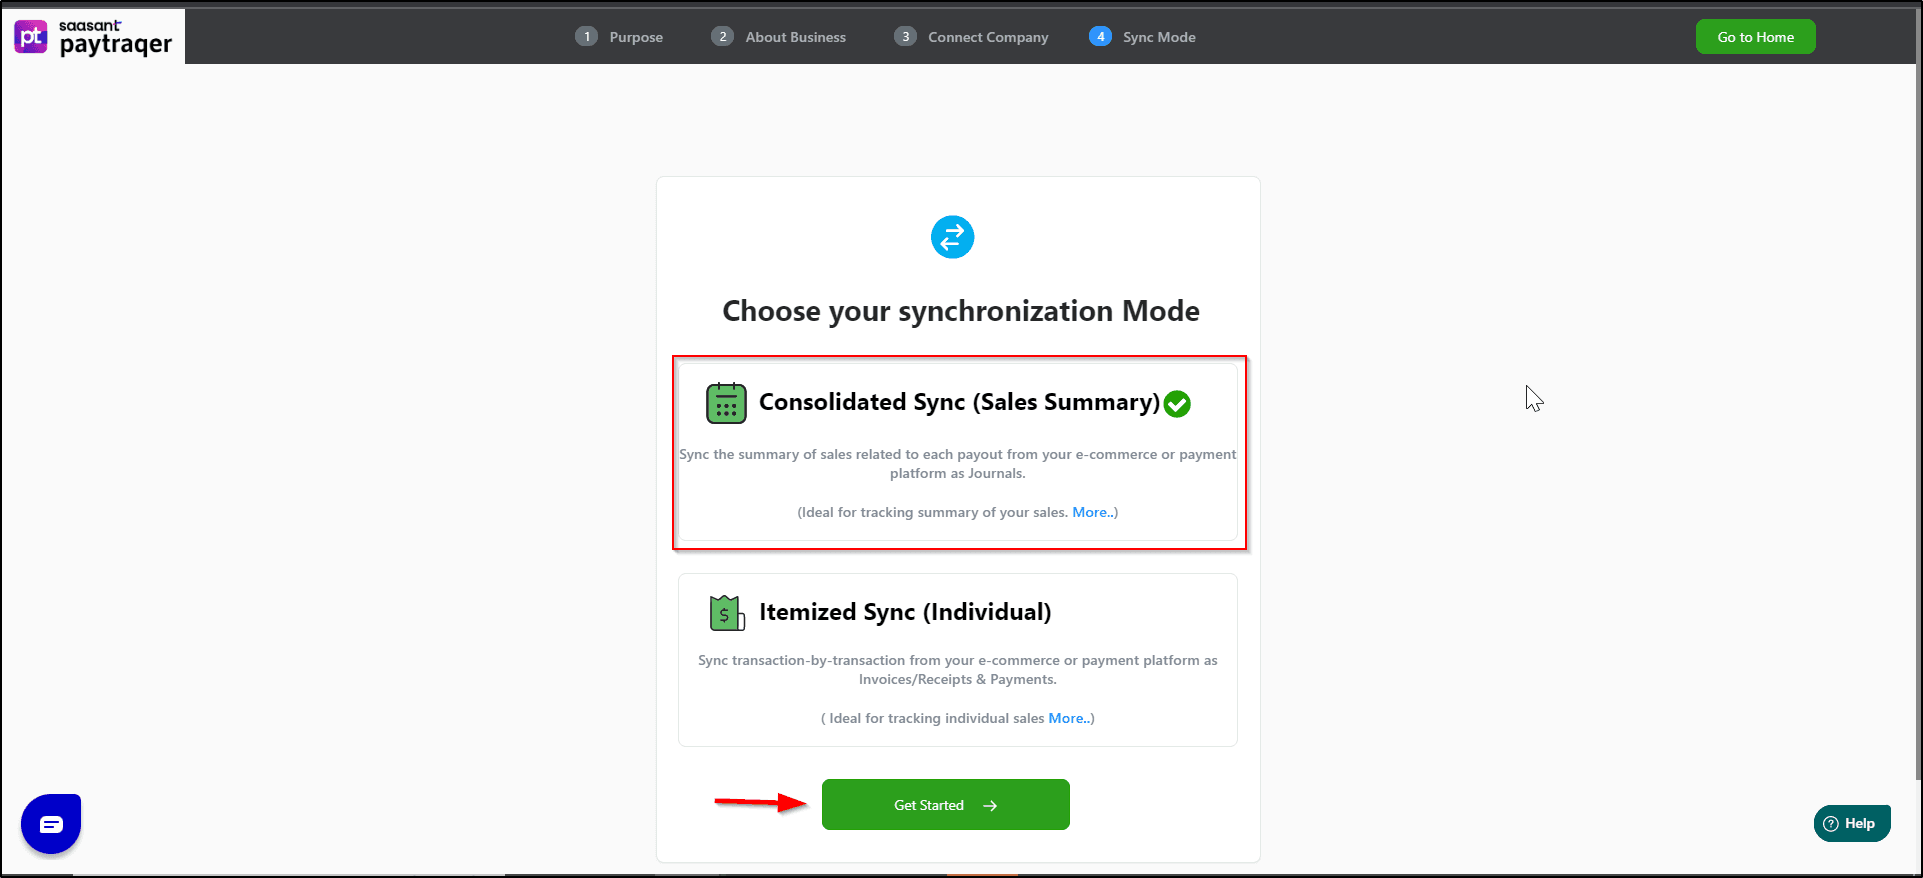
3. Choose Summary Sync (Sales Summary) mode
During the first time setup, PayTraQer asks how you want to sync your data.
You will see an option such as:
Consolidated Sync (Sales Summary)
Syncs summaries of each payout or period from your payment or e commerce platform
Ideal if you want clean daily or payout level totals, not every single transaction
Select Consolidated Sync (Sales Summary) to use Summary Sync.
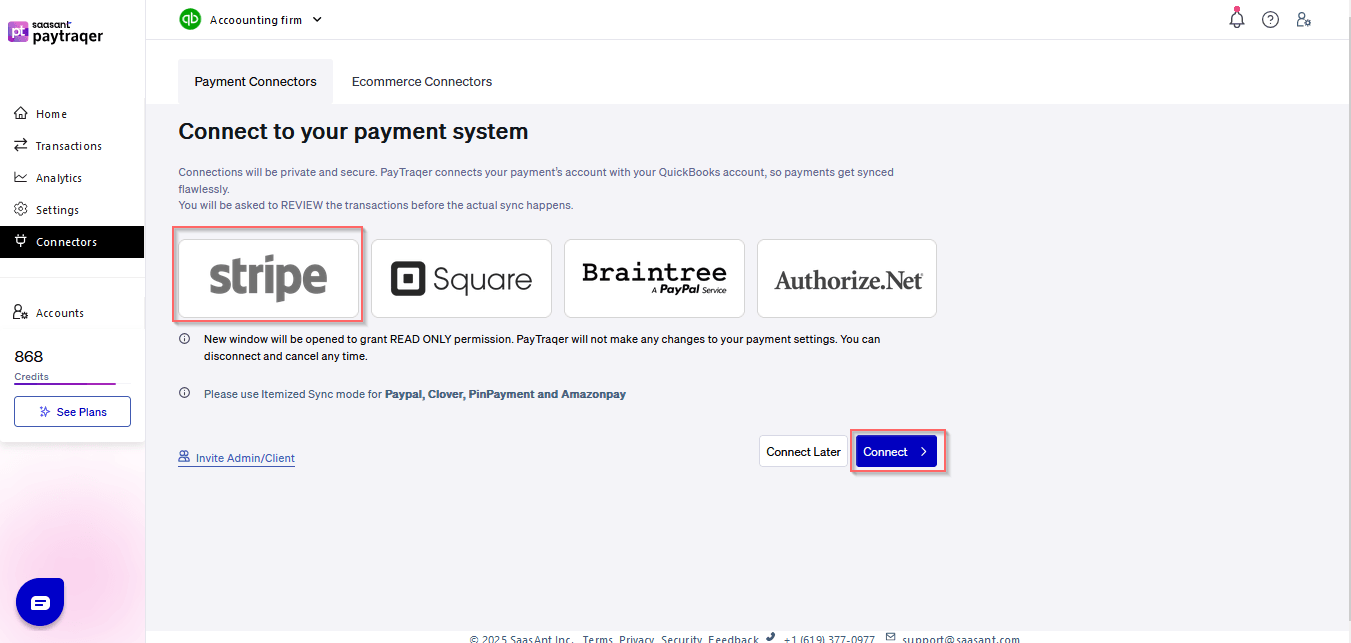
4. Connect your payment and e commerce channels
After picking Summary Sync, PayTraQer guides you to connect your sales channels.
You will see tiles for systems such as:
PayPal
Stripe
Square
Shopify
Amazon
eBay
and more
For each channel you want to sync:
Click the tile for that platform.
Sign in with your platform credentials (for example, your PayPal or Shopify login).
Approve the read only or required access requested by PayTraQer.
Wait for the connection confirmation.
You can repeat this to connect more than one platform to the same QuickBooks company (for example, Stripe + Shopify + PayPal).
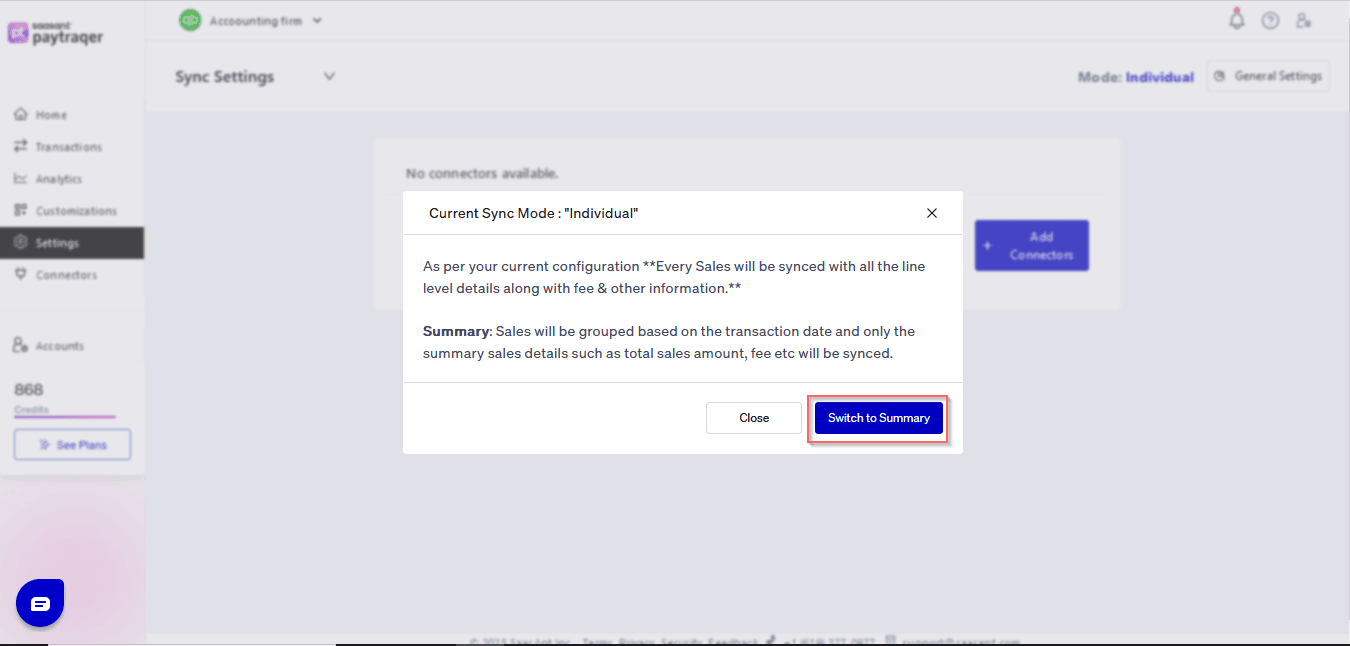
Note: Please be aware that transitioning between Summary Sync and Itemized Sync, or vice versa, is not feasible. If you intend to switch to Itemized Sync, it's necessary to disconnect the PayTraQer app and initiate the setup process from scratch. Disconnecting the app will result in the loss of all settings, profile data, and subscription information.
Once connections are in place, you should review the key Summary Sync settings before posting any data.
1) Please refer to this article How to rollback/undo the Synced transaction in PayTraQer
2) Please refer to this article: Overview of PayTraQer Summary Sync Settings
3) Please refer to this article: How to configure general Settings in PayTraqer
4) Please refer to this article: PayTraQer - Sales Settings Configuration
5) Please refer to this article: Configuration of Tax Settings for Summary Sync in PayTraQer
6) Please refer to this article: Configuration of Fees and Expenses for Summary Sync in PayTraQer
7) Please refer to this article: Configuring Additional Settings for PayTraQer Summary Sync
8) Please refer to this article: Configuration of Payout Settings for Summary Sync in PayTraQer
9) Please refer to this article: Configuration of COGS Matching for PayTraqer Summary Sync
10) Please refer to this article: Configuring COGS Settings for PayTraqer Summary Sync
You can reach out to us at support@saasant.com if you are stuck somewhere.