How to use Quick Import Feature in SaasAnt Transactions?
September 4, 2025
The Quick Import functionality enables users to seamlessly bring transactional data from text files or Excel spreadsheets into QuickBooks Online via the SaasAnt Transactions (Online) software.
Through the Quick Import feature in SaasAnt Transactions Online, users can effortlessly import transactional information from CSV or Excel files directly into their QuickBooks account. This eliminates the need for manual input, streamlining the process and saving users considerable time and effort.
Quick Import Feature:
When utilizing the Quick Import (Single Click Import) option, users can upload their transaction file, such as a CSV or Excel document containing the transaction specifics. If the column names in the file headers match a previously uploaded template, the feature will skip the mapping, review screens, and proceed directly to importing the data into QuickBooks.
Pre-Requisites:
Connect your QuickBooks Online account to the SaasAnt Transactions (Online) App through the QuickBooks AppStore by clicking the "Get App Now" button to access a 30-day free trial [No credit card required].
To utilize Quick Import, follow these steps:
Remove any headers that will not be imported.
Perform at least one test import, review, and import with test transaction numbers to create a cache for efficient Quick Import.
Ensure all necessary headers are mapped for import.
Verify the correct sheet is selected (avoid multiple sheets in the file).
Let's take an example transaction for an Invoice.
How to use Quick Import?
1) Login into SaasAnt Transaction Online
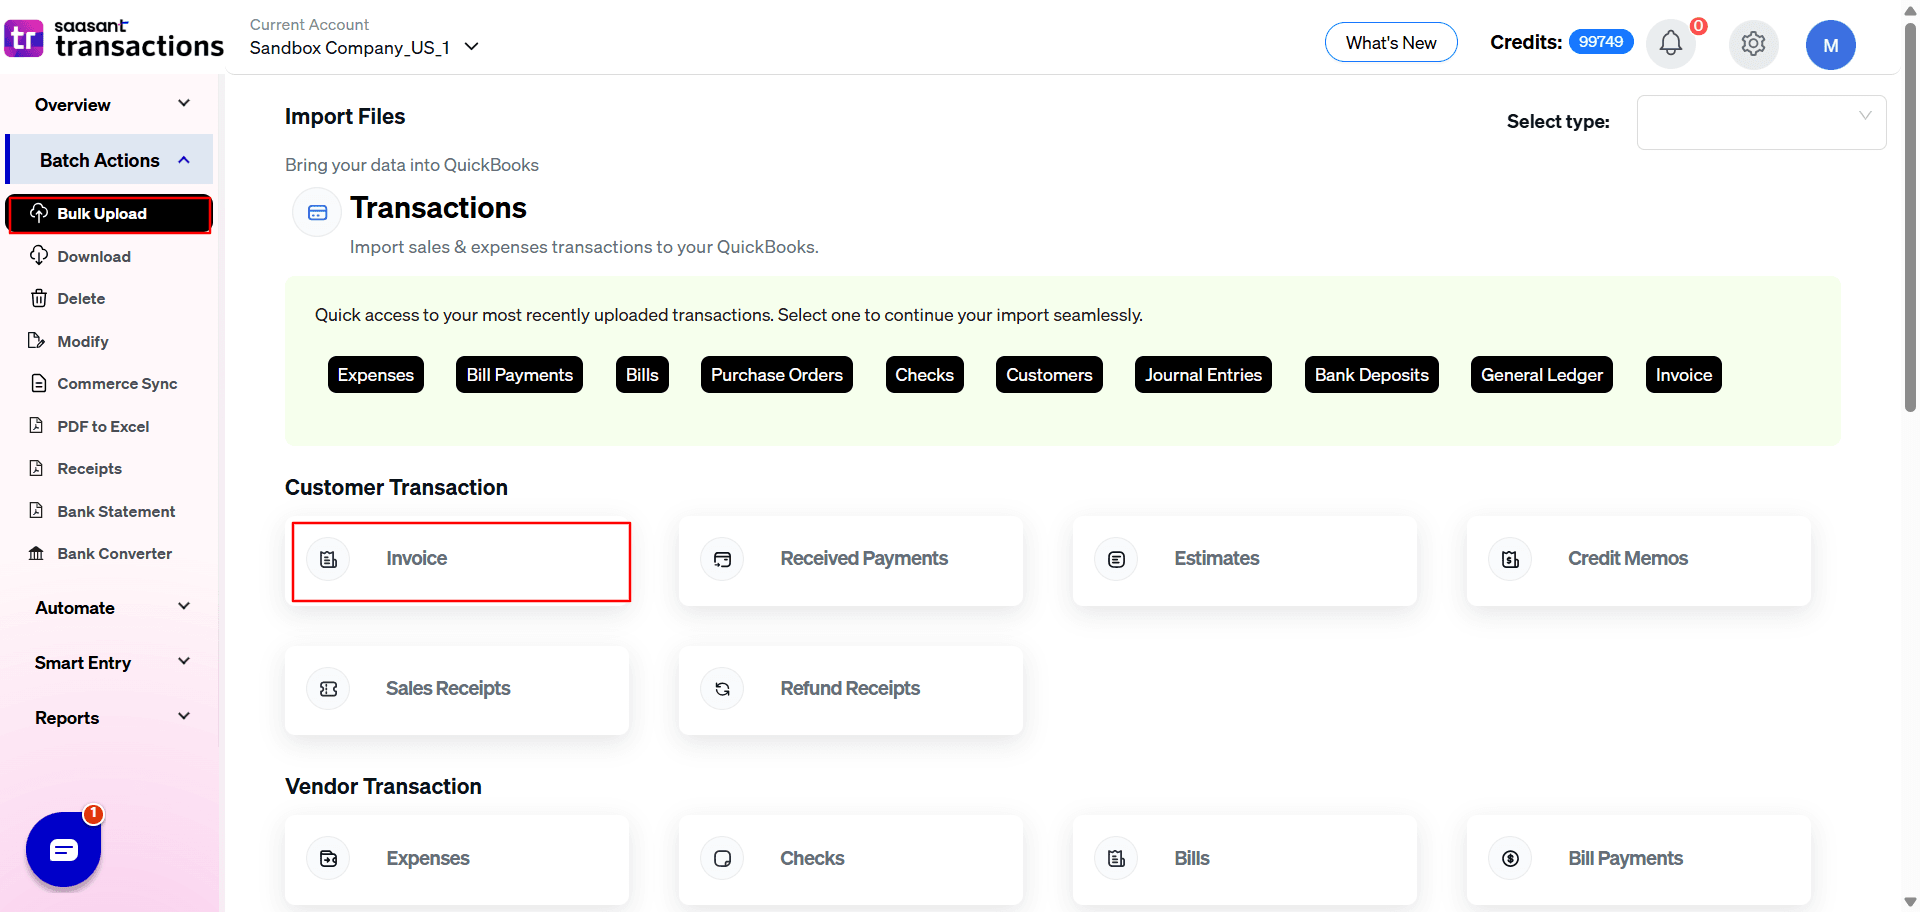
2) Select the Bulk Upload Tab

3) Select the files you want to upload.
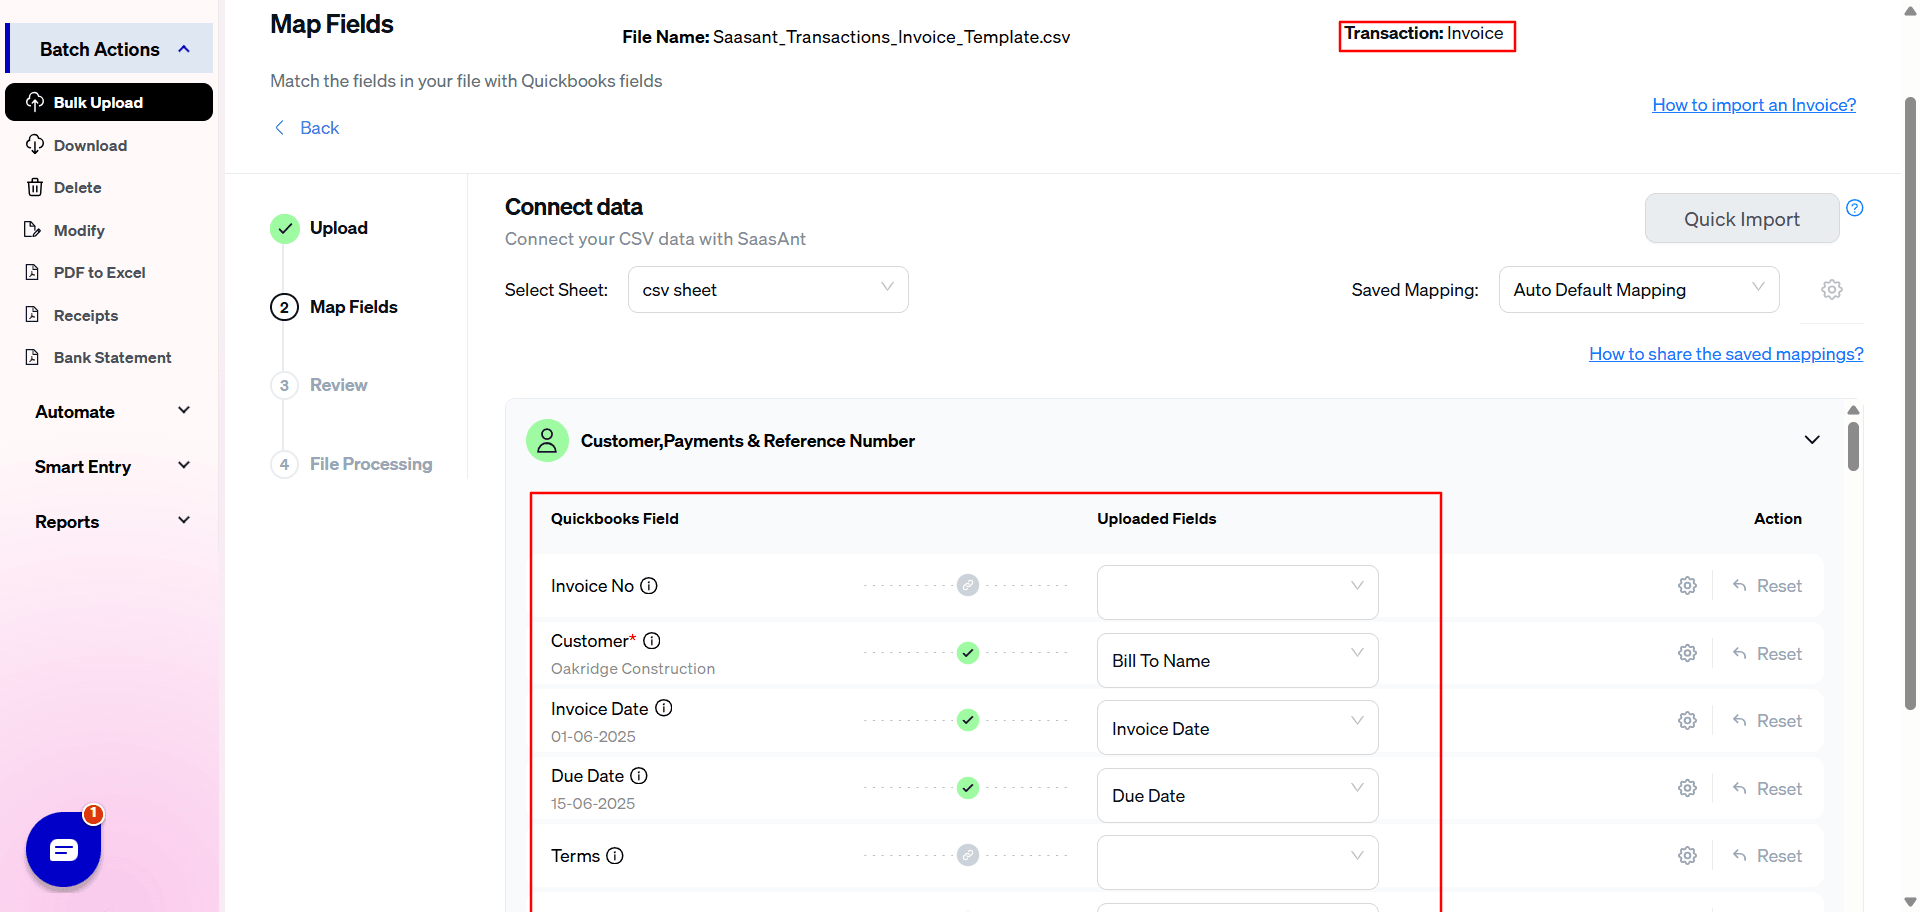
4) Ensure the sheet/file and saved mapping name are selected correctly, then click Quick Import.

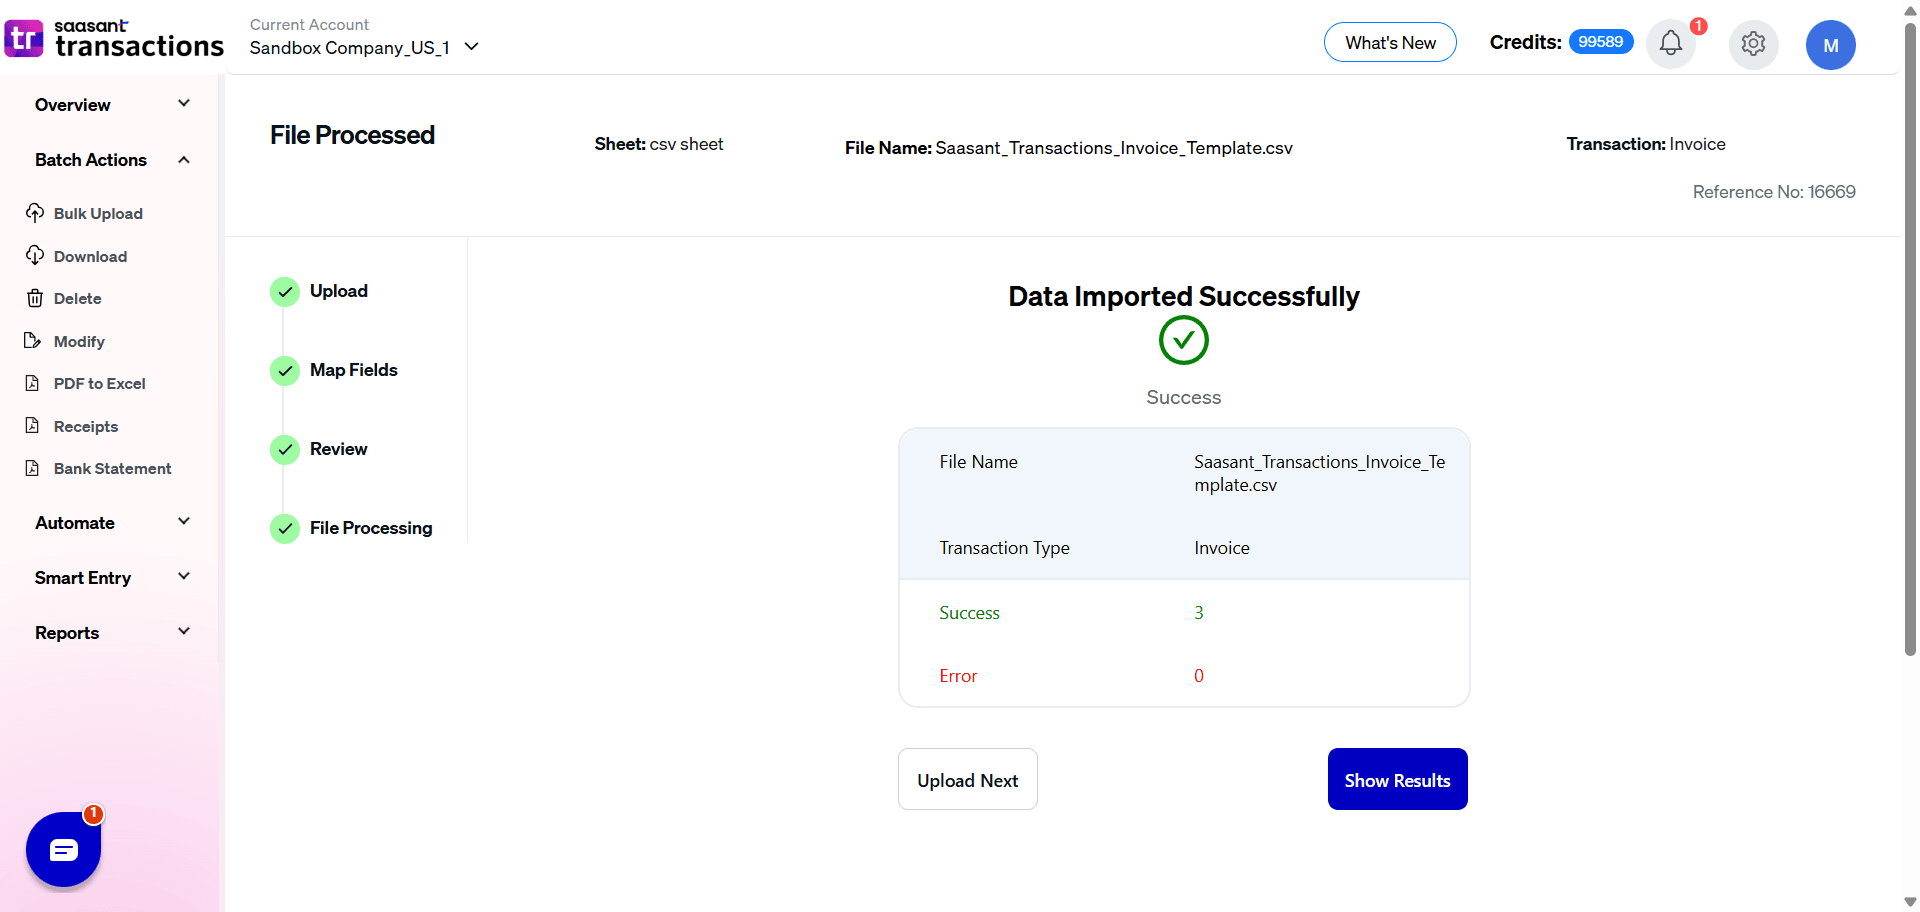
5) The data was imported successfully into QuickBooks using Quick Import.

For more queries related to the Quick Import feature, kindly reach out to us at support@saasant.com