How to connect Amazon Pay Account with Xero using PayTraQer?
January 1, 2025
Learn how to connect your Amazon Pay account with Xero using PayTraQer.
Before beginning, it is essential to ensure that you have all the necessary requirements. Please make sure you have everything you need before proceeding.
Active Xero account
Xero login credentials as a master administrator.
Amazon Pay account (sandbox account cannot be connected)
Amazon Pay account secret keys
Connect your Xero Company
To connect your Amazon Pay account to Xero you need to install PayTraQer and connect your Xero account.
1) Connect your Xero Account with PayTraQer
2) Search for PayTraqer in the Xero app store.
3) Click the Get this App Now button. You will be navigated to our application.
Sign up with your Xero credentials.
A Xero pop-up screen will appear. You need to grant access by clicking the Connect button. Once the connection is established, you will receive a success message on your screen. You can use PayTraQer free for the first 15 days with our free trial.
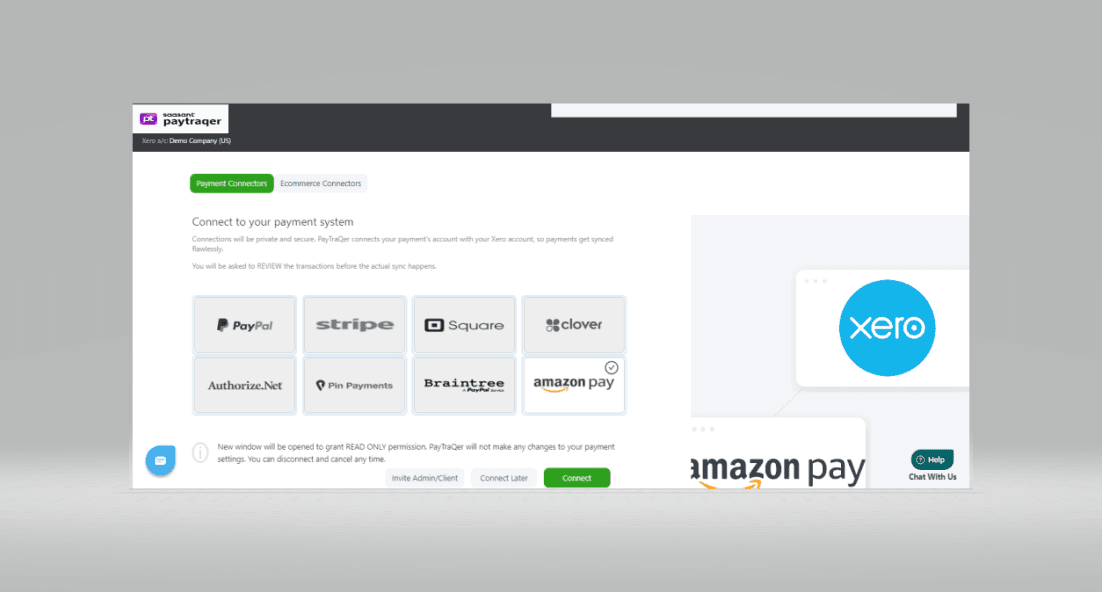
Connect your Amazon Pay Account
After connecting your Xero company, you will be able to link your Amazon Pay account.
When you connect your Xero company, you'll be prompted to link your payment gateway or e-commerce channel. To do this, click the "Add Payment Accounts" button.
You need to provide your Amazon Pay Seller ID, Access Key, and Secret Access Key, as well as select a country for verification. (Here's how to obtain Amazon Pay keys.)
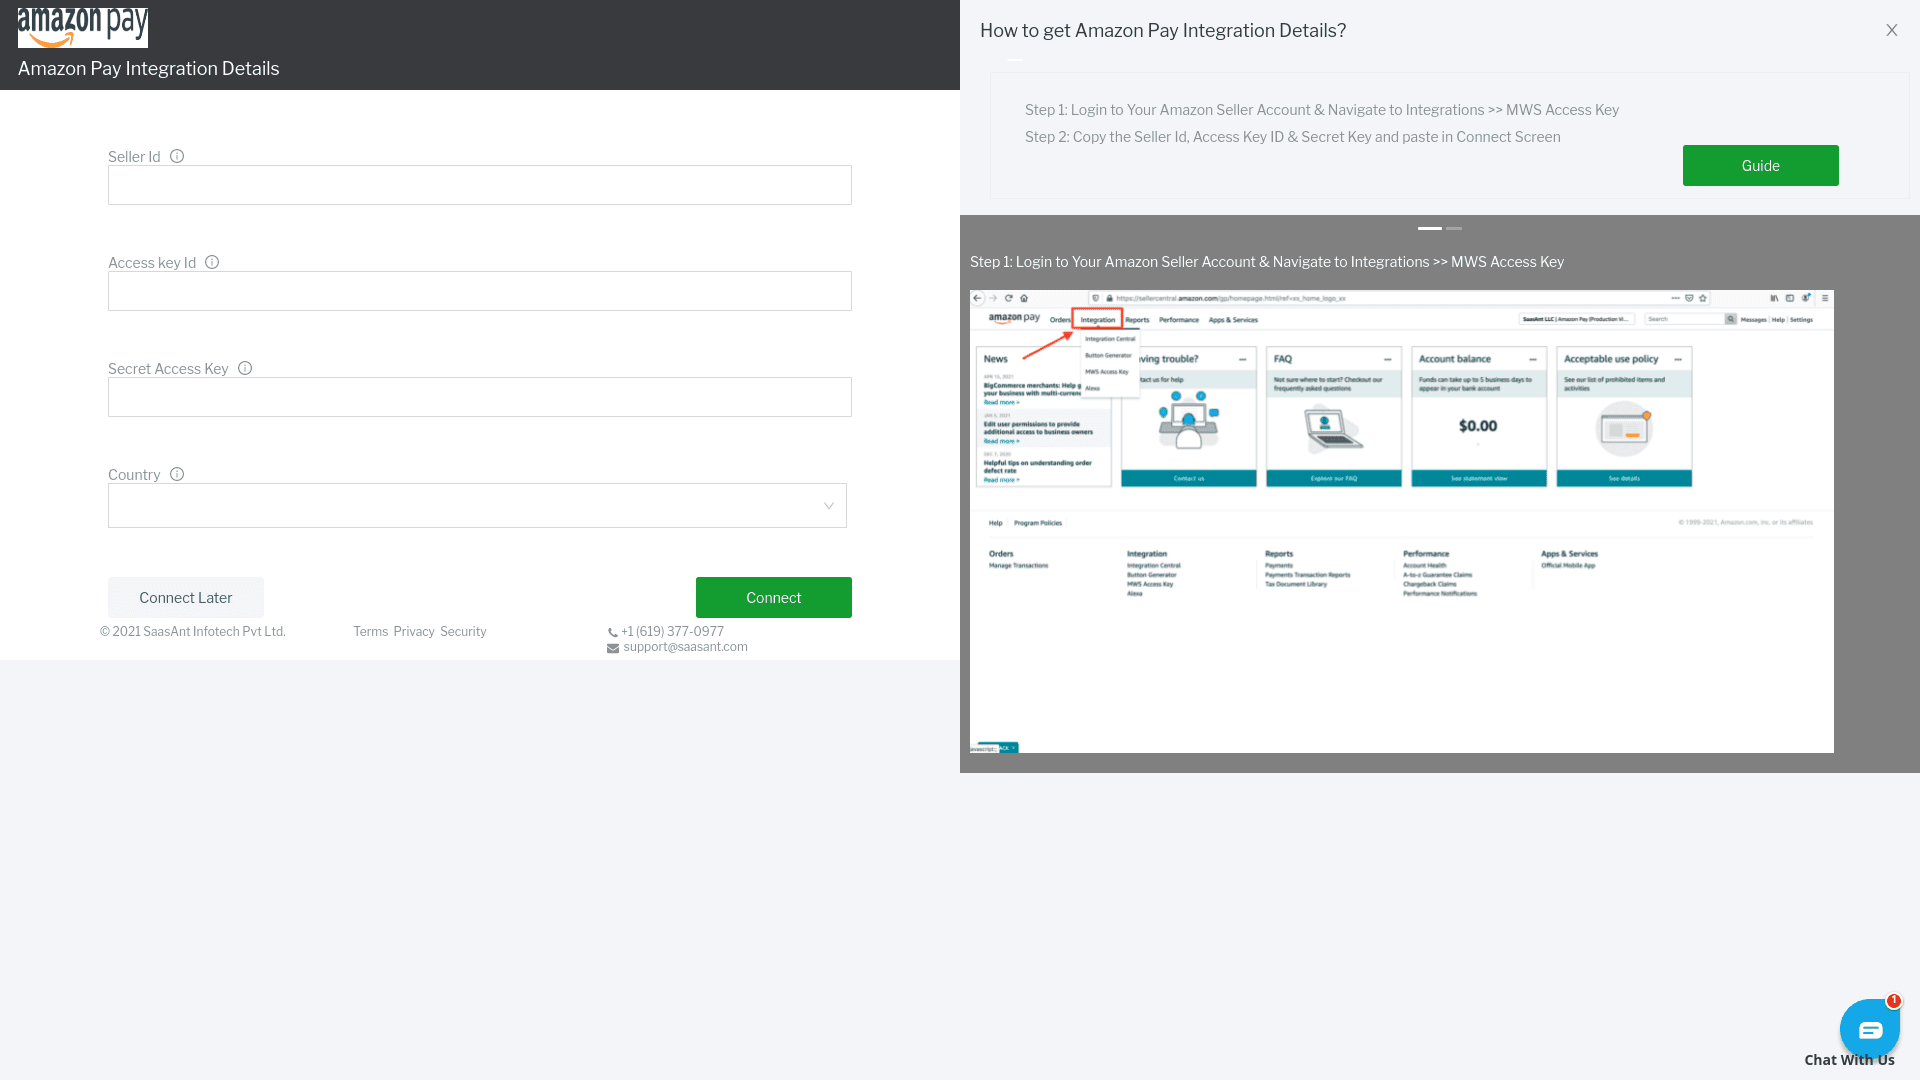 Once the connection is established, you will receive a success message on your screen. Click Next to proceed.
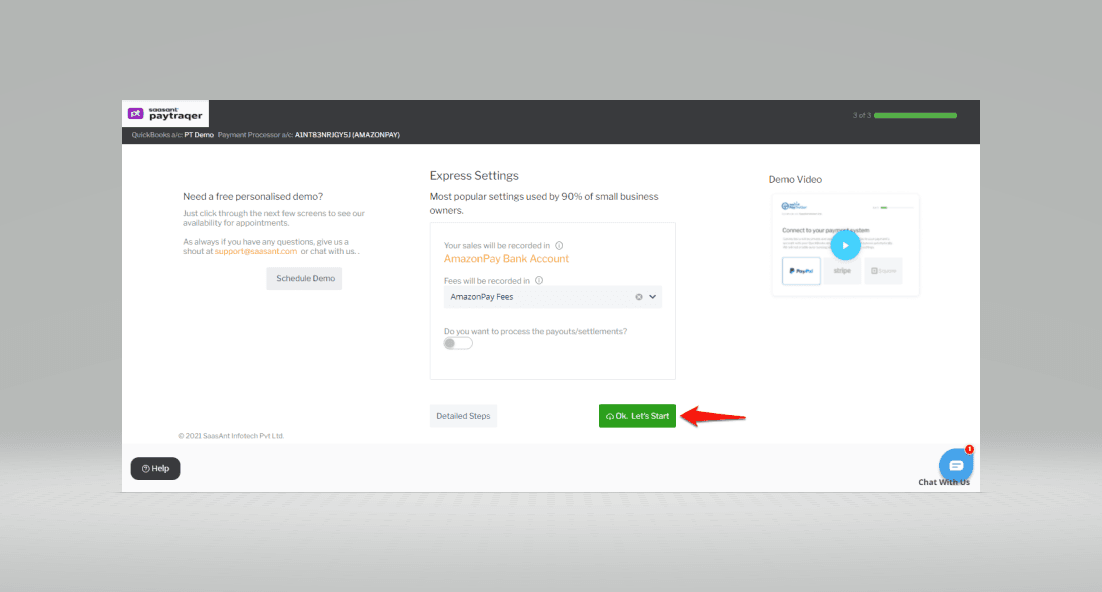
Align the Quickstart Settings
After you connect your Amazon Pay account to PayTraQer, you need to keep your hands on the simple quickstart settings to keep the integration plain sailing.
Note: You have the option to either stick with the default Express Settings or customize your settings using the Detailed Settings.
Express Setting
This is a customized default setting recommended by the pro-advisors. This works perfectly fine and is seamless for your Amazon Pay integration.
Click OK, let's start with the Express Settings.
Detailed Setting
You can fine-tune the settings prior and have things your way with the Detailed Settings. You can manage your Sales, Product, Fees, and Payout preferences here.
Sales Settings

Product Settings
This setting will allow you to choose how your products are synced to Xero. If you turn on the auto-create feature, the missing items in your Xero will be automatically created during the sync.

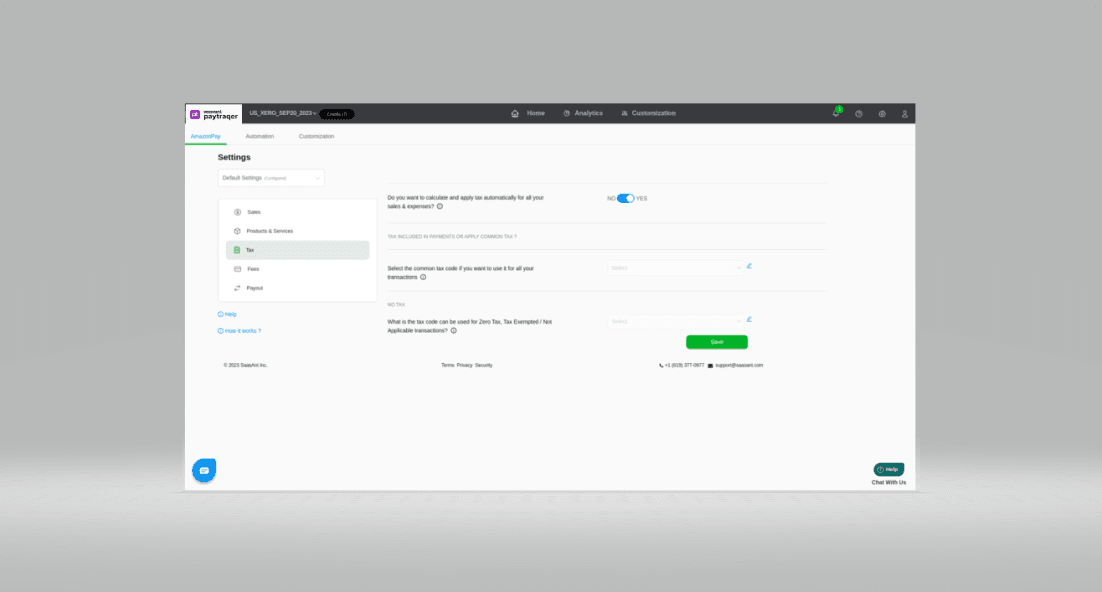
Tax Settings
Turn ON this setting to record sync with tax calculation. If turned OFF, the tax amount will be added to the transaction amount and recorded without tax.
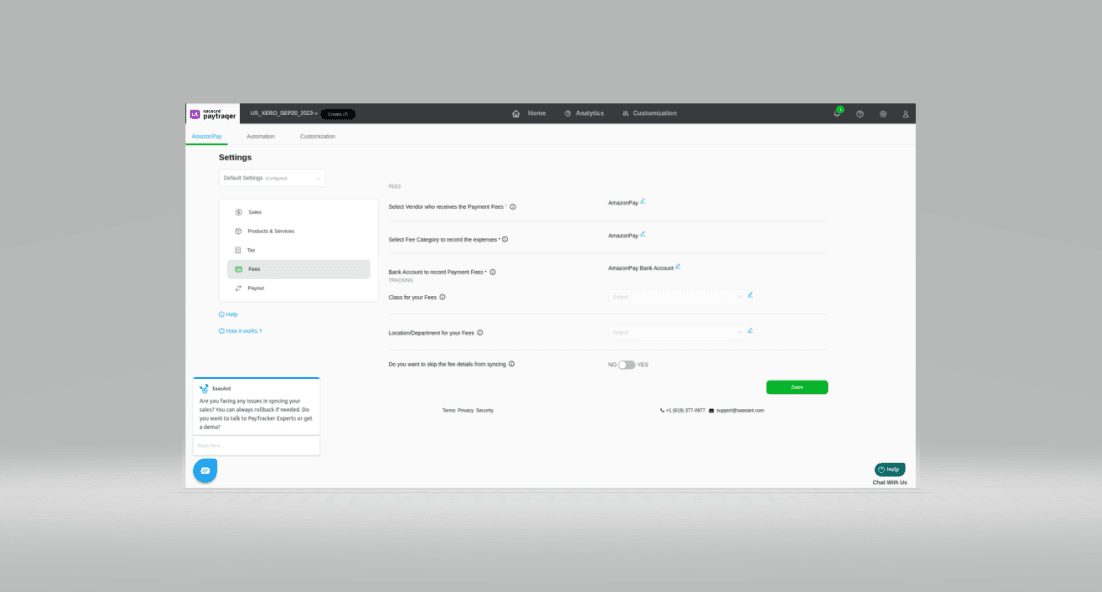
Fee Settings
This setting determines how Amazon Pay fee details are recorded in Xero. You can set the default vendor, expense category, and expense bank account for the corresponding expense transaction.
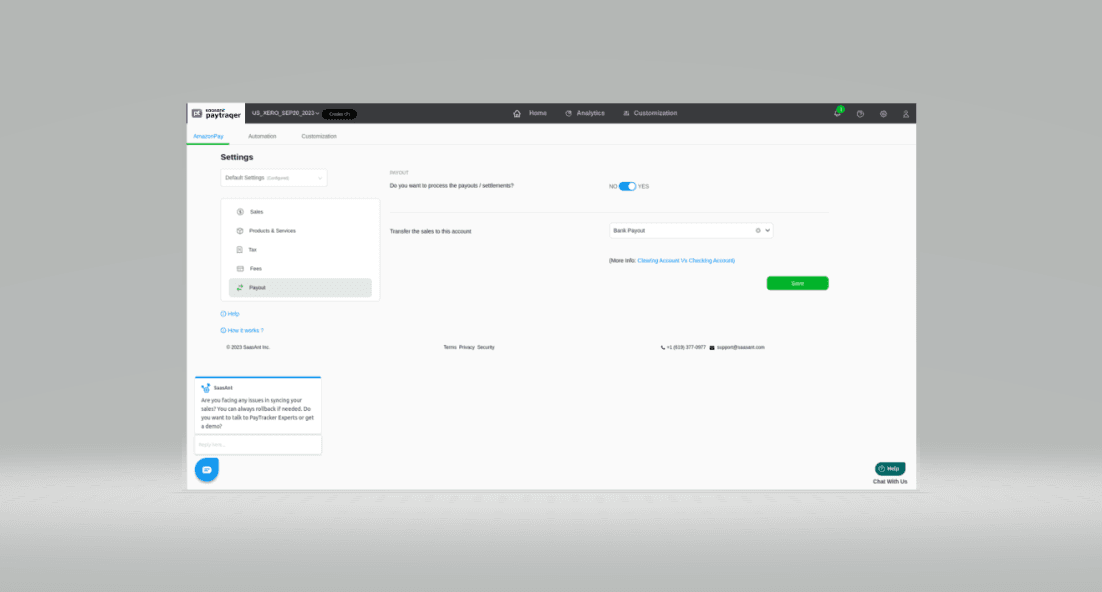
Payout Settings
Enable the "Process the Payout" with the "Transfer To" account, so that all your Amazon Pay Payouts are processed as Transfer transactions in your Xero for easy reconciliation.
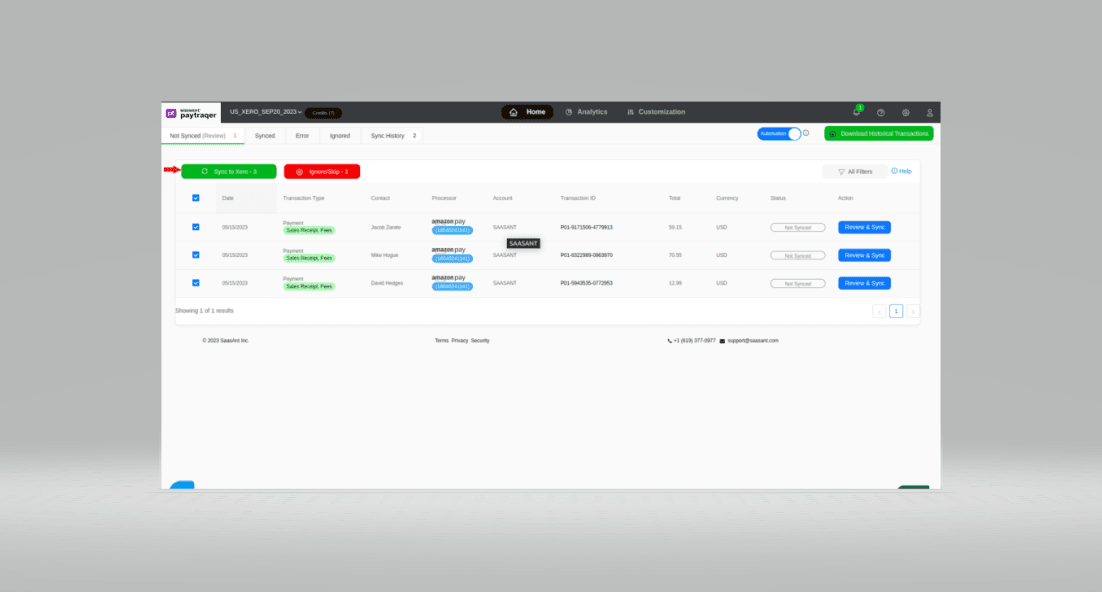
Your configuration is over and now you can start syncing your Amazon Pay transactions to Xero with a single click.
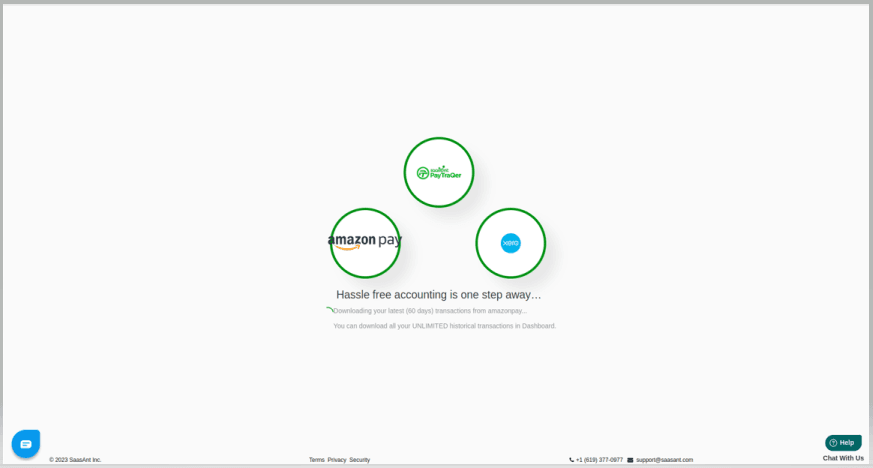
Your previous Amazon Pay transactions for the past 60 days will be automatically downloaded to PayTraQer when you hit the dashboard.
Related articles - Amazon Pay Xero Integration
For more information about how to Obtain Amazon Pay Secret Keys, refer to this article.
For more information about Syncing Amazon Pay Transactions into Xero refer to this article.
If you have any questions or if you get stuck at any point in the process, please don't hesitate to send an email to suppoart@sassant.com.