How to connect Authorize.NET Account with Xero using PayTraQer?
January 1, 2025
How to setup Xero with PayTraQer
1) Connect your Xero Account with PayTraQer
2) In PayTraQer, navigate to the Payment Processors Page and click on 'Add '
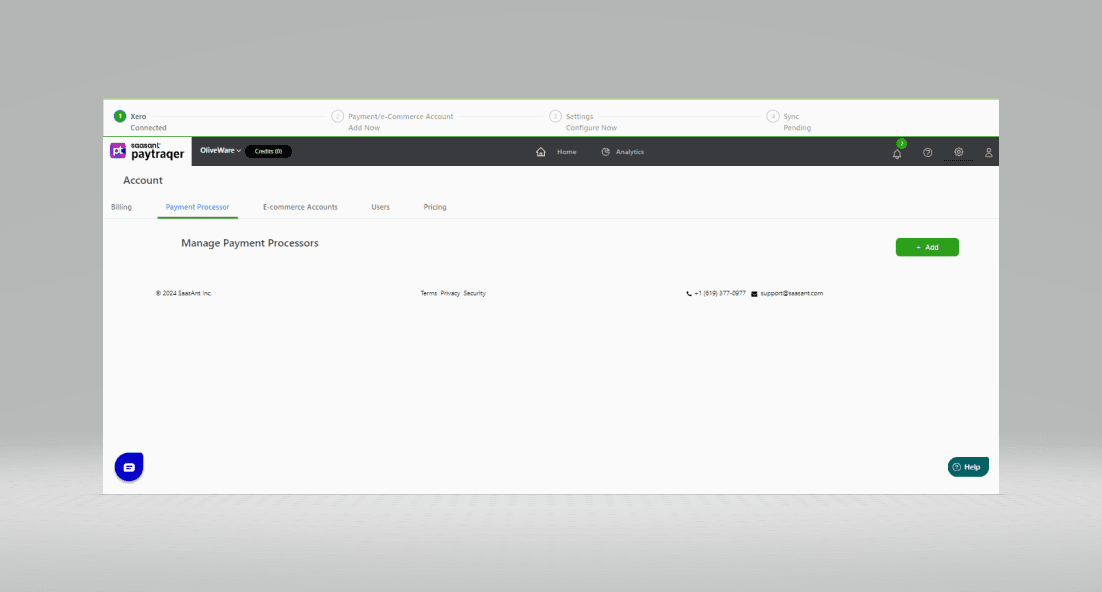
3) On the Payment Processors Screen, click on the 'Authorize.Net' tile.
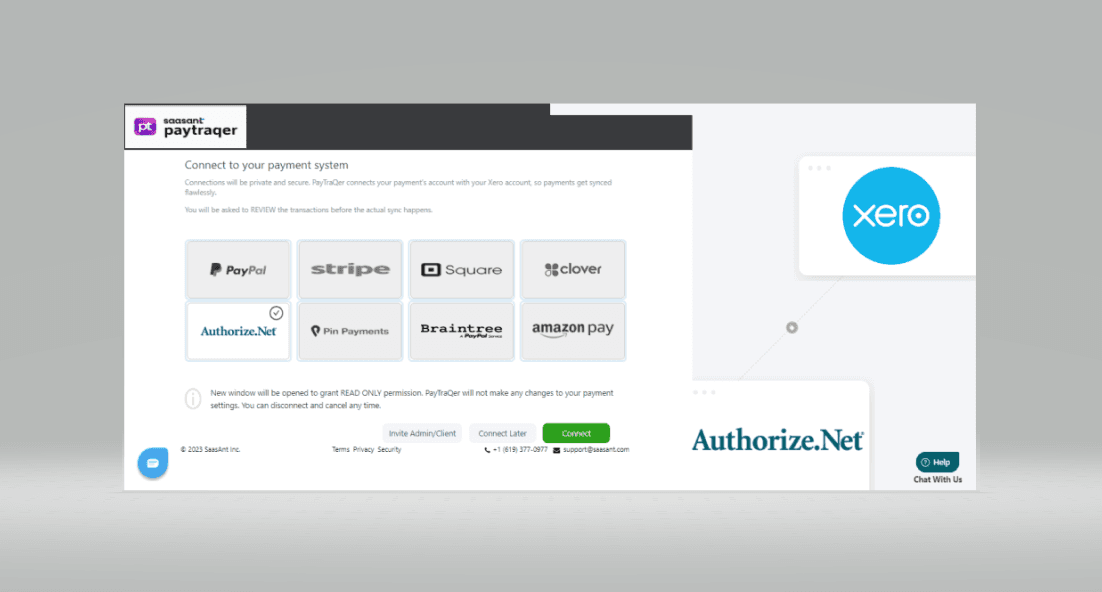
4) The 'Authorize.Net' Integration Screen will open, and you need to carefully follow the instructions below:
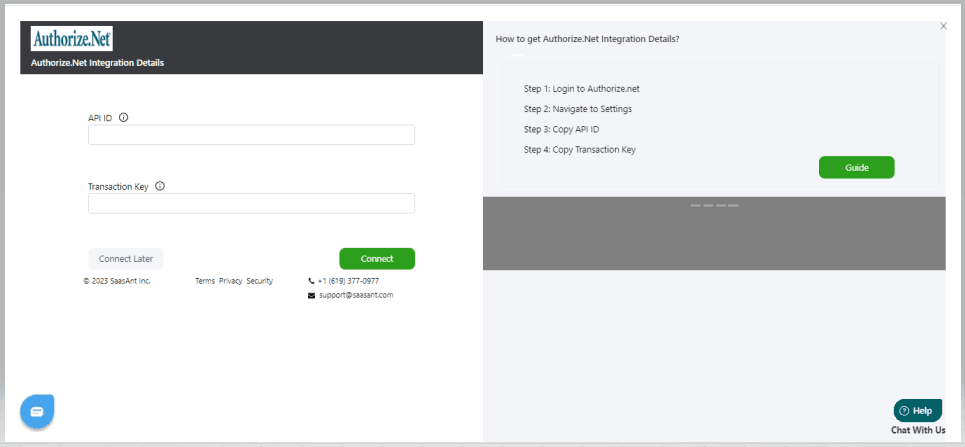
Step 1
Login to your Authorize.net account with your ADMIN user credentials.
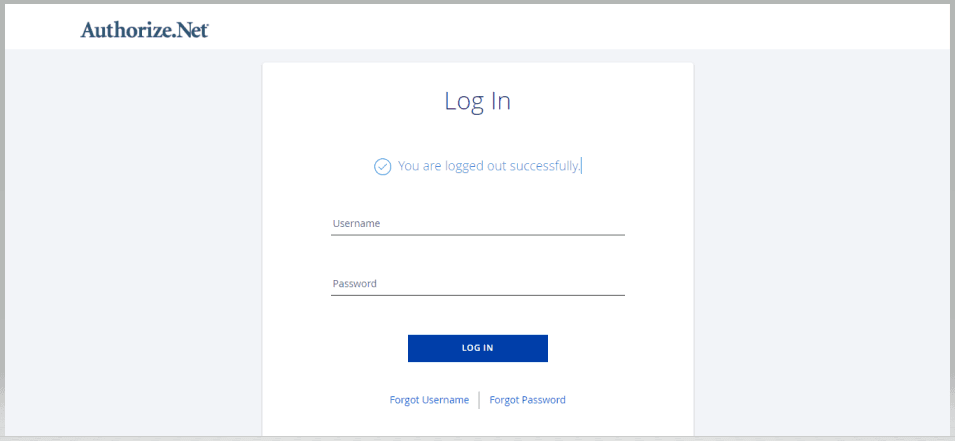
Step 2
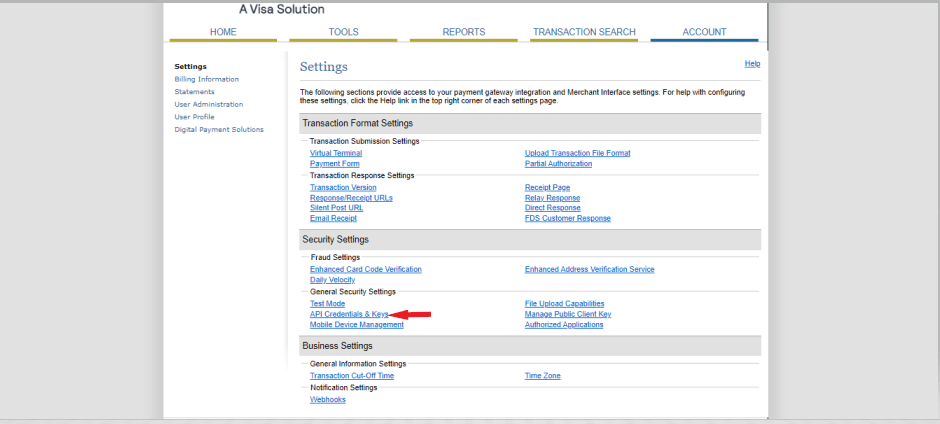
Navigate to Account > Settings Page and click on API Credentials & Keys Link.
Step 3
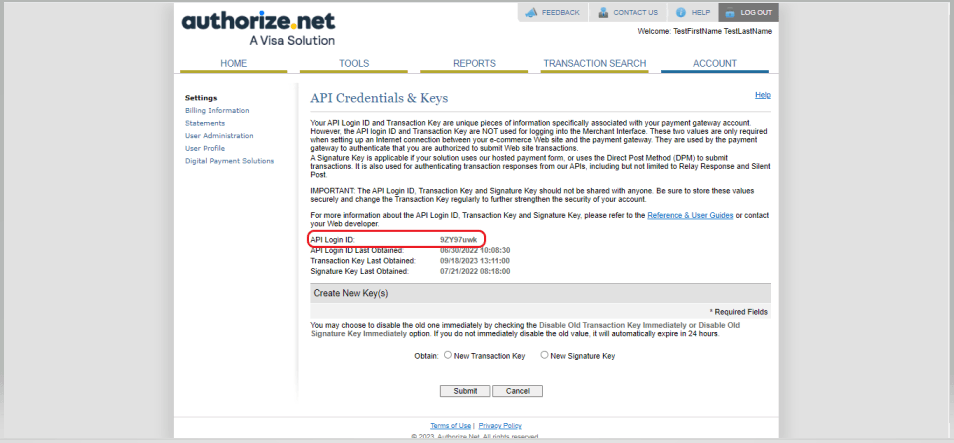
Copy the API Login ID and Paste it in the PayTraQer Authorization Screen.
Step 4
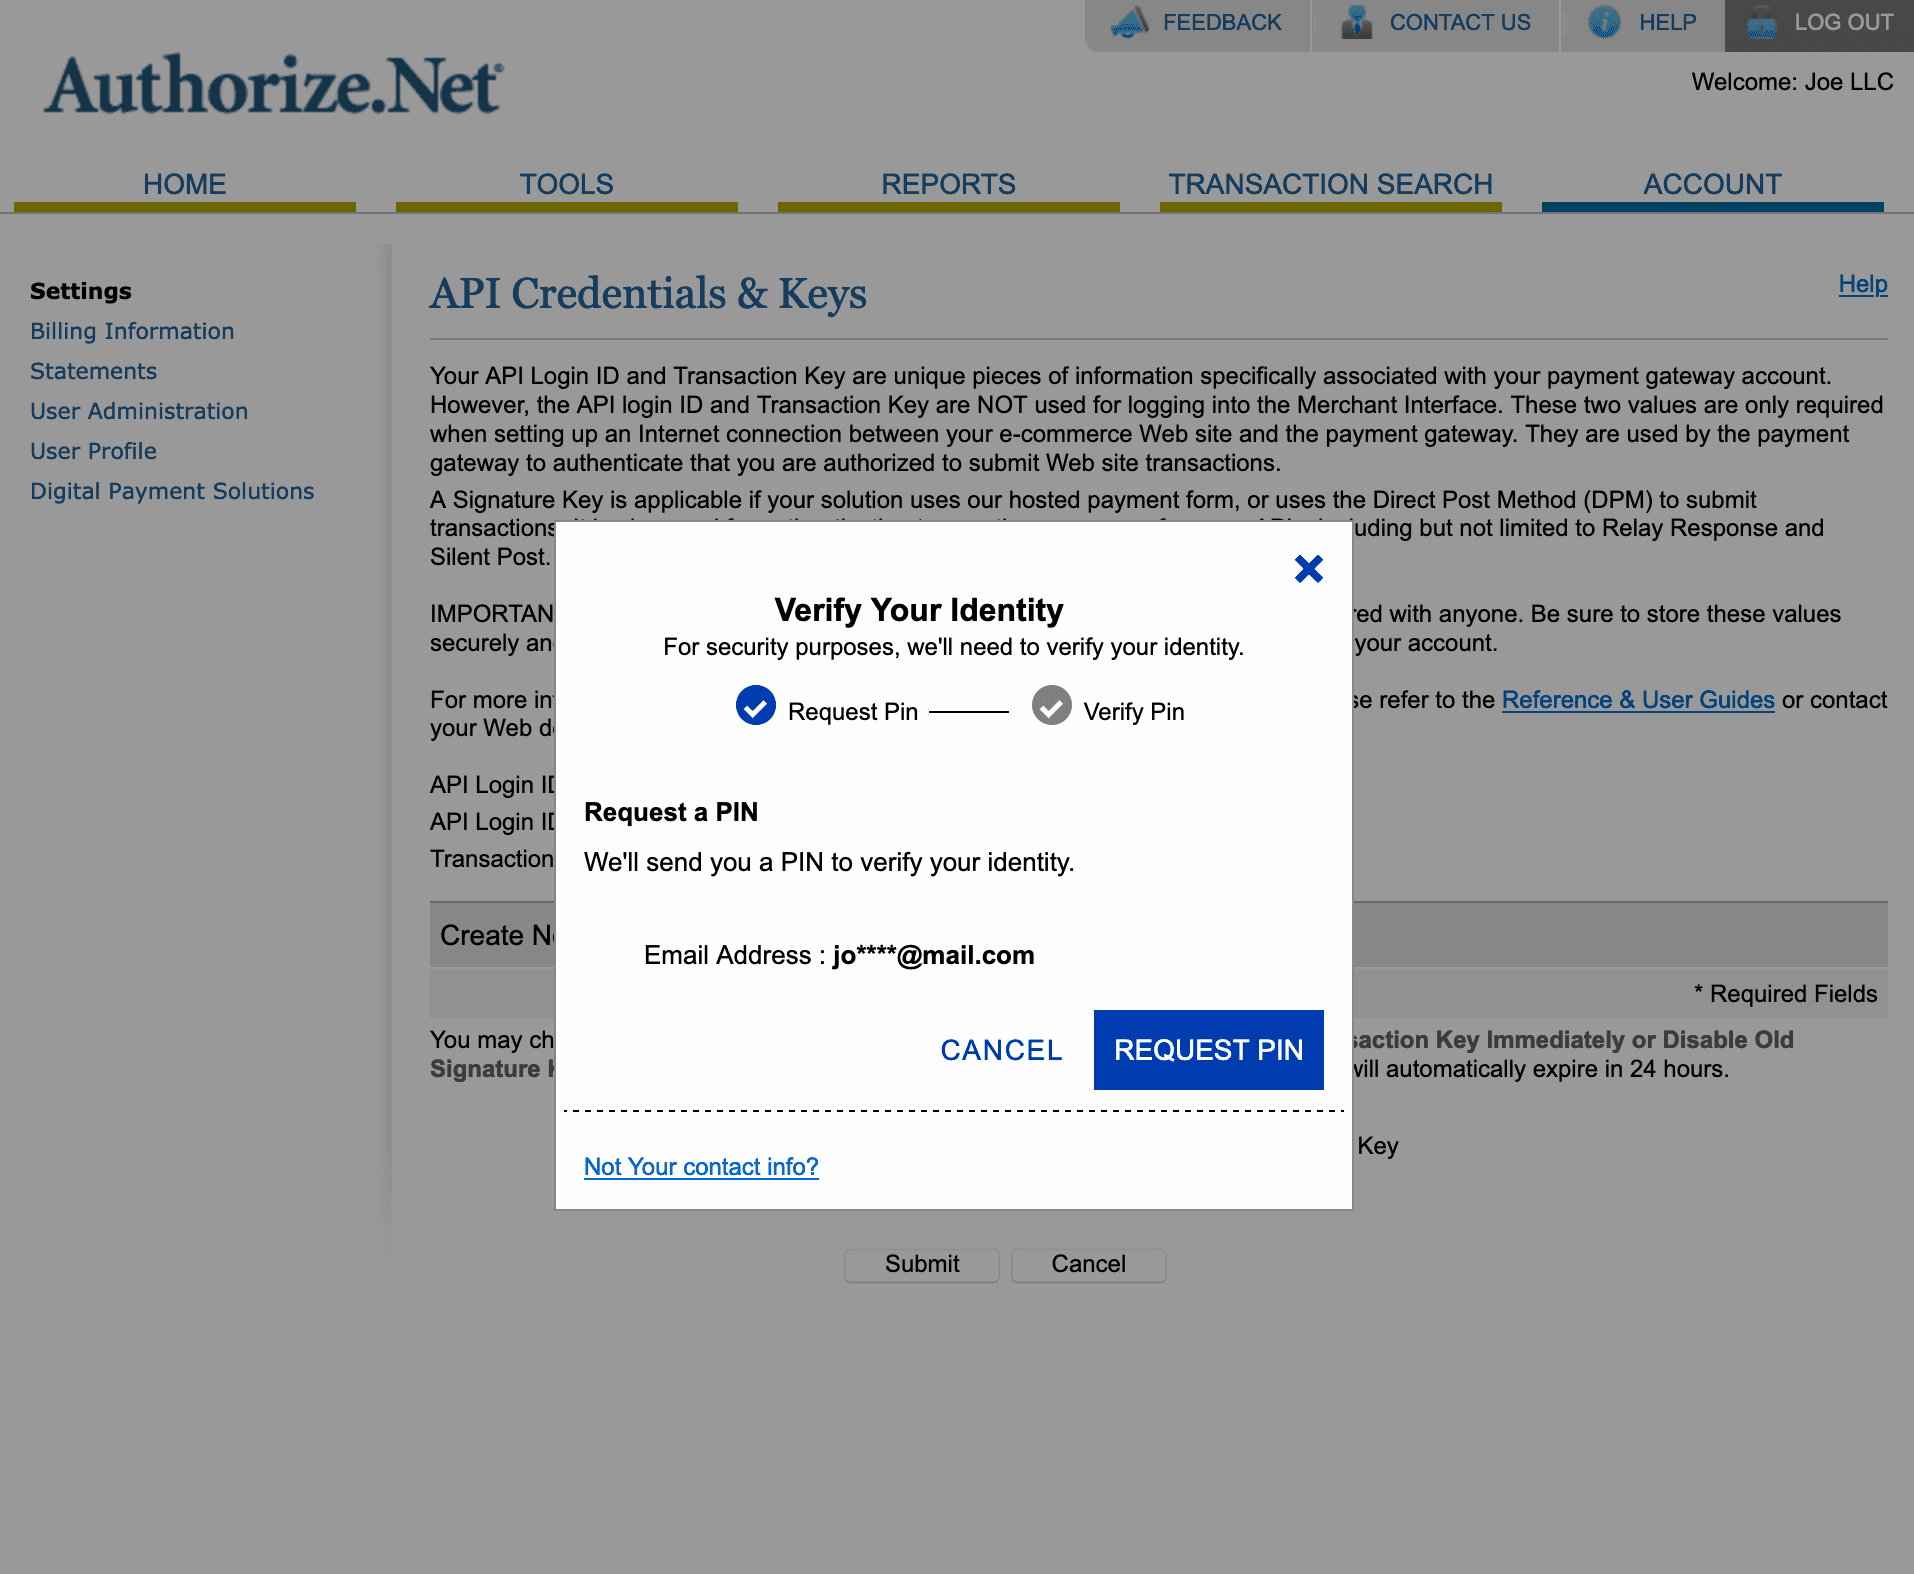
Turn on the "New Transaction Key" option and submit. You will be asked to provide the security pin received from your registered email address
Step 5
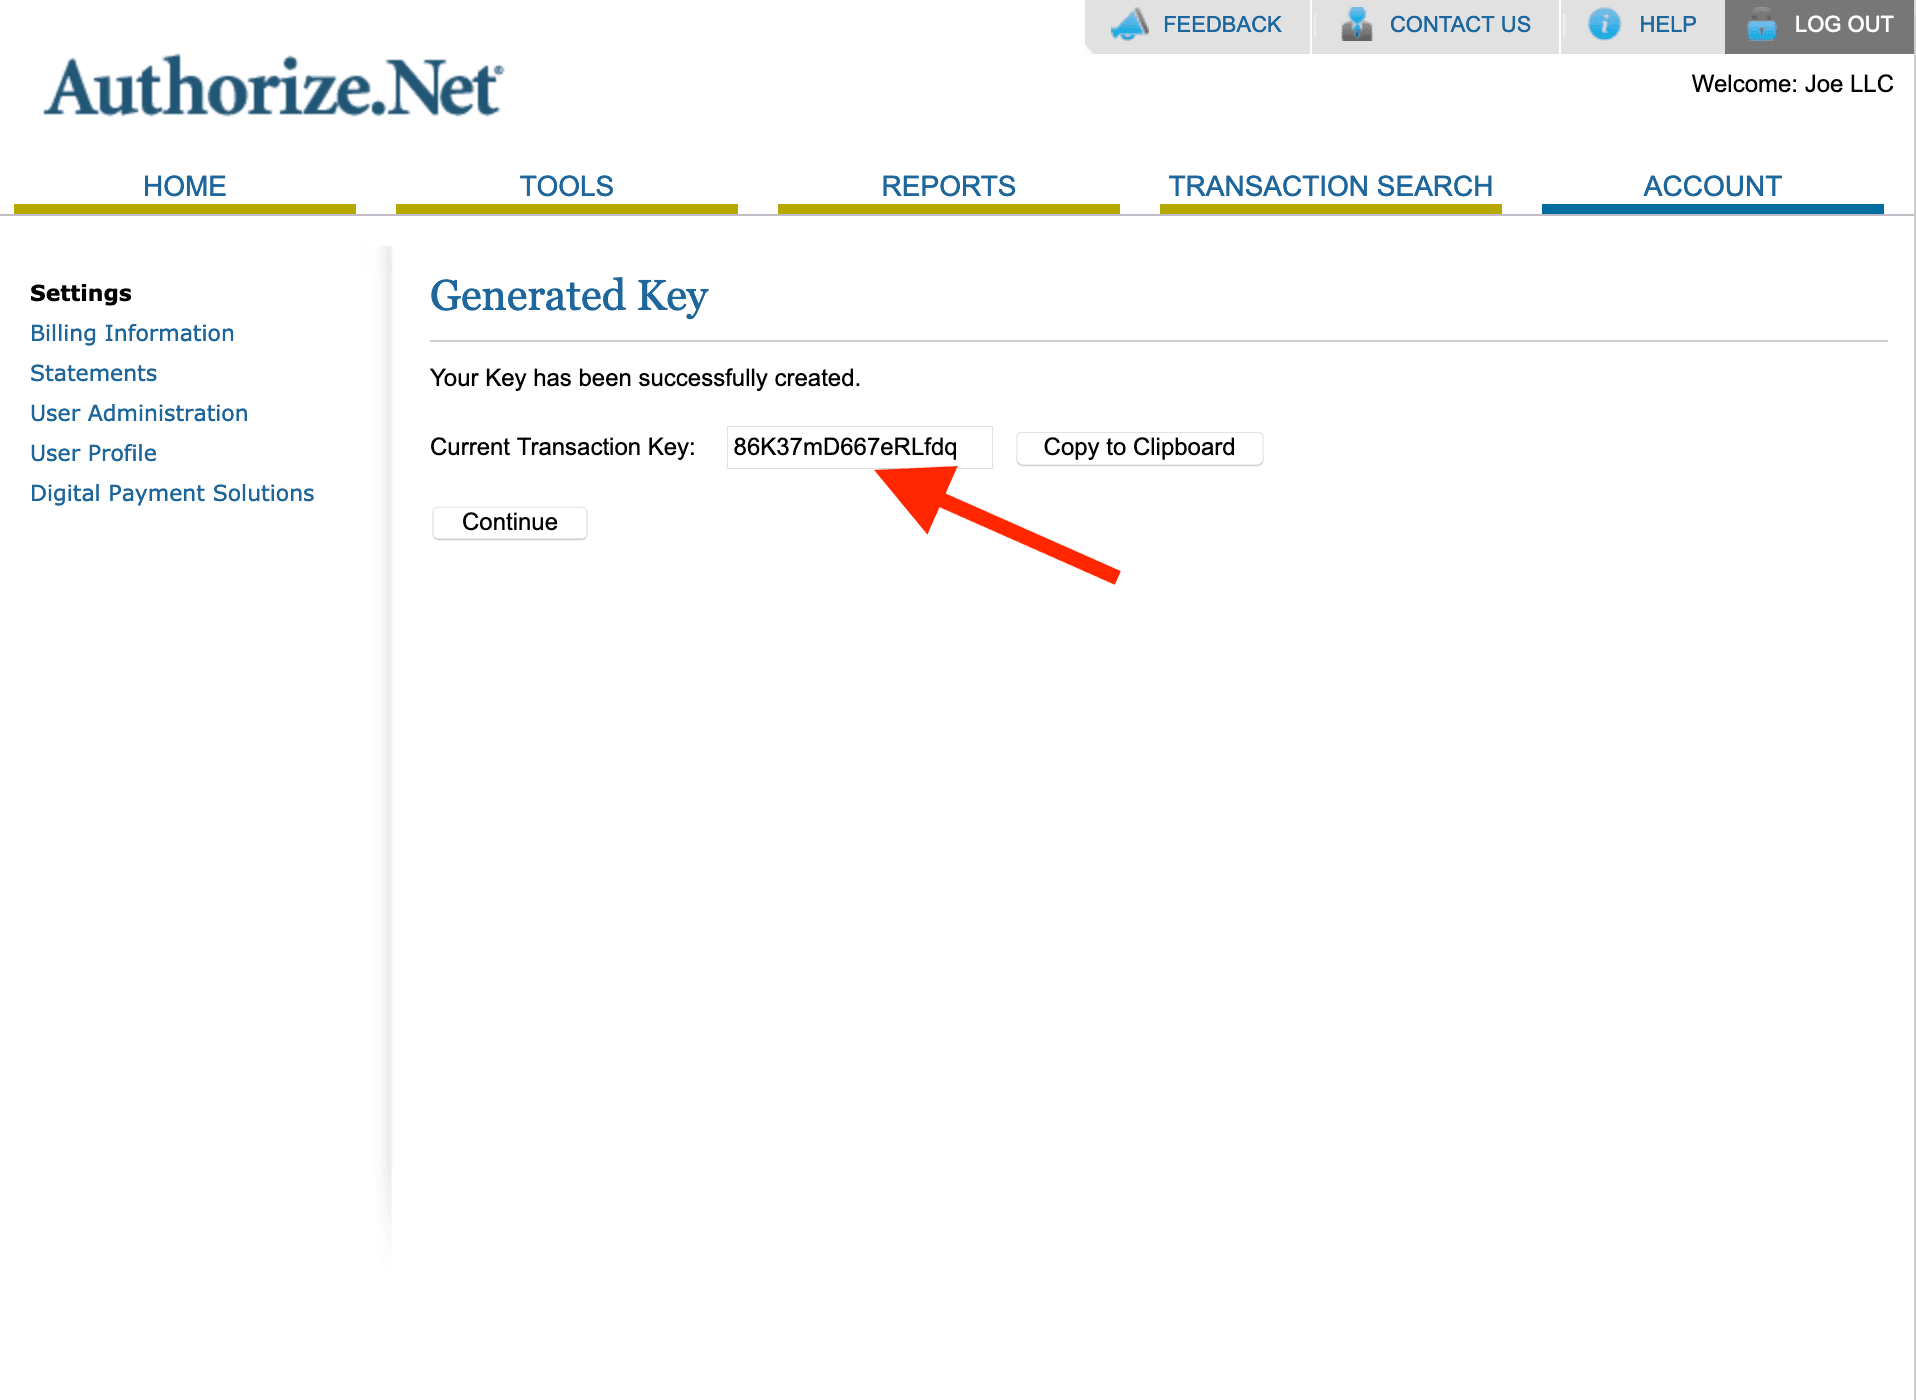
The Transaction Key will be displayed on the screen after the PIN Verification. Copy the Transaction Key and paste it on PayTraQer Authorization Screen.
You can reach out to us at support@saasant.com if you are stuck somewhere. You can also schedule a personalized free demo with us if you need better clarity to connect with us by clicking Demo