How to Connect Squarespace with QuickBooks Online using PayTraQer?
November 20, 2025
PayTraQer connects your Squarespace store to QuickBooks Online so every order, refund, fee, and payout can be posted as clean, individual transactions.
With individual sync, PayTraQer:
Brings each Squarespace order into QuickBooks as its own transaction
Maps customers, items, tax, discounts, and payments correctly
Reduces manual data entry and keeps your books up to date
This guide walks through the full setup: connecting QuickBooks, linking Squarespace, choosing quickstart settings, and getting ready to sync your first transactions.
Prerequisites
Before you begin, make sure you have:
An active QuickBooks Online company
Master Admin or Accountant level access to that company
An active Squarespace e commerce site with orders and payments in production
You will install PayTraQer from inside QuickBooks Online and then link Squarespace from the PayTraQer setup.
Connect PayTraQer to QuickBooks Online
Sign in to your QuickBooks Online company.
From the left menu, click Apps.
Click Find Apps
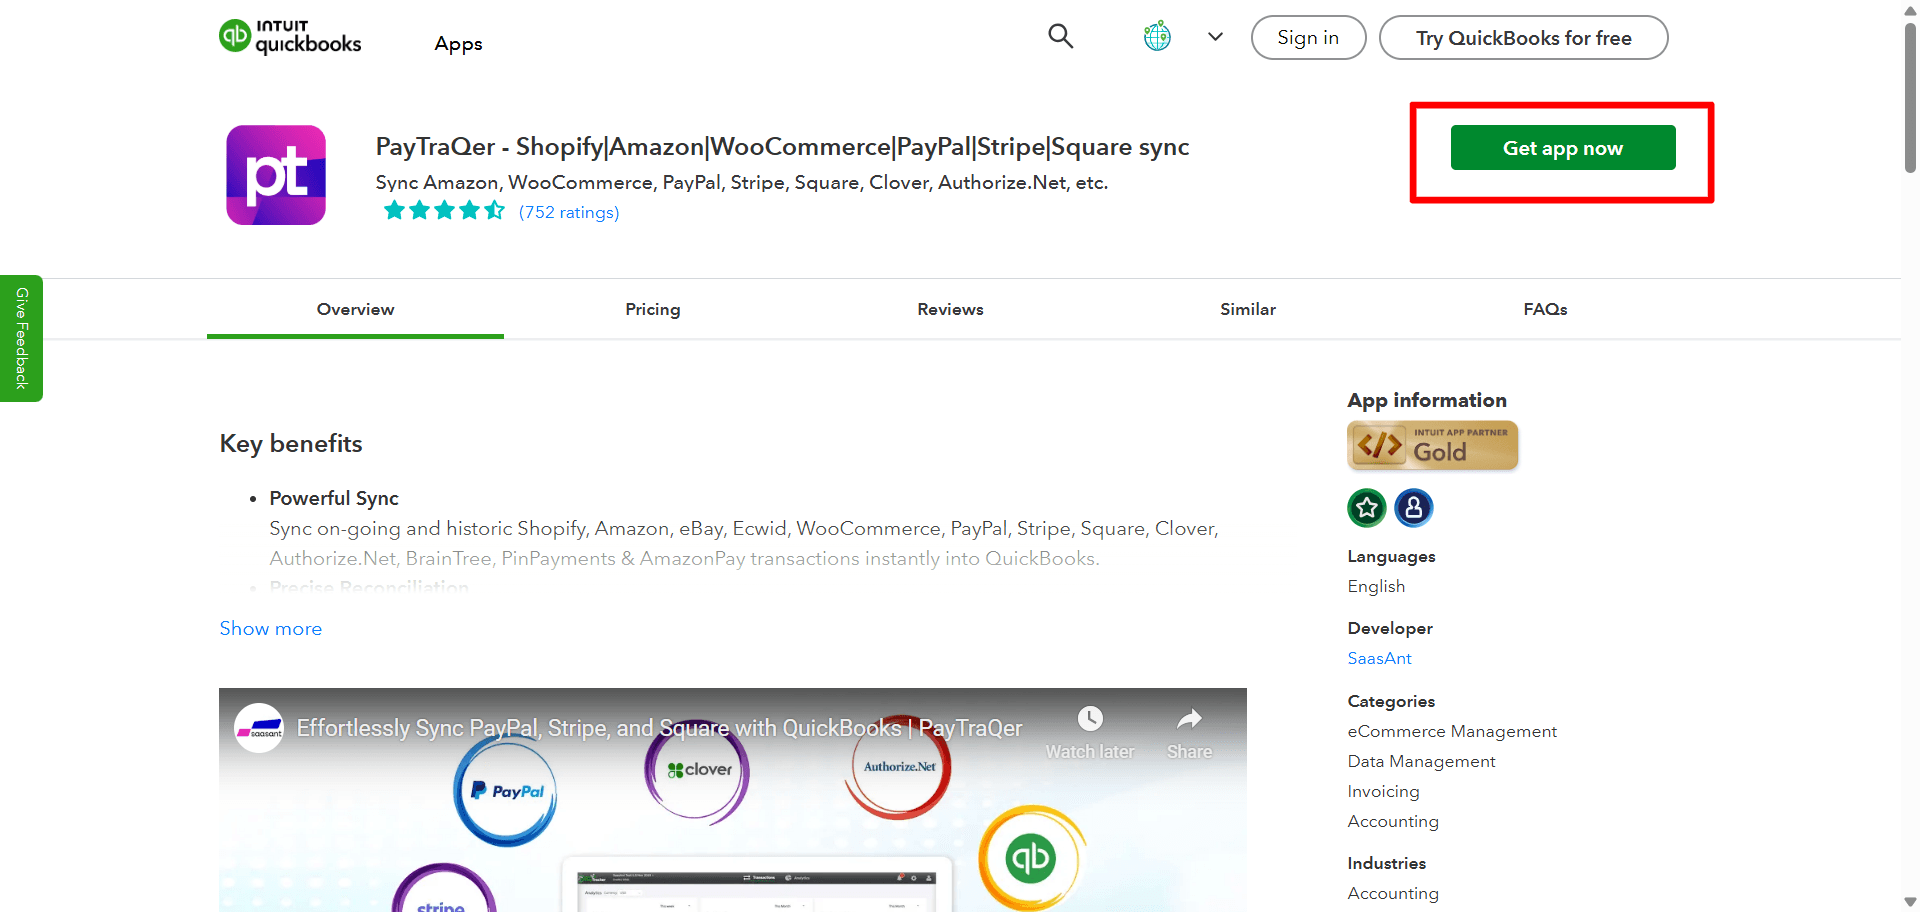
In the search bar, type PayTraQer.
Select PayTraQer from the results.
Click Get app now.
When the QuickBooks permission popup appears, click Connect to grant access.
QuickBooks will redirect you to the PayTraQer application. Your QuickBooks company is now linked, and you can use the free trial for the first 15 days.
Choose the sync mode for Squarespace
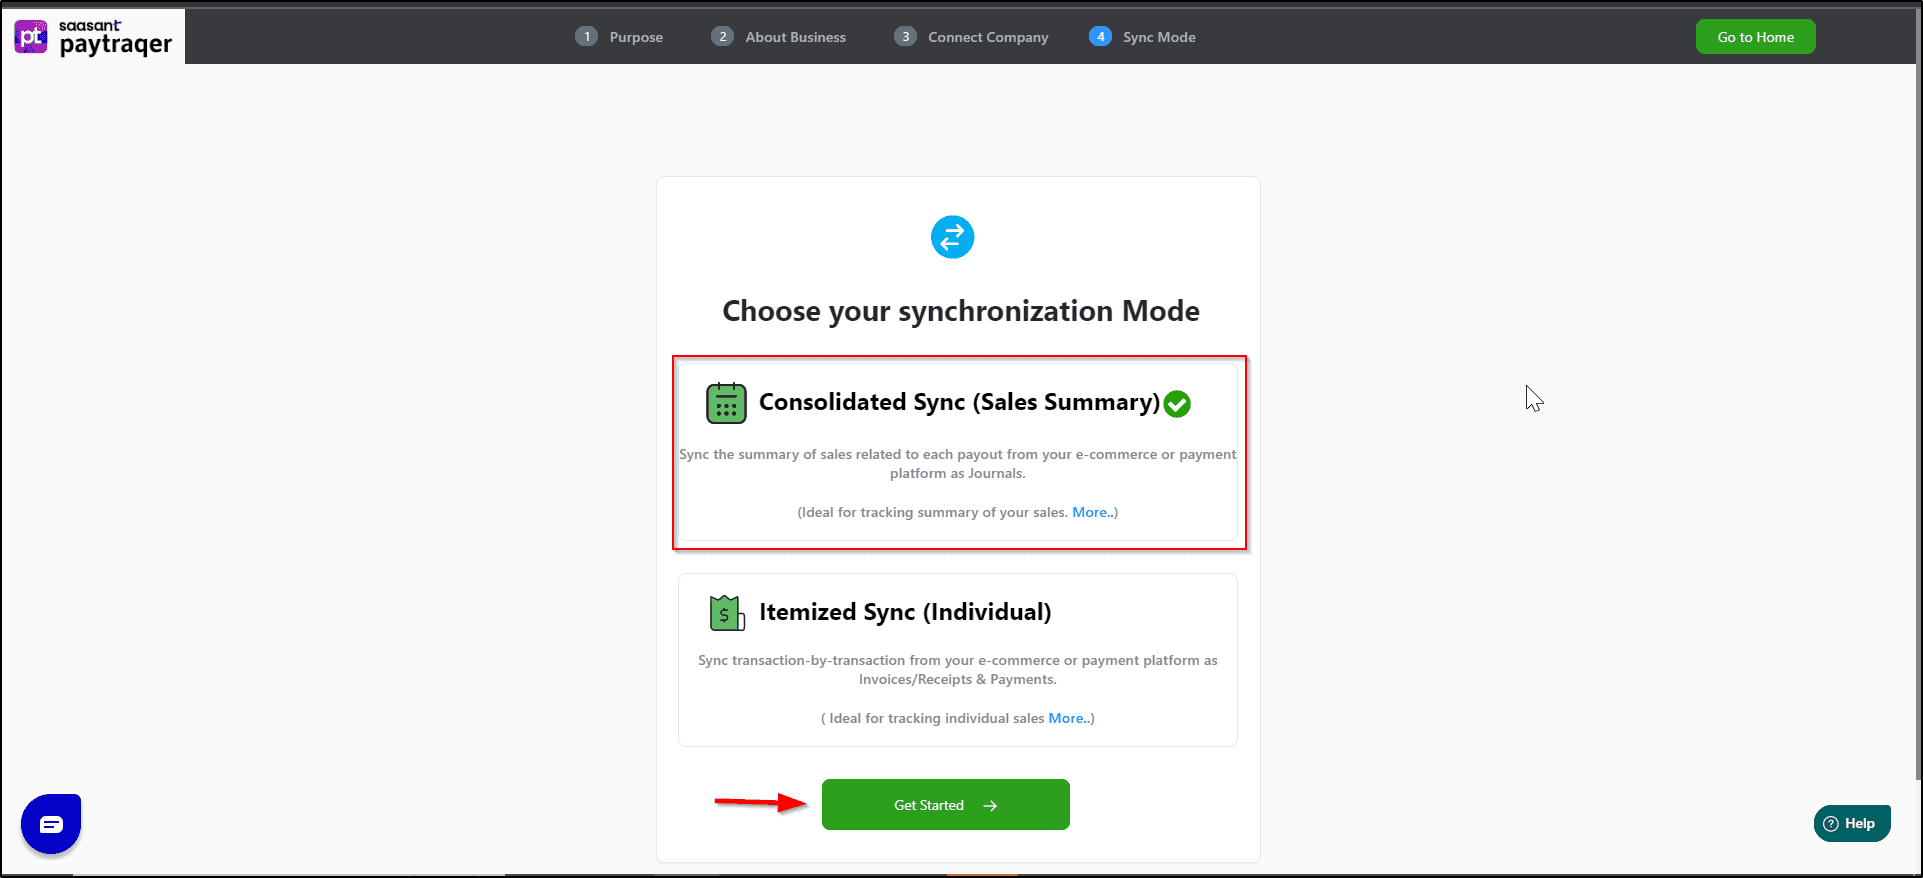
During PayTraQer onboarding, you will be asked how you want to sync:
Individual / Itemized Sync
One entry per order or transaction
Best if you want full detail in QuickBooks
Consolidated / Summary Sync
Combined entries by day or payout
For this article, choose Individual / Itemized Sync so that each Squarespace order is synced separately.
Once a company is set up in one mode, switching to another mode later normally requires disconnecting and setting up again. Decide your sync style before you start large scale syncing.
Connect your Squarespace store in PayTraQer
After your QuickBooks company is connected, PayTraQer will prompt you to link an e commerce channel.
You can follow the wizard or do it from settings. The steps are the same.
On the initial screen, click Add E Commerce Accounts.
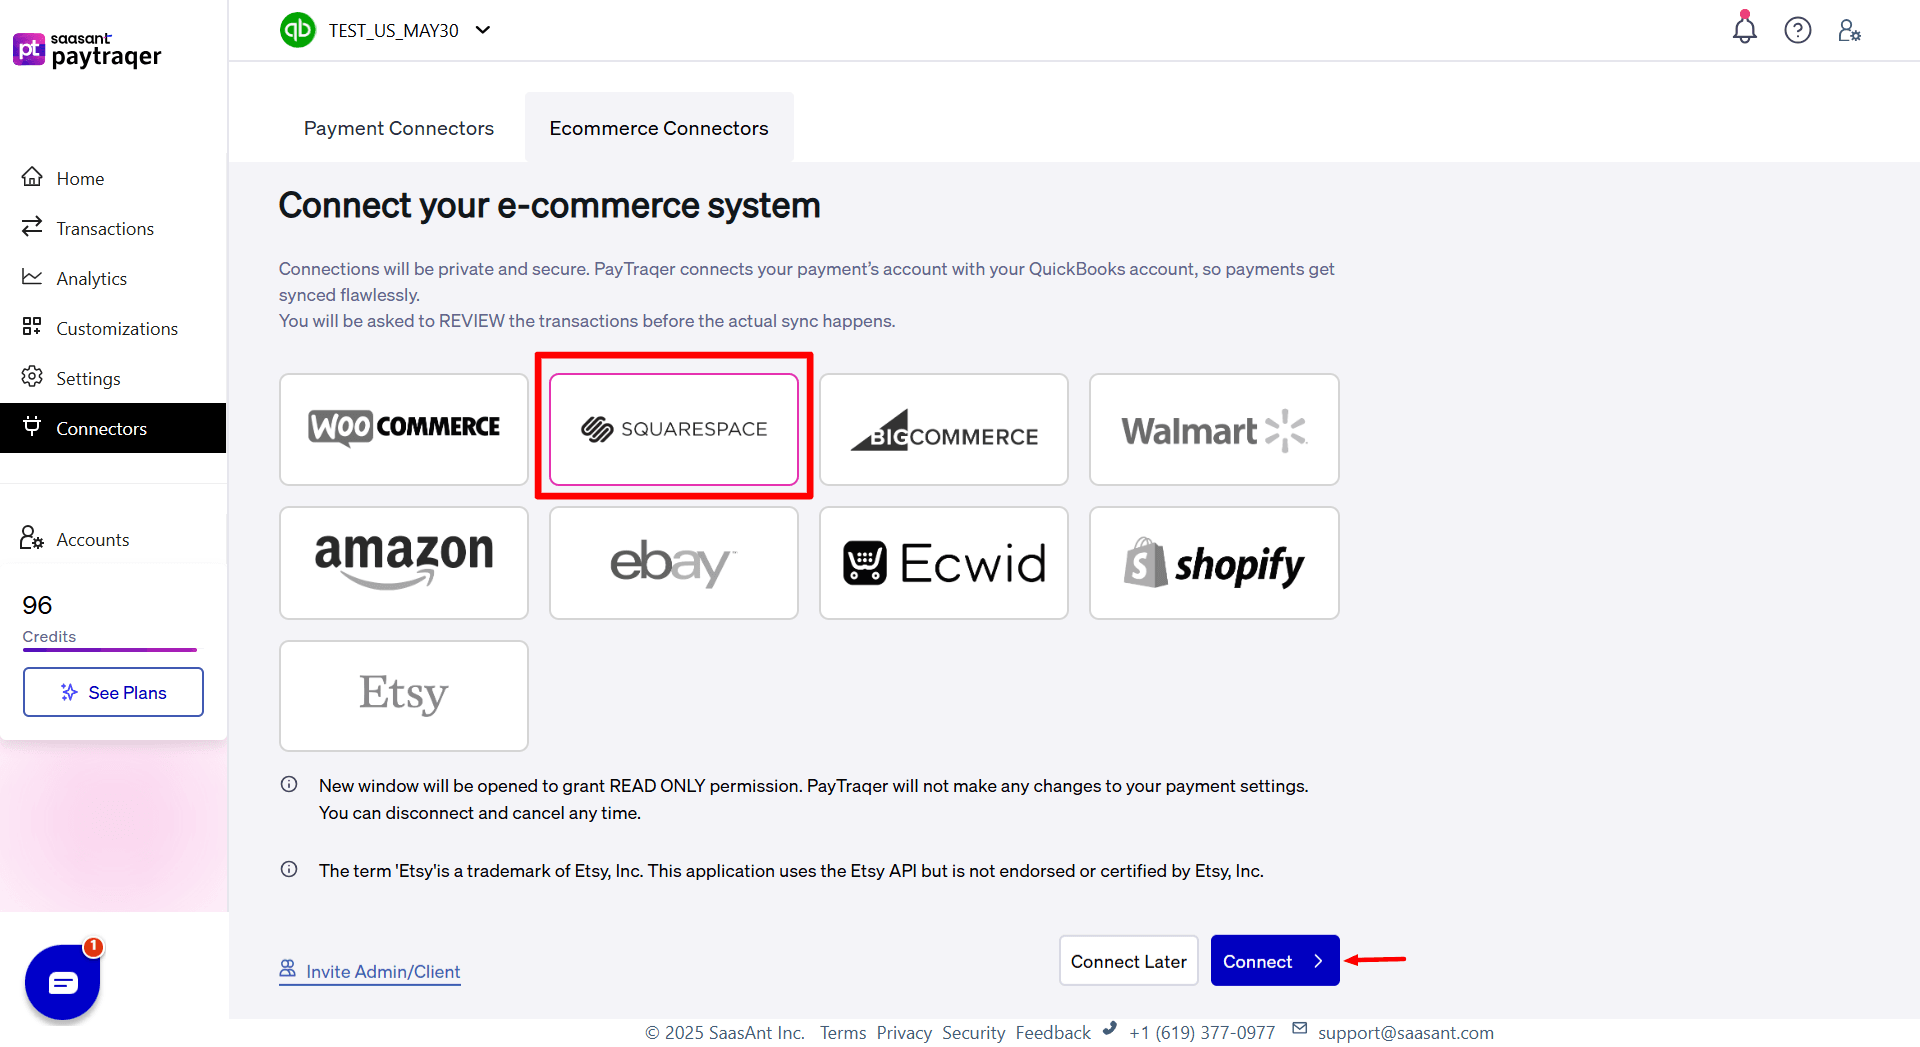
In the Connect to E Commerce window, click the Squarespace tile.
A Squarespace login window opens. Sign in with your Squarespace credentials.
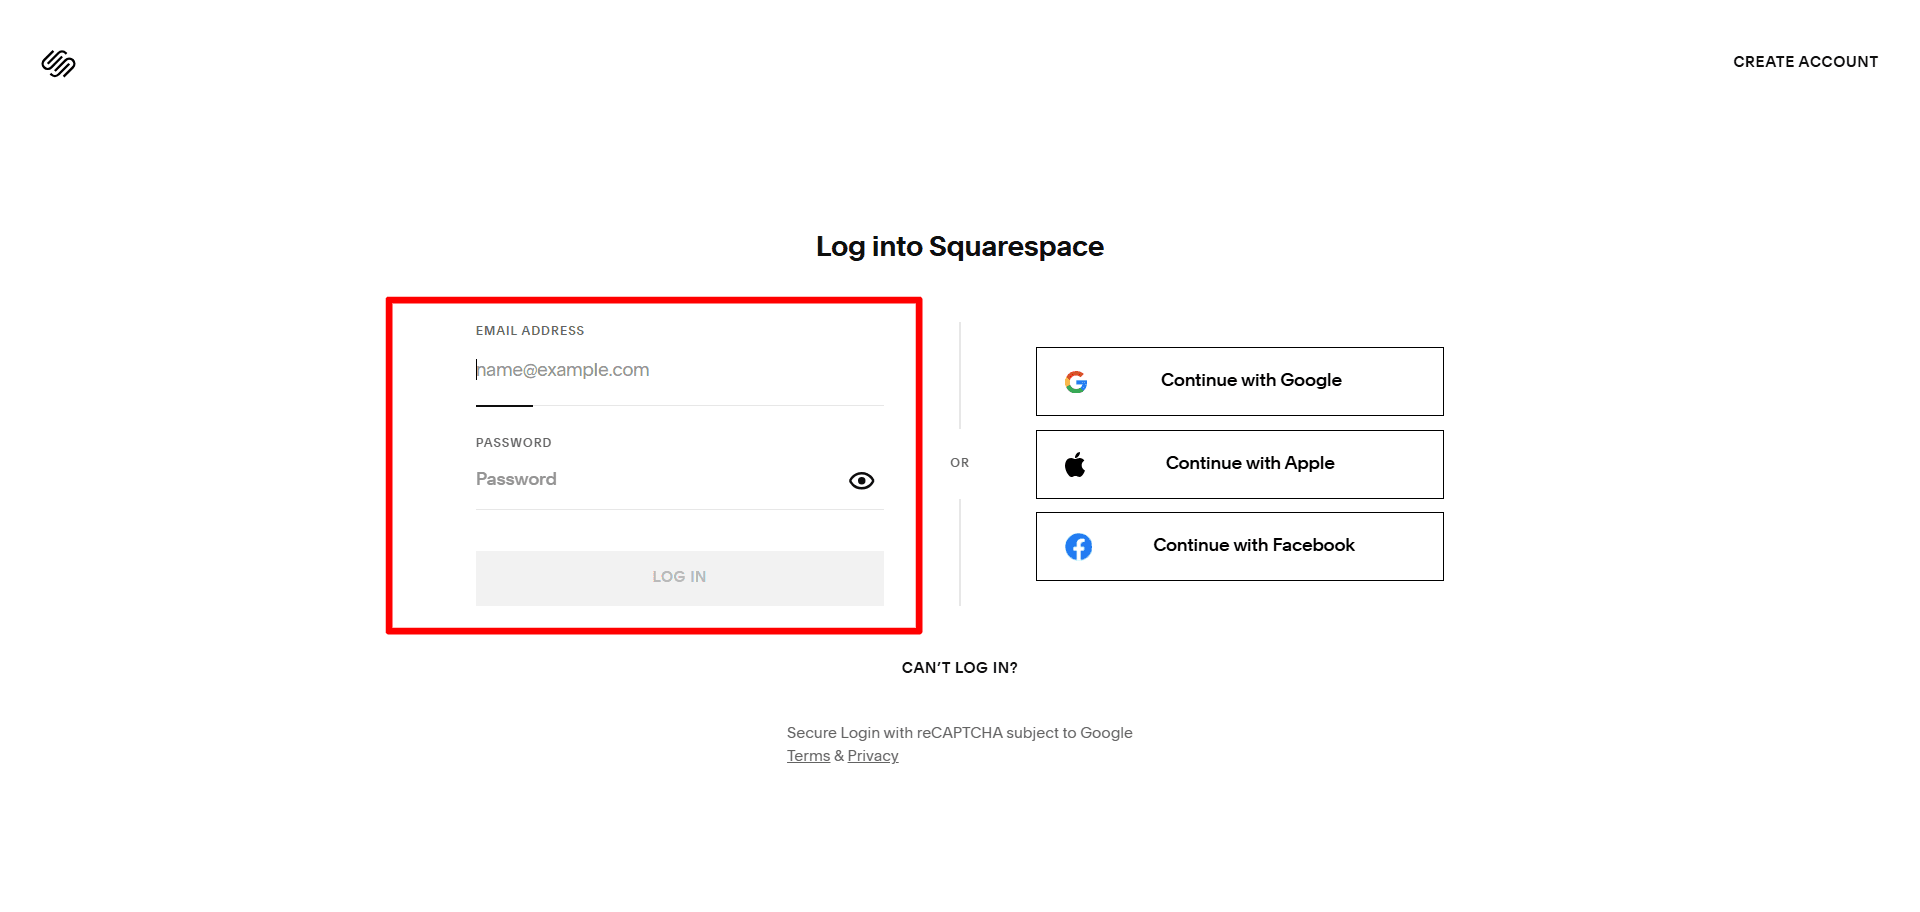
If you manage multiple sites, choose the Squarespace website you want to link to PayTraQer.
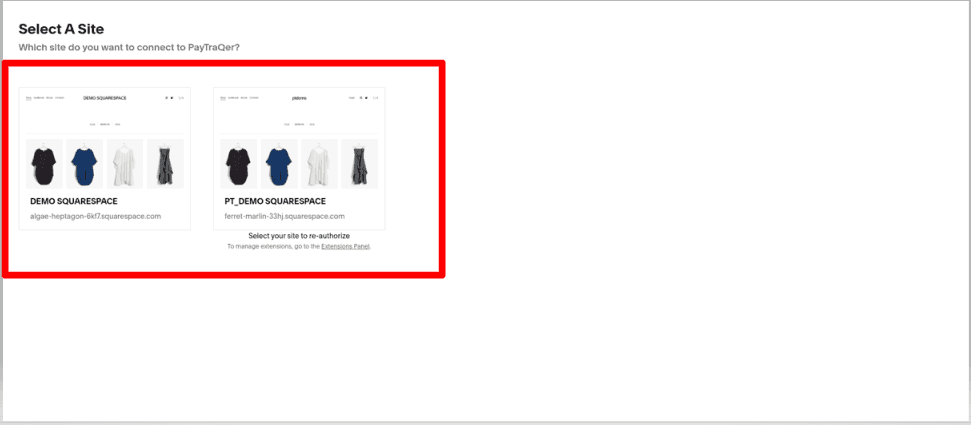
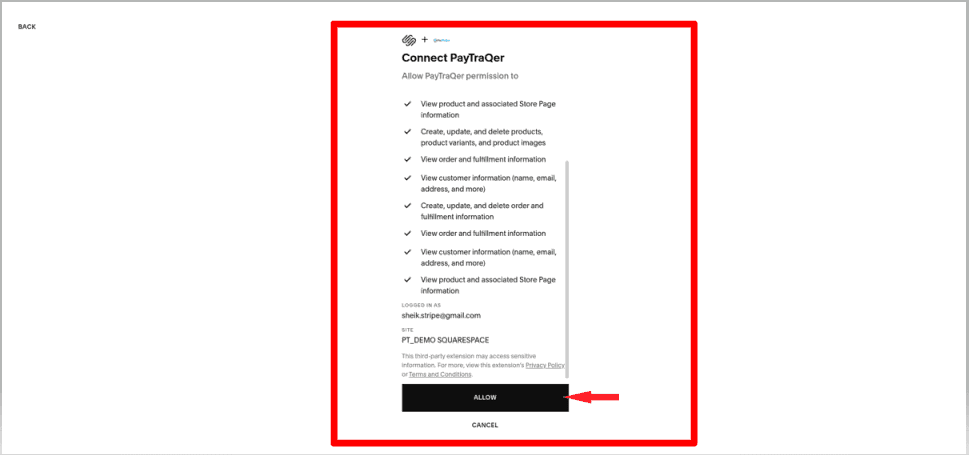
Review the permissions and click Allow or Authorize to grant access.
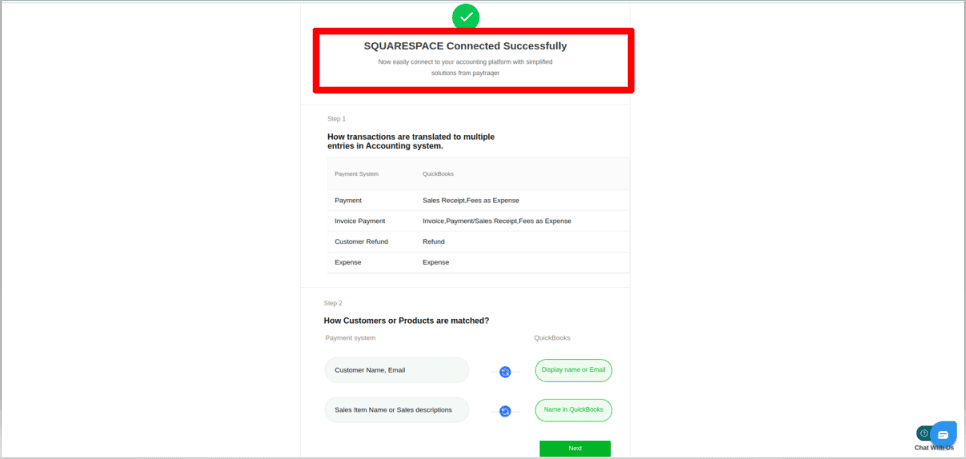
Wait for the confirmation message that Squarespace is connected successfully.
If you already have other connectors connected
In PayTraQer, click the Settings icon (gear) on the top right.
Go to E Commerce Accounts.
Click Add E Commerce Account.
Select the Squarespace tile and follow the same login and authorization steps as above.
Once completed, your Squarespace store is connected to the same QuickBooks company you linked in step 3.
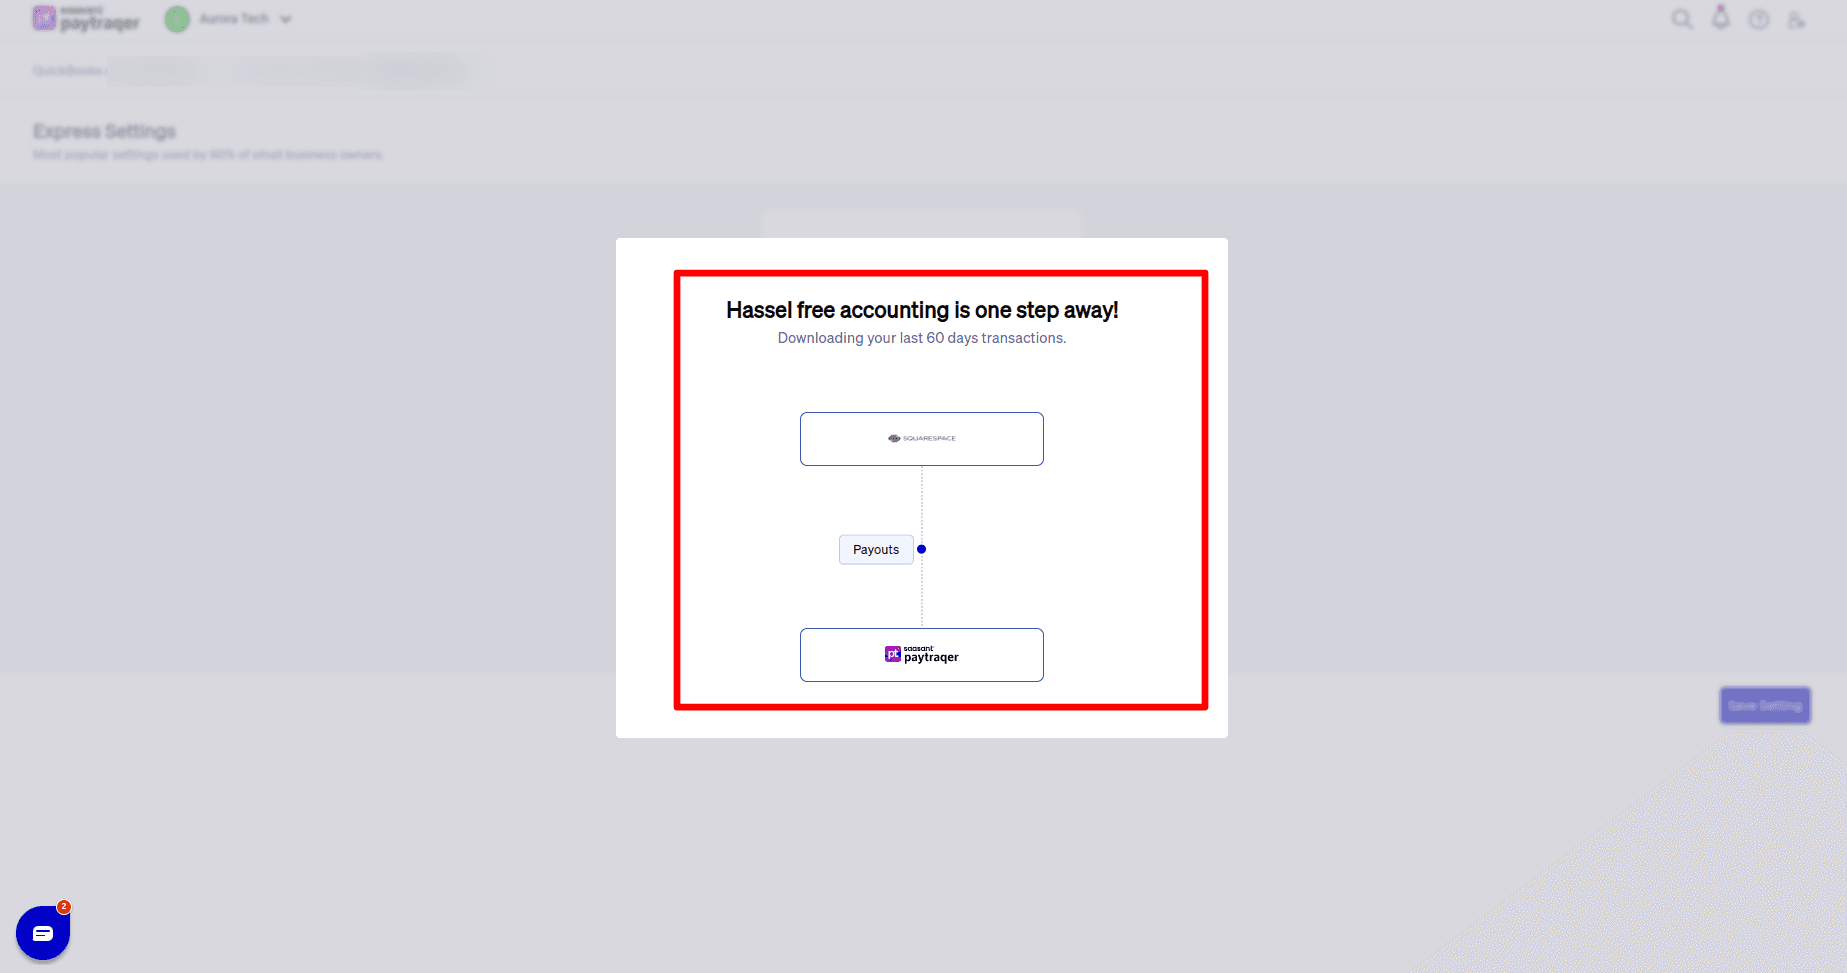
Complete Express Settings for Squarespace
After you connect Squarespace, PayTraQer shows an Express Settings screen. This is a quick way to get a safe default setup.
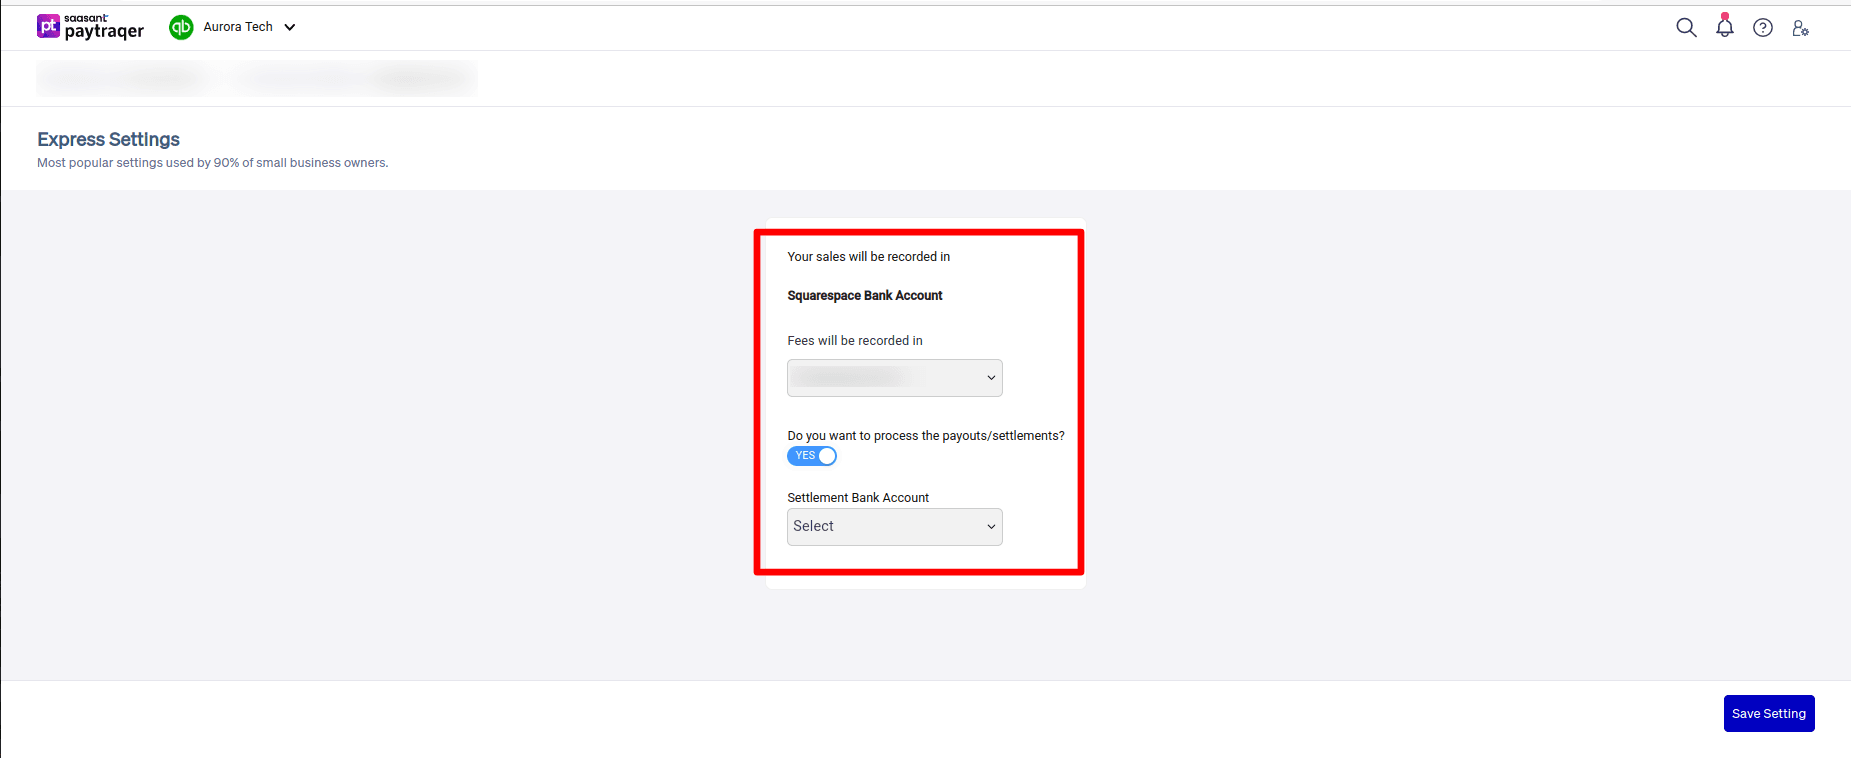
You will see:
Your sales will be recorded in
Select your Squarespace Bank Account.
This is a clearing bank account used to hold Squarespace sales and fees before payouts.
Fees will be recorded in
Choose the expense or bank account where Squarespace fees should be recorded.
Most users point this to a dedicated Squarespace Fees expense account.
Do you want to process the payouts / settlements
Turn On if you want PayTraQer to create transfer entries that move money from the Squarespace clearing bank to your real checking account
Turn Off if you prefer to manage payouts manually in QuickBooks.
Settlement Bank Account
If payouts are on, choose the checking account that receives your Squarespace deposits.
For multi-currency, you should have separate settlement accounts per currency.
Click Save Setting to continue.
After this, PayTraQer will automatically download up to the last 60 days of Squarespace transactions. You can bring in older data later with the historical download option.
Download historical Squarespace Transactions
After your settings are in place:
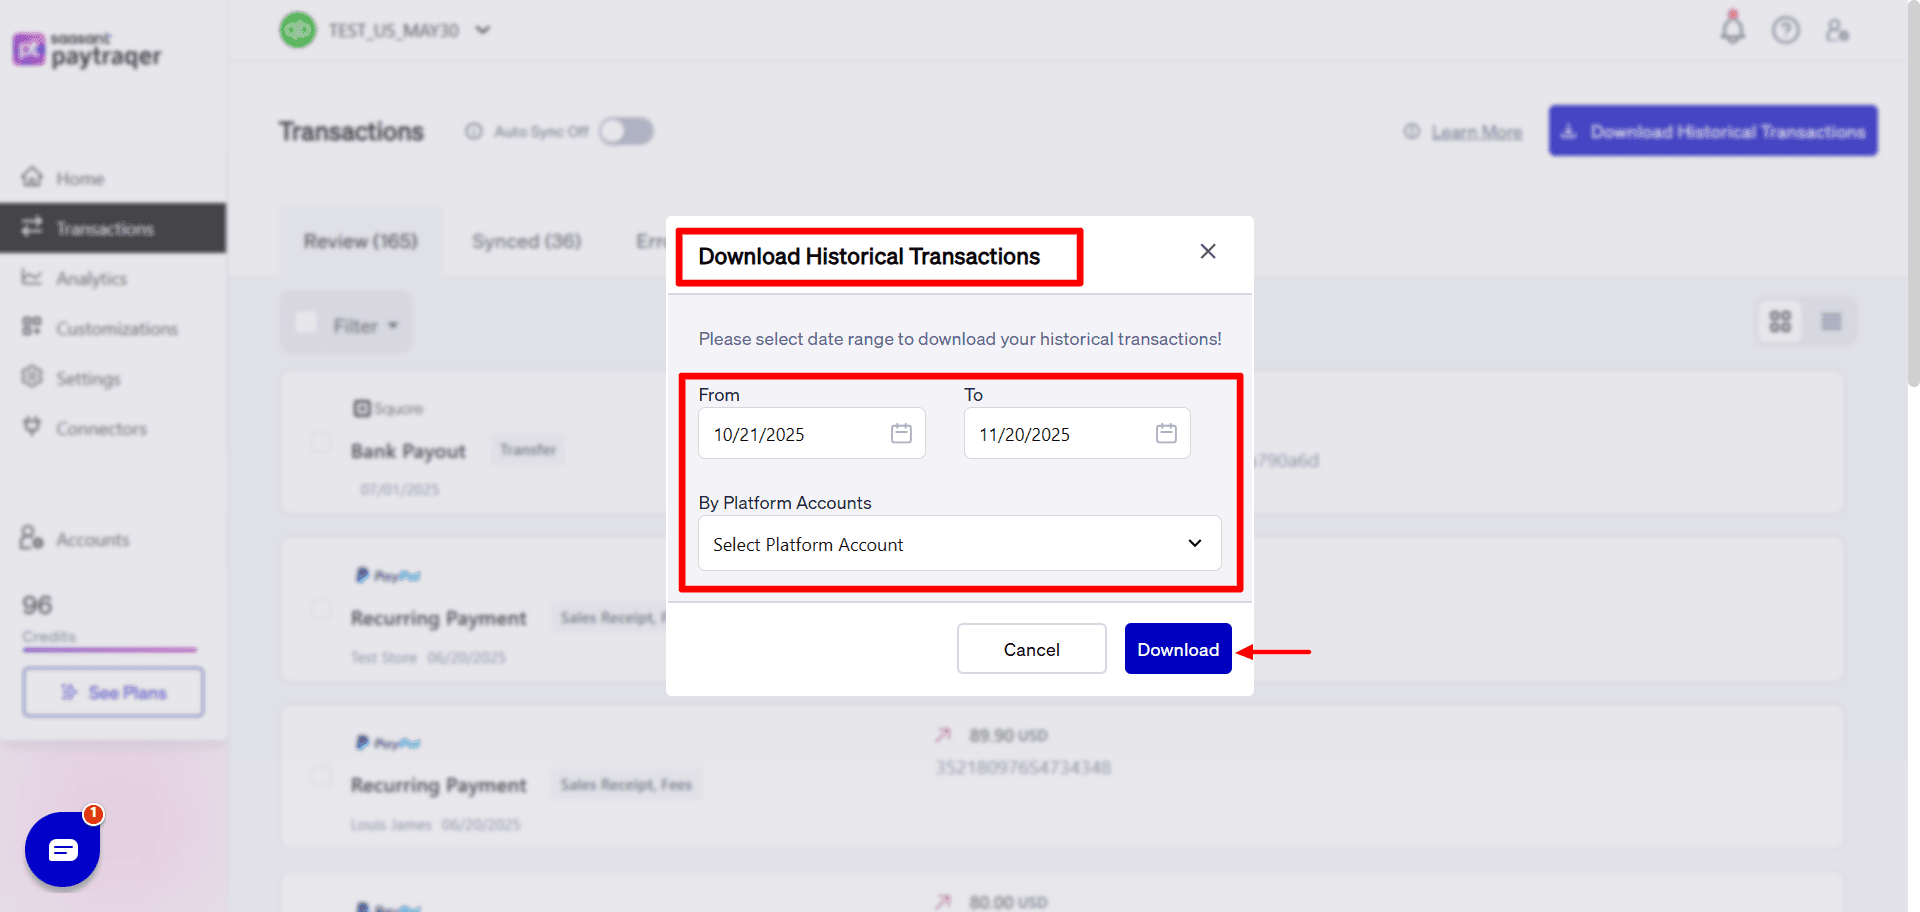
Go to the Transactions screen in PayTraQer.
Click Download Historical Transactions.
Choose your date range for past Squarespace orders.
Download. PayTraQer will show these records in the Review tab.
Review a few sample transactions, then select and click Sync to post them to QuickBooks.
Use smaller ranges when you test, then bring in larger ranges once you are comfortable.
Turn on Auto Sync
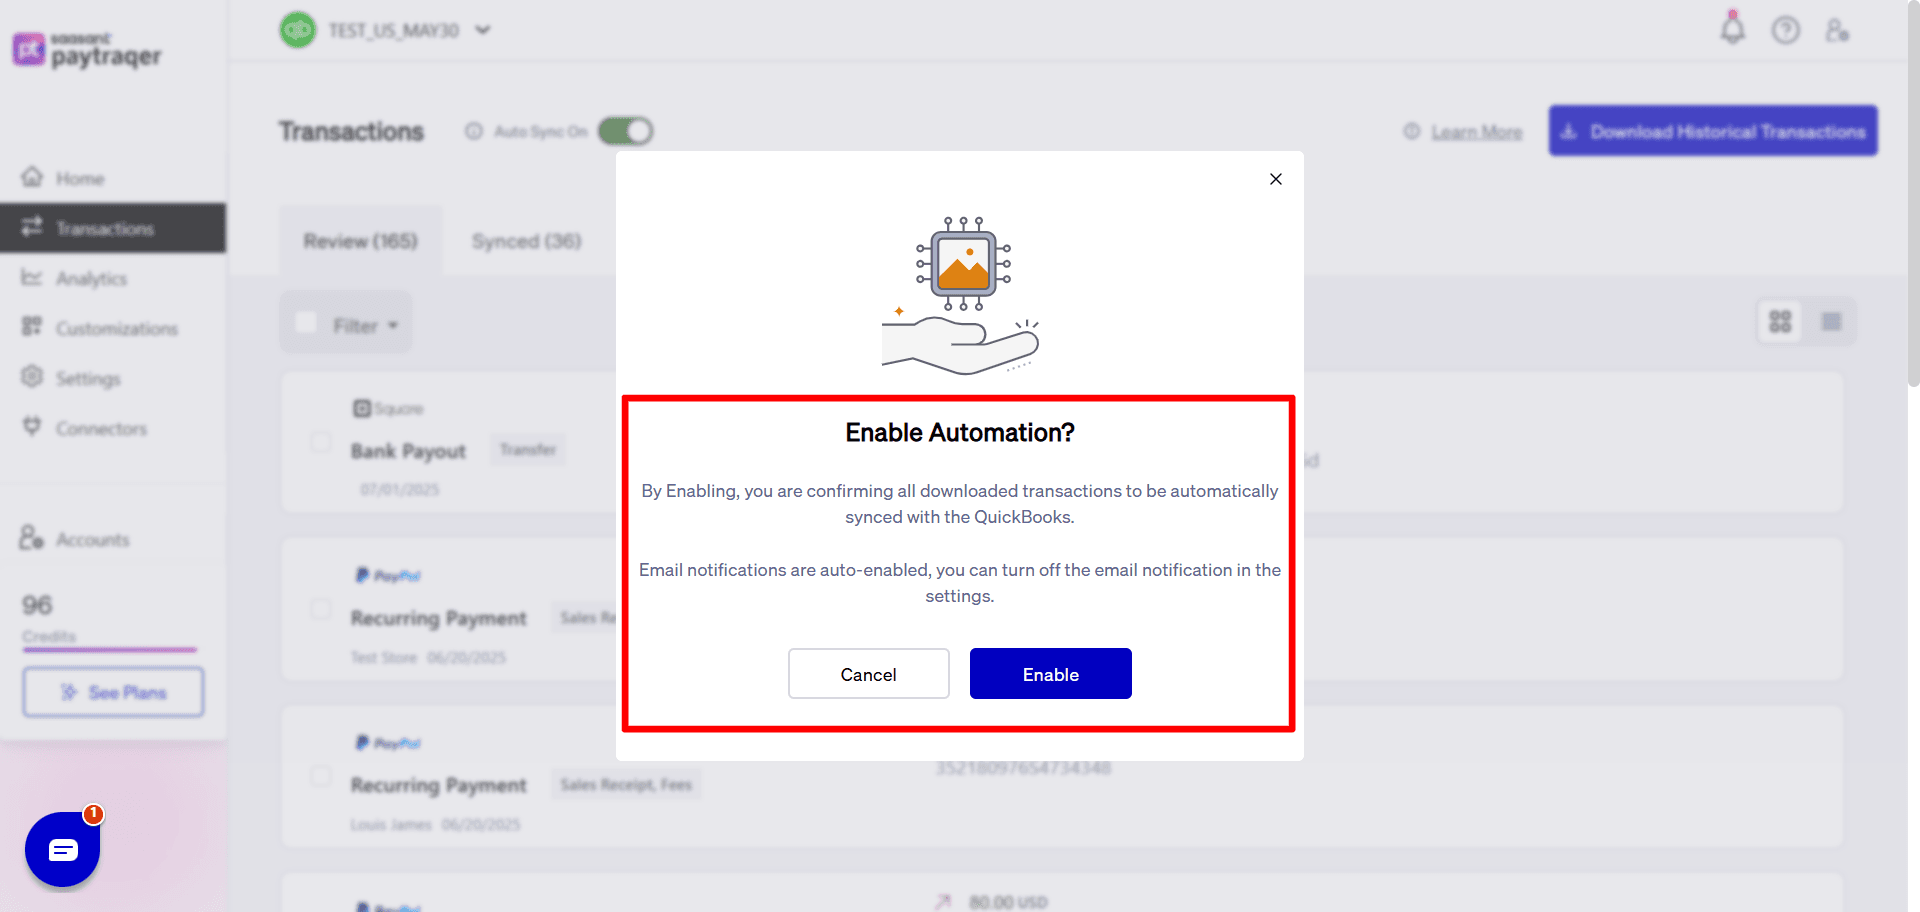
When you are happy with how entries look in QuickBooks:
In PayTraQer, open Settings → General / Automation (or the Auto Sync toggle in the connector area).
Turn Auto Sync to On.
Set the sync interval that works for you, for example every hour.
From now on, new Squarespace orders, refunds, and fees will be pulled in and synced automatically.
Sales settings
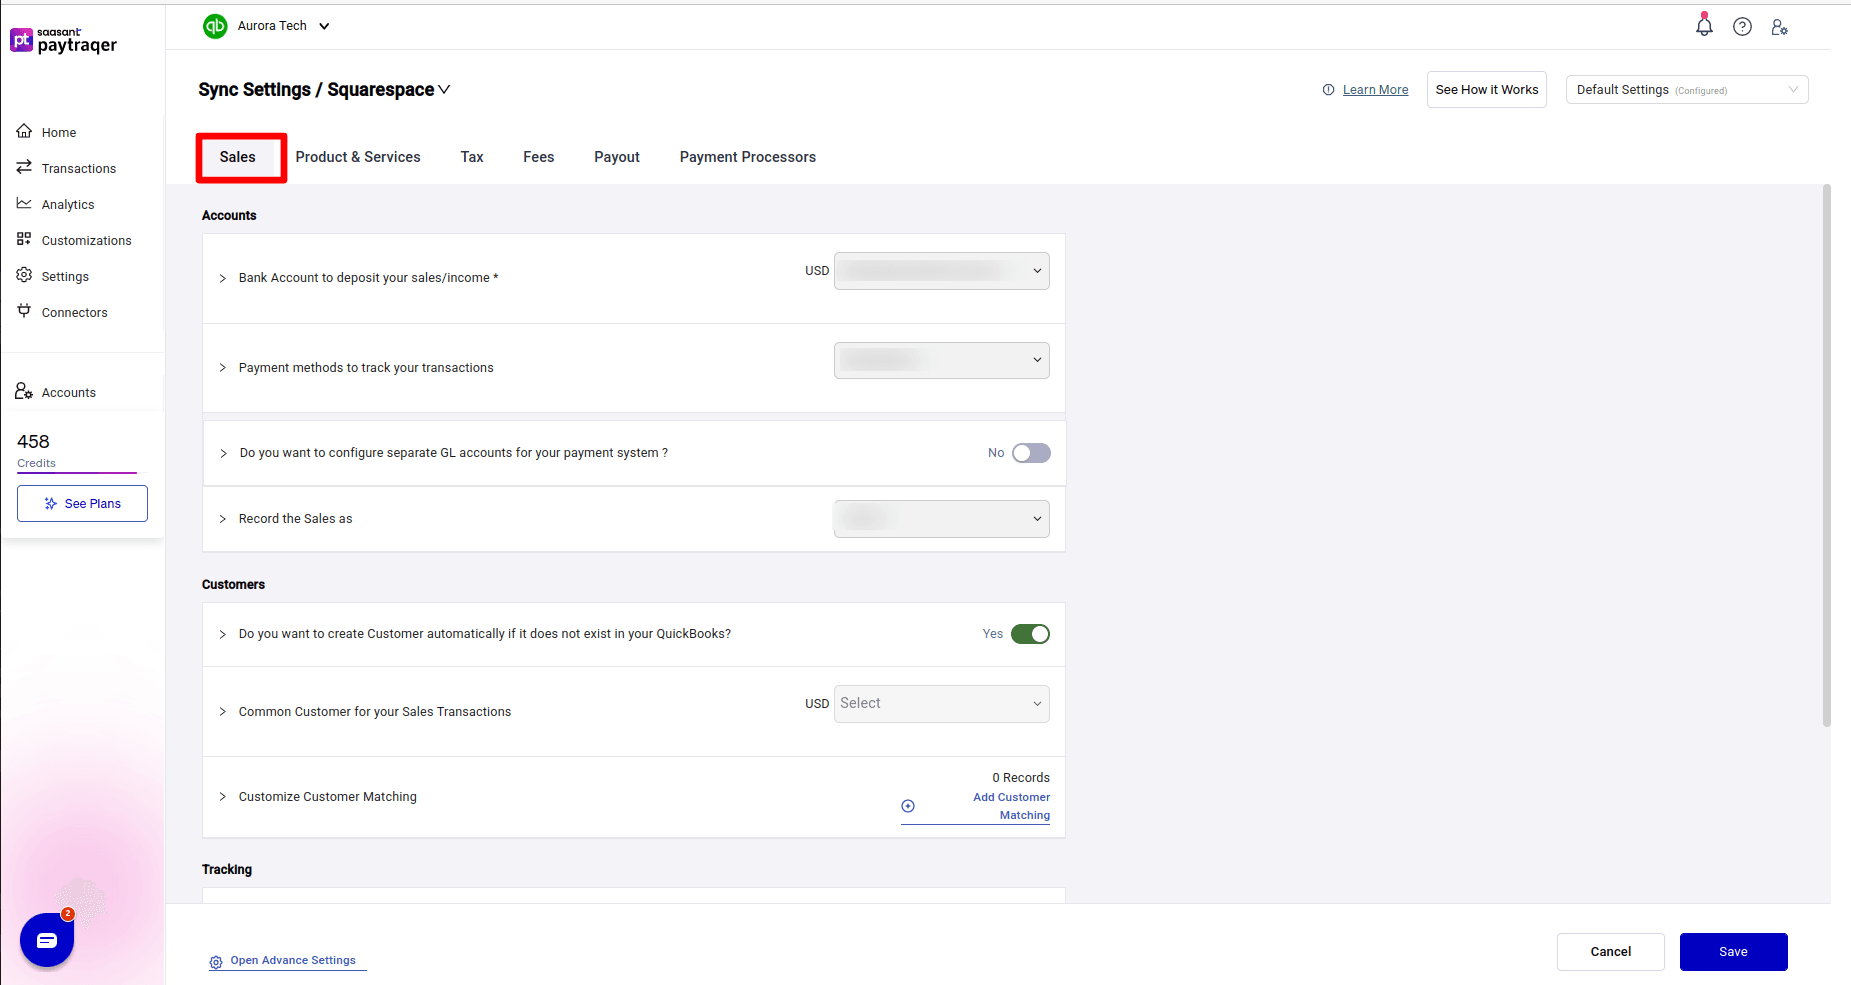
Use this tab to control how sales and customers are created.
Accounts
Bank Account to deposit your sales/income
Keep this as your Squarespace Bank Account per currency.
All Squarespace sales and related fees should hit this clearing account.
Payment methods to track your transactions
Set to Squarespace so the Payment Method on QuickBooks sales is clear.
Do you want to configure separate GL accounts for your payment system
Leave No if Squarespace is your only source.
Turn On only if you later link more processors and want different posting accounts for each.
Record the Sales as
Choose Sales Receipt if Squarespace charges customers at the time of order.
Choose Invoice if you need open invoices and separate payments.
Customers
Do you want to create Customer automatically if it does not exist in your QuickBooks
Keep Yes if you want one customer per buyer.
Turn Off if you prefer to use a common customer.
Common Customer for your Sales Transactions
Optional. Pick a single customer (for example, “Squarespace Online Sales”) if you want all sales under one name.
Customize Customer Matching
Add rules when buyer names in Squarespace do not match exactly with QuickBooks customer names.
Tracking
Location/Department for your Sales transactions
Set this if you use locations or departments in QuickBooks.
Class for your Sales transactions
Set this if you track classes, for example “Online Store”.
After editing, click Save.
Product & Services settings
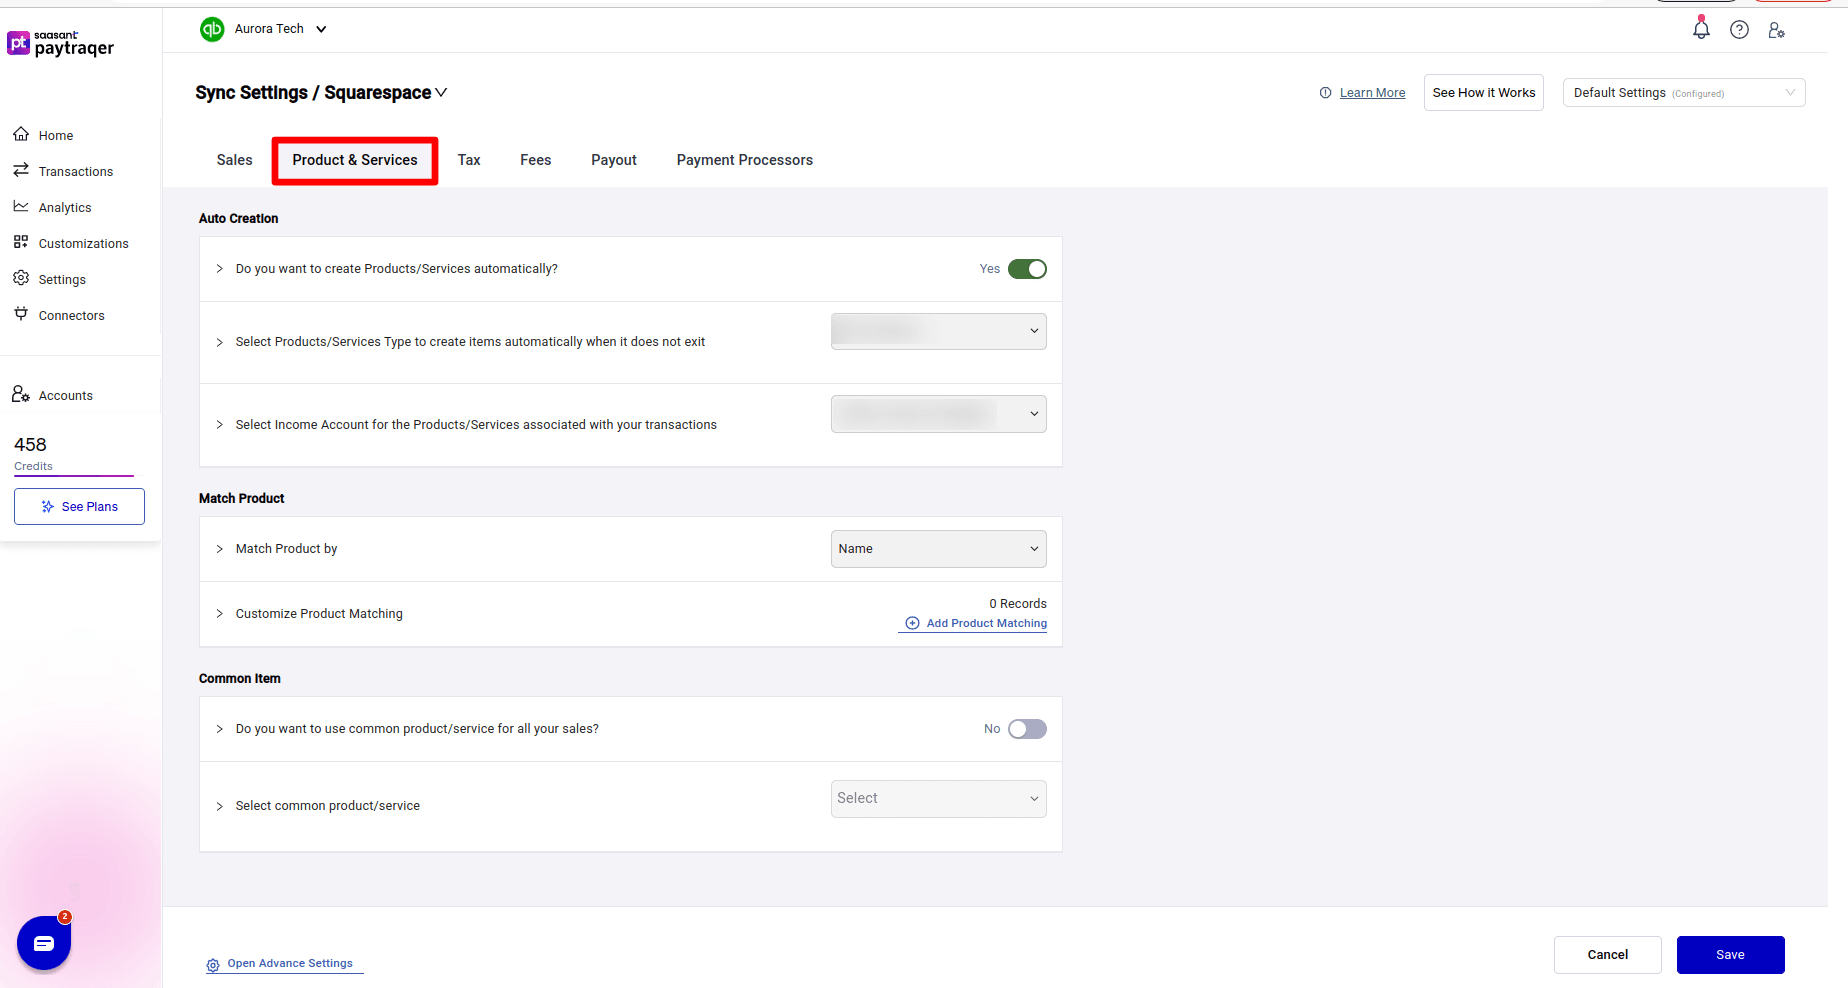
Use this tab to manage how items from Squarespace map to QuickBooks Products/Services.
Auto Creation
Do you want to create Products/Services automatically
Turn On if you want PayTraQer to create new items in QuickBooks when it does not find a match.
Turn Off if you prefer to manage items yourself or use a single common item.
Select Products/Services Type to create items automatically
Choose Non Inventory or Service depending on how you track your items.
Select Income Account for the Products/Services associated with your transactions
Choose the income account that new items should use, for example Sales of Product Income.
Match Product
Match Product by
Default is Name.
Change to SKU if both Squarespace and QuickBooks use reliable SKUs.
Customize Product Matching
Add mapping rules when item names differ between Squarespace and QuickBooks.
Common Item
Do you want to use common product/service for all your sales
Turn On if you only need sales totals and do not care about item detail.
Then choose Select common product/service as the default item.
Click Save after making changes.
Tax settings
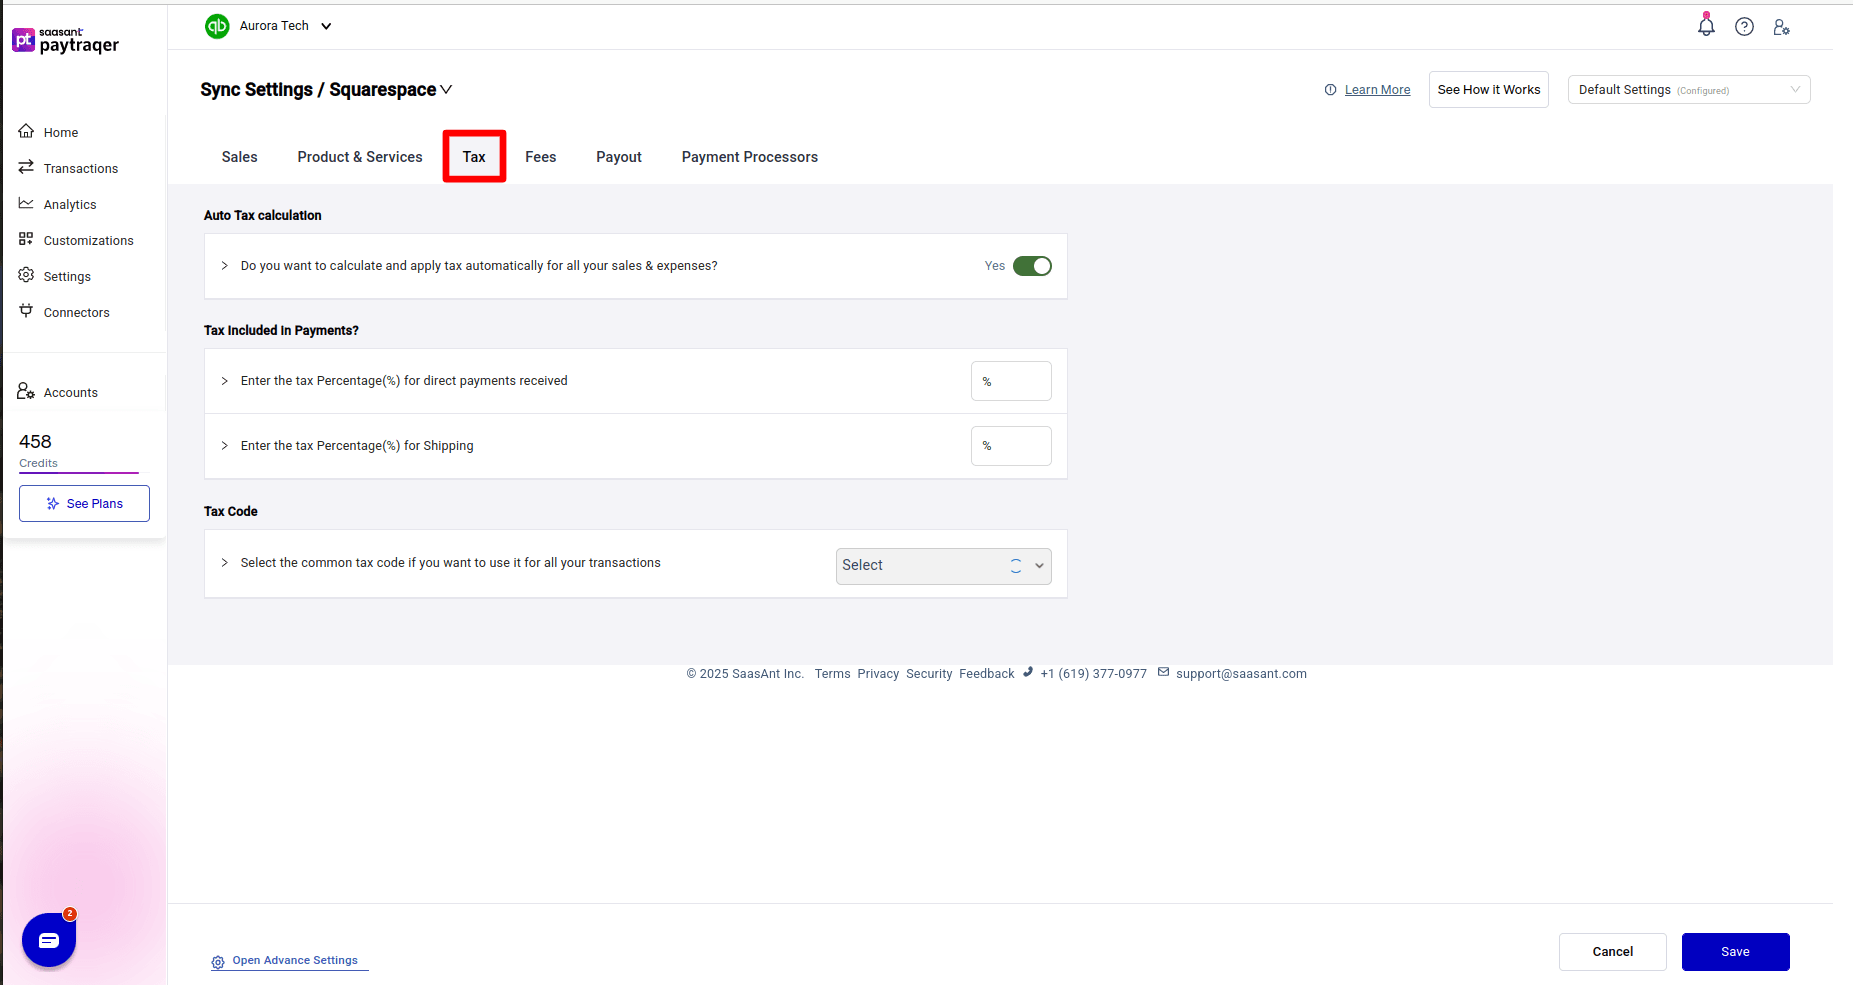
Use this tab to control how sales tax is calculated and applied.
Do you want to calculate and apply tax automatically for all your sales & expenses
Keep Yes in most cases so PayTraQer can apply tax codes based on amounts and percentages.
Enter the tax Percentage(%) for direct payments received
Use this when your Squarespace prices are tax inclusive and you want a default rate.
Enter the tax Percentage(%) for Shipping
Set a rate if shipping is taxable in your region.
Select the common tax code if you want to use it for all your transactions
Choose a default tax code when you want a single code instead of automatic detection.
Always test a few orders after changing tax settings to confirm the tax code and amount in QuickBooks.
Fees settings
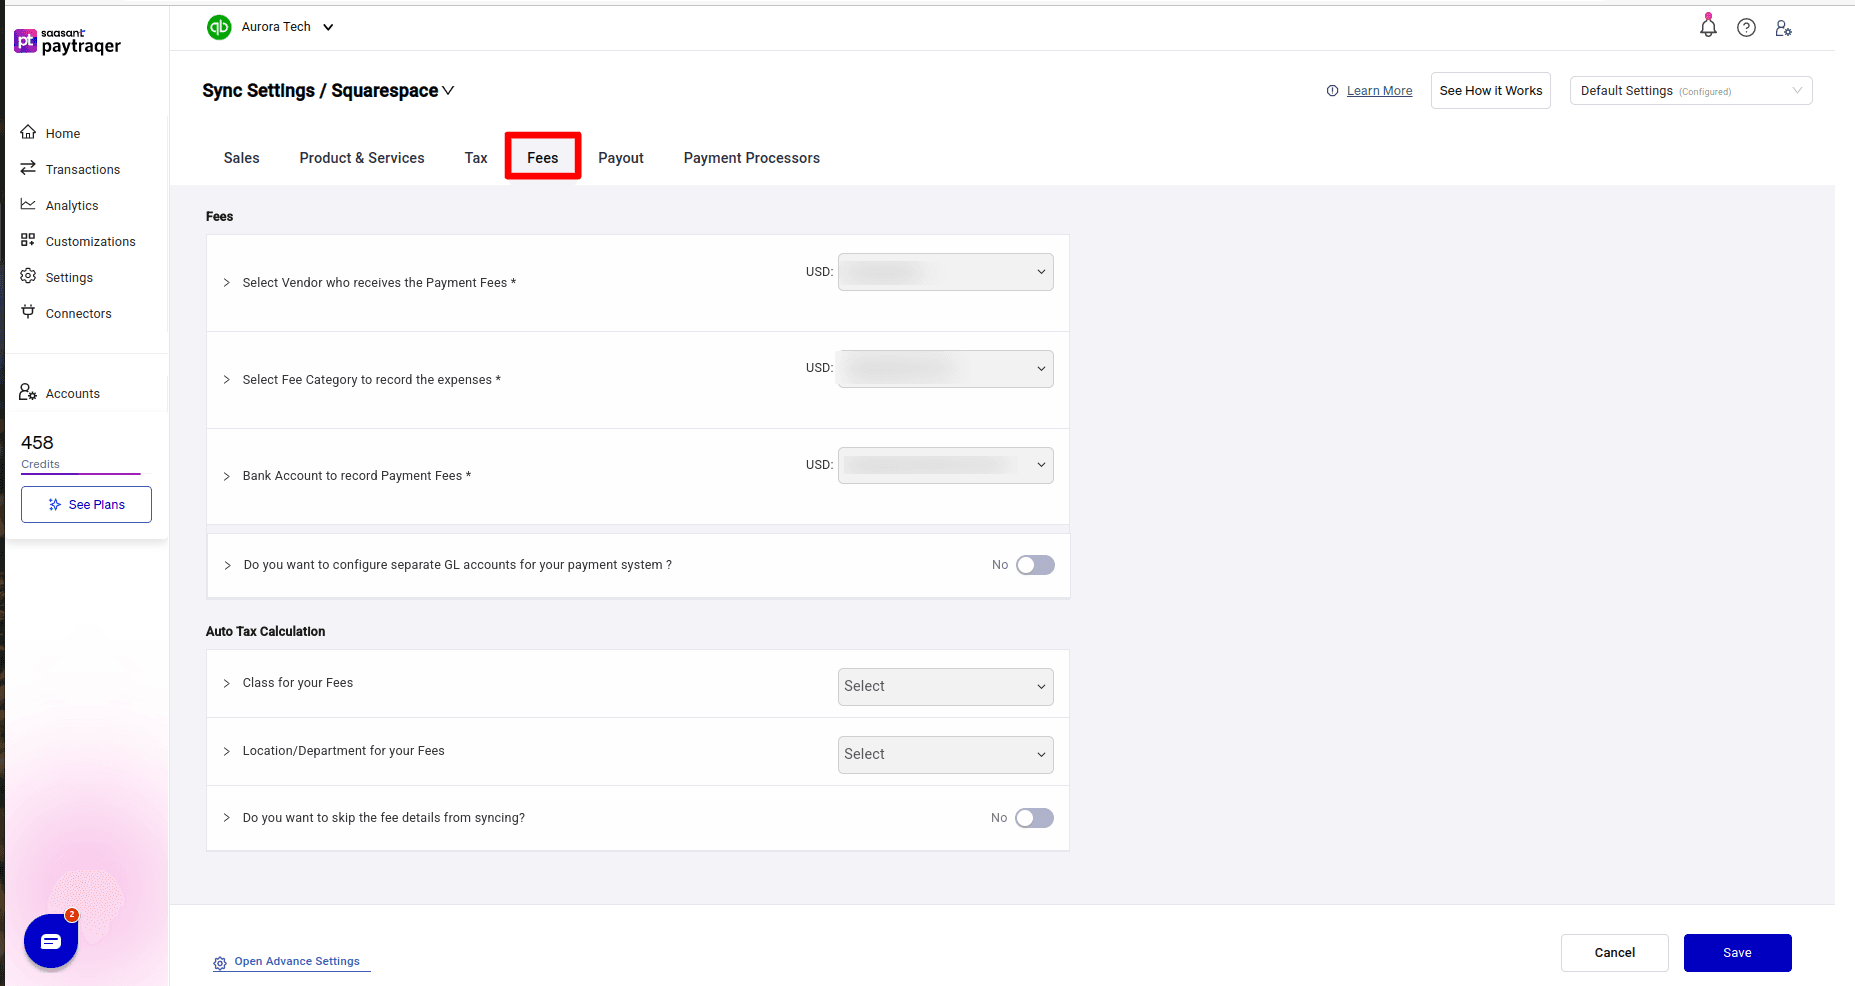
Use this tab to map Squarespace fees to QuickBooks.
Select Vendor who receives the Payment Fees
Choose a vendor such as Squarespace.
Select Fee Category to record the expenses
Pick your fee expense account, for example Squarespace Fees.
Bank Account to record Payment Fees
Normally set to the same Squarespace Bank Account used in Sales.
Do you want to configure separate GL accounts for your payment system
Leave this No unless you need different accounting by processor.
Class for your Fees and Location/Department for your Fees
Set these if you report fees by class or location.
Do you want to skip the fee details from syncing
Keep No if you want detailed fee entries.
Turn On only when you do not need fee line items.
Save your changes.
Payout settings
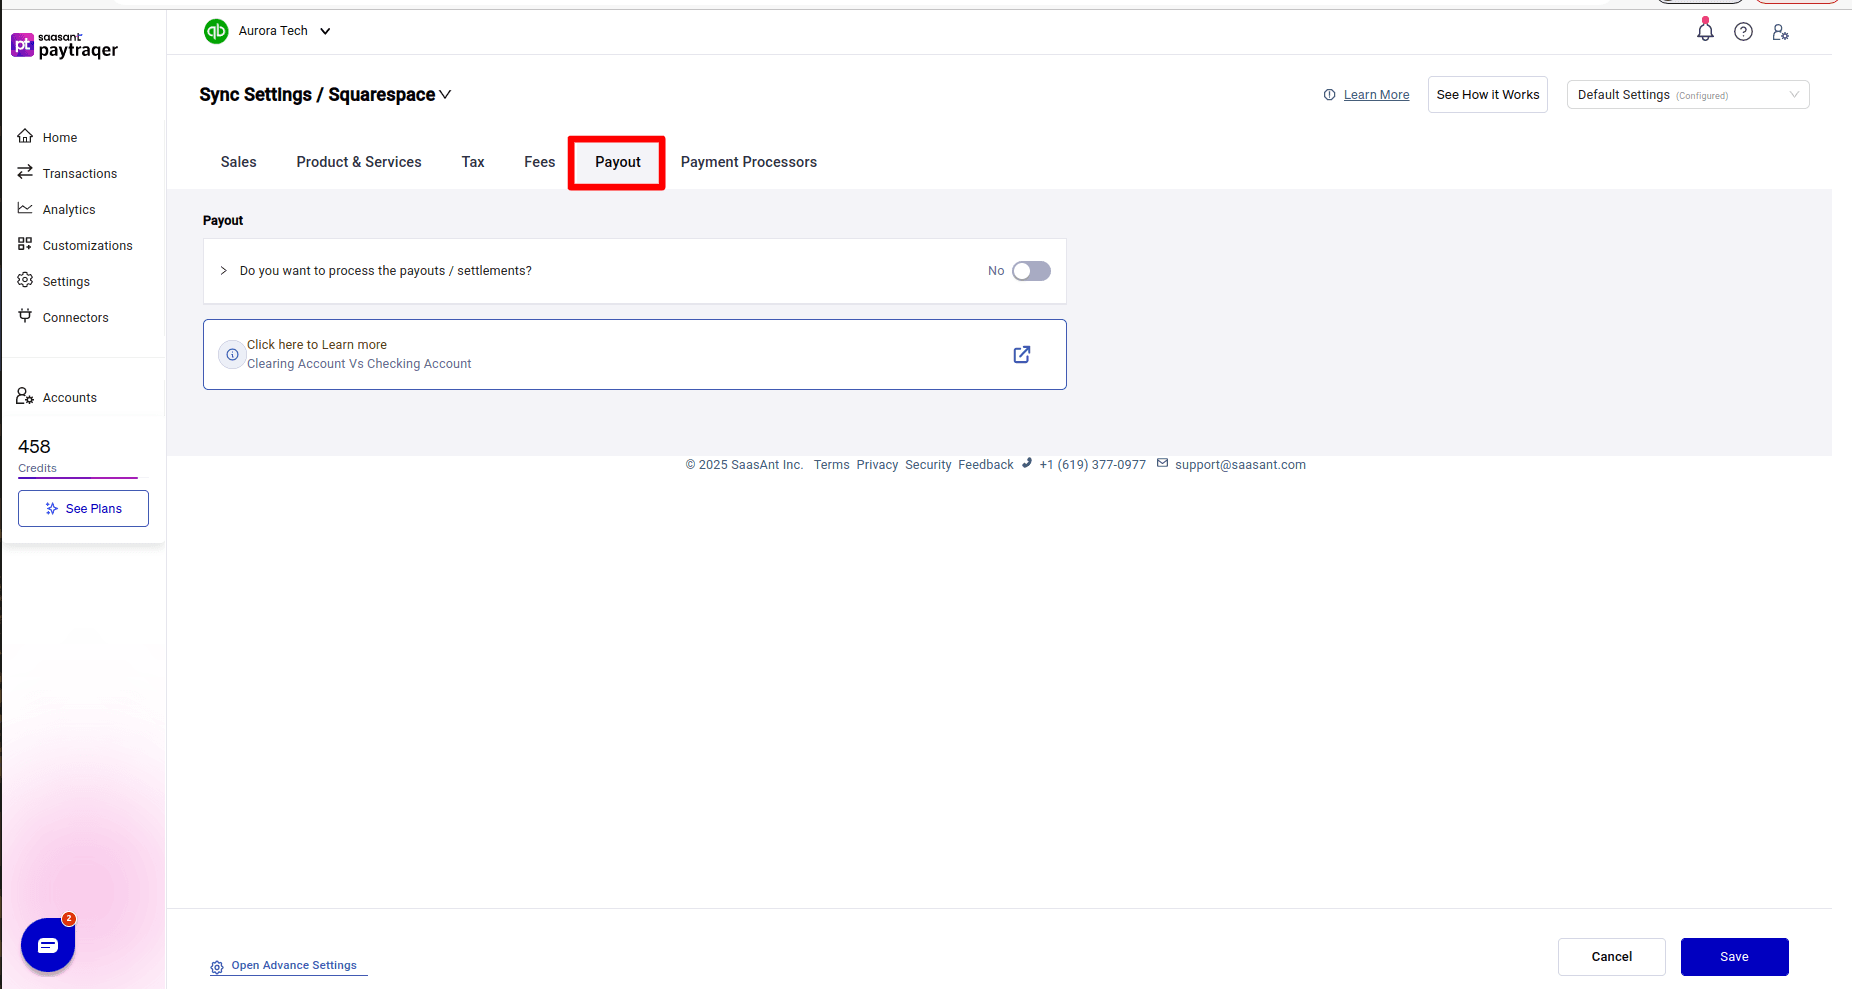
Use this tab if you want PayTraQer to create payout transfers that match your bank deposits.
Do you want to process the payouts / settlements
Turn On to create Bank Transfer entries that move balances from your Squarespace clearing account to your checking account.
Leave Off if you prefer to clear the account manually.
There is also a link to a help article on Clearing Account vs Checking Account, which explains the difference:
The clearing account holds all Squarespace sales and fees inside QuickBooks.
The checking account is your real bank account that receives payouts.
Transfers move money from clearing to checking so the clearing account can reconcile to zero over time.
For multi-currency, you should set separate clearing and settlement bank accounts per currency.