How to Delete Matched/Reconciled Transaction using the SaasAnt Transactions in QuickBooks?
January 1, 2025
What is a matched Transaction in QuickBooks?
A transaction such as a sales receipt or expense that is matched (Reconciled) with your checking account in QuickBooks Online is referred to as a "Matched Transaction." This term signifies that the transaction has been reconciled and properly aligned with the corresponding checking account in QuickBooks.
Why matched transactions cannot be deleted using SaasAnt Transactions?
The transaction that has been matched with the checking account was not exposed with any third-party application.
When you try to delete the matched transactions, you will receive the following error
"You cannot delete this transaction because it is matched to a transaction that was downloaded into a different account."
How to find out if the transaction is matched or not?
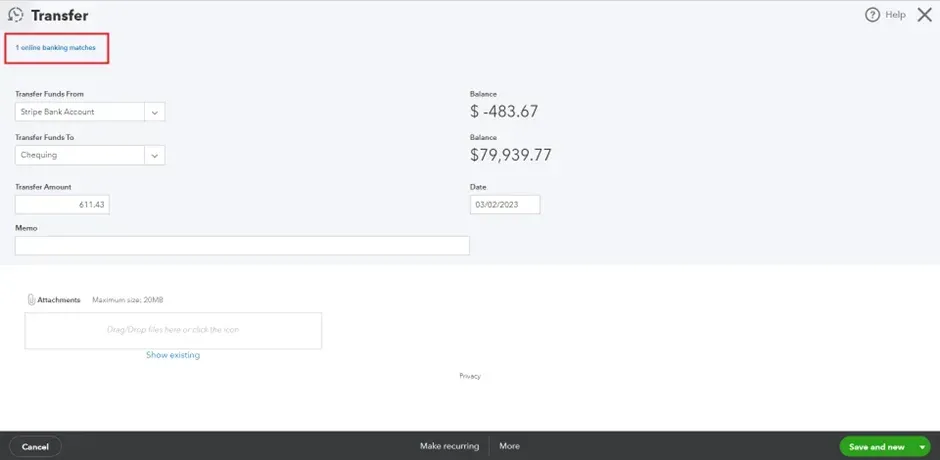
Please open a specific transaction that is generating the following error.
Please refer to the screenshot below, which displays the "1 online Banking Matches" option located at the top left corner of the transaction.
Step 1) Go to Bookkeeping then Transactions then select Bank Transactions or go to Banking
Step 2) Select the tile for the bank or credit card account from which you downloaded the transaction.
Step 3) Select the Categorized tab.
Step 4) Find the transaction you want to unmatch.
Step 5) Select the blue transaction link in the Added or Matched column to see the matched transaction.
Step 6) Select Undo from the Action column
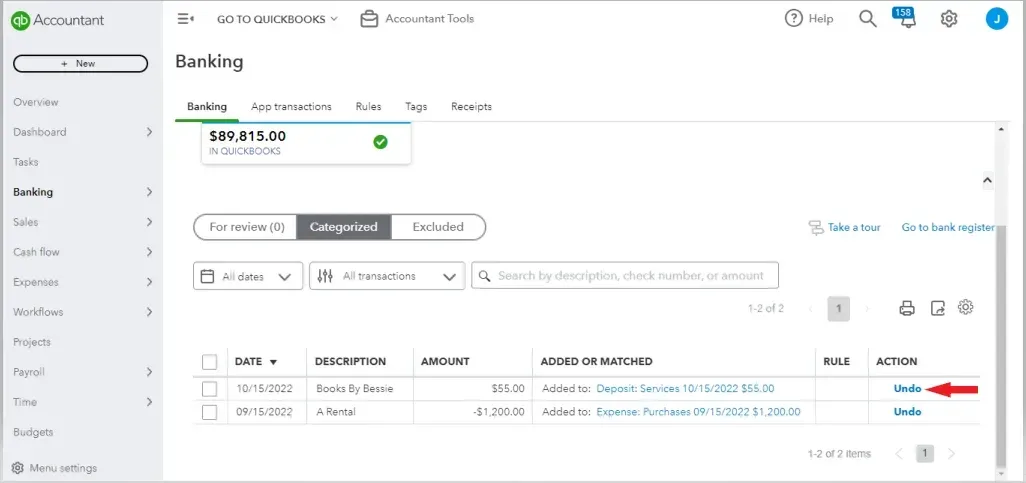
Note: Once the transaction is unmatched in your QuickBooks, you can start deleting the transaction using SaasAnt Transactions online application seamlessly.
There are two methods available to delete multiple QuickBooks Online transactions using the SaasAnt Transactions (Online) application.
A) How to delete Transactions associated with Uploaded Files?
Step 1) Please log in to the SaasAnt app.
Step 2) Select the Delete functionality.
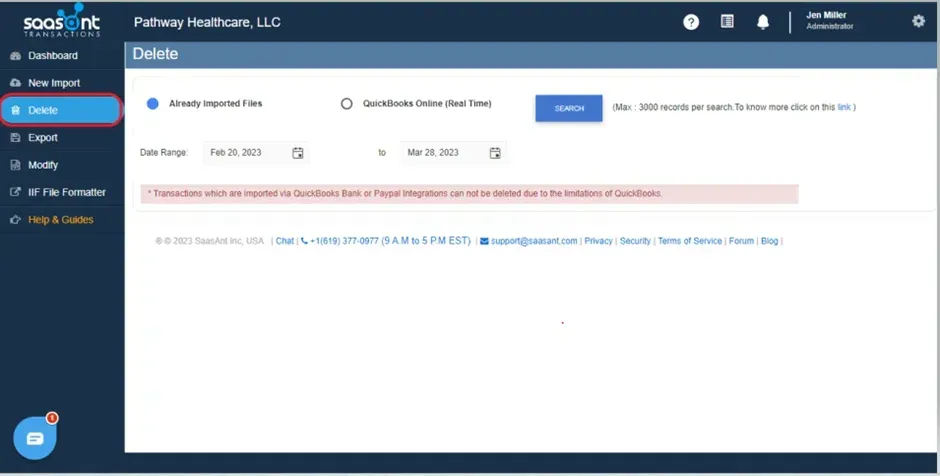
Step 3) Select the "Already Imported Files" Option in the delete screen.
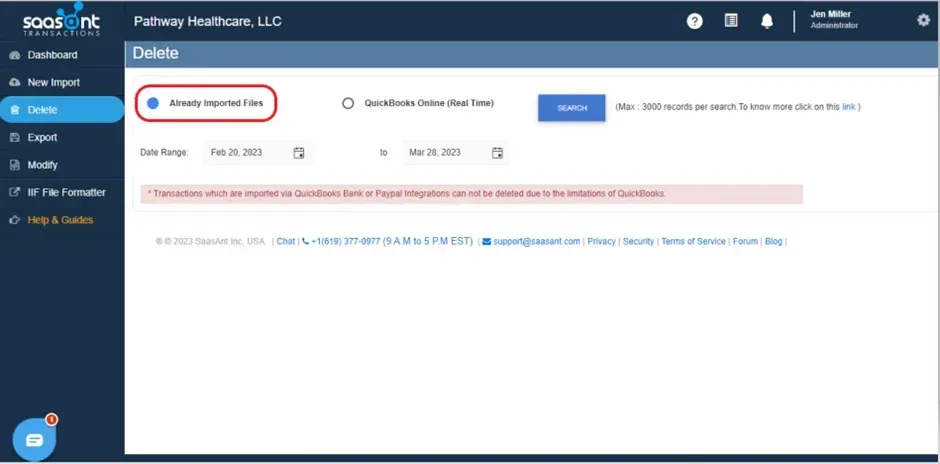
Step 4) Select the desired date range using the calendar and then click the Search button.
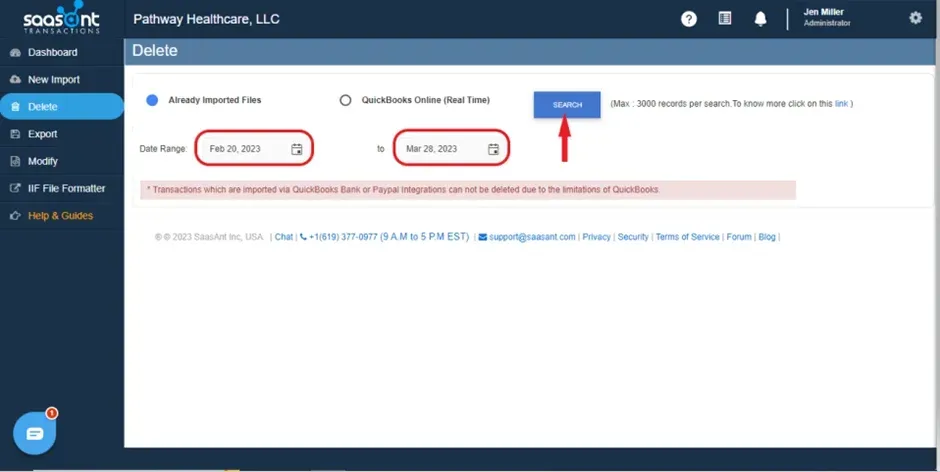
Note: You will receive search results based on the provided date range, organized chronologically on a calendar basis.
Step 5) Select the Delete button to delete the selected transactions. The chosen transactions will be removed from QuickBooks Online.
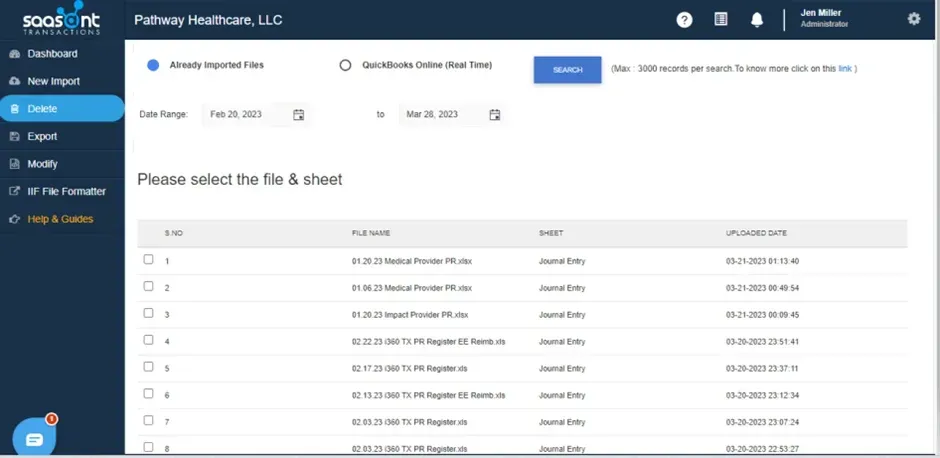
Note: The successfully deleted transactions will be displayed after the deletion process.
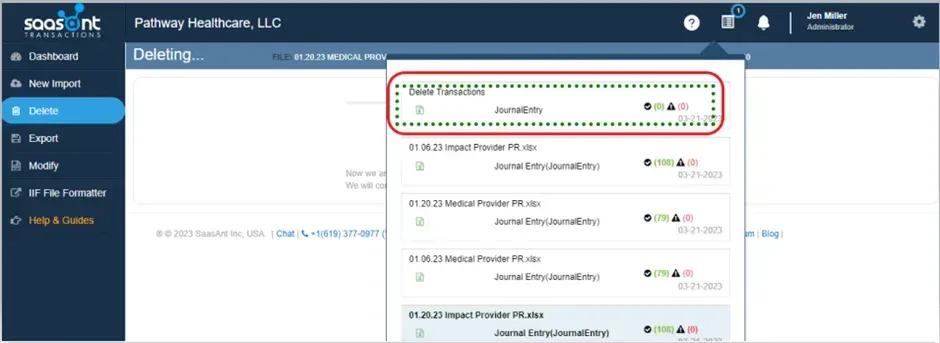
B) To delete QuickBooks Online transactions in real-time using the SaasAnt application, follow these steps
If you have manually created transactions or transactions from other sources in QuickBooks Online, you can follow the instructions below to delete those transactions.
Step 1) Log in to SaasAnt Transaction Online
Step 2) Select the Delete function
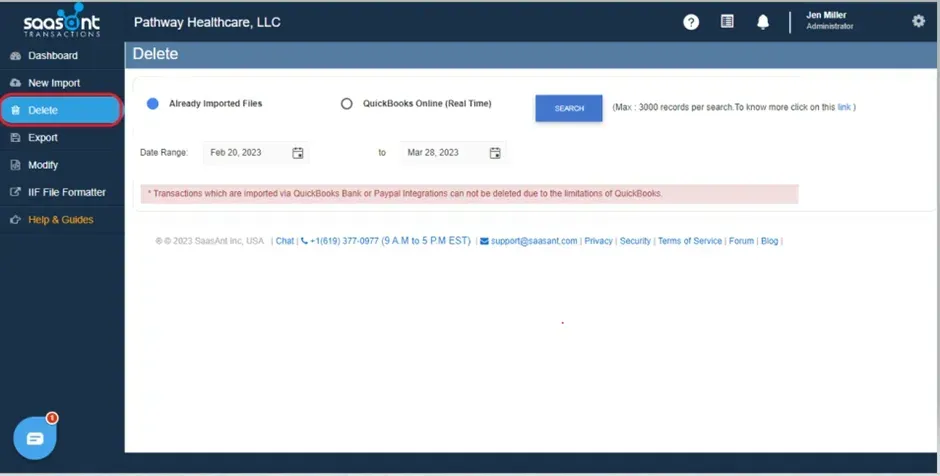
Step 3) Select the "QuickBooks Online (Real-Time)" option in the delete screen.
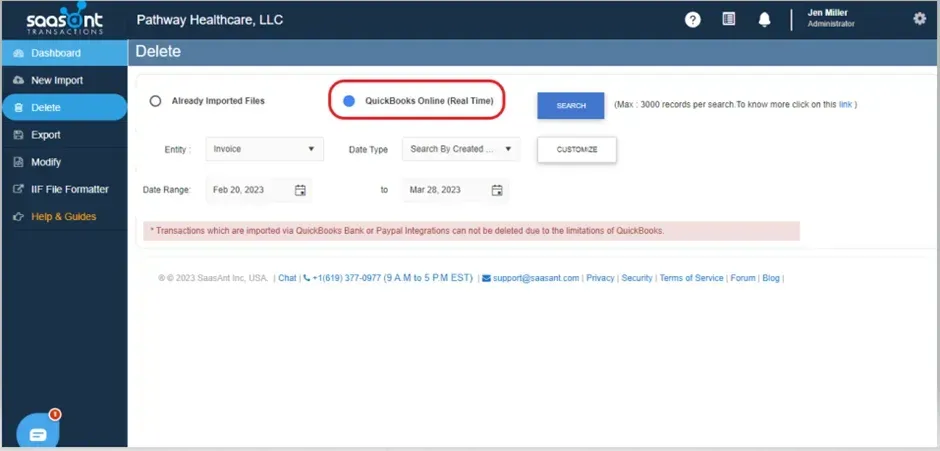
Step 4) Select the QuickBooks Transaction Entity Type (Entity) as Journal Entry or Bills
Step 5) Choose the date range using the calendar and click the Search button.
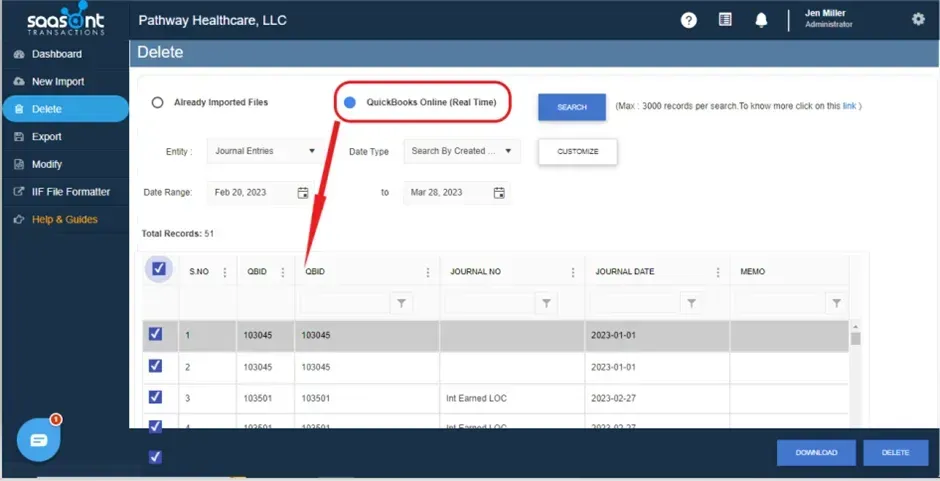
Step 6) Select the Delete button to remove the selected transactions. The chosen transactions will be deleted from QuickBooks Online
Note: The successfully deleted transactions will be displayed after the deletion process.
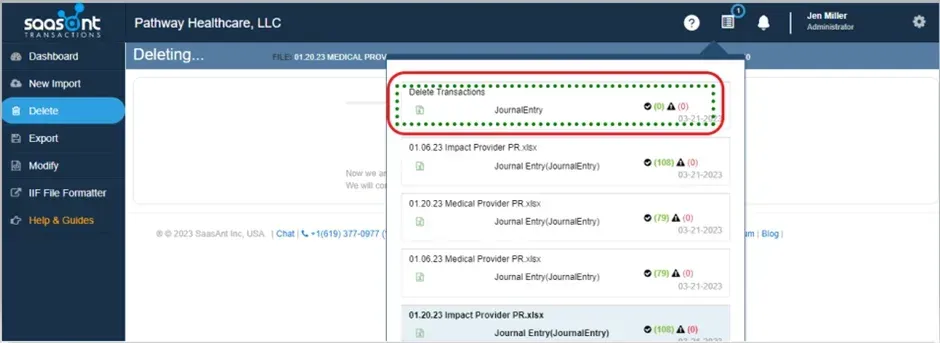
Key Area: Search Criteria.
Search By Created Date: This refers to searching for transactions or list entities based on their creation date in QuickBooks. The search criteria are based on the date when the transaction or entity was originally created in QuickBooks.
Search By Transaction Date: This method involves searching for transactions based on the date the transaction occurred. It typically refers to the specific date associated with the transaction, such as the invoice date or bill date.
Search By Last Updated Date: This search criterion involves searching for transactions or list entities based on the date they were last modified or updated in QuickBooks. It focuses on the date when any changes or updates were made to the transaction or entity within the QuickBooks system.
You can reach out to us at support@saasant.com if you are stuck somewhere. You can also schedule a personalized free demo with us if you need better clarity to connect with us by clicking Demo
How to delete the Matched/Reconciled transcation using (New user Interface 2.0)
What is a matched Transaction in QuickBooks?
A transaction such as a sales receipt or expense that is matched (Reconciled) with your checking account in QuickBooks Online is referred to as a "Matched Transaction." This term signifies that the transaction has been reconciled and properly aligned with the corresponding checking account in QuickBooks.
Why matched transactions cannot be deleted using SaasAnt Transactions?
The transaction that has been matched with the checking account was not exposed with any third-party application.
When you try to delete the matched transactions, you will receive the following error
"You cannot delete this transaction because it is matched to a transaction that was downloaded into a different account."
How to find out if the transaction is matched or not?
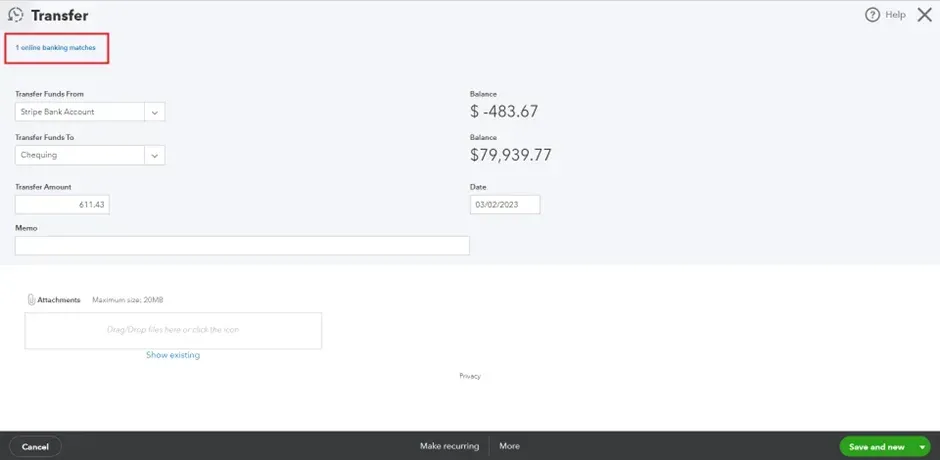
Please open a specific transaction that is generating the following error.
Please refer to the screenshot below, which displays the "1 online Banking Matches" option located at the top left corner of the transaction.
Step 1) Go to Bookkeeping then Transactions then select Bank Transactions or go to Banking
Step 2) Select the tile for the bank or credit card account from which you downloaded the transaction.
Step 3) Select the Categorized tab.
Step 4) Find the transaction you want to unmatch.
Step 5) Select the blue transaction link in the Added or Matched column to see the matched transaction.
Step 6) Select Undo from the Action column
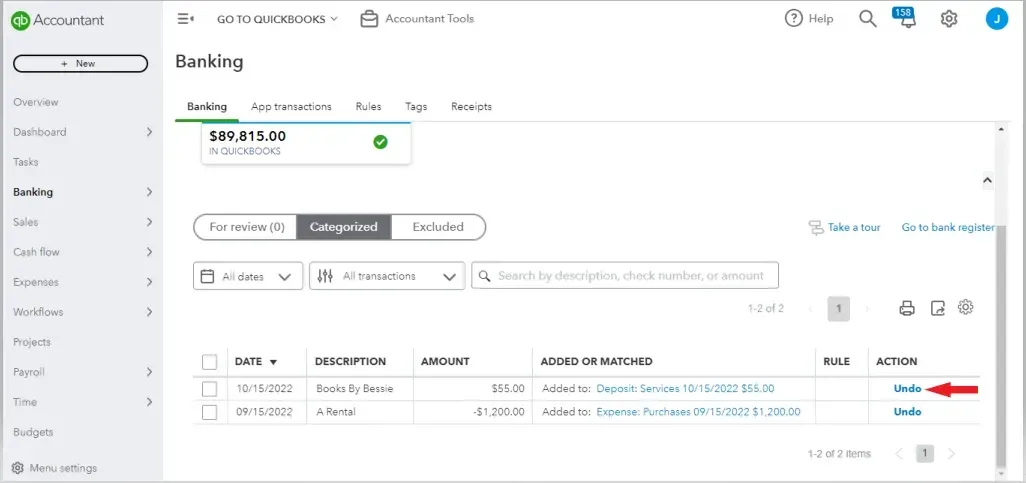
Note: Once the transaction is unmatched in your QuickBooks, you can start deleting the transaction using SaasAnt Transactions online application seamlessly.
Two methods are available to delete multiple QuickBooks Online transactions using the SaasAnt Transactions (Online) application.
A) How to delete Transactions associated with Uploaded Files?
Step 1) Please log in to the SaasAnt app.
Step 2) Select the Delete functionality in the left menu.
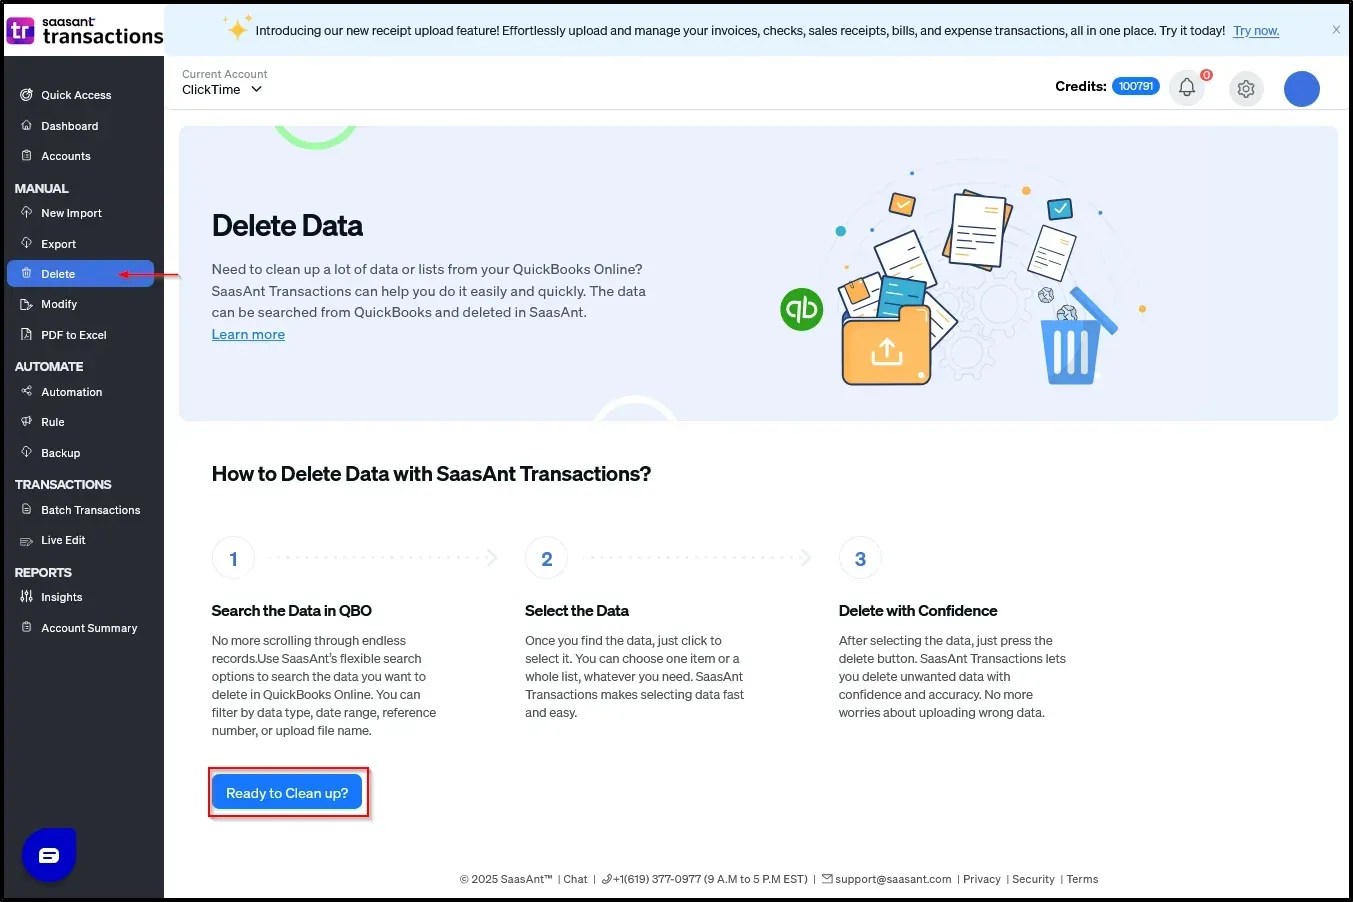
Step 3) Click "Ready to Clean up?"
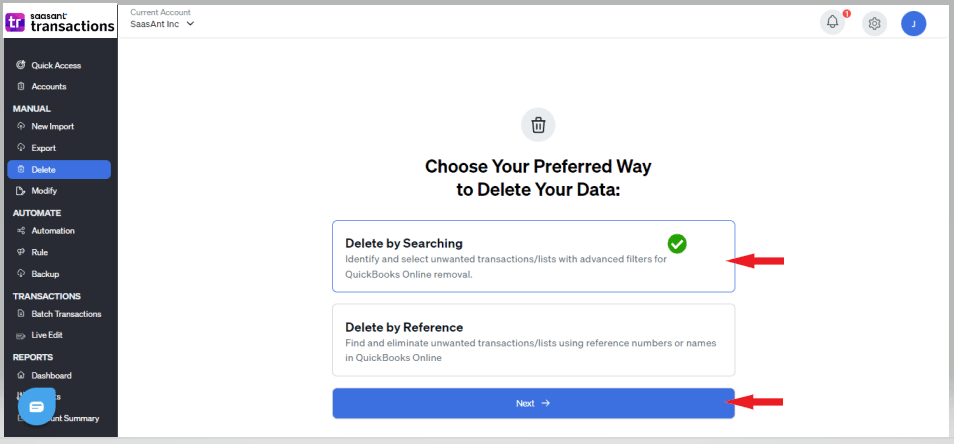
Step 4) There are two methods for deleting the transcation "Delete by Searching or Delete by Reference"
A) Delete by Searching
1: Delete by Searching
2: Click on Next
3: Select the QuickBooks Transaction Entity Type (Entity) as Journal Entry or Bills
4) Select the Date type as Search by Transaction date.
5) Choose the date range using the calendar and click the Search button.
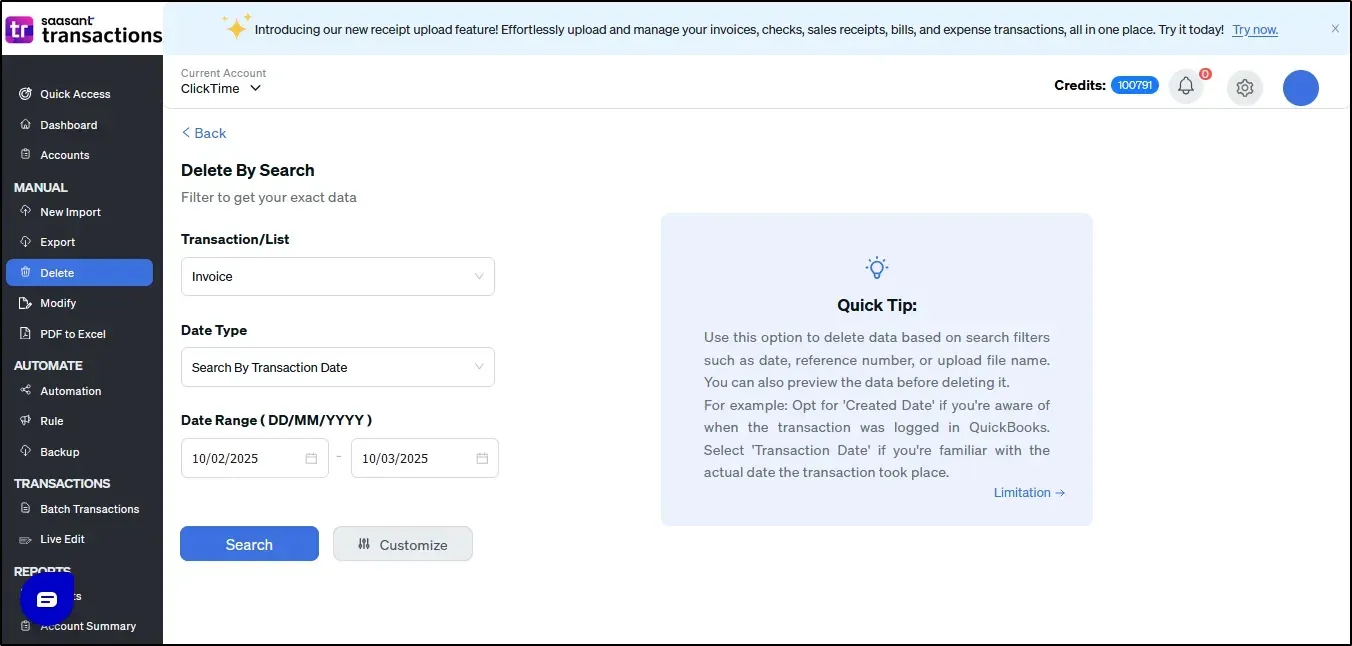
Step 6) Select the Delete button to remove the selected transactions. The chosen transactions will be deleted from QuickBooks Online
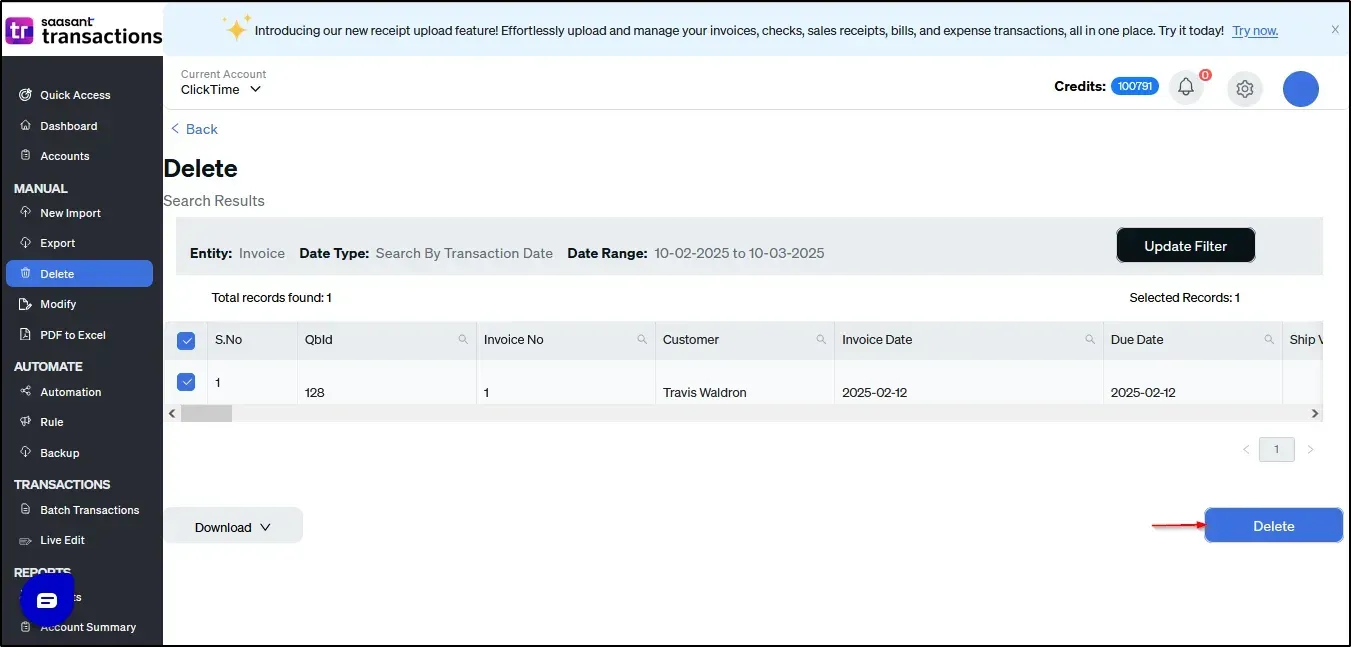
Note: The successfully deleted transactions will be displayed after the deletion process.
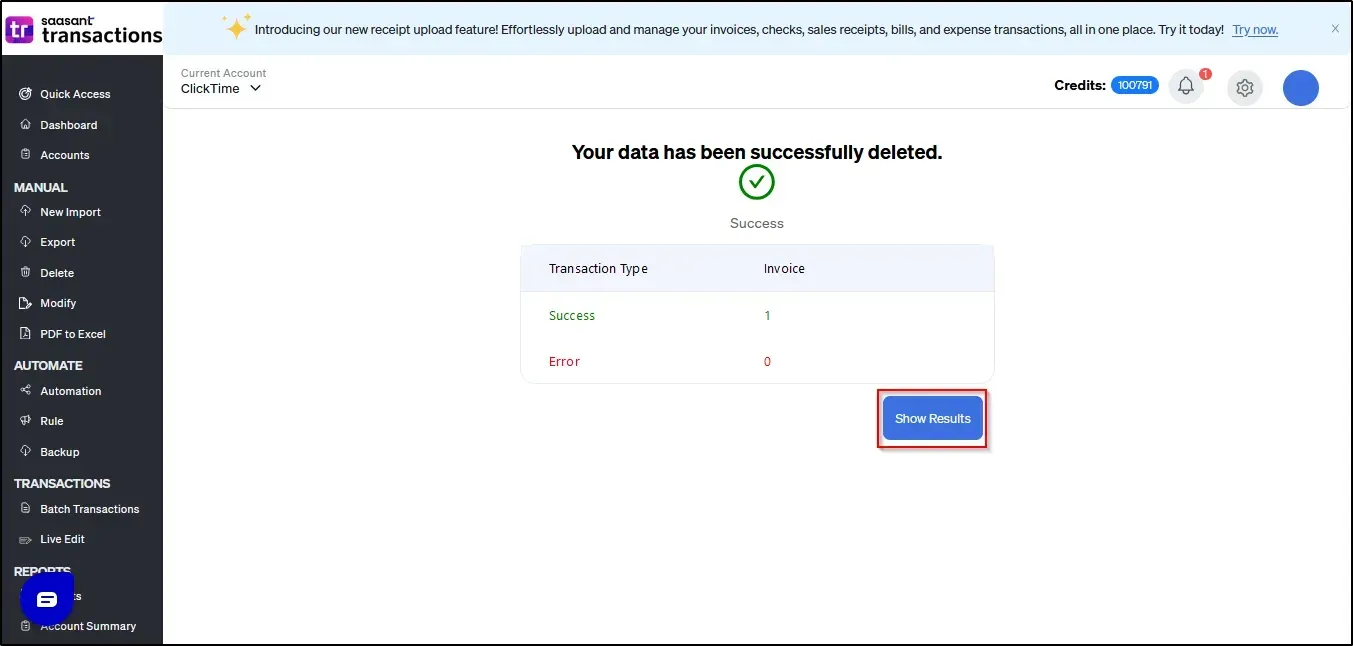
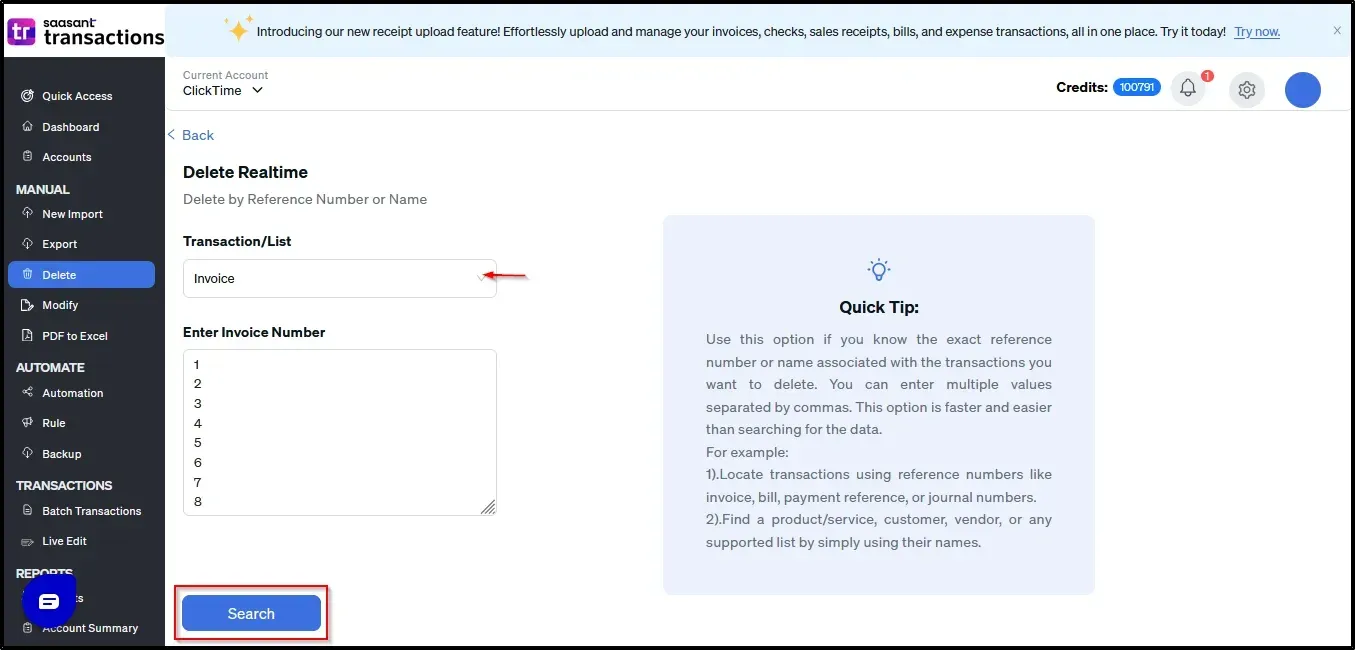
B) Delete by Reference Number or Name
1) Select the QuickBooks entity type Ex., Invoice, Bill or Journal Entry
2) In the reference number dialog box, enter the transaction number or reference number for the transaction you want to delete
Note: To search Multiple transactions enter the trasnaction number by hitting enter, there is NO limitation in entering the transaction number.
3) Click on the Search button
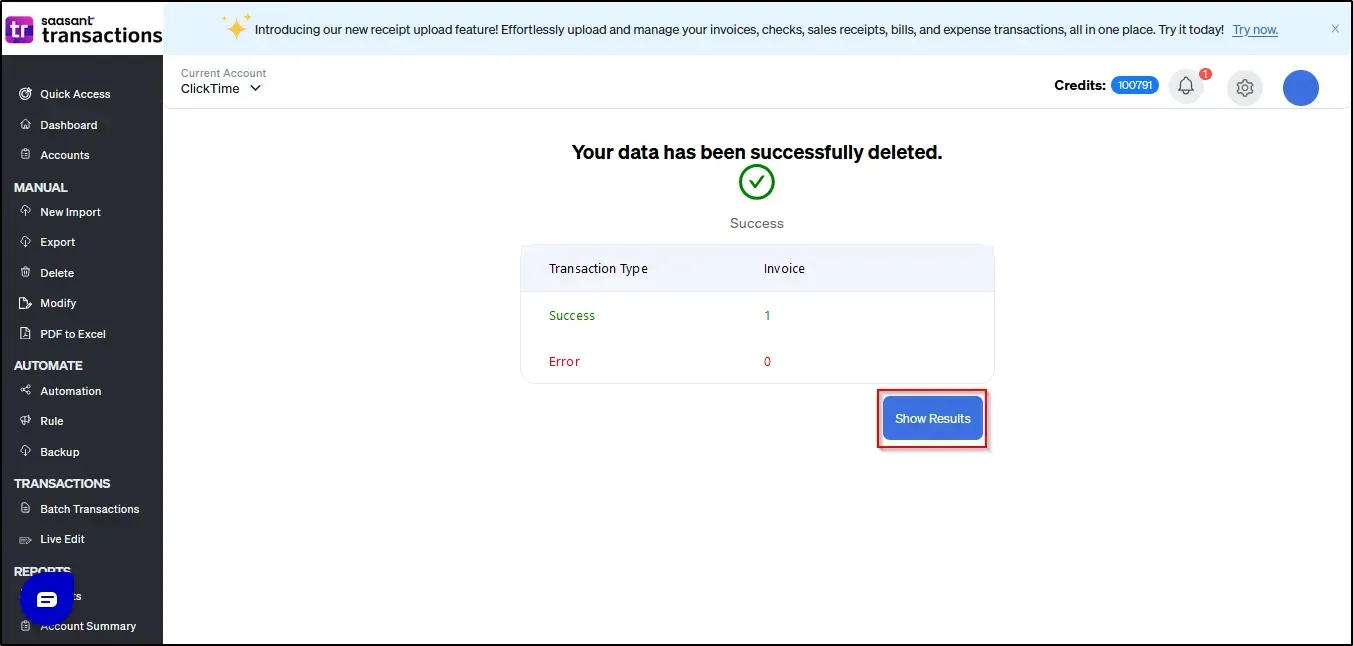
4: Select the Delete button to remove the selected transactions. The chosen transactions will be deleted from QuickBooks Online
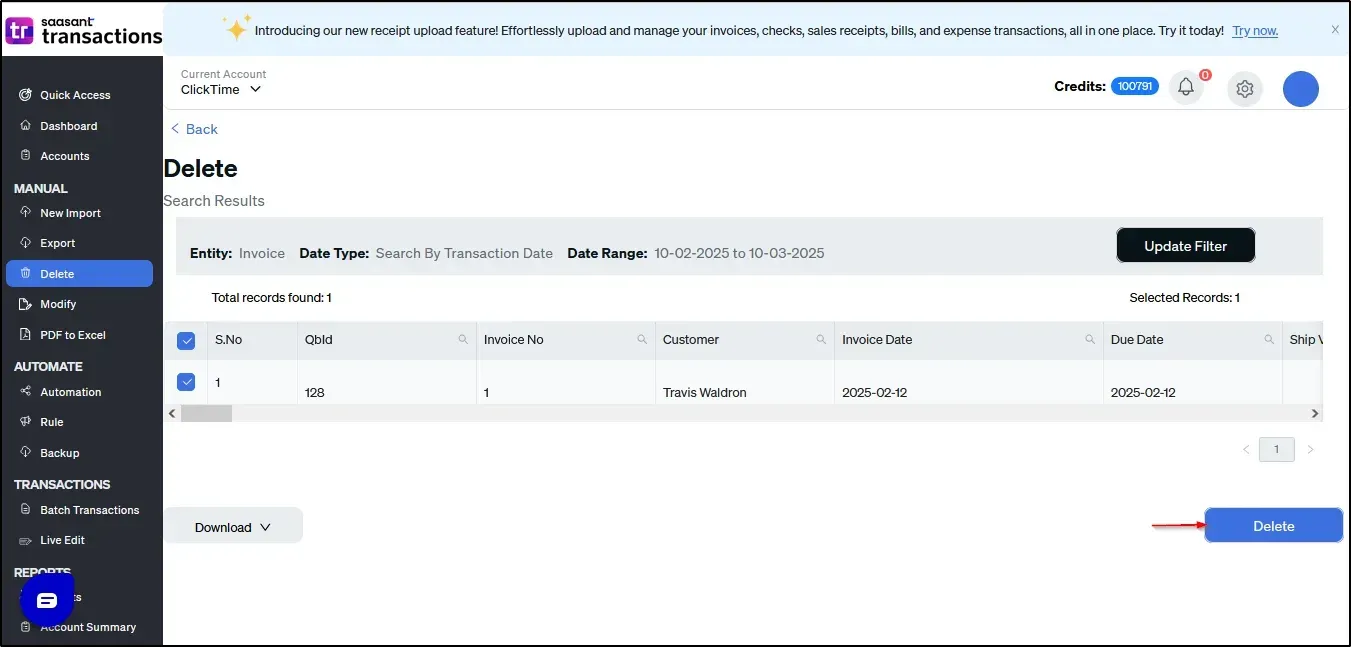
Note: The successfully deleted transactions will be displayed after the deletion process.
Key Area: Search Criteria.
Search By Created Date: This refers to searching for transactions or list entities based on their creation date in QuickBooks. The search criteria are based on the date when the transaction or entity was originally created in QuickBooks.
Search By Transaction Date: This method involves searching for transactions based on the date the transaction occurred. It typically refers to the specific date associated with the transaction, such as the invoice date or bill date.
Search By Last Updated Date: This search criterion involves searching for transactions or list entities based on the date they were last modified or updated in QuickBooks. It focuses on the date when any changes or updates were made to the transaction or entity within the QuickBooks system.
You can reach out to us at support@saasant.com if you are stuck somewhere. You can also schedule a personalized free demo with us if you need better clarity to connect with us by clicking Demo
Video tutorial: