How to import list with Sub-Customers or Items with existing into QuickBooks Online?
January 2, 2025
To import a transaction with existing sub-customers or items, include the sub-customer name or sub-item name in the import file.
Parent:Child (or ) Parent Customer:Sub Customer (or) Parent Customer:Job (or) Parent Item:Sub ItemFor example John:Alex represents - John is the parent Items and Alex is sub-Item
Step 1) Please select the file and spreadsheet that contain the sub-customers and items you wish to import.
 Step 2) Select the Quickbooks Entity.
 Step 3) Configure the mapping of columns in your transaction import file to the corresponding fields in QuickBooks
 Step 4 ) Select "Import," and your customers will be directly added to your QuickBooks company.
Note: You can create a customer, item, or account as a sub-customer, sub-item, or sub-account for an existing customer, item, or account.
How to import a list with Sub-Customers or Items with existing into QuickBooks Online using (New User Interface 2.0)
To import a transaction with already existing sub-customers or items, include the sub-customer name or sub-item name in the import file.
Parent: Child (or ) Parent Customer: Sub Customer (or) Parent Customer: Job (or) Parent Item:Sub Item
For example John:Alex represents - John is the parent Items and Alex is sub-Item

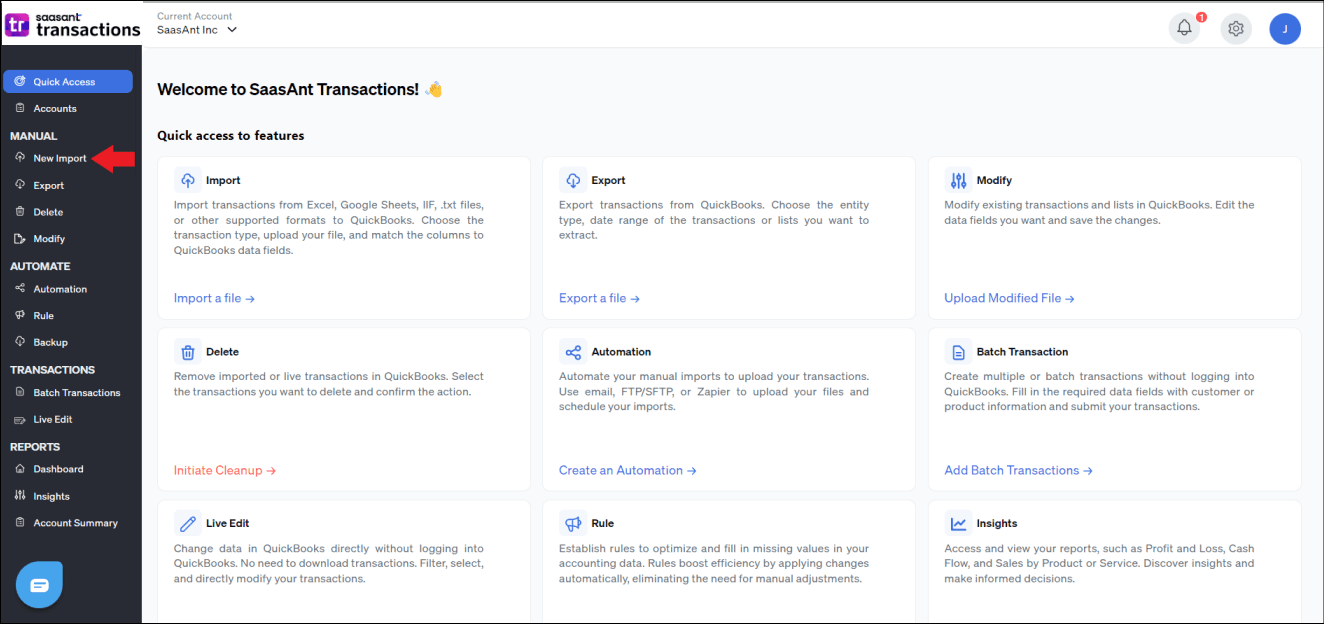
1) Login into SaasAnt Transaction Online
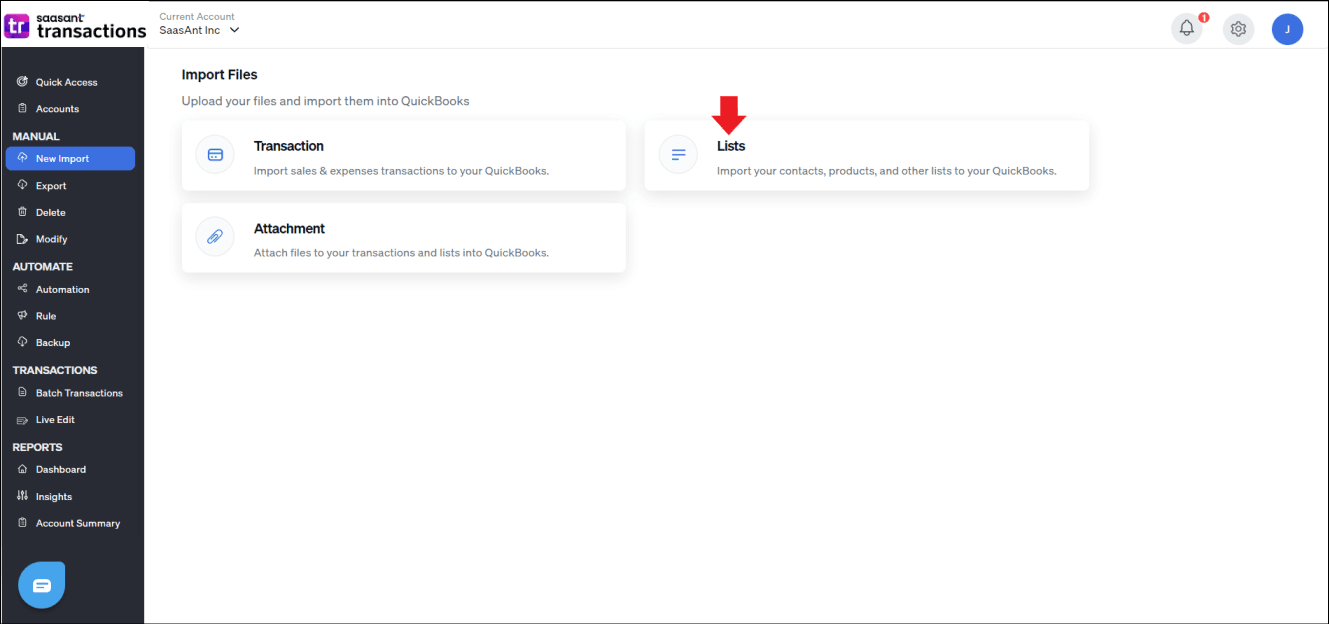
2) Select the New Import Tab.
 3) Select Transaction, List, or Attachment to upload your file into QuickBooks.
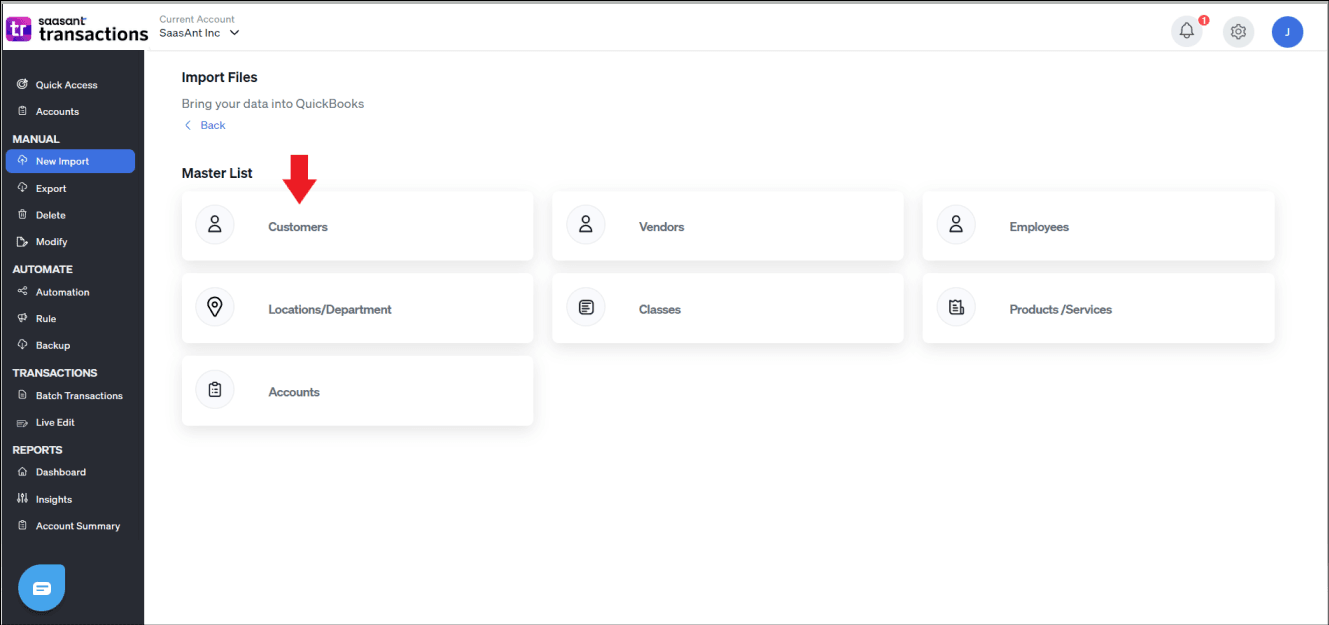
4) Select the QuickBooks entity as "Customers."
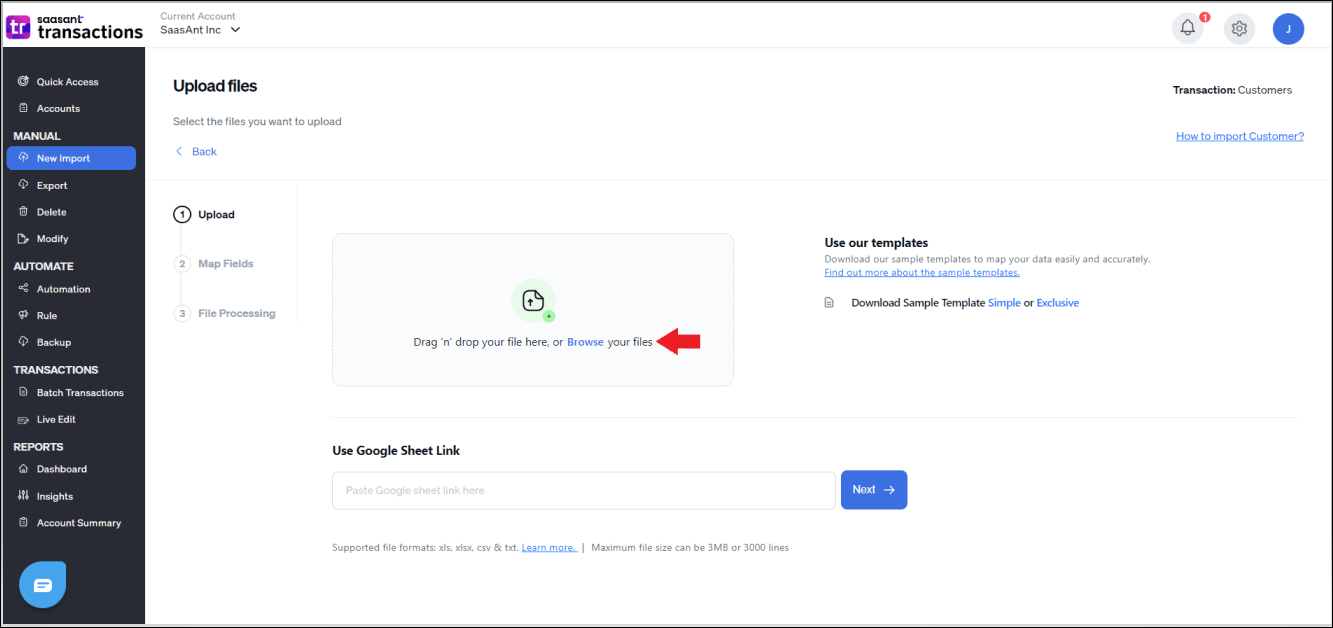
5) Select the files you want to upload.
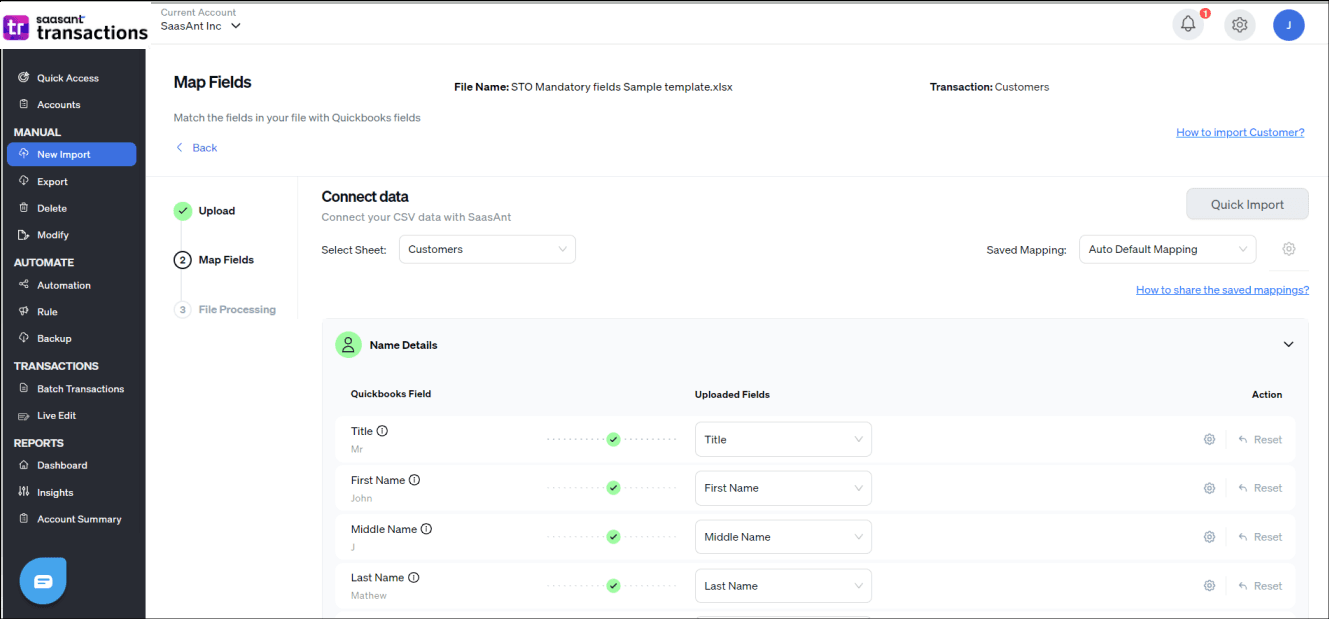
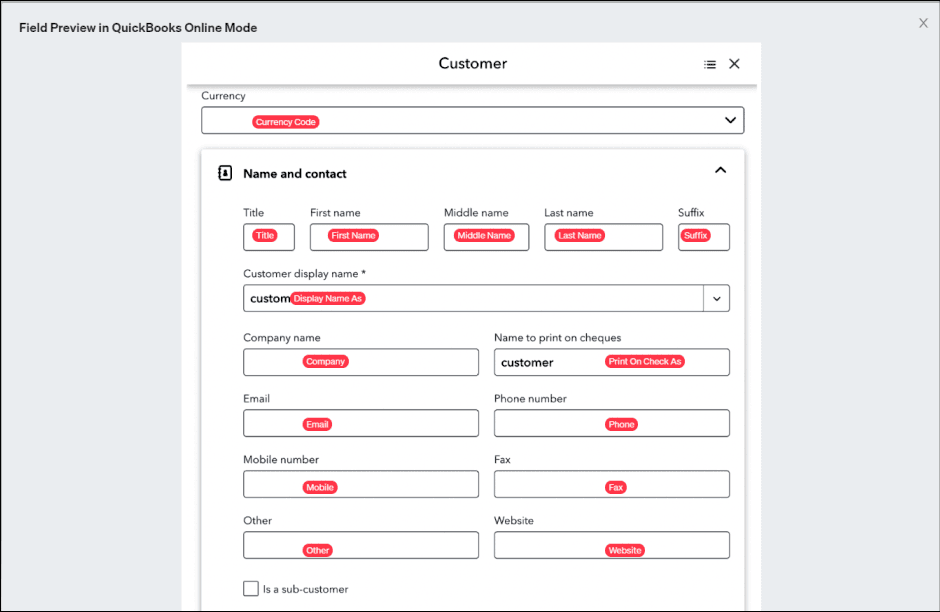
6) Set up the Mapping of the columns in your Customers.
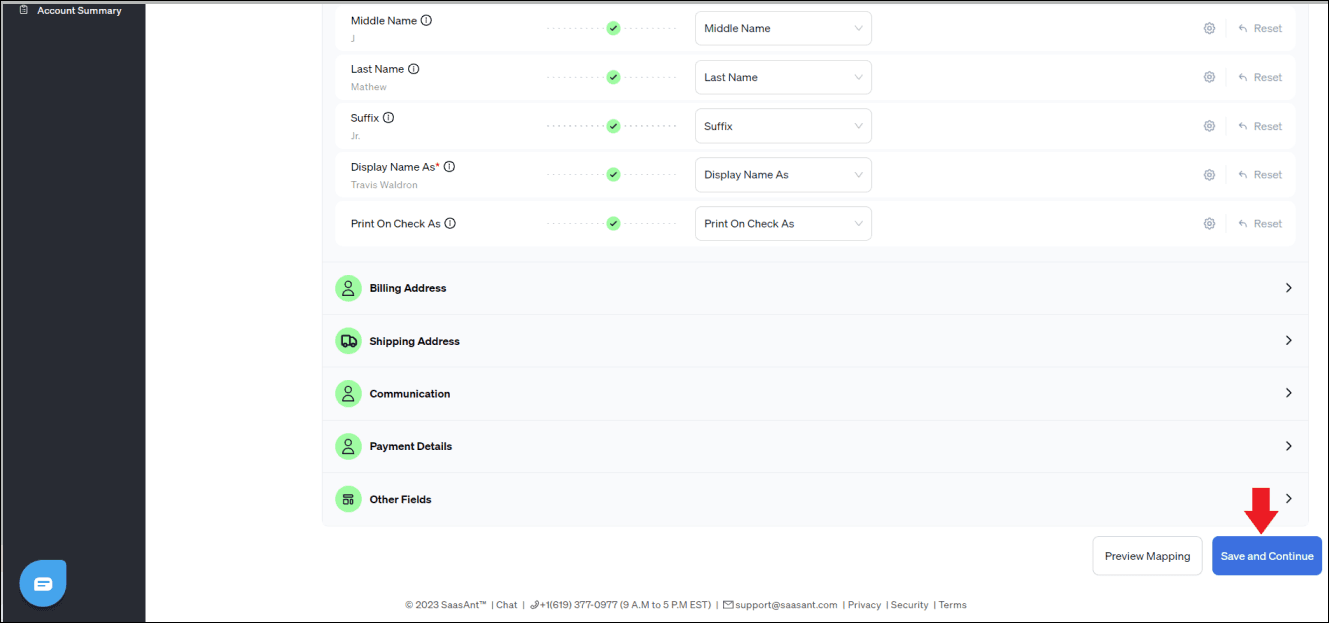
7) Select the "Preview Mapping" button to visualize current mapping based on QuickBooks.
8) Select the "Save and Continue" button to view the mapped Excel data according to the QuickBooks file headers.
9) Select the Upload tab
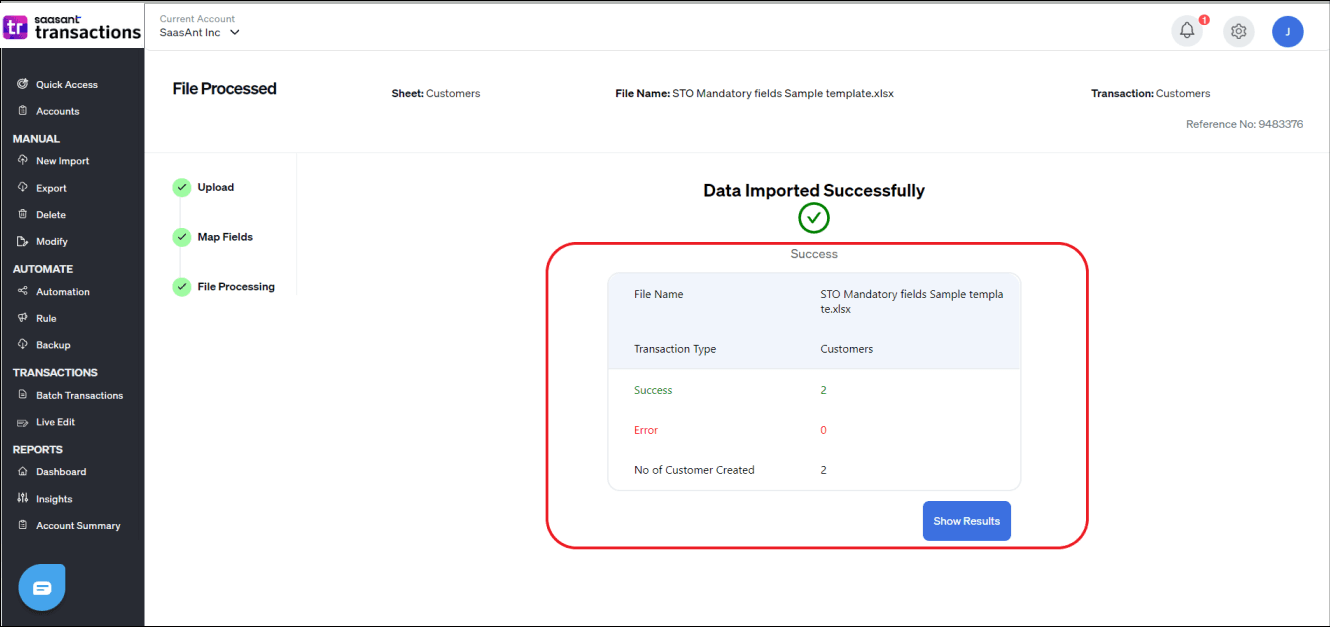
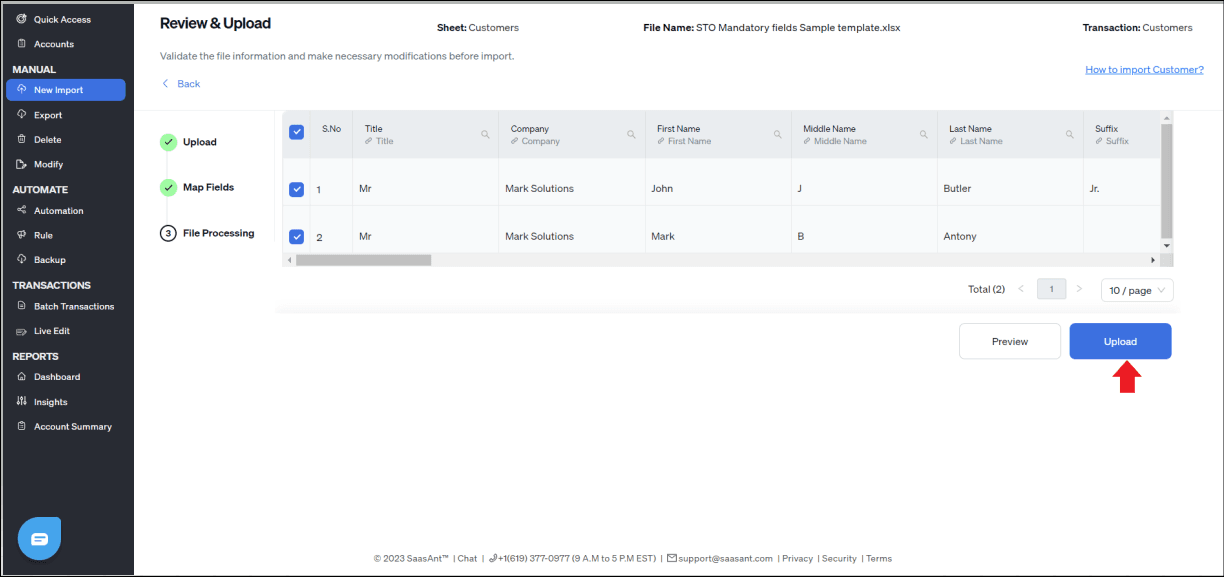 10) The data was imported successfully into Quickbooks.
To import a list into an existing parent, include a column with the parent customer information in the spreadsheet.
Step 1) Please select the file and spreadsheet that contain the parent and sub-list entities you wish to import.
Step 2) Select the QuickBooks entity (customer/items/accounts) you want to work with.
Step 3) To make a customer/item/account a sub-entity, set up the mapping of columns in your transaction import file to the corresponding fields in QuickBooks. To do this, map the "Parent" column to the corresponding QuickBooks field during the mapping process.
Step 4) Select "Import," and your list entities will be directly added as sub-entities to the existing parents in your QuickBooks company.
You can reach out to us at support@saasant.com if you are stuck somewhere. You can also schedule a personalized free demo with us if you need better clarity to connect with us by clicking Demo.
Video tutorial for importing customer list into QuickBooks Online: