How to upload the attachment to QuickBooks Online?
September 4, 2025
This is for you if you spend a lot of time importing documents into QuickBooks. Importing XLSX, CSV, DOCX, JPEG, PNG, TXT, and PDF attachments one at a time into QuickBooks is the most time-consuming and inconvenient chore for accountants and bookkeepers. Still, a key feature of Saasant Transactions can now handle it with just a zip file. The steps listed below will show you how to achieve them.
Directly uploading files as attachments in accounting platforms like QuickBooks is a time-consuming and tiring process. In contrast, uploading files using SaasAnt transactions allows you to upload bulk or multiple files as a single entity in a zip file, saving a significant amount of time.
Supported Transactions:
1. Invoice
2. Received payments
3. Estimates
4. Credit memos
5. Sales receipts
6. Refund receipts
7. Bills
8. Expenses
9. Checks
10. Vendor credits
11. Credit card credits
12. Journal Entries
13) Customers
14) Vendors
15) Product or Service
Supported File Formats:
Note: To add attachments you can only upload using a zip file, and the zip file should contain files within the following formats XLS, XLSX, CSV, TXT, PDF, PNG, Docx, and JPEG.
How to create Attachments:
1. Prepare an Excel file with two distinct headers: "Reference Number" and "File Name."
2. The "Reference Number" corresponds to the invoice number in your QuickBooks, while the "File Name" pertains to the attachment you intend to upload.
3. Ensure you specify the attachment format within the Excel file (e.g., .png, .jpeg, .pdf, etc.)
4. Rename the file as "Mapping."
5. Place the Excel file and the images within a single folder, then compress the folder into a zip file.
Download Sample Template Zip File
Steps to Import Attachment
Step 1: Log in to SaasAnt Transaction Online
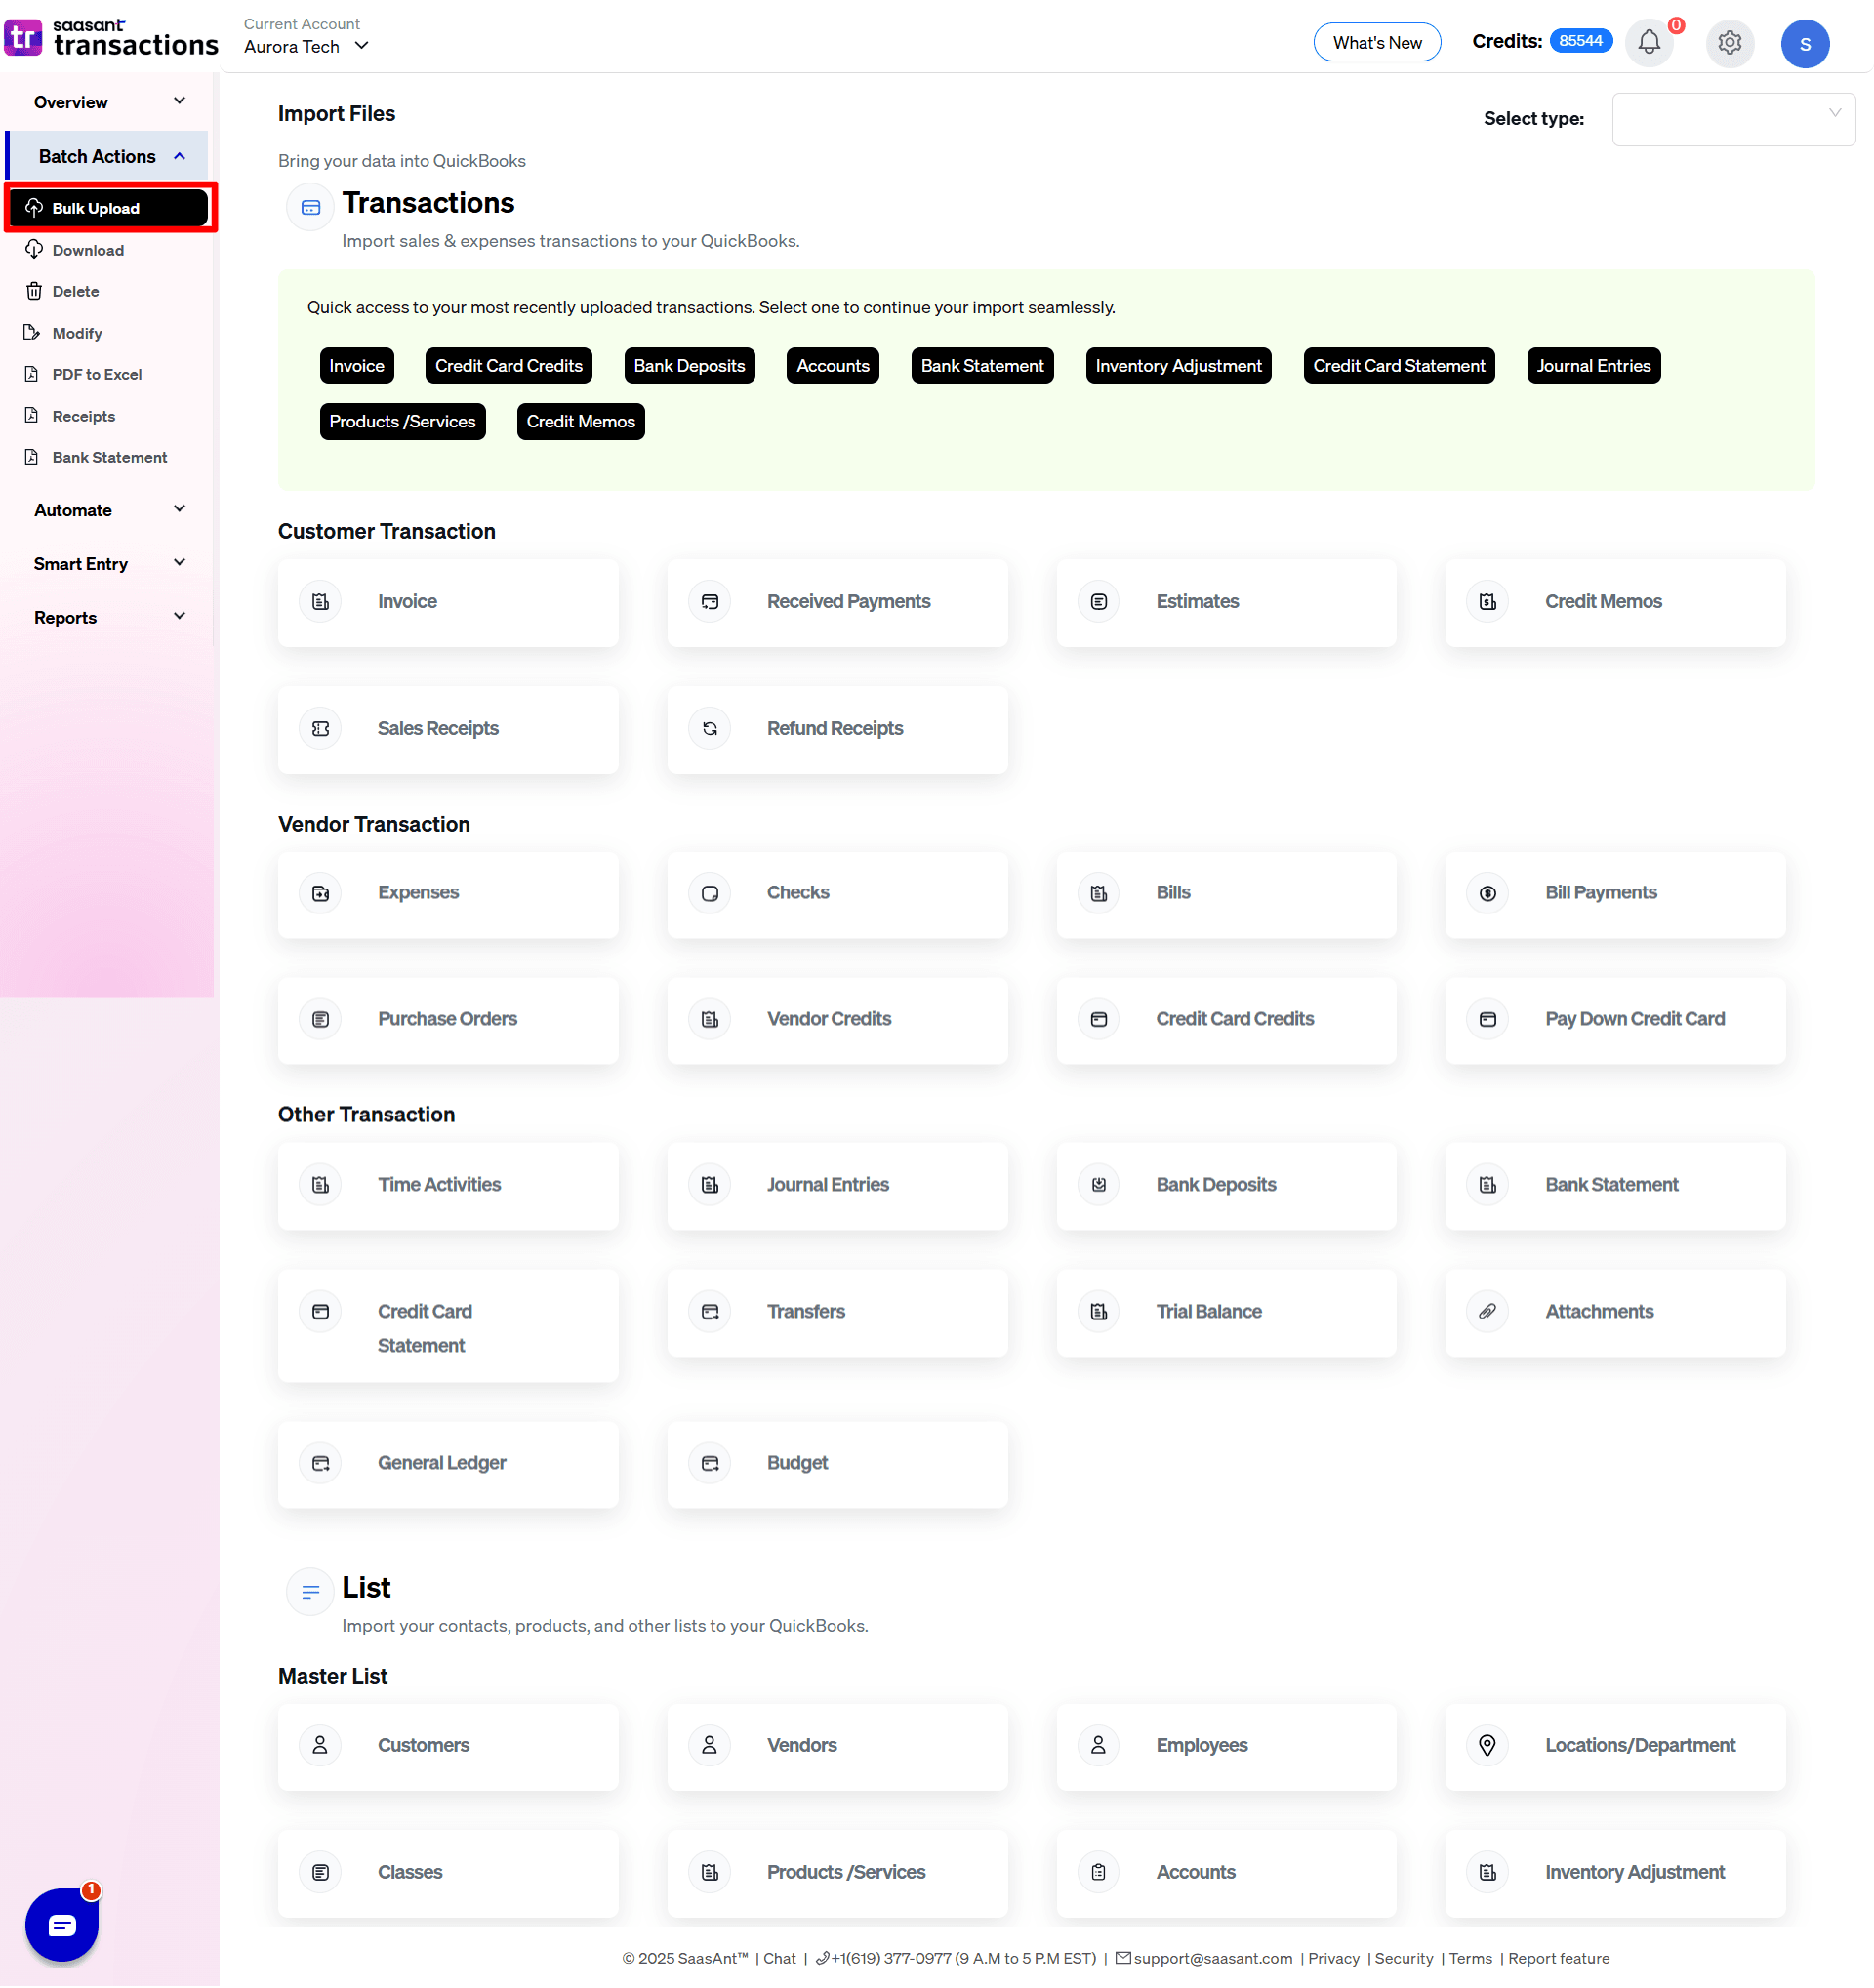
Step 2: Select Bulk Upload.
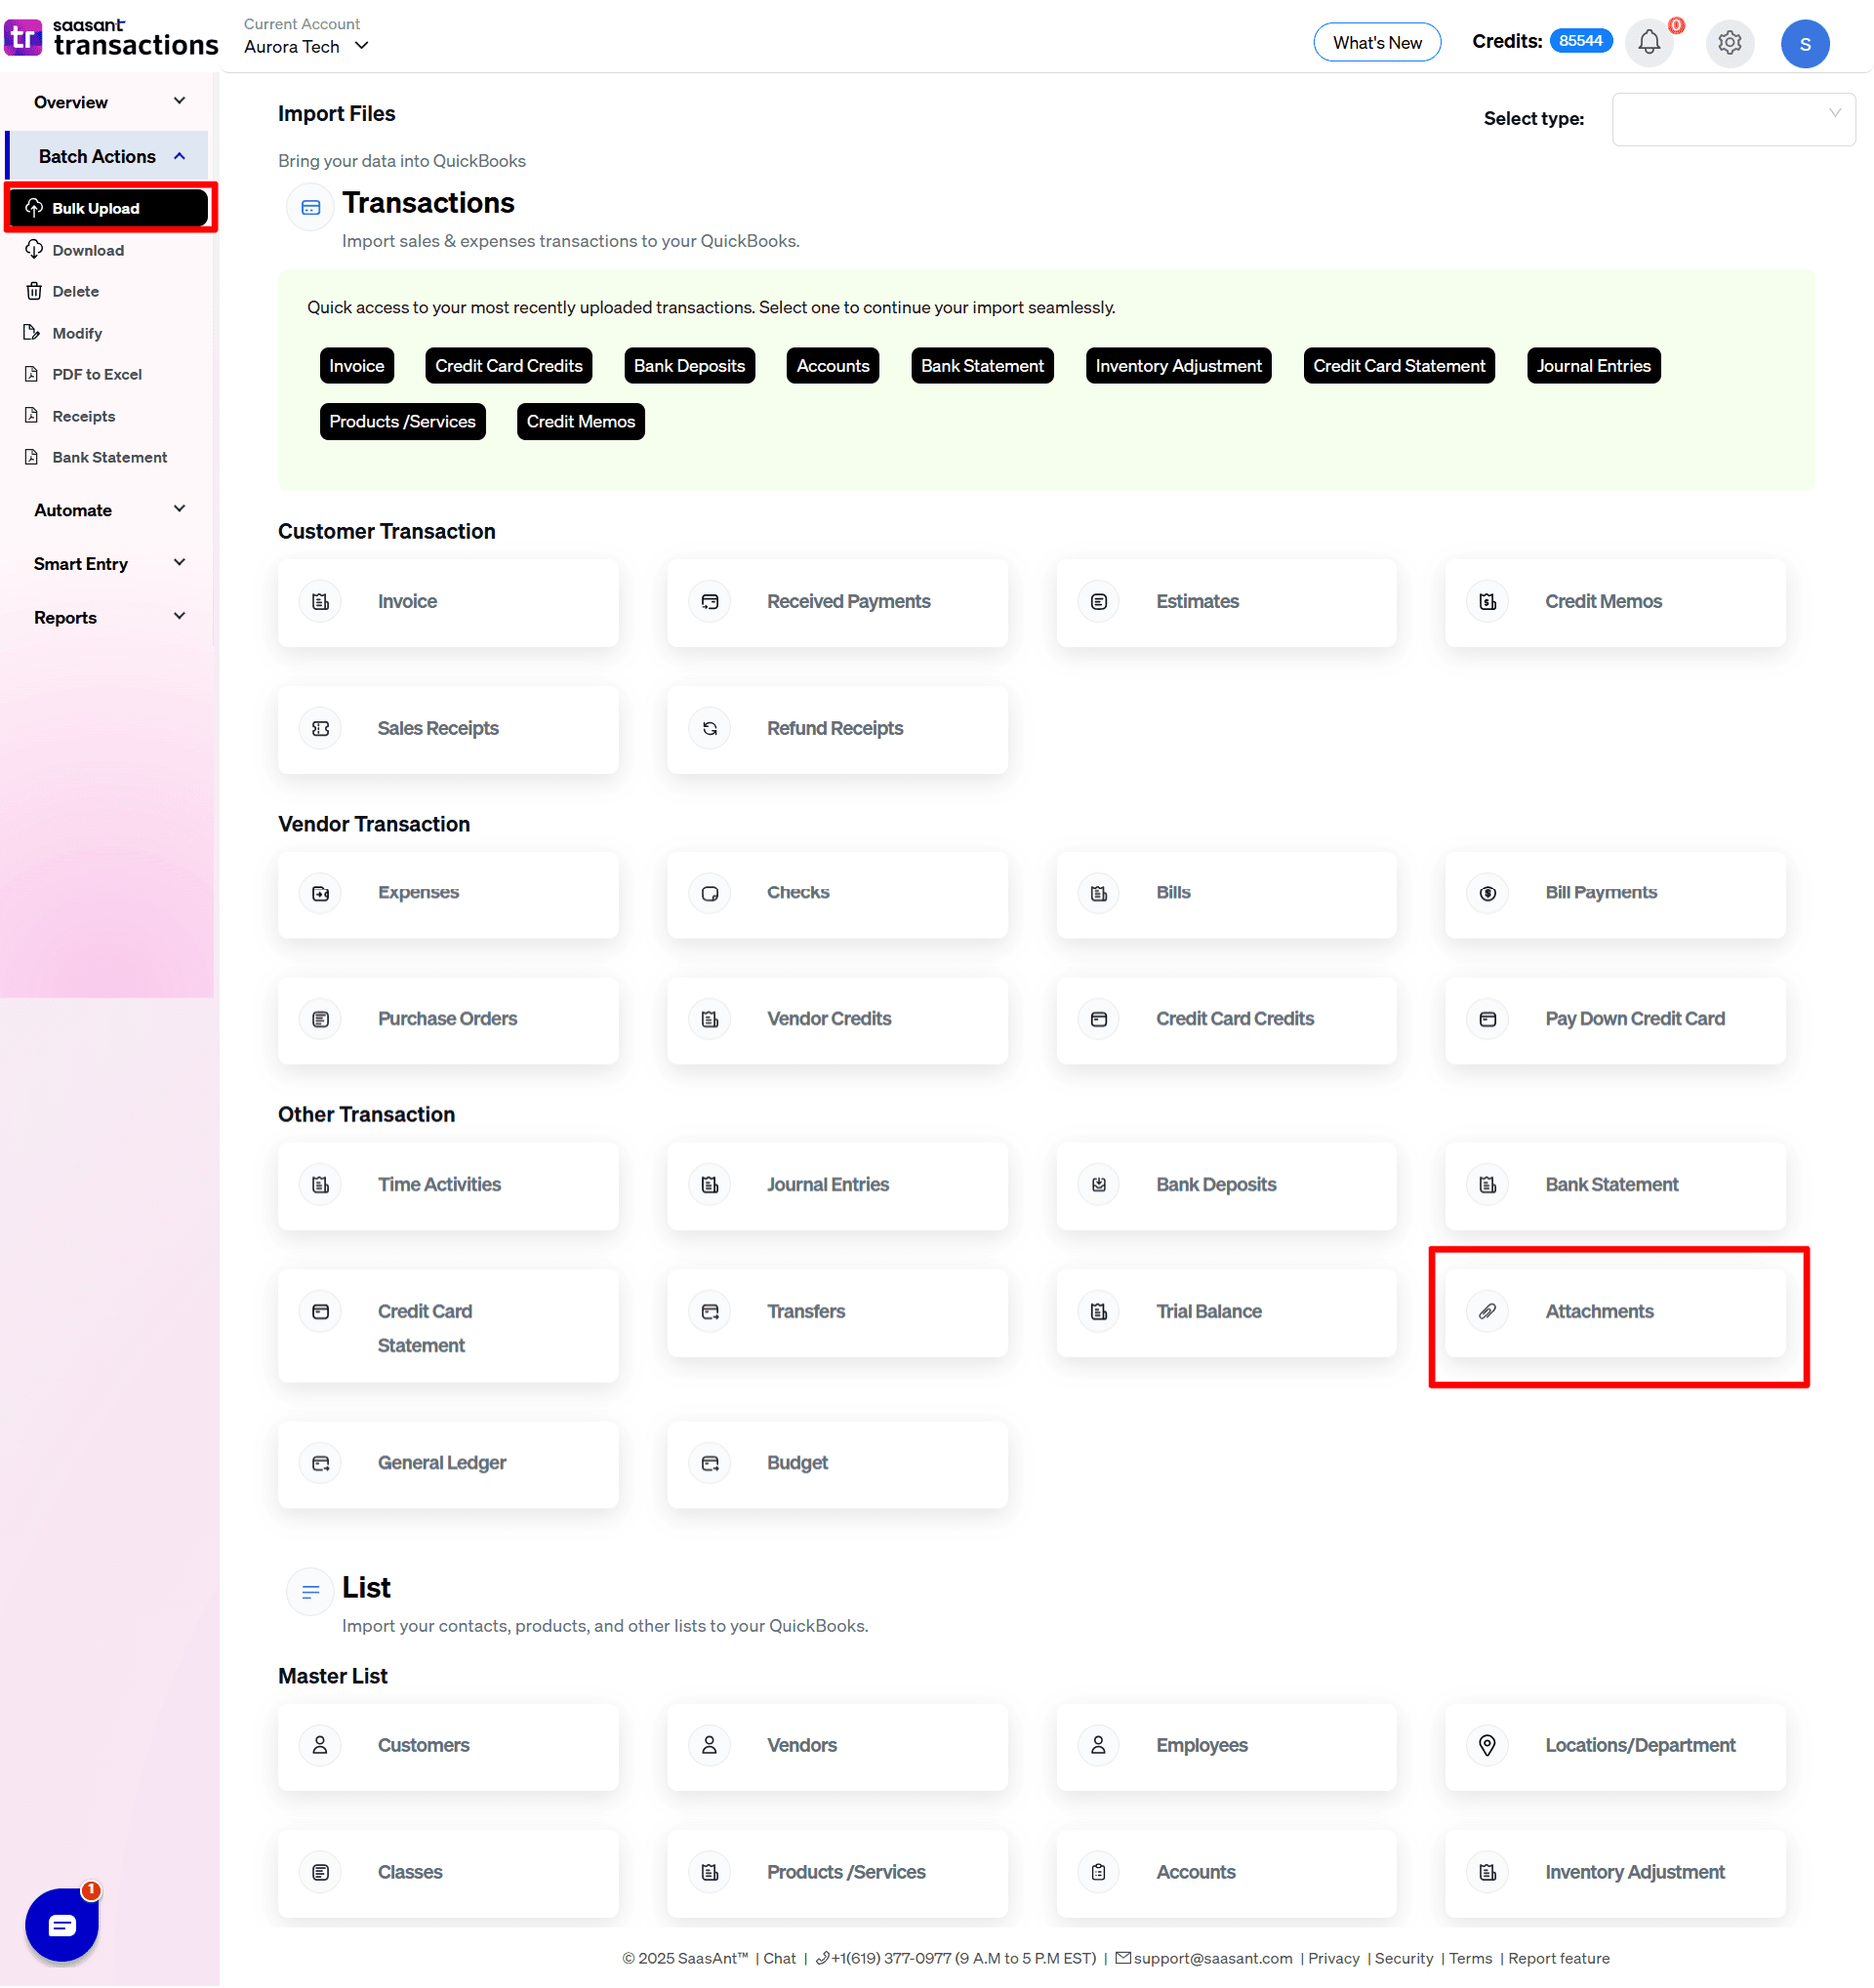
Step 3: Select the attachment.
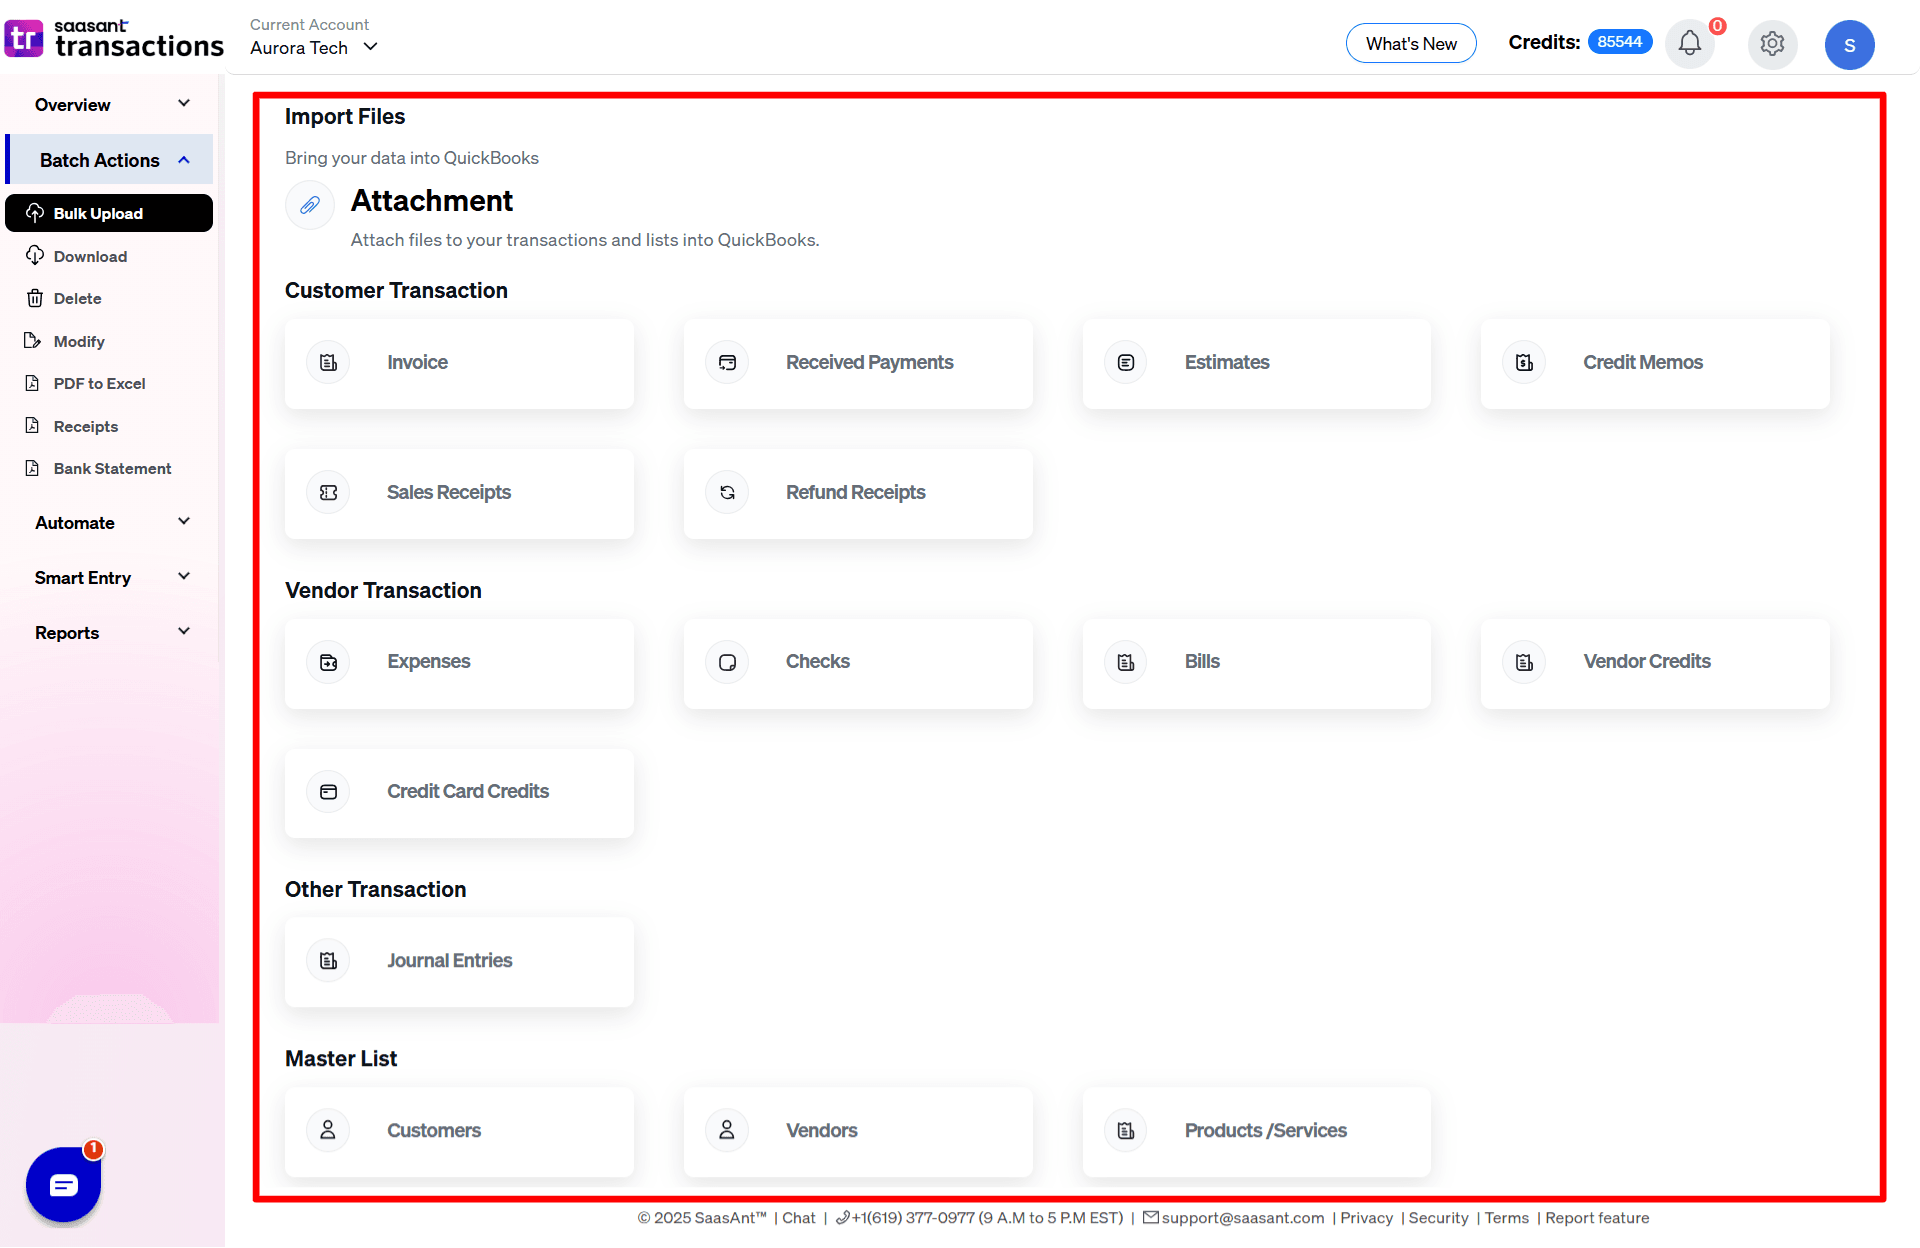
Step 4: Choose the transaction or list
Select the transaction or list type. For this article, we have chosen "Invoice."
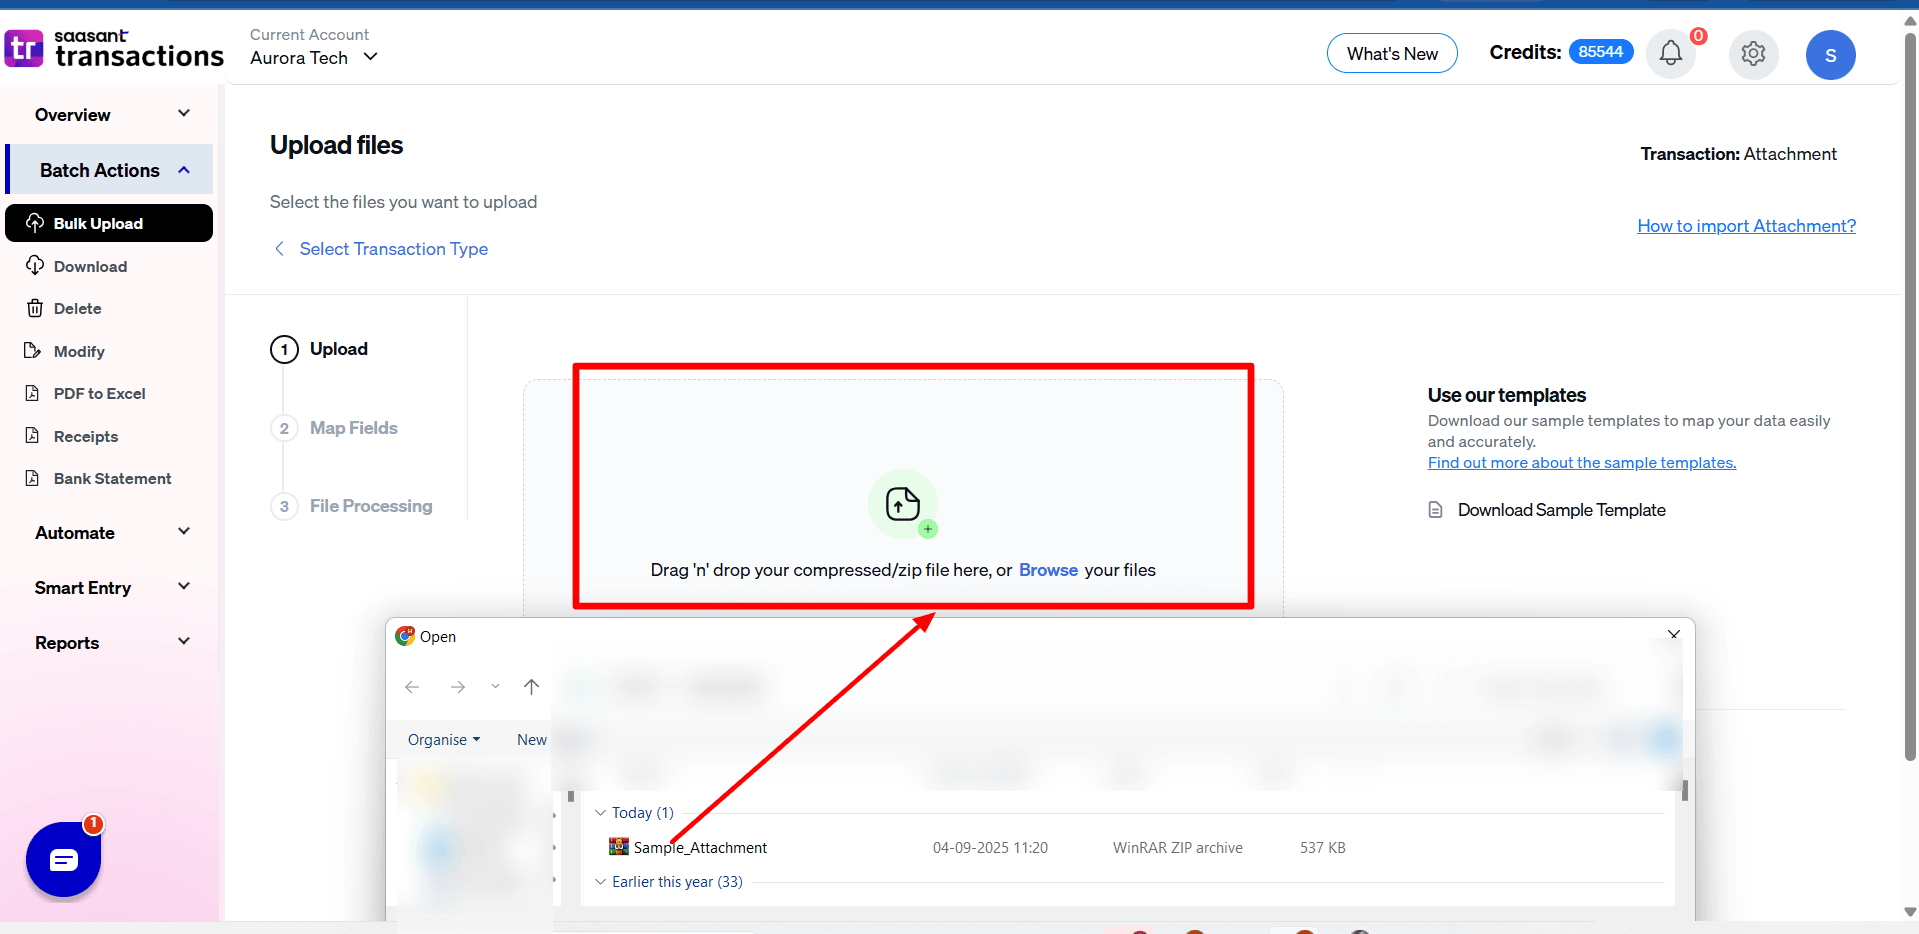
Step 5: Browse and select the file to be attached.
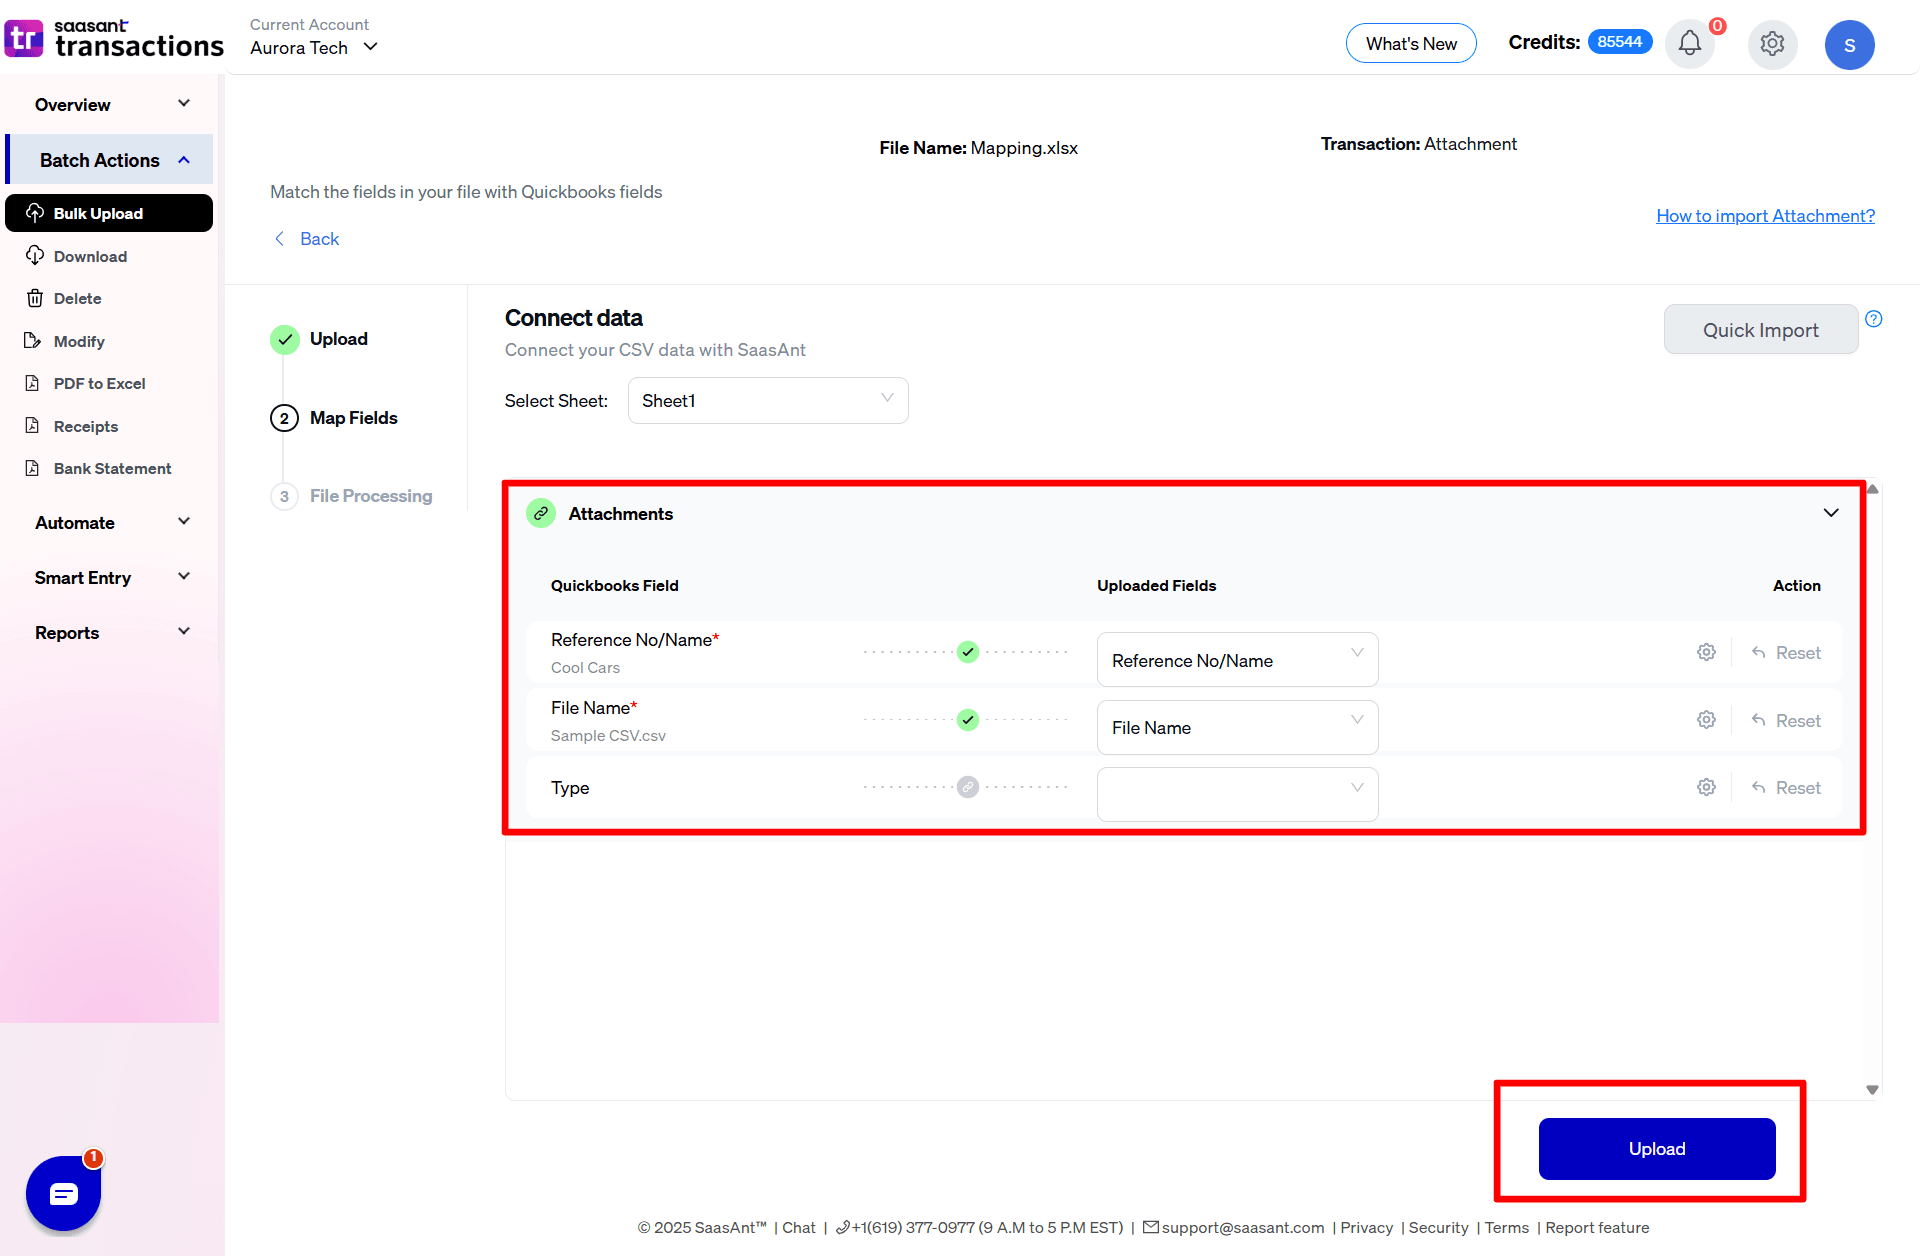
Step 6: In the map attachments fields page, select QuickBooks Transaction Type and match your file header with the QuickBooks attribute.
a. Note: The file to be imported should exist in QuickBooks already, without the Invoice file in QuickBooks, the system will throw an error as no match transactions are available for the particular line.
b. Note: The excel file that is attached in the Zip should possess details that match with the invoice accordingly.
Step 7: Select Upload to QuickBooks.
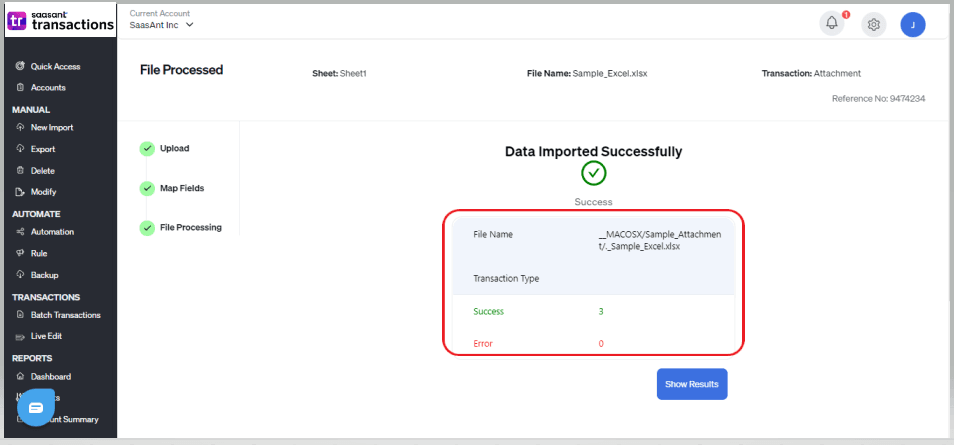
Note: When the upload is complete, check the upload status and the success and error numbers.
Step 8: Select Show Results to navigate to the job history page and find out the detailed success and error records.
 Step: 9 Check your QuickBooks account to verify the file attachment success or you can also navigate easily from the show results page by just clicking the QuickBooks ID.
Template:
Download Sample Template Zip File
Reference Number | File Name |
Test 01 | Test01.pdf |
Test 02 | Test02.pdf |
Test 03 | Test03.jpeg |
Test 04 | Test04.png |
Test 05 | Test05.png |
Test 06 | mapping.csv or simple_excel.csv |
FAQs
1) Can I use the same image for multiple entities in the attachments?
Ans: Yes you can use it, but you need to use the same file.
2) Can I upload files for multiple entities at the same time?
Ans: No, you cannot, you can only upload one entity at a time.
3) Why should I use the Saasant transaction attachment feature instead of the QuickBooks attachment feature?
Ans: Using the SaasAnt transactions feature will help you save enormous time by helping you upload thousands of transactions with just a single zip file, whereas using QuickBooks will result in uploading one entity at a time.
4) What file types does SaasAnt Transactions Online support for QuickBooks Online imports?
For almost all entities in QuickBooks Online, SaasAnt Transactions Online supports XLS, XLSX, XLSM, CSV, TXT, Google Sheets, and IIF. Additionally, PDF, PNG, and JPEG are supported only for Receipts, Invoices, Bank Statements, Checks, and Expenses.
For more queries related to the Attachment feature, kindly reach out to us at support@saasant.com