How to customize QuickBooks imports using rules in SaasAnt Transactions?
September 4, 2025
How to customize your QuickBooks imports using rules in SaasAnt Transactions?
As an accountant when you handle different items under the same vendor or customer, rules can help you categorize the list of items and speed up the process into a simplified process.
To learn more about customization create a set of rules using SaasAnt Transactions Online. Check out this video to understand more about the process in-depth with simple steps.
What are the rules?
The rule is setting up a new set of conditions with relevant actions(overrides on the file data) for the transactions to be uploaded in your own way. This aids in the eradication of clumsy categorization of data in QuickBooks.
When can you use the rules?
When you are dealing with bulk accounting files and if they have incorrect data, instead of manually making corrections you can simply create a rule with conditions to easily categorize and correct them before uploading them into QuickBooks.
How to configure the Rules in SaasAnt Transactions?
1) Log in to SaasAnt transactions Online
2) Select the rule
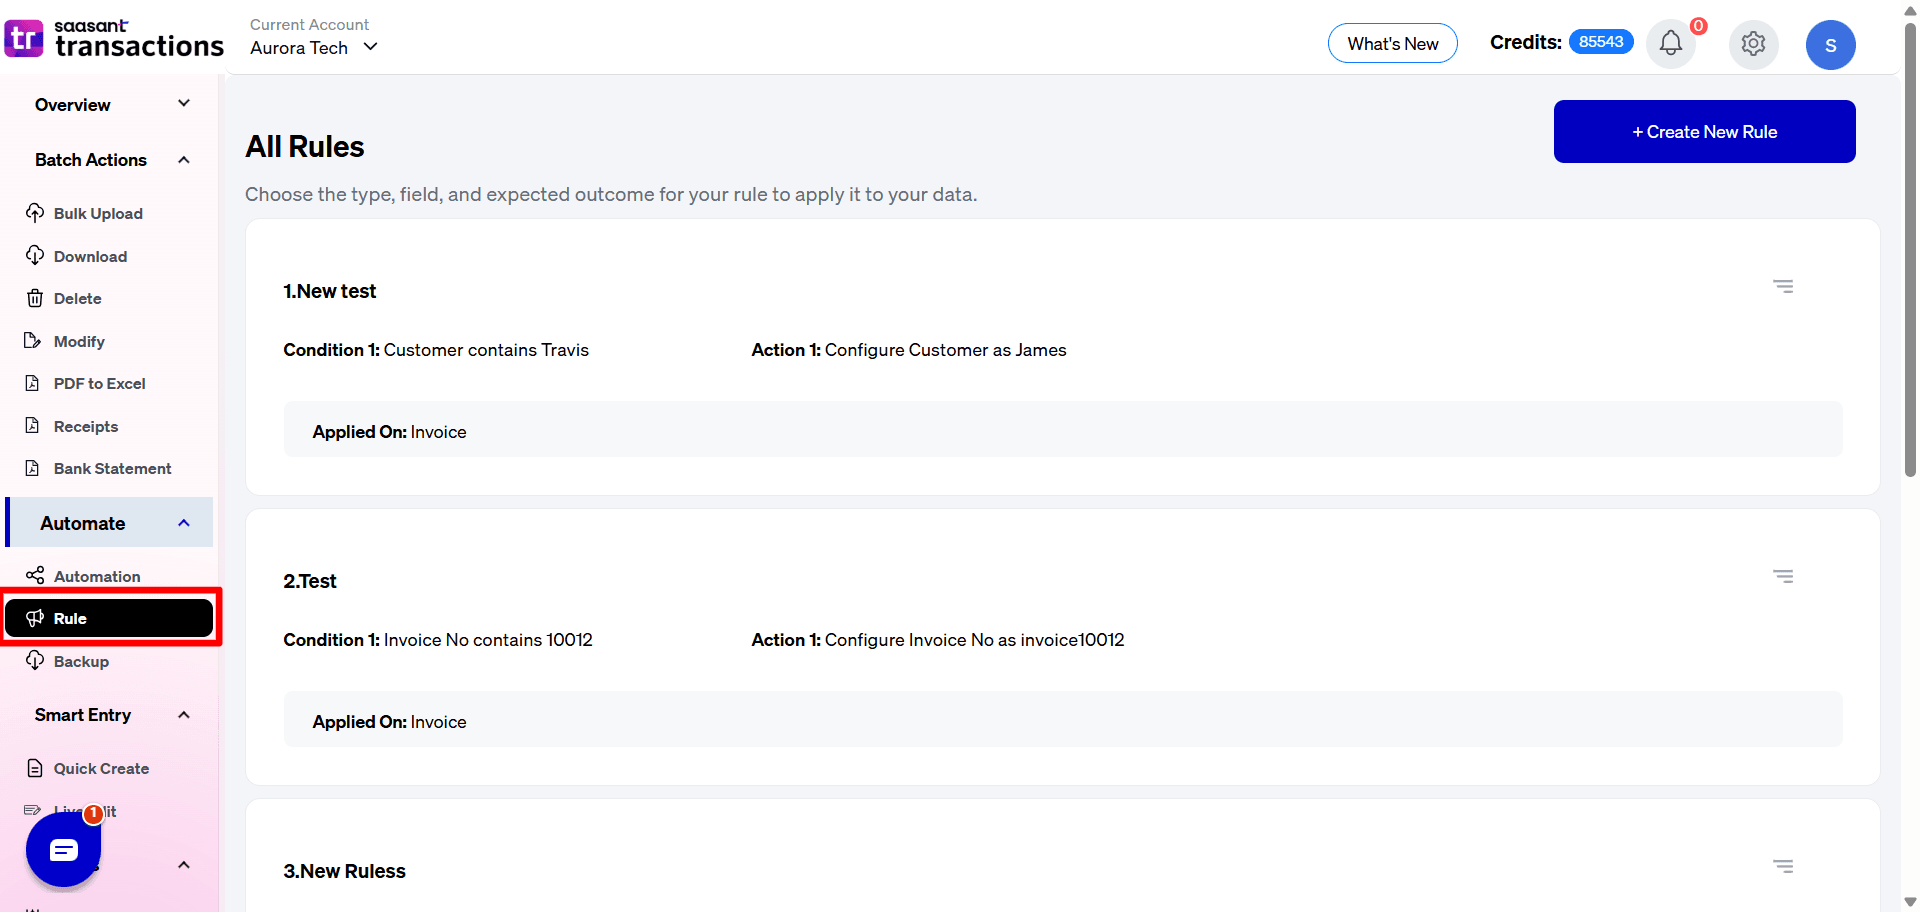
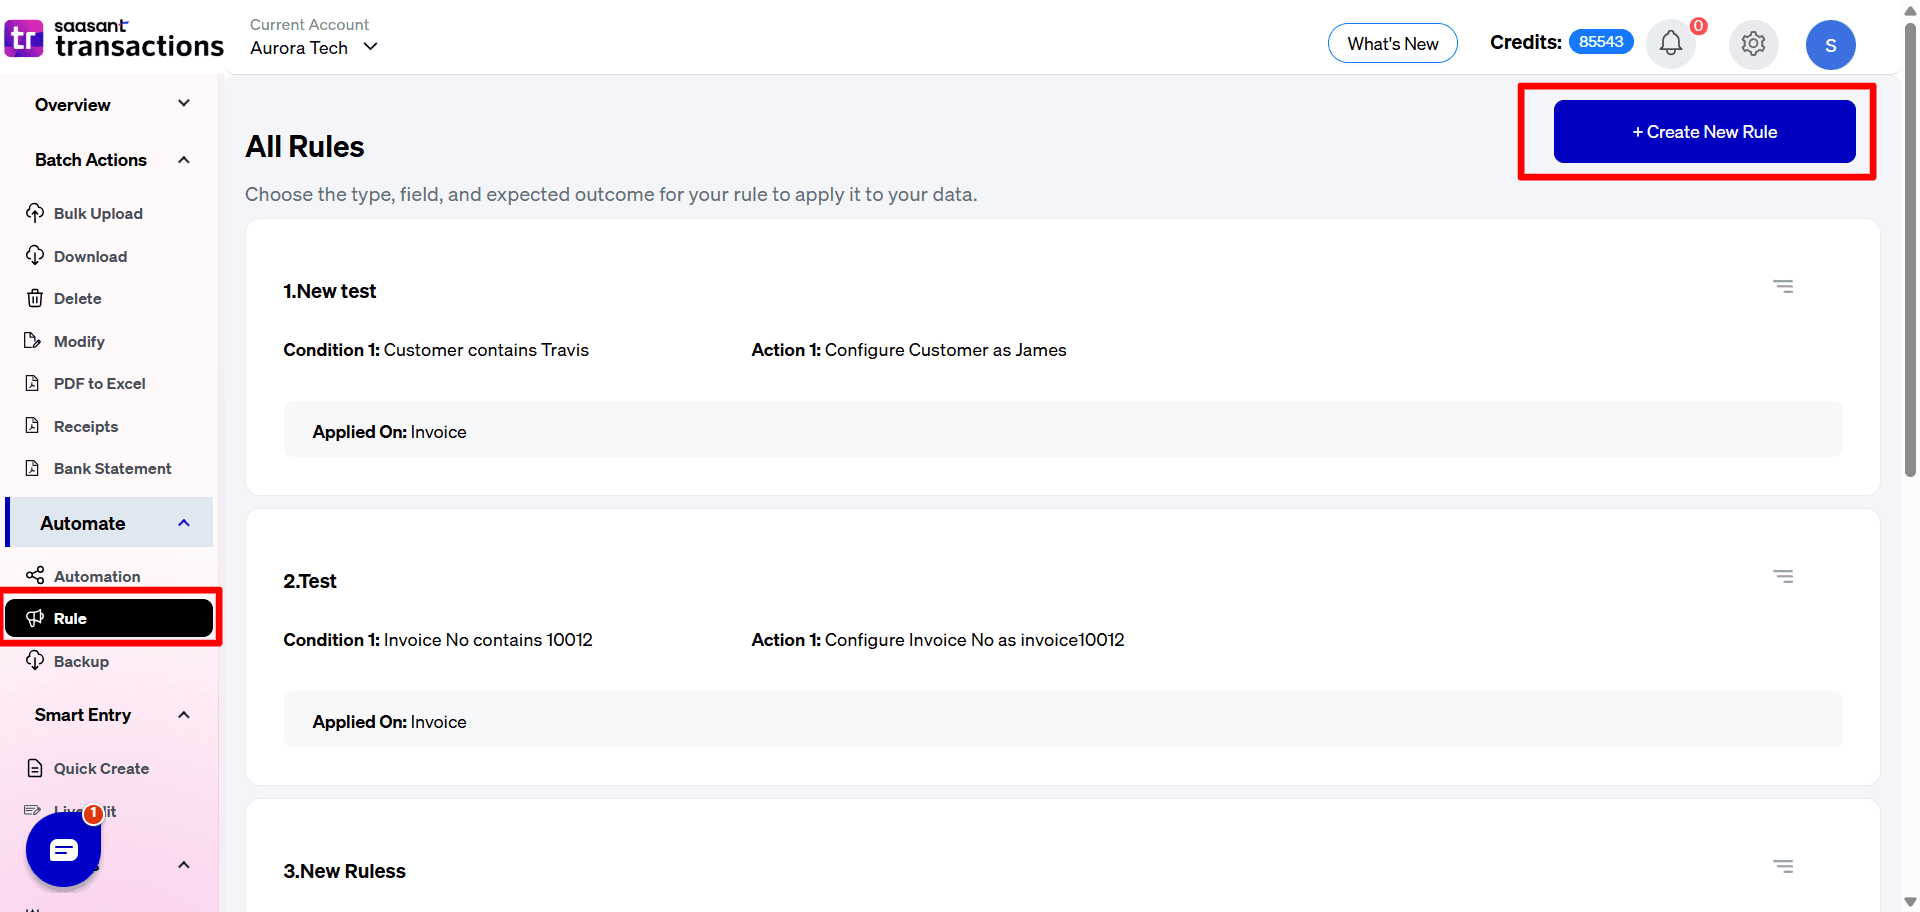
3) Select Create a new rule
4) Enter the new rule name you want to create
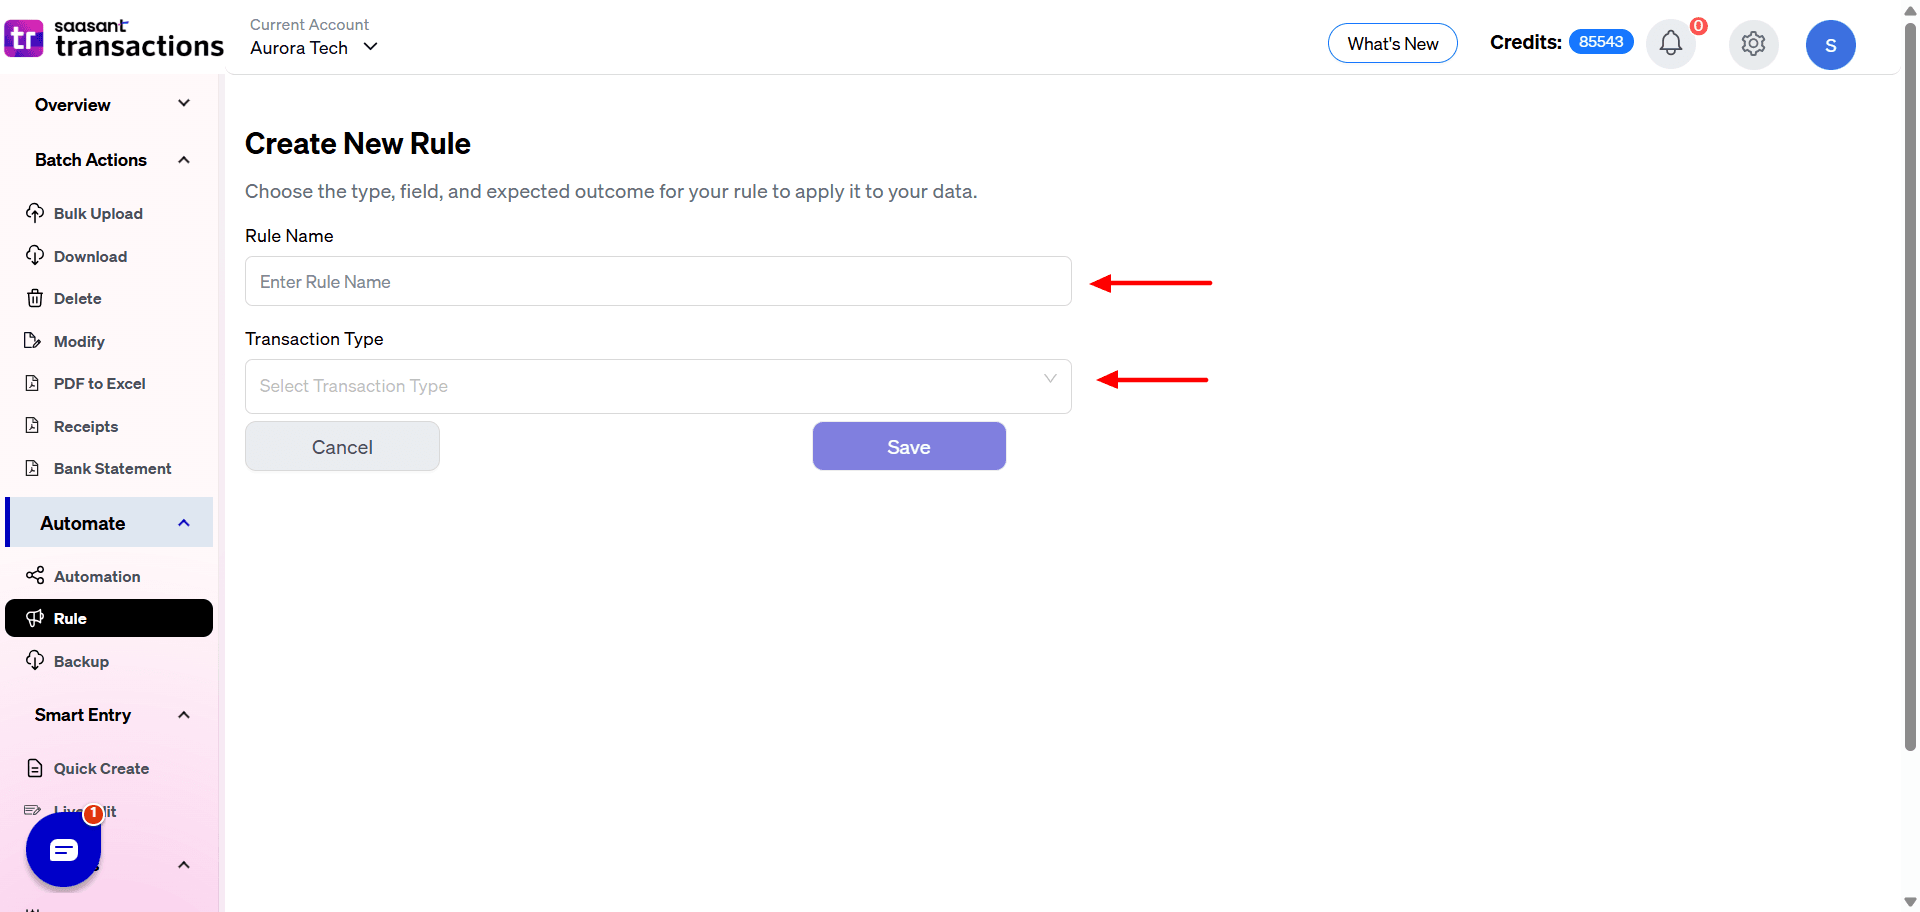
5) Select the transaction type.
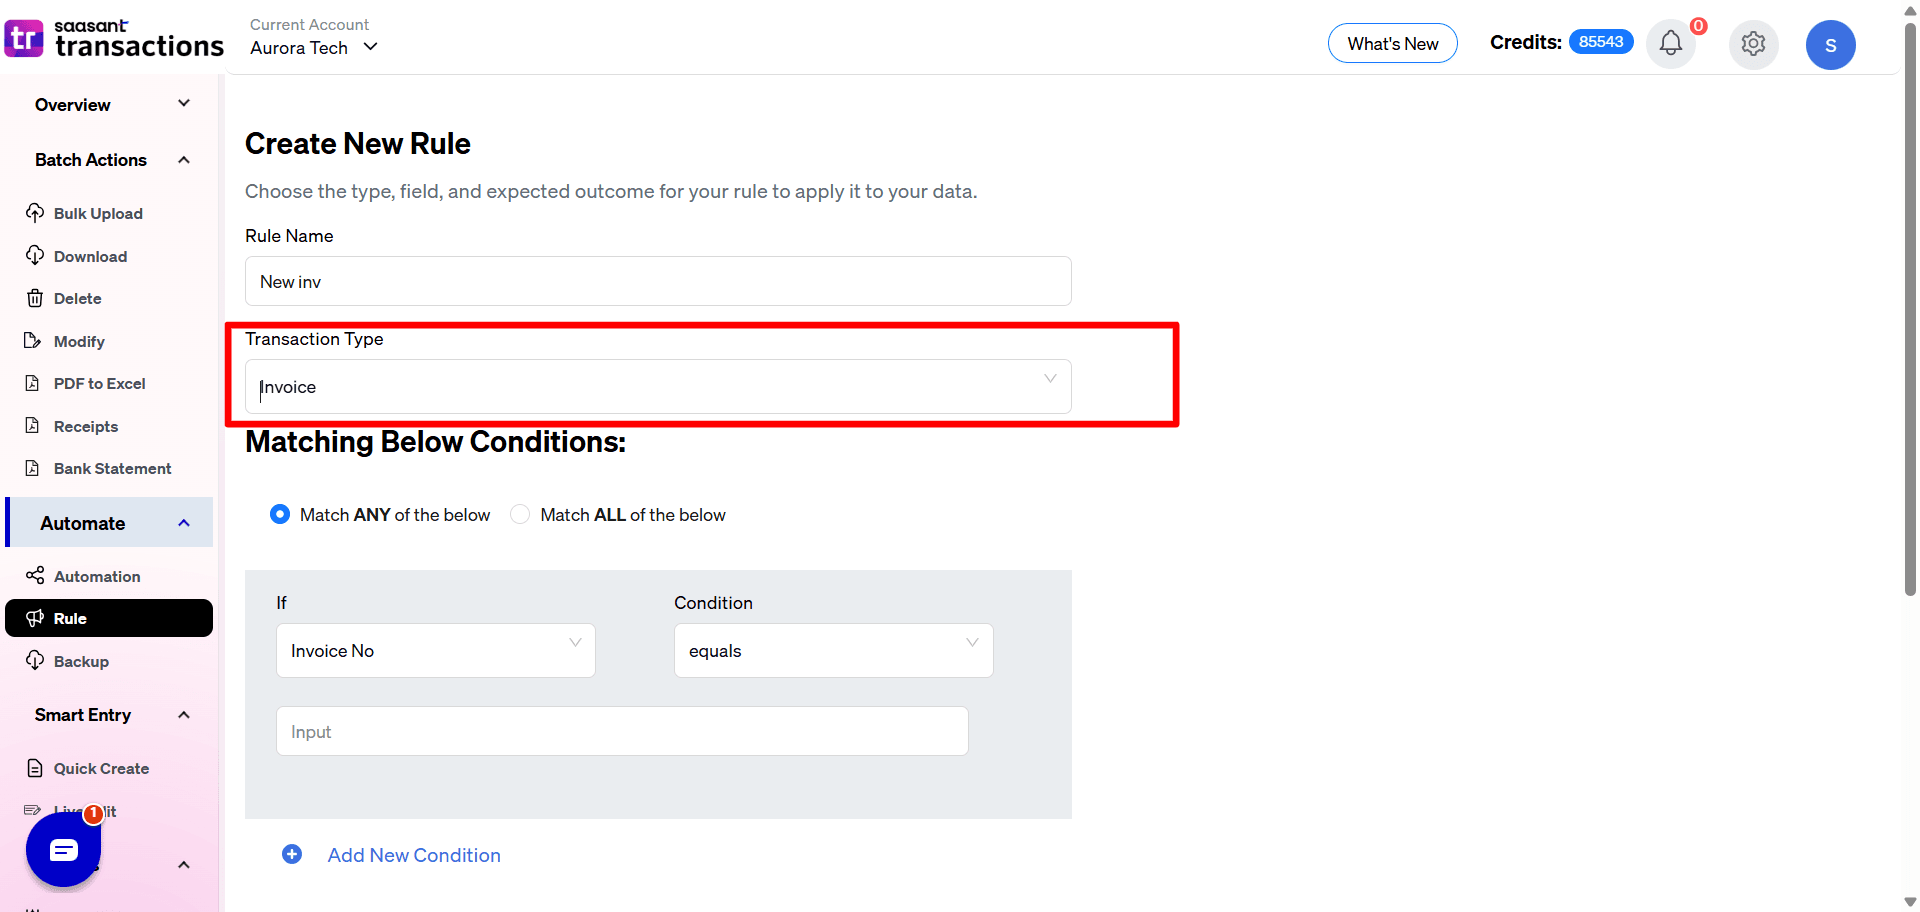
Conditions: ( When to apply the rule)
A) Match any conditions:
Match any conditions is where any one of the given conditions matches to perform the actions given in a rule.
B) Match all conditions:
Match all the conditions given should satisfy so that it will perform the actions given in a rule.
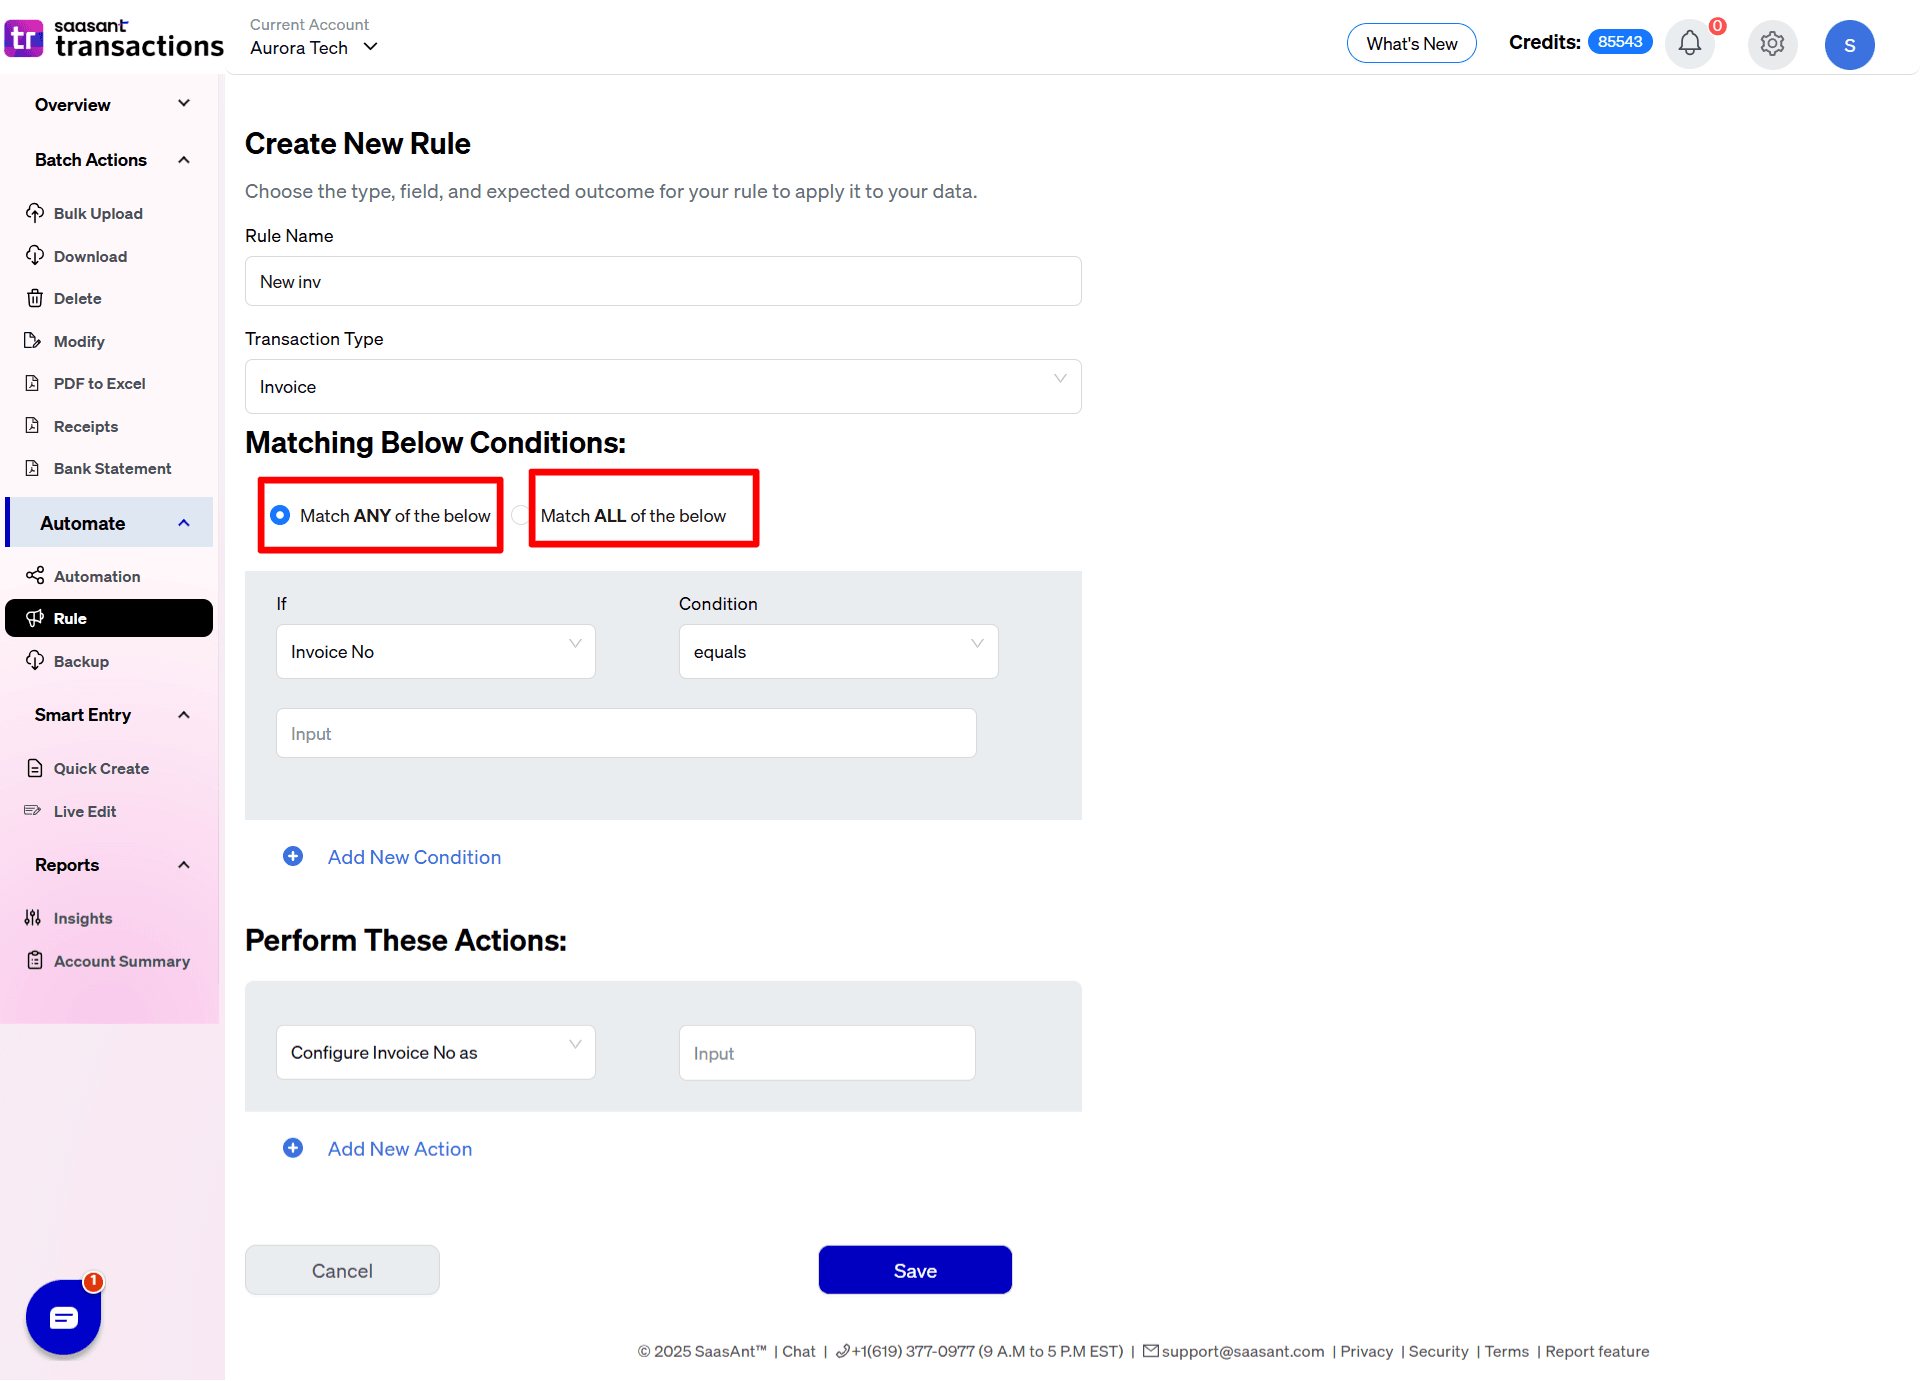
C) In Condition 1:
In the IF drop-down list, select the entity attributes, and in the OPERATION select one of the five conditions functions listed below:
1: Equals
2: Is not
3: Contains
4: Does not contain
5: Empty
Note: You can also perform multiple conditions by selecting Add new condition.
Examples:
When the Product Name contains “Apple”
When the Product Description contains “Mobiles”
When the Product Description Does not contain “Pipe”
When the Product Description Does not contain “Pipe”
Actions: ( What fields need to be updated)
Now perform actions for the above condition by selecting the fields associated with the transaction which need to be modified based on the conditions.
Examples:
Change the Product Name to “iPhone”
Change the Customer Name to “Retail Customer”
Change the Invoice Date to “10/12/2023”
Change the Class to �“Services”
Change the Product Item Amount to 110.00
Note: you can also perform multiple new actions by selecting Add new action.
Select save to complete the rule creation process, now the new rule will be successfully created.
How are the rules executed?
1) To create a rule, follow the steps below, here we are going to match different phone brands.
For example: if you are handling invoices of multiple phone brands like iPhone, Samsung, and Moto to get uploaded in QuickBooks under the product name “Phone”.
2) First, create a rule by giving the appropriate rule name and select the transaction type as Invoice (the created rule is applicable only for Invoices since you are selecting the transaction type as invoice)
3) Following that Match, the conditions by either selecting match any conditions or must match all conditions.
4) Select the IF condition as Product and services from the drop-down box and the operation as Contains
And give the product name in the text box as Nothing phone, as mentioned in the invoice
Note: You can also add multiple conditions in a rule.
5) Perform actions by selecting configure the product and services from the drop-down list and give the product name which is configured in the accounting platform (QuickBooks) in the text box.
Supported Transactions:
Customers | Vendors | Others | Lists |
1. Invoices | 1. Expense | 1. Journal Entry | 1. Customer |
2. Receive Payments | 2. Check | 2. Time Activity | 2. Vendor |
3. Estimate | 3. Bill | 3 Transfer | 3. Employee |
4, Credit Memo | 4. Bill Payment | 4. Location | |
5. Sales Receipt | 5. Purchase Order | 5. Product/Service | |
6. Refund Receipt | 6. Vendor Credit | 6. Chart of Accounts | |
7. Credit Card Credit | 7 Classes |
Use Case 1:
Rule creation for product matching:
A. If you are handling invoices of multiple products, you can create rules and match and upload them in QuickBooks easily, rule creation helps users to avoid product duplication or uploading incorrect products, manual data correction, etc.
B. To create a rule, follow the steps below, here we are going to match different phone brands,
For example, if you are handling invoices of multiple phone brands like iPhone, Samsung, and oppo to get uploaded in QuickBooks under the product name as “Phone”.
1) First, create a rule by giving the appropriate rule name and select the transaction type as Invoice (the created rule is applicable only for Invoices since you are selecting the transaction type as invoice)
2) Following that Match, the conditions by either selecting match any conditions or must match all conditions.
3) Select the IF condition as Product and services from the drop-down box and the operation as Contains
4) And give the product name in the text box as Nothing phone, as mentioned in the invoice
Note: You can also add multiple conditions in a rule.
5) Perform actions by selecting configure the product and services from the drop-down list and give the product name which is configured in the accounting platform (QuickBooks) in the text box.
6) Select save and your rule will be successfully created. Now all those products will get uploaded into Phone in the QuickBooks account.
Use Case 2:
For instance, when a vendor has a QuickBooks account for his stationary items as Stationary, if new invoices or bills for pencils, books, and other stationery products are generated and imported into accounting platforms. You can create a new rule and categorize the different products into the stationary account by simply setting rules for the particular category.
Use case 3:
Creating a rule for the class will help users to categorize all the data into one single hub in QuickBooks, for example, if the products of an invoice file is set as vehicles in QuickBooks containing files of Honda, BMW, rolls Royce you can set the rule as a class, followed by matching the conditions of vehicles and categorize them all under one class as Transport.
FAQ
1: Can I modify the rules after creation?
Yes, you can modify the rules by selecting the edit icon.
2: Can we apply one rule to different entities?
No, you have to create one rule for every single entity.
Why do you need to use rules?
Clear Categorisation: Using rule creation you can categorize data and files, making it easy to access files in QuickBooks.
Huge time saver: Manual correction of improper data results in more time consumption by setting up rules, and a huge amount of time can be saved.
Class segregation: Class creation will help categorize and segregate data in your own way, whereas directly uploading them may result in data duplication.
Rule customization helps you organize your customer and vendor transactions and minimizes your effort by saving a huge amount of time.
For queries related to Rule creation, reach out to us at support@saasant.com