How to Integrate FTP/SFTP Server with QuickBooks using SaasAnt Transactions?
January 3, 2025
Although FTP is common, manually downloading files from shared file servers and uploading each one at a time into automation platforms like QuickBooks is challenging.
If a company relies solely on manual file sharing, it will be challenging to move, manage, and distribute files to accounting platforms like QuickBooks. Let's look at how SaasAnt transactions can be used in these situations to help businesses and accountants quickly import files.
To learn more about integrating FTP & SFTP servers with QuickBooks using SaasAnt Transactions. Check out this video to understand the process in-depth with simple steps.
Connect & Integrate FTP Server with QuickBooks
Step 1: Log in to SaasAnt Transaction Online
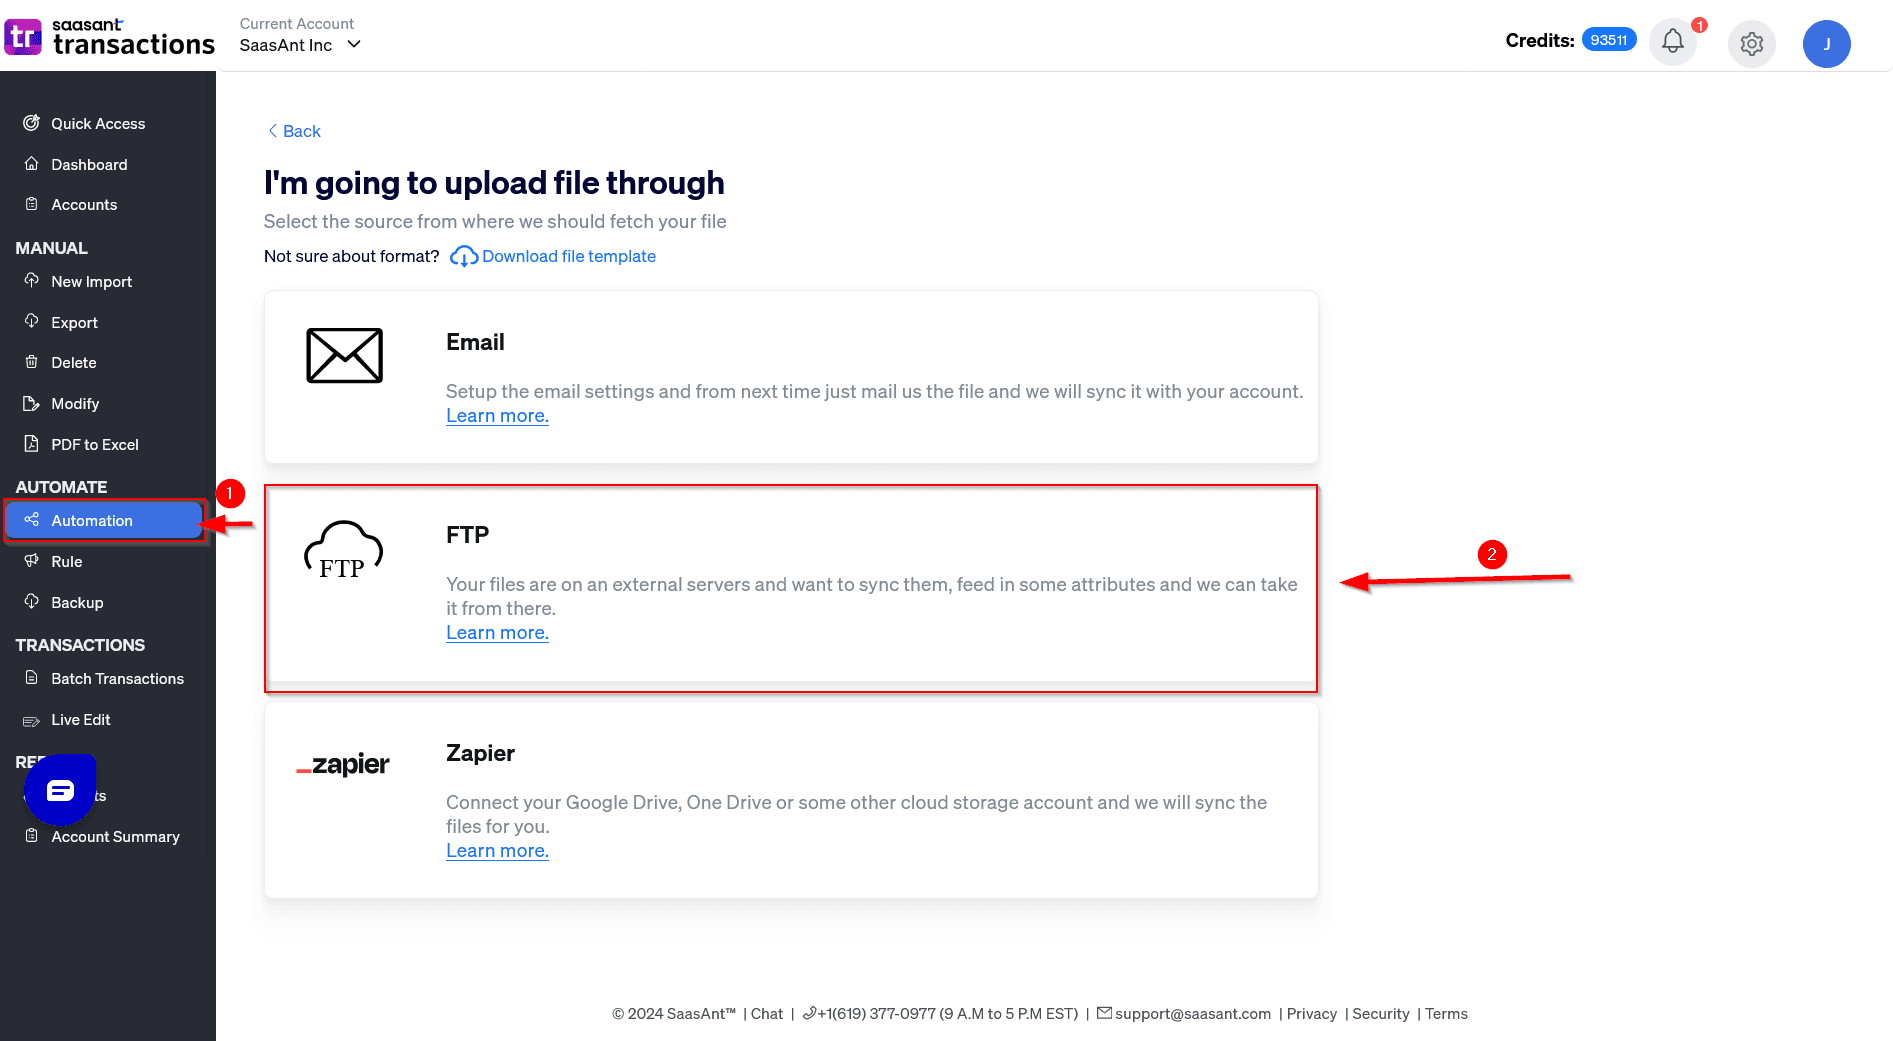
Step 2: Select automation
Step 3: Choose the source as FTP

Step 4: Enter your FTP details like Transaction type, Hostname or IP address of your server, server type, address, port, email address, and folder path.

 Note: The folder path is where you store the files you want to be imported. The email address is where you will be getting the notifications.
Step 5: Upload the Excel file and configure it to match the header section with the Quickbooks header using the drop-down boxes to connect the .csv file with SaasAnt to import it to Quickbooks successfully. Now, review your automation and create the automation to complete the process.
 Step 6: Please map the file header to the respective Quickbooks field in the mapping screen.


 Step 7:
1. Drag and drop the .csv file from your folder to the FTP server folder path.
2. Transactions will monitor your server and fetch the files in defined intervals (60 to 120 minutes)
3. After your file gets imported, you will receive a notification to the email id, stating the confirmation.
4. Once the file is processed, it will be moved into an archive folder inside the same folder.
The same procedure applies to the SFTP server; instead of choosing FTP, choose the source as SFTP.
Track your FTP Imports:
You can verify your processed file information through.
a) E-Mails
b) Automation History
A) E-Mail:
You will receive notification alerts immediately after the file is dropped in the folder pathway.
Note: SaasAnt Transactions will crawl and search for files ( 60 to 120 minutes) mentioned server folder path.
1) Confirmation mail - SaasAnt Transactions will send you a confirmation email to the source email address.
Note: *source email is the email address specified during email setup configuration
2) Error and fix mail: After your file gets processed, you will receive a notification email outlining any errors in the files with a possible fix suggestion.
3) Analysis mail: You will also receive a thorough analysis of the success and error rates for the uploaded file.
B) Track your automation:
Tracking your file using automation helps find errors and identify the reasons behind process errors.
Select Automation
Select jobs on the "my automation" page to track and check the import success status of your file.
Select the history icon in the top right corner of the automation page to view the file analysis with the success and failure records.
 Trips & Tricks:
Check out the list of errors below to see how to fix any you could encounter after uploading your file.
1. Server not connected error – If you are receiving a server not connected error, then the given server ID is incorrect, to fix this error mention the proper ID.
2. Username and password mismatch error - In the mapping screen, when the entered Username and password are incorrect, the system will throw this error. Use the proper credentials to fix this error.
3. Folder path unavailable error - If the mentioned folder path is not found then you will get this error, “folder path unavailable error”, to rectify it check and mention the proper folder path.
4. FILE FORMAT error- If you receive an error mentioning the wrong file format, then you need to rectify it by uploading the file format, which is .csv file/Excel.xlsx; no other formats will be accepted
5. File not processed error -- If you receive a file not processed error, then the processed files are moved into the error archive due to issues in the uploaded data. To fix it, place the folder again in the exact designation location with the corrected data. For example, incorrect data could be no customer id or invoice number in the header section.
If you come across any other issues, kindly reach out to support@saasant.com