How to Integrate Zapier with QuickBooks Online using SaasAnt Transactions?
February 6, 2025
The struggle to upload your accounting files manually from cloud support systems like Google Drive, through Zapier to QuickBooks is tedious and it can be rectified with just one automation tool, and one such tool is SaasAnt transactions.
As a business owner, all you need to do is integrate Zapier with SaasAnt transactions, and the rest is taken care of with just a setup of trigger and action. To find out how to follow the instructions below to understand the process.
To learn more about integrating Zapier with QuickBooks Online using SaasAnt Transactions. Check out this video to understand more about the process in-depth with simple steps.
Prerequisites:
Account in SaasAnt Transactions with Automation Plan with Zapier Account
Integrate Zapier with QuickBooks
Step 1: Log in to QuickBooks and connect with the SaasAnt Transactions.
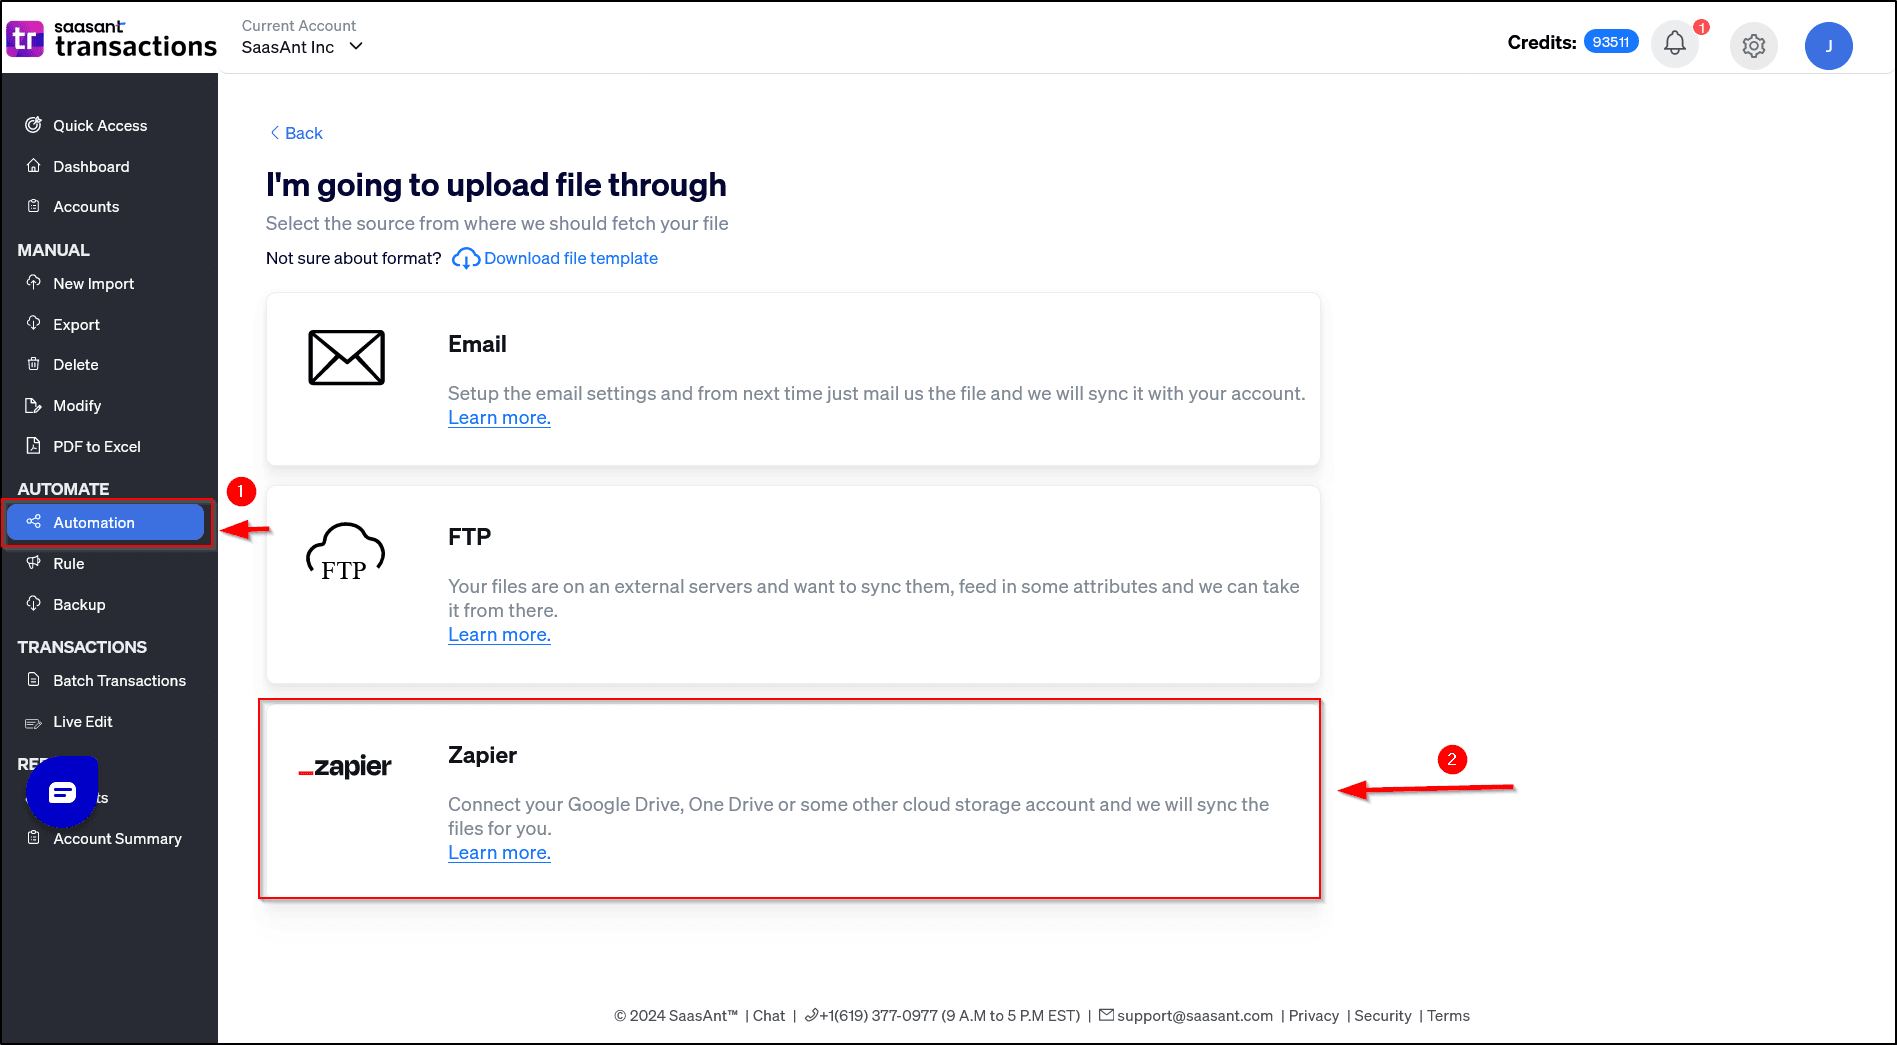
Step 2: Select automation.
Step 3: Choose the source as Zapier.
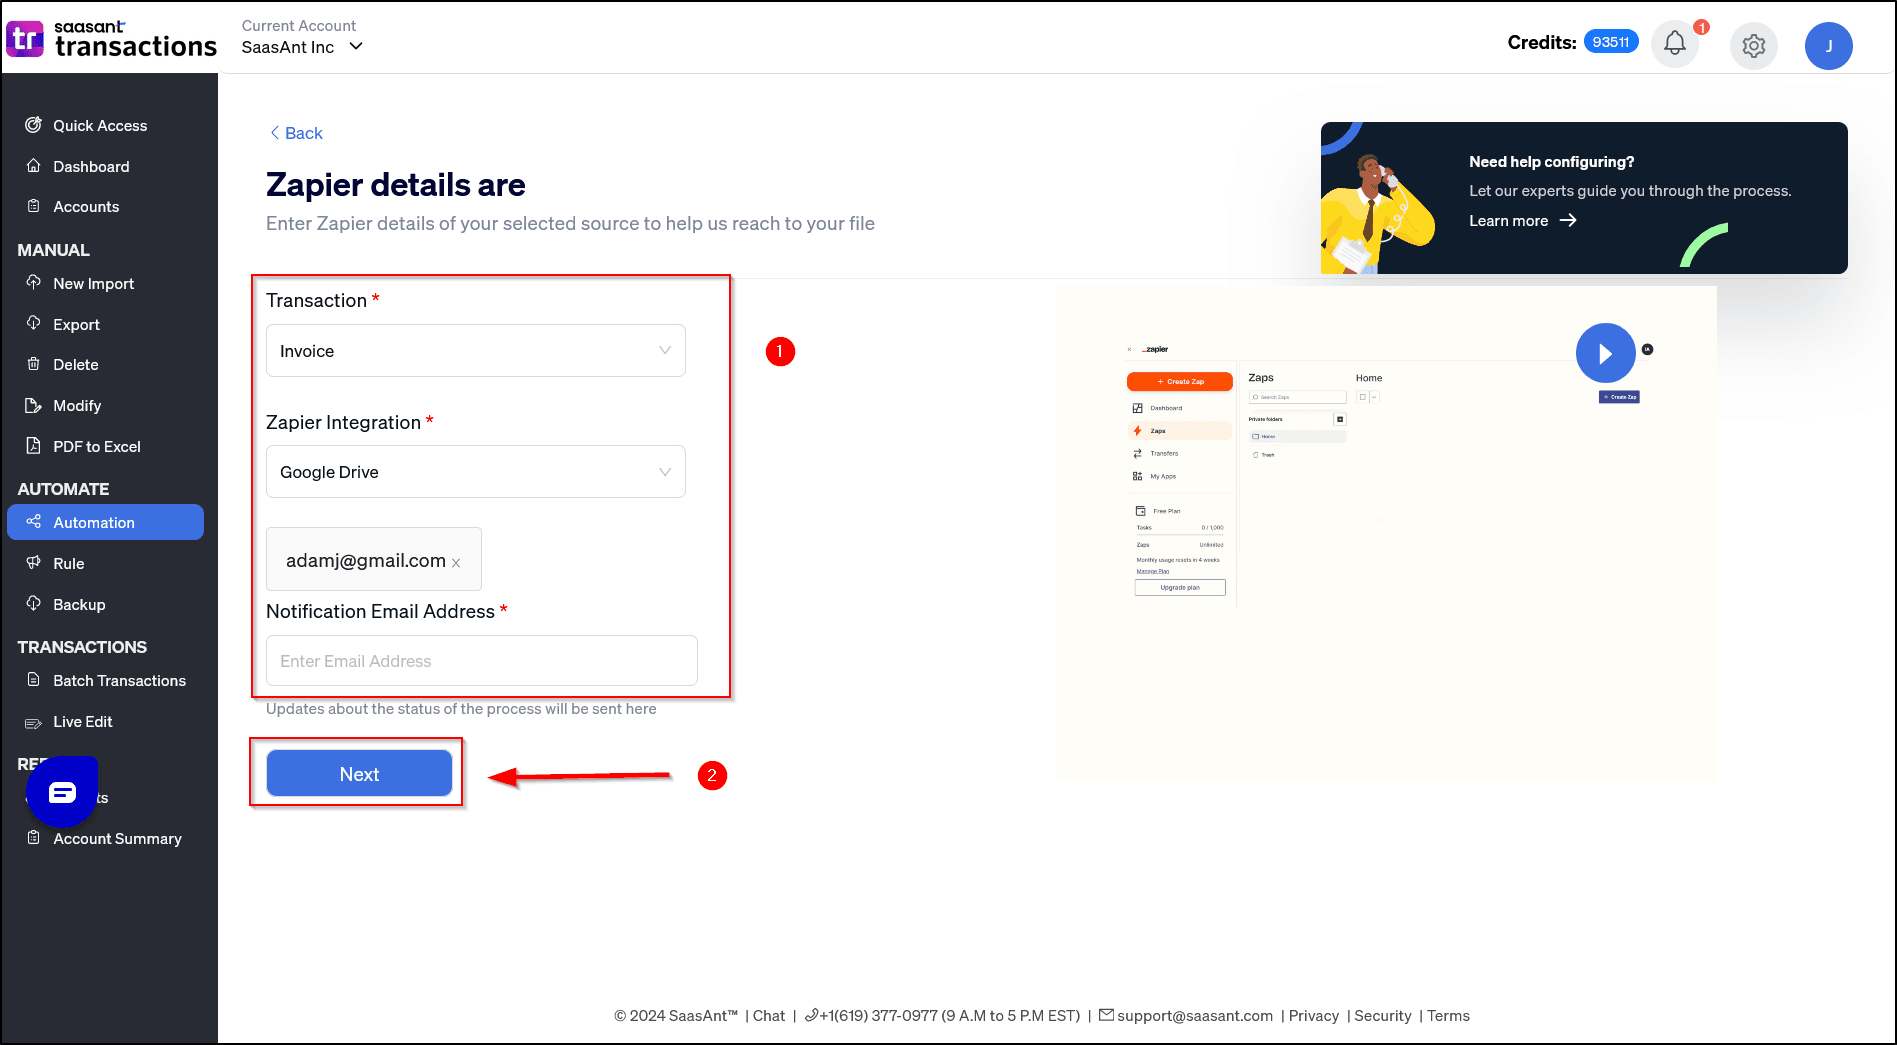
 Step 4: Select the transaction and then select the Zapier integration method as " Email or Google Drive."
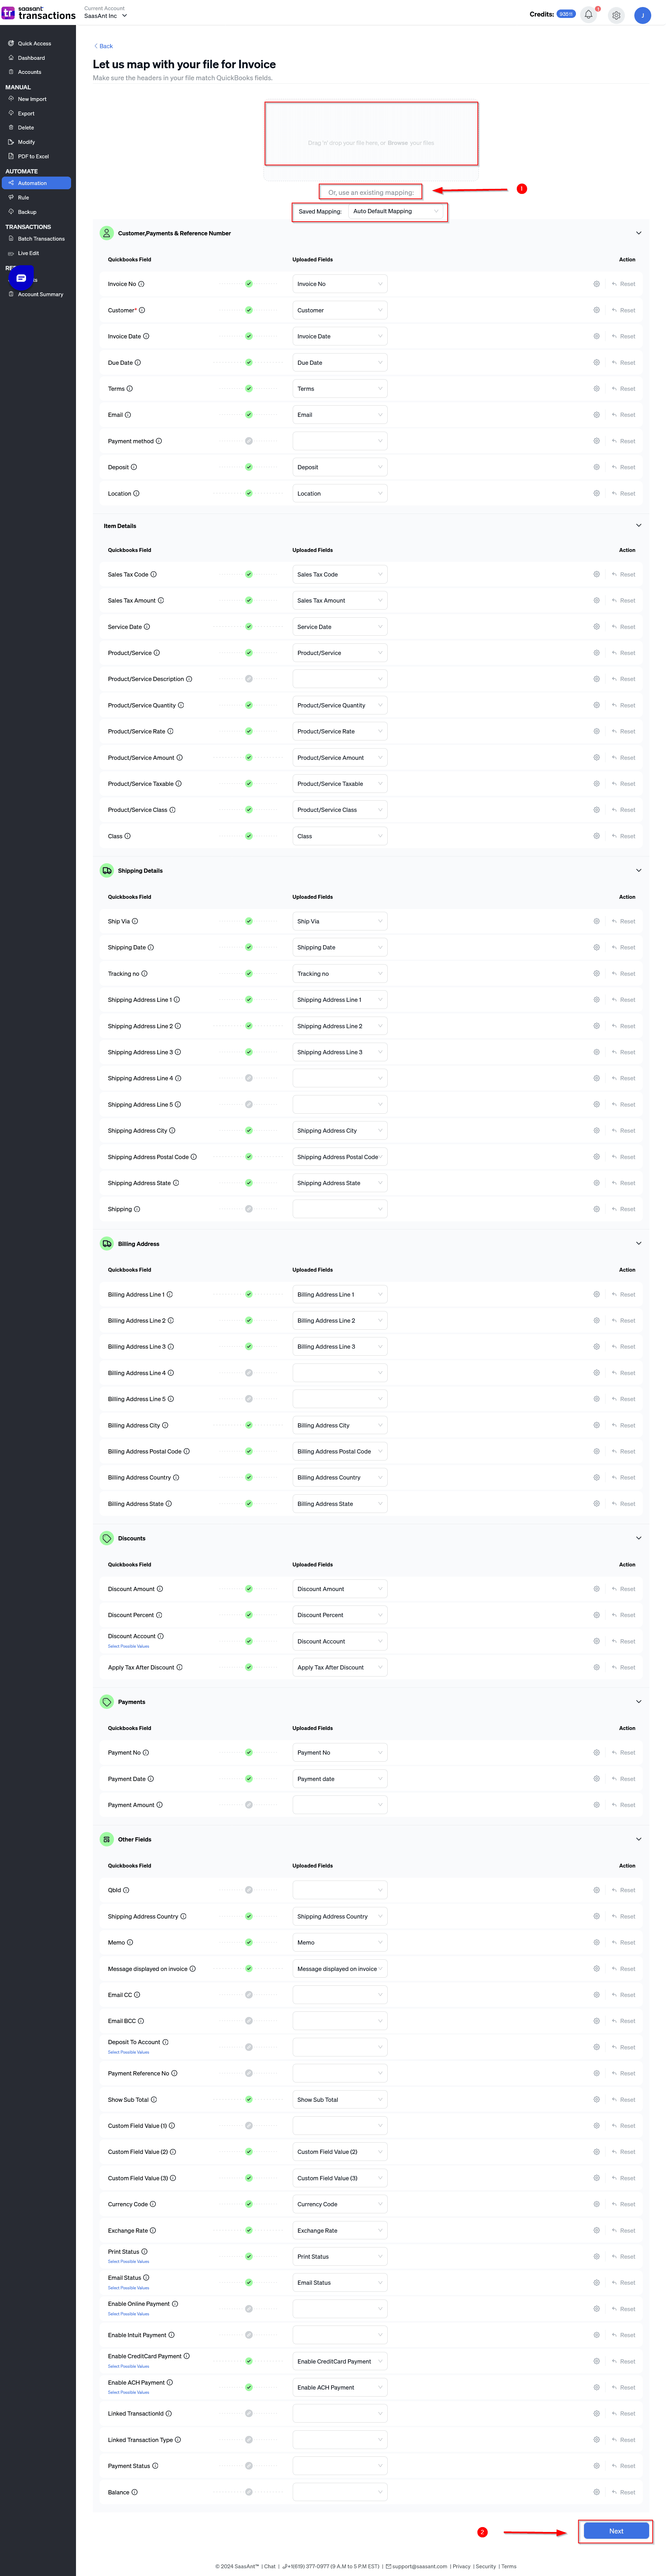
 Step 5: Upload the excel file and configure it to match the header section with the QuickBooks header using the drop-down boxes to connect the .csv file with SaasAnt, to import it to QuickBooks successfully
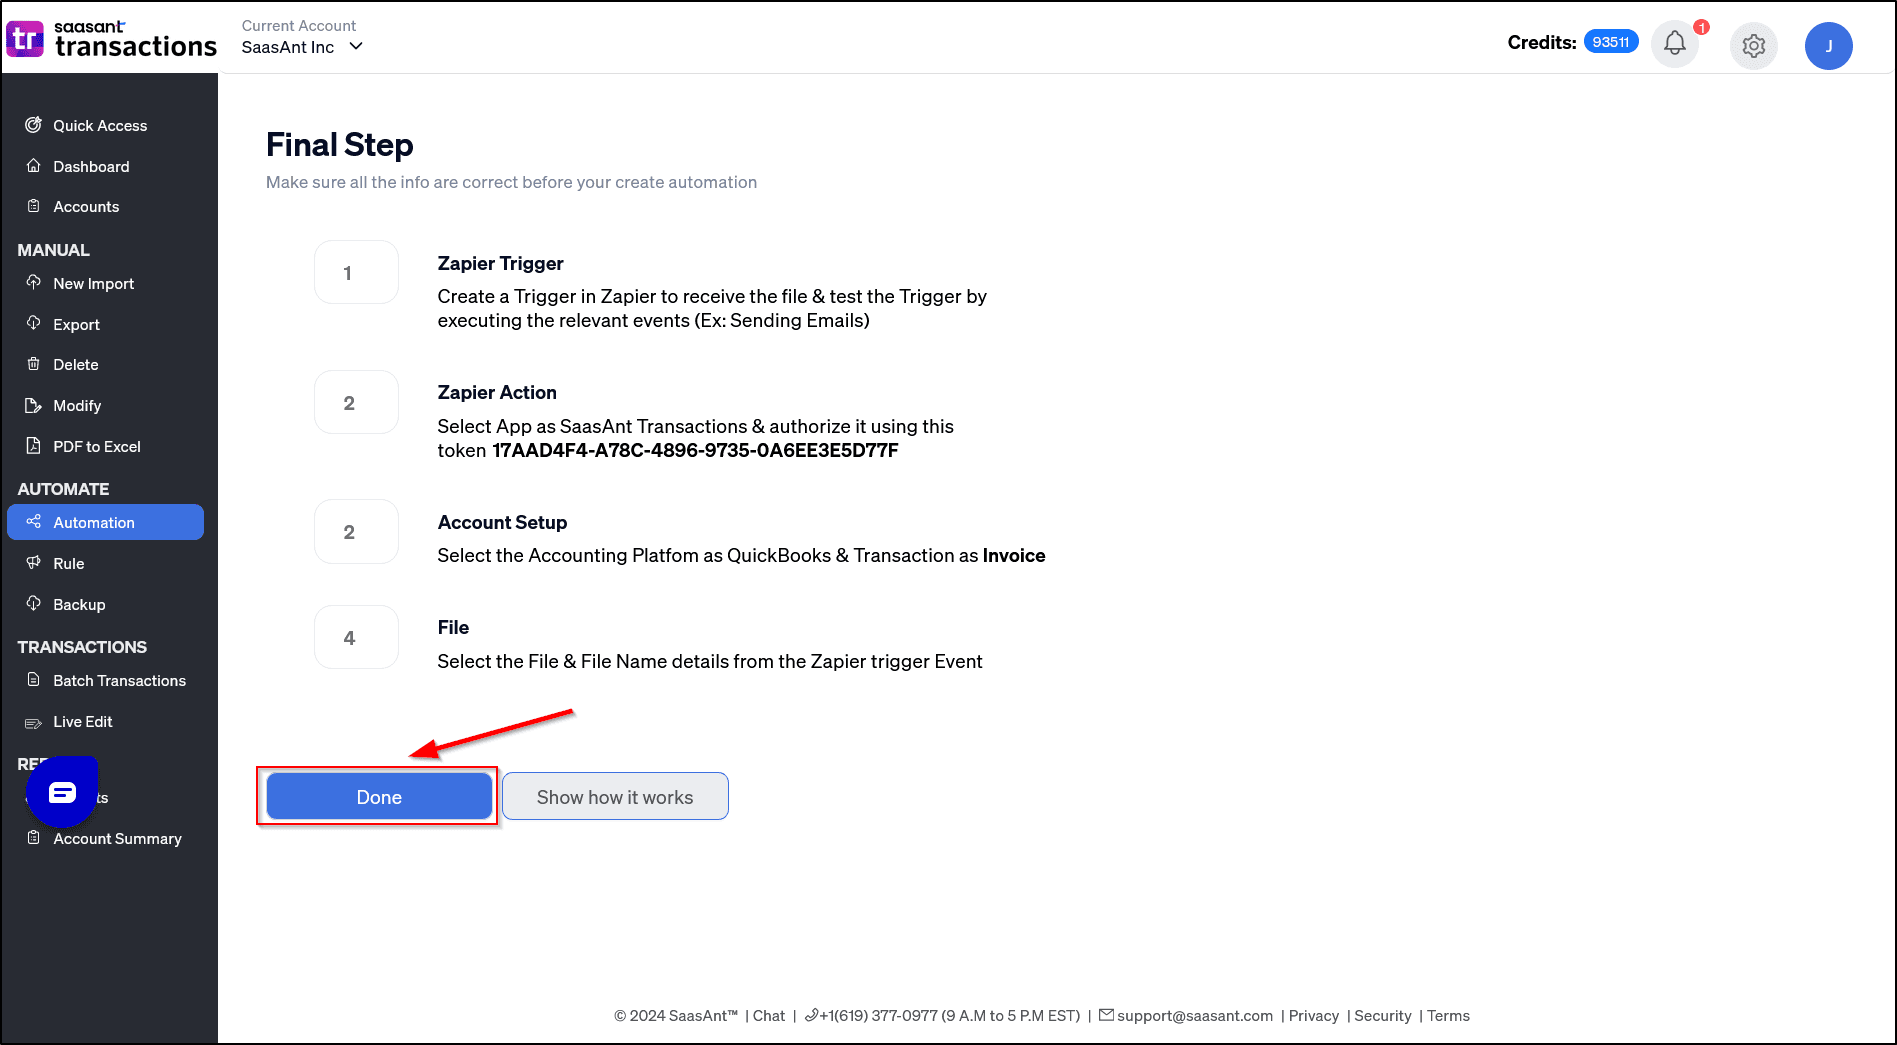
Step 6: Review your automation and select create the automation to complete the process.
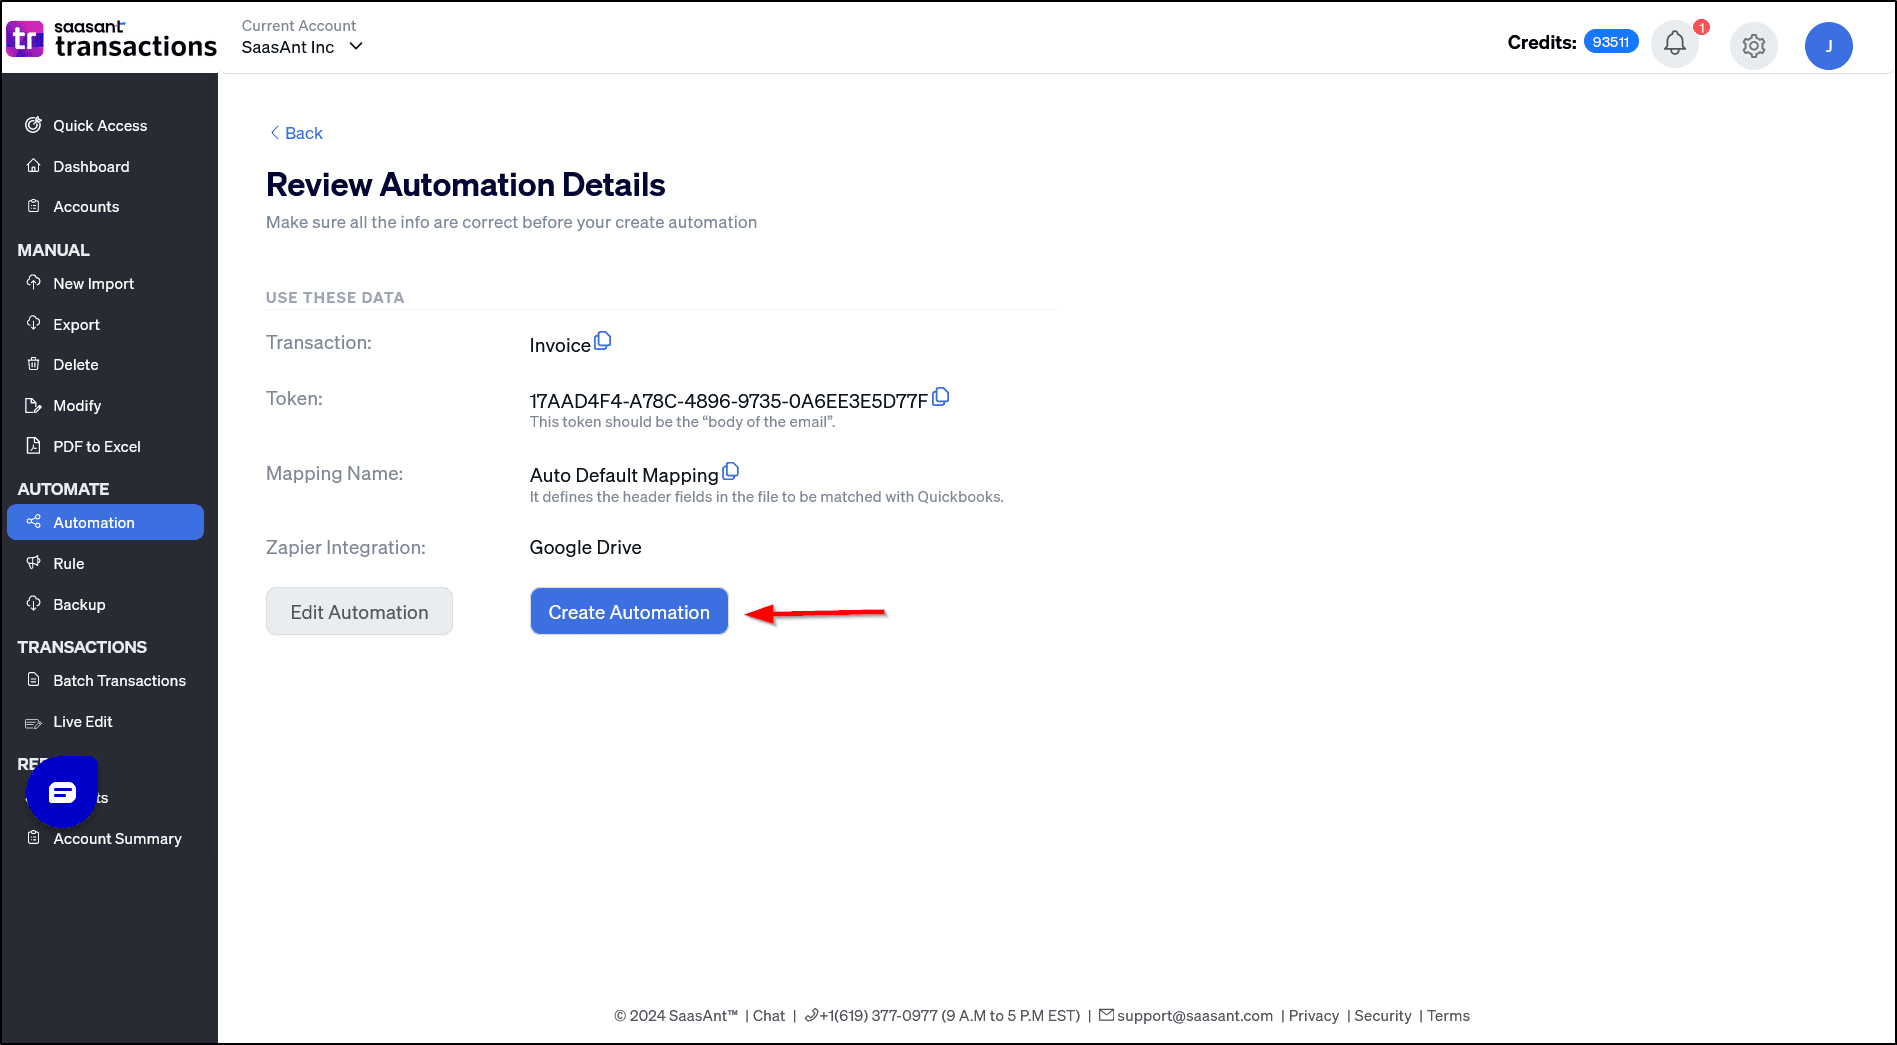
Step 7: A secret Token ID will be displayed for secured file processing. Make sure you note down the token id, it will be used in the Zapier authentication screen.
Note: The email address is where you will be getting the notifications.
Connect Zapier with SaasAnt by configuring a trigger and action.
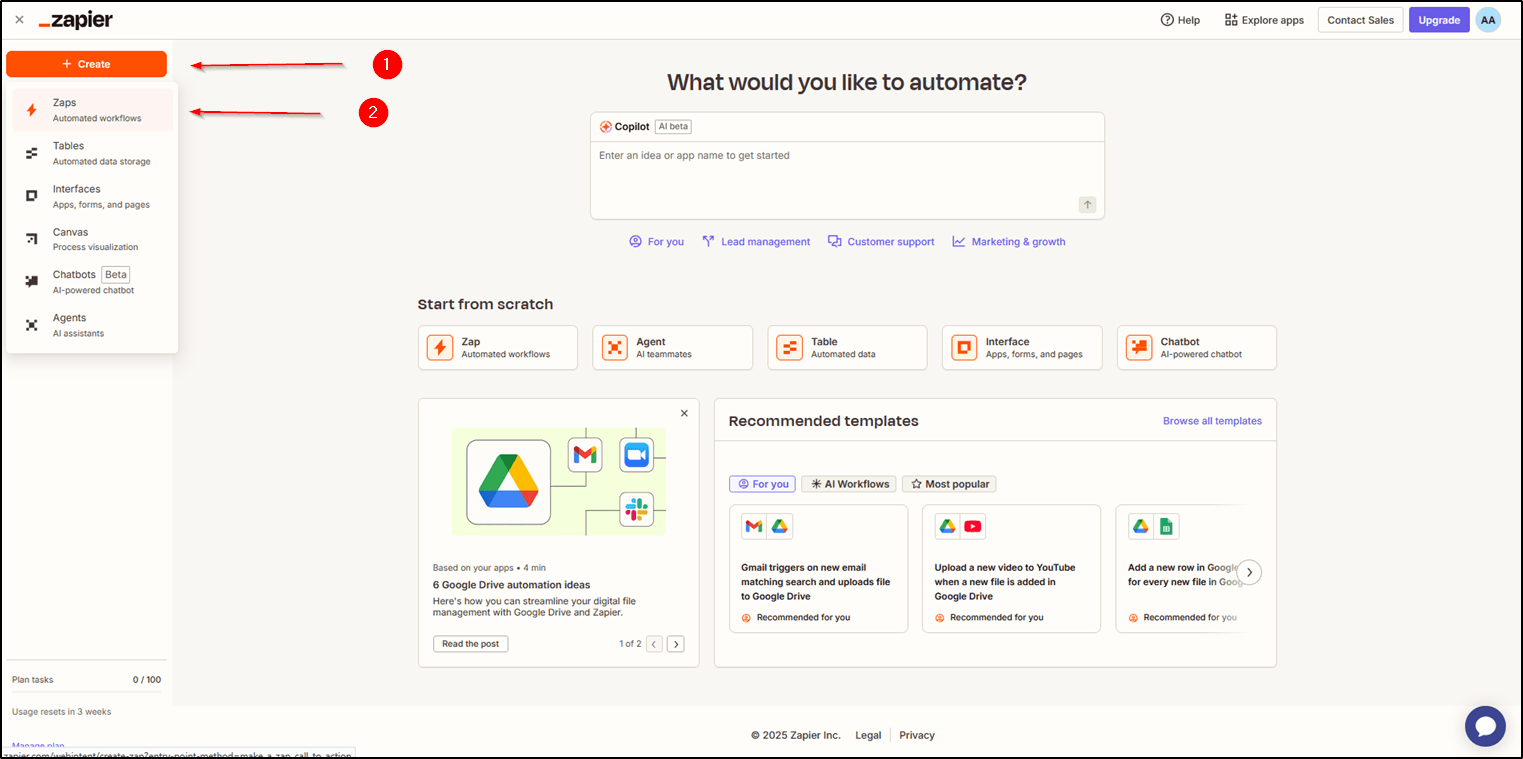
1. Log in to your Zapier account and select Create a Zap. Select Create and then click Zaps.
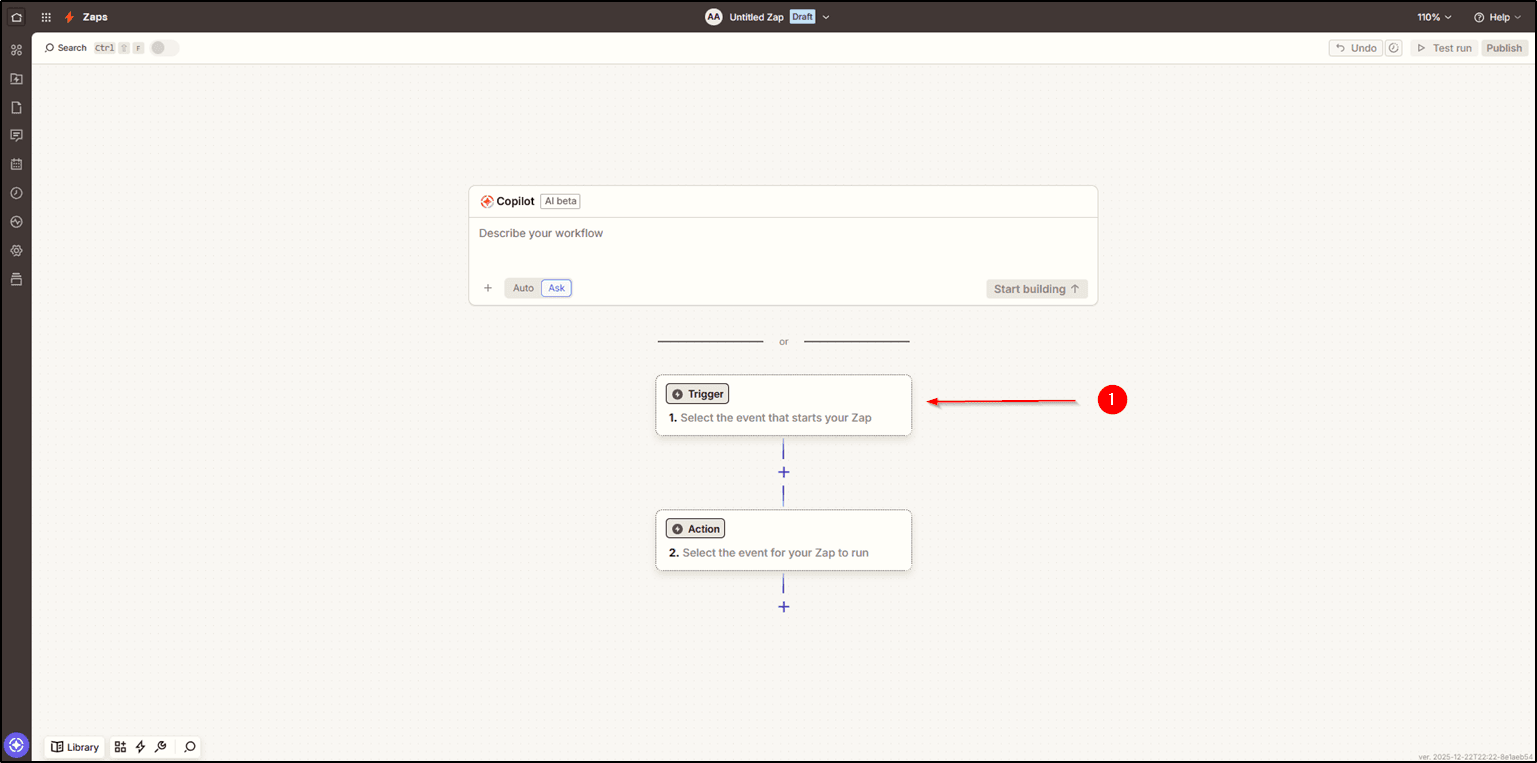
2. Select Trigger and select Google Drive.
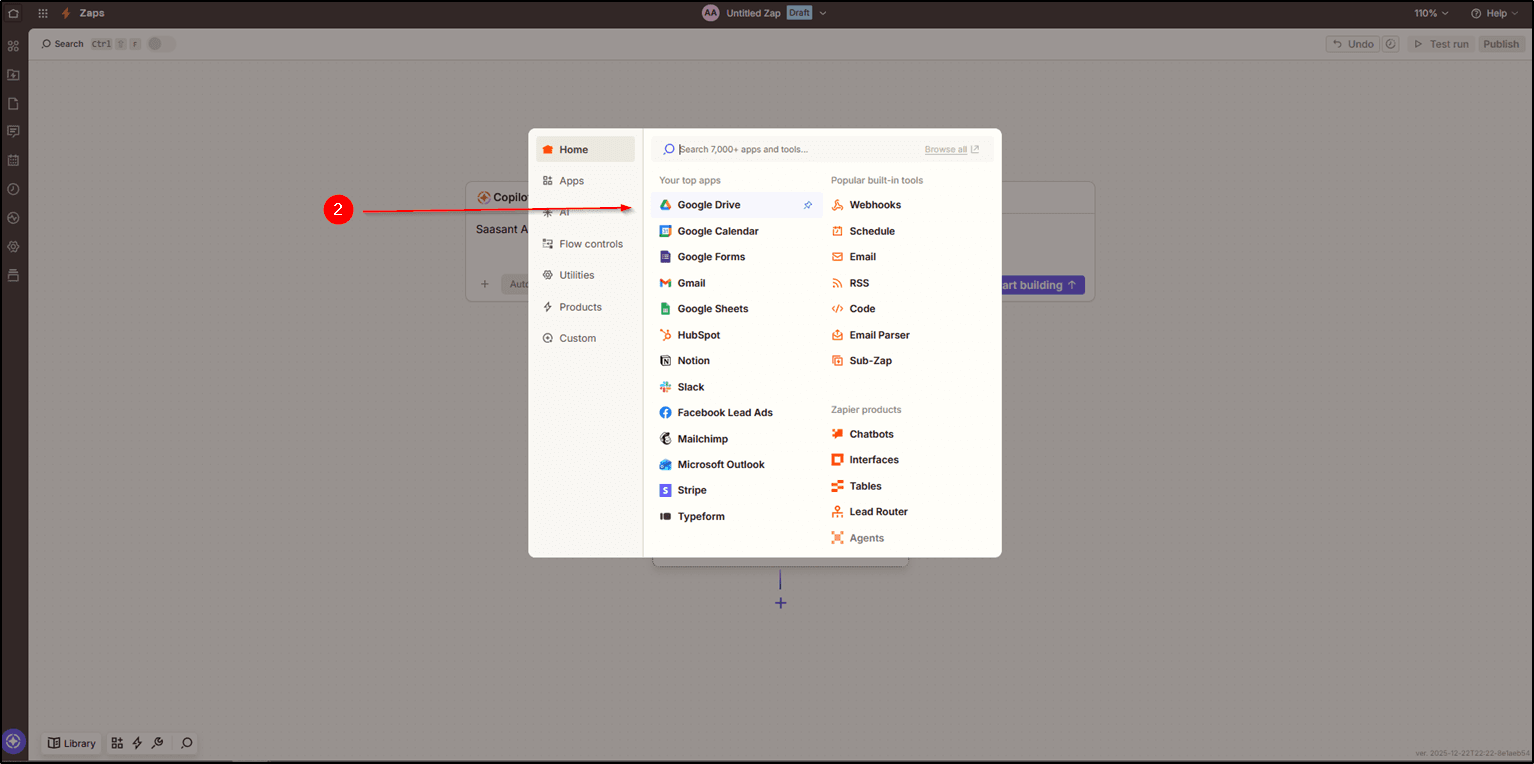
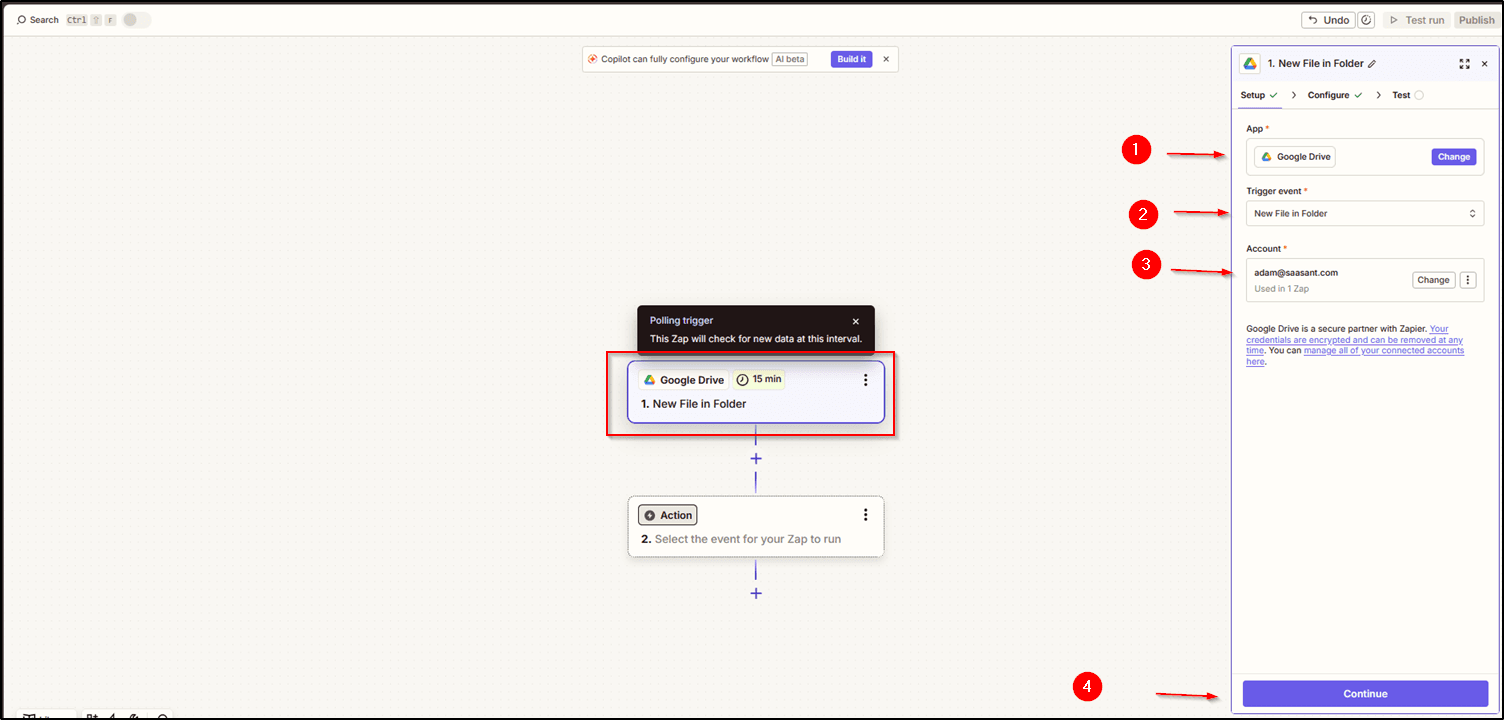
3. Setup to Trigger the Event. Select Google Drive, Select “ New file in Folder “ ( or other options according to your Google Drive setup). Select your Google account and click continue.
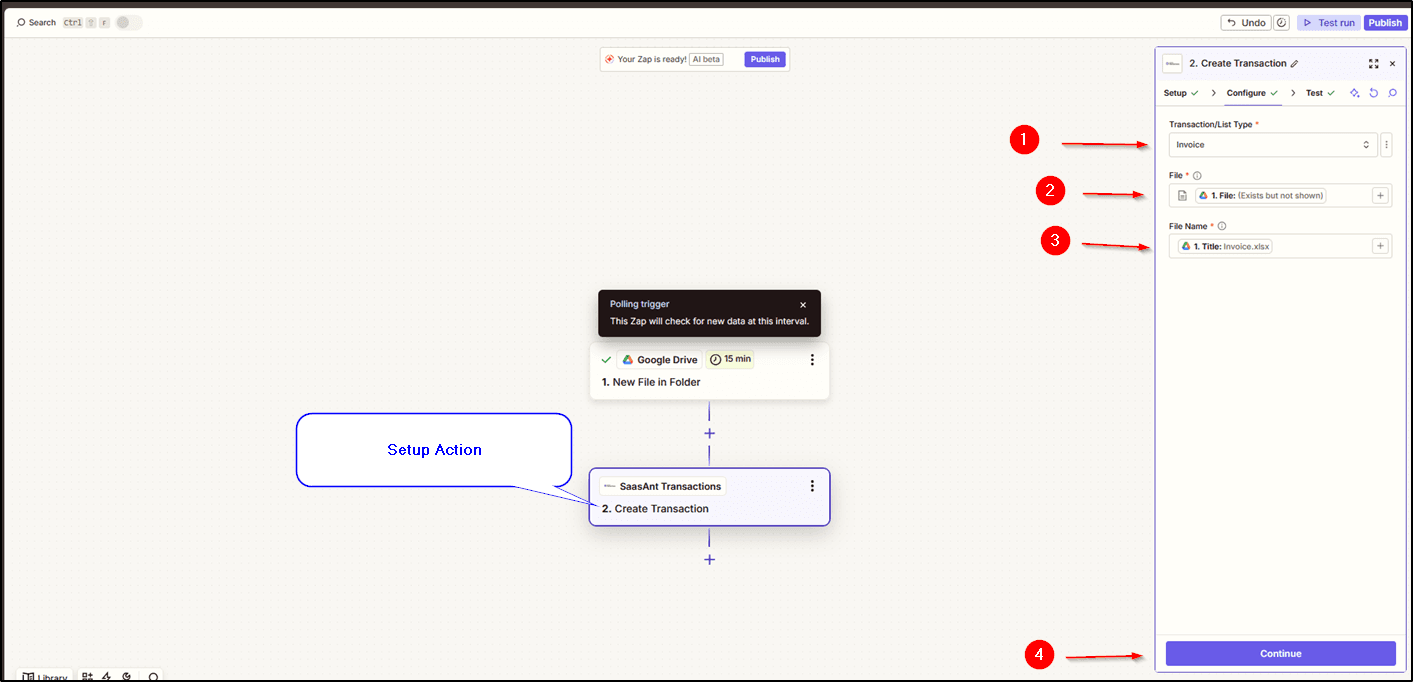
4. Set up the Action. Select Transaction type, select File and select title and continue.
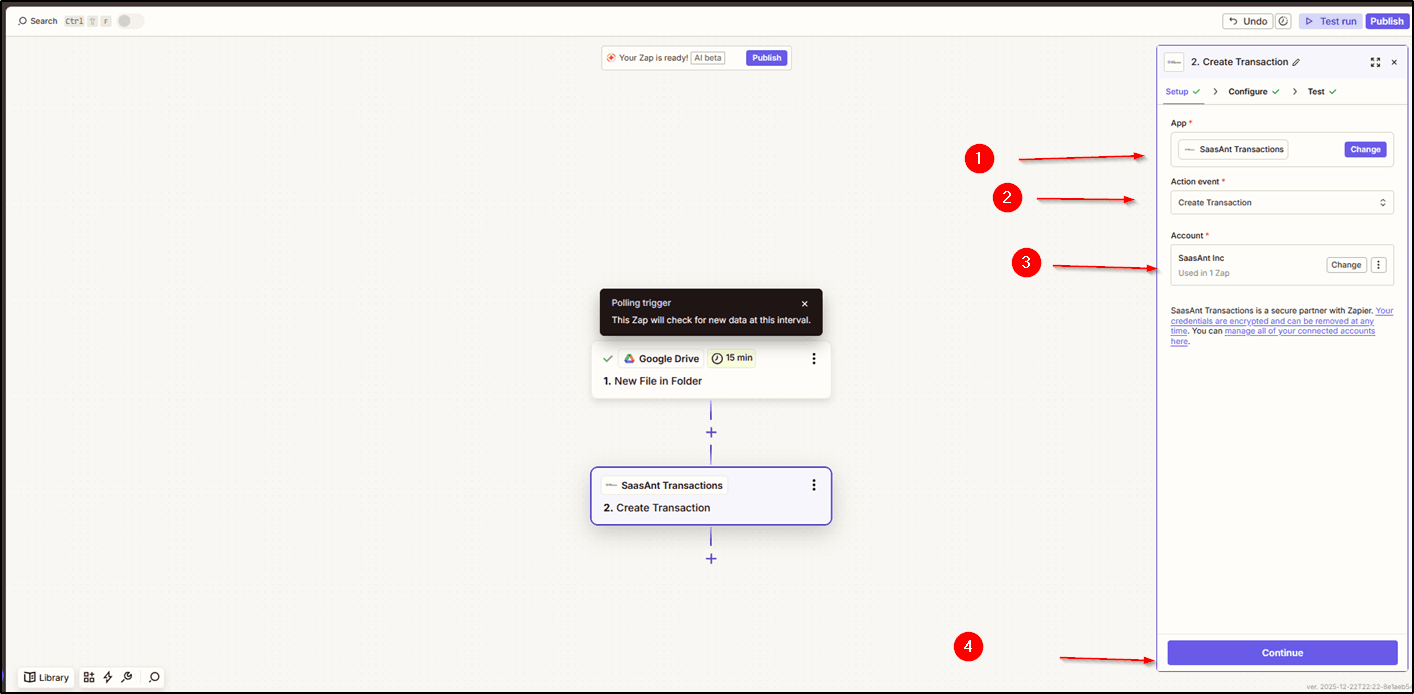
5. Select the Saasant app, select Create transaction, select the company name, and click continue.
6. Click Test

7. When you see the message Success, click Publish.
Note: Zapier will deliver them to SaasAnt, and SaasAnt will automatically upload them into QuickBooks.
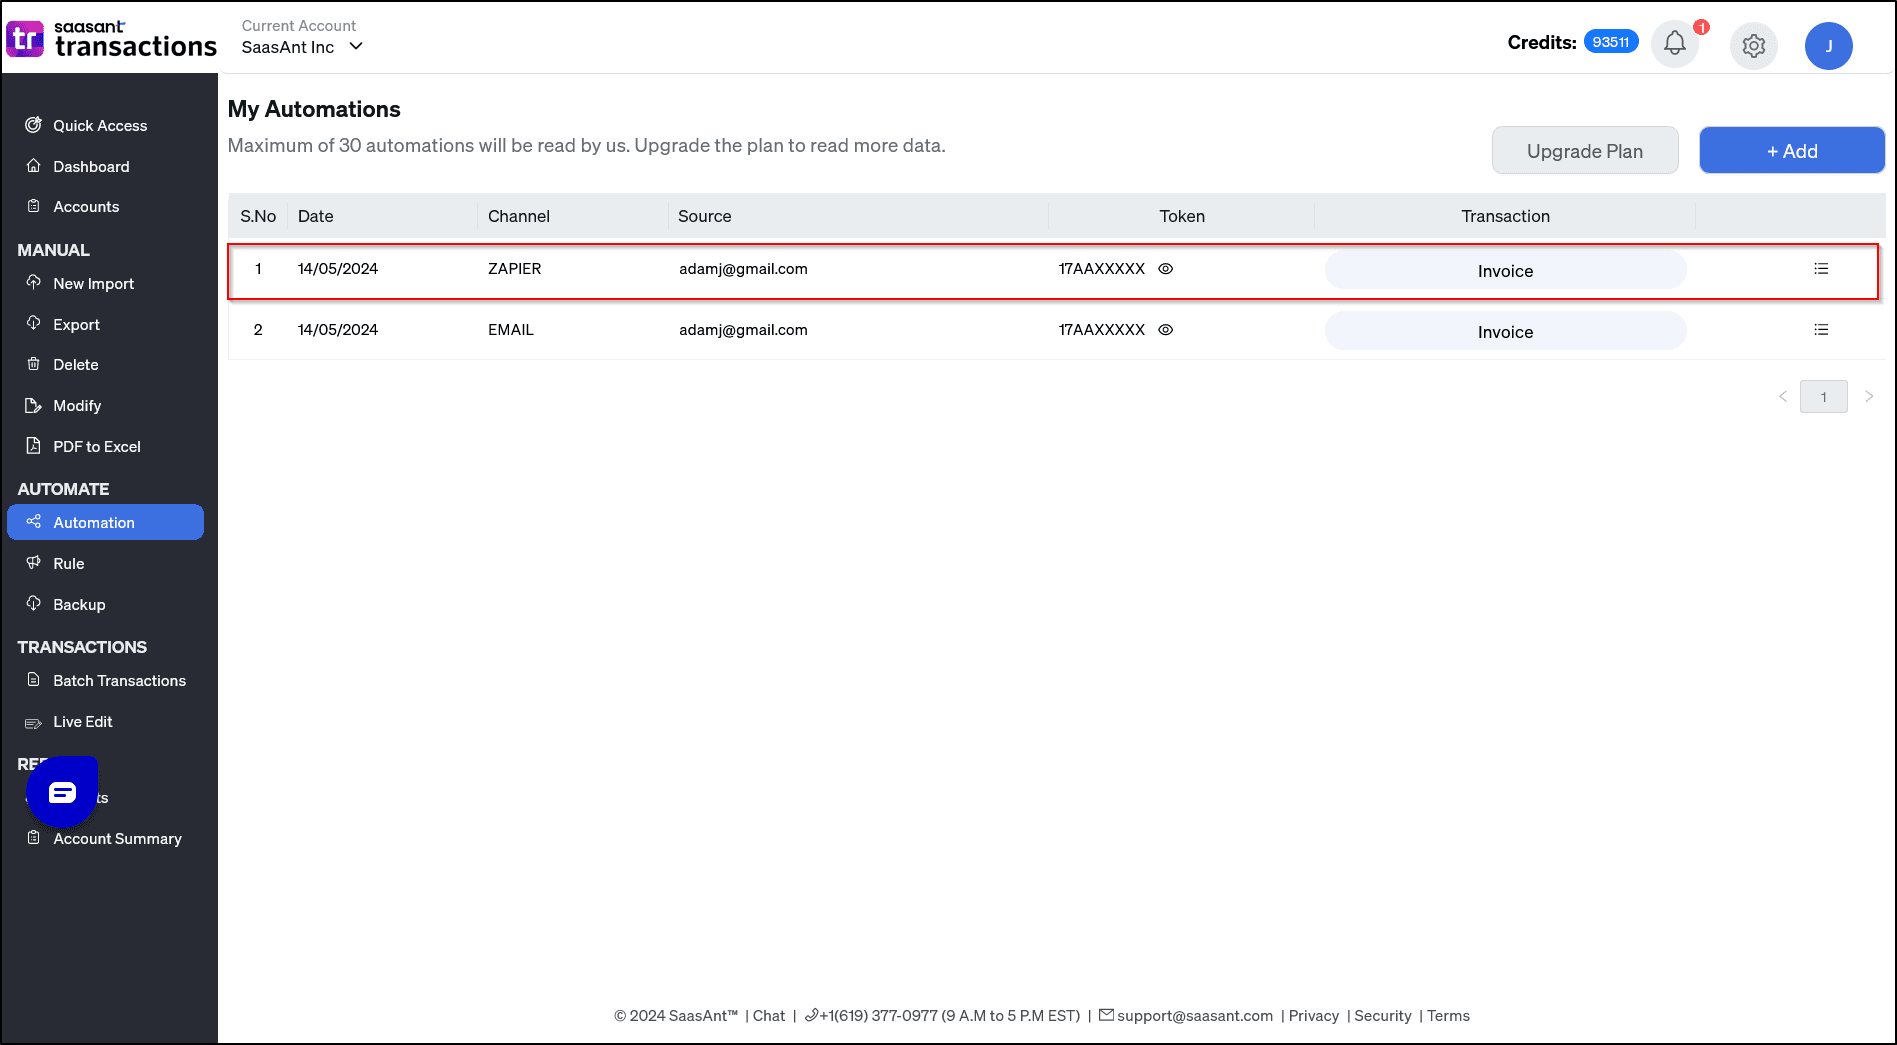
8. Go to Saasant Automation and click edit and view jobs.

Set up an action.
1: Select SaasAnt transactions from the apps & events section
2: Select Create Transactions and sign in to SaasAnt transactions.
3: Enter the token id in the Zapier authentication screen and allow Zapier to access SaasAnt transactions.
4: Select the accounting platform as QuickBooks online,
5: Select the transaction type
6: Select the file, which is the same attachment as the file you have sent
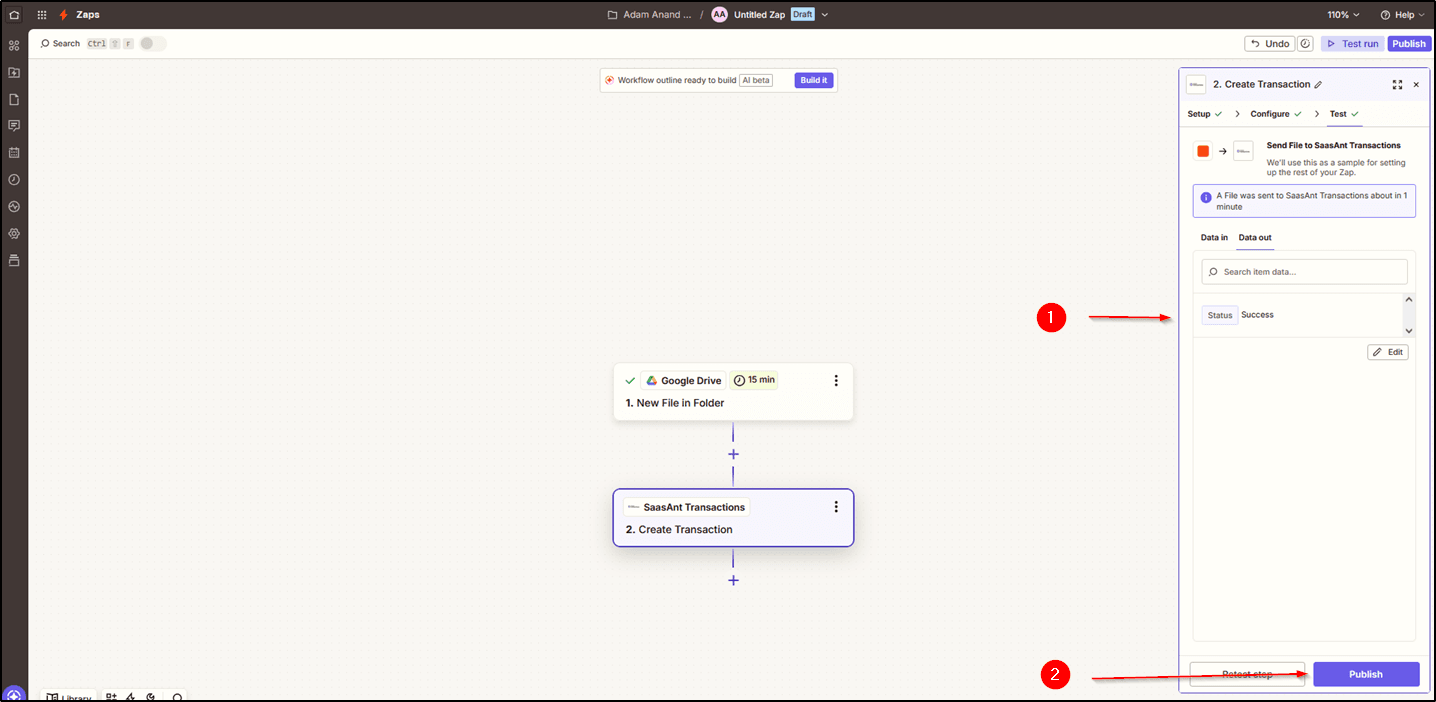
7: Test the action, Zapier will send the file to SaasAnt.
8: Check the status of the sent file and publish the zap.
Note: Zapier will deliver them to SaasAnt and SaasAnt will automatically upload them into QuickBooks.
How to track your automation history:
To find whether the file is successfully imported or not, notification alerts are communicated via:
E-Mails
Automation History
A) E-Mail:
1. Confirmation mail: A confirmation email will be sent to the source email address by SaasAnt transactions.
2. Error Notification mail: Following the processing of your file, you will receive an email notification describing errors in the files and a fix suggestion.
3 . Import Summary mail: You will also get a comprehensive analysis of the success and error rates for the submitted file in the analysis mail.
B) How to track your automation history:
1. Automated file tracking is useful for identifying errors and determining the causes of processing errors.
2. Select automation, then view jobs on the "my automation" tab to track and check the import success status of your file.
3. Select the history icon in the top right corner of the automation page, to view the analysis of the entire file, the success and failure records, and the import status.

Tips & tricks:
You may encounter the problems described below after uploading your file; take a look at them to learn how to fix them.
Invalid Token ID error:
When the Token ID provided in the Zapier Account Creation Screen differs from the Original Token ID, the system will display an error as "Invalid token error." The original Token ID must be correctly and accurately stated in order to correct this.
Email address configuration error:
The system will identify this as an "email address is not configured error" if the email was sent from a different address than the one you mentioned as a source email address. Use the configured source E-mail id to sort out this problem.
Processing error:
It's likely that the file you just uploaded is empty if you get an email message that says "processing error" and contains blank status reports for both errors and successes. In this case, you should review the data sheet before uploading the file.
If you come across any other issues, kindly reach out to support@saasant.com