PayTraQer Rules Configuration - A Complete Guide
January 1, 2025
Prerequisites
You should have signed up with PayTraQer and connected your QuickBooks account and payment processor or e-commerce store.
Frame customized rules in PayTraQer
Sign in to your PayTraQer account.
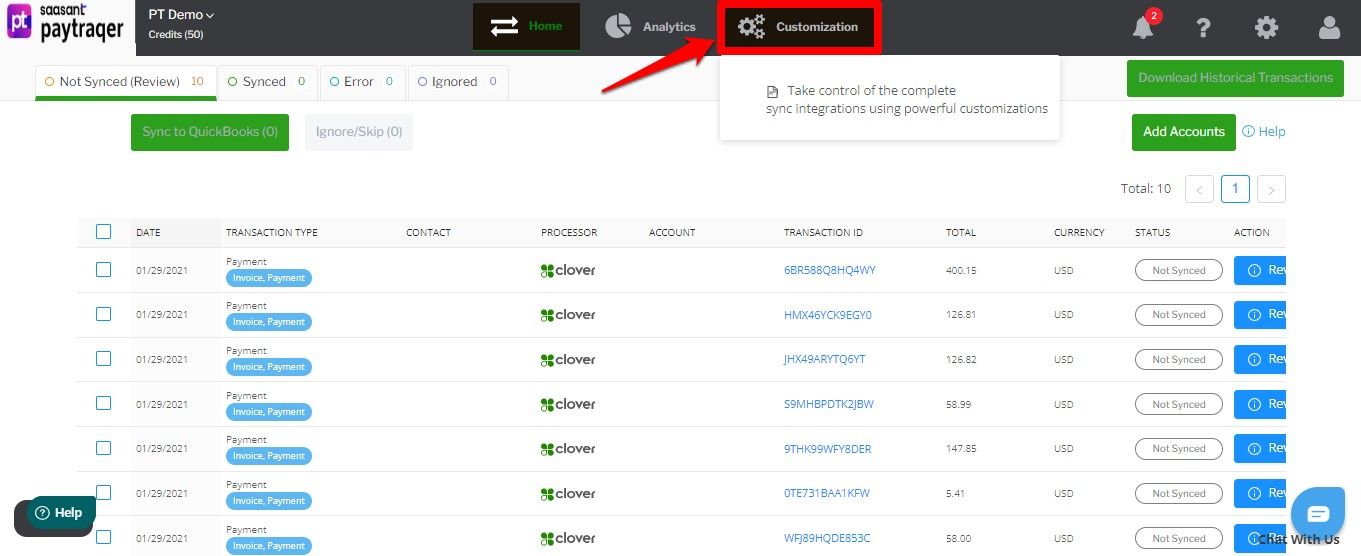
Click on the Customization tab from the top horizontal menu.
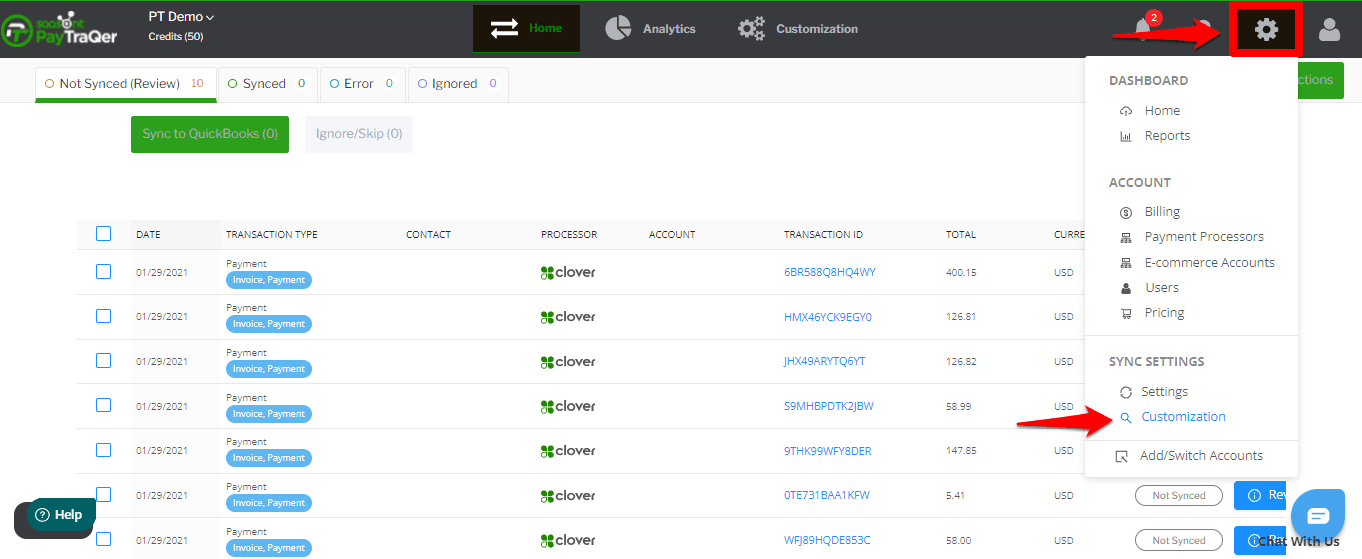
Alternatively, navigate to Settings icon > Customization.
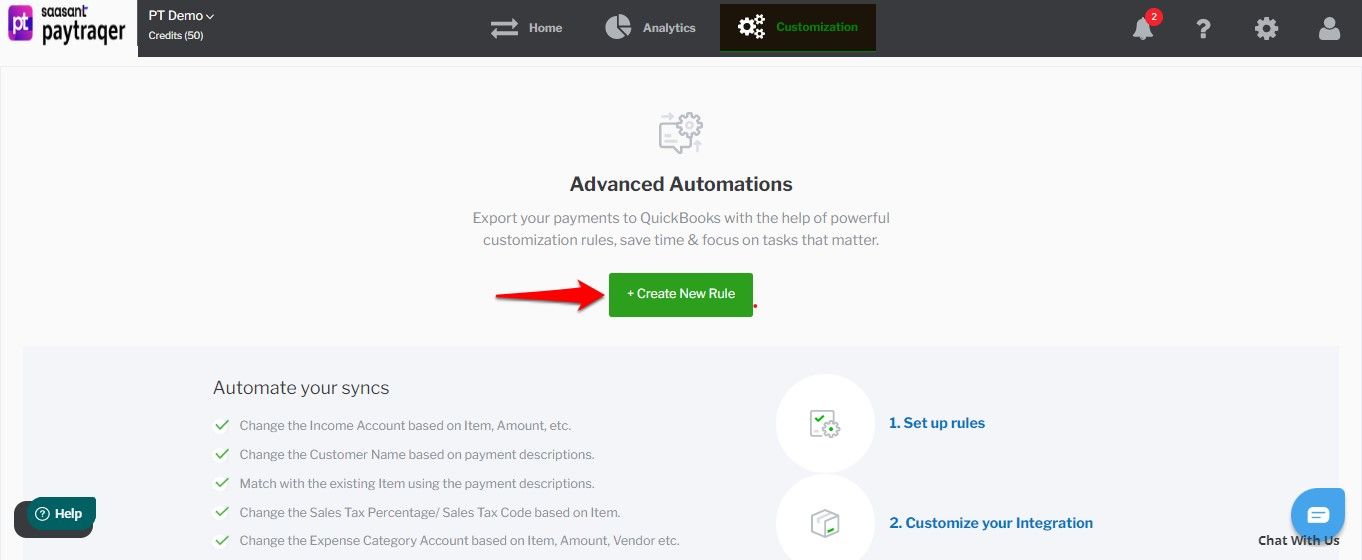
Click on the Create New Rule button.
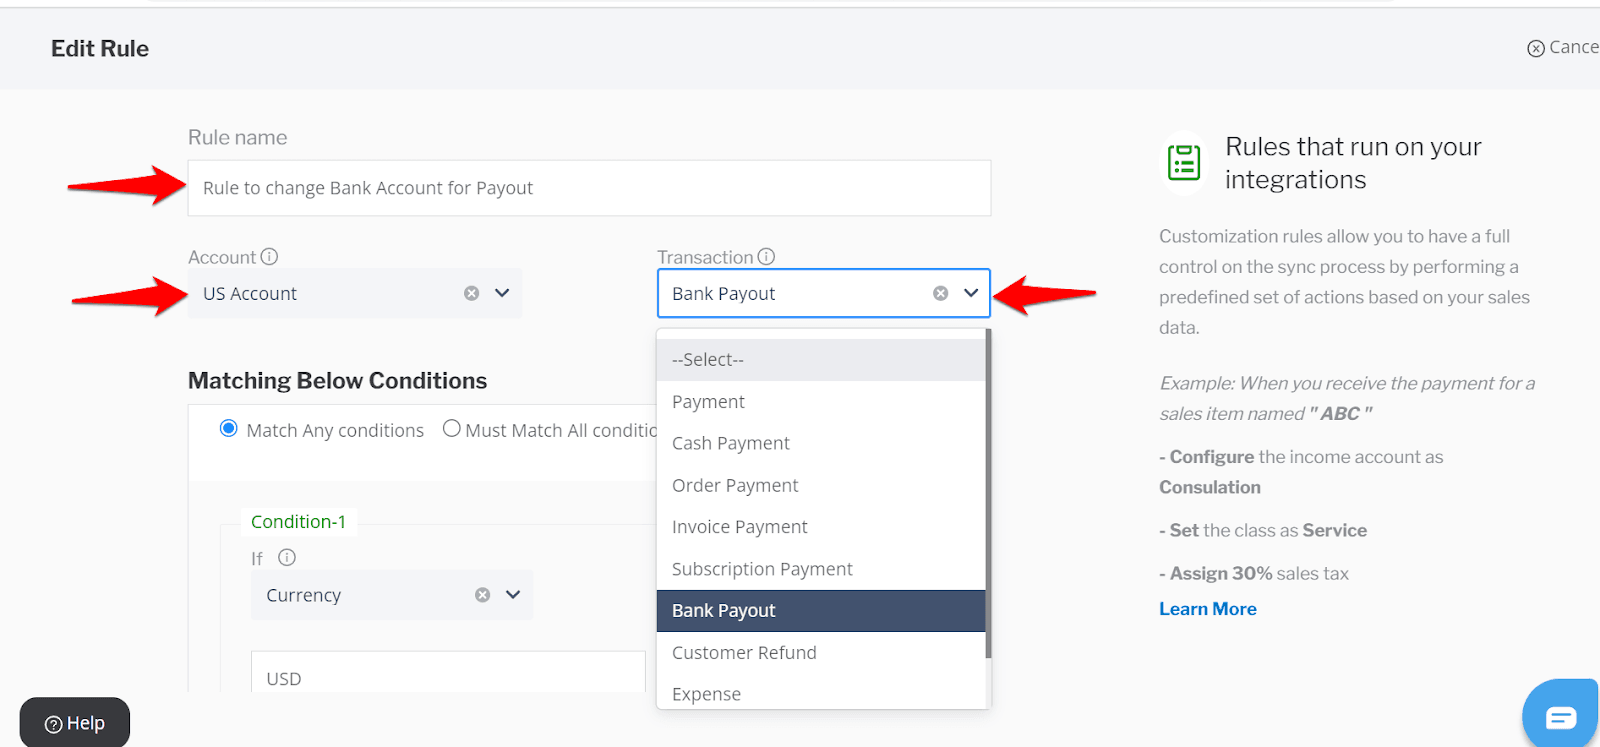
Enter a unique Rule Name for your reference.
Choose the Account from the dropdown menu.
Choose the type of Transaction to which you want to apply rules.
Conditions | Description | Possible Values |
Currency | The Currency associated with the transaction (Sale/Expense/Payout) | USD, CAD, etc... |
Processor Currency | The Currency associated with the end customer (Sale). Sometimes, it may be different from the transaction currency due to multi-currency sales | CAD, EUR , etc... |
Processor Channel | Method of Payment (eg) Card Payment or Cash Payment | Cash or Card |
Amount | Actual amount of the transaction (Sale/Expense/Payout) | Actual Amount |
Customer Name | Exact Name of the Customer, as provided in the processor | Customer Name |
Product/Service Name | The Product or the Service Name, as provided in the processor | Product/Service Name |
Product/Service Description | To capture the information given in the processor description | Notes |
Custom Function/Expression | This function is to modify the configuration settings, Only SaasAnt Developers will use this function, If you want to customize kindly contact support | Contact Support |
Conditions and Actions
Now, this step can be a little tricky. So, observe the instructions carefully to set rules appropriately.
You will need to set Conditions and Actions here.
If the transaction matches the given conditions, PayTraQer will perform the configured actions.
Conditions
For instance, let’s say you want to transfer the payouts to a different bank account if the amount is greater than a certain value.
In the condition part, choose the field to which you need to set rules (Currency, in this case).
In the Operation box, choose your condition, that is if the selected field value equals, exceeds or contains.
Enter the condition value in the next box.
You can set multiple conditions by clicking the Add New Condition button.
Multiple Conditions
You can set multiple conditions and actions.
Select Match any condition if you want PayTraQer to perform the action even if the transaction matches any one of your conditions.
Select Match all conditions if you want PayTraQer to perform the condition only if the transaction matches all the given conditions.

So, let’s say you want to transfer the payouts to a different account if the payout value is greater than or equal to $5000.
In the Transaction box, select Bank Payout.
Select Match any condition.
In the condition part, select Currency.
In the Operation box, select equal.
Enter 5000 USD in the next box.
Click the Add New Condition button and select Currency.
In the Operation box, select is greater than and enter 5000 USD in the next box.
Actions
Now, the conditions are set. PayTraQer automatically applies the configured action to all the transactions that match your conditions.
Here is how to do it.
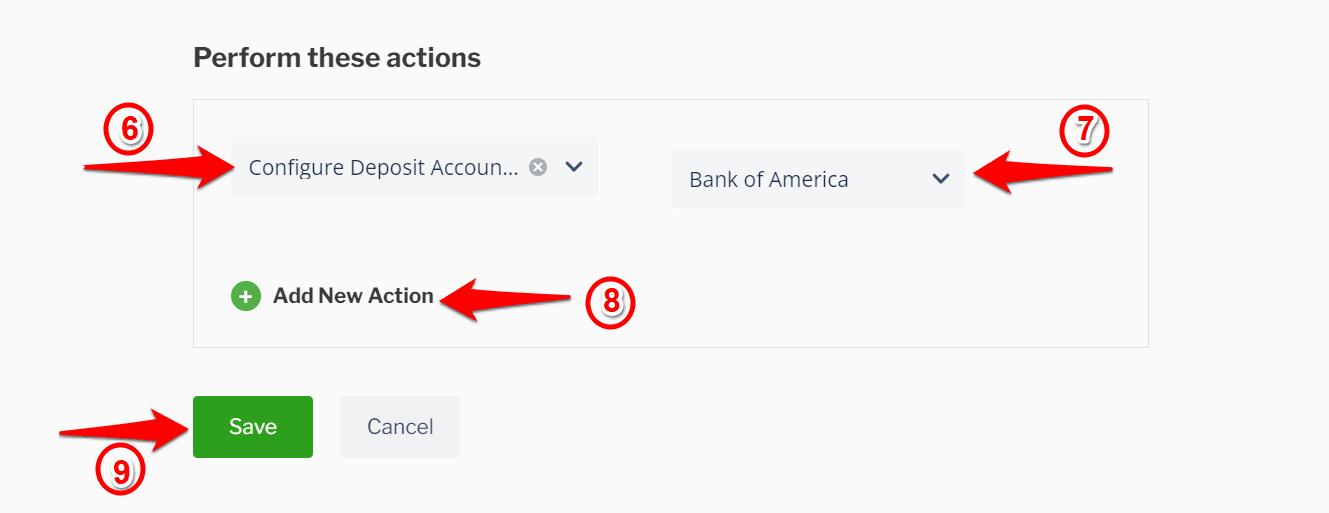
1. Choose the field to which you want to perform the action.
2. Select the action in the next box. PayTraQer suggests the possible actions in the dropdown menu.
3. You can add multiple actions by clicking the Add New Action button.
4. Click on the Save button.

Actions | Description | Possible Values |
Configure Product as | Name of the Product, (eg) XYX | Same as QuickBooks |
Configure Class as | Product/Service class | Same as QuickBooks |
Configure Fee Class as | The Expense class given to track fee in the transaction | Same as QuickBooks |
Configure Location as | Location associated with the transaction | Same as QuickBooks |
Configure Fee Location as | The Expense location associated with the transaction | Same as QuickBooks |
Configure Product Alias as | To change the associated product name in the transaction, (eg) Product Name A to be captured as Product Name B. | Name of the Product |
Configure Income Account as | The associated Checking Account | Same as QuickBooks |
Configure Bank Account as | The associated processor account | Same as QuickBooks |
Configure Fee Bank Account as | The Expense Bank | Same as QuickBooks |
Coming to our payout example, you will have to choose the Configure Deposit Account and the bank account to which you want to transfer your payouts.
That’s it. PayTraQer performs the action on all the transactions that match your condition.
Similarly, you can do more with the rules configuration. You can
Change the Income Account based on Item, Amount, etc.
Change the Customer Name based on payment descriptions.
Match with the existing Item using the payment descriptions.
Change the Sales Tax Percentage/ Sales Tax Code based on Item.
Change the Expense Category Account based on Item, Amount, Vendor, etc.
Change the Fee Category Account based on Item, Amount, Vendor, etc.
Match the Vendor based on payment descriptions.
You can also set as many rules as you want.
Now you can configure your own rules and manage your bookkeeping automatically!
If you get stuck in the process, feel free to reach us at support@saasant.com or +1 (619) 377-0977 or schedule a demo with us. We are happy to help you at every inch of the process.