How to connect AmazonPay Account with QuickBooks Online using PayTraQer?
October 17, 2025
Learn how to connect your Amazon Pay account with QuickBooks Online using PayTraQer.
Before you get started
You will need to have
Active QuickBooks Online account
QuickBooks Online login credentials as a master administrator.
Amazon Pay account (sandbox account cannot be connected)
Amazon Pay account secret keys
Connect your QuickBooks Online Company
To connect your Amazon Pay account to QuickBooks Online you need to install PayTraQer and connect your QuickBooks Online account.
Login to your QuickBooks Online account.
Search for PayTraQer in the Intuit App Store.
Click the Get App Now button. You will be navigated to our application.
Alternatively, you can use this direct link to get started: Login Link
Sign up with your QuickBooks Online credentials.
A QuickBooks Online pop-up screen will appear. You need to grant access by clicking the Connect button. Once the connection is established, you will receive a success message on your screen.
You can use PayTraQer free for the first 30 days with our free trial.
Connect your Amazon Pay Account
Once your QuickBooks Online company is connected, you can link your Amazon Pay account.
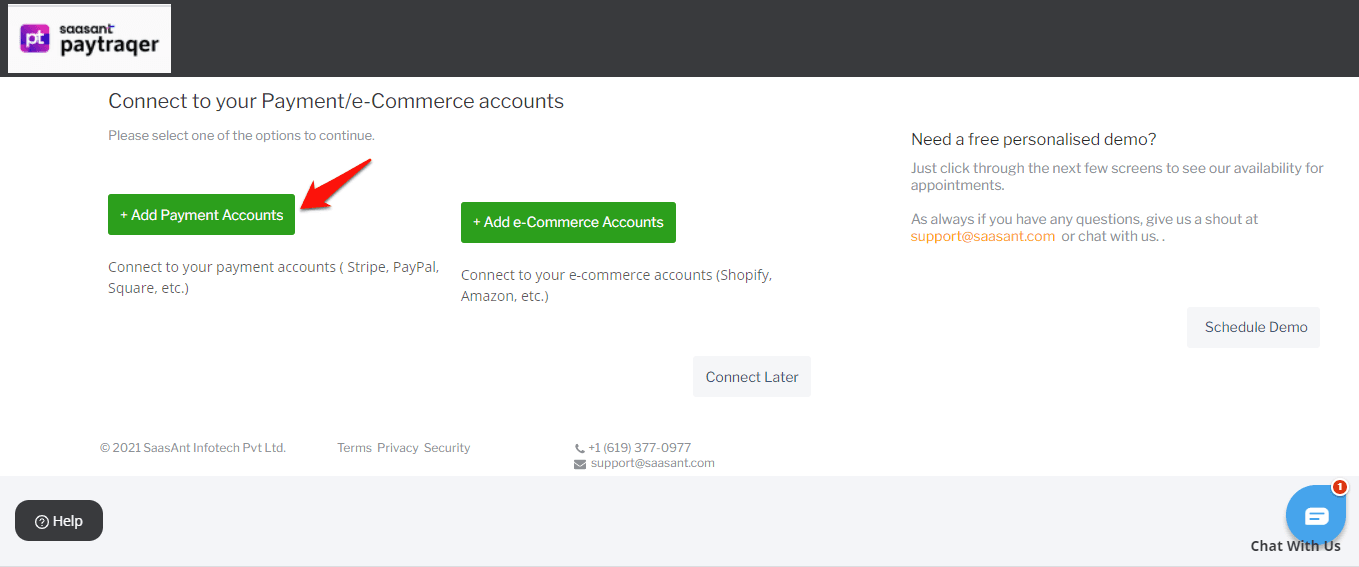
Once your QuickBooks Online company is connected, you will be asked to link either your payment gateway or e-commerce channel. Click on the Add Payment Accounts button.
If you had skipped this step, in the top right corner, navigate to the Settings icon![]() > Payment Processor to get here.
> Payment Processor to get here. 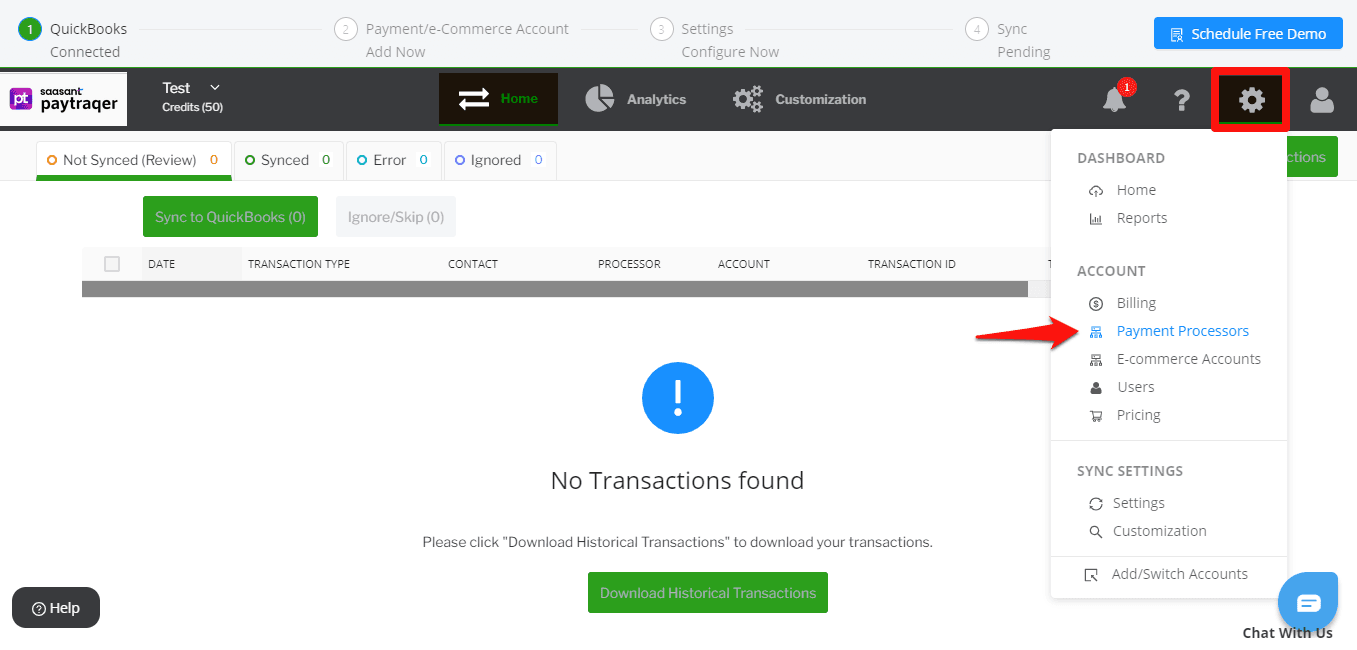
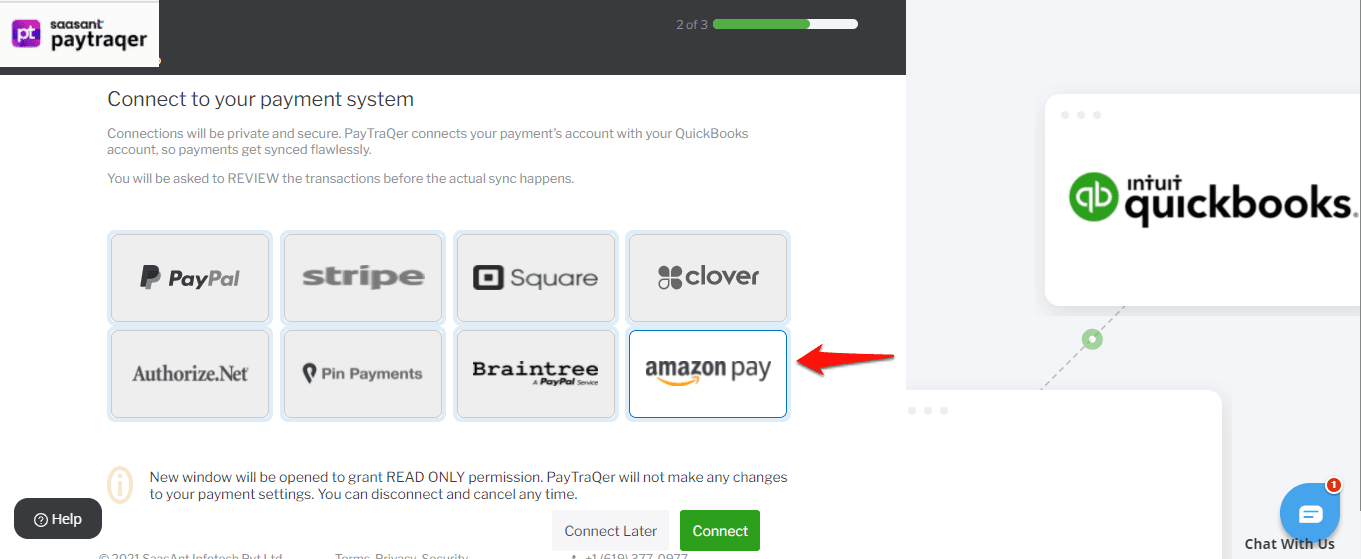
In the payment system screen, choose the Amazon Pay tile and click Connect.
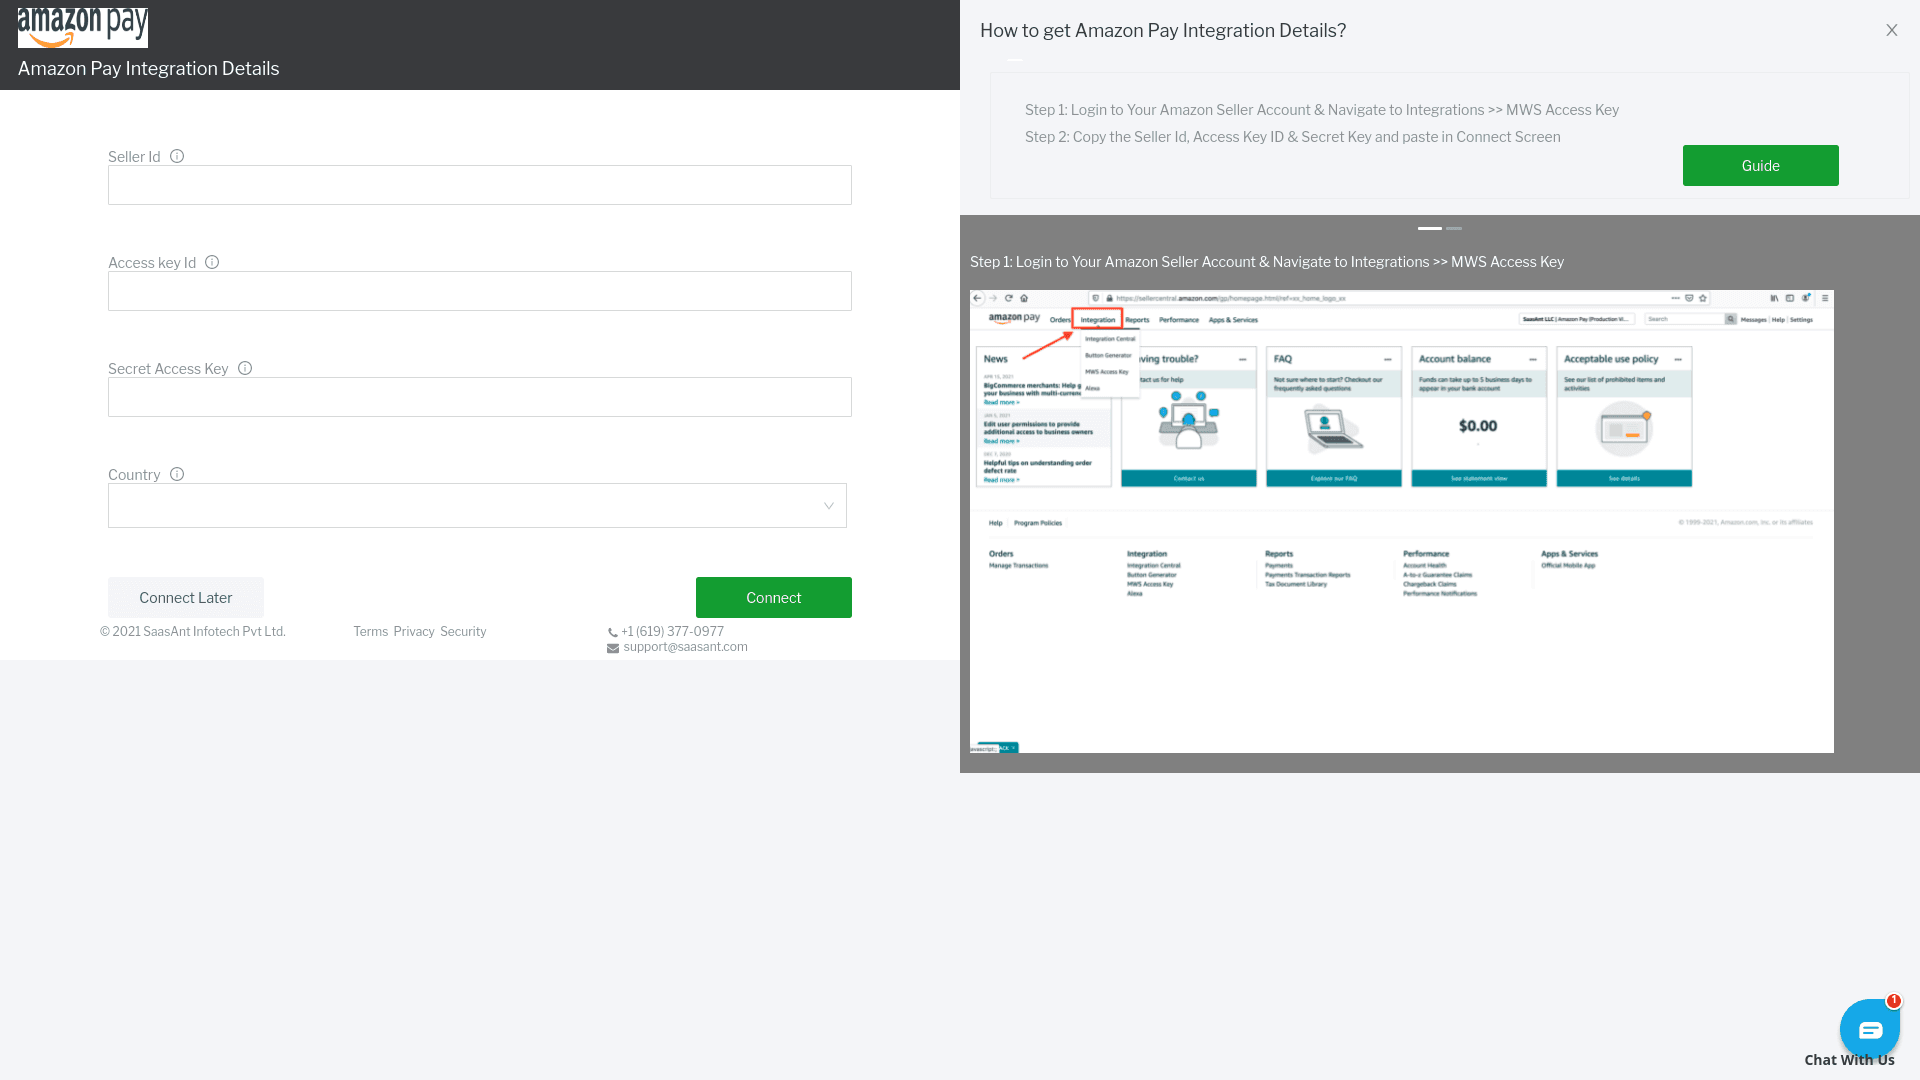
You will need to submit your Amazon Pay Seller Id, Access Key, Secret Access Key and choose the Country for verification.
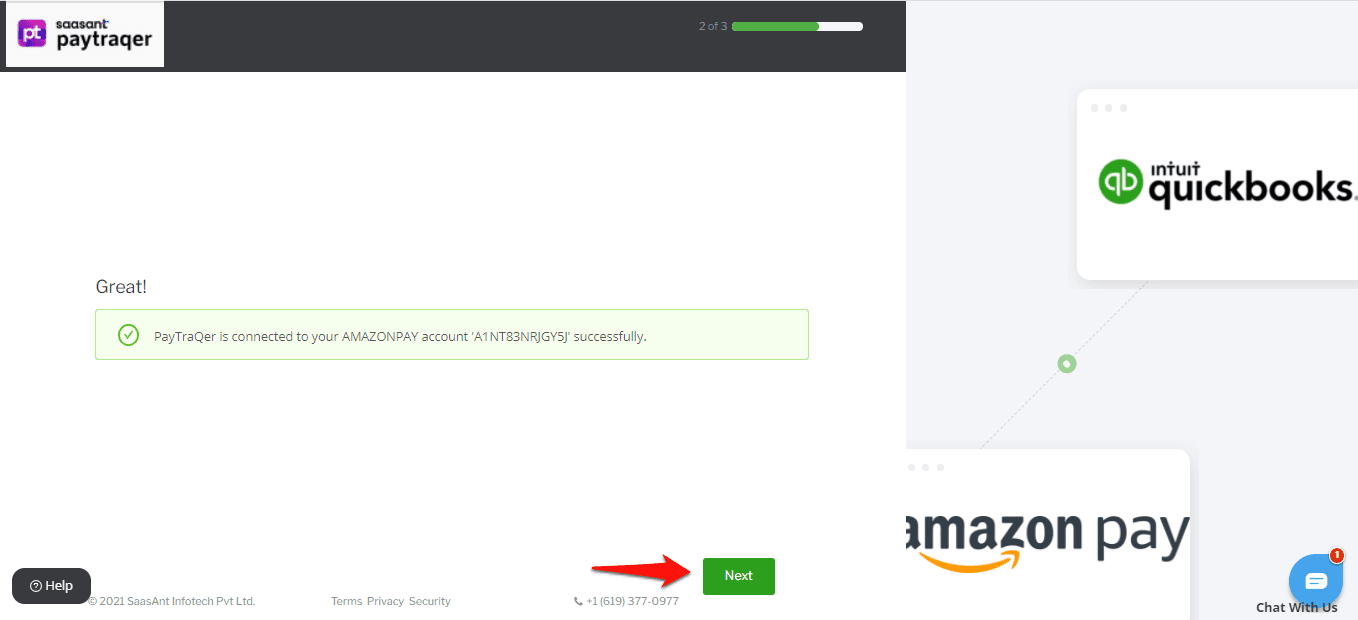
Once the connection is established, you will receive a success message on your screen. Click Next to proceed.
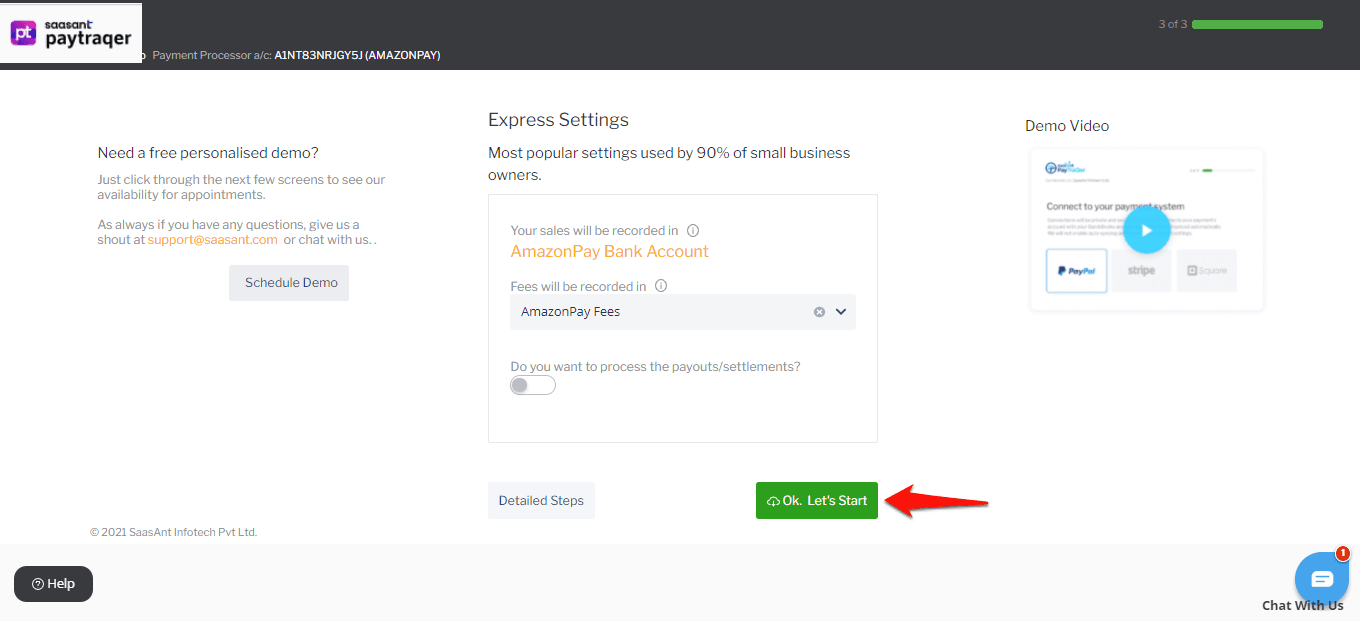
Align the Quickstart Settings
After you connect your Amazon Pay account to PayTraQer, you need to keep your hands on the simple quickstart settings to keep the integration plain sailing.
You can either go with the default Express Settings or customize your settings with the Detailed Settings.
Express Settings
This is a customized default setting recommended by the pro-advisors. This works perfectly fine and is seamless for your Amazon Pay integration.
Click Ok, Let’s Start to go with the Express Setting.
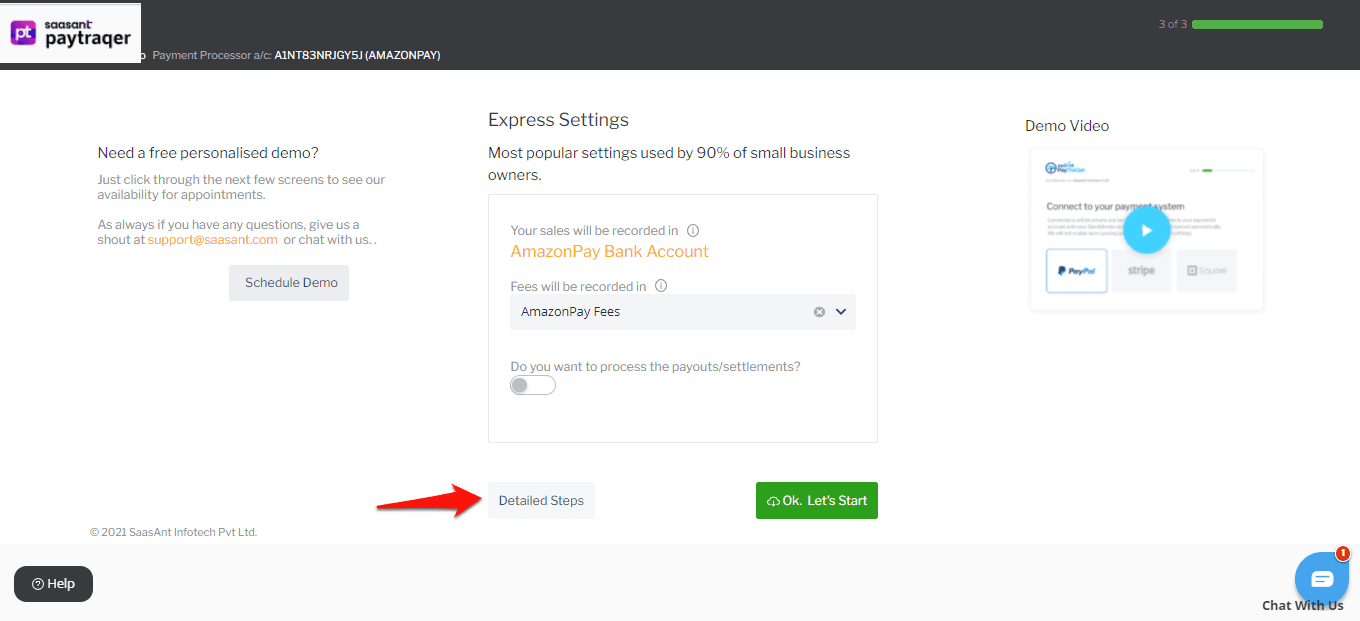
Detailed Setting
You can fine-tune the settings prior and have things your way with the Detailed Settings. You can manage your Sales, Product, Fees, and Payout preferences here.
Click the Detailed Steps to manage your preferences.
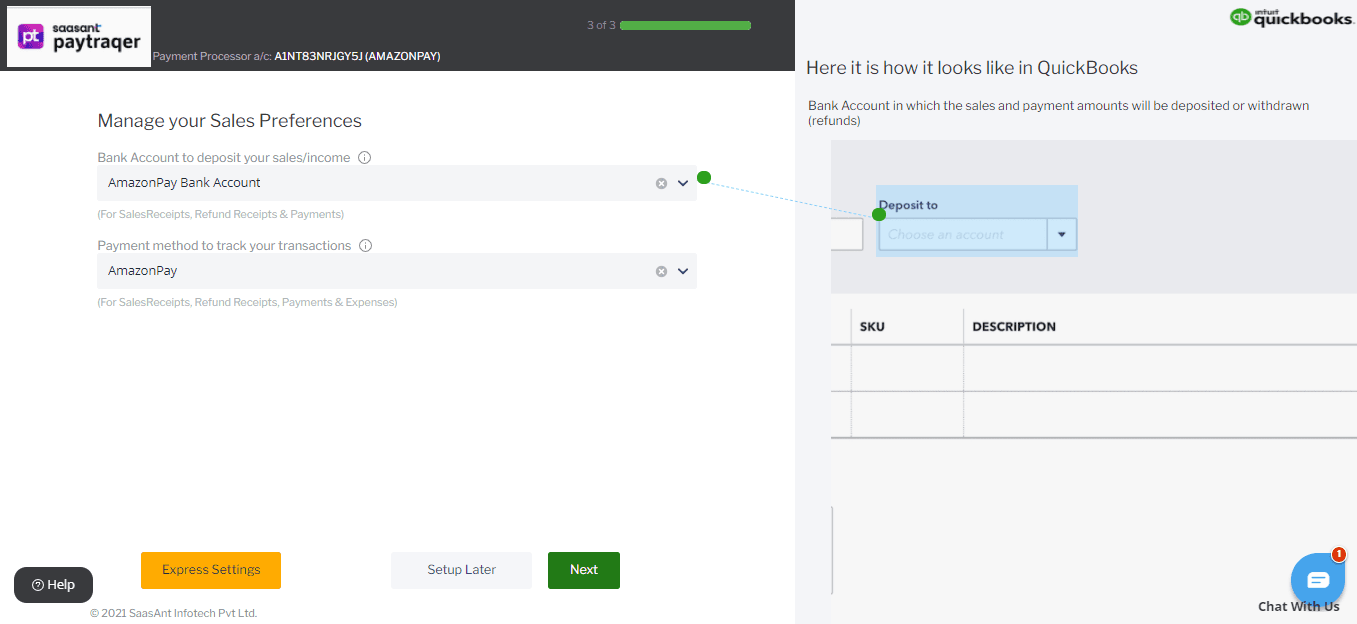
Sales Settings
This setting will govern how your sales transactions will be recorded in your QuickBooks Online. Default values provided will automatically be created for you in your QuickBooks Online and is recommended for accurate bookkeeping.
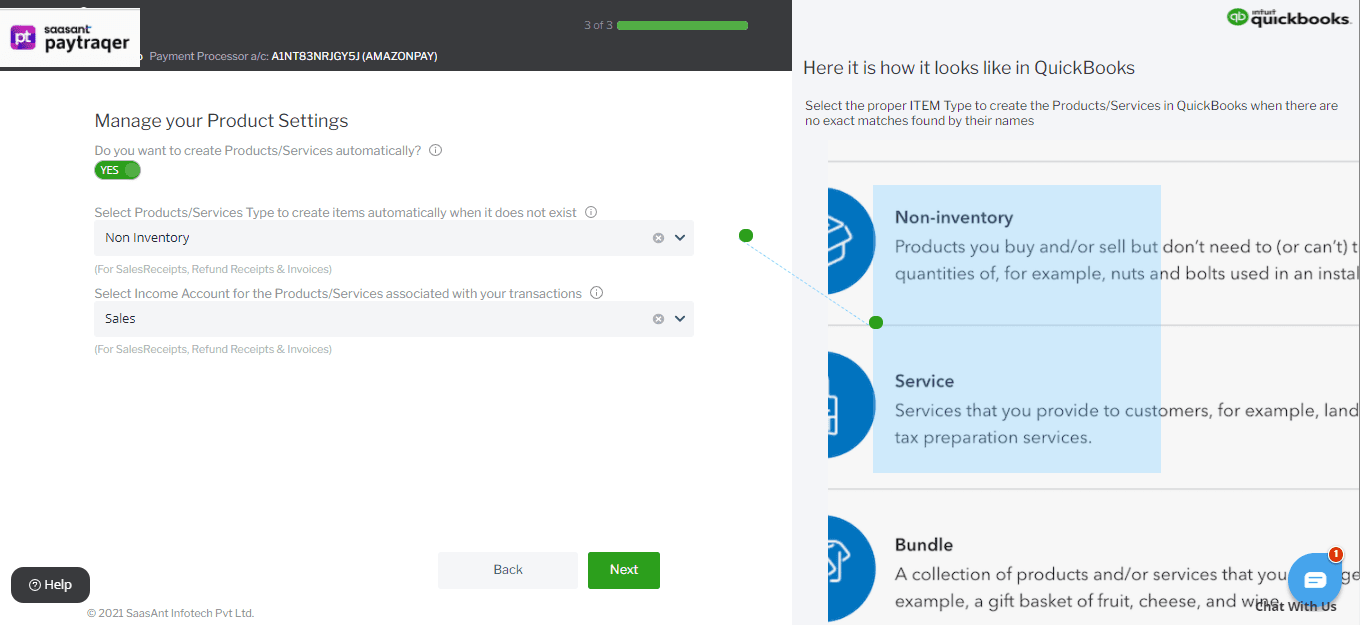
Product Settings
This configuration will determine how Products/ Services are synced. If "Create Product/Services automatically" is turned ON, then missing items in your QuickBooks Online will be auto-created during sync.
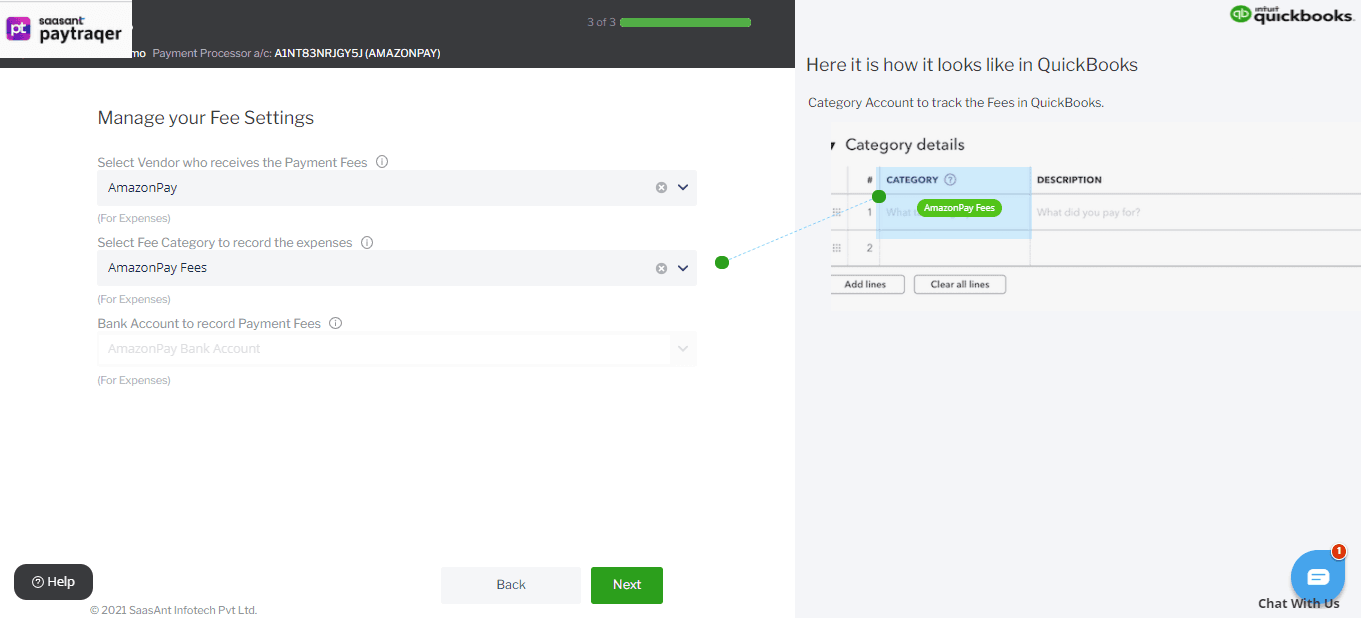
Fee Settings
This setting will govern how the Amazon Pay fee details get recorded in your QuickBooks Online. You can configure the default vendor, expense category, and expense bank account for creating the expense transaction corresponding to the Amazon Pay fees component.
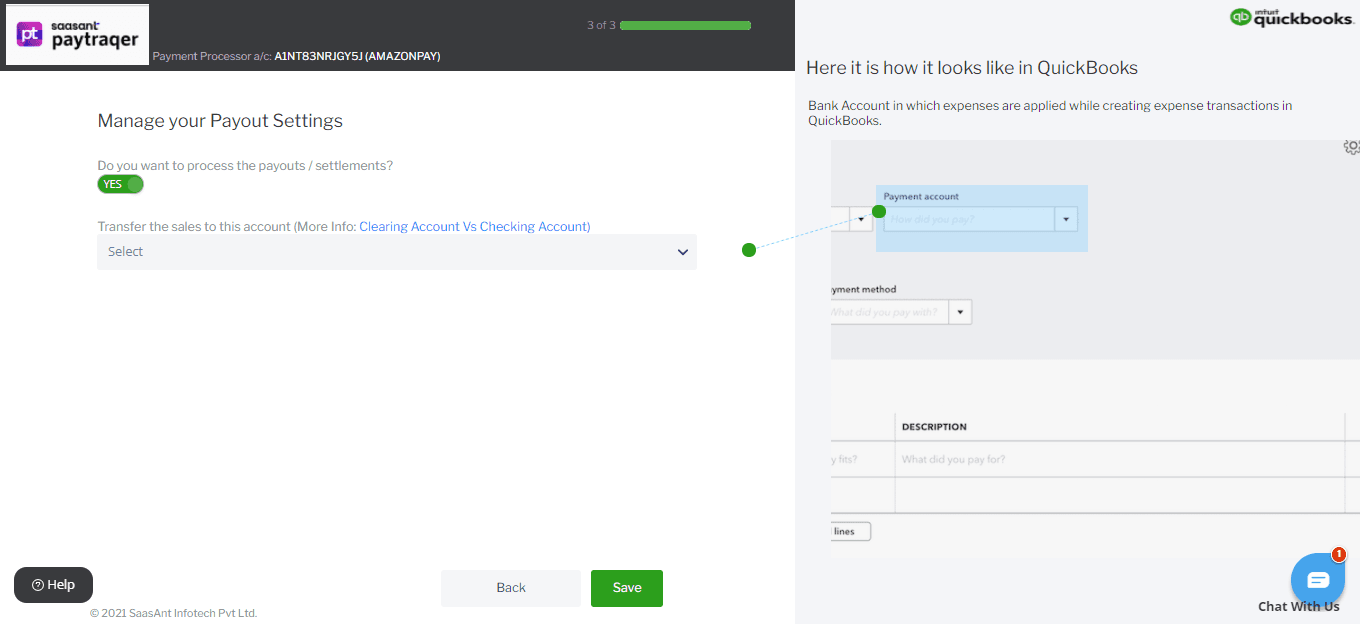
Payout Settings
Enable the "Process the Payout" with "Transfer To" account, so that all your Amazon Pay Payouts gets processes as Transfer transaction in your QuickBooks Online and will be very handy during reconciliation.
These are just minimalistic quick start settings, you can change these anytime after setting up. There are more advanced customization's available inside the application.
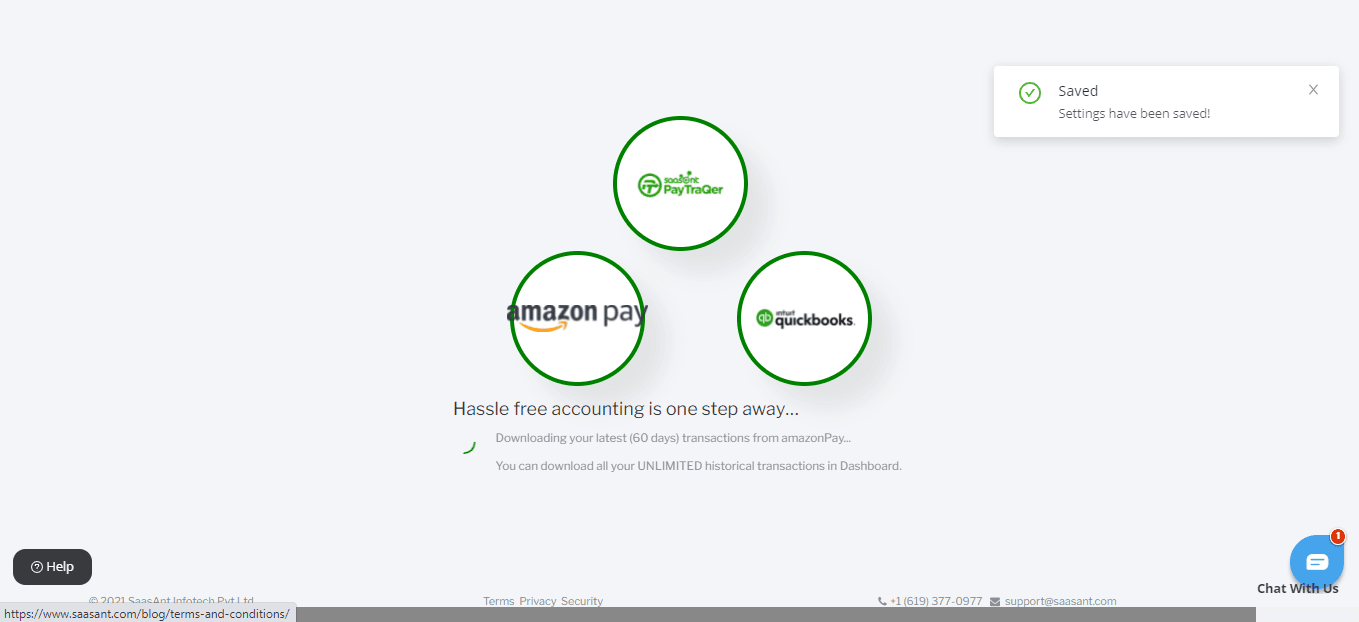
You will be navigated to the dashboard once you’re done configuring your quickstart settings.
Throw us a line at support@saasant.com if you are stuck somewhere. You can also schedule a personalized free demo with us if you need better clarity.