How to Integrate Pin Payments Transactions into QuickBooks Online Using PayTraQer
November 21, 2025
How to connect Pin Payments with QuickBooks Online using PayTraQer
This guide walks you through connecting your Pin Payments account to PayTraQer, entering your API key, and choosing the right sync settings so that sales, fees, and payouts land in the correct places in QuickBooks Online.
Video Tutorial for 𝗛𝗼𝘄 𝘁𝗼 𝗖𝗼𝗻𝗻𝗲𝗰𝘁 𝗮𝗻𝗱 𝗦𝘆𝗻𝗰 𝗣in 𝗣𝗮𝘆𝗺𝗲𝗻𝘁𝘀 𝘁𝗼 𝗤𝘂𝗶𝗰𝗸𝗕𝗼𝗼𝗸𝘀 𝗢𝗻𝗹𝗶𝗻𝗲 using PayTraQer:
1. Before you start
Make sure you have:
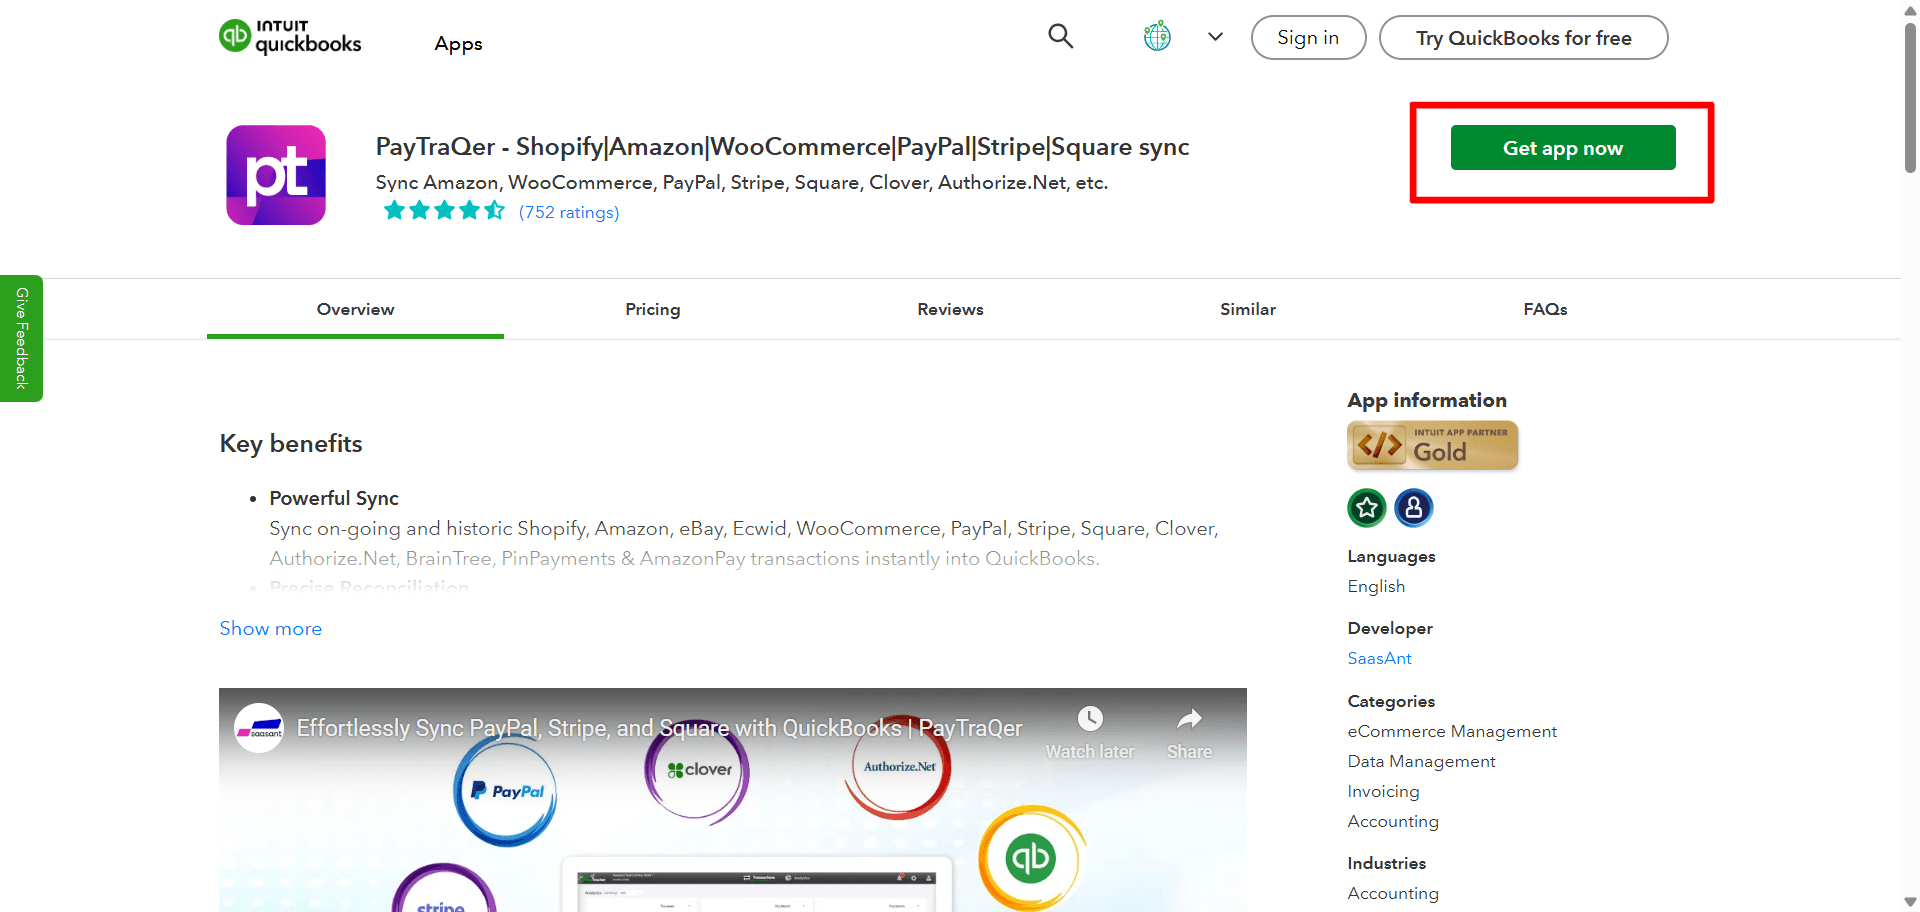
An active QuickBooks Online company with admin access
PayTraQer installed from the QuickBooks App Store and opened from within QuickBooks
A live Pin Payments account
Your Pin Payments API key (test or live)
Tip: If you are new to the integration, start with a recent date range and sync a small batch first.
Pick your Sync Mode
Right after connecting to QuickBooks, choose how PinPayments data should post.
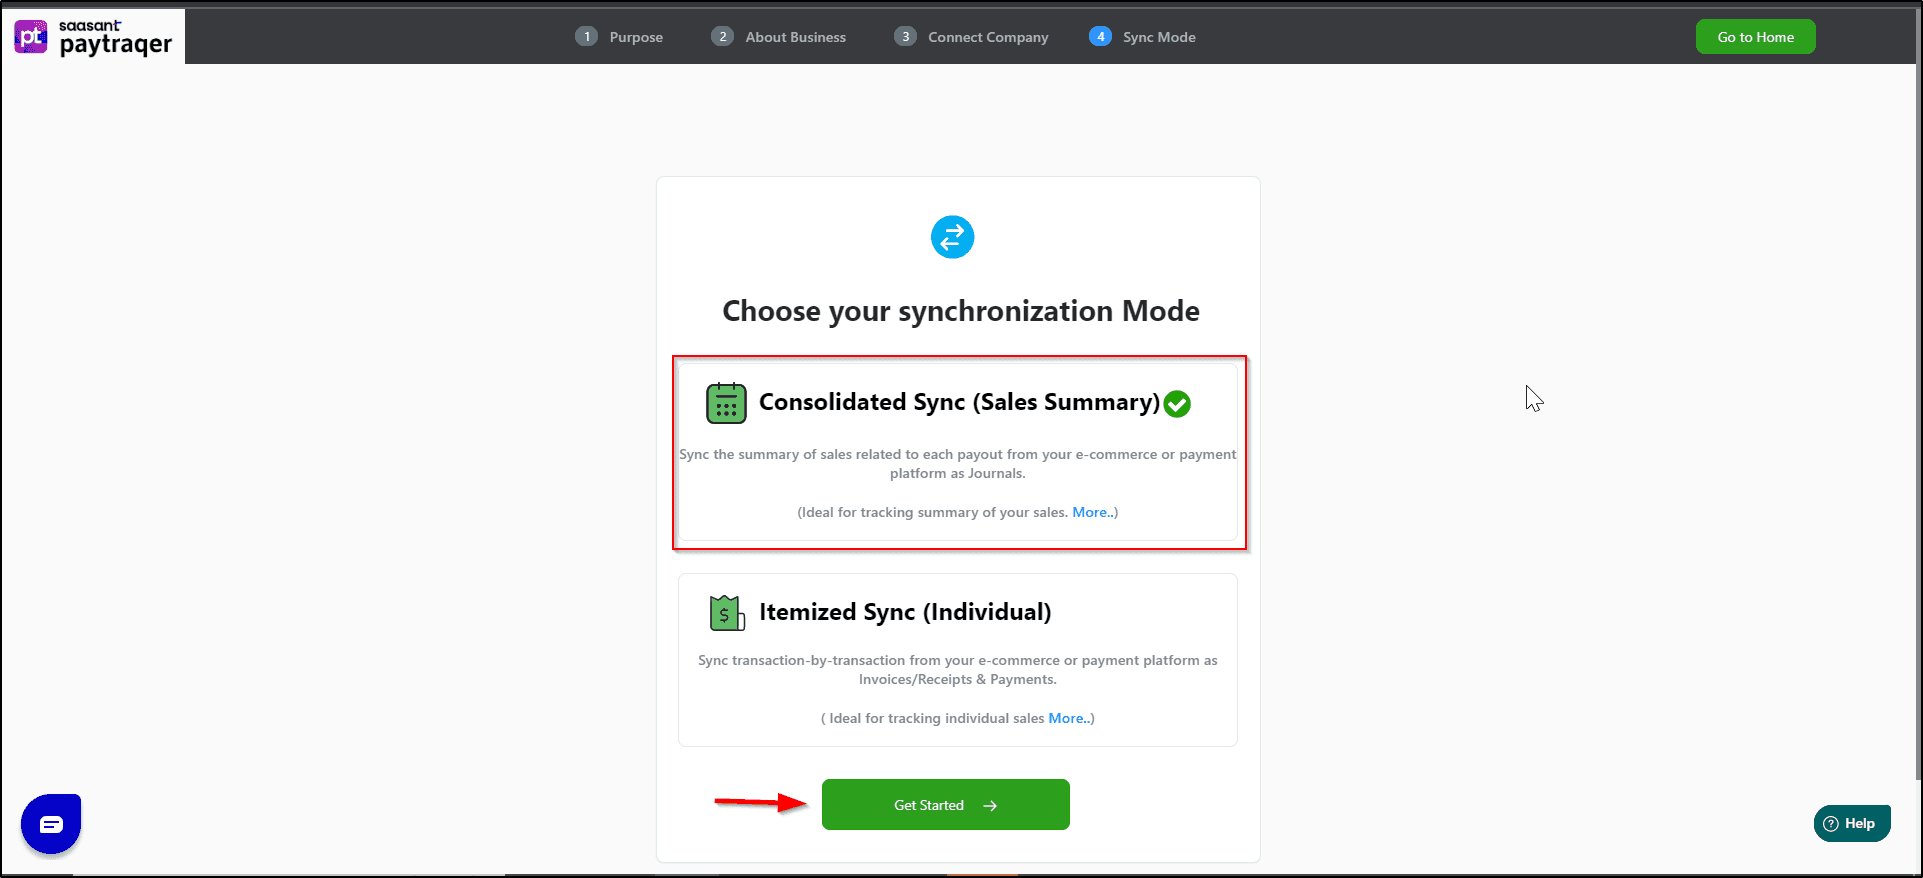
Consolidated Sync (Sales Summary): fewer entries and faster reconciliation
Itemized Sync (Individual): customer and item detail in QuickBooks
Select one and click Get Started. You can change this later in settings.
2. Get your Pin Payments API key
Log in to your Pin Payments dashboard.
Go to the Developers / API keys section.
Copy the Secret API key you want to use.
Use test keys for testing.
Use live keys when you are ready for real data.
Keep this key handy. You will paste it into PayTraQer.
3. Connect Pin Payments to PayTraQer
In QuickBooks Online, go to Apps and open PayTraQer.
In PayTraQer, choose Connect to Payment Systems.
Select Pin Payments from the list of connectors.
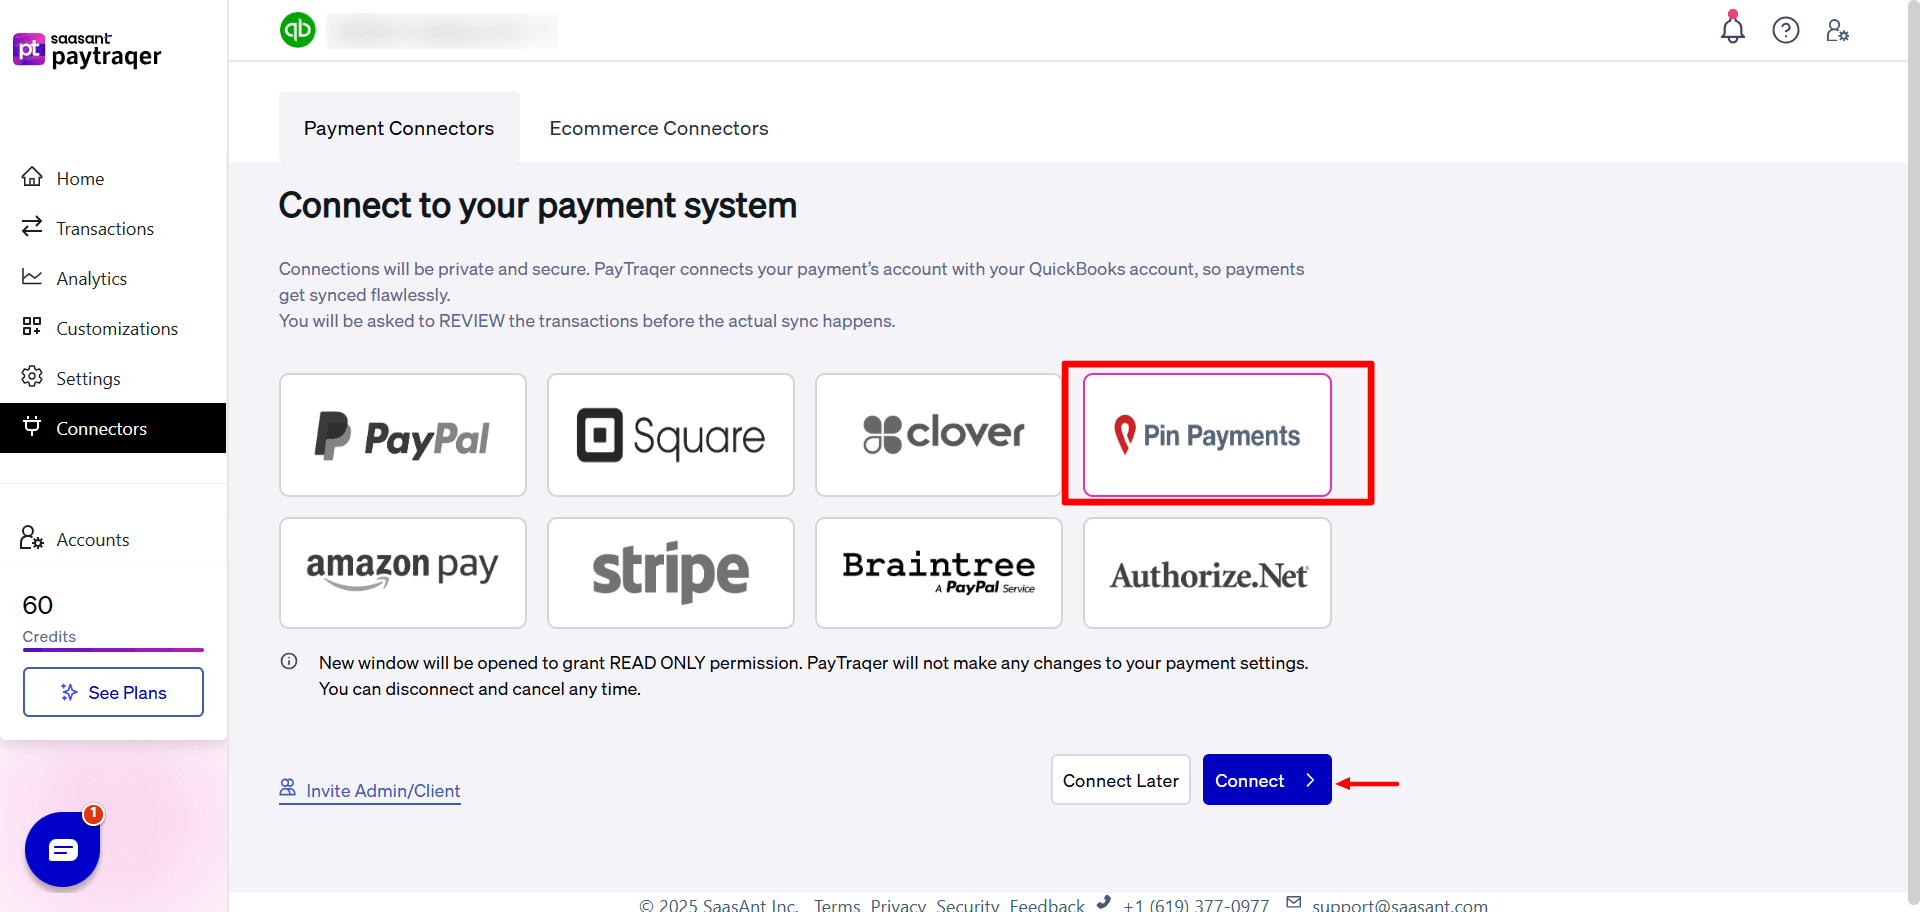
Paste your Pin Payments API key into the field provided.
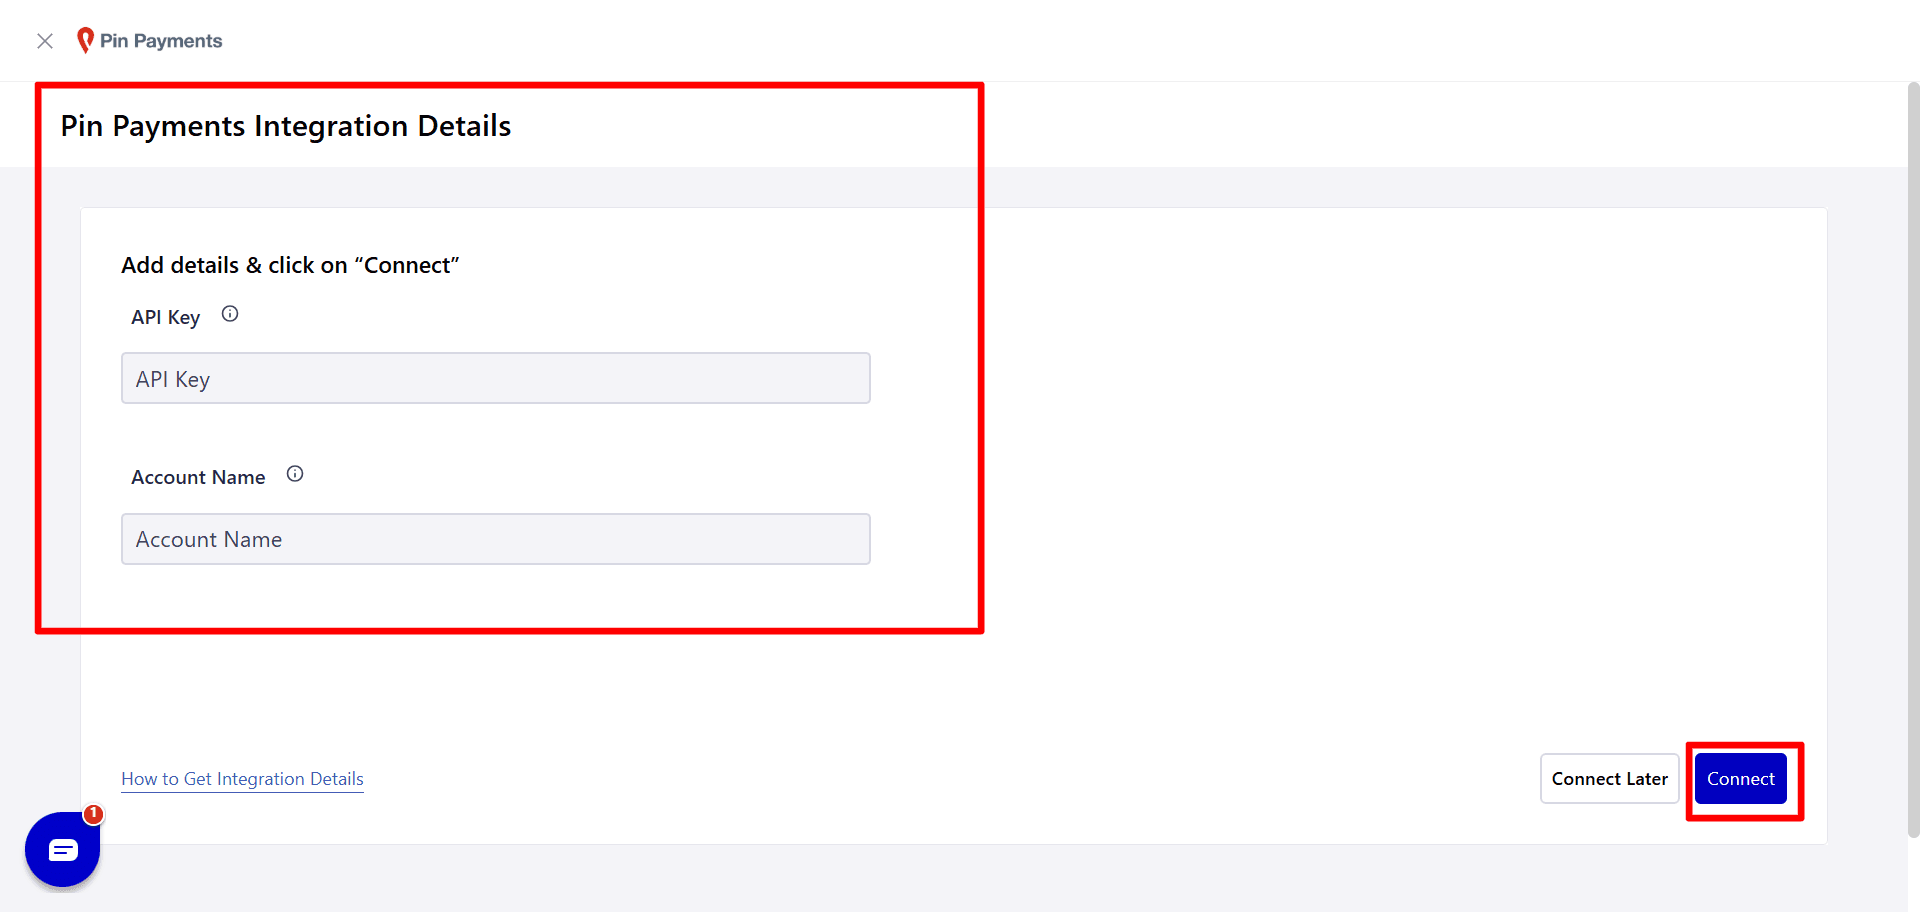
Confirm and complete the connection.
After a successful connection, PayTraQer will open the Pin Payments Express Settings page.
4. Express Settings for Pin Payments
On the Express Settings screen you tell PayTraQer where to record your Pin Payments activity.
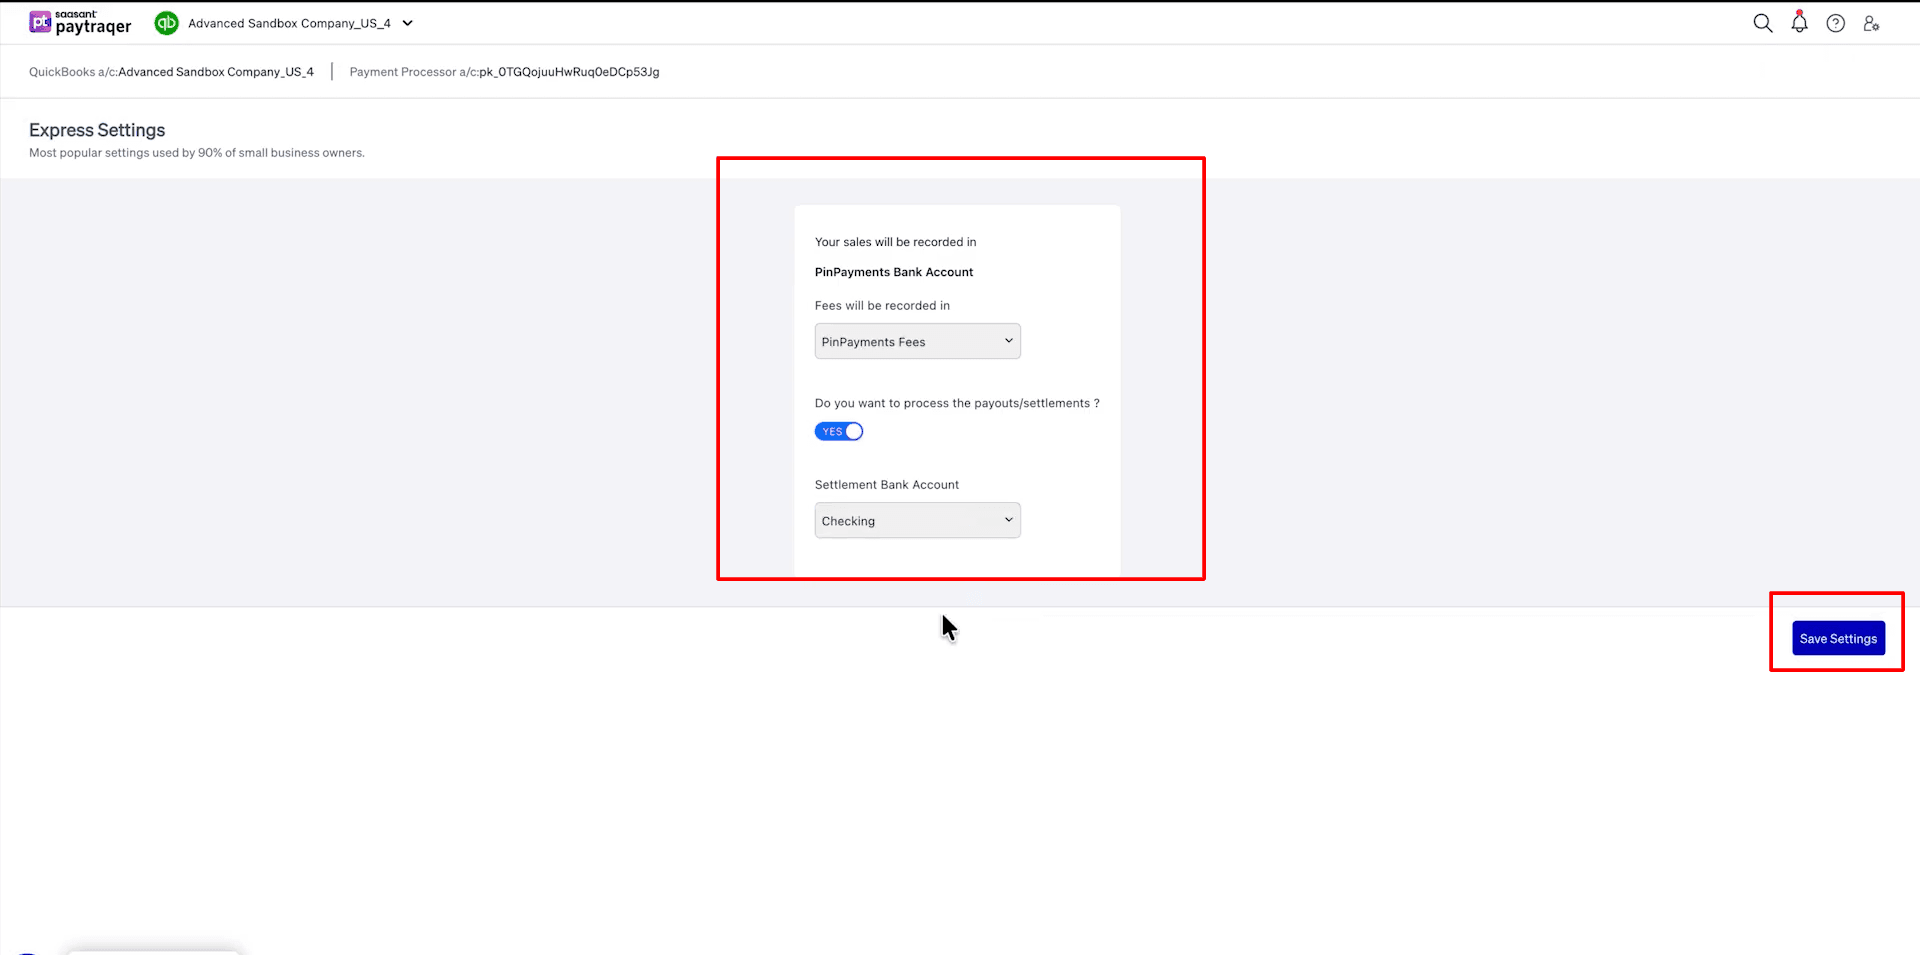
Your sales will be recorded in
Select your Pin Payments Bank Account or another clearing account. This is the holding account that collects all synced sales before payouts move funds to your real bank.Fees will be recorded in
Choose an expense account such as Pin Payments Fees.Do you want to process the payouts / settlements
Turn On if you want PayTraQer to create transfer transactions from the Pin Payments clearing account to your actual checking account.
Leave Off if you prefer to handle payouts manually.
Click Save Settings to continue to the detailed sync settings.
Auto download
After saving, PayTraQer automatically downloads the last 60 days of Pin Payments data.
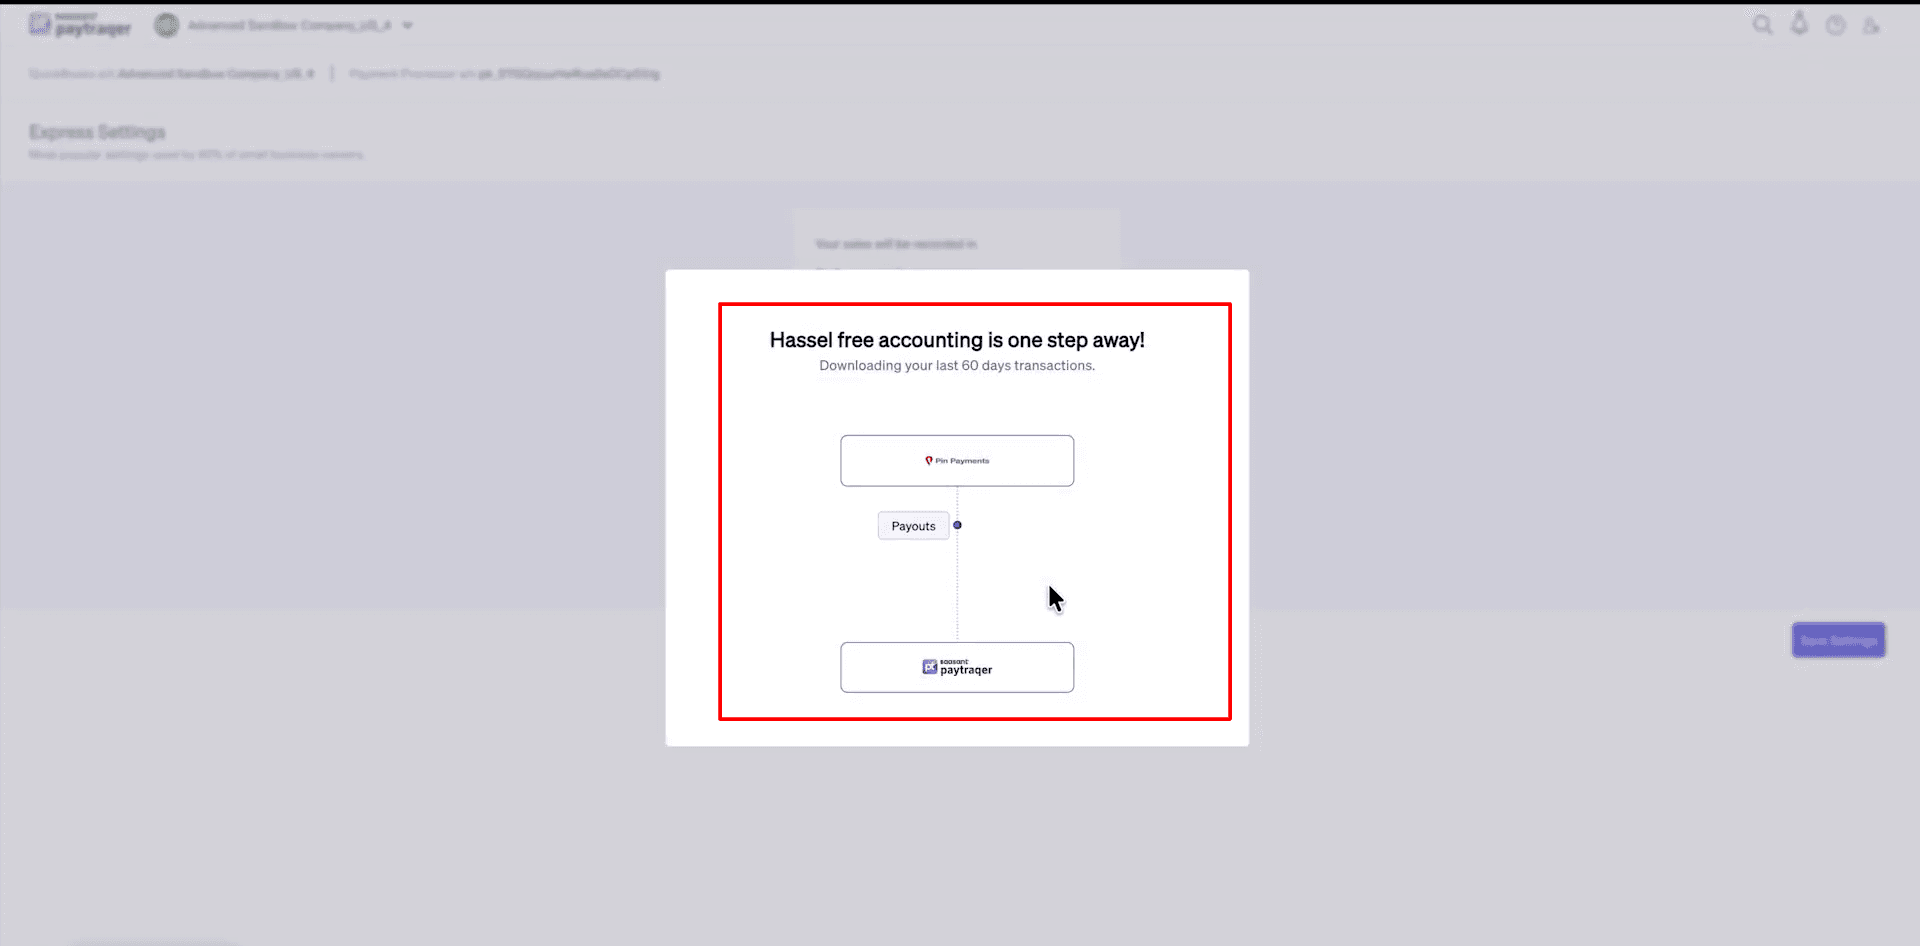
More history
Use Download historical transactions to pull other date ranges with From and To filters.
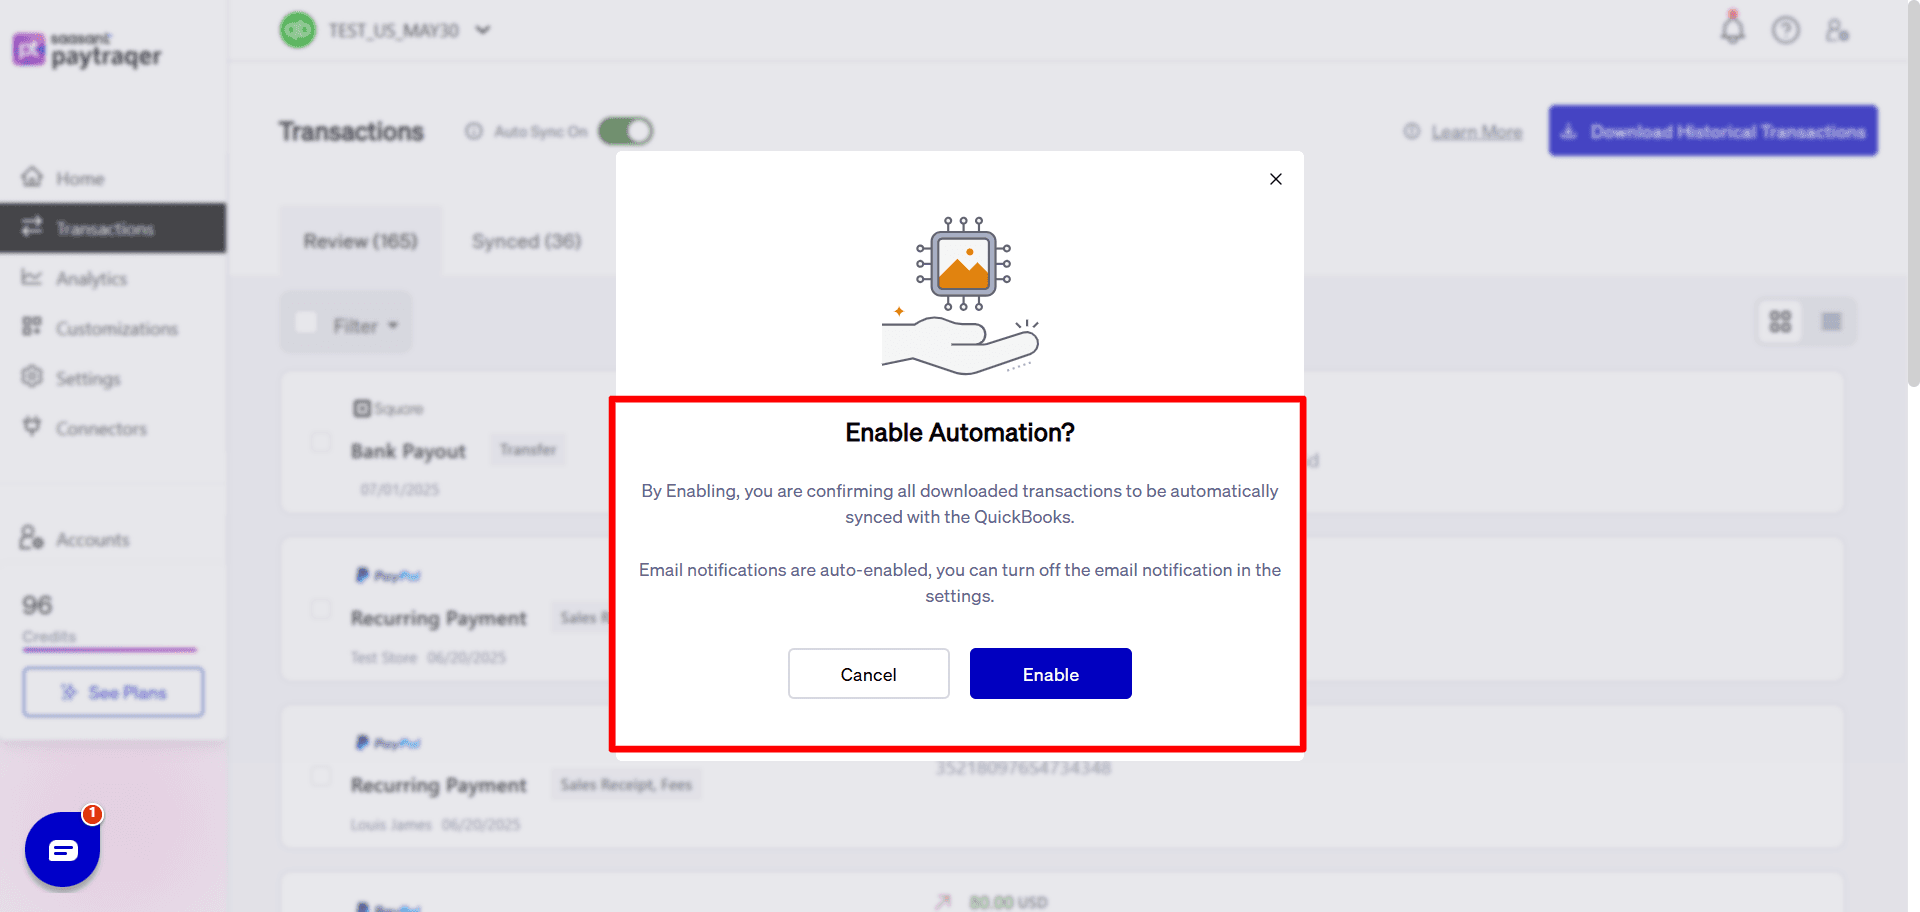
Auto Sync
Turn on Auto Sync to download and post new transactions at the interval you set.
5. Sales settings for Pin Payments
Go to Sync Settings → Pin Payments → Sales.
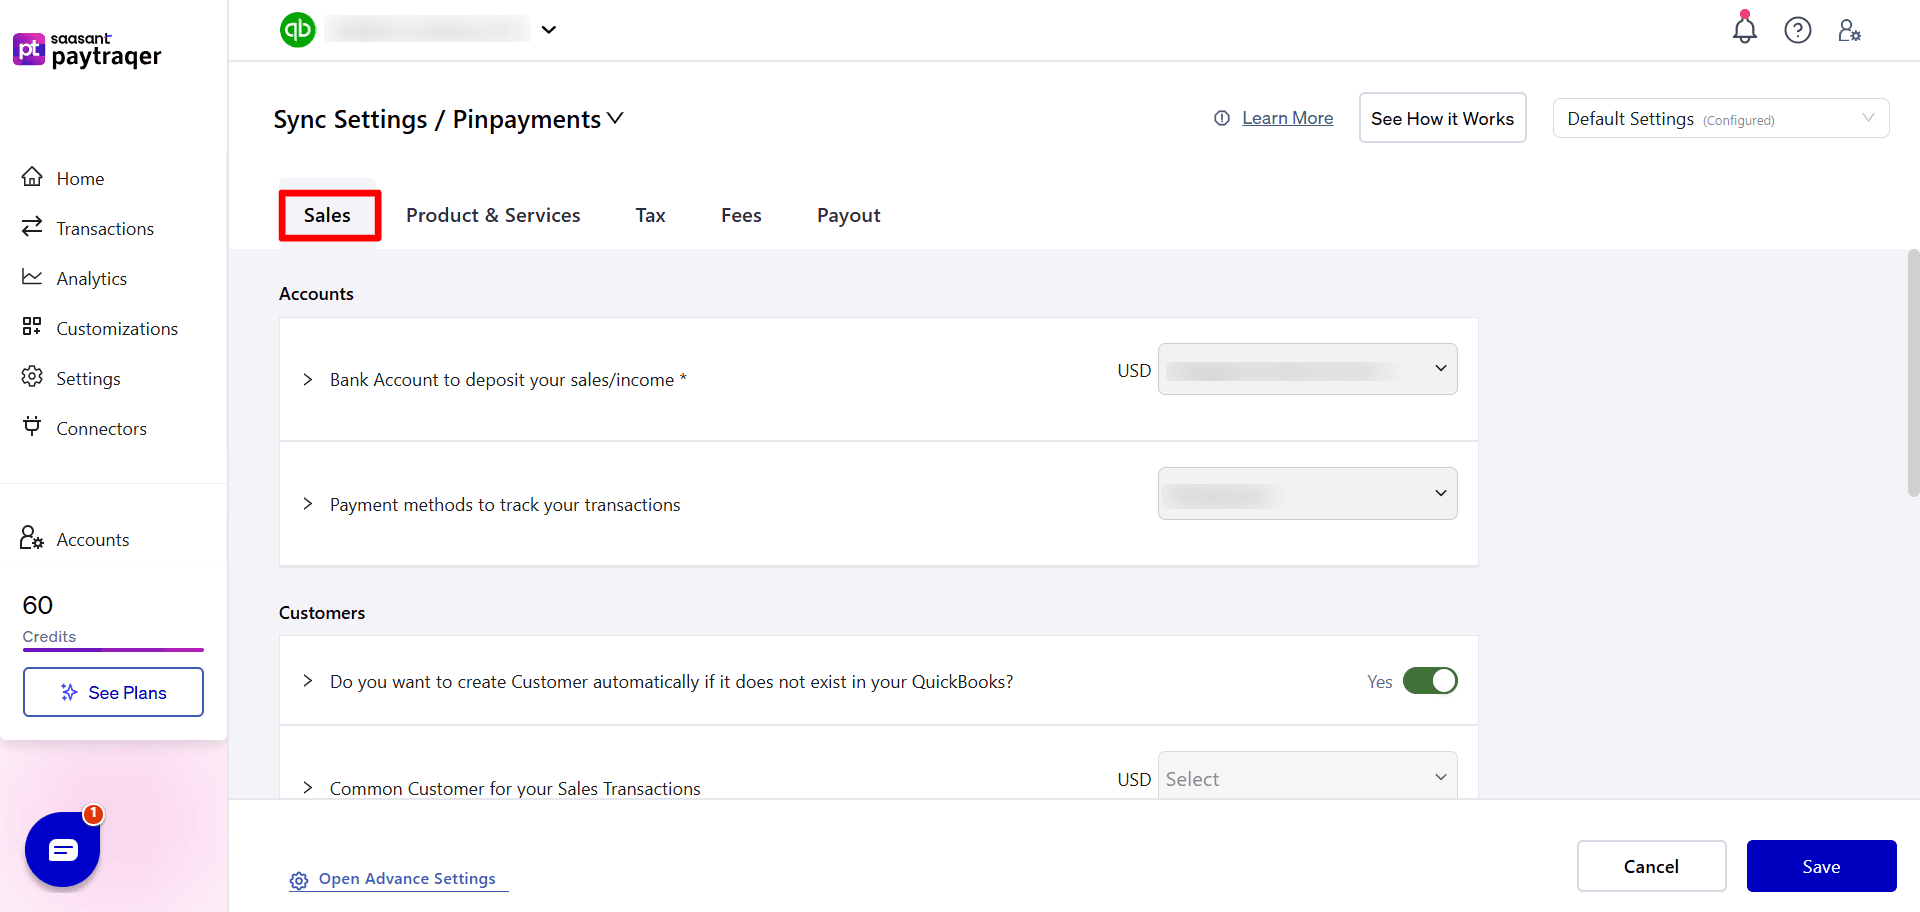
Accounts
Bank Account to deposit your sales/income
Choose the Pin Payments Bank Account (clearing account). For multi currency, create a separate clearing account per currency.Payment methods to track your transactions
Select Pin Payments or any other method label you want to use. This is the payment method that will appear on invoices, payments, or sales receipts created in QuickBooks.
Customers
Do you want to create Customer automatically if it does not exist in your QuickBooks
Turn On to let PayTraQer create a new customer when it cannot find a name match.
Turn Off if you prefer to map everything to a common customer or maintain customers manually.
Common Customer for your Sales Transactions
Choose a single customer record (for example, Online Sales Customer) if you want all Pin Payments sales to use one customer instead of creating thousands of individual customers.Customize Customer Matching
Use Add Customer Matching to map names from Pin Payments to existing QuickBooks customers. This is useful if names differ slightly between systems.
Tracking
Location/Department for your Sales transactions
Pick a fixed Location or Department if you want every Pin Payments sale to carry the same location.Class for your Sales transactions
Choose a Class such as Online Sales so you can filter reports by channel.
Sync
Do you want to skip the sales and process the associated fees only
Turn On if you only want to bring in Pin Payments fees and keep sales entries manual.
Leave Off for full sales and fees sync.
6. Product and Service settings
Go to Sync Settings → Pin Payments → Product & Services.
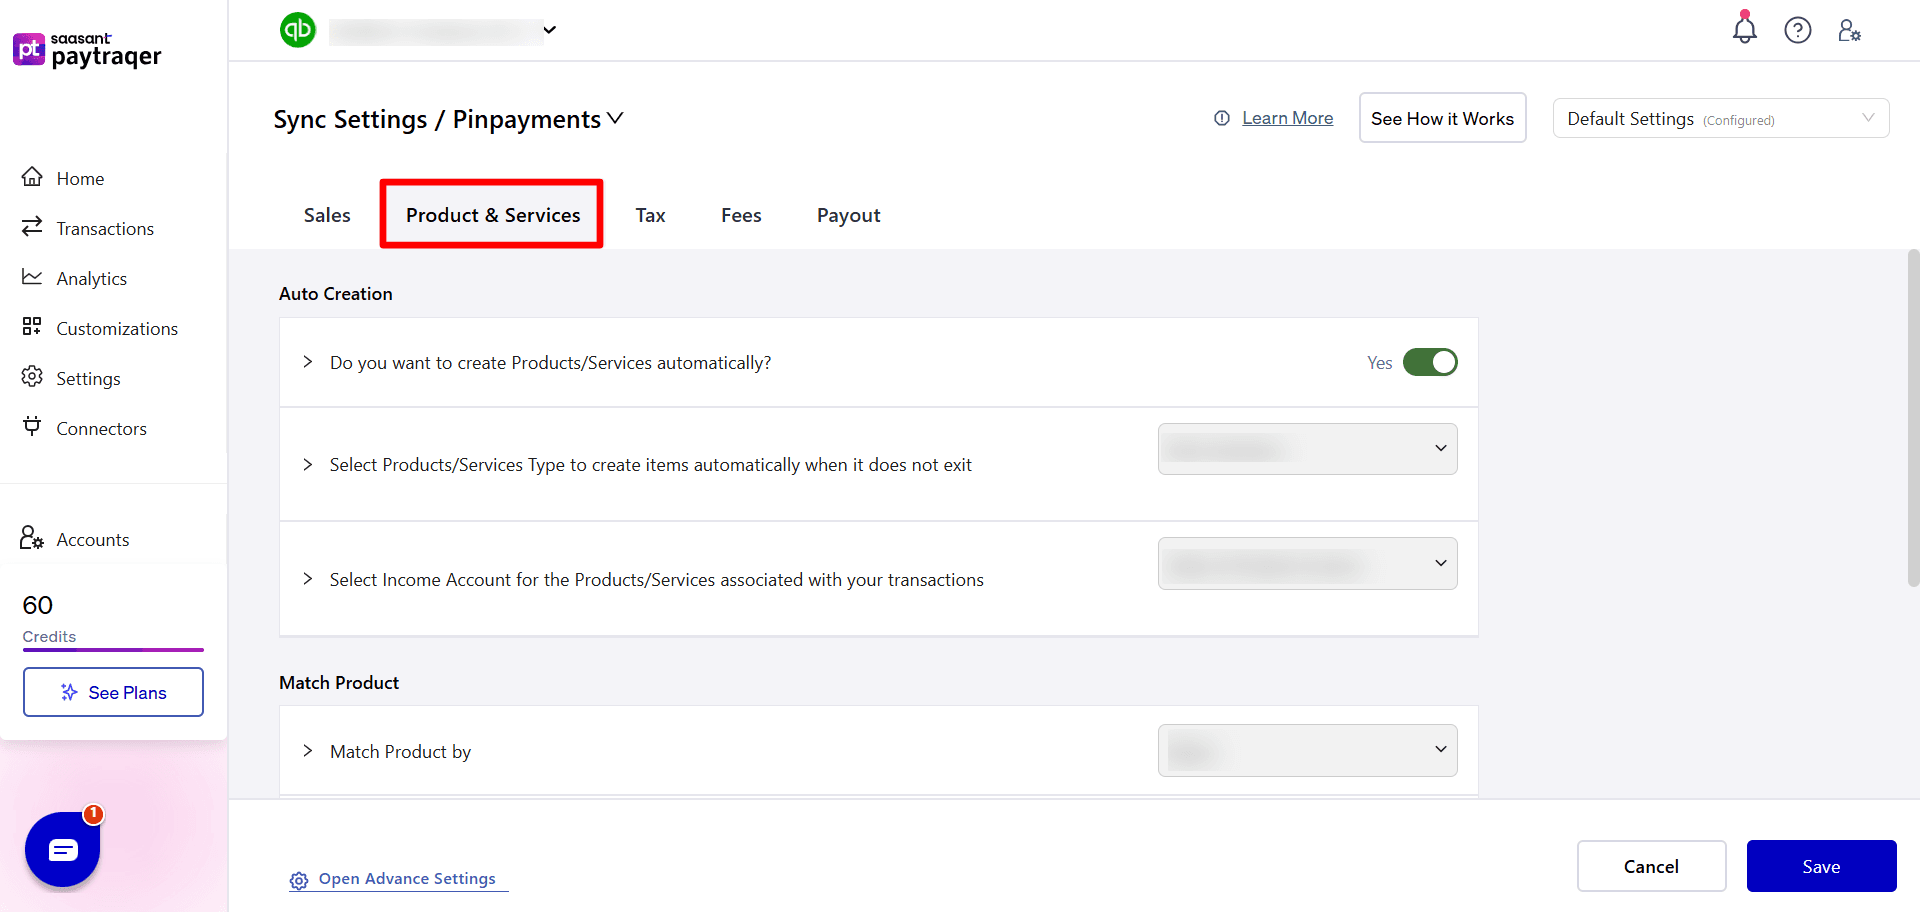
Auto Creation
Do you want to create Products/Services automatically
Turn On to let PayTraQer create items in QuickBooks when it cannot find an exact name match.Select Products/Services Type to create items automatically when it does not exist
Choose Non Inventory or Service based on how you track your items.Select Income Account for the Products/Services associated with your transactions
Choose an income account such as Sales of Product Income. All auto created items will point here.
Match Product
Match Product by
Pick Name or SKU based on how your items line up between Pin Payments and QuickBooks.Customize Product Matching
Use Add Product Matching to set manual mapping rules for product names that are not identical.
Common Item
Do you want to use common product/service for all your sales
Turn On if you want to post every sale to one generic item like Online Sales.Select common product/service
Choose the default item that should be used when common item is enabled.
7. Tax settings
Go to Sync Settings → Pin Payments → Tax.
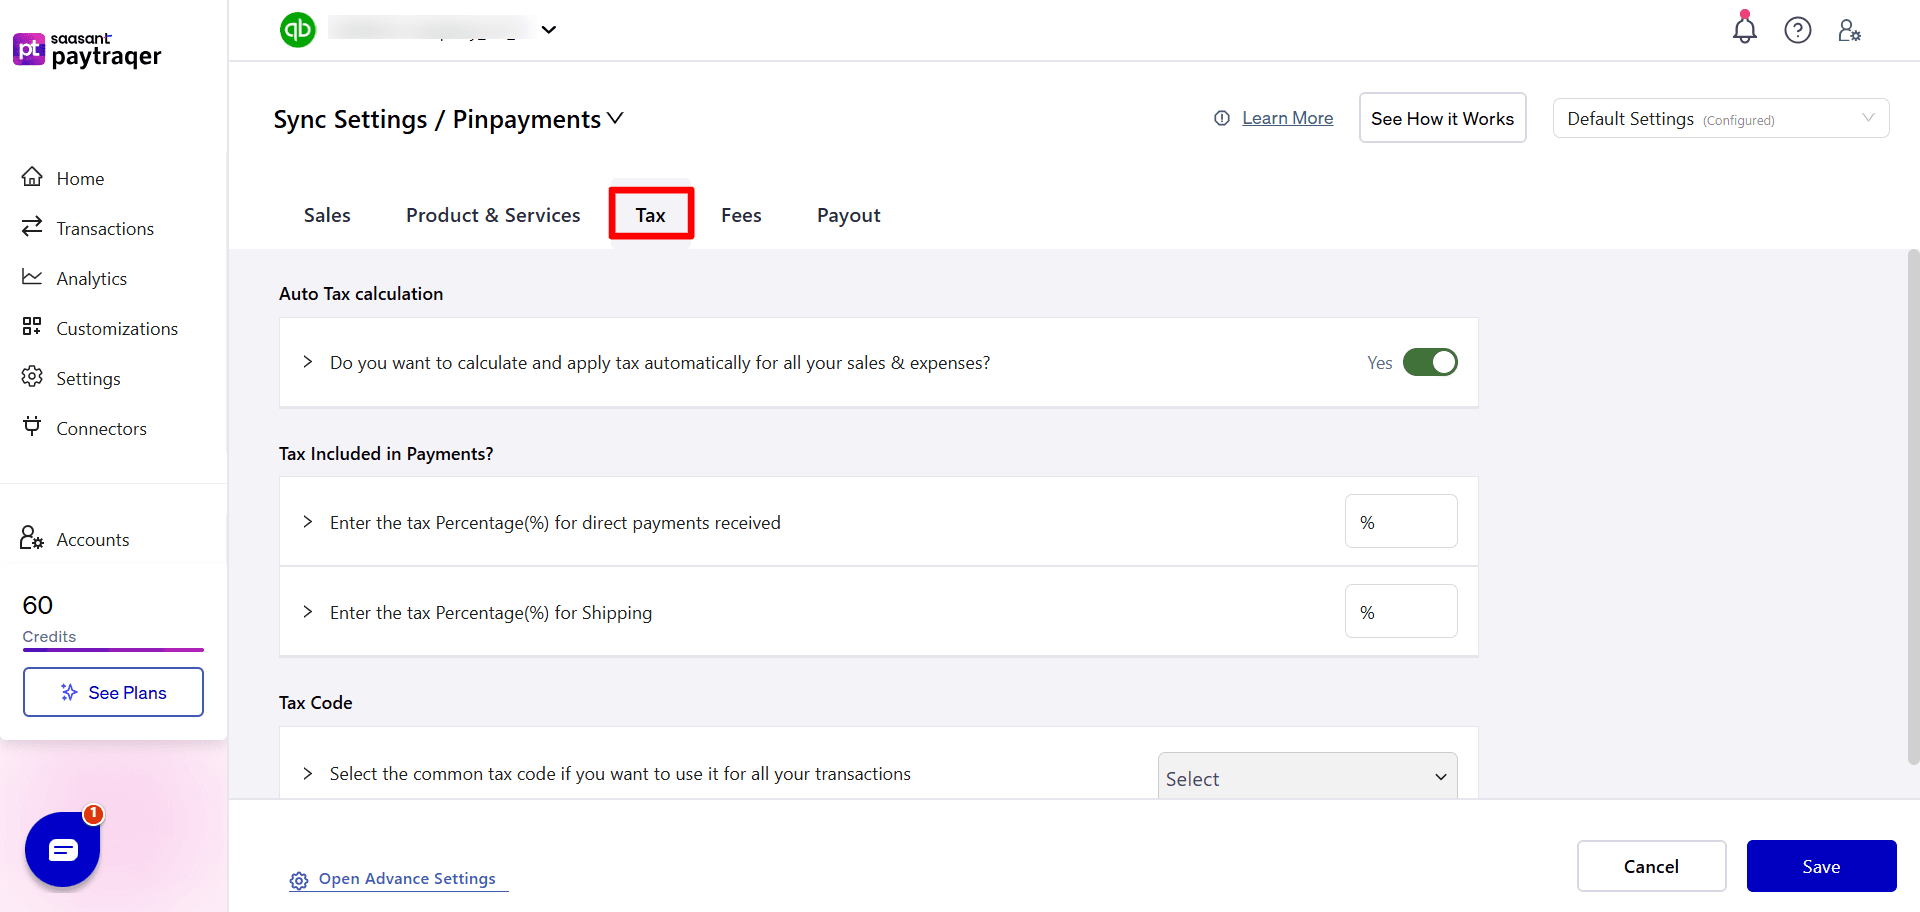
Auto Tax calculation
Do you want to calculate and apply tax automatically for all your sales & expenses
Turn On to let PayTraQer detect tax from each transaction and apply the right tax amount.
Tax included in payments
Enter the tax Percentage(%) for direct payments received
Use this if you want to force a fixed tax rate for all direct payments. If left blank, PayTraQer uses the tax in each transaction where possible.Enter the tax Percentage(%) for Shipping
Set a default tax rate for shipping charges if needed.
Tax Code
Select the common tax code if you want to use it for all your transactions
Choose a single QuickBooks tax code if you prefer one code for every synced transaction. This will override automatic tax detection.
8. Fees settings
Go to Sync Settings → Pin Payments → Fees.
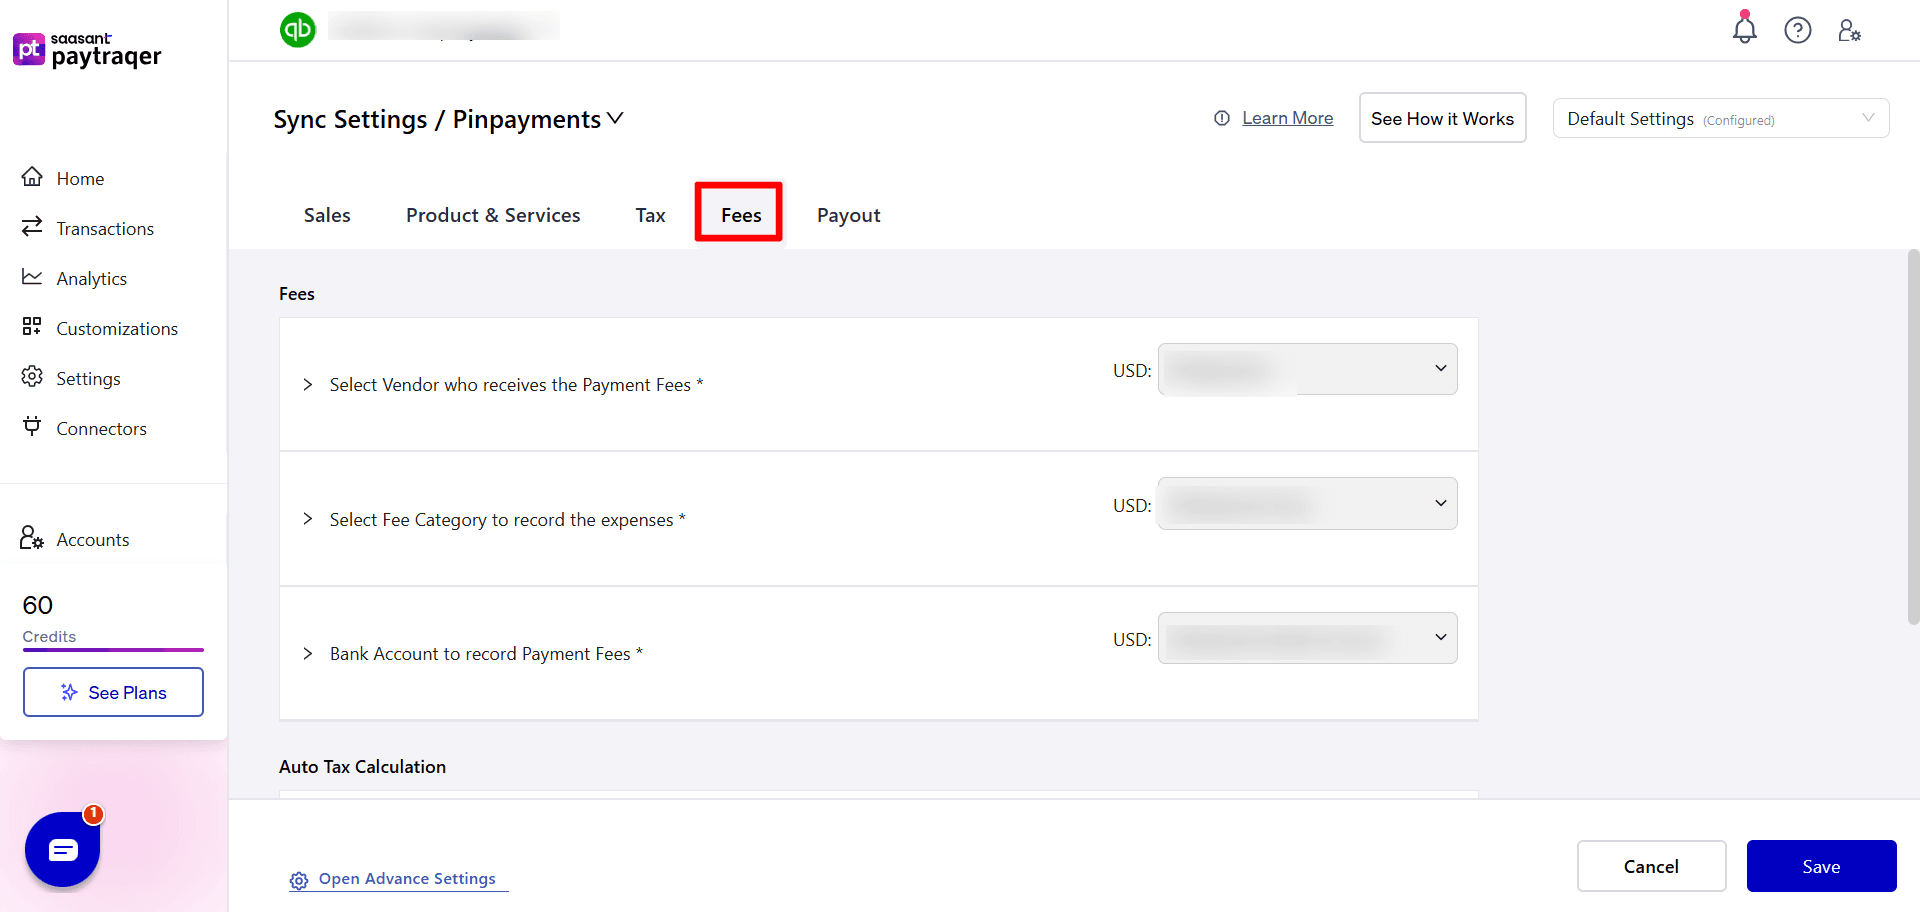
Fees
Select Vendor who receives the Payment Fees
Choose PinPayments or another vendor name. All fee expenses will be recorded under this vendor.Select Fee Category to record the expenses
Pick an expense account such as PinPayments Fees.Bank Account to record Payment Fees
Select the bank or clearing account where fee expenses should post. Often this is the same PinPayments Bank Account used for sales.
Auto Tax Calculation for fees
Class for your Fees
Apply a fixed Class to all fee expenses if you track them by class.Location/Department for your Fees
Apply a fixed Location or Department for fee expenses.Do you want to skip the fee details from syncing
Turn On if you do not want individual fee lines synced. Leave Off to bring all fee breakdowns into QuickBooks.
9. Payout settings
Go to Sync Settings → Pin Payments → Payout.
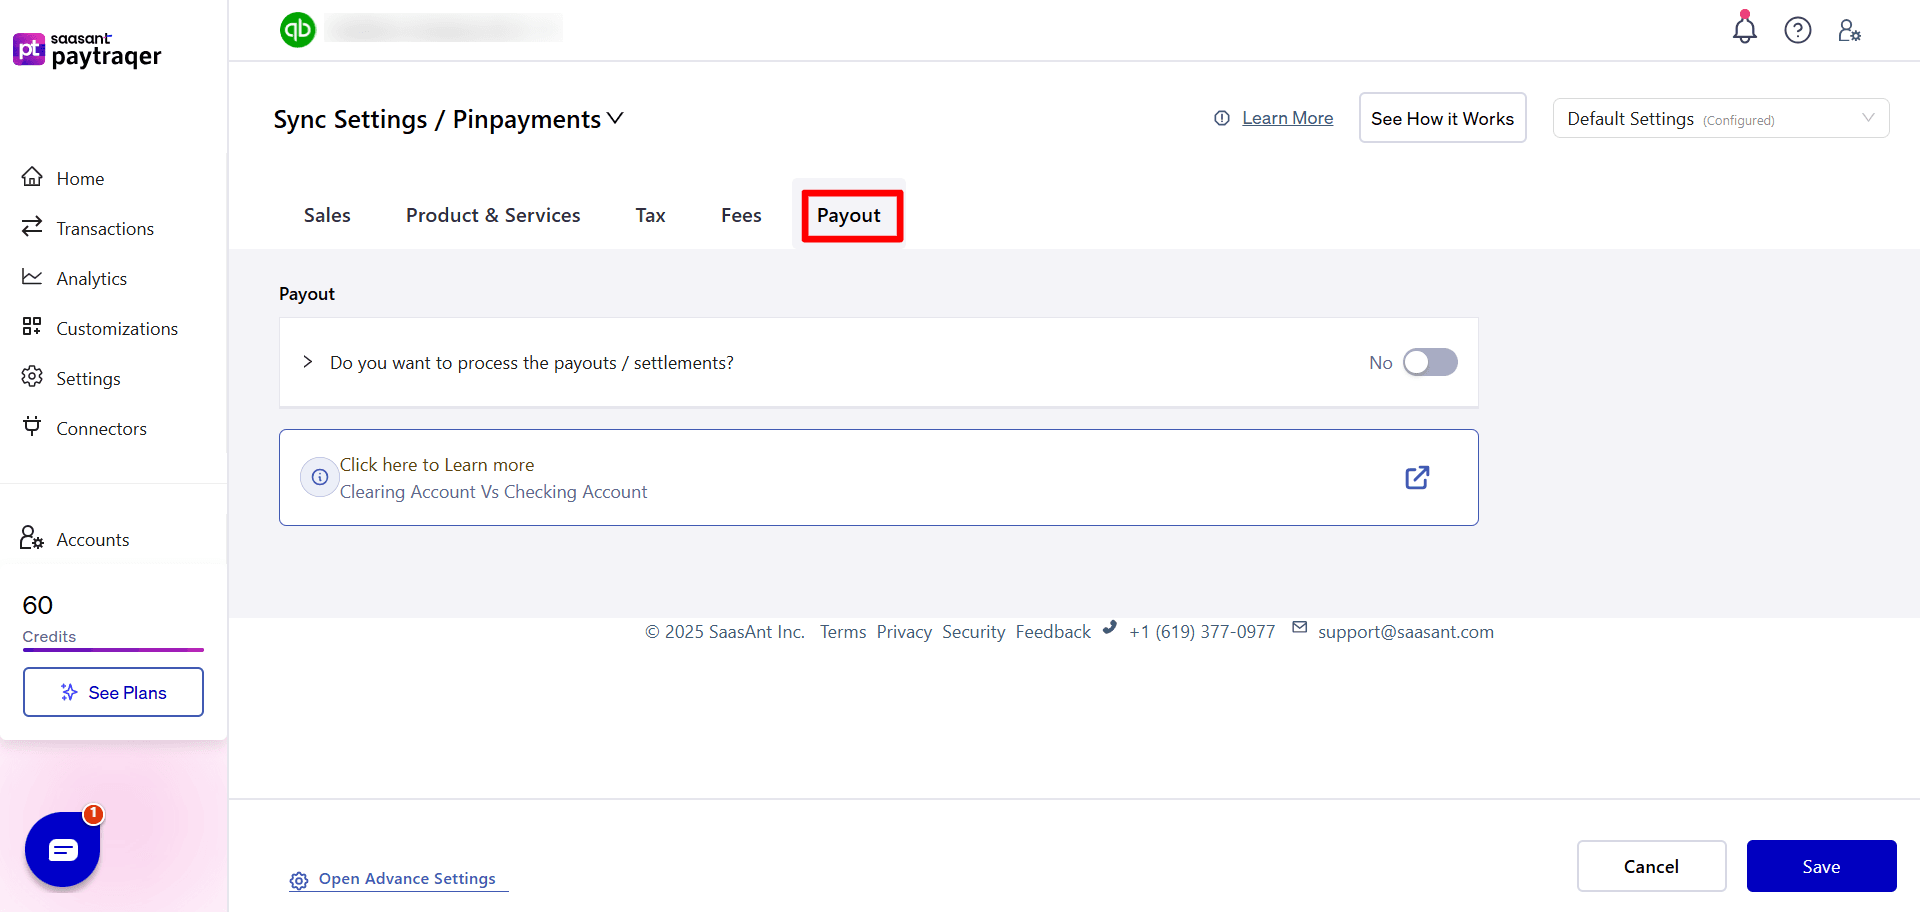
Do you want to process the payouts / settlements
Turn On to have PayTraQer create transfer transactions from the Pin Payments Bank Account to your real checking account each time a payout is sent.
This makes it easier to match bank deposits in QuickBooks during reconciliation.
Leave Off only if you plan to handle these transfers yourself.
Click Save after you finish each tab.