Overview of PayTraQer Settings for Braintree
November 17, 2025
Braintree settings guide in PayTraQer
This article explains every Braintree specific setting in PayTraQer and how it affects posting in QuickBooks.
Video tutorial for How to connect and Sync BrainTree Transactions to QuickBooks Online using PayTraQer:
Use it when you want to review or change how Braintree sales, fees, expenses, and payouts are synced.
1. Where to find Braintree settings
Sign in to PayTraQer.
Go to Settings → Sync settings.
Select the Braintree connector.
You will see these sections:
Sales
Product
Tax
Fees
Expense
Payout
General Settings like Auto Sync, duplicate check, and time zone are shared across all connectors. Use Settings → General for those.
2. Sales settings for Braintree
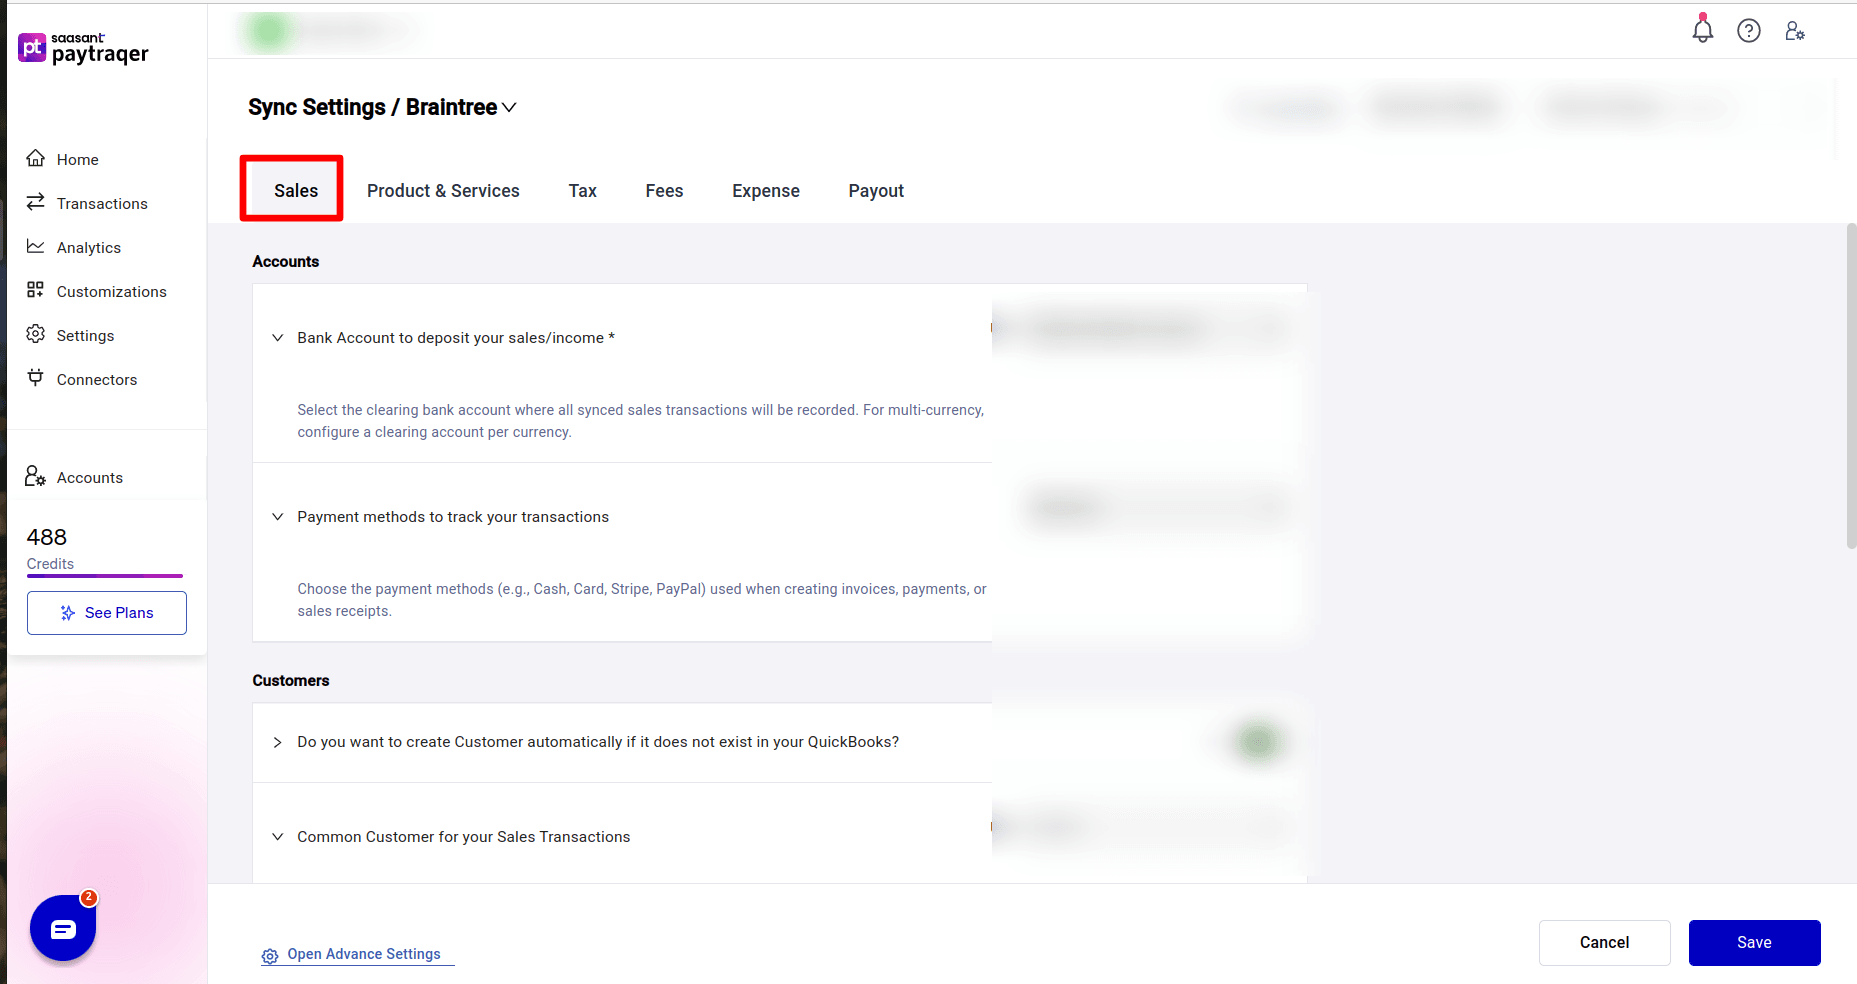
Path: Sync settings → Braintree → Sales
These options control how Braintree payments become sales entries in QuickBooks.
2.1 Accounts
Bank Account to deposit your sales/income
Example: Braintree Bank Account (USD)
This is your Braintree clearing bank in QuickBooks.
All Braintree sales go here.
For multi currency, pick a clearing account per currency.
Tip: Use the same clearing account here and in Fees and Expense settings so the account nets correctly.
2.2 Payment method
Payment methods to track your transactions
Set to Braintree.
This value appears as the Payment Method on Sales Receipts or Payments in QuickBooks.
2.3 Customers
Do you want to create Customer automatically if it does not exist in your QuickBooks
Set to Yes to let PayTraQer create customers when there is no exact name match.
Set to No only if you maintain all customers manually in QuickBooks.
Common Customer for your Sales Transactions
Optional.
Turn on and select a customer if you want all Braintree sales under one name, for example “Braintree Sales”.
Useful for summary style posting when you do not need per customer reporting.
Customize Customer Matching
Use Add Customer Matching to map Braintree customer names to existing QuickBooks customers.
Helps avoid duplicates when names differ slightly between systems.
2.4 Tracking
Location/Department for your Sales transactions
Class for your Sales transactions
Assign a fixed Location/Department and Class to every Braintree sale.
Use this if you report by channel, branch, or practice area.
Leave blank if you do not use these fields in QuickBooks.
2.5 Sync scope
Do you want to skip the sales & process the associated fees only
No by default.
Set to Yes only when another integration already creates the Braintree sales and you want PayTraQer to bring in fees only.
3. Product settings for Braintree
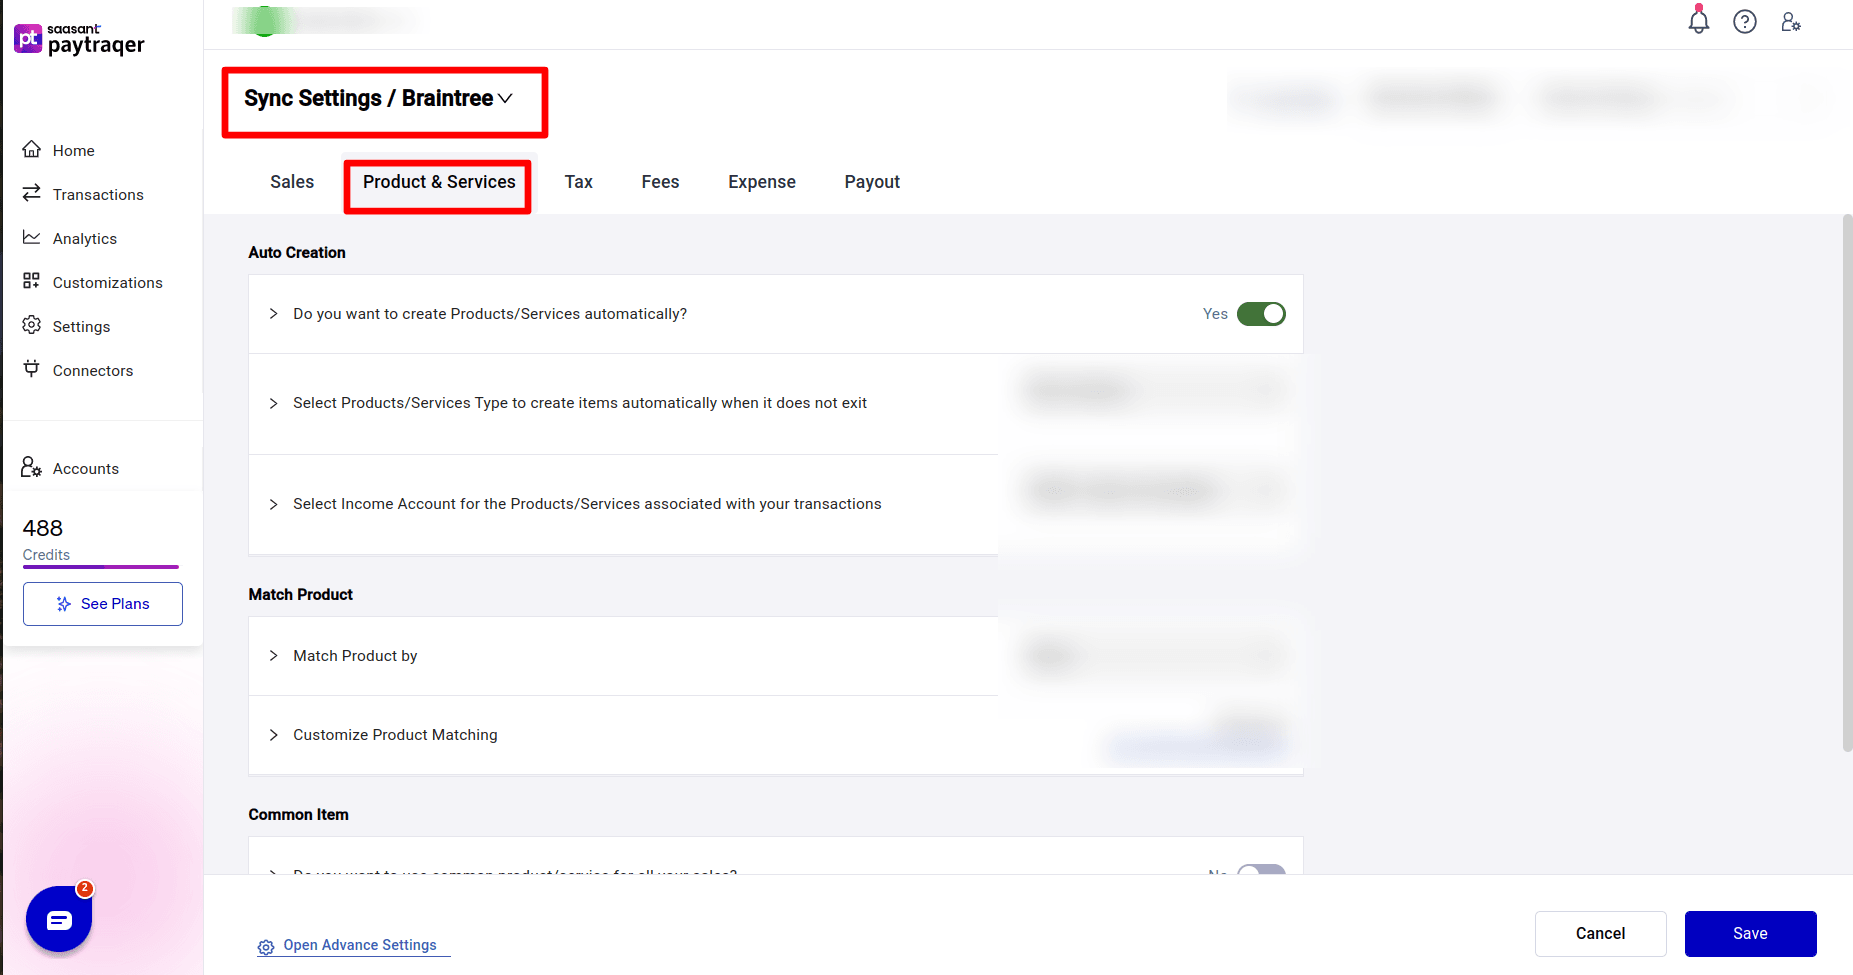
Path: Sync settings → Braintree → Product
These settings control how items from Braintree are handled in QuickBooks.
3.1 Auto creation
Do you want to create Products/Services automatically
Yes to auto create new items when there is no exact name match.
Prevents sync failures when new products appear.
Select Products/Services Type to create items automatically
Choose Non Inventory or Service for auto created items.
Select Income Account for the Products/Services associated with your transactions
Choose the income account to link to auto created items.
The example screenshot shows a liability account, but you should pick the revenue account that fits your Braintree sales.
3.2 Product matching
Match Product by
Set to Name by default.
Switch to SKU if you keep consistent SKUs between Braintree and QuickBooks.
Customize Product Matching
Use Add Product Matching to map Braintree item names to existing QuickBooks items when naming is different.
3.3 Common Item
Do you want to use common product/service for all your sales
No by default.
Set to Yes if you want to post all Braintree sales under one item, then choose it in Select common product/service.
Useful for summary sync when item level reporting is not needed.
4. Tax settings for Braintree
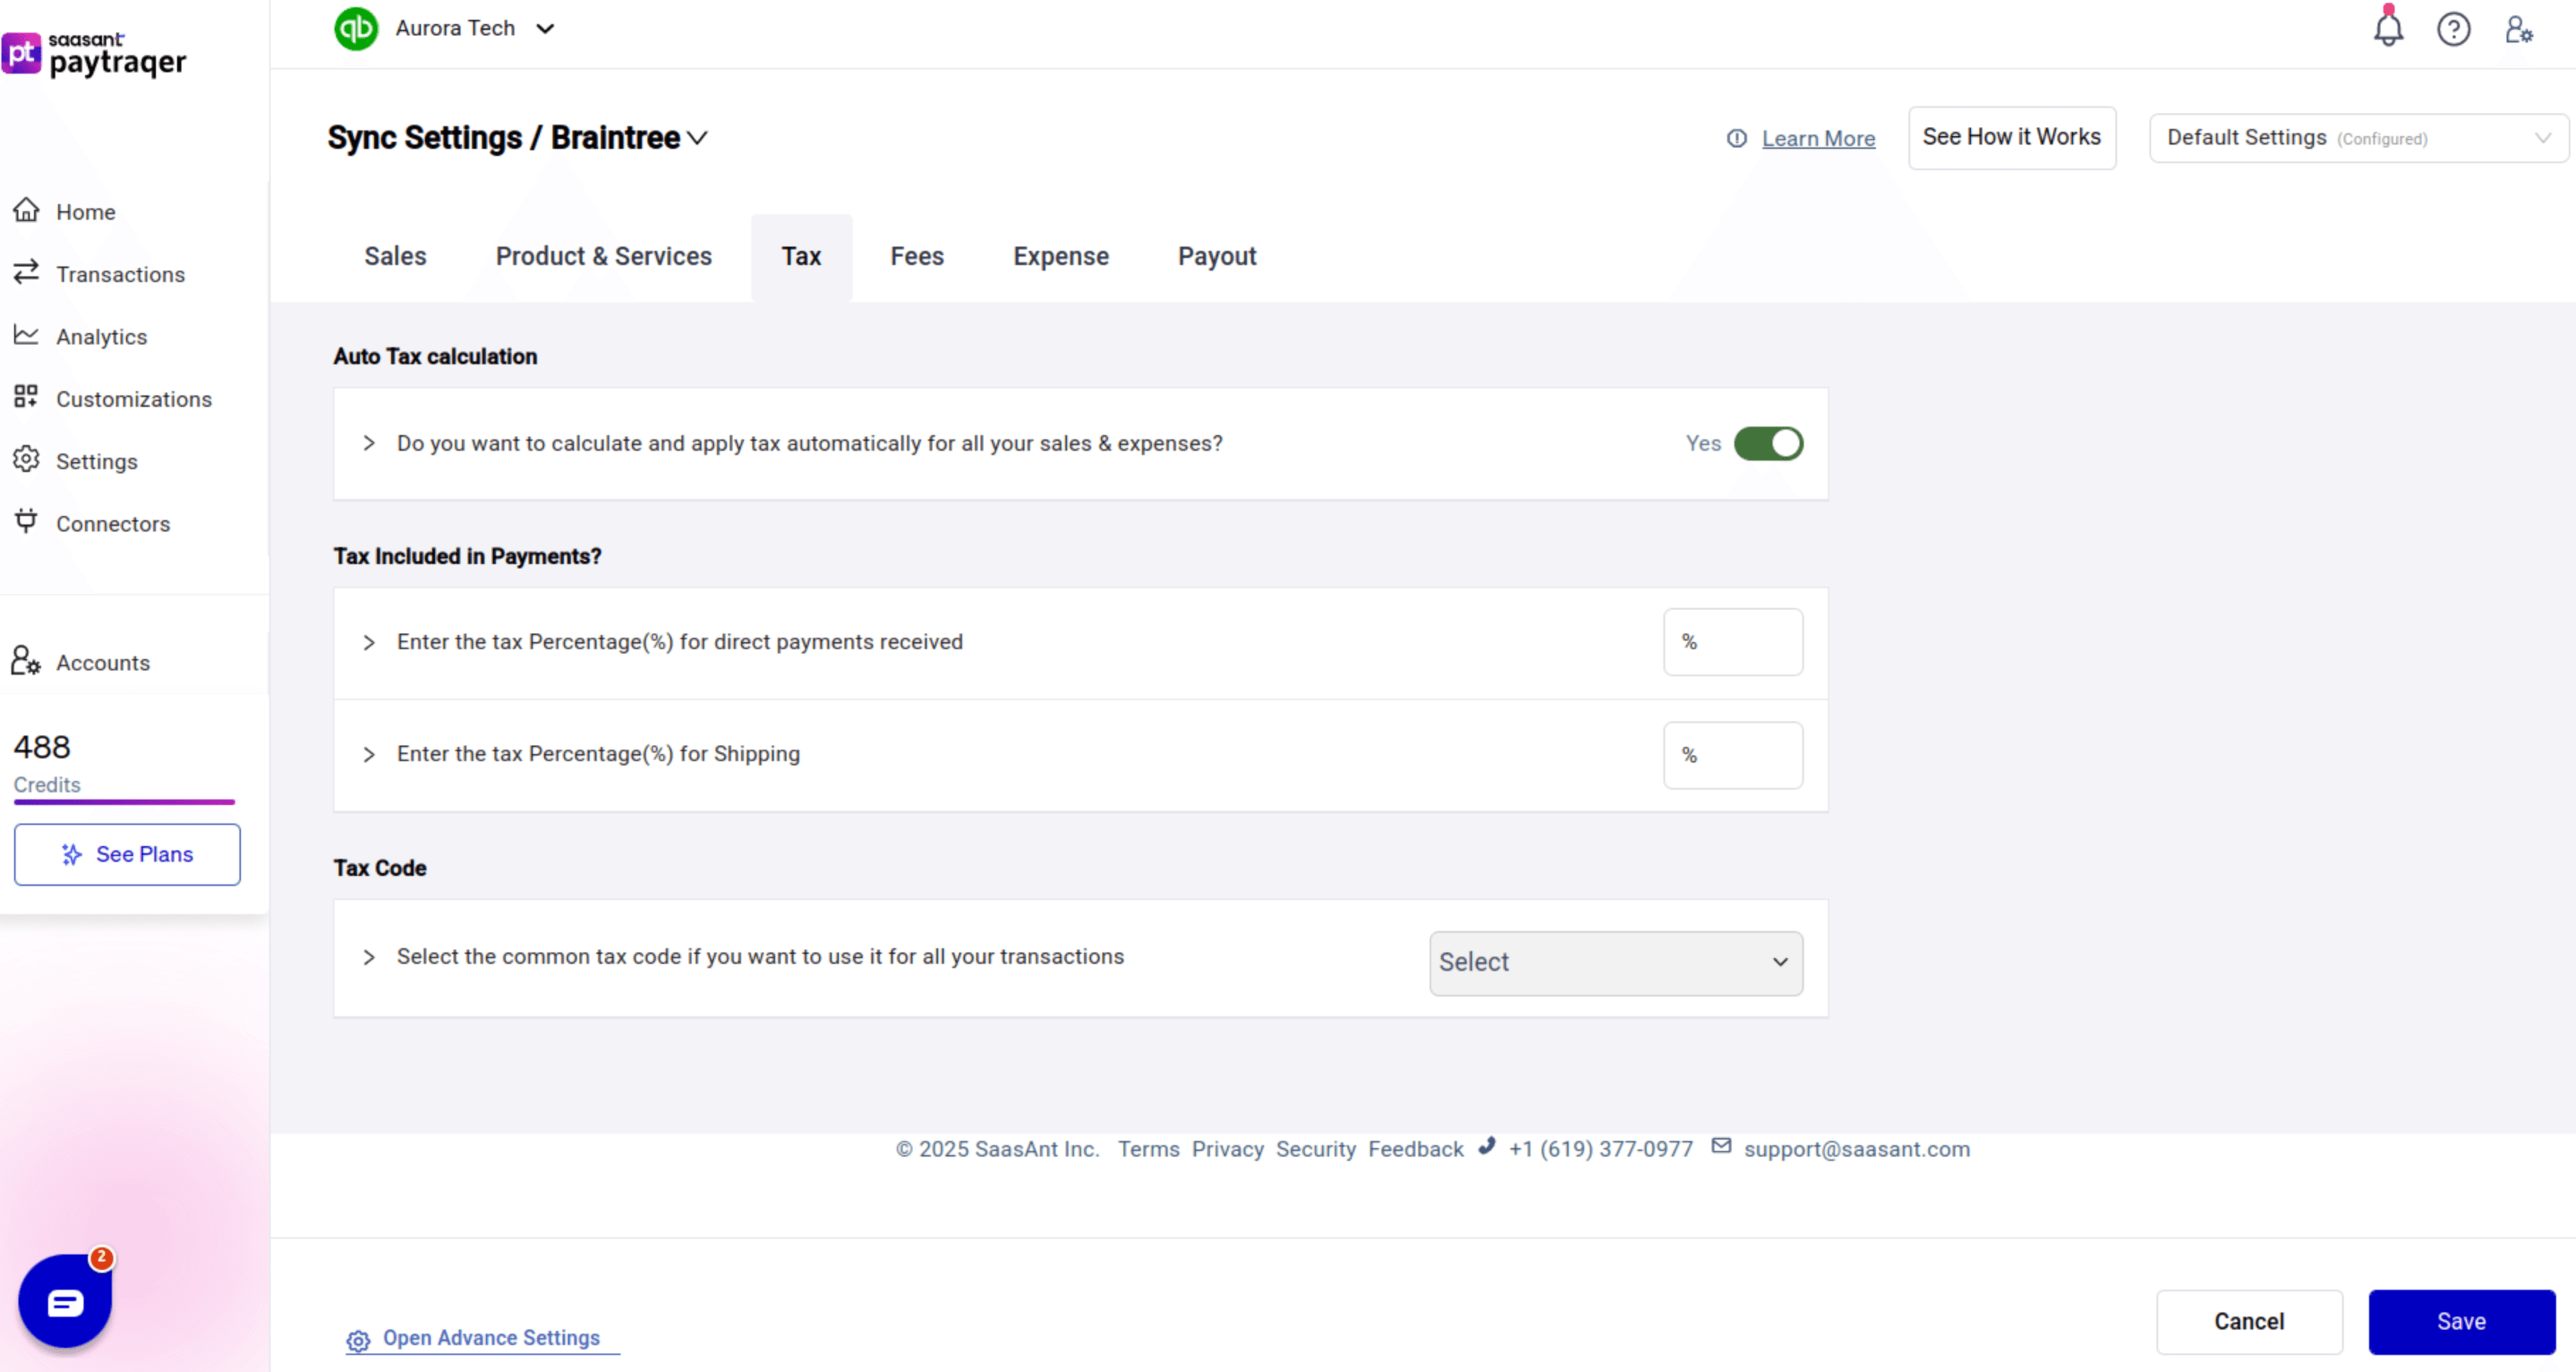
Path: Sync settings → Braintree → Tax
These settings control how tax is calculated and mapped.
Do you want to calculate and apply tax automatically for all your sales & expenses
Yes to let PayTraQer find and apply tax where needed.
Tax Included in Payments
Enter the tax percentage for direct payments if your Braintree charges are tax inclusive.
PayTraQer uses this to identify the correct tax code.
Enter the tax Percentage(%) for Shipping
Set a separate tax percentage for shipping amounts when shipping is taxable.
Tax Code
Choose a default tax code if you want one common code for all Braintree transactions.
This overrides automatic tax detection when set.
Always test with a sample transaction in QuickBooks after changing tax settings.
5. Fees settings for Braintree
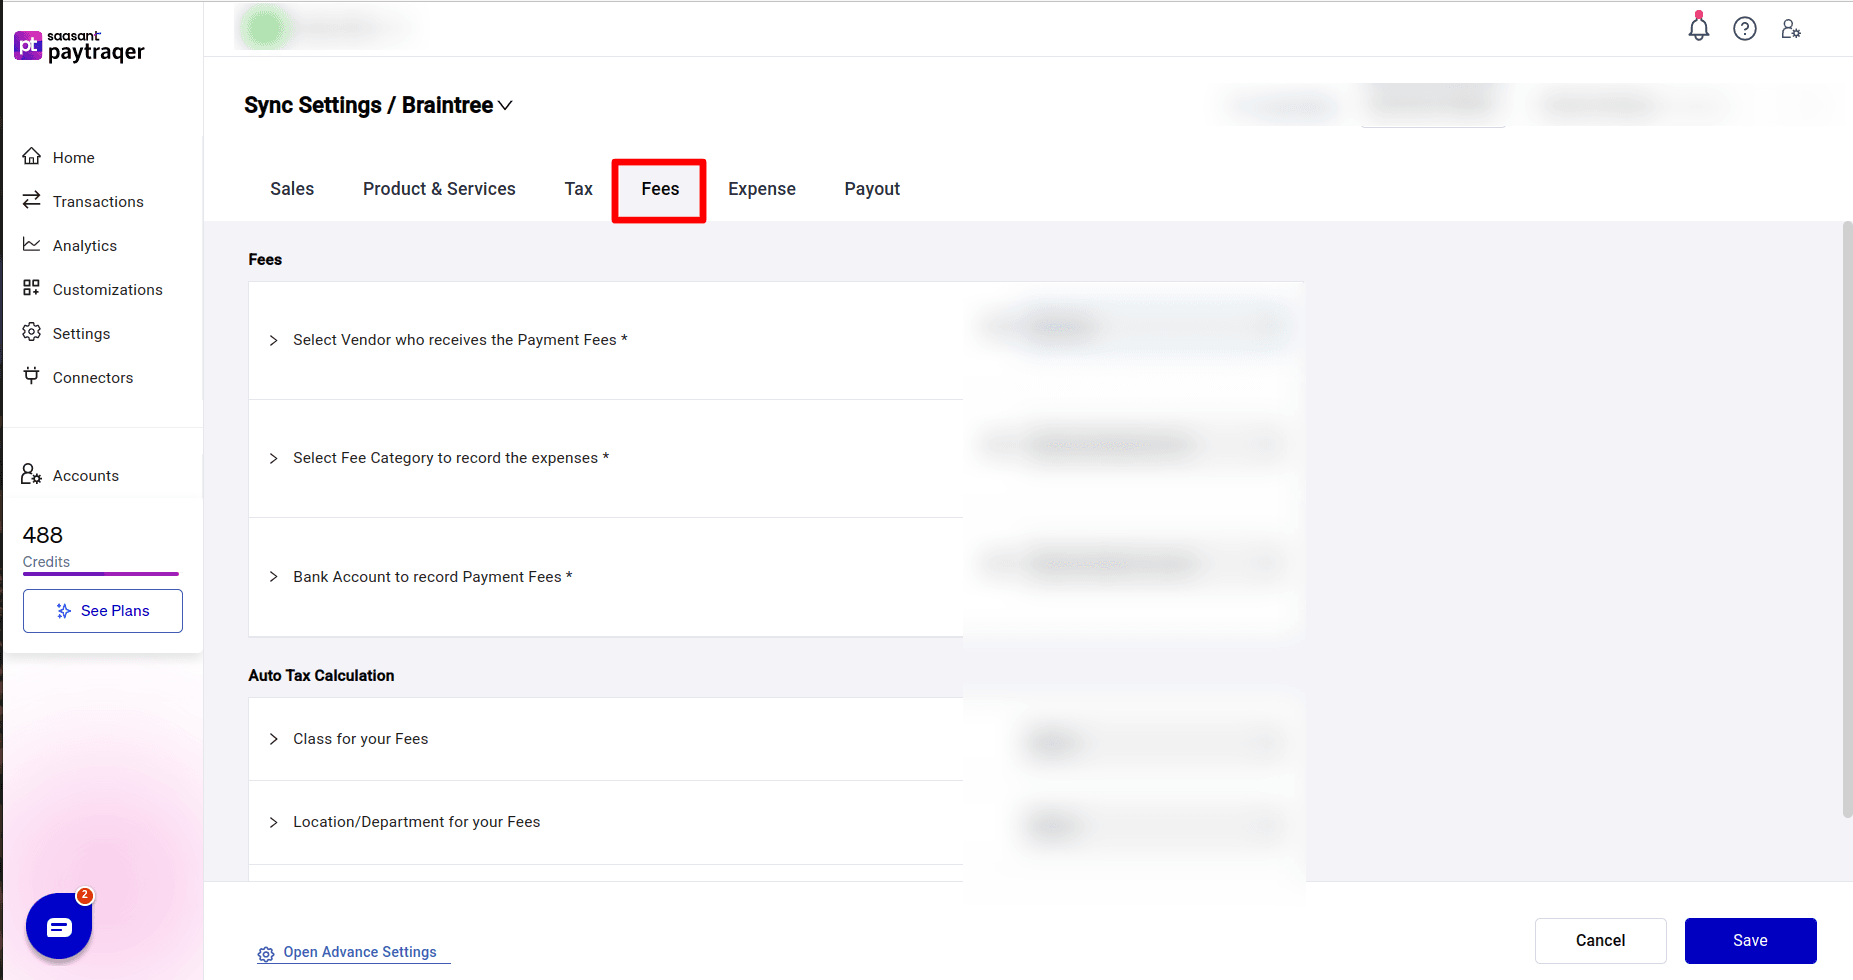
Path: Sync settings → Braintree → Fees
These settings describe how Braintree fees are recorded.
Select Vendor who receives the Payment Fees
Set to Braintree.
All fee expenses will use this vendor.
Select Fee Category to record the expenses
Choose your Braintree fee expense account, for example Braintree Fees.
Bank Account to record Payment Fees
Set to Braintree Bank Account.
This keeps sales and fees in the same clearing account.
Class for your Fees
Location/Department for your Fees
Optional tracking fields for fee expenses.
Do you want to skip the fee details from syncing
No by default.
Set to Yes only if you do not want individual fee lines to post.
6. Expense settings for Braintree
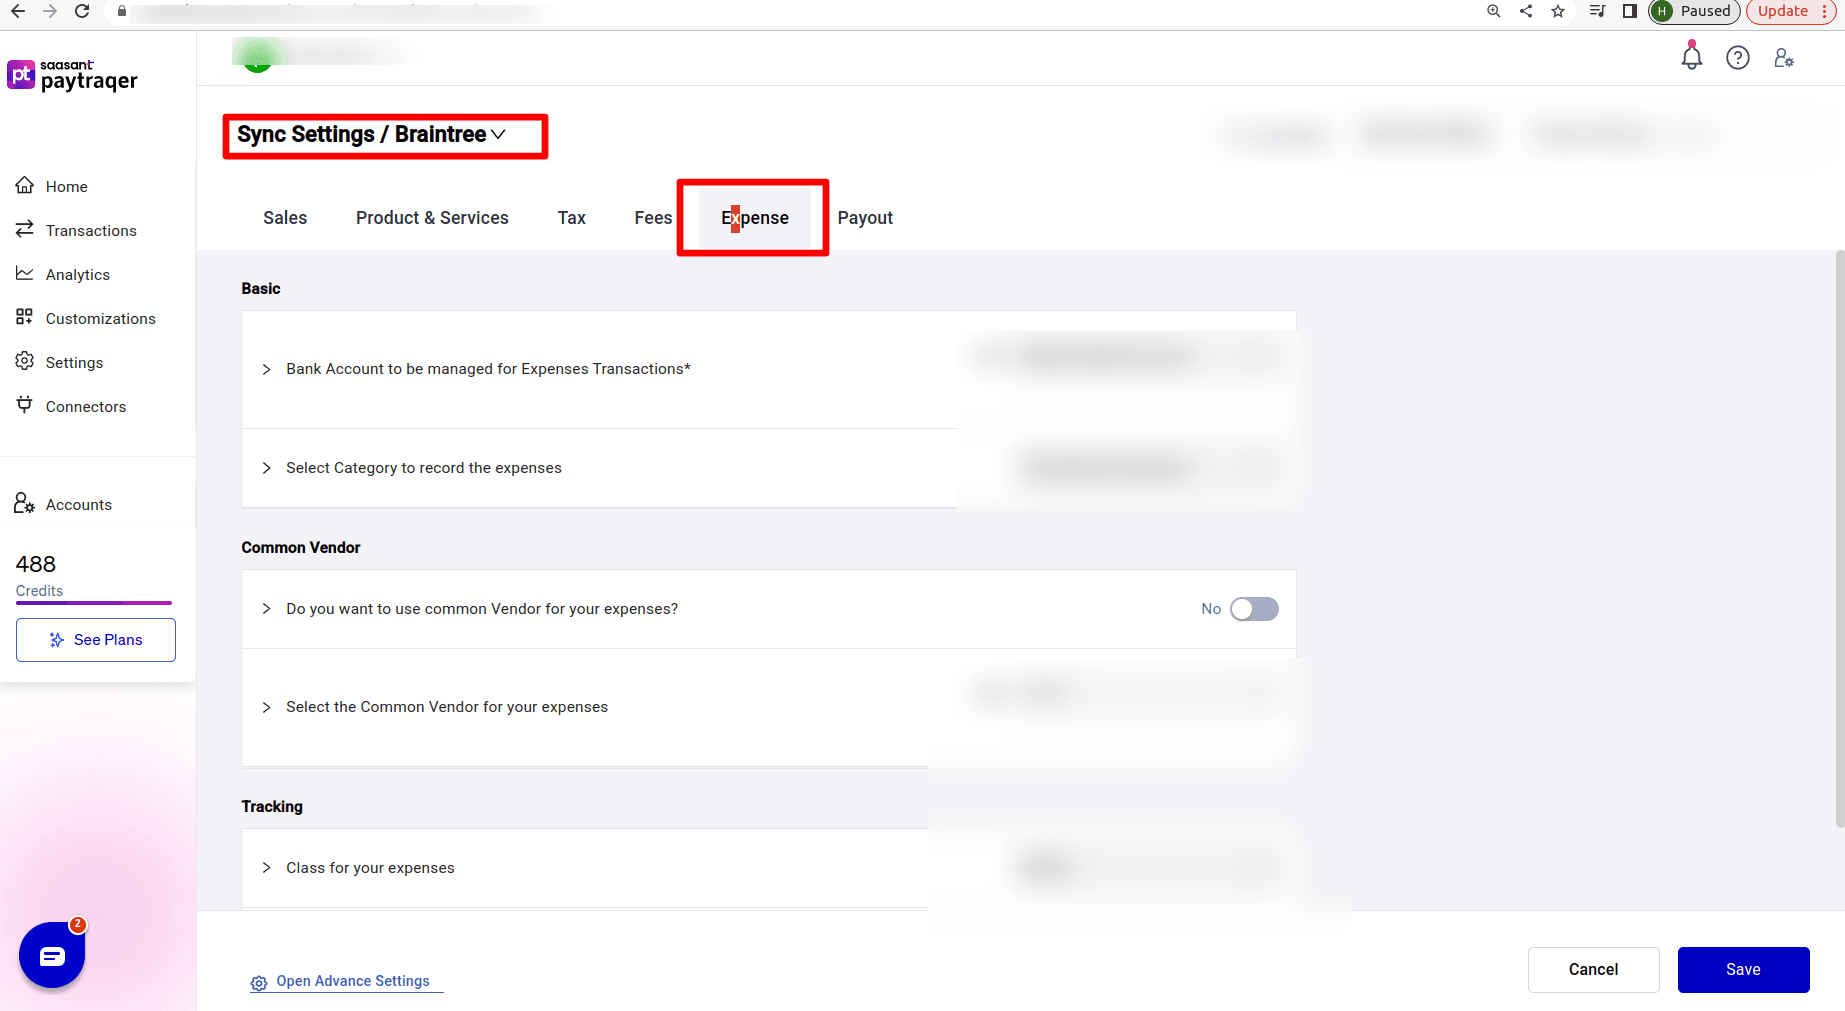
Path: Sync settings → Braintree → Expense
Used for extra expenses that are not per transaction fees.
Bank Account to be managed for Expenses Transactions
Set to Braintree Bank Account so these expenses affect the same clearing account.
Select Category to record the expenses
Choose an expense account such as Uncategorized Expense or a Braintree specific expense account.
Do you want to use common Vendor for your expenses
No by default.
Set to Yes if you want all such expenses under one vendor, then choose it in Select the Common Vendor for your expenses.
Class for your expenses
Location/Department of your expenses
Optional tracking fields for these expenses.
7. Payout settings for Braintree
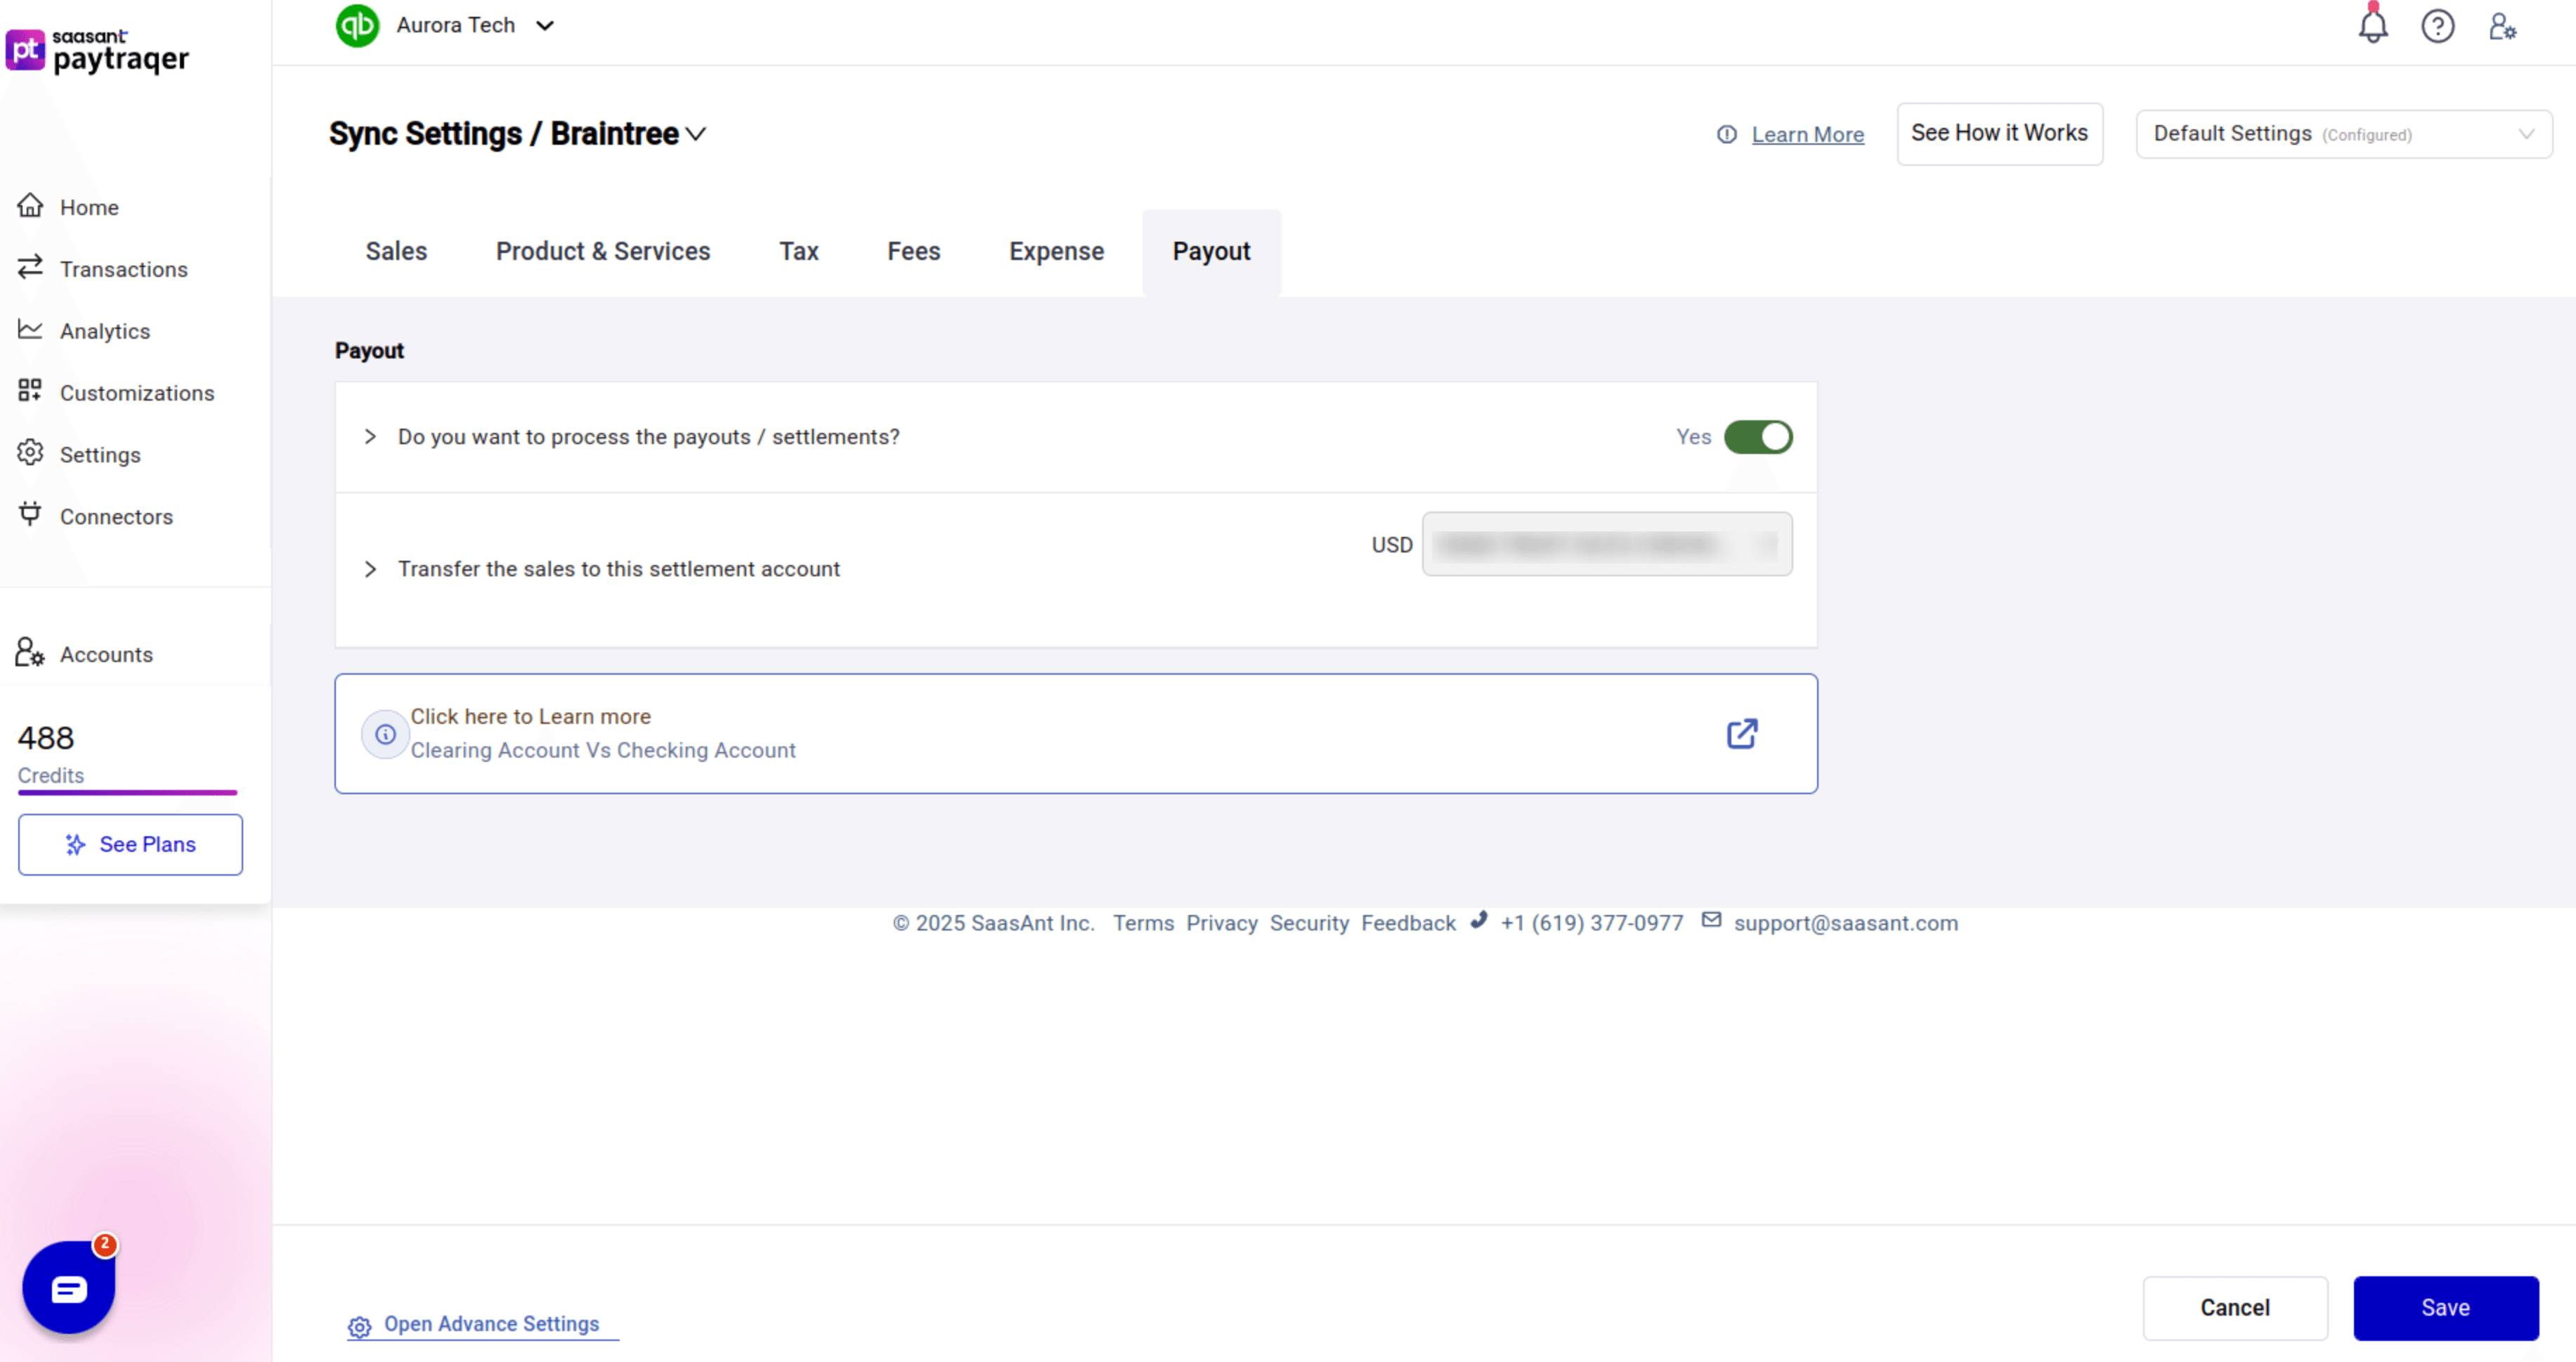
Path: Sync settings → Braintree → Payout
These settings handle how Braintree settlements move from the clearing account to your real bank.
Do you want to process the payouts / settlements
Yes to sync payouts and settlements as transfer transactions.
Transfer the sales to this settlement account
Choose your settlement bank account, for example a checking or trust account:
How it works:
Sales and fees post to Braintree Bank Account.
When Braintree sends a payout, PayTraQer creates a Bank Payout or Transfer from Braintree Bank Account to the chosen settlement account.
That transfer amount should match the deposit in your bank feed.
8. How Braintree transactions map to QuickBooks
For reference, here is how Braintree transaction types become QuickBooks entries:
Payment system | QuickBooks entry created |
Invoice Payment | Invoice, Fees as Expense |
Subscription Payment | Sales Receipt, Fees as Expense |
Payment | Sales Receipt, Fees as Expense |
Recurring Payment | Invoice, Payment, Fees as Expense |
Customer Refund | Refund |
Payouts are handled separately in the Payout section as Bank Payout or Transfer entries.
9. Test and review
After you adjust Braintree settings:
Use Download historical transactions for a short date range.
Sync that range.
In QuickBooks, verify:
Sales post to Braintree Bank Account with Payment Method Braintree.
Customers and items are created or mapped as expected.
Fees and extra expenses hit the correct expense accounts.
Tax codes and amounts look correct.
Payout transfers match bank deposits and reduce the Braintree clearing balance.
Once the results look right, you can turn on Auto Sync in General Settings to keep Braintree and QuickBooks in sync going forward.