How to Integrate Braintree Transactions to QuickBooks Online Using PayTraQer
April 17, 2026
How to integrate Braintree with QuickBooks Online using SaasAnt PayTraQer
PayTraQer connects your Braintree account to QuickBooks Online. It syncs payments, refunds, fees, expenses, and payouts so your bank deposits match and your reports stay accurate.
Video tutorial for How to connect and Sync BrainTree Transactions to QuickBooks Online using PayTraQer:
Who this is for
Bookkeepers and accountants managing Braintree activity
Business owners who want to stop keying in Braintree reports by hand
Before you start
You will need:
An active QuickBooks Online company
QuickBooks Online login with admin access
Braintree account with access to API keys
Your SaasAnt PayTraQer account (or free trial)
Quick setup: short version
In QuickBooks Online, open Apps, search PayTraQer, click Get app now, and connect.
In PayTraQer, choose your Sync Mode (Consolidated or Individual) and click Get Started.
In Braintree, open Settings → API and copy your API key details.
In PayTraQer, go to Connectors → Payment connectors → Braintree → Connect, paste the API key, and save.
In Sales settings, set Bank Account to deposit your sales/income to Braintree Bank Account.
In Fees, Expense, Payout settings, map fee accounts and settlement account.
Use Download historical transactions for a small date range and verify results.
Turn on Auto Sync when you are happy with the posting.
What the sync does
When Braintree sends data, PayTraQer creates these entries in QuickBooks:
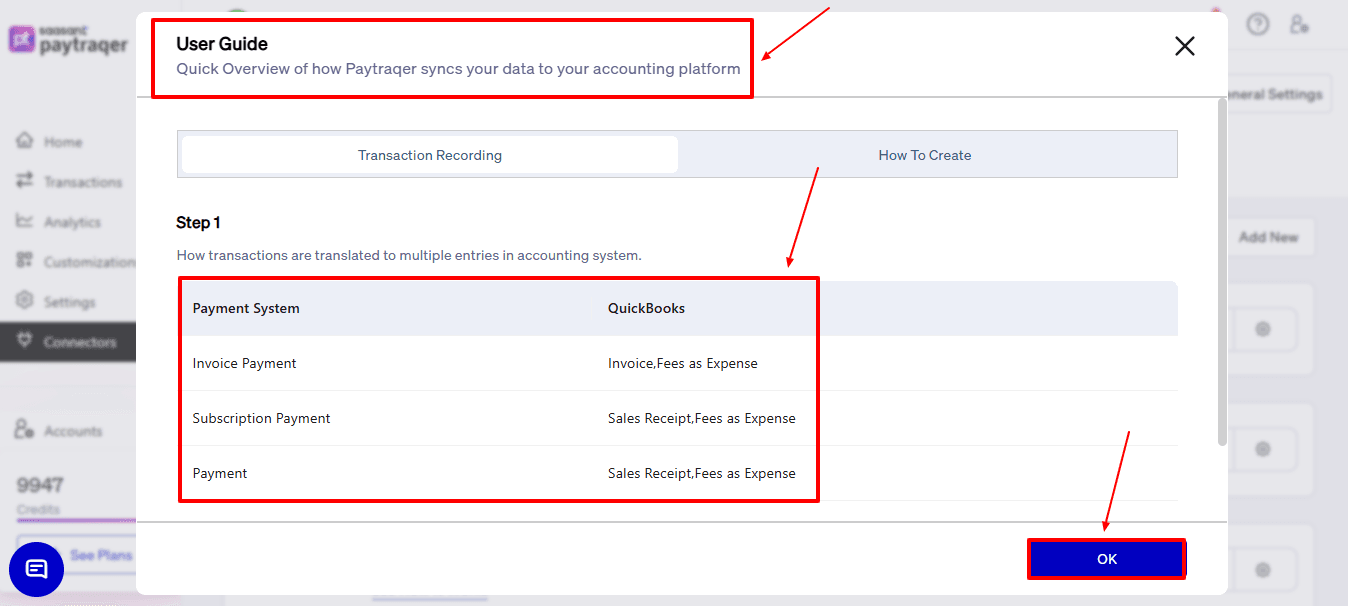
Payment system | QuickBooks entry created |
Invoice Payment | Invoice, Fees as Expense |
Subscription Payment | Sales Receipt, Fees as Expense |
Payment | Sales Receipt, Fees as Expense |
Recurring Payment | Invoice, Payment, Fees as Expense |
Customer Refund | Refund |
Notes
Fees from each payment type are recorded as Expenses to your Braintree fee account.
Payouts and settlements are handled through the Payout settings where PayTraQer posts Bank Payout or Transfer entries from the Braintree clearing account to your settlement bank account.
Step 1: Install PayTraQer from QuickBooks
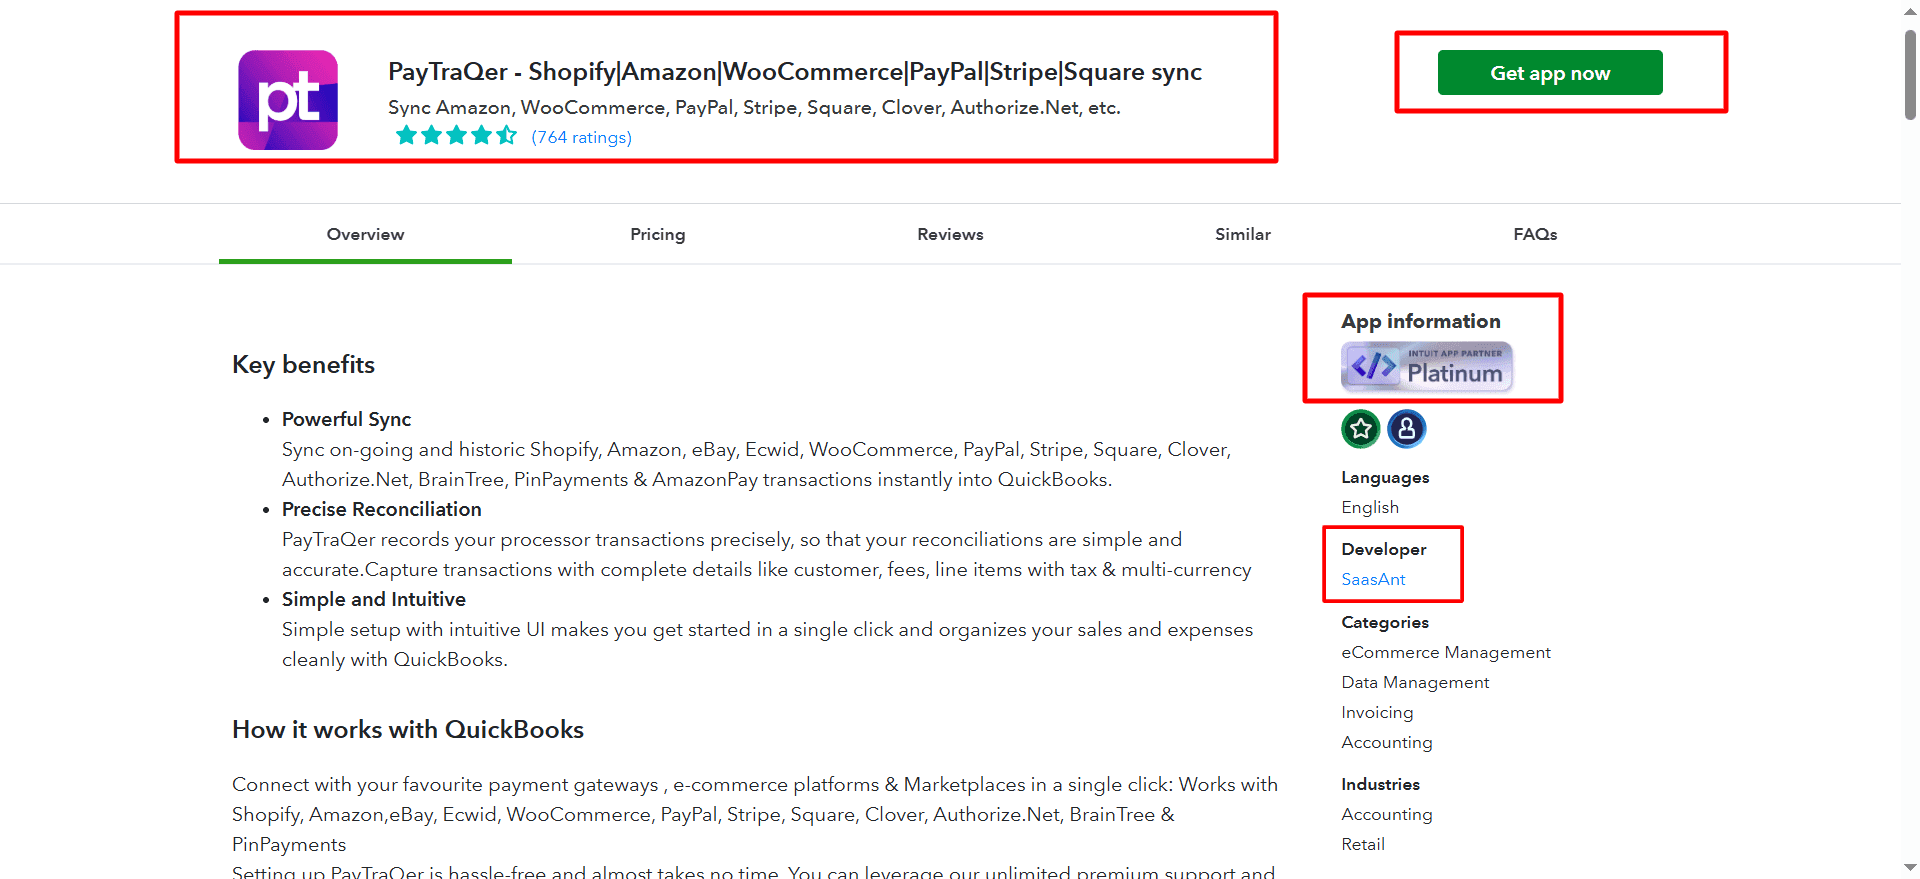
Sign in to QuickBooks Online.
Open Apps and search for PayTraQer.
Click Get app now and follow the prompts.
When QuickBooks asks for permission, click Connect.
You can use the free trial to complete setup and your first reconciliation.
Step 2: Choose Sync Mode
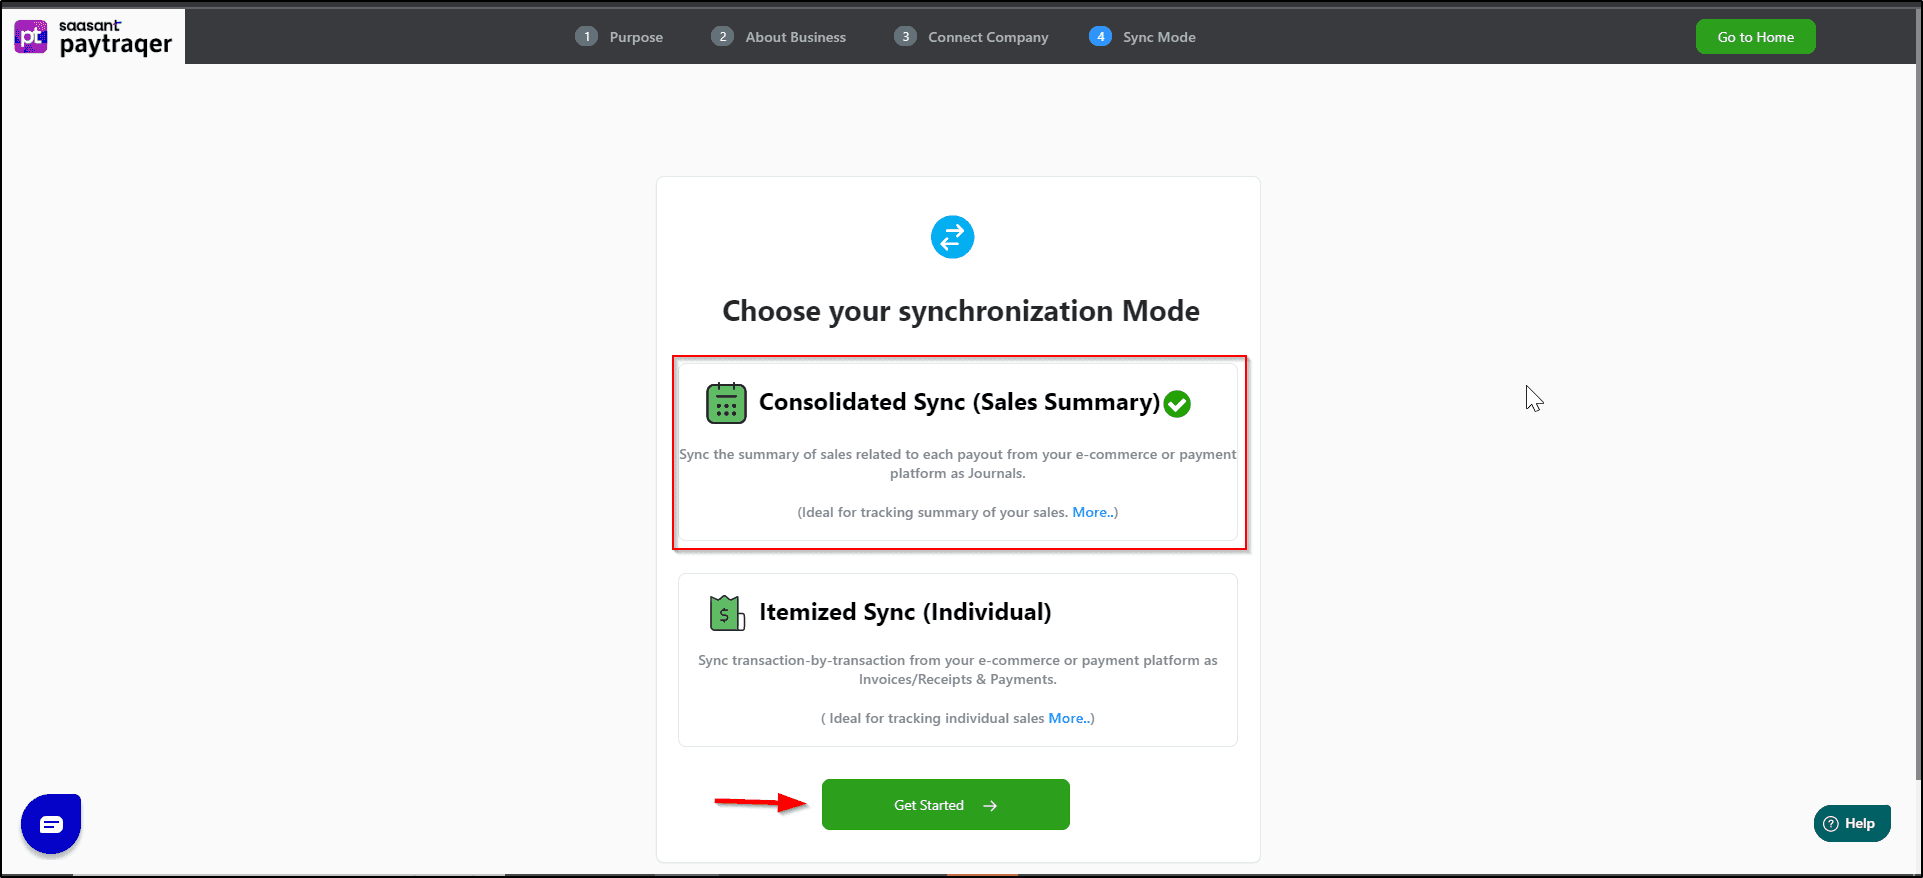
When PayTraQer opens, you will be asked to pick a sync mode:
Option | When to use | What you get |
Individual (Itemized) | Need full detail for each payment and refund | One entry per transaction with full detail |
Consolidated (Summary Sync) | Higher volume and focus on bank reconciliation | Fewer entries grouped by day or payout |
You can change this later, but only after disconnecting all connectors.
To switch modes you must:
Turn off Auto Sync
Disconnect Braintree and any other connectors
Change the mode
Reconnect and test a short date range
Step 3: Connect Braintree using API keys
Unlike Shopify or WooCommerce, Braintree uses API keys.
Log in to your Braintree account.
Go to Settings → API (exact menu names can vary).
Copy the required API key details from Braintree.
In PayTraQer, open Connectors → Payment connectors → Braintree → Connect.
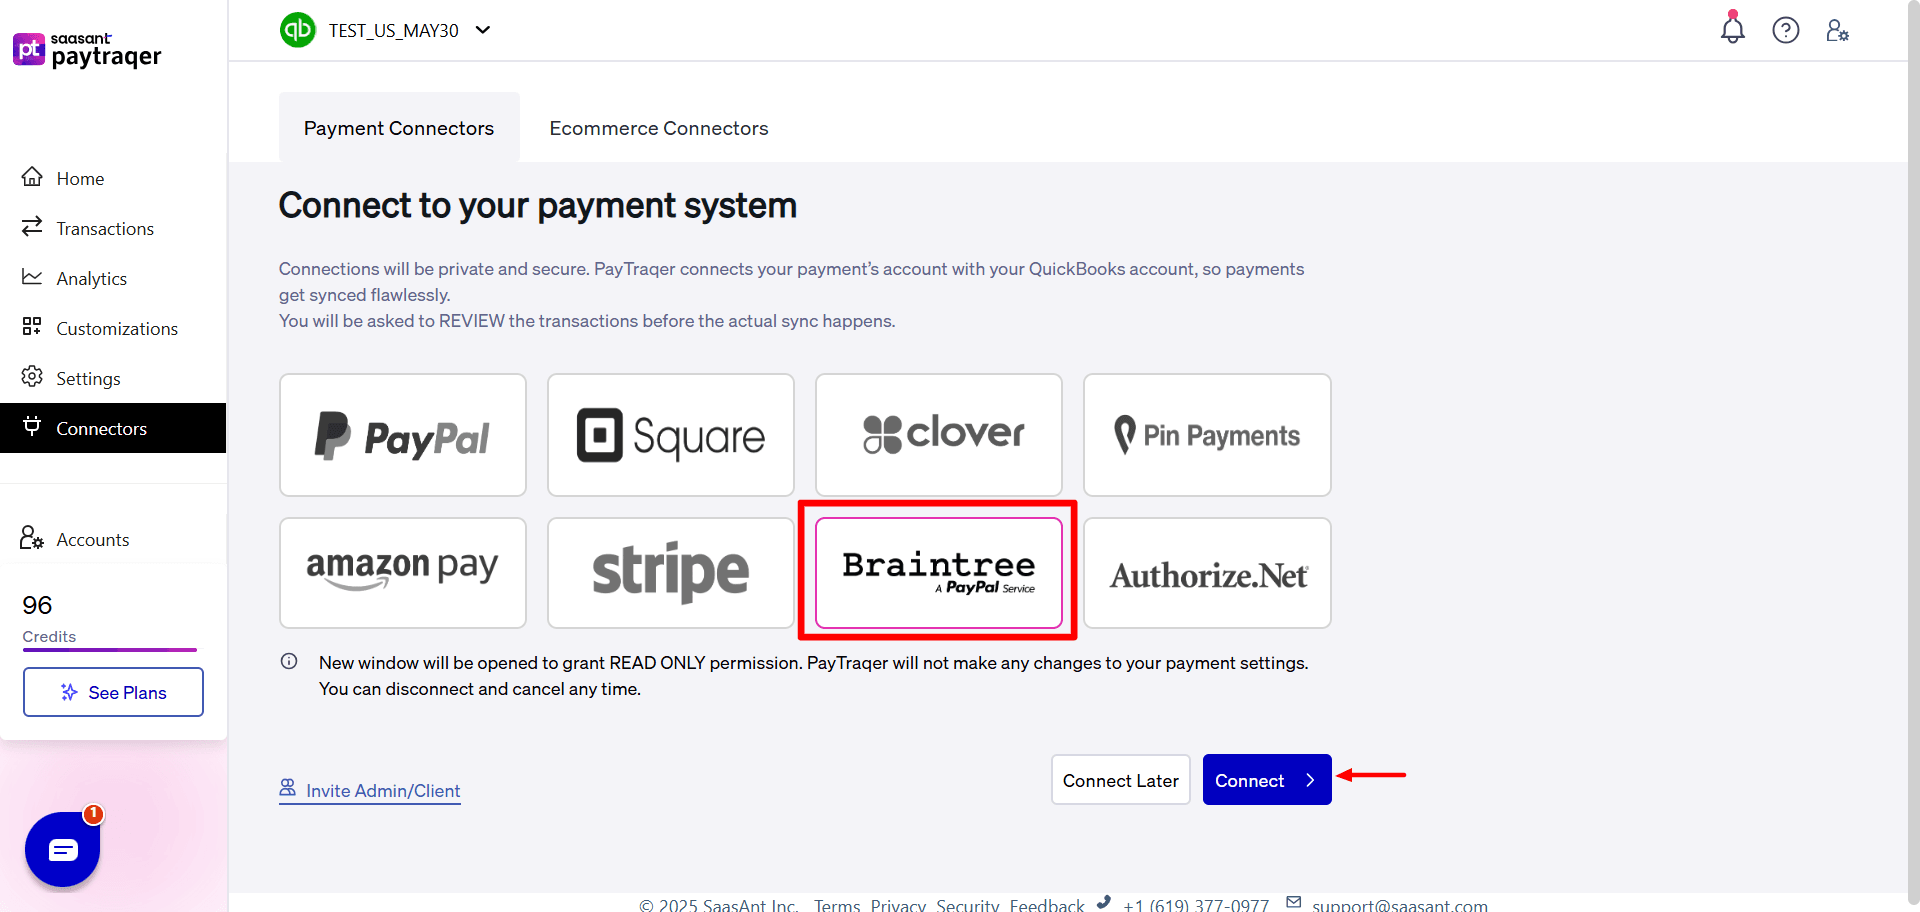
Paste the API key details into the fields shown and save.
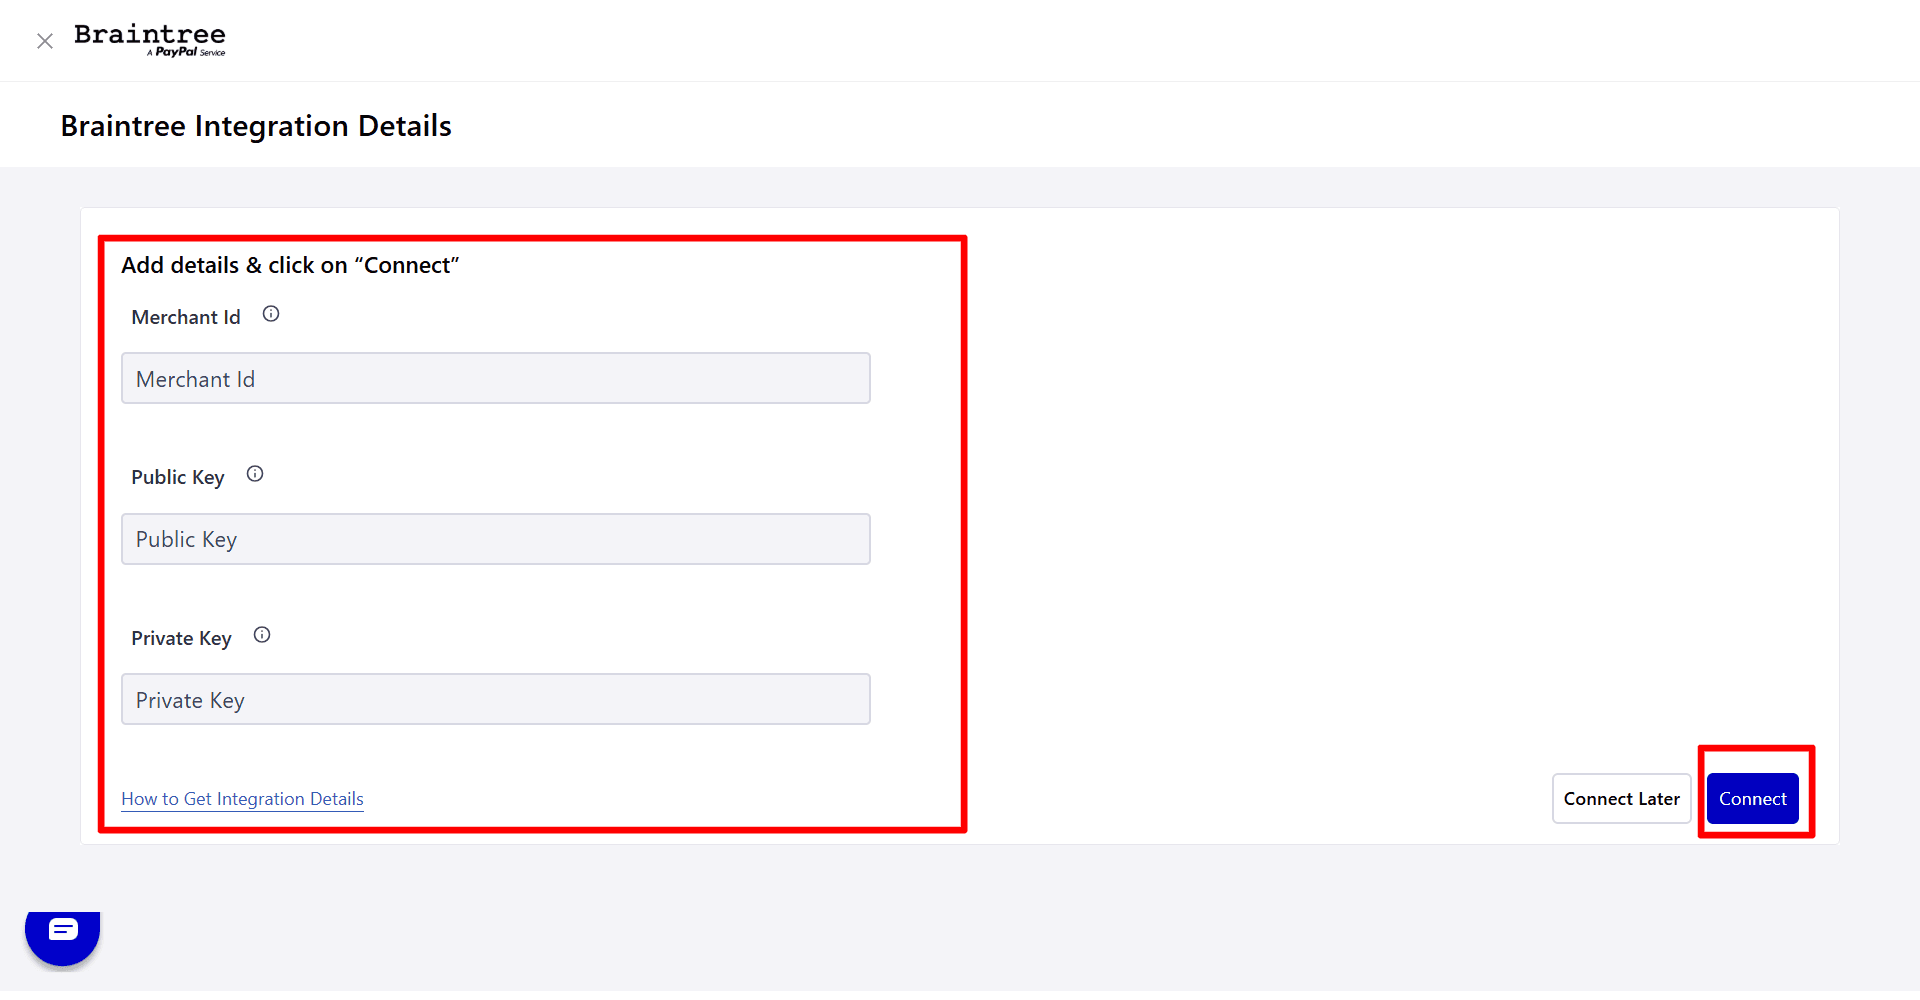
After this, PayTraQer can read Braintree payments, refunds, fees, and payouts.
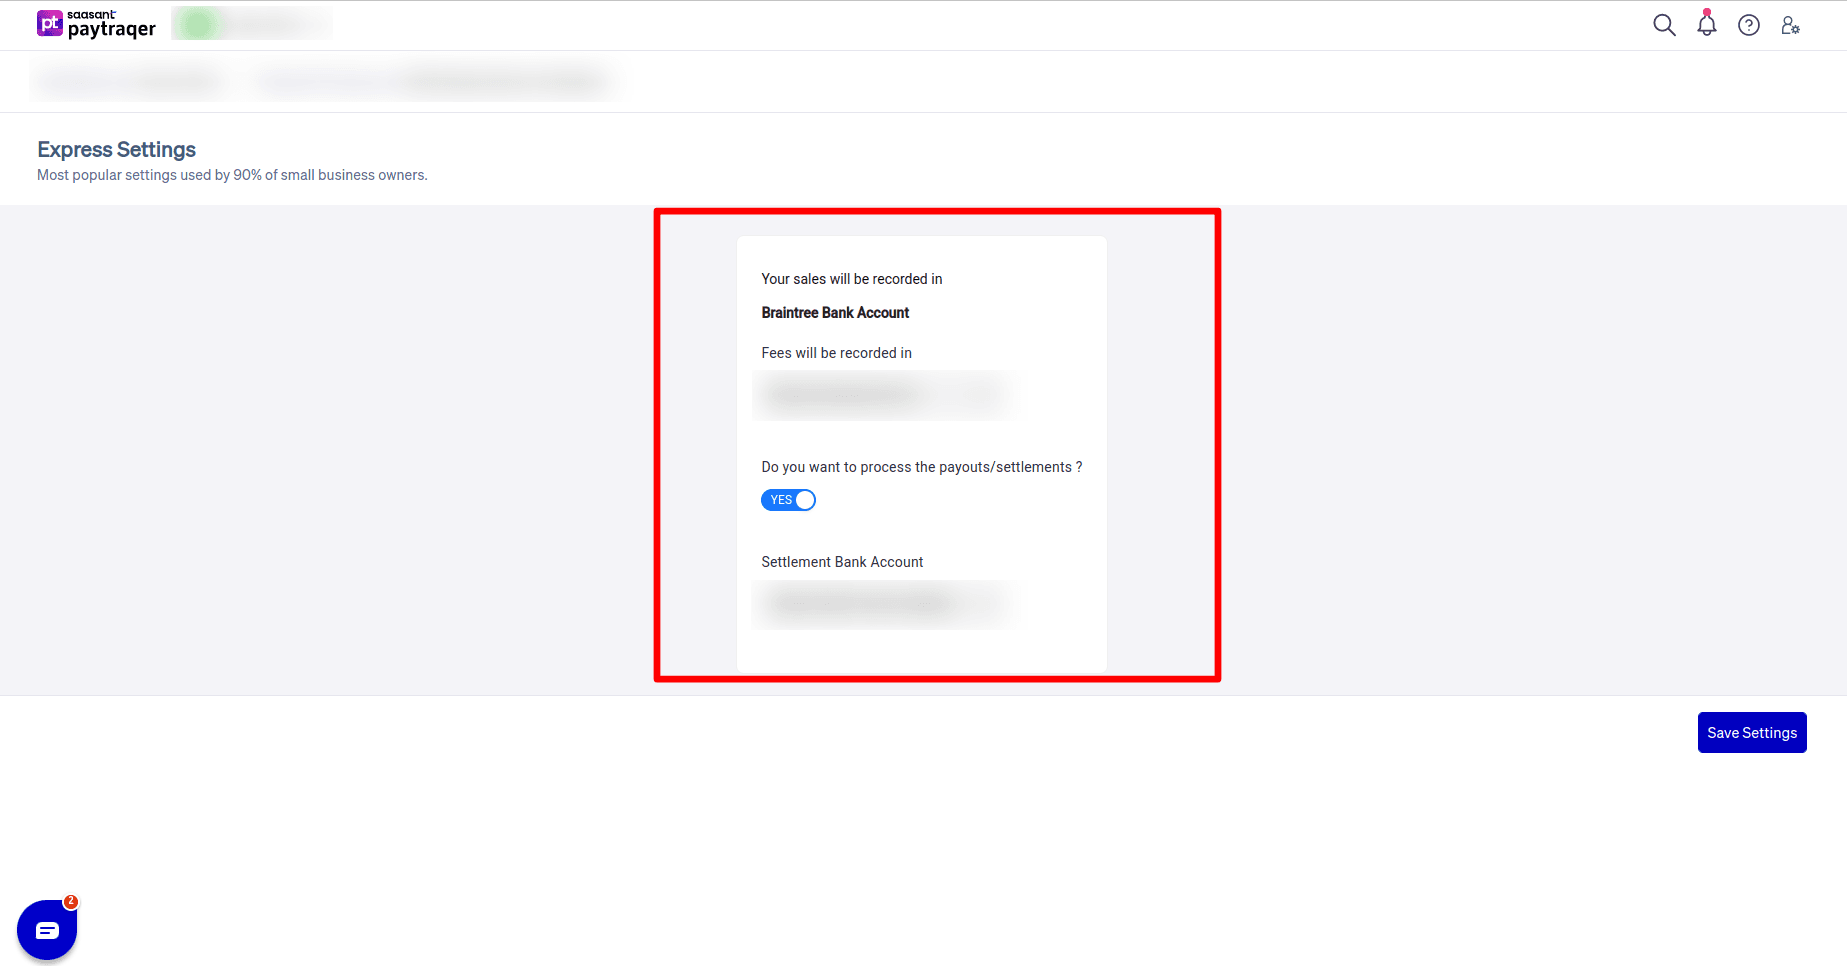
Once you connect, you will be asked to set up your account with a clearing account, a bank account for payouts in express settings.
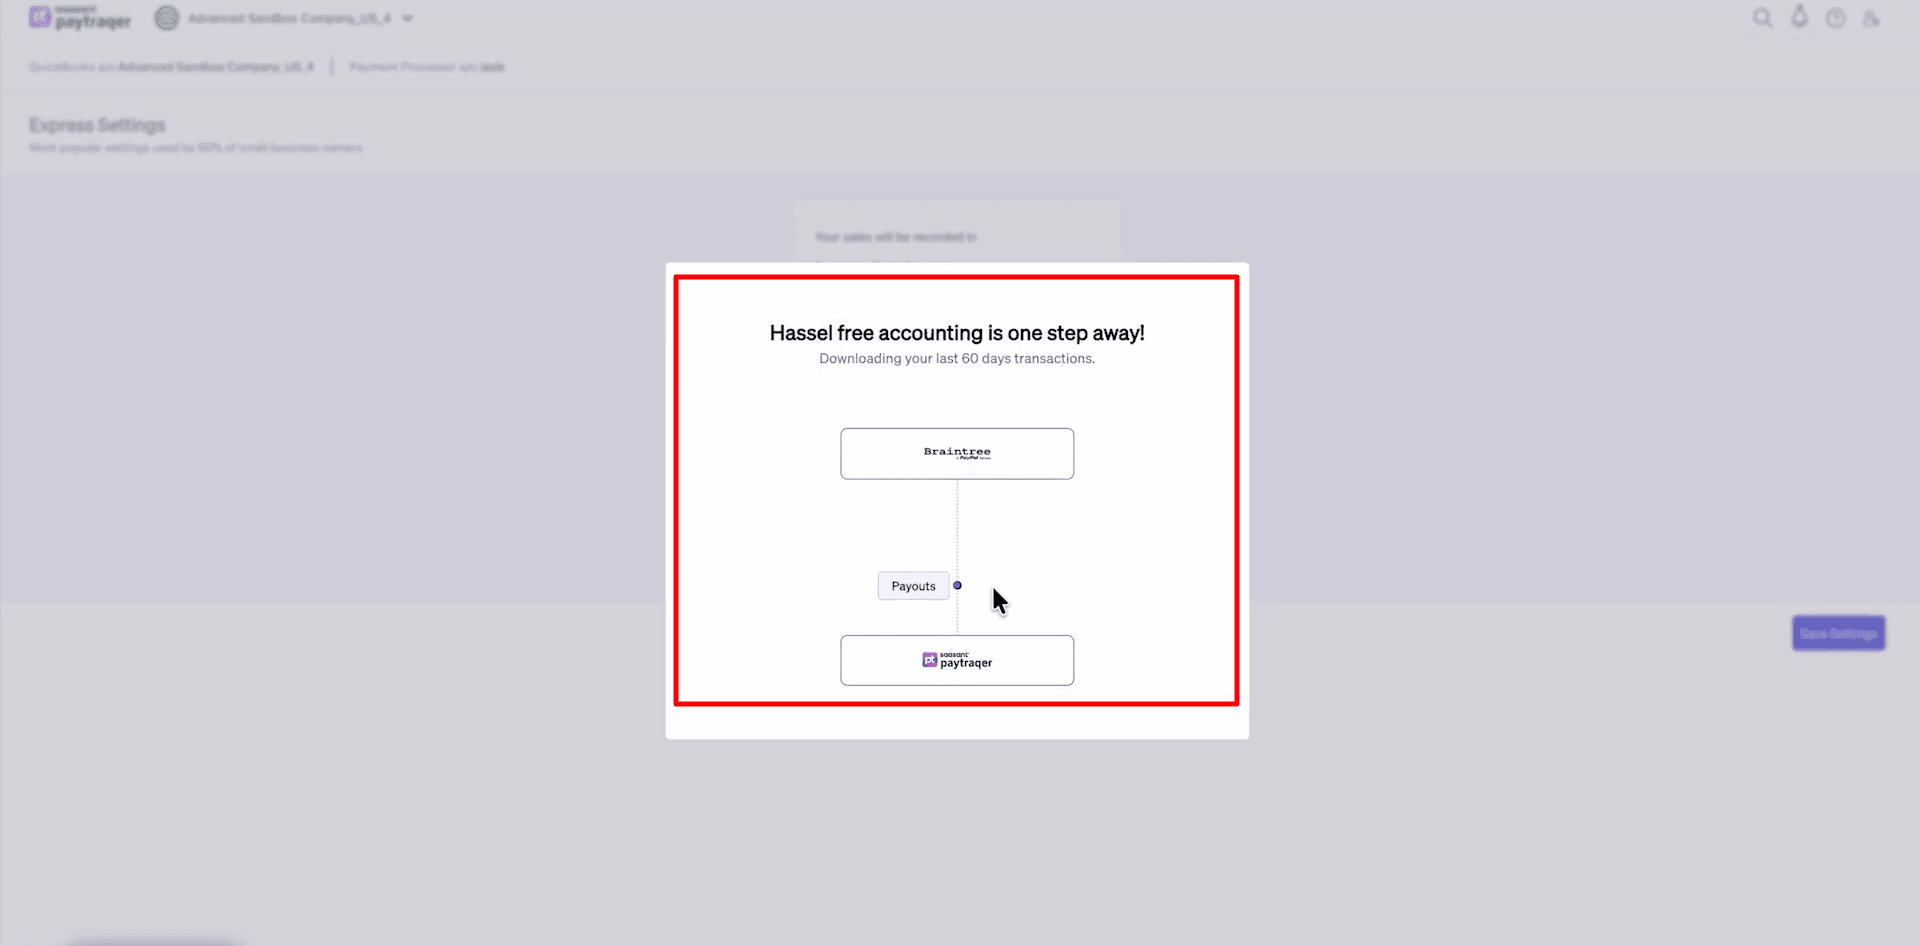
 Once you finish the setup, PayTraQer will automatically download your historical data from Braintree for the last 60 days.
Step 4: Configure Braintree Sales settings
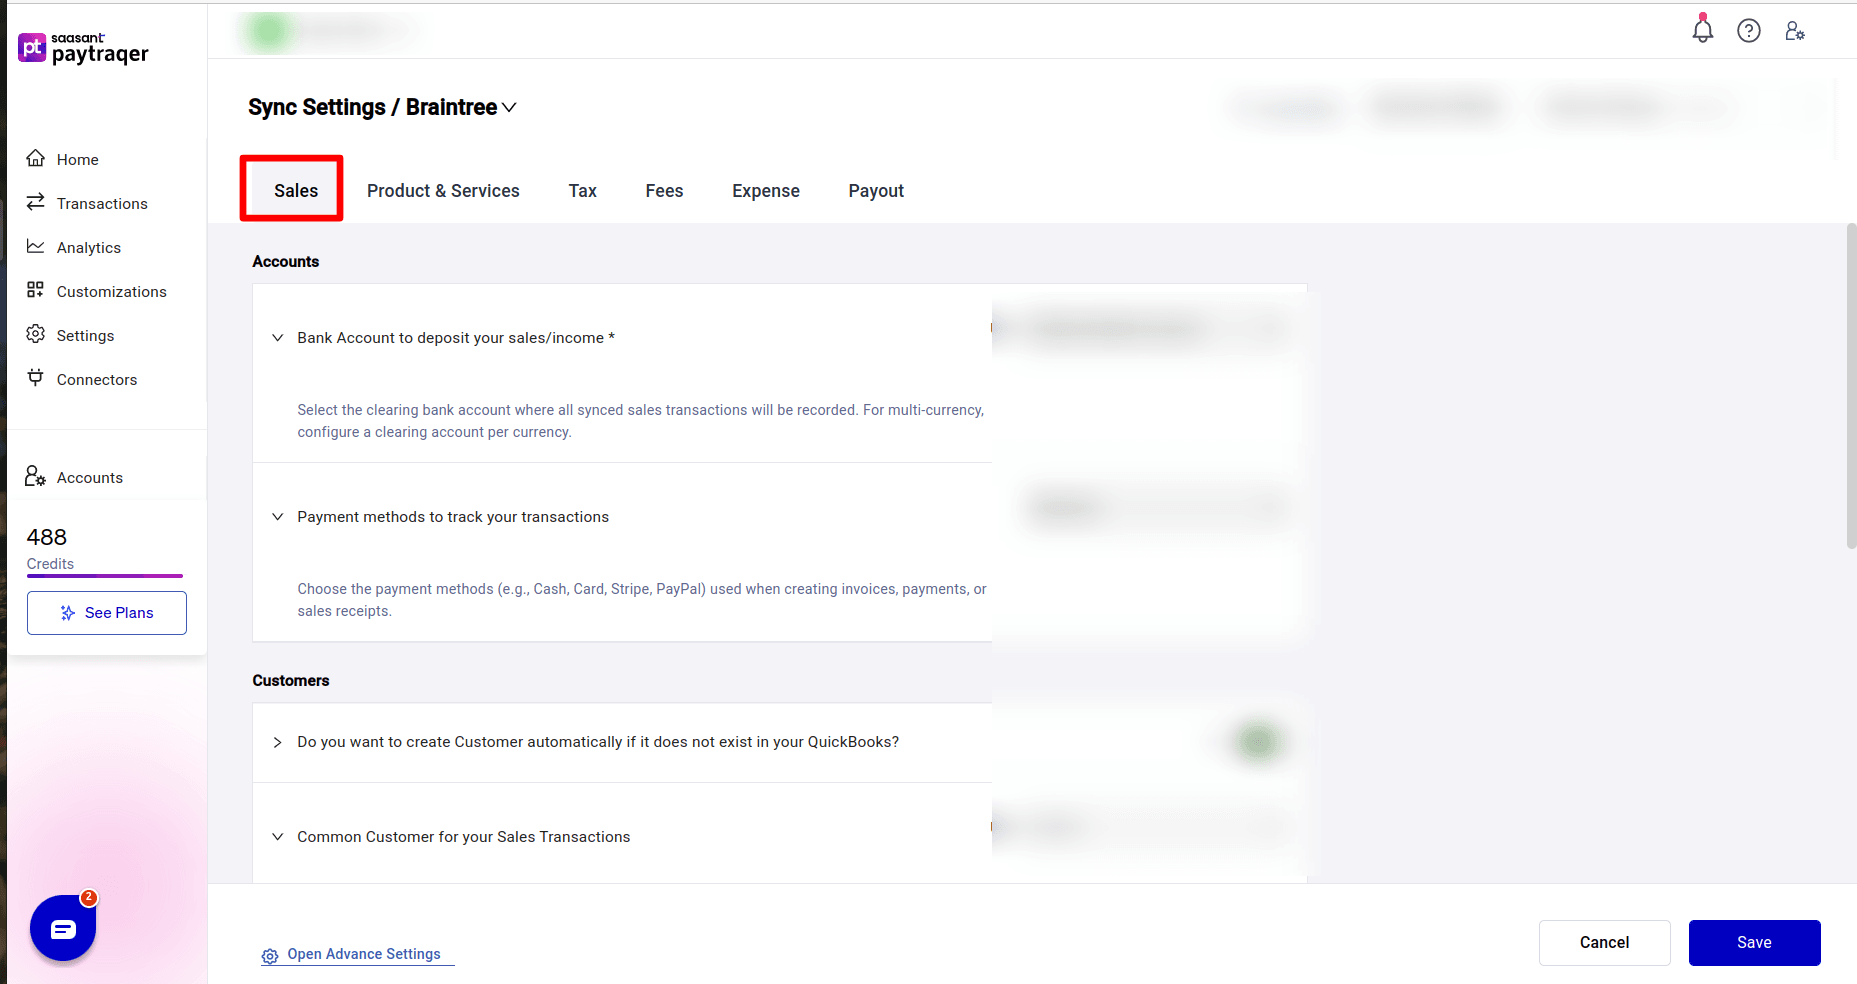
Open Settings → Sync settings → Braintree → Sales.
Bank Account to deposit your sales / income
Set Bank Account to deposit your sales/income to Braintree Bank Account (per currency).
This is your clearing account for Braintree.
All Braintree sales and related activity will post here.
Best practice:
Use a dedicated Braintree Bank Account for each currency you accept.
Use the same bank in Fees and Expense settings so the clearing account behaves correctly.
Payment method
Payment methods to track your transactions: set to Braintree.
This becomes the Payment Method on Sales Receipts or Payments in QuickBooks.
Customer creation and mapping
Do you want to create Customer automatically if it does not exist: set this to Yes.
PayTraQer will create new customers when there is no exact name match.
Common Customer for your Sales Transactions (per currency): optional.Turn this on and select one customer if you want all Braintree sales under a single name.
Useful for summary style reporting or when you do not need per-customer detail.
Customize Customer Matching
Add rules when Braintree customer names differ from the names you use in QuickBooks.
Helps avoid duplicates and keeps customer lists clean.
Tracking
Location/Department for your Sales transactions and Class for your Sales transactions are optional.
Use these if you track Braintree sales by a specific location, department, or class.
All Braintree sales will carry these values if set.
Skip sales and process fees only
Do you want to skip the sales & process the associated fees only:
Leave this as No if you want sales entries.
Set to Yes only if another integration already posts the sales and you only want Braintree fees.
Step 5: Configure Products & Services
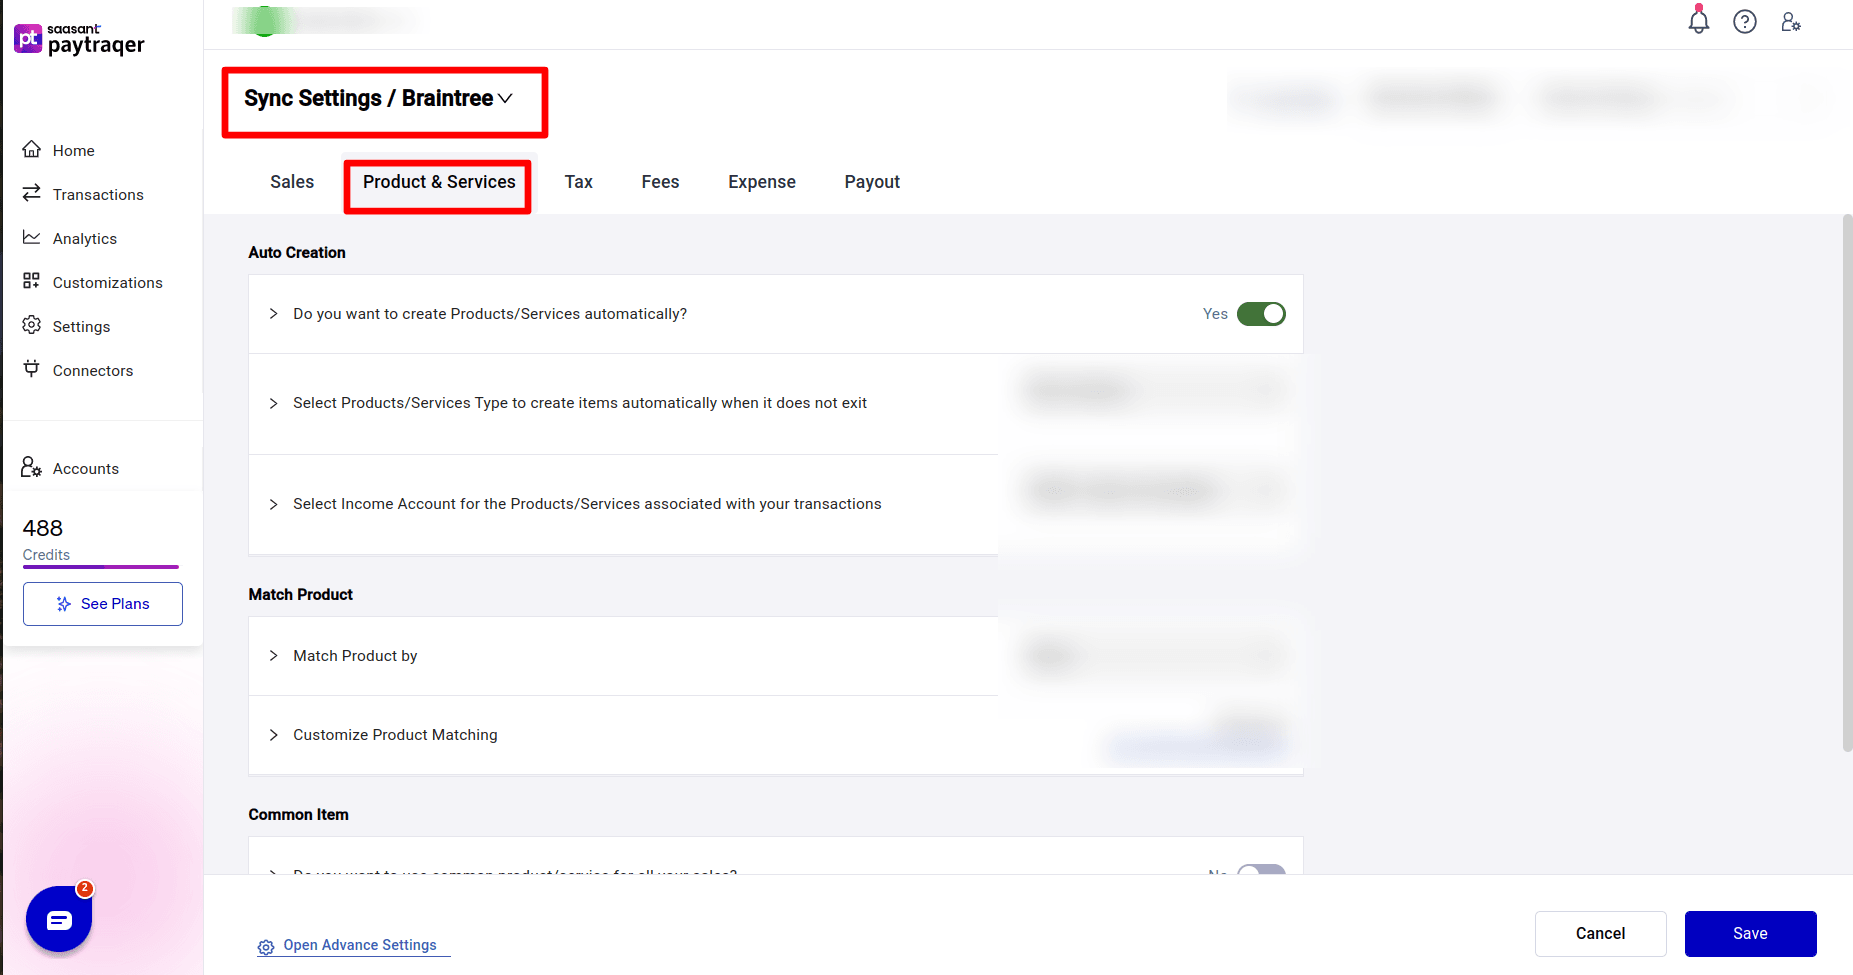
Open Settings → Sync settings → Braintree → Product.
Auto creation
Do you want to create Products/Services automatically: Yes.
This prevents missing item errors when new items appear from Braintree.
Select Products/Services Type to create items automatically: choose Non Inventory or Service.
Select Income Account for the Products/Services associated with your transactions:
Choose your income account for Braintree sales.
In your screen this is set to an account called “Sales Tax Payable,” but in most setups you should pick a revenue account such as “Sales” or “Service Income.”
Product matching
Match Product by: set to Name by default.
If you use SKUs consistently, you can switch to SKU.
Customize Product Matching
Add rules when Braintree item names and QuickBooks item names are not the same.
Common Item
Do you want to use common product/service for all your sales: default No.
Turn on and select a single item if you do not need item level detail and prefer to post all Braintree sales under one item.
Step 6: Configure Tax settings
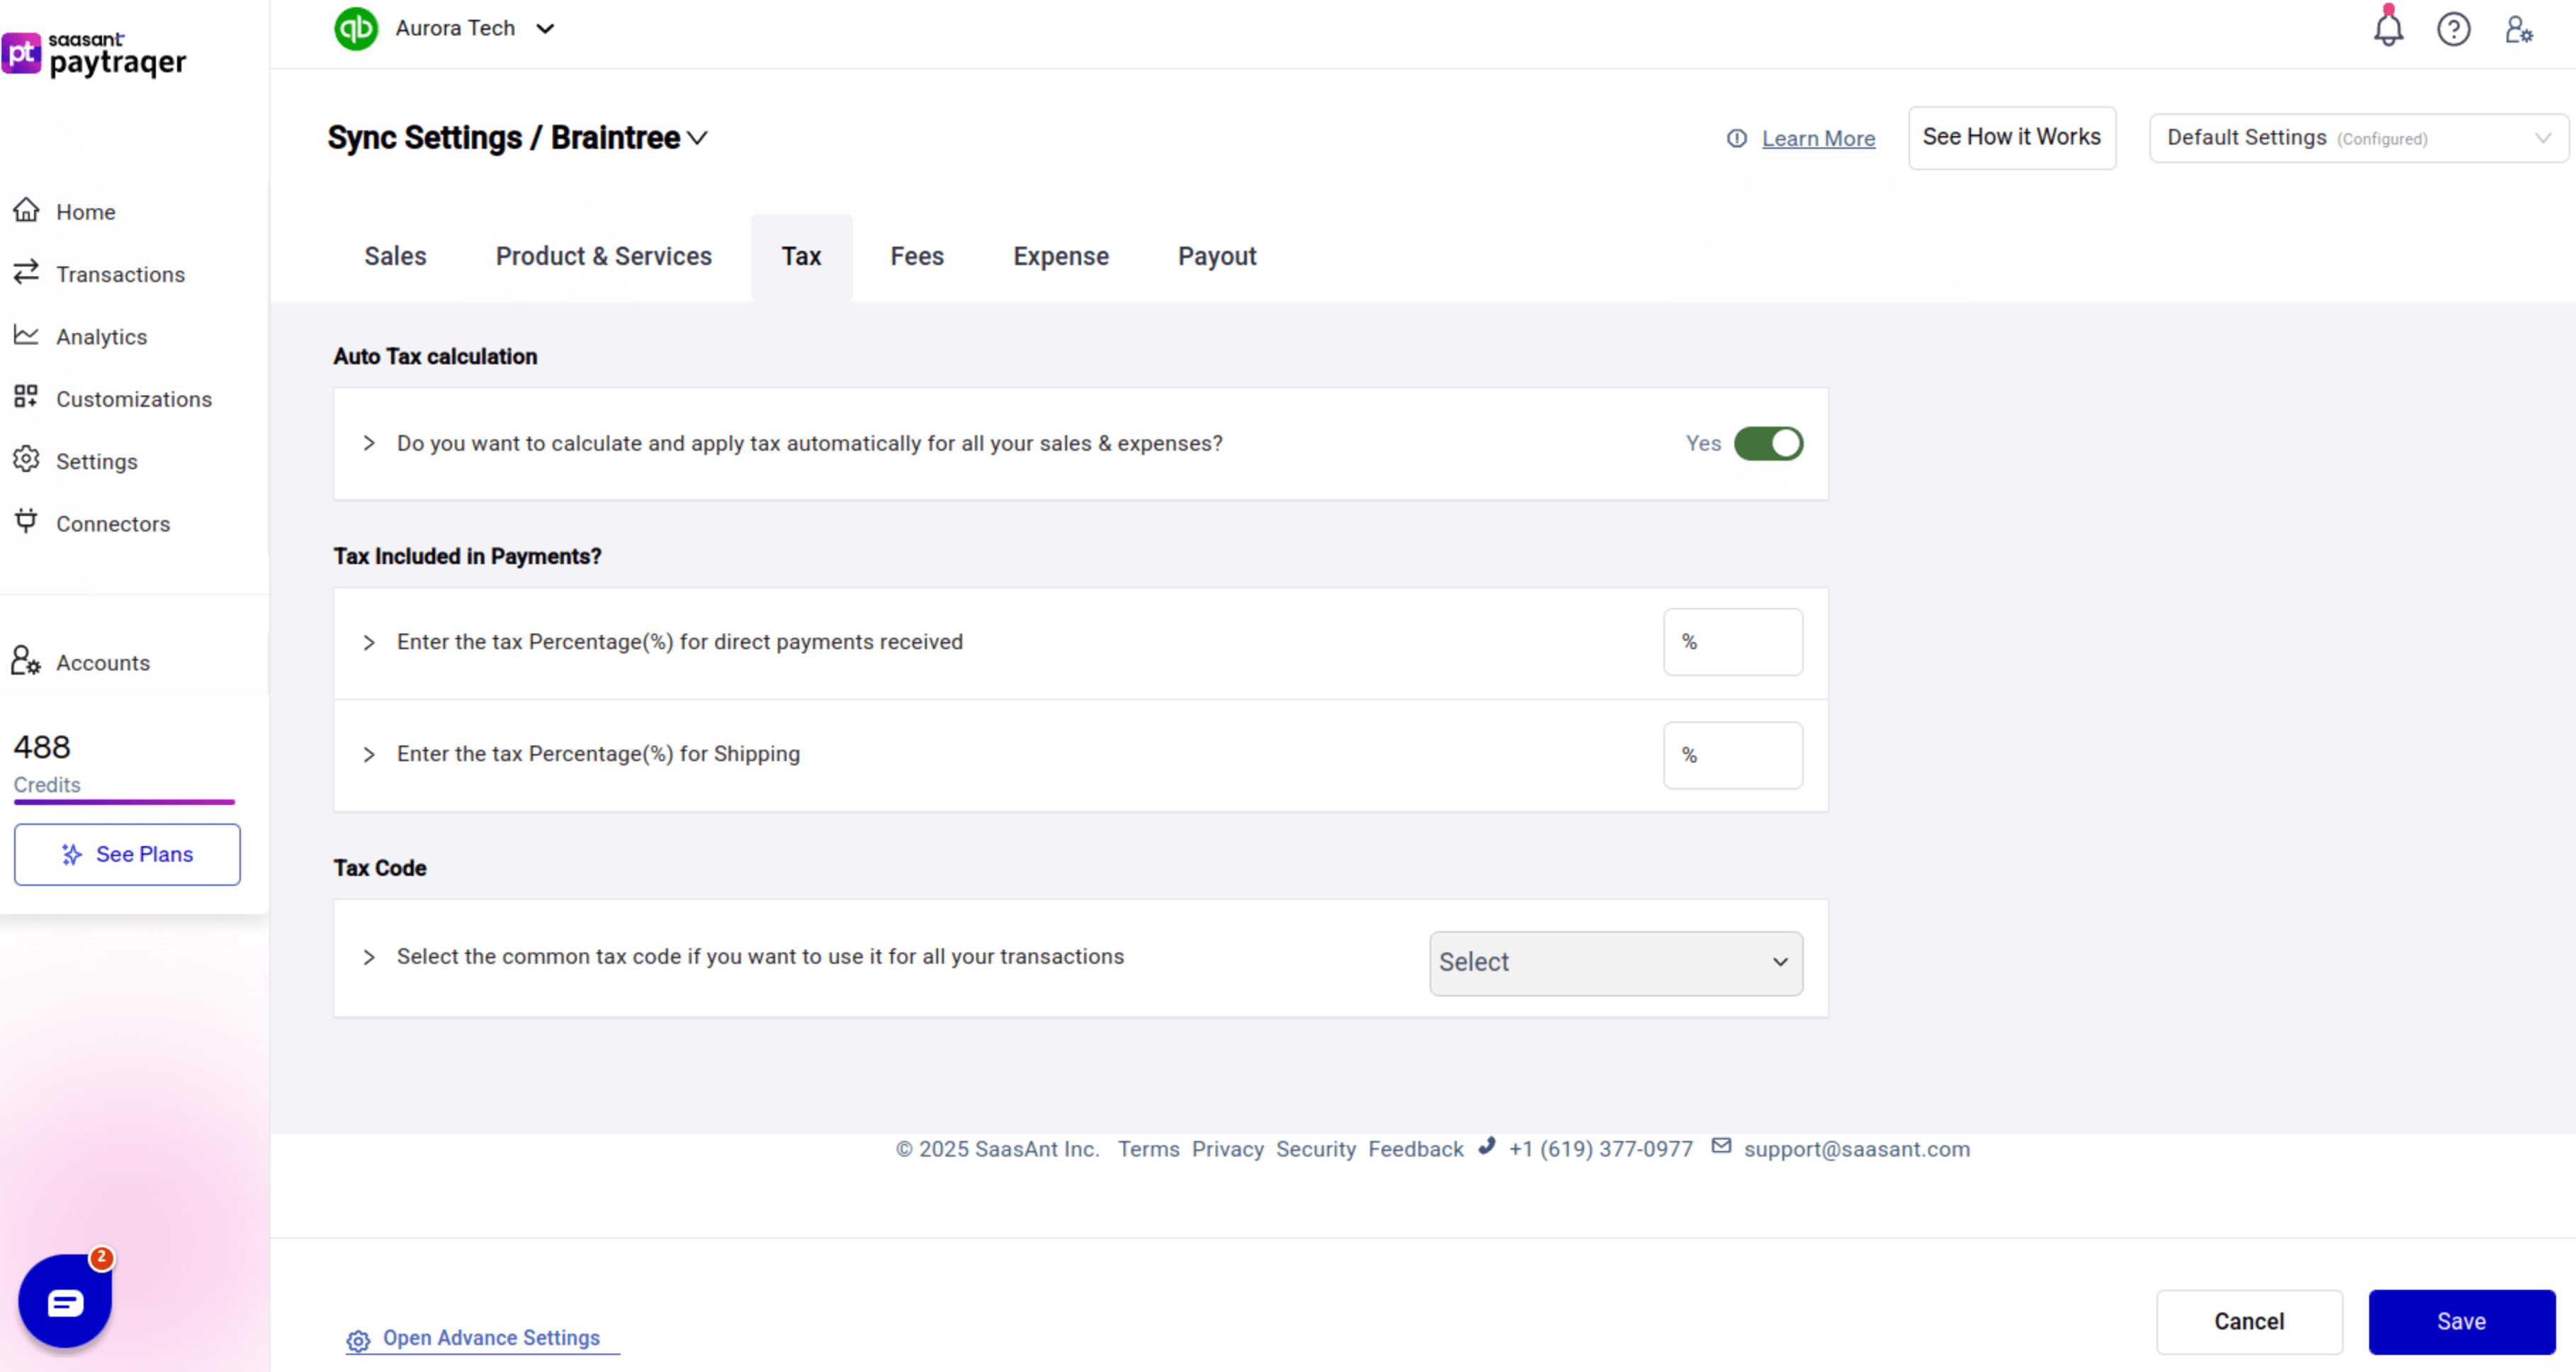
Open Settings → Sync settings → Braintree → Tax.
Auto Tax calculation
Do you want to calculate and apply tax automatically for all your sales & expenses: Yes.
PayTraQer will identify tax and apply it where needed.
Inclusive tax and shipping
Tax Included in Payments
Enter the tax percent if your Braintree payments include tax.
Tax for Shipping
Enter the tax percent if shipping is taxable.
Default Tax Code
Tax Code
Choose a default tax code if you want one common code for all Braintree transactions.
This overrides automatic detection when set.
Always test by opening a sample Braintree sale in QuickBooks and checking the tax code and amount.
Step 7: Configure Fees settings
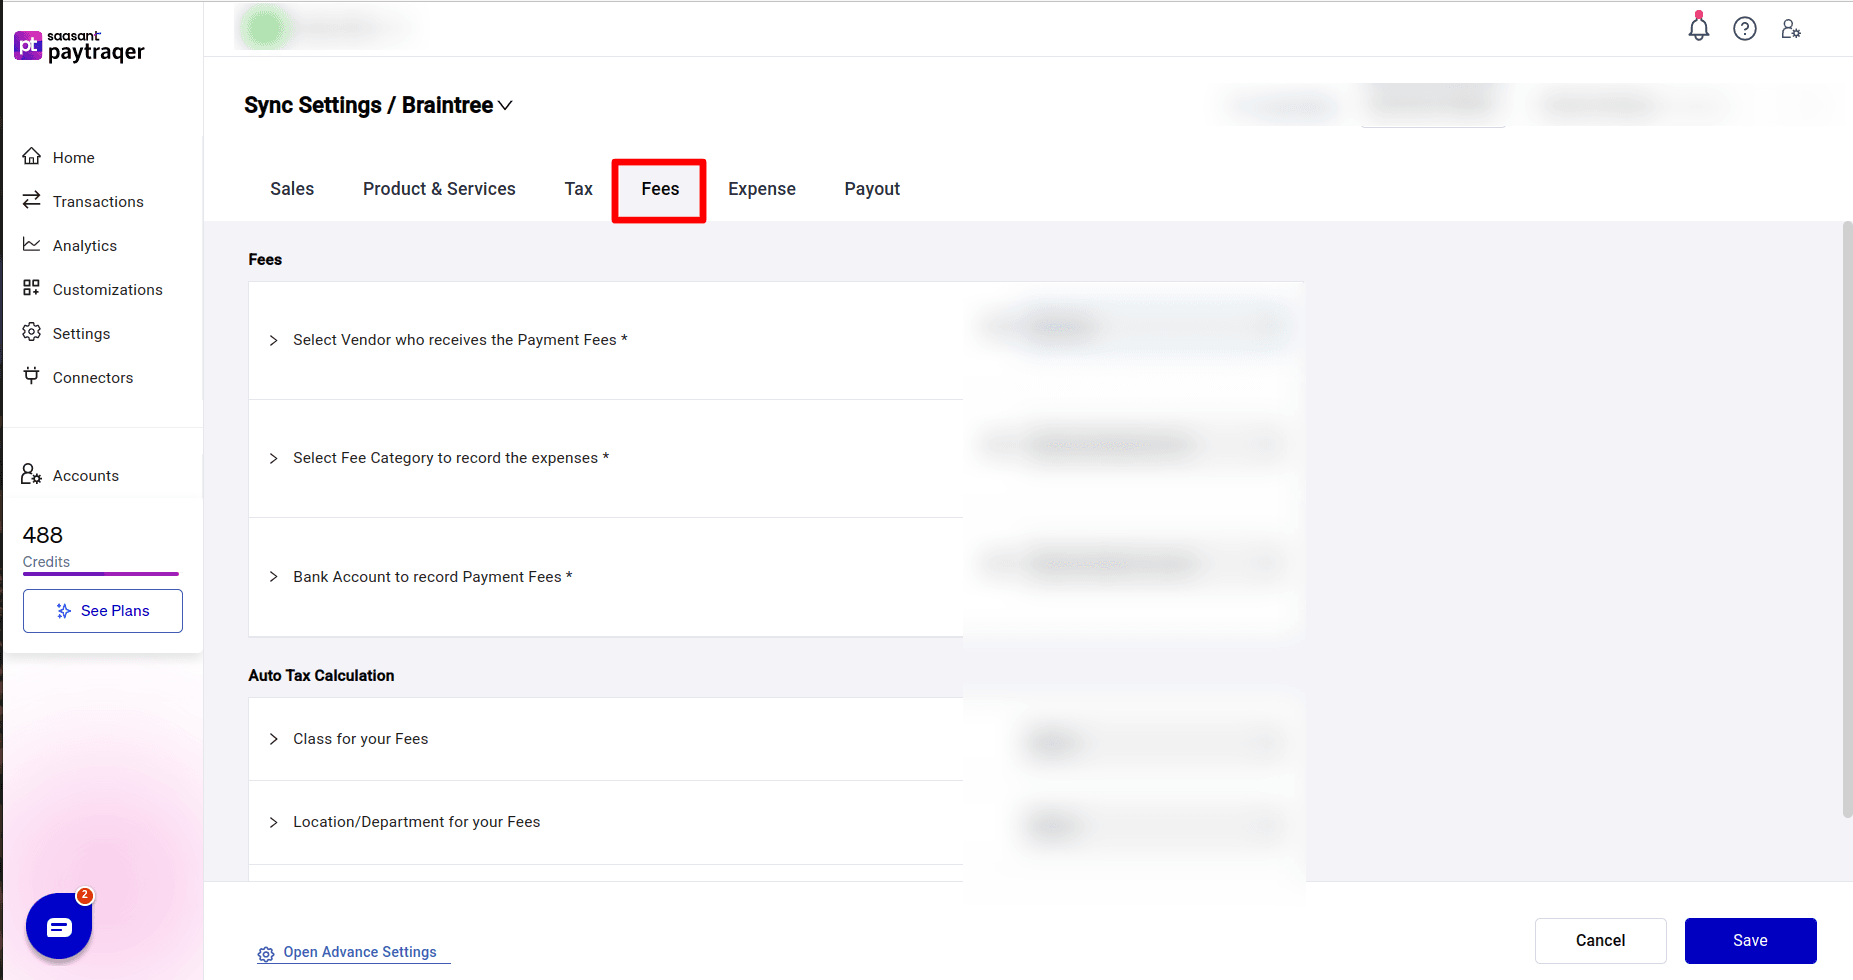
Open Settings → Sync settings → Braintree → Fees.
Select Vendor who receives the Payment Fees: set to Braintree.
Select Fee Category to record the expenses: pick an expense account such as Braintree Fees.
Bank Account to record Payment Fees: set to Braintree Bank Account so sales and fees share the same clearing account.
Class for your Fees and Location/Department for your Fees: optional tracking fields.
Do you want to skip the fee details from syncing: set to No if you want fee line detail.
This ensures that gateway fees are recorded clearly against Braintree.
Step 8: Configure Expense settings
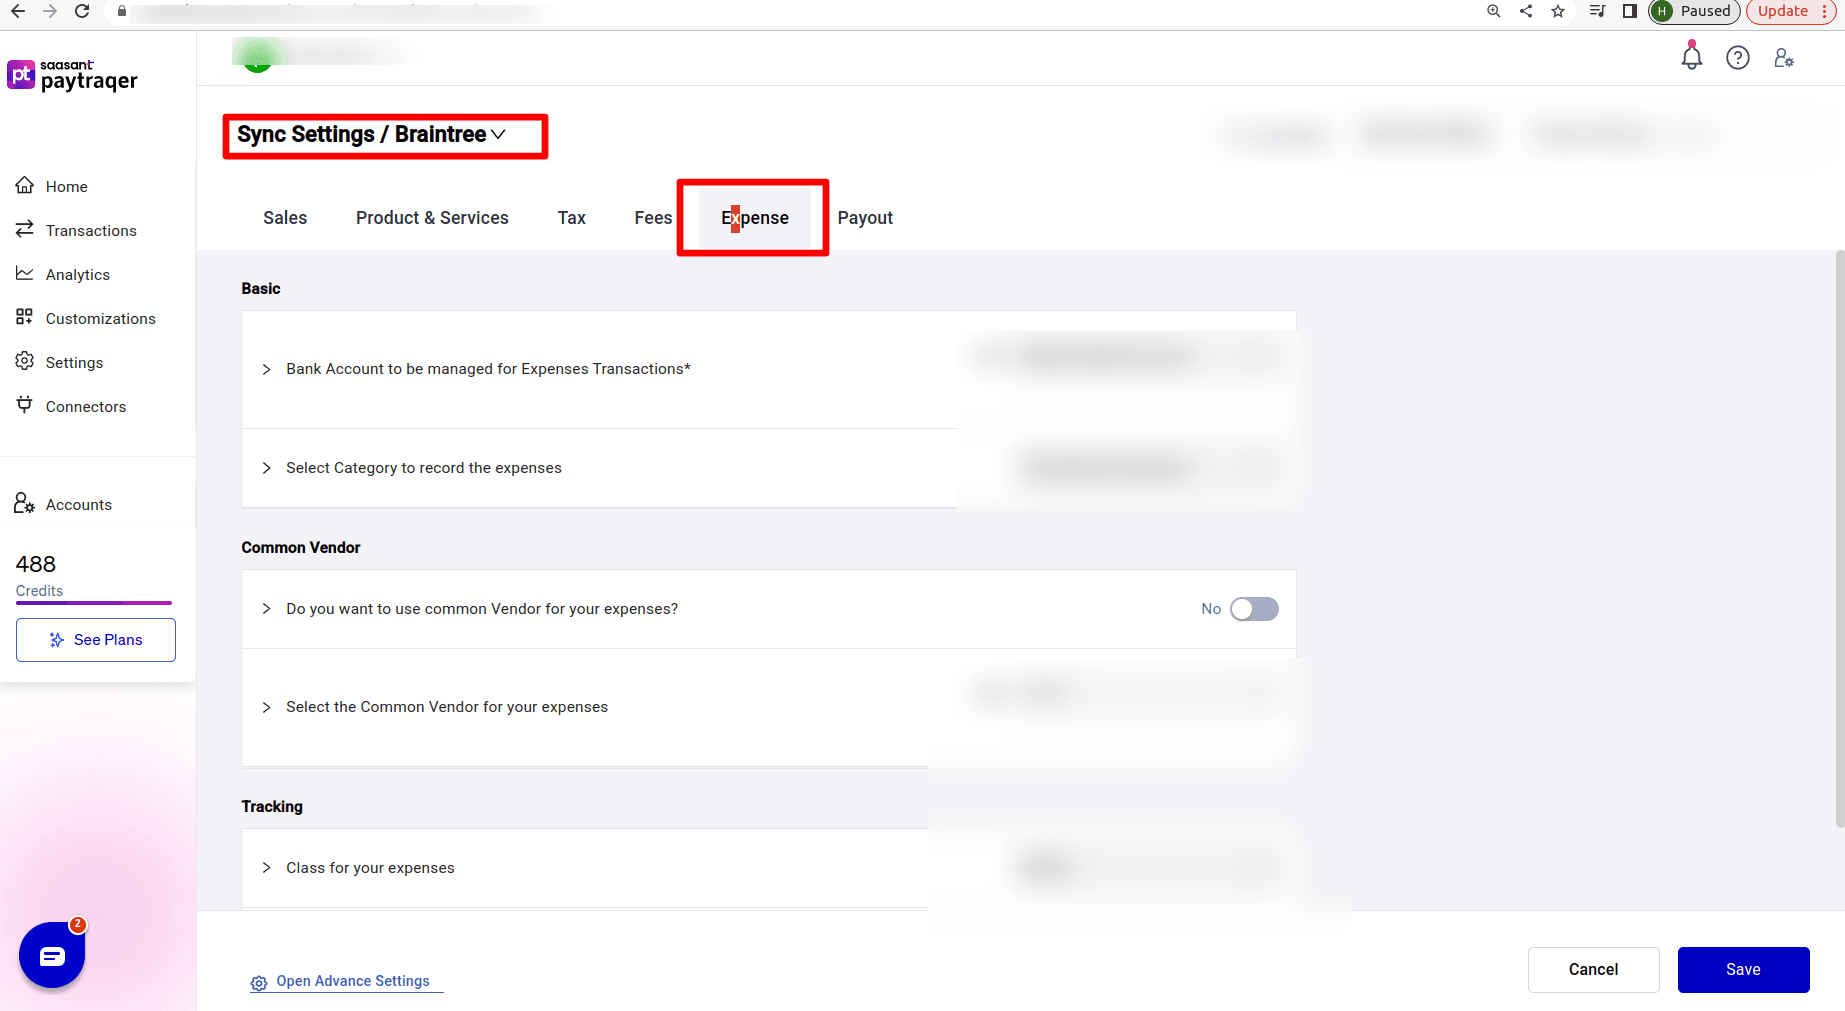
Open Settings → Sync settings → Braintree → Expense.
These settings handle extra expenses from Braintree that are not simple per-transaction fees (for example certain chargebacks or service charges).
Bank Account to be managed for Expenses Transactions: set to Braintree Bank Account.
Select Category to record the expenses: choose an expense account such as Uncategorized Expense or a more specific Braintree expense account.
Common Vendor
Do you want to use common Vendor for your expenses:
Set to Yes if you want all these expenses under a single vendor.
Then choose that vendor in Select the Common Vendor for your expenses.
Tracking
Class for your expenses and Location/Department of your expenses: optional.
Use these if you want to report charges by class or location.
Step 9: Configure Payout settings
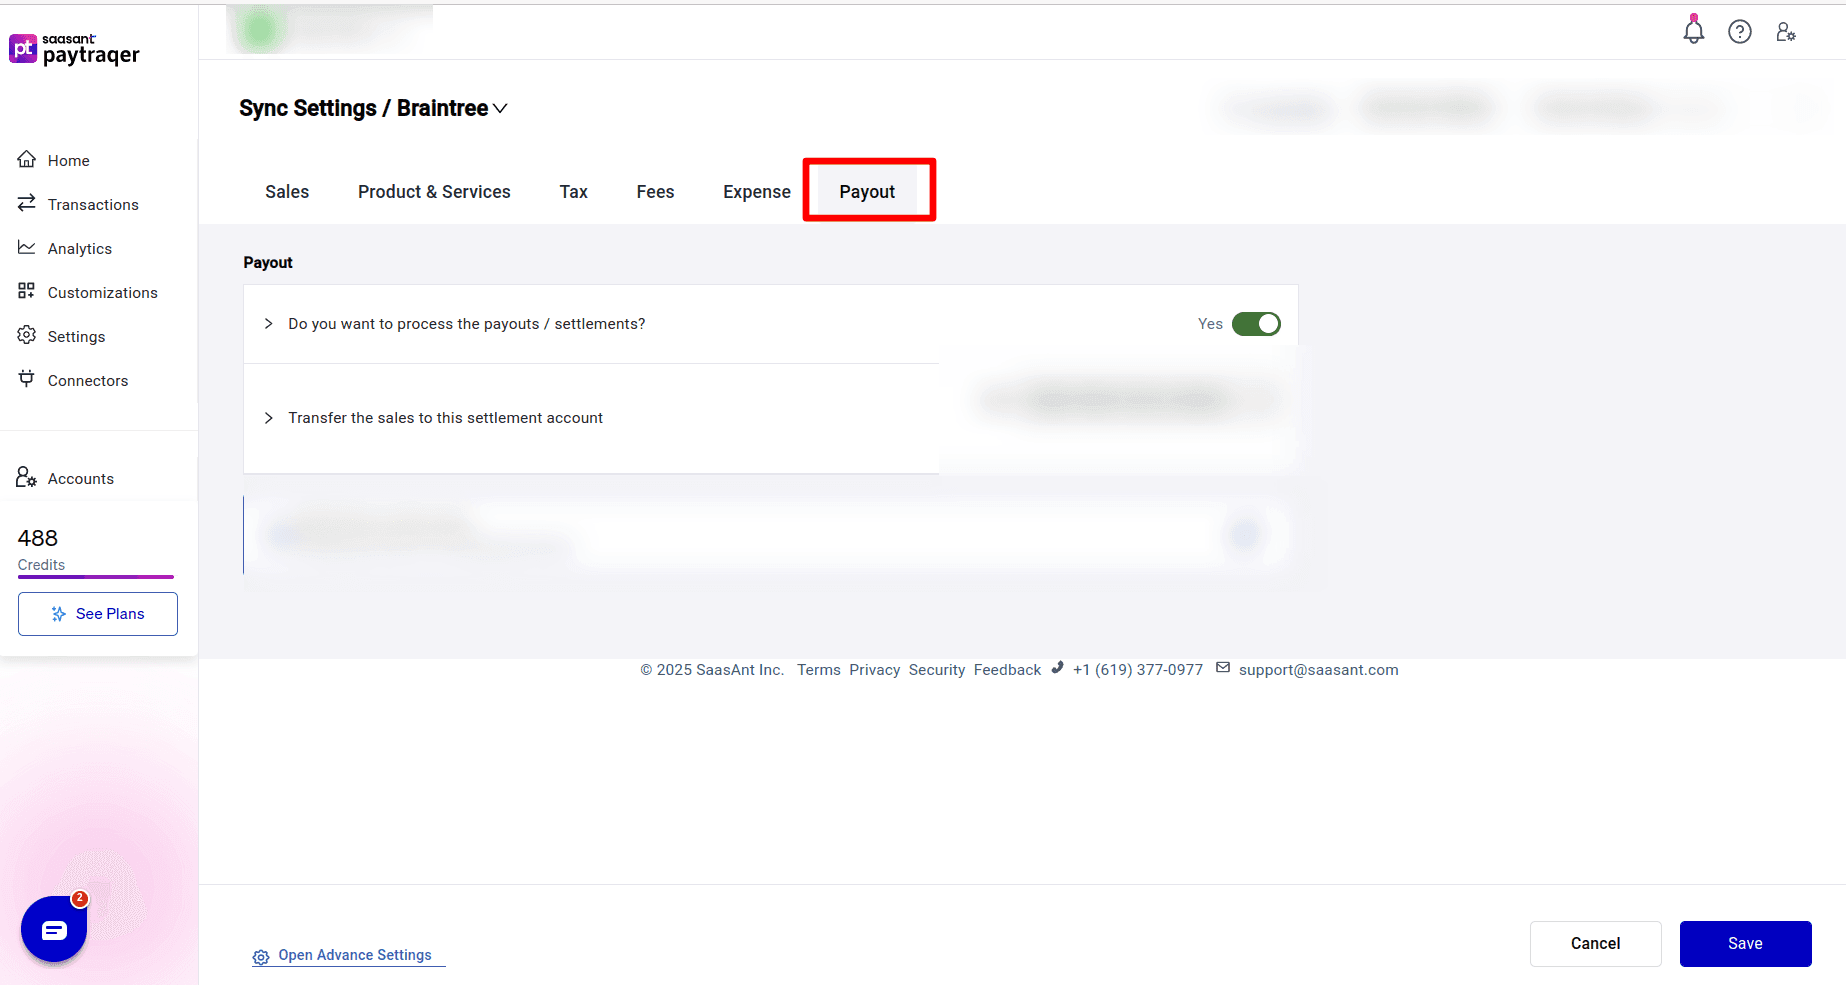
Open Settings → Sync settings → Braintree → Payout.
Do you want to process the payouts / settlements: set this to Yes if you want automatic payout entries.
Transfer the sales to this settlement account: pick your real bank account.
How this works:
Sales and fees stay in Braintree Bank Account as a clearing account.
When Braintree sends a payout, PayTraQer creates a Bank Payout or Transfer from the Braintree clearing account to your settlement account (for example the trust checking account).
That transfer should match the deposit you see in your bank feed.
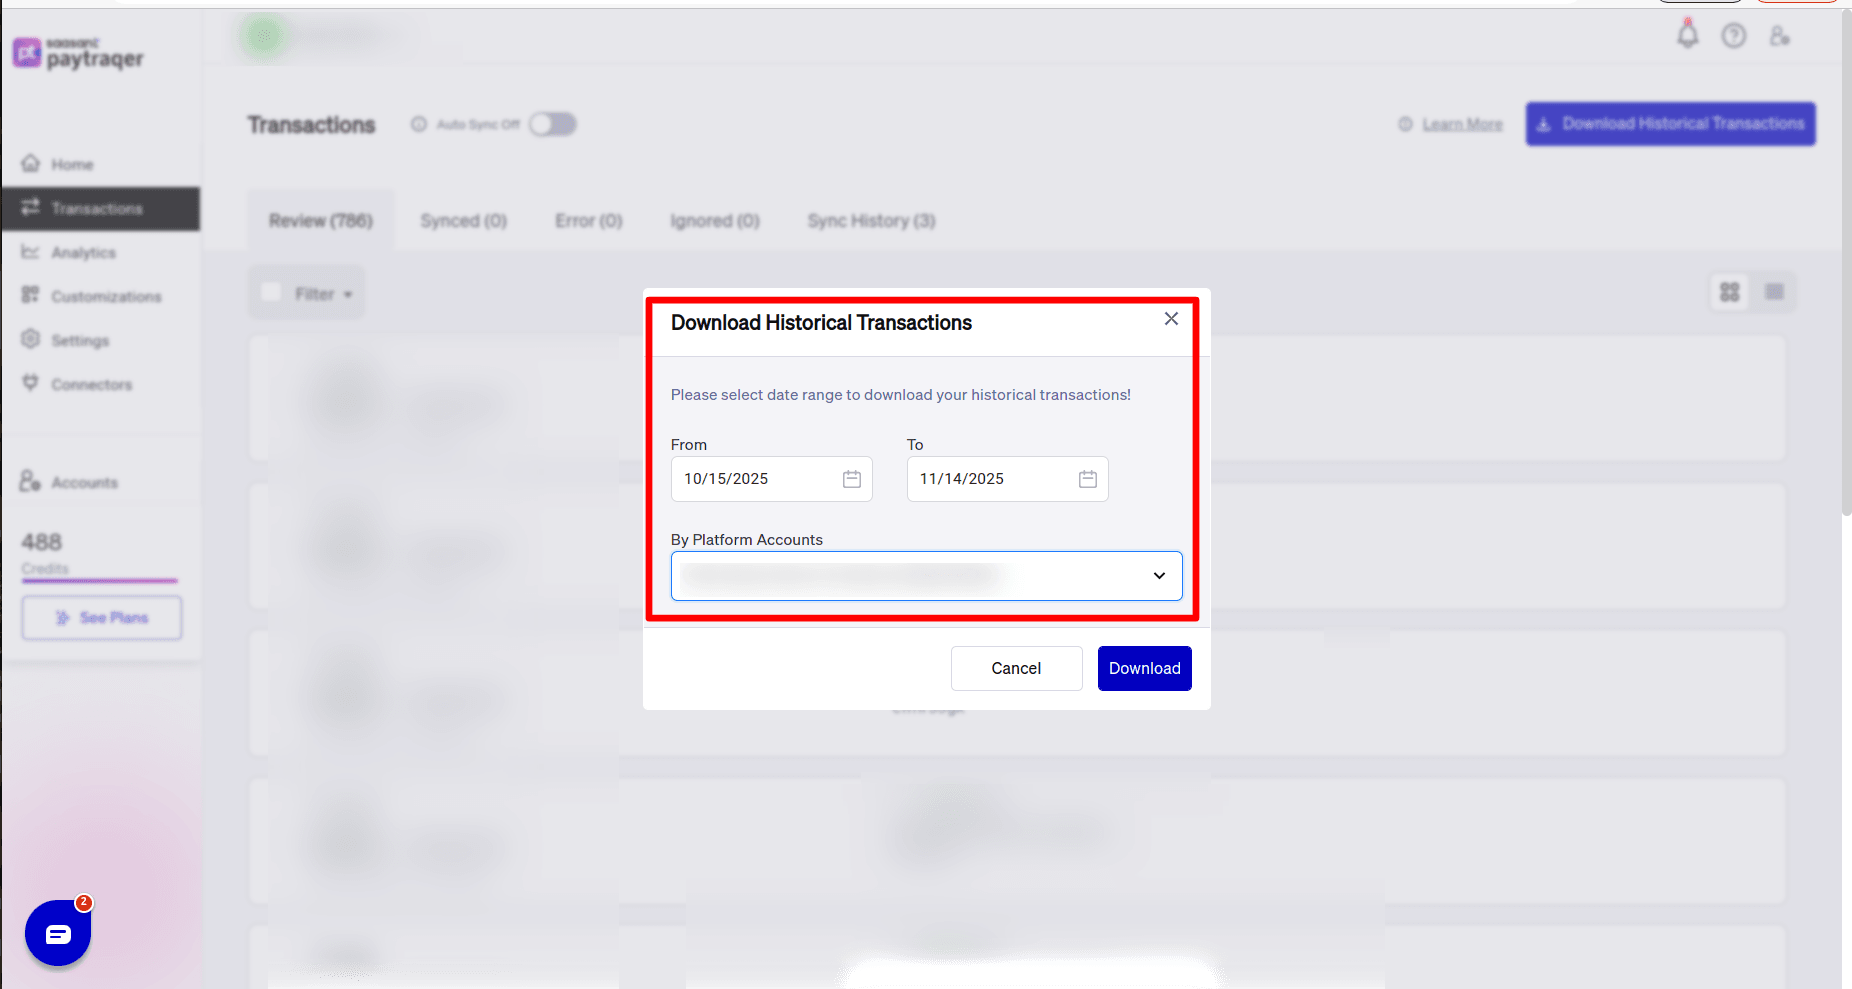
History and automation
Download historical transactions
After the first connect:
Use Download historical transactions to pull past Braintree activity for cleanup or migration.
Always start with a small date range and review results in QuickBooks.
Auto Sync
In General Settings → Transaction settings:
Turn on Auto Sync to have PayTraQer download and sync Braintree transactions at regular intervals.
Use Email Notifications for automation if you want a summary of each run.
Only enable Auto Sync after your first test range looks correct.
Verify your first Braintree sync
Use a short date range and then check in QuickBooks:
A payment posts to Braintree Bank Account as a Sales Receipt (or Invoice + Payment) with Payment Method Braintree.
Customers are created or matched as you expect.
Items are created or matched correctly and point to the right income account.
A fee posts to the Braintree Fees (or chosen) expense account with vendor Braintree.
One extra expense (if present) posts to the category you set in Expense settings.
Tax codes and amounts look correct on a sample sale.
A Bank Payout or Transfer moves funds from Braintree Bank Account to your settlement account and matches your bank feed.
Troubleshooting
No Braintree data appears after connect
Recheck the API key in Braintree and PayTraQer.Confirm the connector is active and date filters are correct.
Deposits do not match bank feed
Make sure payouts are enabled and the settlement account is the same as your bank feed account.
Confirm fees are also using the Braintree clearing account.
Braintree Bank Account does not zero out
Confirm that sales, fees, and payouts all use Braintree Bank Account as the clearing account.
Check for missing payouts or partial date filters.
Wrong items or duplicates
Adjust Match Product by and add Product Matching rules.
Keep auto creation on until mapping is stable.
Duplicate customers
Add Customer Matching rules or use a Common Customer for summary style posting.
Tax looks wrong
Review Auto Tax, inclusive percentages, shipping percentages, and default Tax Code.
Test again on a short date range.
Only want fees, not sales
Set Skip the sales & process the associated fees only to Yes in Sales settings.
FAQs
Can I sync Braintree as a summary instead of each payment
Yes. Use Summary Sync mode. To switch, you must disconnect all connectors, change the mode, then reconnect and test.
Can I bring in older Braintree activity
Yes. Use Download historical transactions with the date filters.
Do I need multi currency settings
Turn on multi currency in General Settings only if Braintree processes more than one currency and your accounting system has multi currency enabled.
Can I post only Braintree fees and not sales
Yes. Turn on Skip the sales & process the associated fees only when you want PayTraQer to handle fees only.
If you follow these steps, Braintree activity should flow into QuickBooks with clear sales, fees, expenses, and payouts, and your clearing account and settlement account will stay in line with your bank.