How to Obtain your Clover API Token?
January 1, 2025
Step 1: Log in to Your Clover Account

Go to the Clover login page and enter your registered Email address and Password in the necessary fields.
Press the Log in button to access your Clover dashboard.
Step 2: Open Clover Settings
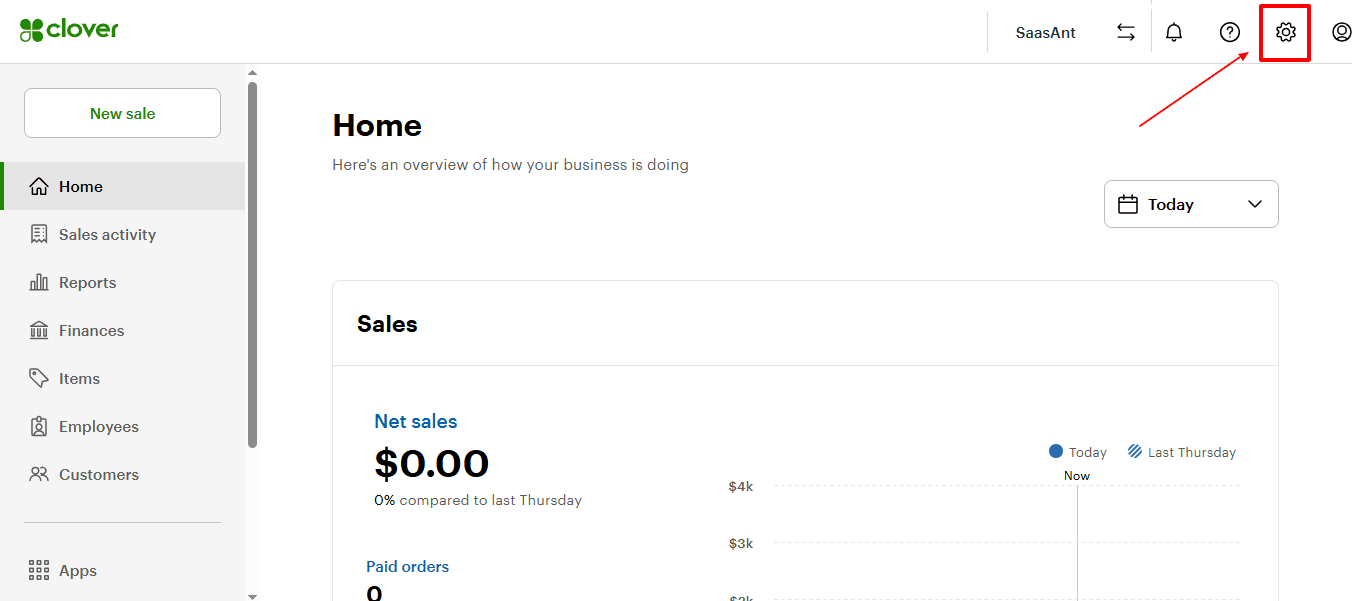
In the top-right corner of the dashboard, click on the Settings icon.
This will open the settings panel, allowing you to search for settings related to your account and integrations.
Ensure you are logged into the correct Clover account before creating an API token.
Step 3: Search for API Tokens
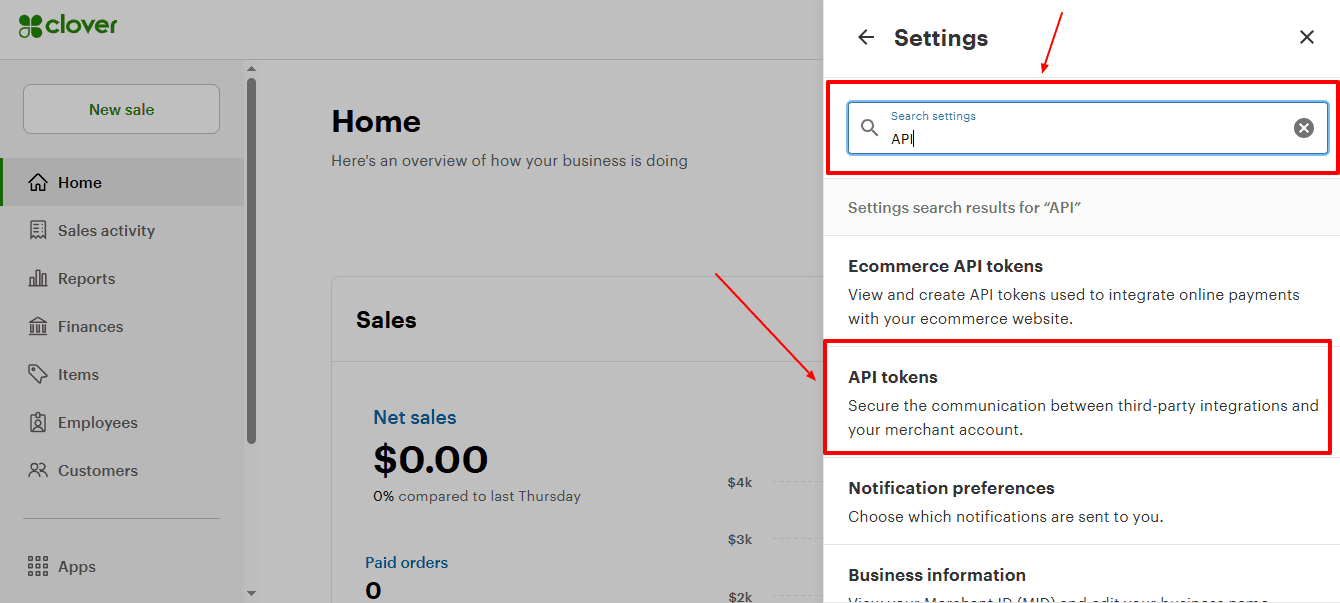
Type API in the settings search bar to find the relevant API options.
Select API tokens from the search results.
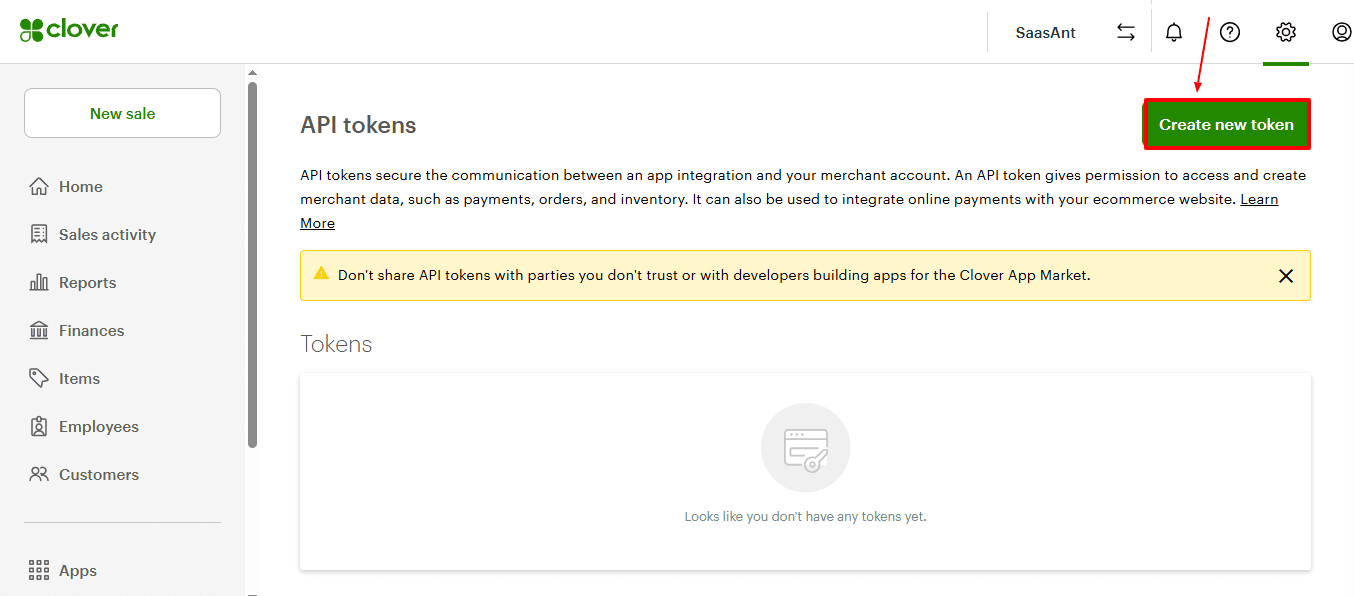
Step 4: Create a New API Token
On the API tokens page, select Create new token.
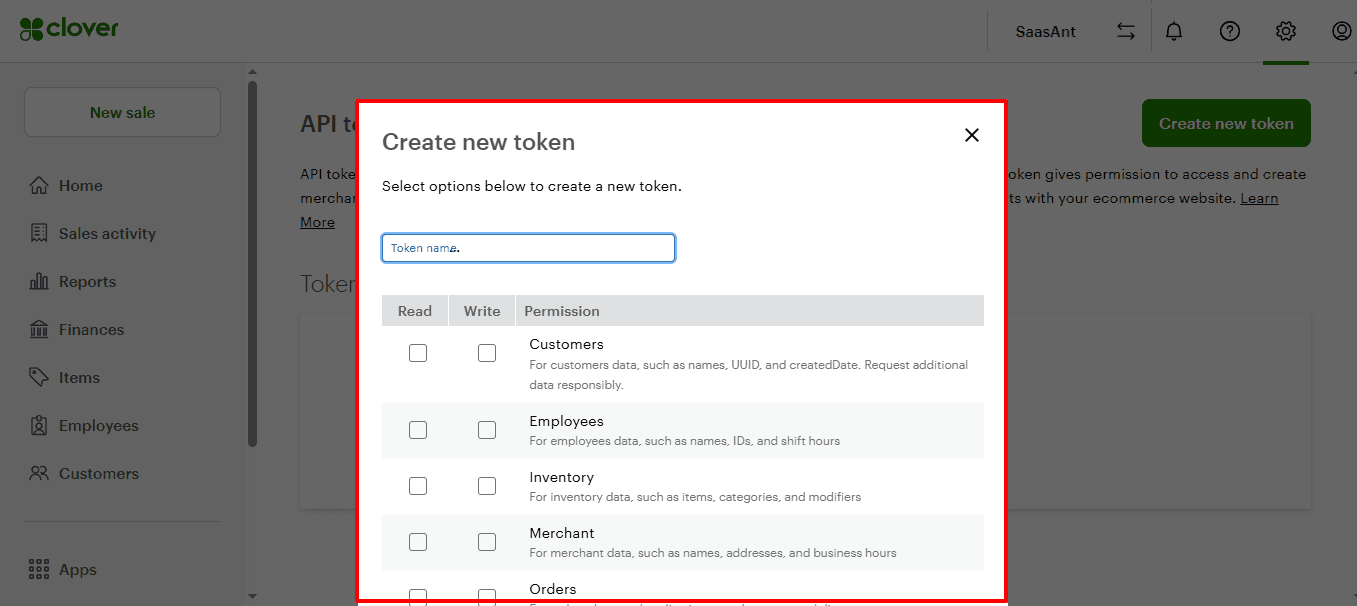
Step 5: Enter Token Details and Select Permissions
In the Create new token window, type a clear name for the token so you can recognize it later.
Choose the necessary Read and Write permissions according to the data the connected app needs to access.
Once you have selected the needed permissions, create the token and securely copy the generated API key for your integration setup.
Step 6: Enter the Clover Details in PayTraQer
Open Clove Integration Details in PayTraQer and enter the copied Merchant ID.
Click on Connect to connect your Clover account with PayTraQer and continue with the sync setup.
Video Tutorial for How to Connect and Sync Clover Transactions to QuickBooks Online using PayTraQer: