An Overview of PayTraQer Settings for Authorize.Net
January 1, 2025
Overview of PayTraQer Settings for Authorize.Net
Each section shows what the setting controls, a safe default, when to change it, and a quick check.
Sales settings
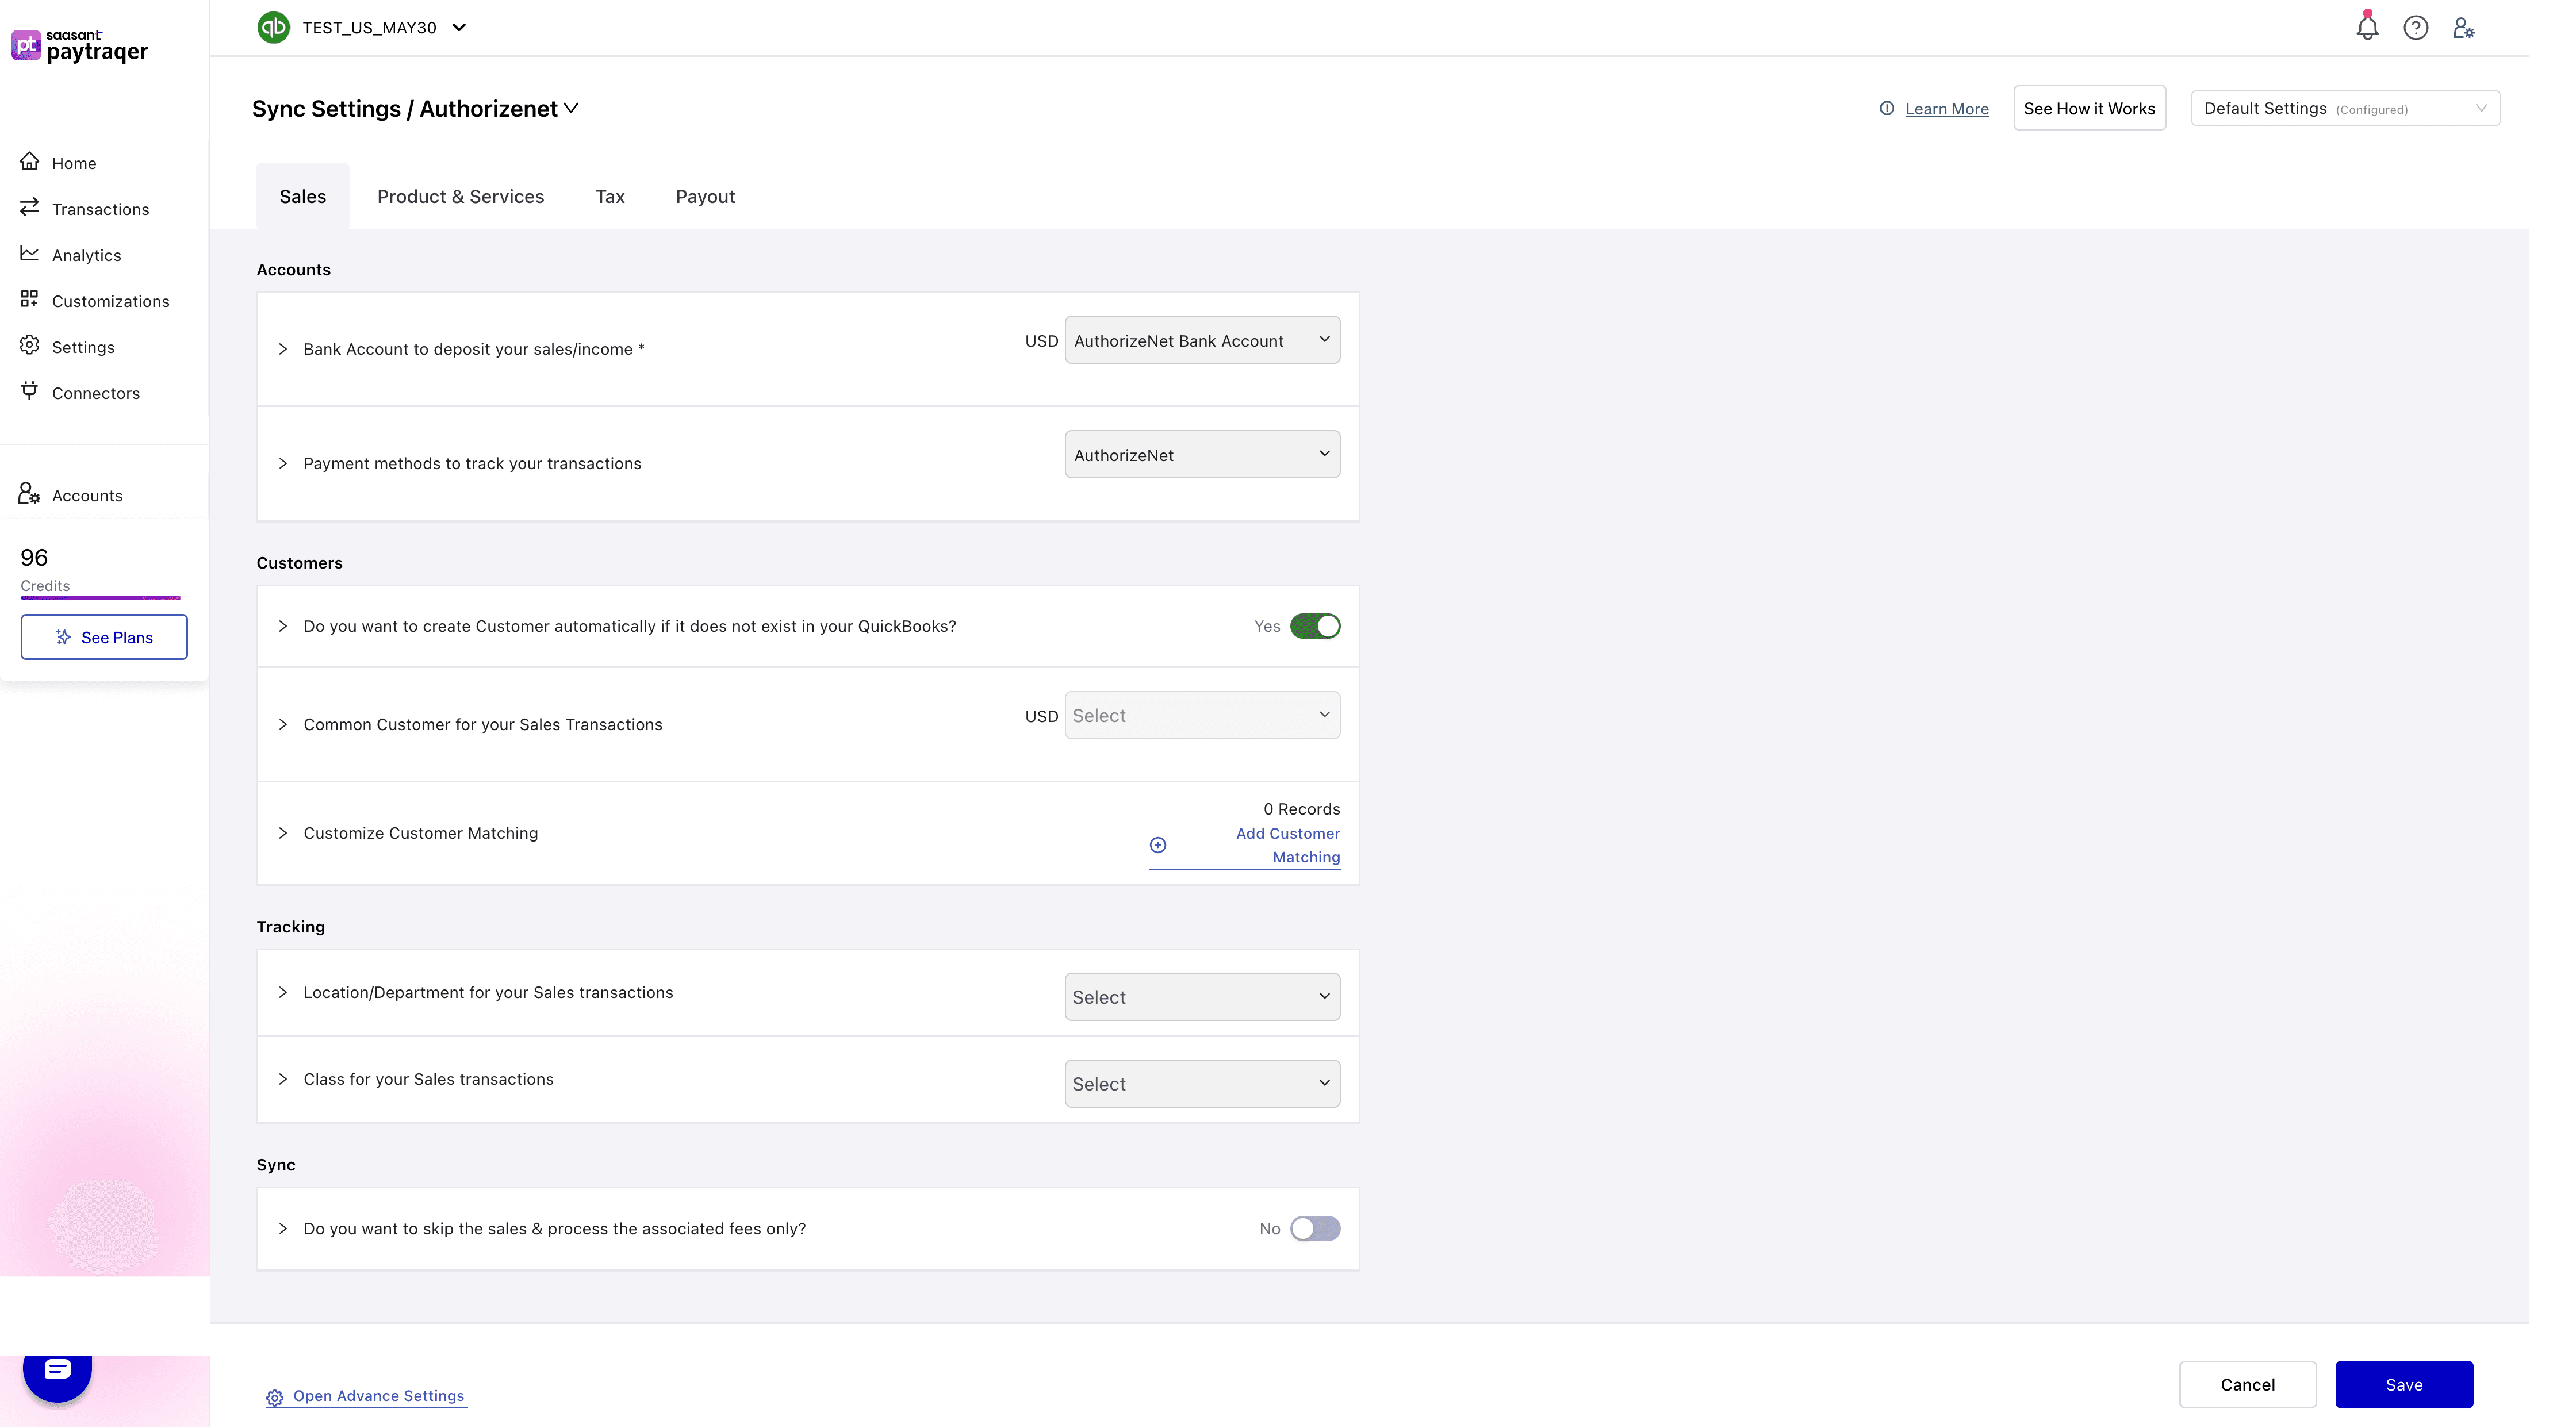
Accounts
Bank Account to deposit your sales/income
Default: AuthorizeNet Bank Account per currency.
Change when: You keep separate clearing banks by currency or brand.
Check: Sales and refunds land in the same clearing bank.
Payment method
Payment methods to track your transactions
Default: AuthorizeNet.
Check: Payment Method shows AuthorizeNet on created sales.
Customers
Do you want to create Customer automatically if it does not exist
Default: Yes.
Check: No import errors for missing customers.
Common Customer for your Sales Transactions
Default: Off.
Use when: You run summaries or do not need per-customer detail.
Customize Customer Matching
Use when: Payer names differ from your QuickBooks customers.
Check: Repeat payers map to a single customer record.
Tracking
Location/Department and Class
Default: Not set.
Use when: You track by location or class.
Check: New sales carry the selected values.
Sync scope
Do you want to skip the sales & process the associated fees only
Default: No.
Use when: Sales are posted by another system and you only want fee expenses.
Products and services Settings
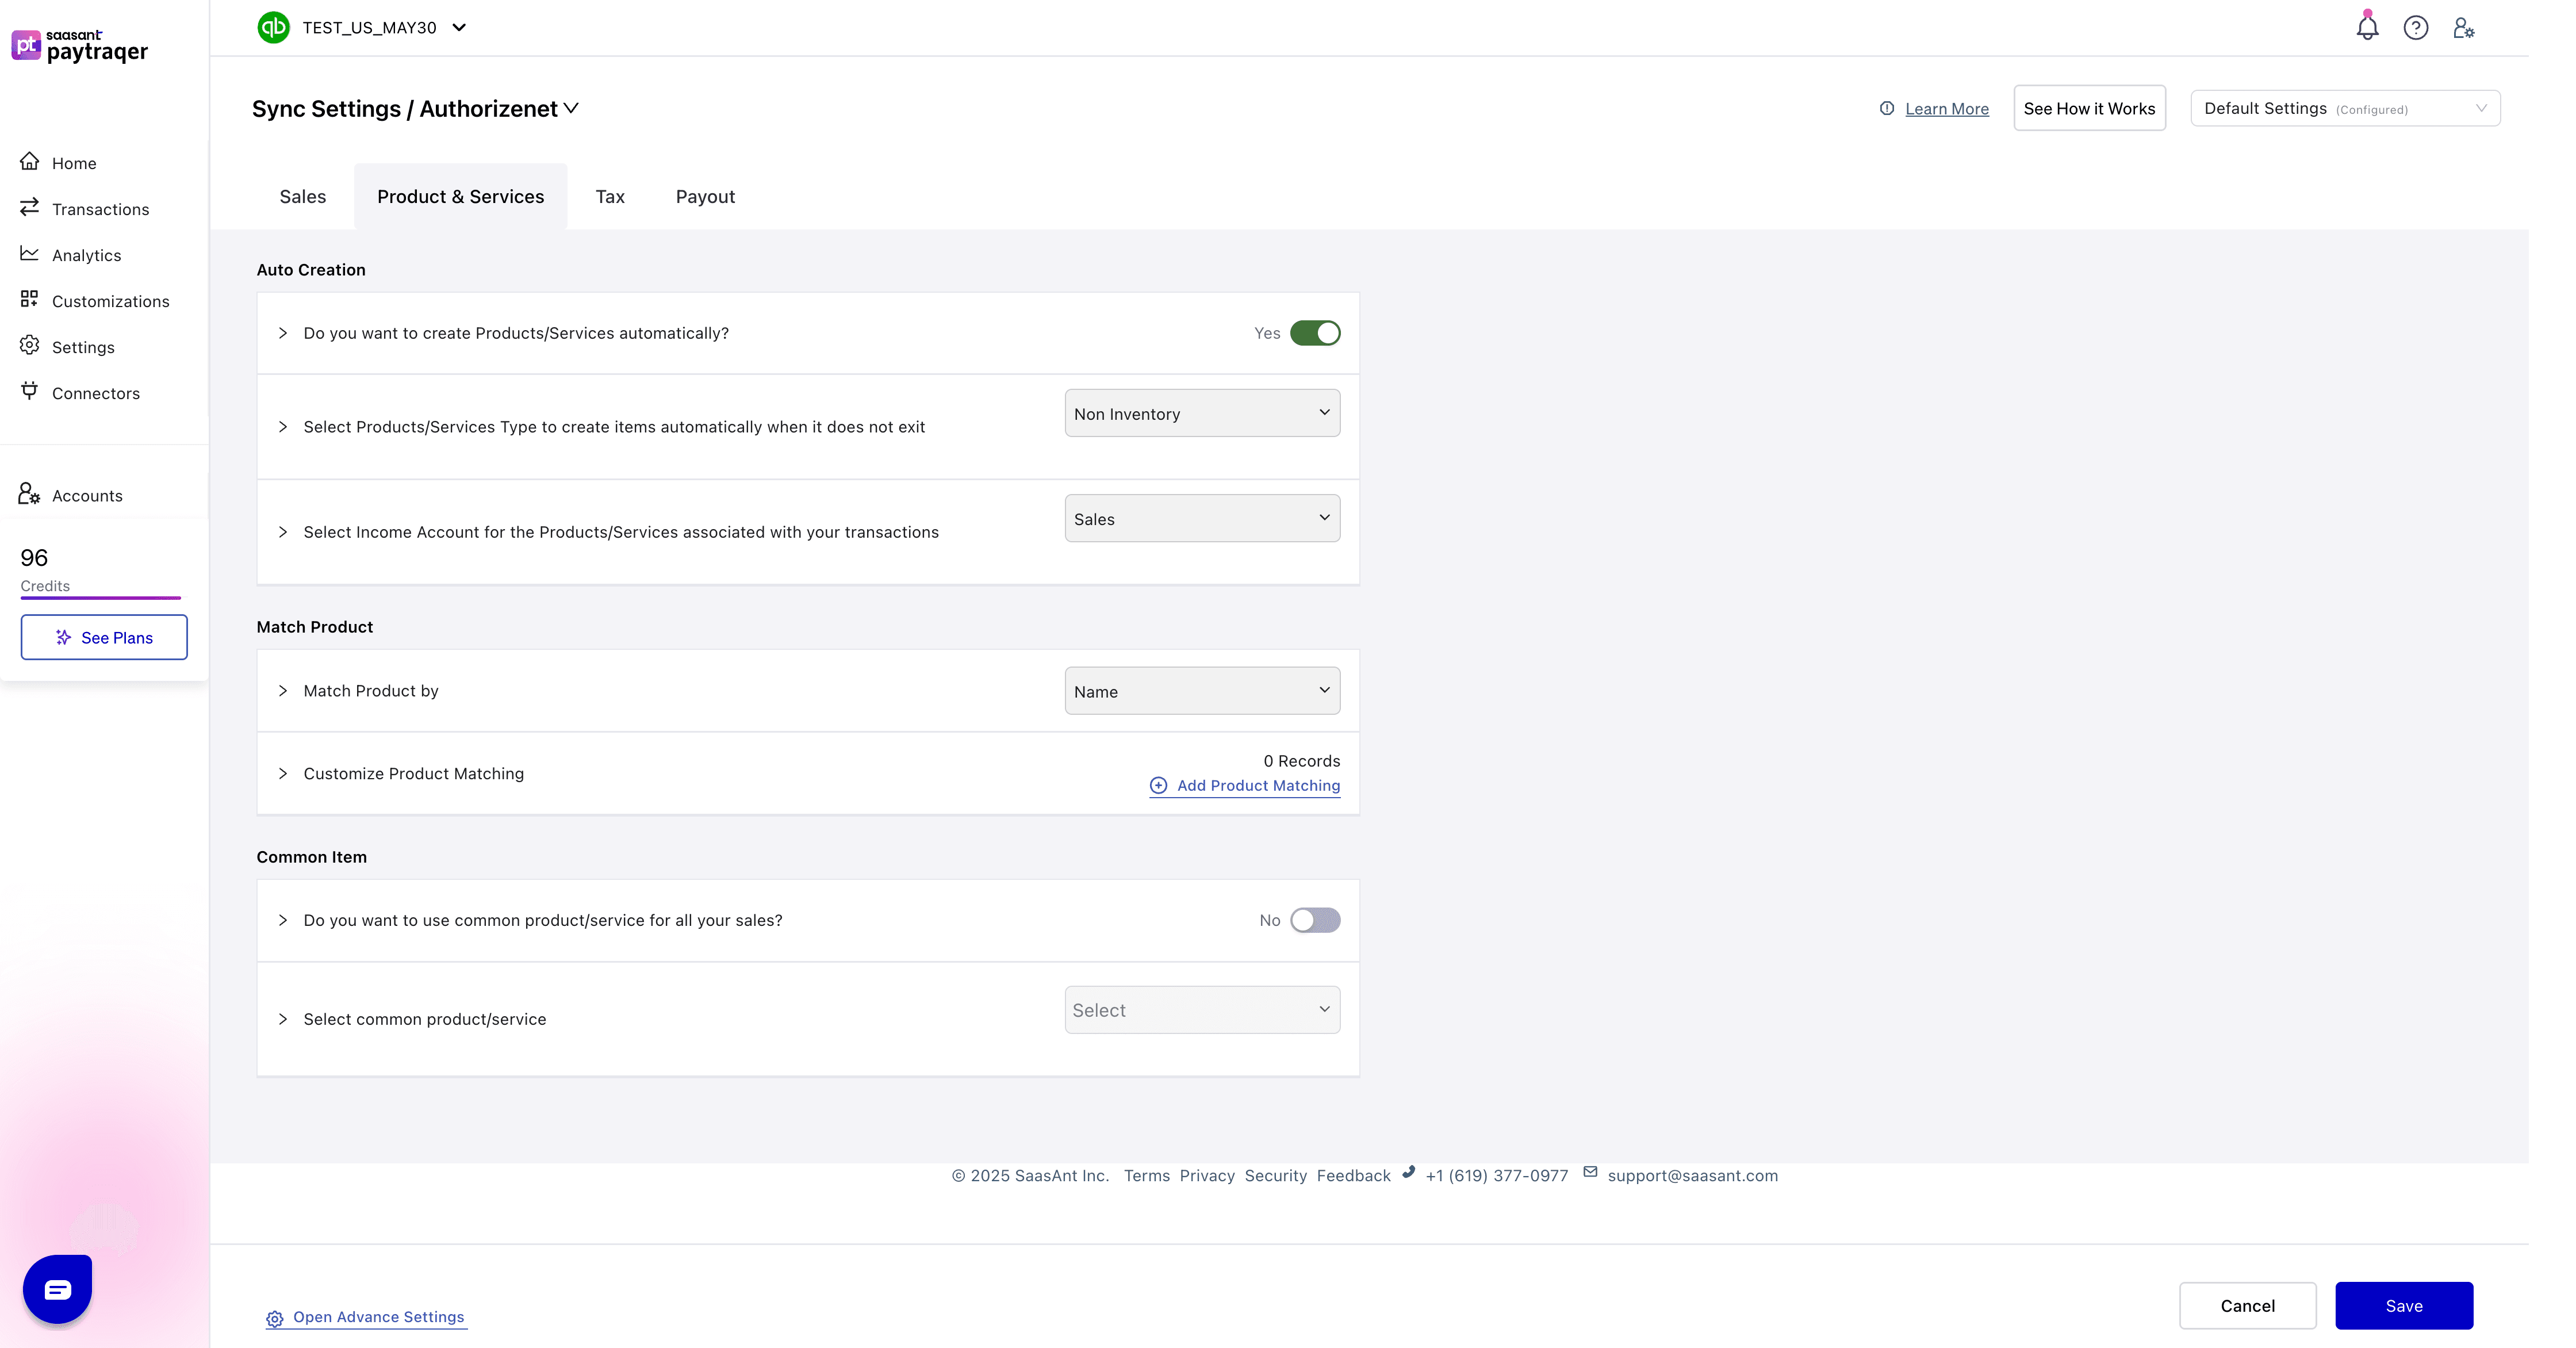
Auto Creation
Do you want to create Products/Services automatically
Default: Yes to avoid missing item errors.
Select Products/Services Type
Default: Non-Inventory or Service.
Select Income Account
Default: Sales.
Check: New items point to the chosen income account.
Match Product
Match Product by
Default: Name. Use SKU if both catalogs use stable SKUs.
Customize Product Matching
Use when: Names differ between your source and QuickBooks.
Check: No duplicate items appear.
Common Item
Do you want to use common product/service for all your sales
Default: No.
Use when: You post summaries or do not need item detail.
Then: Select common product/service to pick the default item.
Tax settings
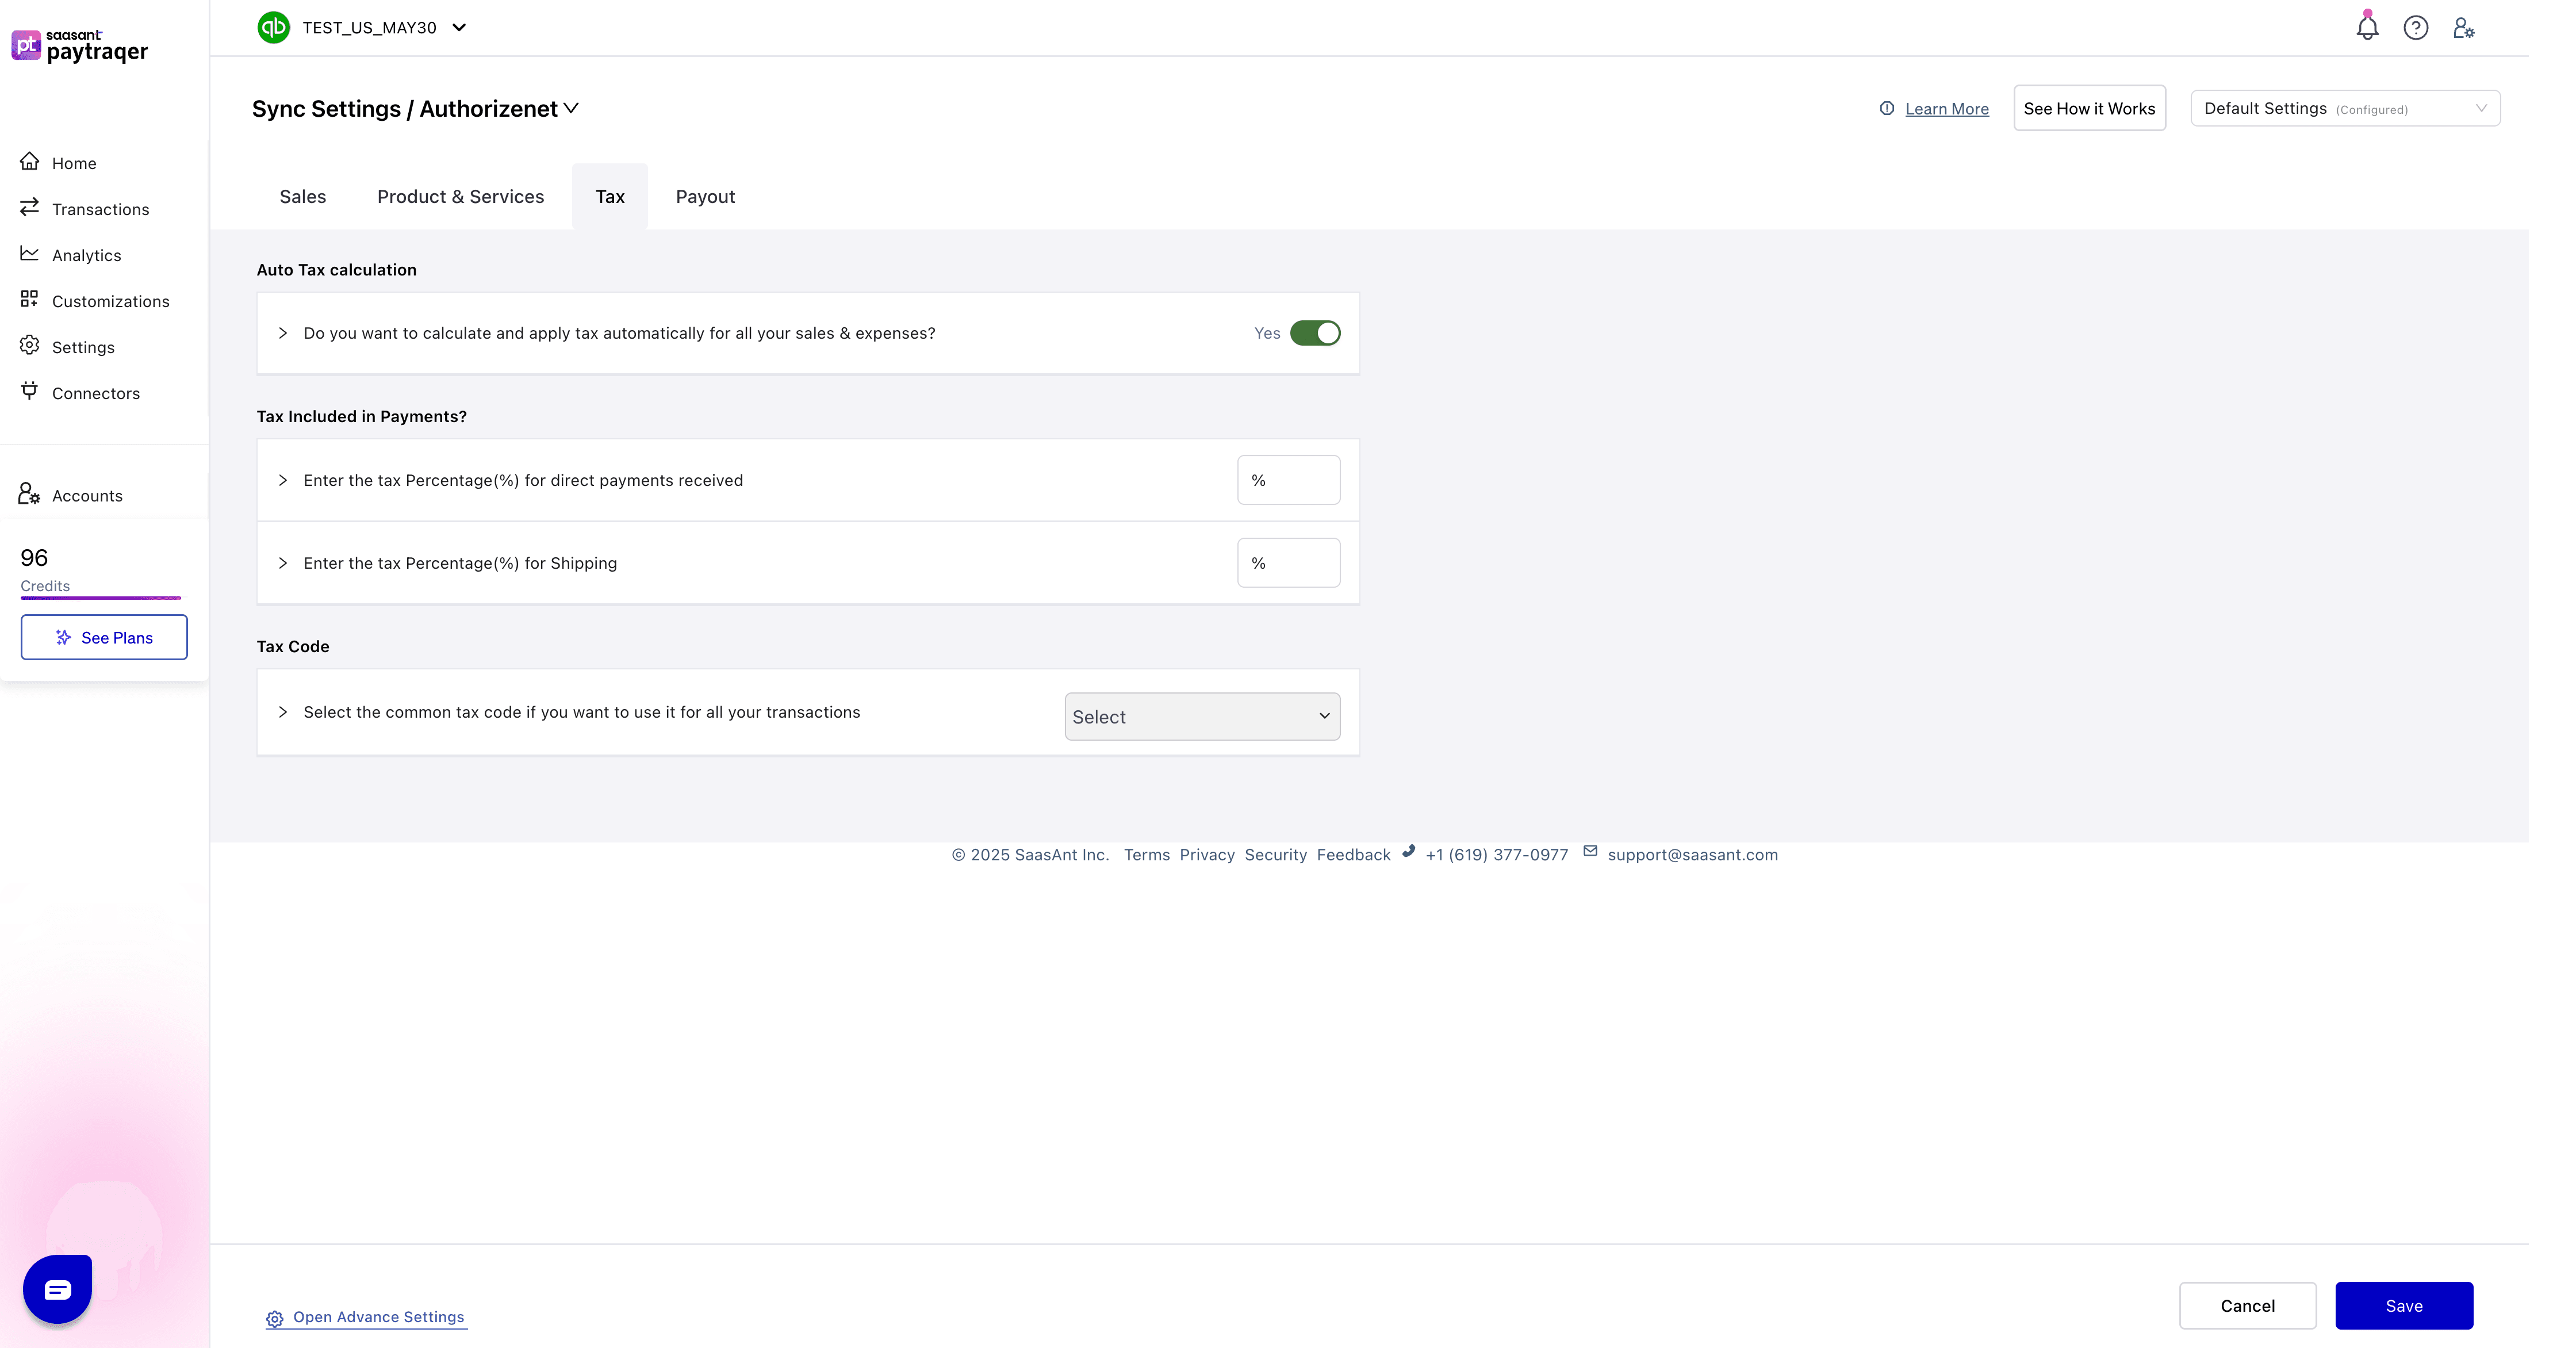
Auto Tax calculation
Default: Yes to detect and apply tax on synced sales and expenses.
Tax included settings
Tax Included in Payments
Enter the Tax Percentage (%) for direct payments if tax is included.
Shipping tax percentage
Enter the Tax Percentage (%) for shipping amounts if shipping is taxable.
Default Tax Code
Tax Code
Choose a common tax code to apply to all transactions.
This overrides automatic detection.
Check: Open a synced sale and confirm the tax code and amount.
Payouts and settlements
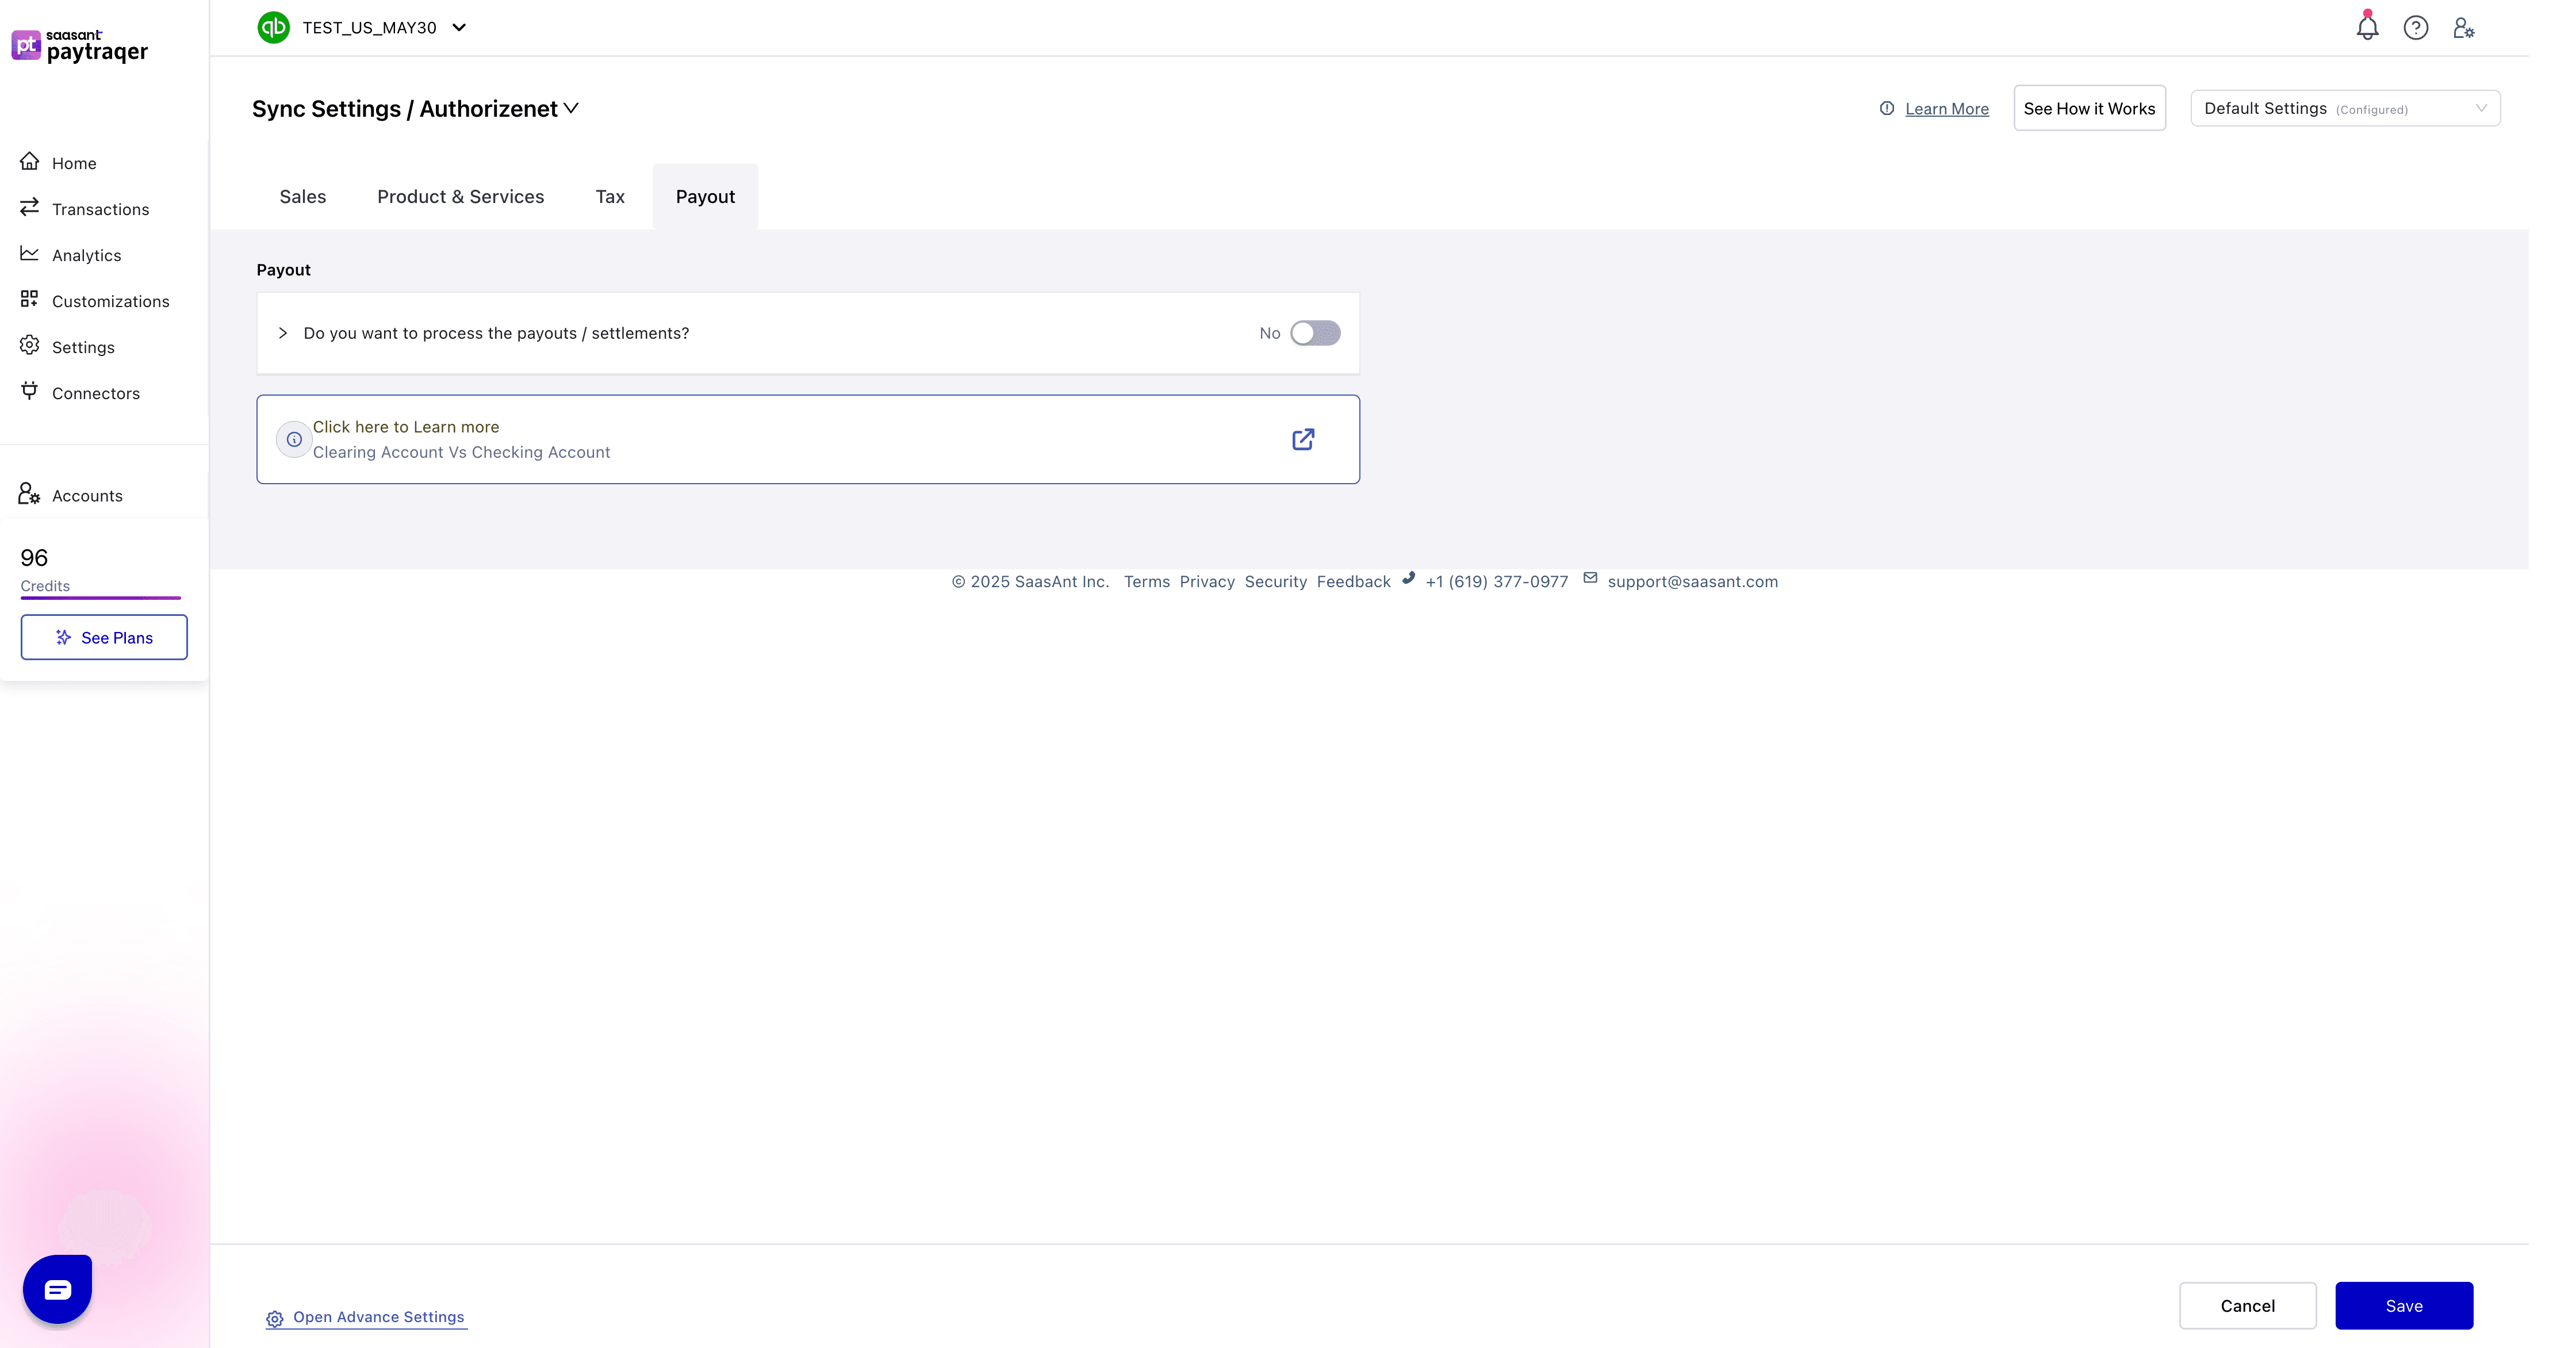
Do you want to process the payouts/settlements
Default: No. Turn On to create Bank Transfer transactions from the AuthorizeNet clearing bank to your real checking account.
Check: Transfers match deposits in your bank feed when enabled.
Clearing account vs checking account
The clearing account holds Authorize.Net sales inside QuickBooks.
The checking account is your real bank that receives the deposit.
When payouts are on, transfers move money from clearing to checking so the clearing account nets to zero.