How to Integrate Clover Transactions with QuickBooks Online Using PayTraQer
January 1, 2025
This article walks you through connecting your Clover account to PayTraQer and QuickBooks Online, choosing the first time settings, and understanding the key sync settings for Clover:
Installing PayTraQer from the QuickBooks App Store
Connecting Clover using API credentials
Choosing Express settings
Reviewing Sales, Products & Services, and Tax sync settings
Getting your first set of Clover transactions into QuickBooks
Video Tutorial for How to Connect and Sync Clover Transactions to QuickBooks Online using PayTraQer:
2. Prerequisites
Before you start, make sure you have:
An active QuickBooks Online company
Admin or Accountant access in QuickBooks Online
An active Clover account
Permission in Clover to view Setup and create API tokens
3. Install PayTraQer from QuickBooks Online
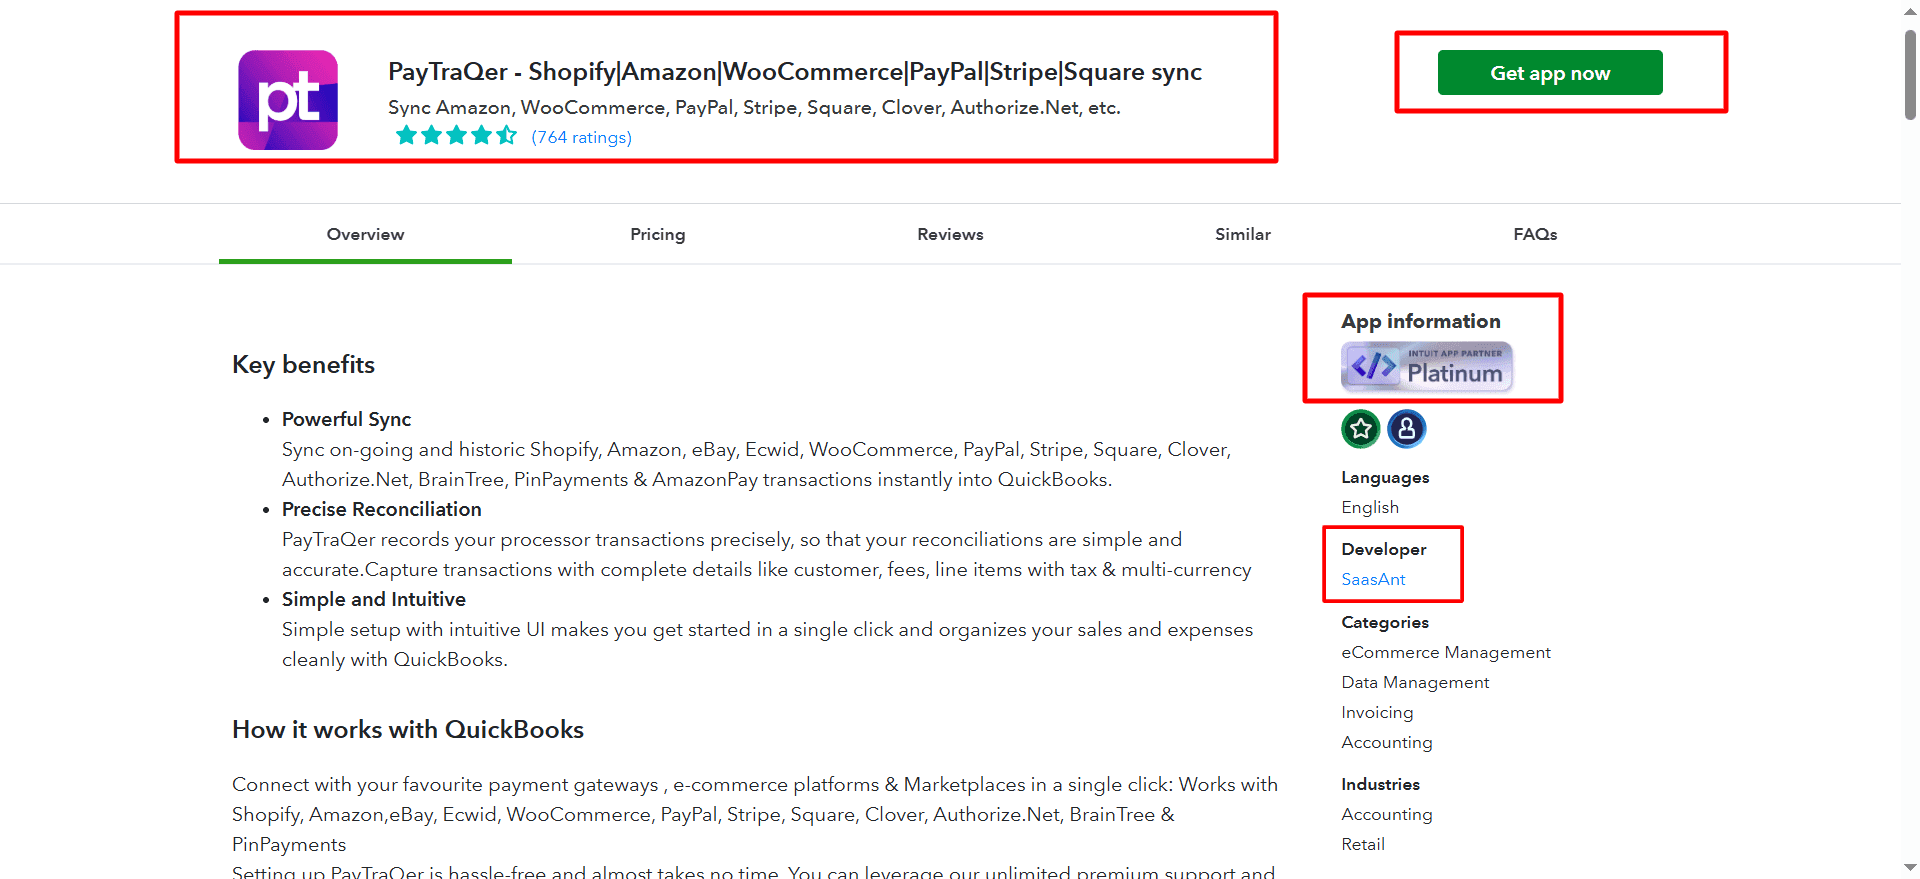
Sign in to QuickBooks Online as an admin.
Go to Apps → Find Apps.
Search for PayTraQer.
Select PayTraQer and click Get app now.
Authorize access when QuickBooks prompts you.
You will be taken into PayTraQer and your QuickBooks Online company will be connected.
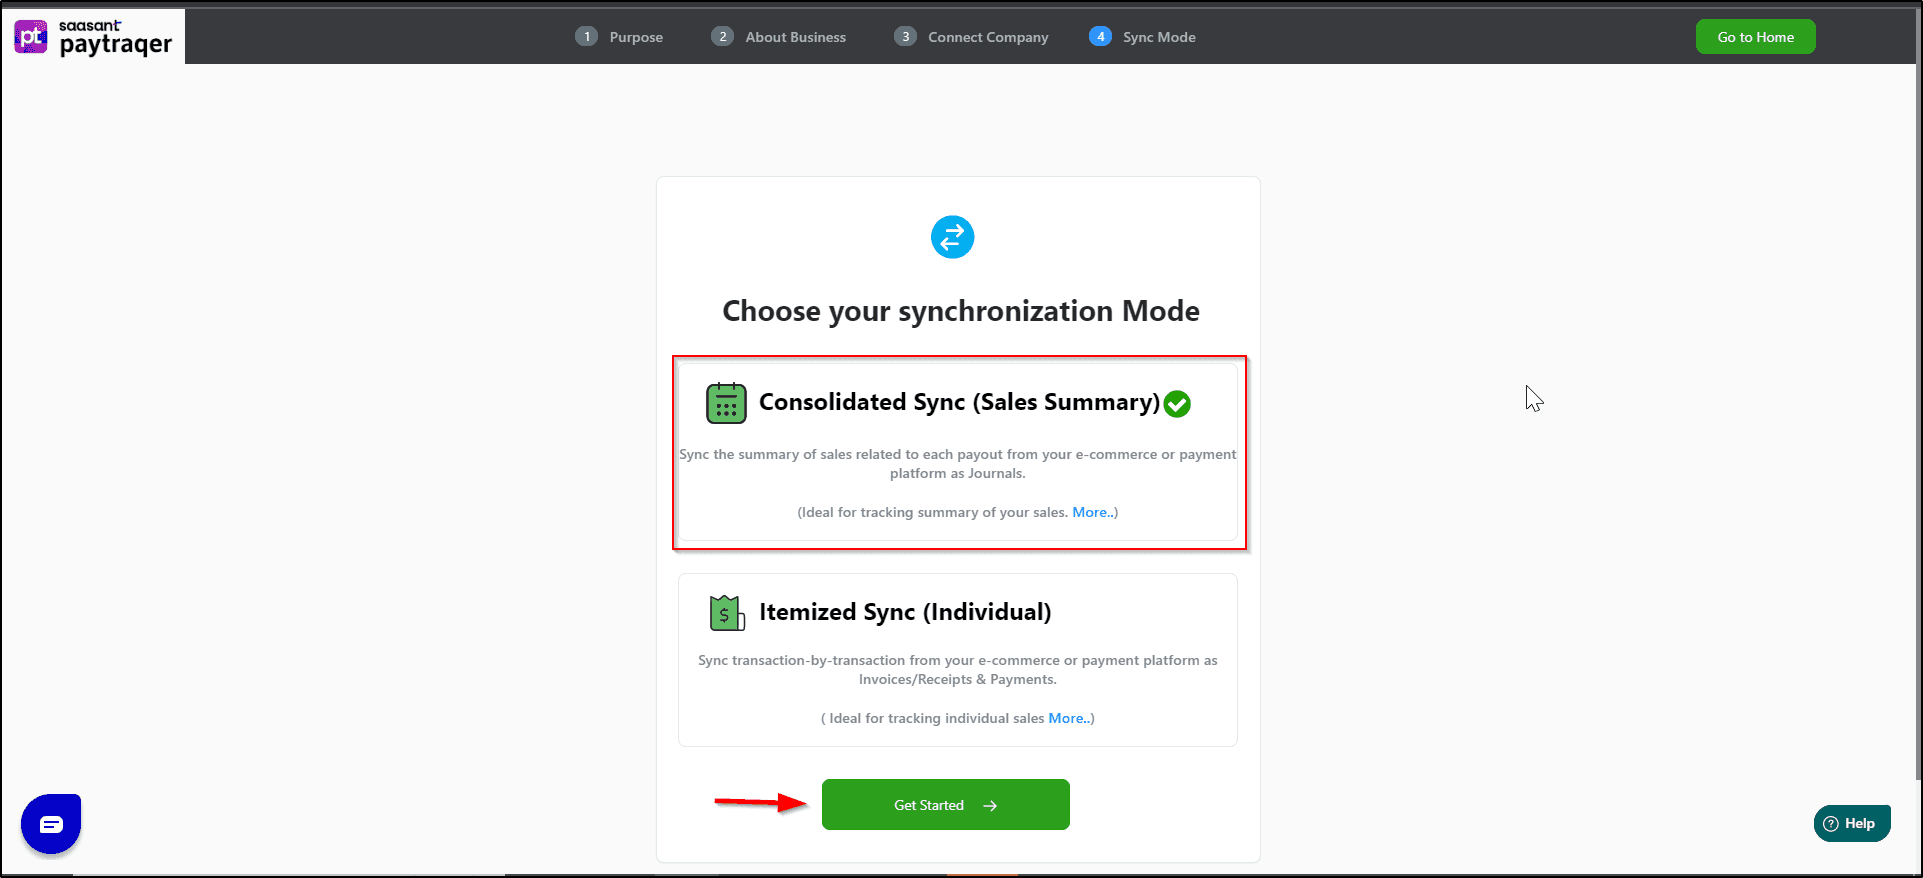
Choose the sync mode for Clover
During PayTraQer onboarding, you will be asked how you want to sync:
Individual / Itemized Sync
One entry per order or transaction
Best if you want full detail in QuickBooks
Consolidated / Summary Sync
Combined entries by day or payout (covered in a separate article)
4.Connect your Clover account to PayTraQer
After QuickBooks is linked, you can connect Clover as a payment processor.
In PayTraQer, open the left menu and go to Connectors or Settings → Payment Processors.
Click Add Payment Processor (or Connect Payment Processor).
Choose the Clover tile.
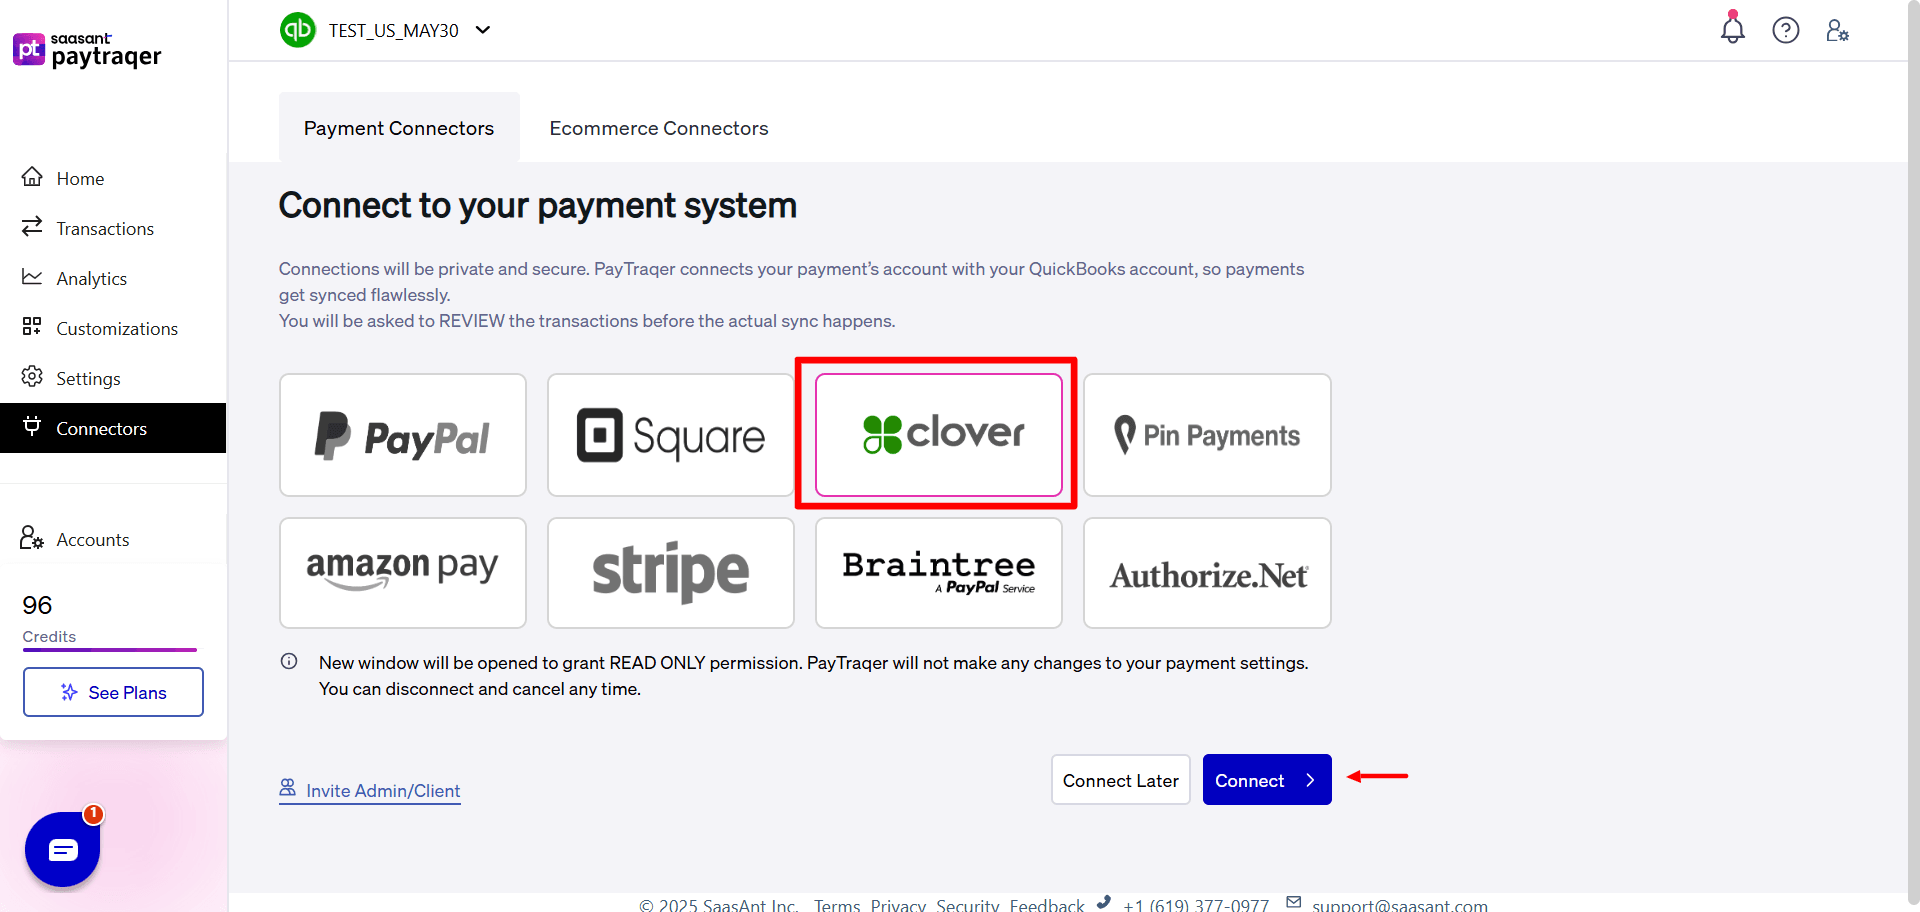
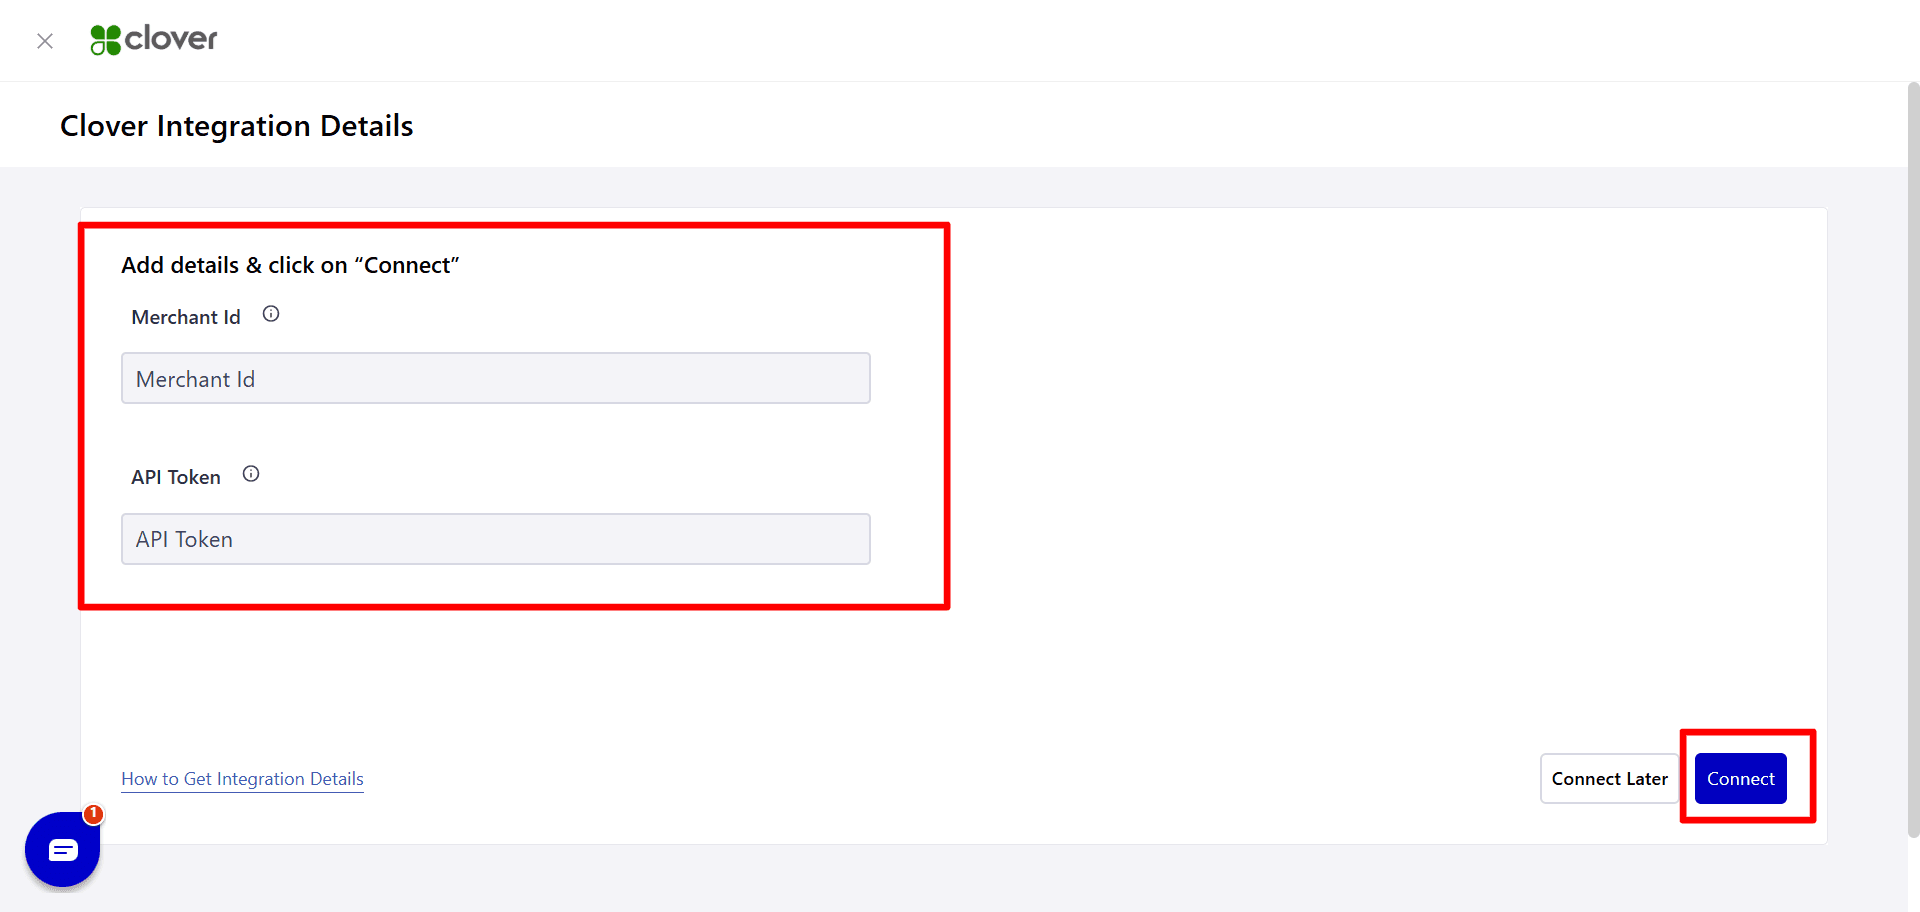
A Clover integration screen will open asking for Merchant ID and API Token.
4.1 Get your Clover Merchant ID
Log in to your Clover dashboard.
Open Setup.
Look at the browser URL. Your Merchant ID appears in the link (the value after /m/).
Copy this Merchant ID.
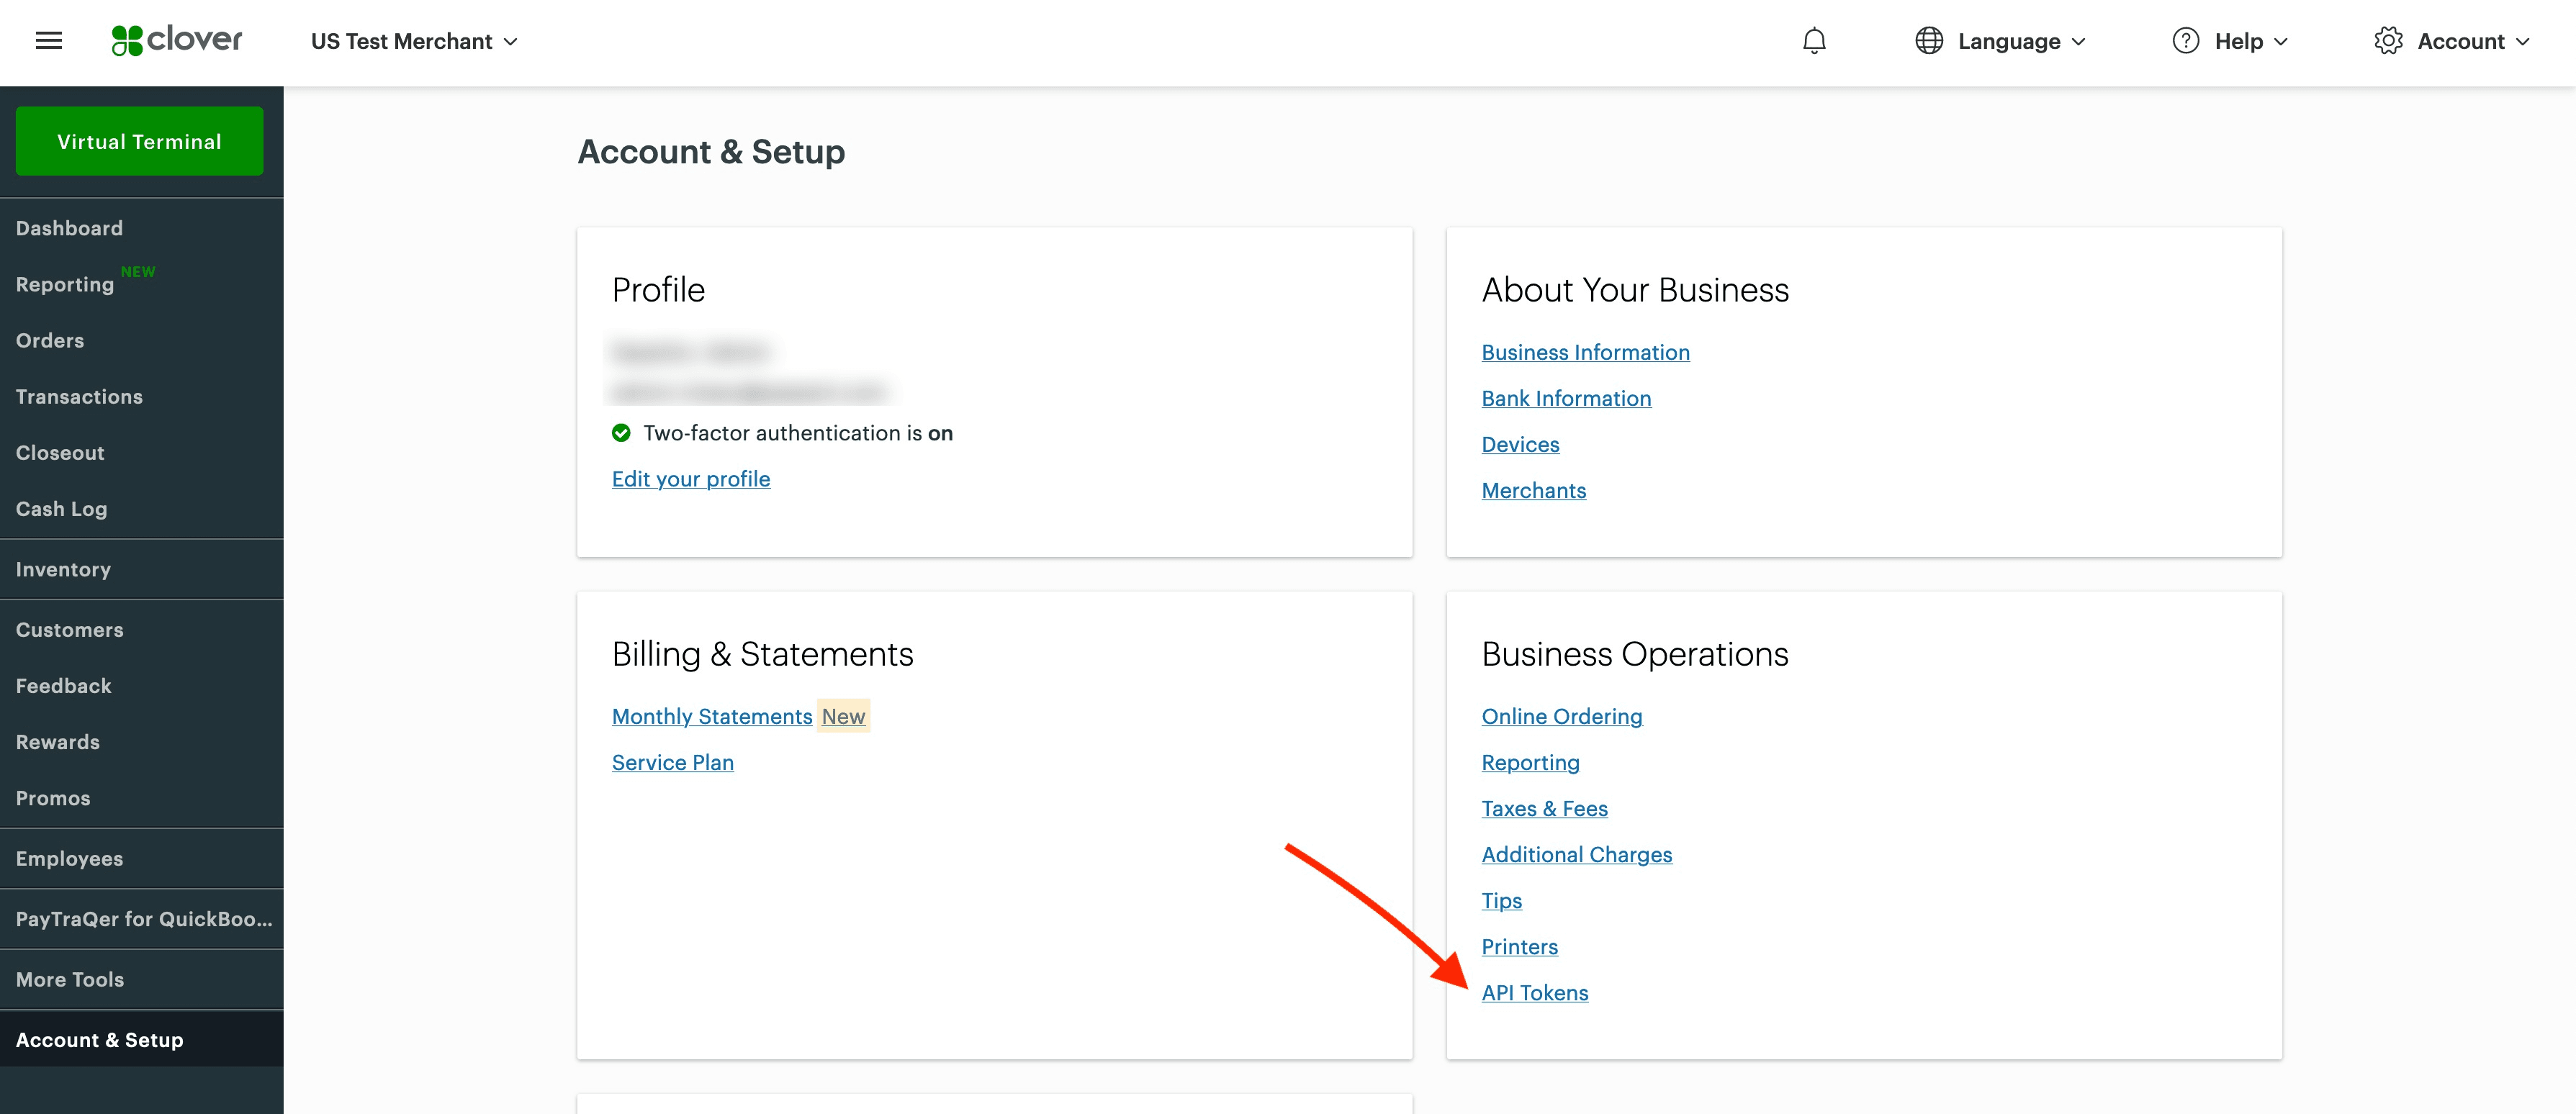
4.2 Create a Clover API token
Still in Setup, look for API Tokens.
Click Create New Token.
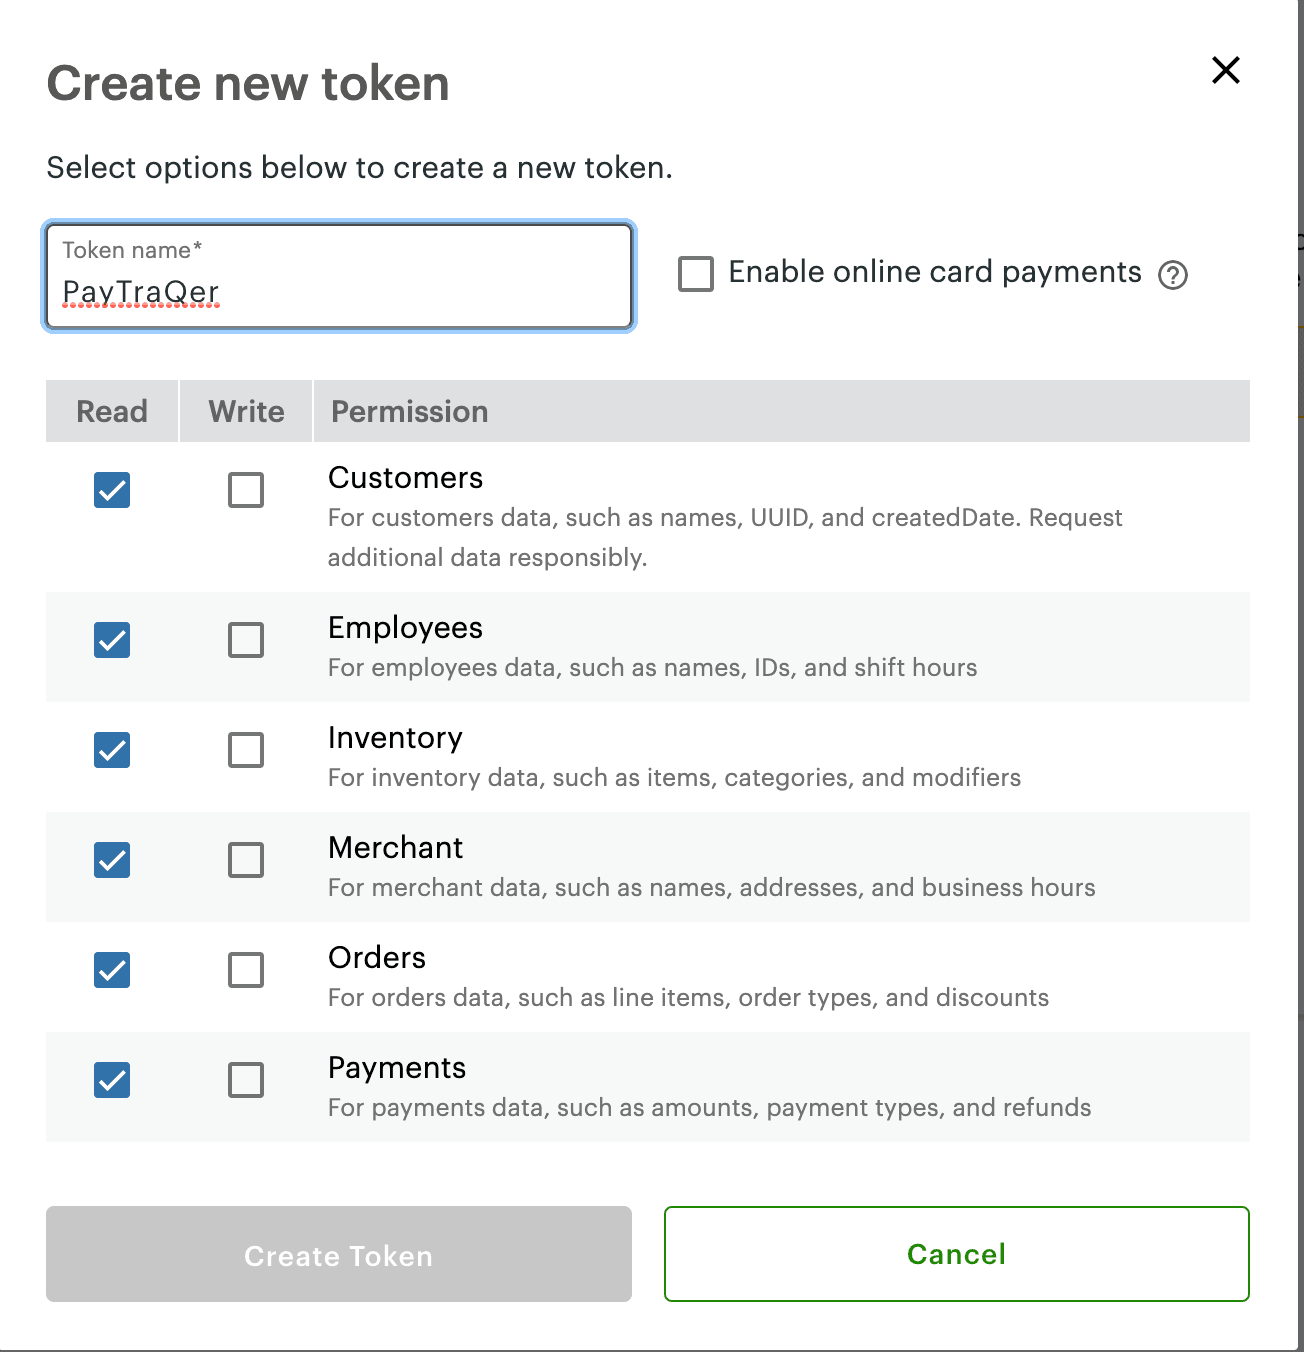
Give the token a clear name, for example PayTraQer QuickBooks Sync.
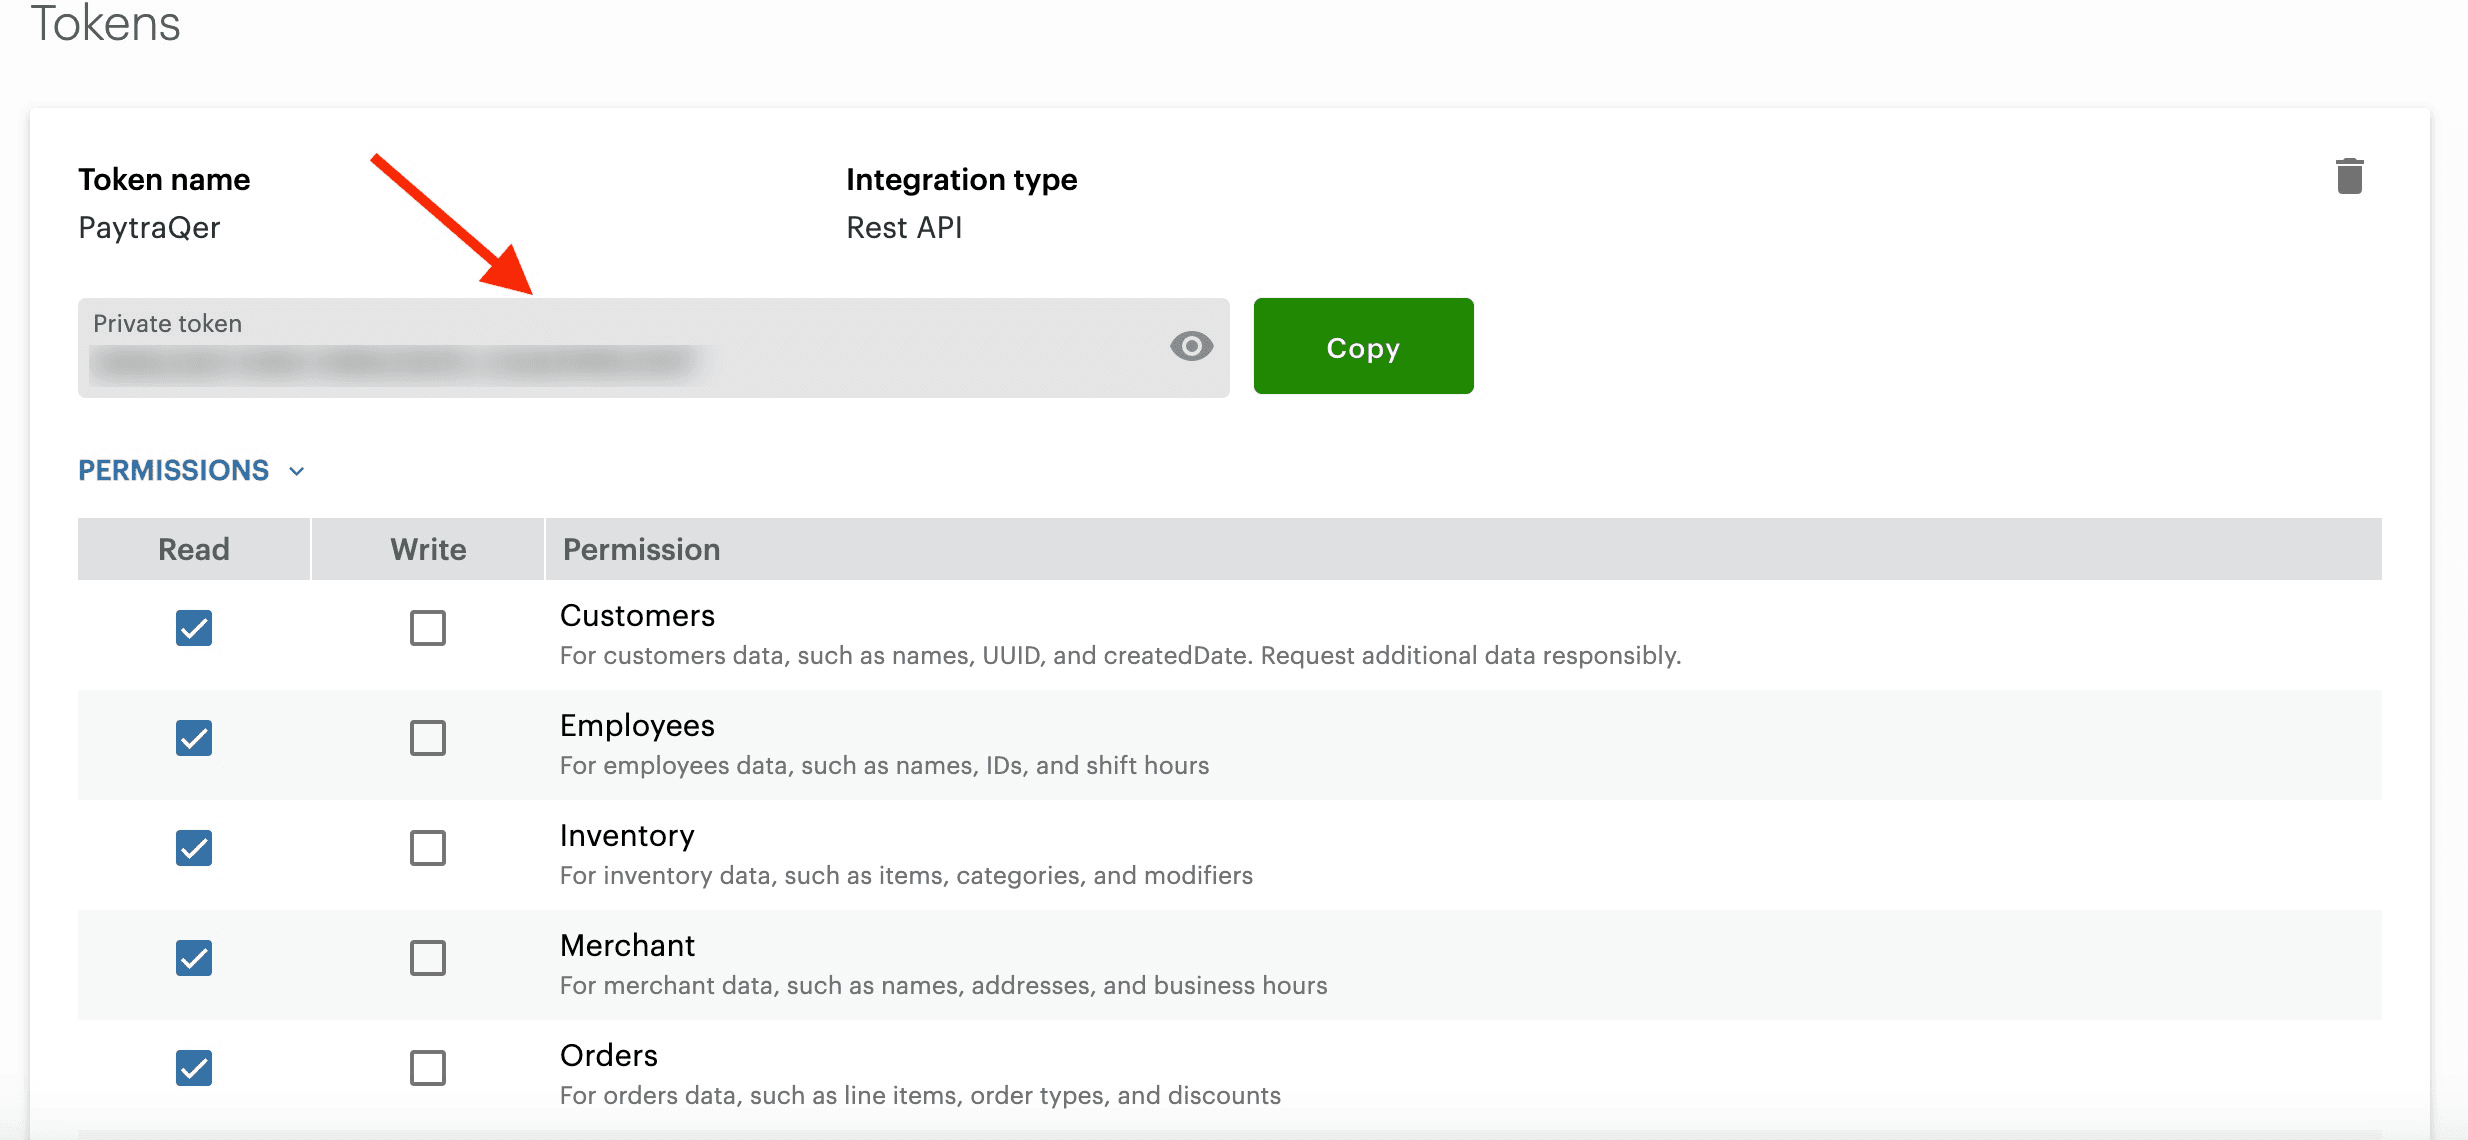
Grant the required READ permissions for sales, payments, refunds and related records.
Save and copy the API Token.
4.3 Finish connection in PayTraQer
Go back to the Clover screen in PayTraQer.
Paste the Merchant ID and API Token into the fields.
Click Connect.
When the connection is successful, PayTraQer will move to the Express Settings screen for Clover.
5. First time setup: Express Settings for Clover

The Express Settings screen sets a safe default clearing account for all Clover activity.
You will see a card that says “Your sales will be recorded in Clover Bank Account”.
Clover Bank Account
This is the clearing bank in QuickBooks where PayTraQer will post Clover sales and refunds.
Best practice is to use a dedicated clearing account such as “Clover Bank Account”, not your real checking account.
Select or confirm the clearing bank, then click Save Settings.
After you save, PayTraQer opens the Transactions dashboard and starts pulling recent (60 days) Clover transactions automatically.

Download historical Clover transactions

After your settings are in place:
Go to the Transactions screen in PayTraQer.
Click Download Historical Transactions.
Choose your date range for past Clover transactions
Download. PayTraQer will show these records in the Review tab.
You can later turn on Auto Sync so PayTraQer brings in new Clover activity automatically at regular intervals.

6. Clover sync settings in detail
You can review or change the default configuration at any time.
Go to Settings → Sync Settings → Clover. You will see three tabs:
Sales
Product & Services
Tax
6.1 Sales settings

Accounts
Bank Account to deposit your sales/income
The clearing bank used for Clover sales and refunds.
Recommended: keep this as the Clover Bank Account you set in Express Settings.
Payment methods to track your transactions
The payment method written to QuickBooks (for example, Clover).
Use this if you want to filter or report on Clover payments in QuickBooks.
Customers
Do you want to create Customer automatically if it does not exist in your QuickBooks?
When ON, PayTraQer creates a new customer in QuickBooks if it cannot find a match.
When OFF, you must maintain matching customer records yourself.
Common Customer for your Sales Transactions
Use a single customer, such as “Clover Customer”, for all Clover sales if you do not need per buyer detail.
Helpful for high volume retail where individual names are not important.
Customize Customer Matching
Add rules that map Clover buyer names to existing QuickBooks customers, avoiding duplicates.
Tracking
Location/Department for your Sales transactions
Class for your Sales transactions
If your QuickBooks file uses Location or Class tracking, set fixed values here so every Clover sale is tagged correctly.
6.2 Products & Services settings

Open the Product & Services tab.
Auto Creation
Do you want to create Products/Services automatically?
When ON, PayTraQer creates new items in QuickBooks when Clover item names do not exist.
Select Products/Services Type to create items automatically when it does not exist
Choose Non Inventory or Service for auto created Clover items.
Select Income Account for the Products/Services associated with your transactions
Set the income account where revenue for new items should post.
Match Product
Match Product by
Default is Name.
Switch to SKU if your Clover and QuickBooks item lists share stable SKUs.
Customize Product Matching
Add mapping rules when Clover item names differ from QuickBooks item names.
Common Item
Do you want to use common product/service for all your sales?
Turn this ON if you do not need line level item detail.
Select common product/service
Choose a single QuickBooks item to use on every Clover sale.
6.3 Tax settings

Open the Tax tab.
Do you want to calculate and apply tax automatically for all your sales & expenses?
When ON, PayTraQer reads Clover tax amounts and maps them to QuickBooks tax codes where possible.
Tax Included in Payments?
Enter the tax Percentage(%) for direct payments received
Enter the tax Percentage(%) for Shipping
Use these fields when your Clover amounts are tax inclusive and you want PayTraQer to split tax correctly.
Tax Code
Choose a common QuickBooks tax code if you want to use one code for all Clover transactions.
Use this only when your tax setup is simple. It overrides some automatic detection.
Need help?
If you get stuck at any step, you can contact us at support@saasant.com for assistance or schedule a quick walkthrough with our team.