How to connect Authorize.Net Account with PayTraQer?
November 12, 2025
How to integrate Authorize.Net with QuickBooks Online using PayTraQer
This guide shows how to install PayTraQer, connect Authorize.Net, choose how data posts, set your rules, pull history, and turn on auto sync. Written for QuickBooks Online.
Video Tutorial for How to Connect and Sync Authorize.Net Transactions with QuickBooks Online using PayTraQer:
Install PayTraQer from QuickBooks
In QuickBooks Online, open Apps.
Search PayTraQer.
Select SaasAnt PayTraQer and click Get app now.
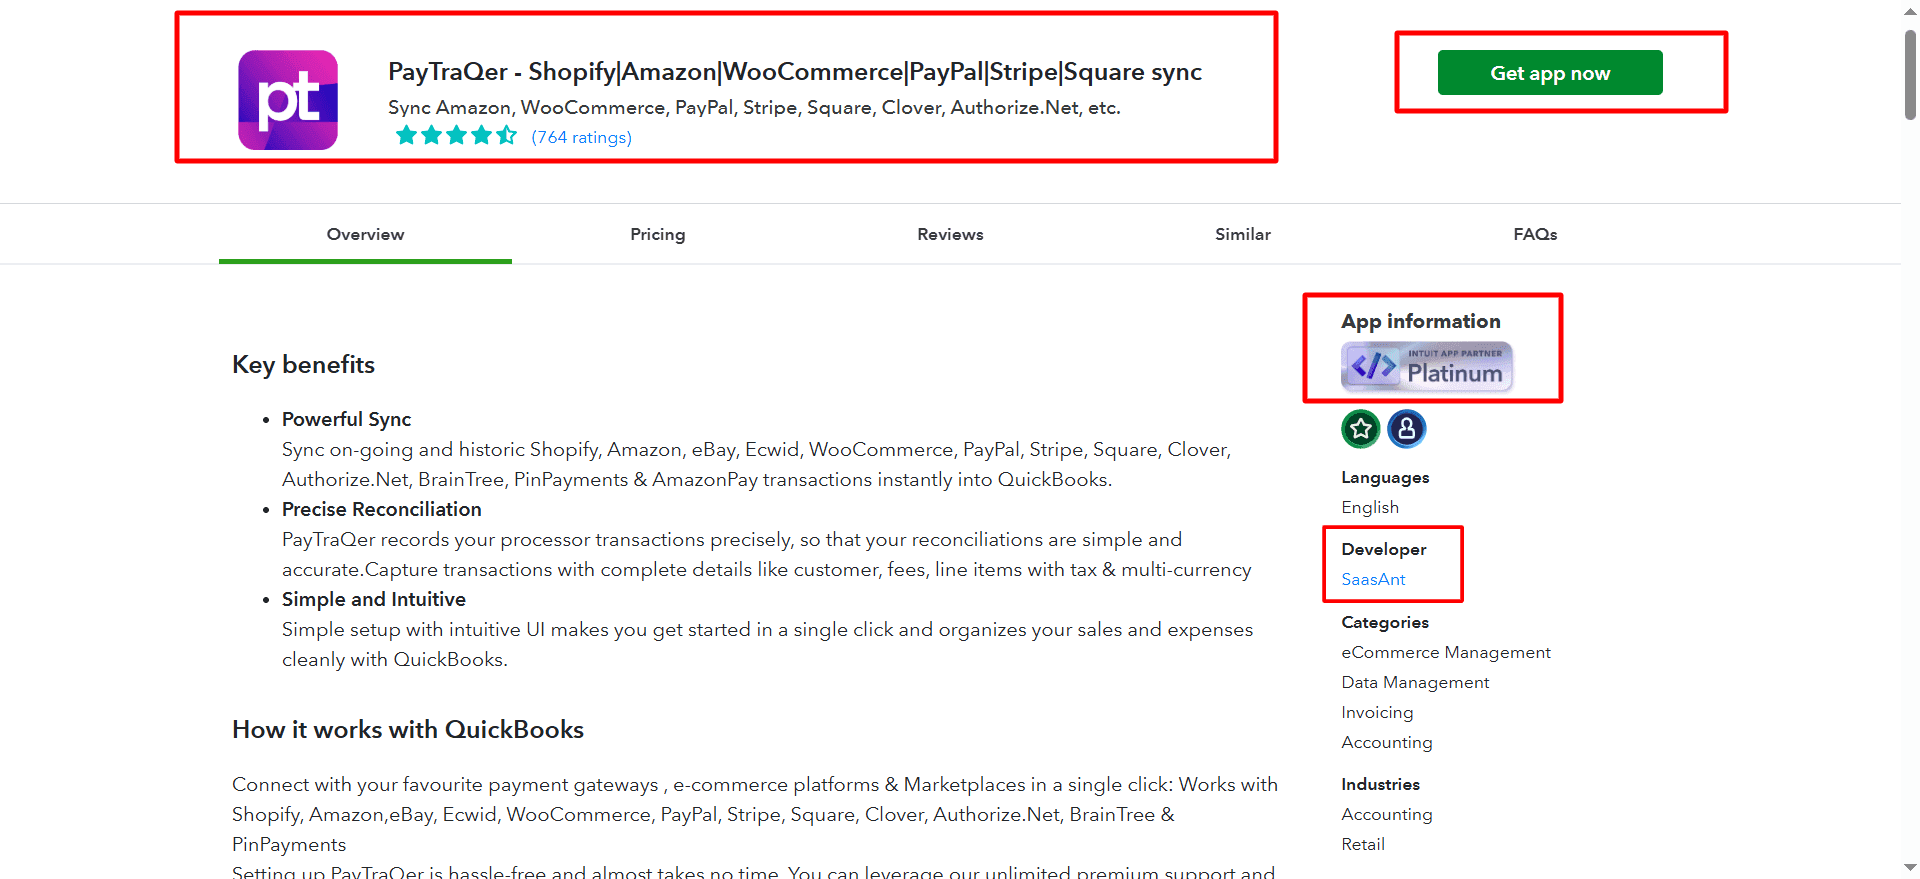
Follow the prompts and Authorize access to your QuickBooks company.
Pick your Sync Mode
Right after connecting to QuickBooks, choose how Authorize.Net data should post.

Consolidated Sync (Sales Summary): fewer entries and faster reconciliation
Itemized Sync (Individual): customer and item detail in QuickBooks
Select one and click Get Started. You can change this later in settings.
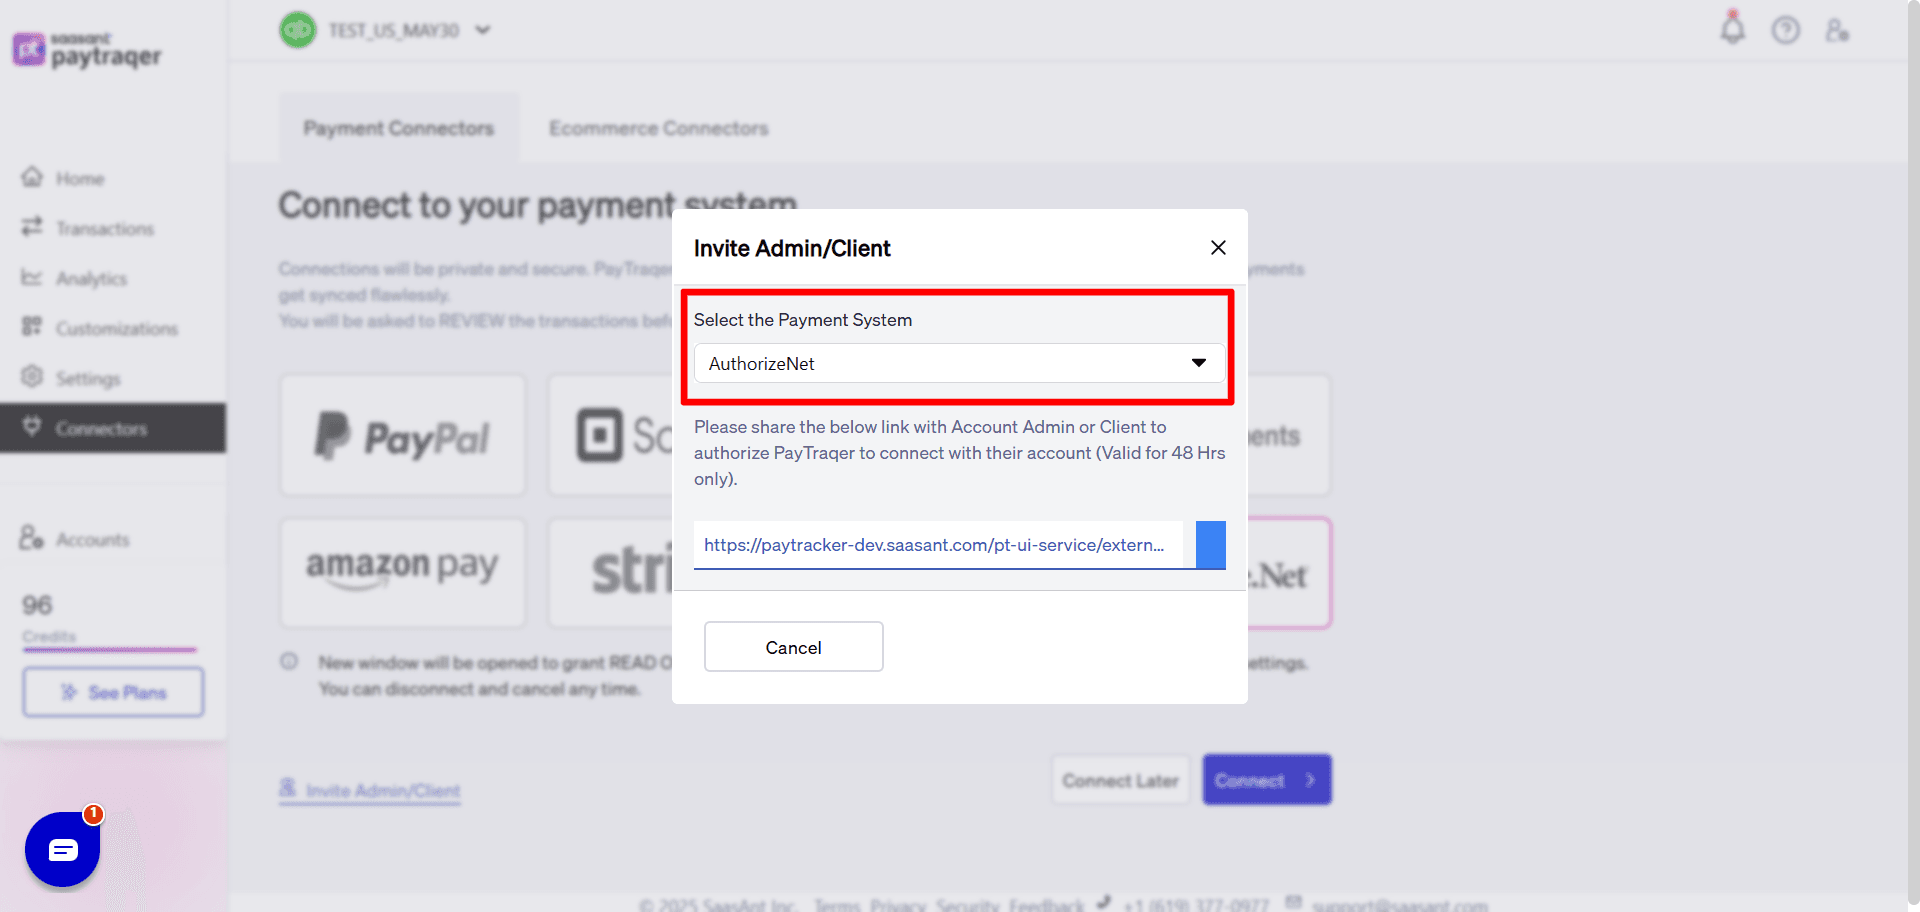
Connect Authorize.Net in PayTraQer
In PayTraQer, go to Connectors > Payment Connectors
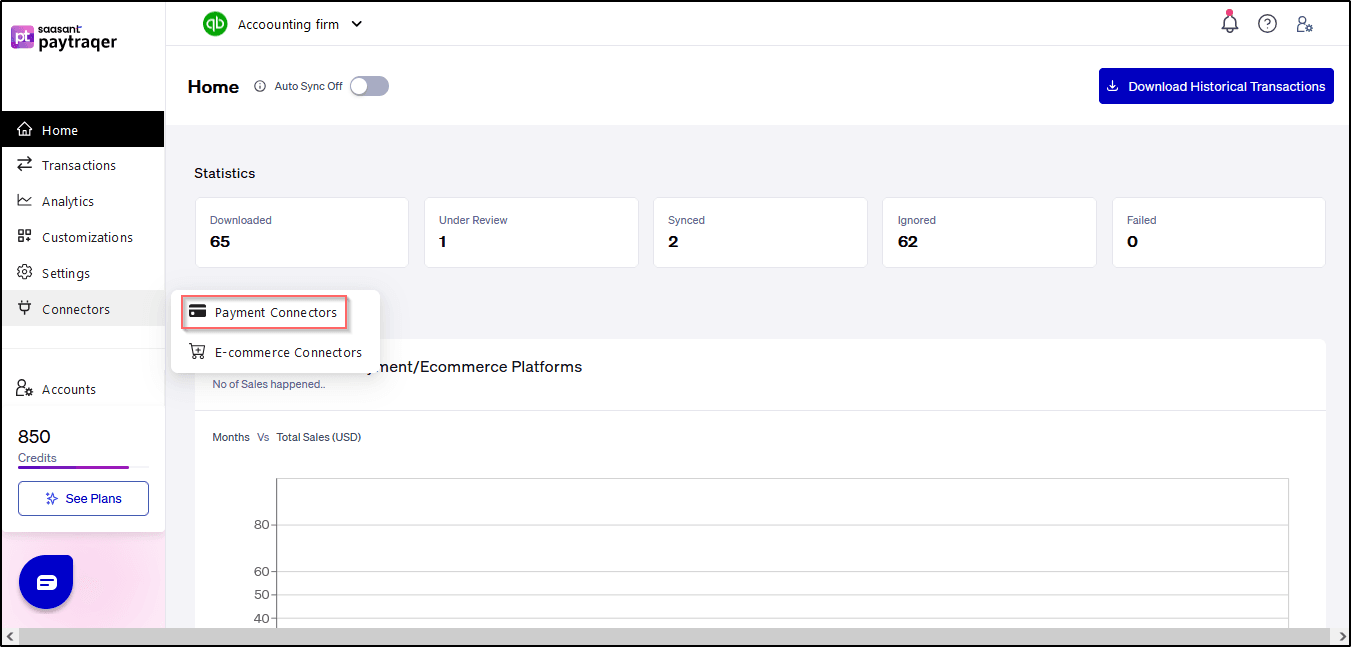
Select Authorize.Net and click Connect.
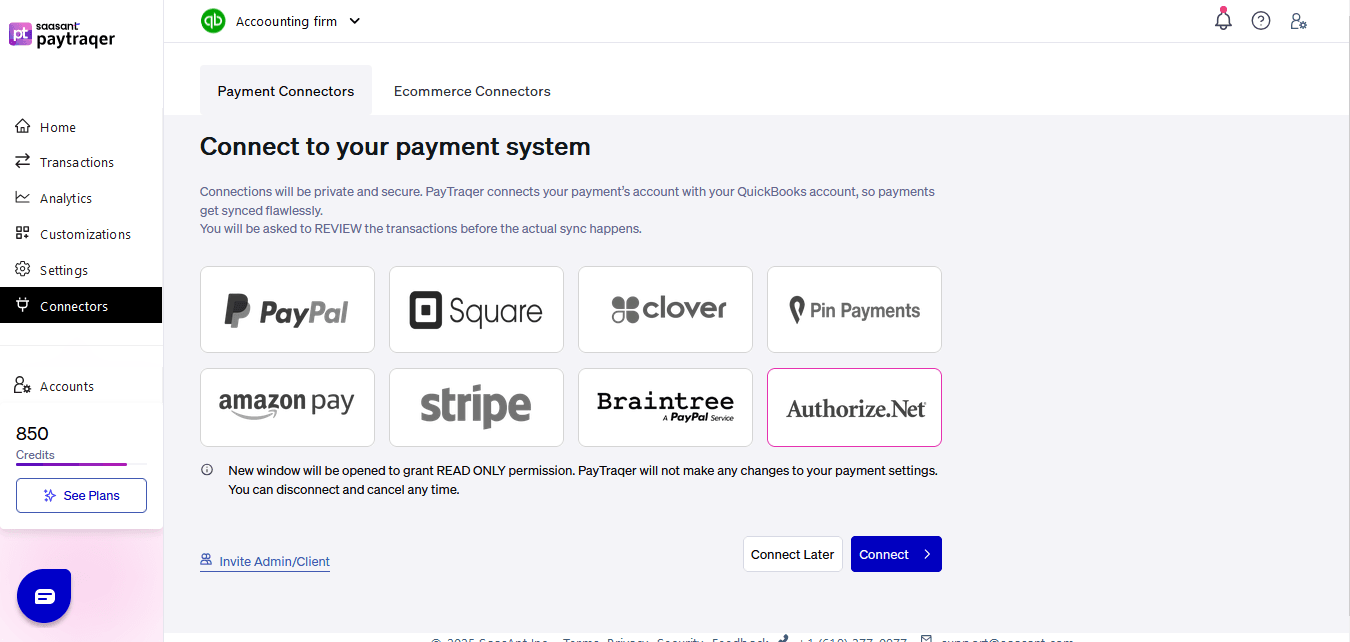
Sign in to Authorize.Net and approve access.
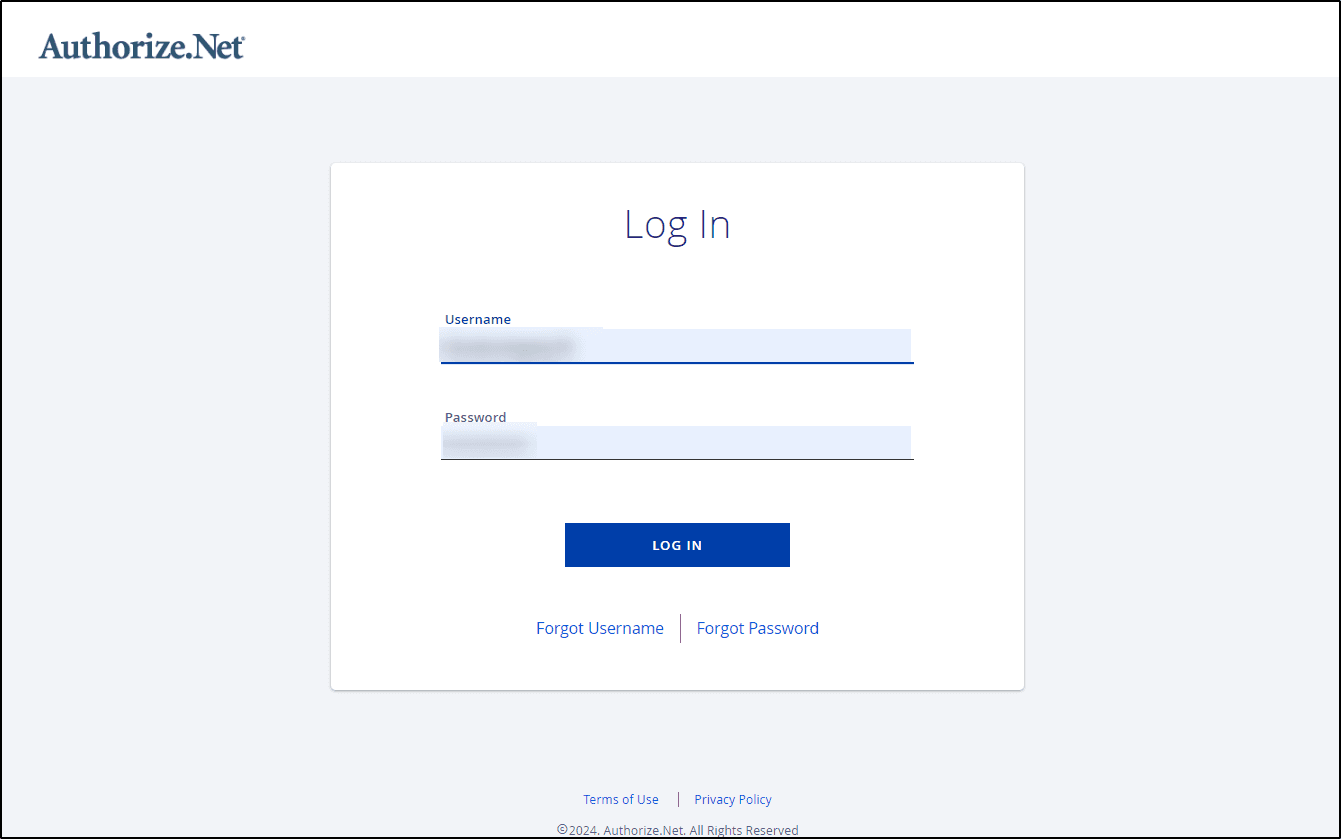
Login to your Authorize.Net account with your ADMIN user credentials.
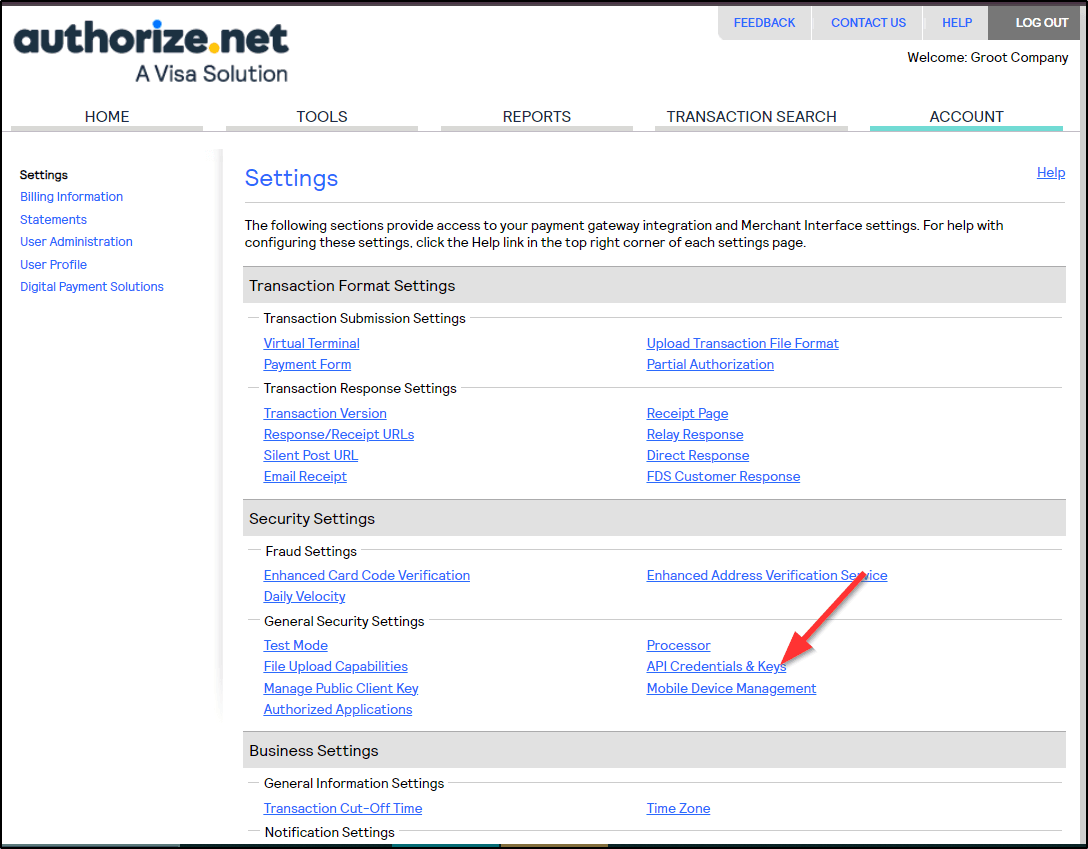
Navigate to Account >> Settings Page and click on API Credentials & Keys Link.
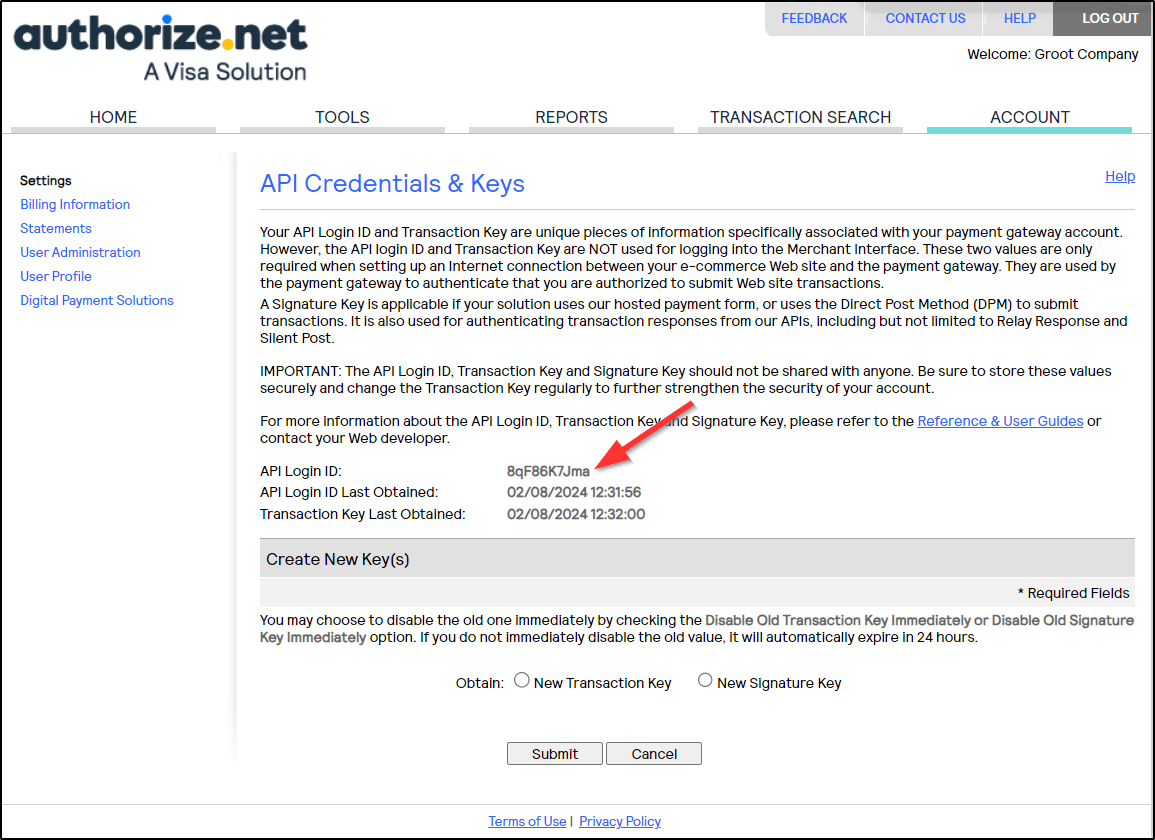
Copy the API Login ID and Paste it in PayTraQer Authorization Screen.
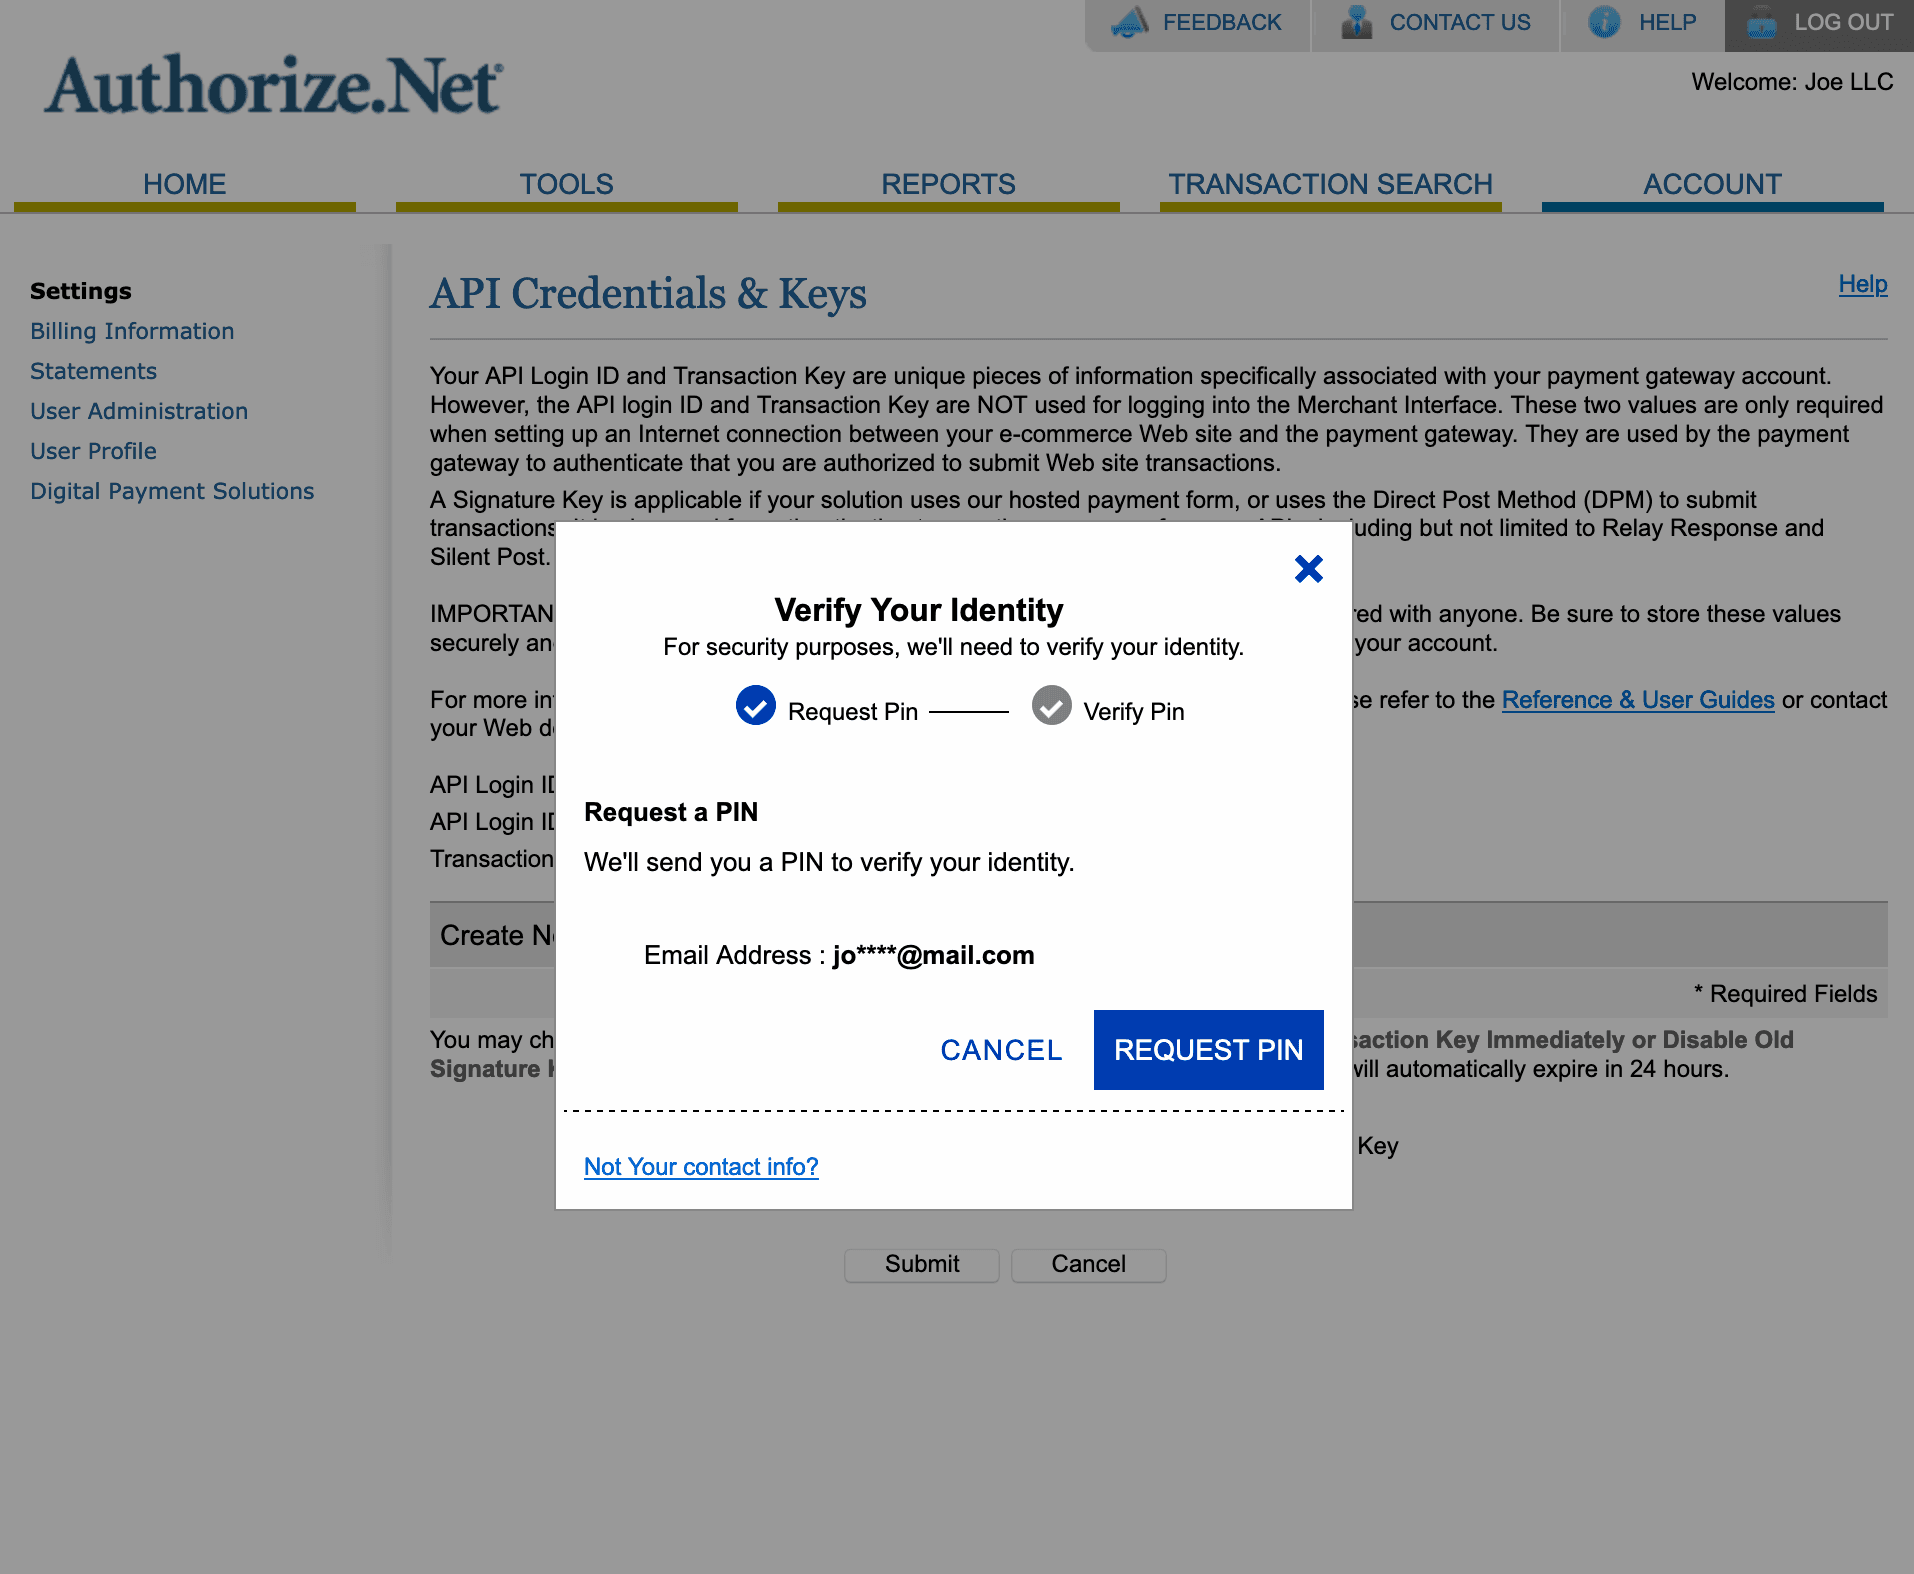
Turn on the "New Transaction Key" option and submit. You will be asked to provide the security pin received from your registered email address.
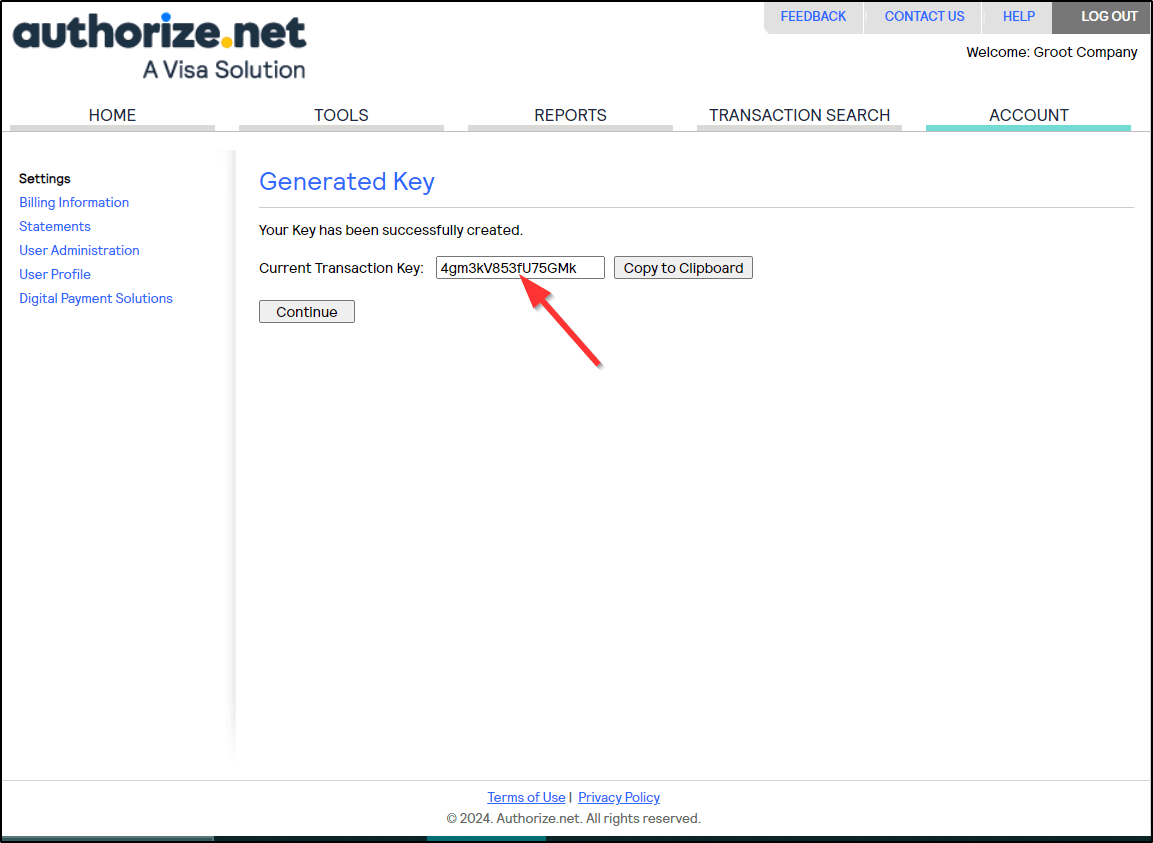
The Transaction Key will be displayed on the screen after the PIN Verification. Copy the Transaction Key and paste it on PayTraQer Authorization Screen.
If you are not the admin, use Invite admin/client to send the link to the approver.
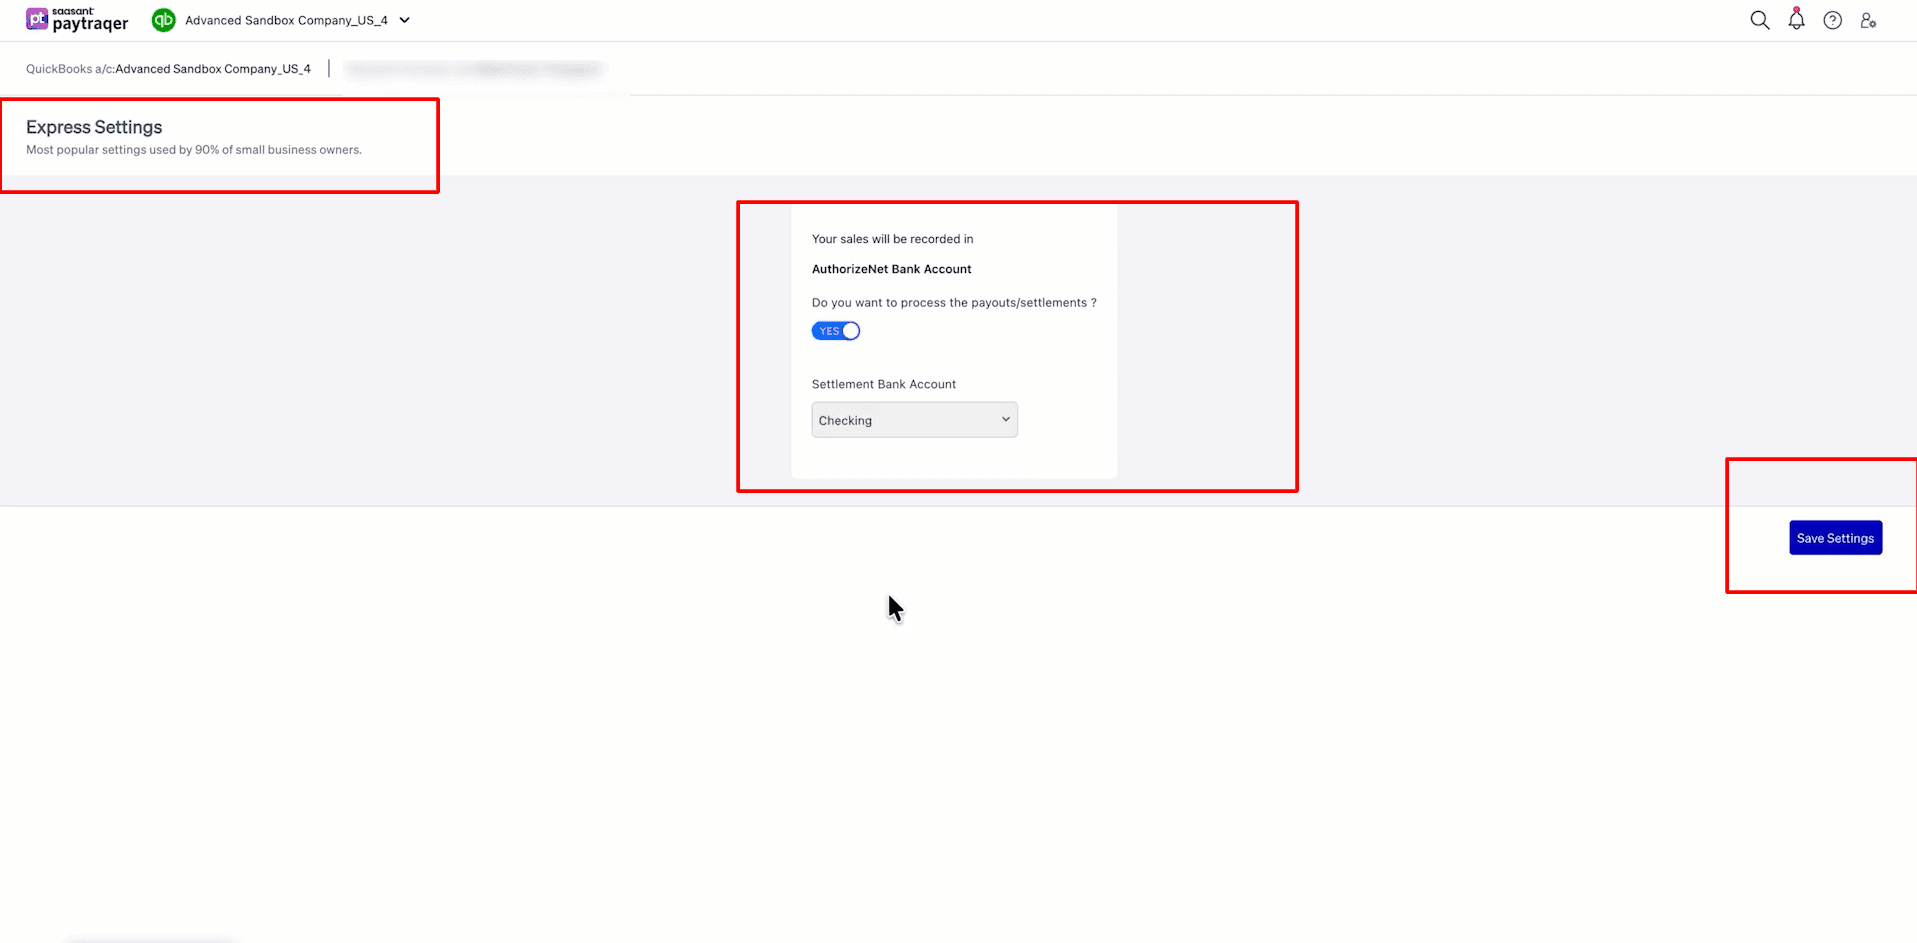
First-time setup after
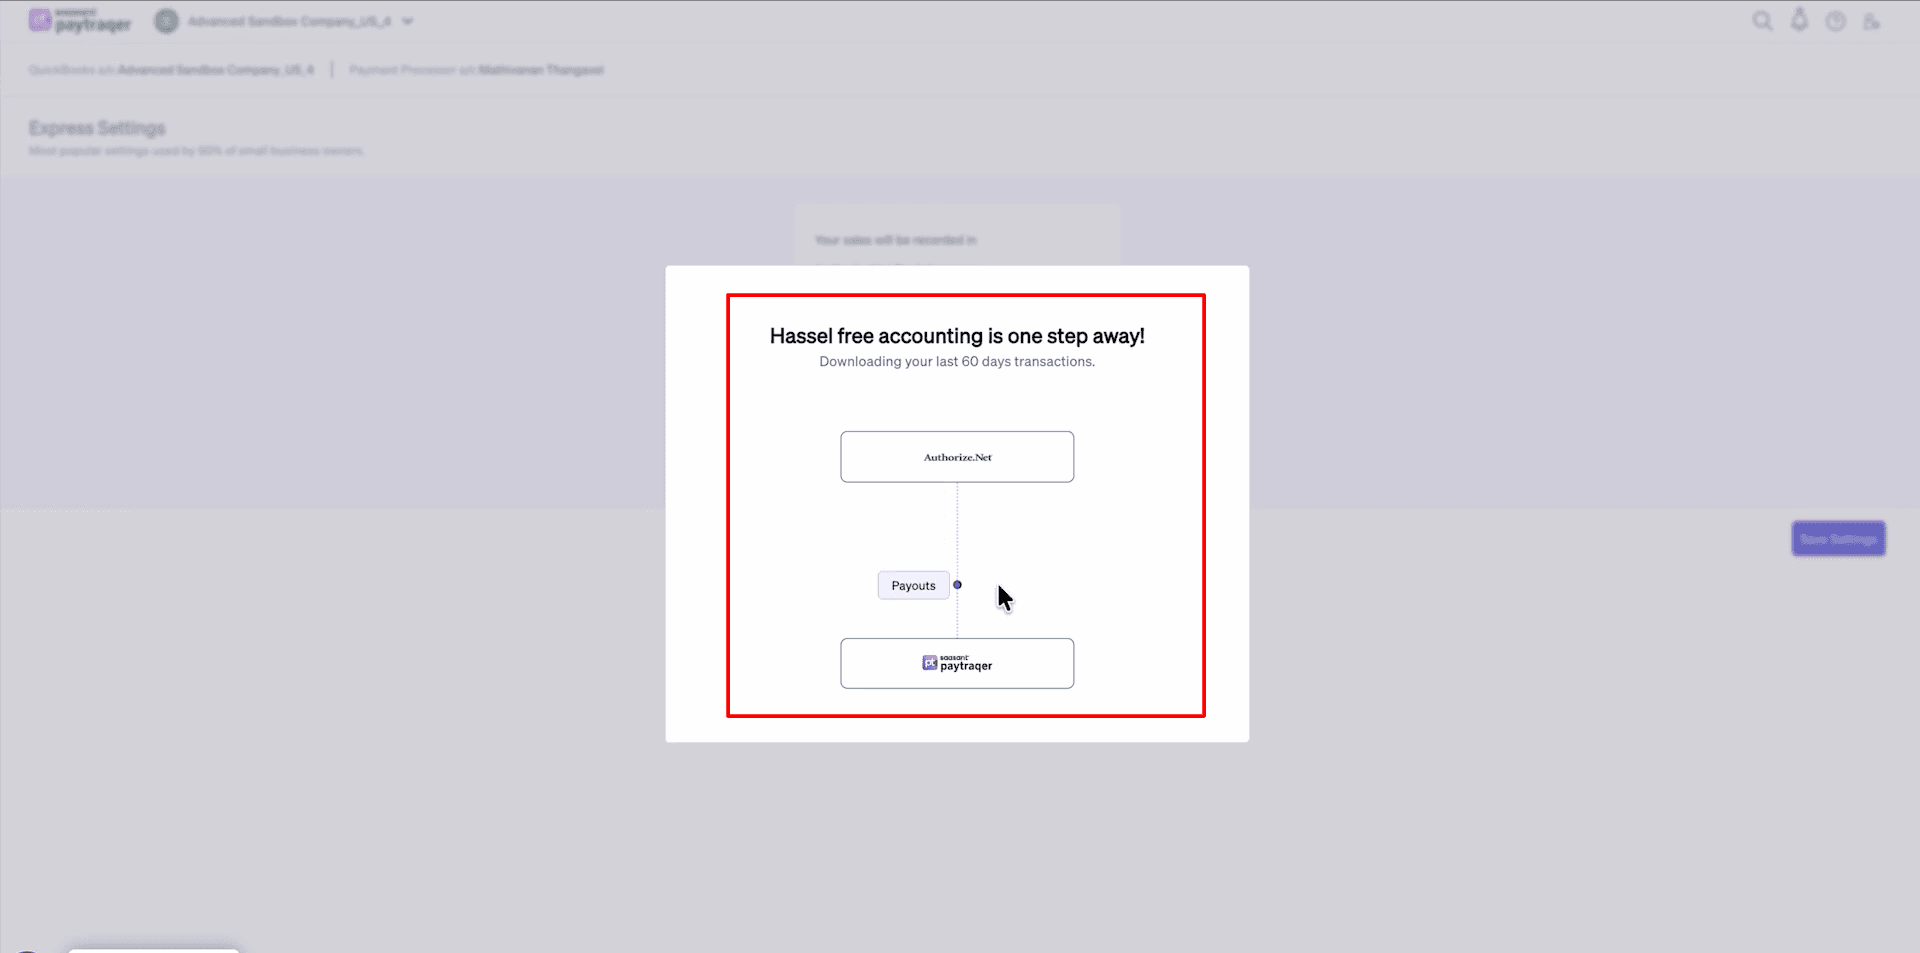
You will be redirected back to PayTraQer to finish initial express settings.
Auto download
After saving, PayTraQer automatically downloads the last 60 days of Authorize.Net data.
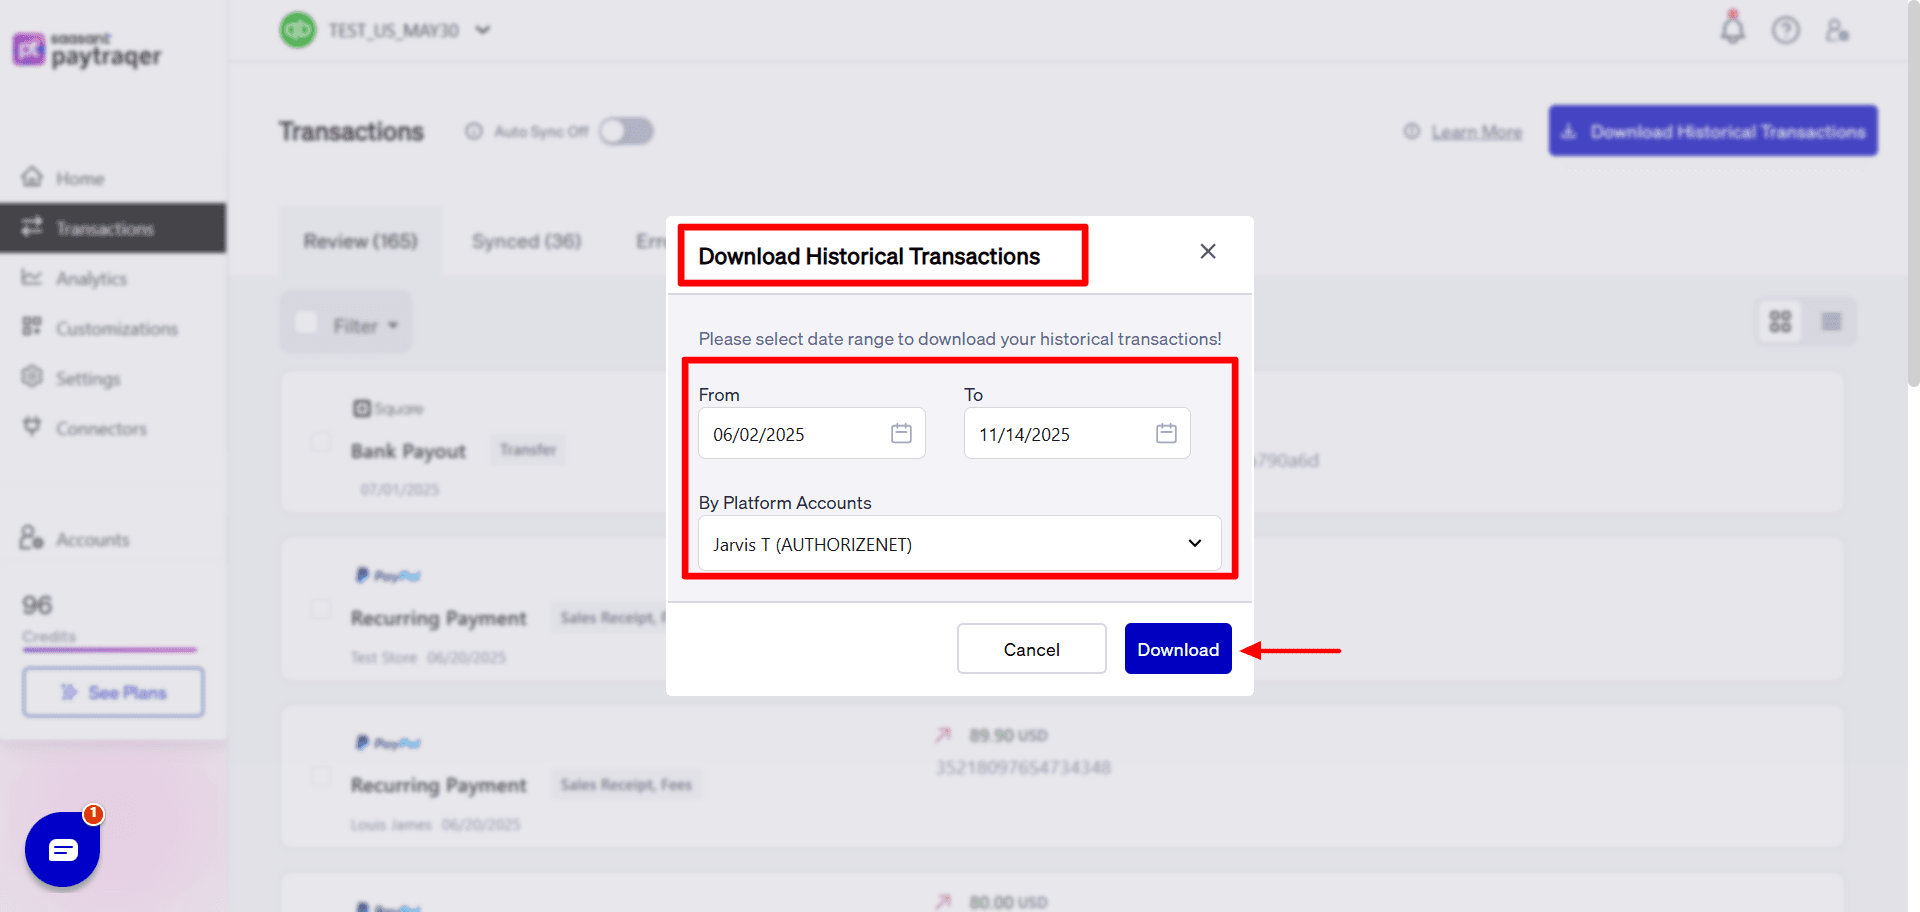
More history
Use Download historical transactions to pull other date ranges with From and To filters.
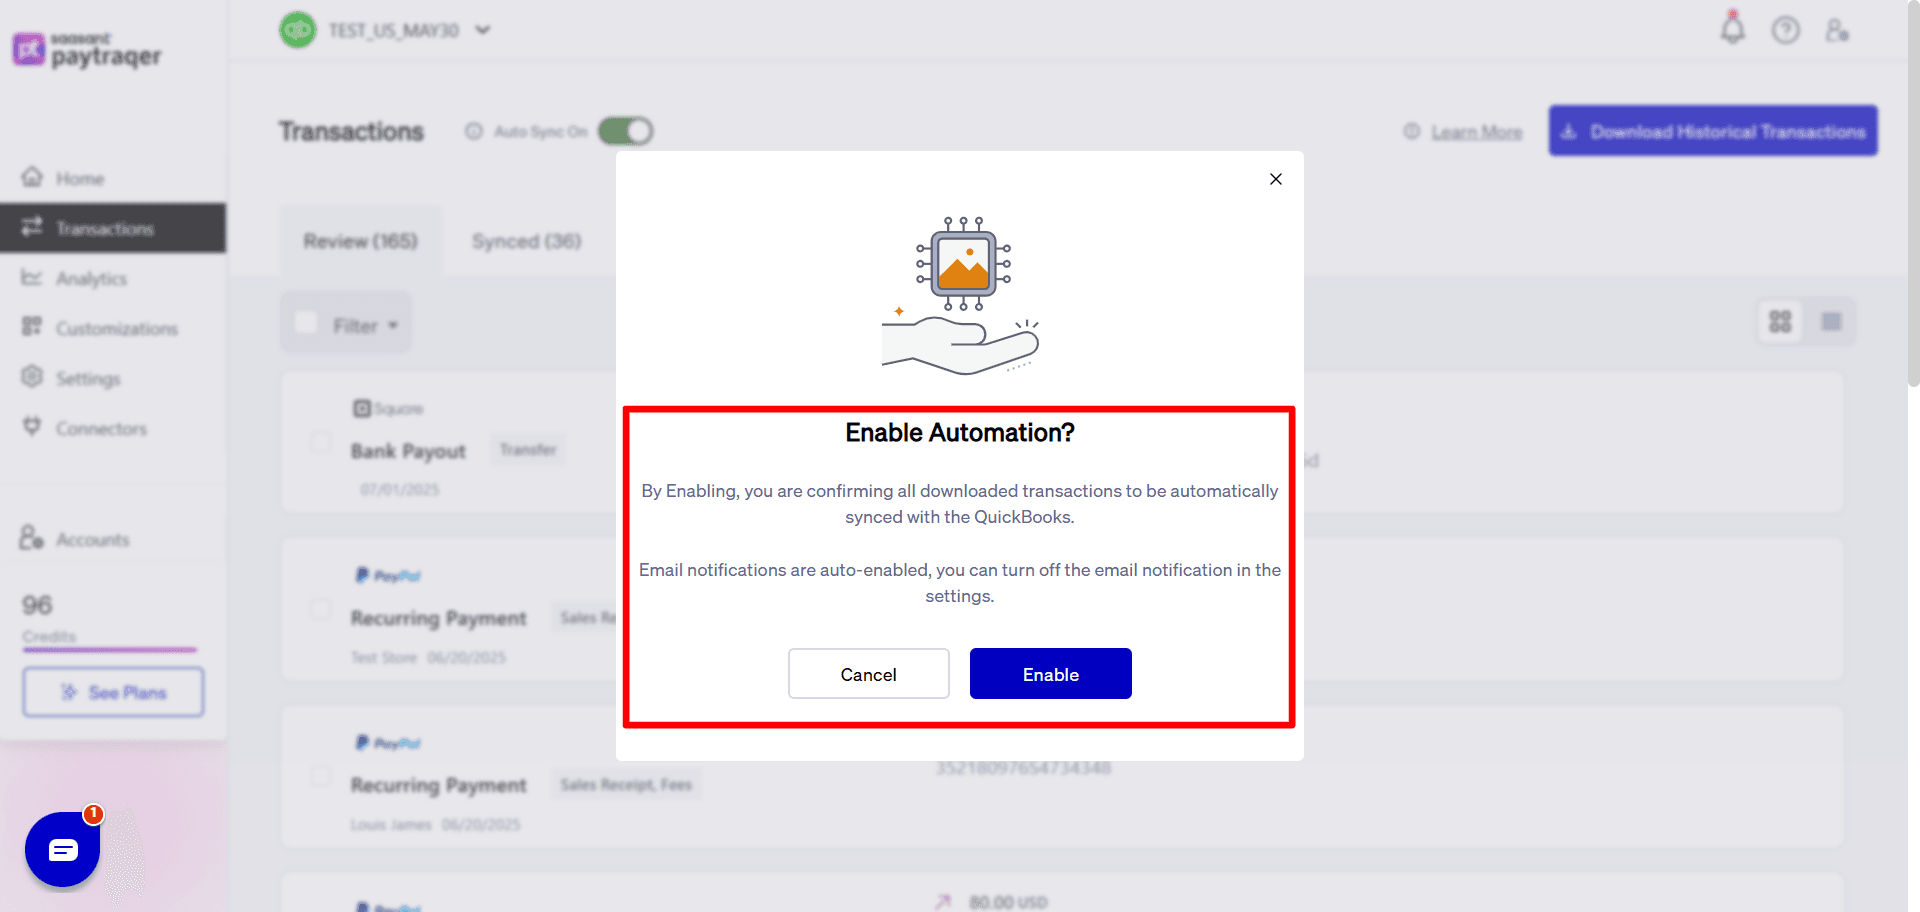
Auto Sync
Turn on Auto Sync to download and post new transactions at the interval you set.
Overview of PayTraQer Settings for Authorize Net
Each section shows what the setting controls, a safe default, when to change it, and a quick check.
Sales settings
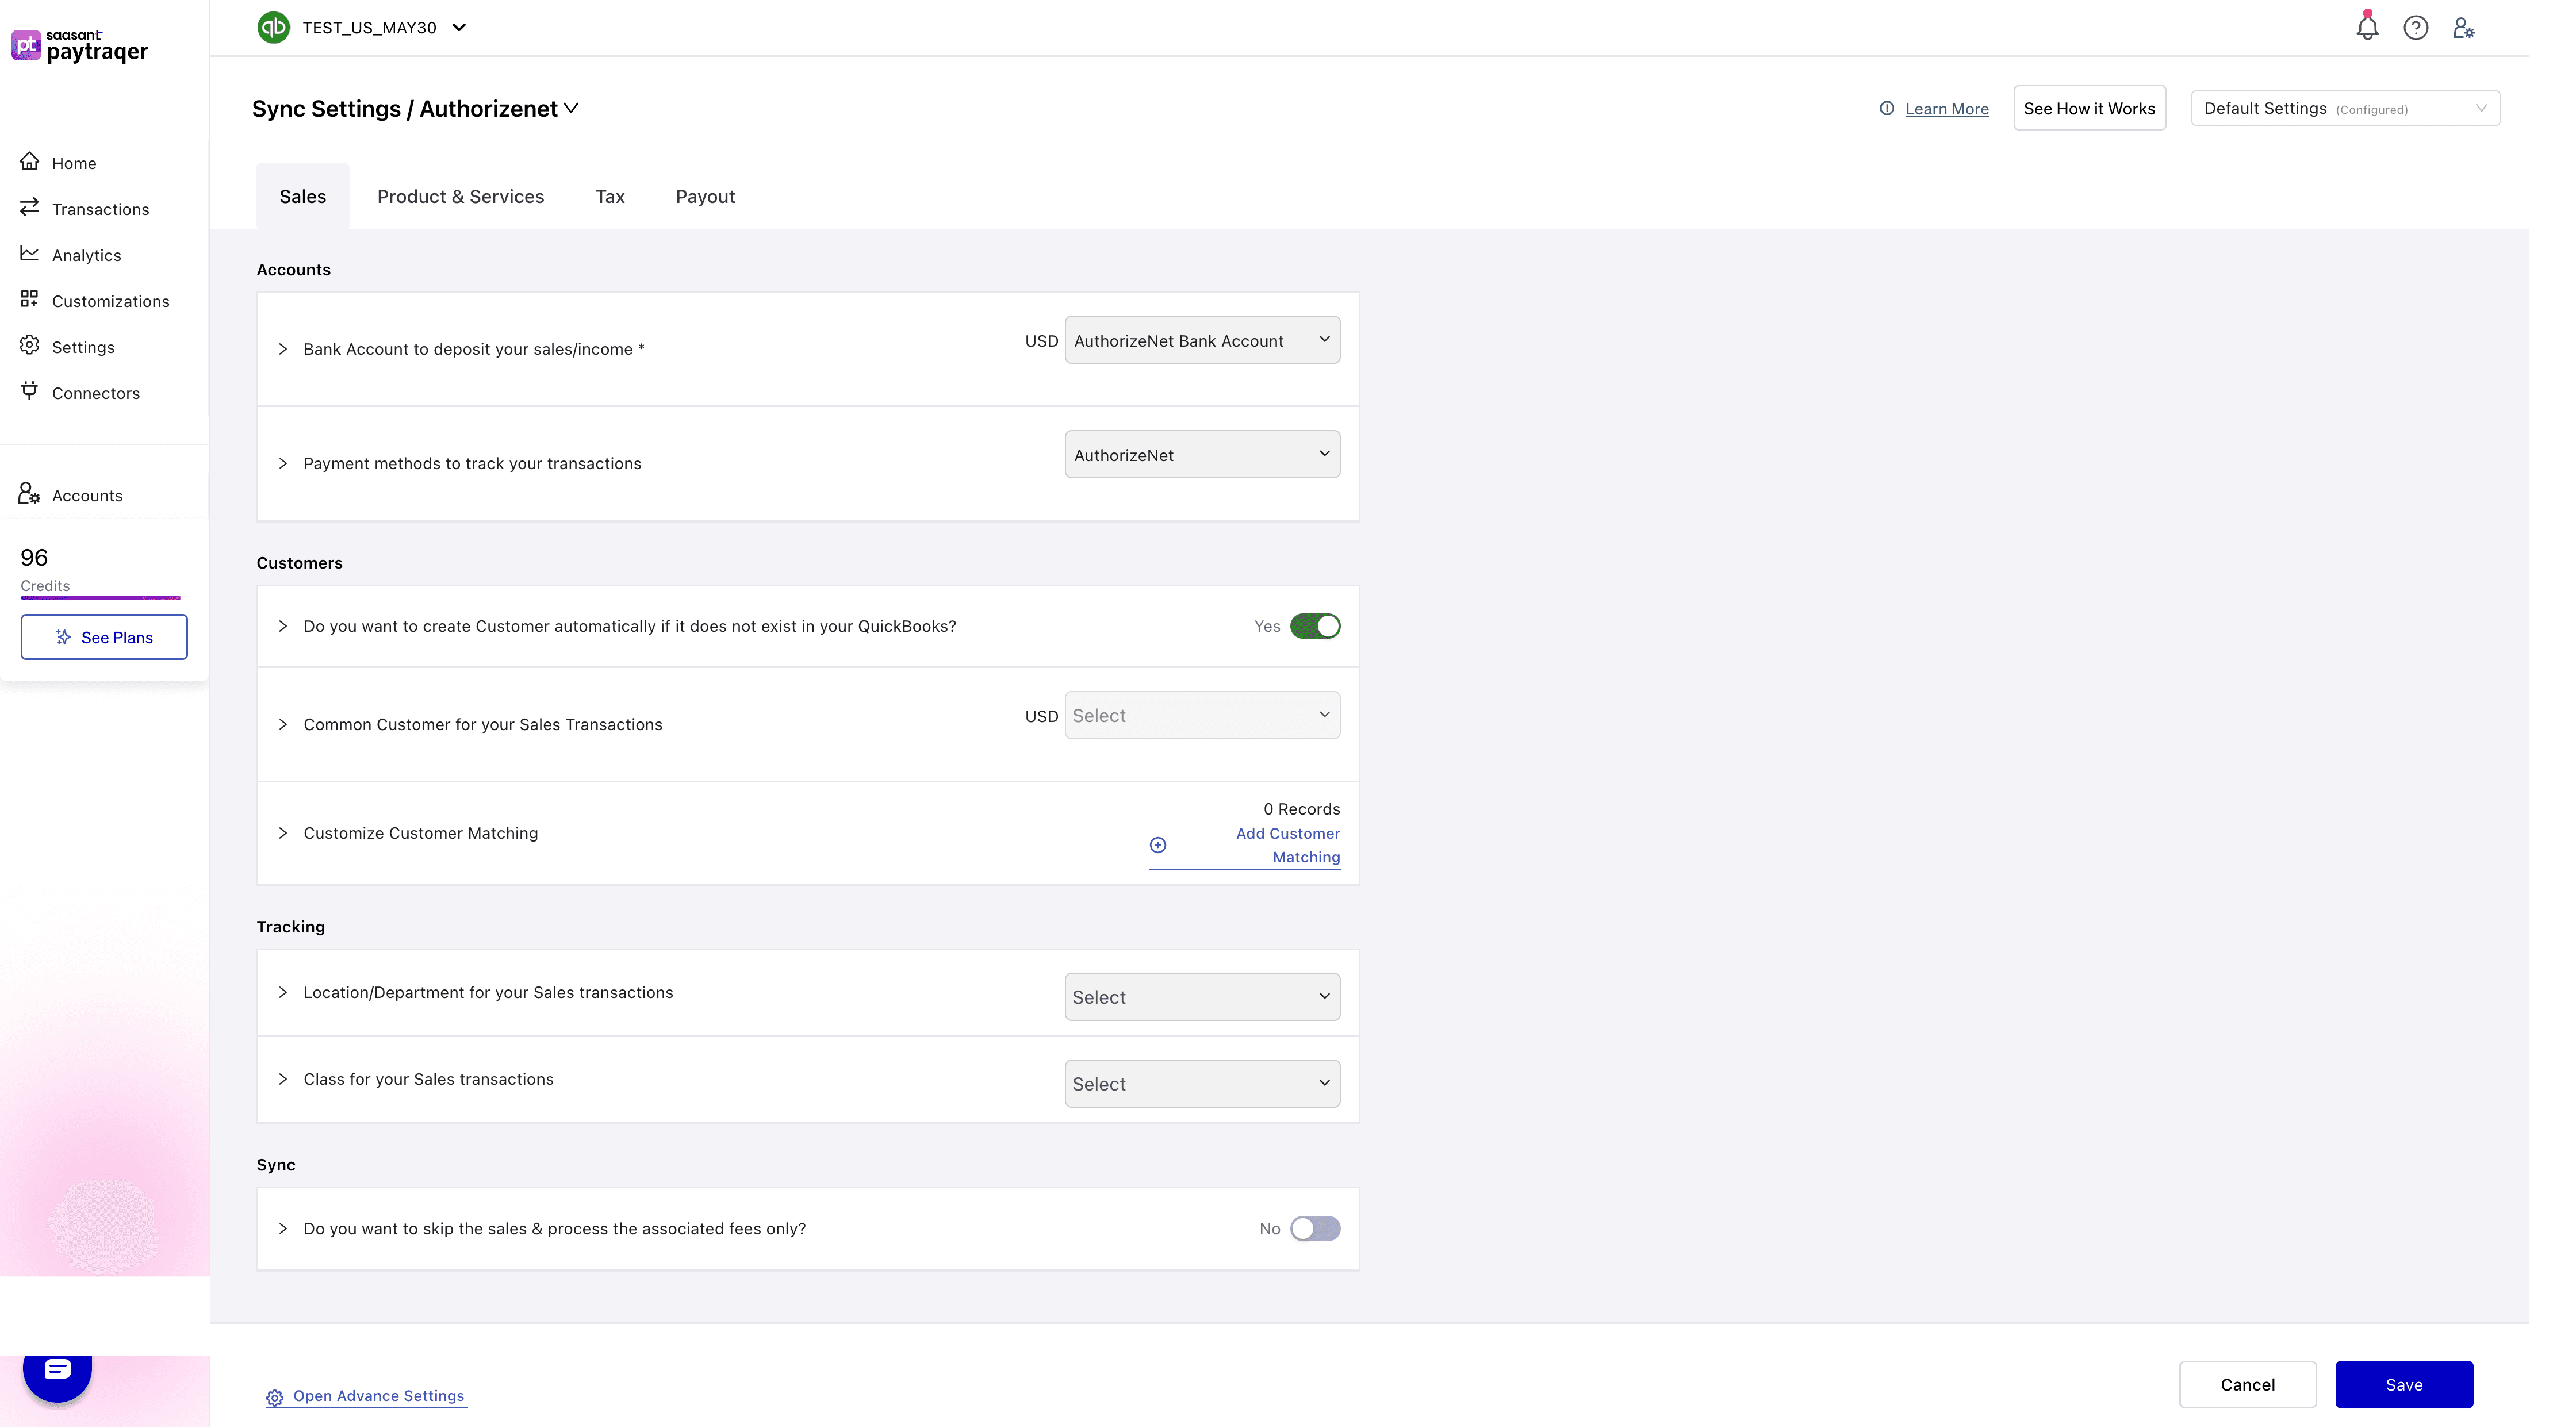
Accounts
Bank Account to deposit your sales/income
Default: Authorize Net Bank Account per currency.
Change when: You keep separate clearing banks by currency or brand.
Check: Sales and refunds land in the same clearing bank.
Payment method
Payment methods to track your transactions
Default: Authorize Net.
Check: Payment Method shows Authorize Net on created sales.
Customers
Do you want to create Customer automatically if it does not exist
Default: Yes.
Check: No import errors for missing customers.
Common Customer for your Sales Transactions
Default: Off.
Use when: You run summaries or do not need per-customer detail.
Customize Customer Matching
Use when: Payer names differ from your QuickBooks customers.
Check: Repeat payers map to a single customer record.
Tracking
Location/Department and Class
Default: Not set.
Use when: You track by location or class.
Check: New sales carry the selected values.
Sync scope
Do you want to skip the sales & process the associated fees only
Default: No.
Use when: Sales are posted by another system and you only want fee expenses.
Products and services
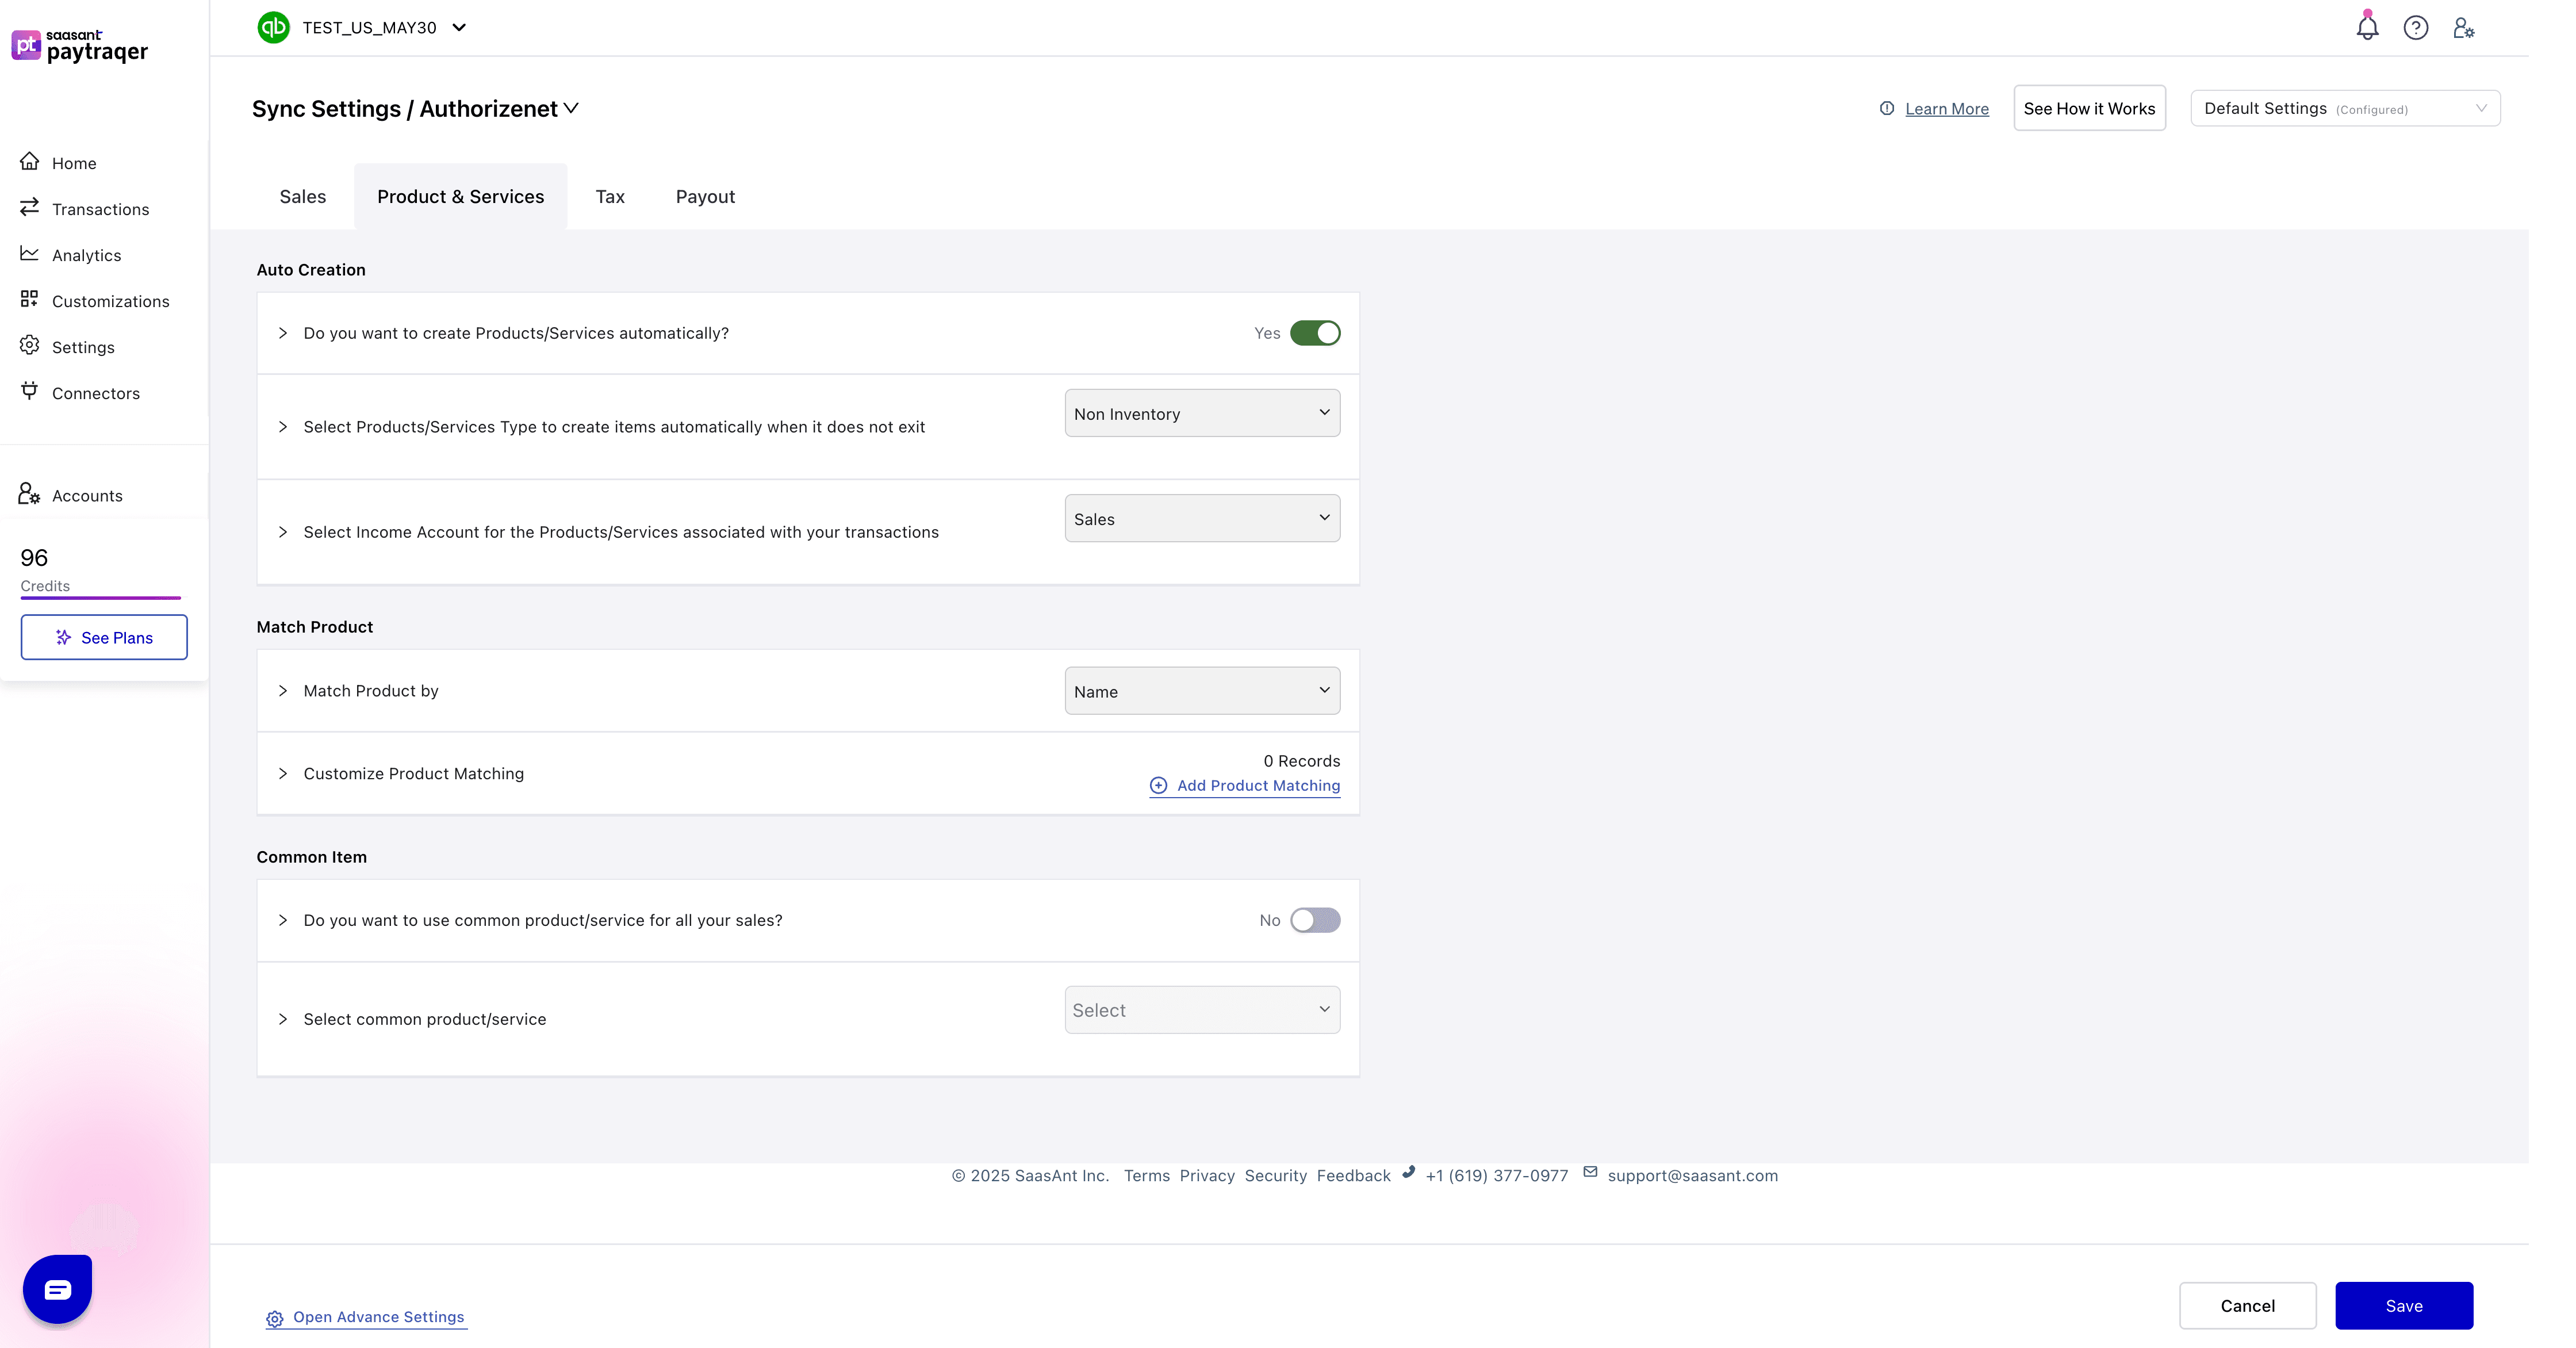
Auto Creation
Do you want to create Products/Services automatically
Default: Yes to avoid missing item errors.
Select Products/Services Type
Default: Non-Inventory or Service.
Select Income Account
Default: Sales.
Check: New items point to the chosen income account.
Match Product
Match Product by
Default: Name. Use SKU if both catalogs use stable SKUs.
Customize Product Matching
Use when: Names differ between your source and QuickBooks.
Check: No duplicate items appear.
Common Item
Do you want to use common product/service for all your sales
Default: No.
Use when: You post summaries or do not need item detail.
Then: Select common product/service to pick the default item.
Tax settings
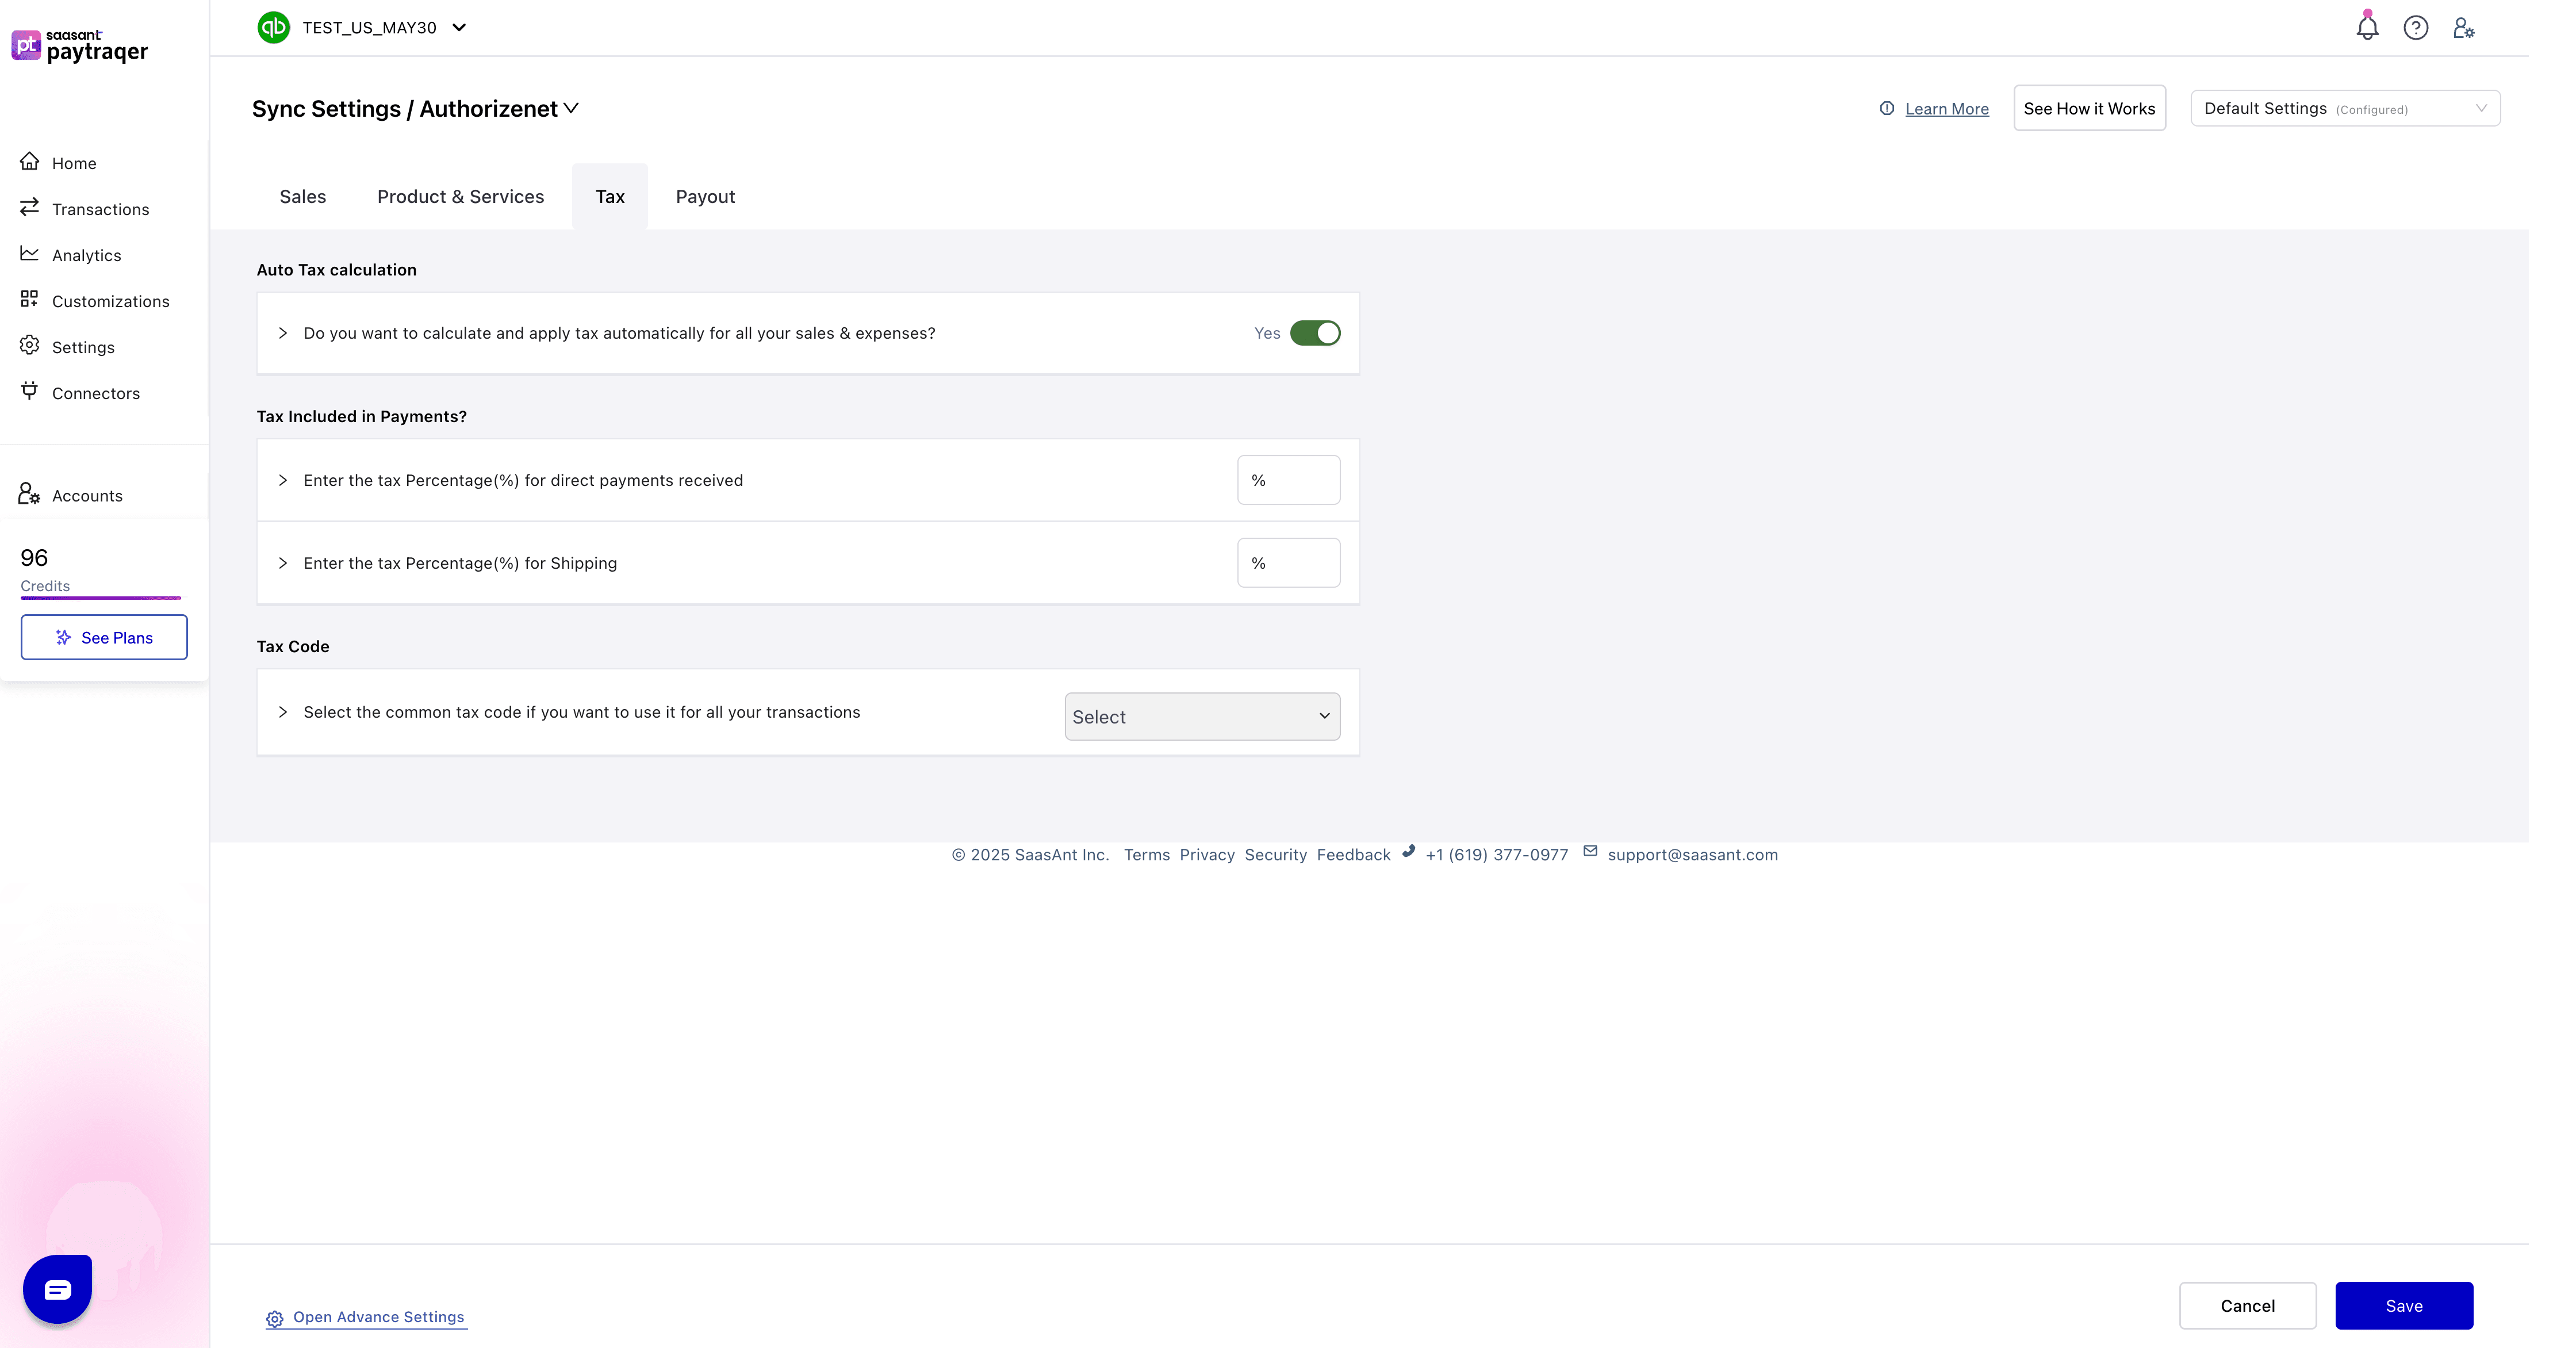
Auto Tax calculation
Default: Yes to detect and apply tax on synced sales and expenses.
Tax included settings
Tax Included in Payments
Enter the Tax Percentage (%) for direct payments if tax is included.
Shipping tax percentage
Enter the Tax Percentage (%) for shipping amounts if shipping is taxable.
Default Tax Code
Tax Code
Choose a common tax code to apply to all transactions.
This overrides automatic detection.
Check: Open a synced sale and confirm the tax code and amount.
Payouts and settlements
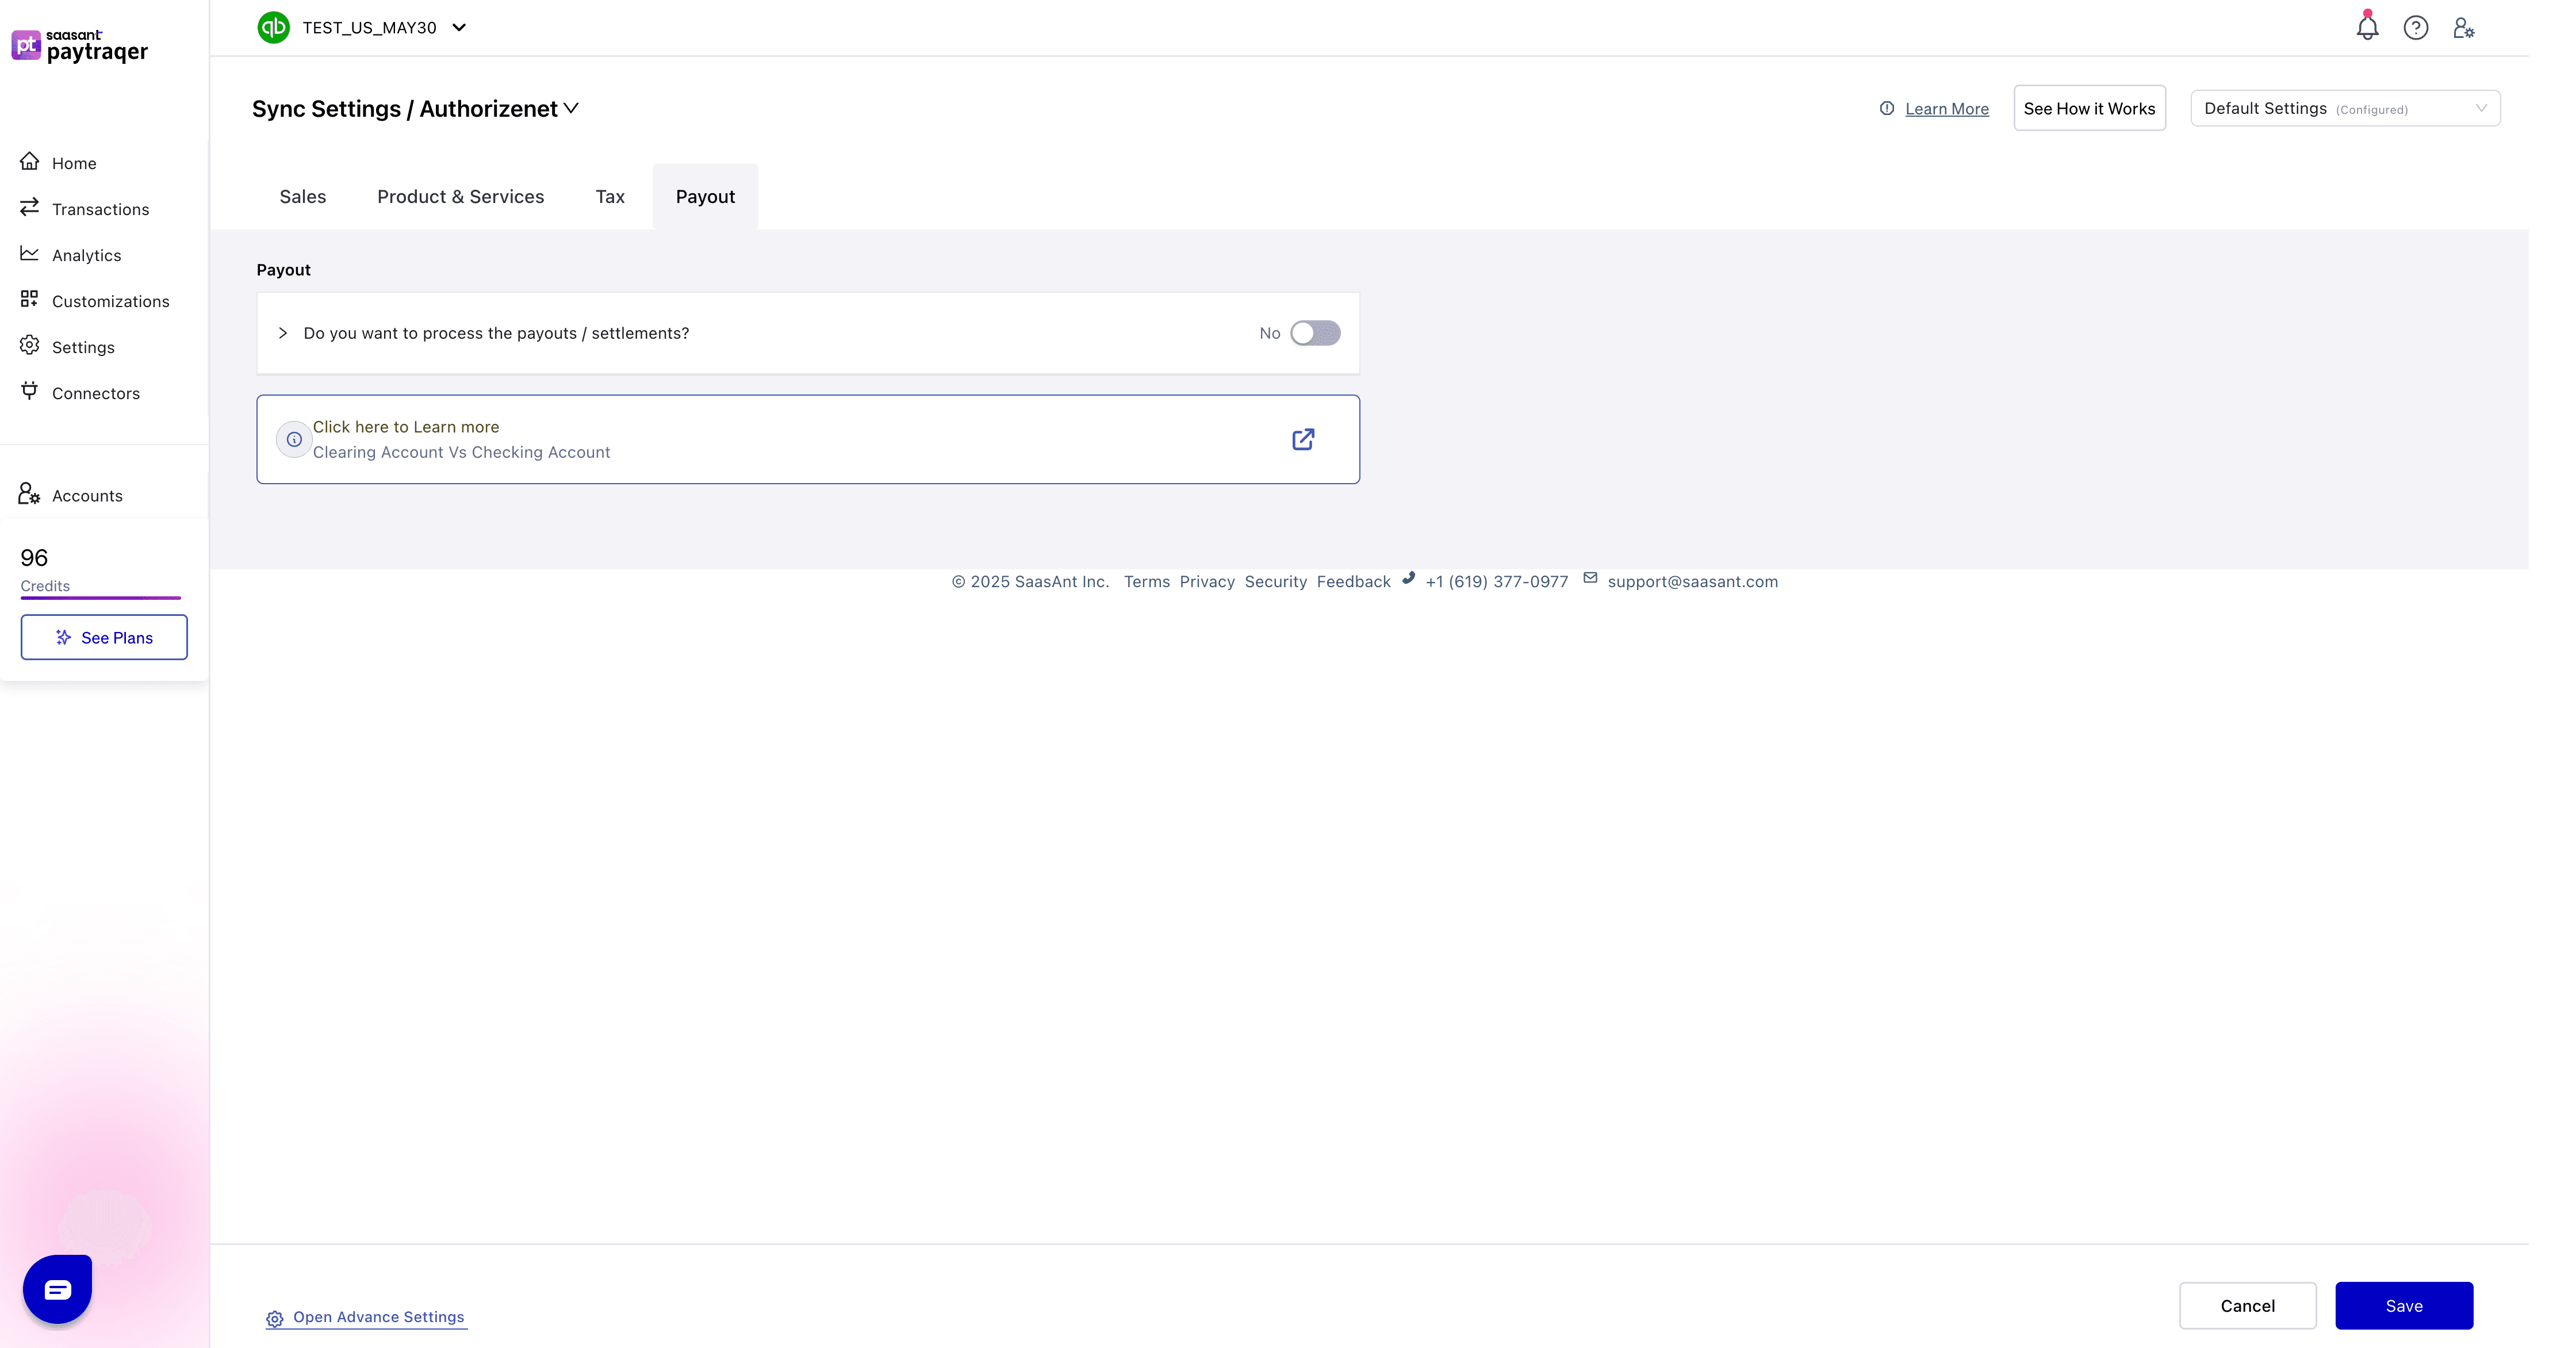
Do you want to process the payouts/settlements
Default: No. Turn On to create Bank Transfer transactions from the Authorize Net clearing bank to your real checking account.
Check: Transfers match deposits in your bank feed when enabled.
Clearing account vs checking account
The clearing account holds Authorize.Net sales inside QuickBooks.
The checking account is your real bank that receives the deposit.
When payouts are on, transfers move money from clearing to checking so the clearing account nets to zero.
Verify your first sync
Use a short date range, then check these in QuickBooks:
A sale posts to the Authorize Net Bank Account with the correct form and Payment Method Authorize Net.
Customer names follow your Customer Matching rules or your common customer.
Items exist, map correctly, or were auto-created with the right income account.
One refund posts as a Refund Receipt when you trigger a test refund.
The tax code and amount look right on a sample sale.
If payouts are on, a Bank Transfer moves funds to your checking account and matches your bank feed.
Troubleshooting
Authorization failed
Regenerate the Transaction Key in Authorize.Net and update PayTraQer.No data after connect
Confirm API credentials, connector status, and date filters.Deposits do not match
Turn on payouts and select your real checking account as the settlement account.Clearing account does not zero
Post sales and refunds to the same clearing bank and enable payouts.Wrong item on sales
Change Match Product by to SKU or Name. Add Product Matching. Keep auto-create on.Duplicate customers
Add Customer Matching rules or use a Common Customer for summaries.Tax looks off
Review Auto Tax, Tax Included in Payments, Shipping tax, and Tax Code settings. Test again.Only need fee entries
Turn on Skip the sales and process the associated fees only.
FAQs
Can I sync as a daily summary instead of itemized lines
Yes. Choose Consolidated Sync during setup or change it later in Sync Mode.
Which form should I use for payments
Use Sales Receipts if payment is collected at the time of sale. Use Invoices if you bill first and collect later.
Where do payouts land in QuickBooks
When enabled, PayTraQer creates a Bank Transfer from the Authorize Net clearing bank to your checking account that matches your bank feed.
What if a product does not exist in QuickBooks
Enable auto-create items or map names or SKUs in Product Matching. You can also use a common item for summaries.
Can I post only fees and skip sales
Yes. Turn on “Skip the sales and process the associated fees only” in Sales settings.
Can I switch from itemized to consolidated later
Yes. Change Sync Mode in settings. Test with a short range before turning Auto Sync back on.
Security and permissions
From Authorize.Net: PayTraQer uses API credentials you supply to read payments, refunds, and related data.
In QuickBooks Online: With your approval, PayTraQer creates or updates sales, payments, refunds, expenses, and transfers.
Known limits and notes
PayTraQer auto downloads the last 60 days after first connect. Use date filters to pull other ranges.
For multi-currency, set a clearing bank per currency.
If SKUs differ, match by Name or add Product Matching rules.