How to import IIF files into QuickBooks Desktop - SaasAnt Transactions
January 1, 2025
Intuit Interchange Format (.IIF) files are ASCII text, TSV (Tab-Separated Value) files that QuickBooks Desktop uses to import or export lists or transactions. These files make it easier to transfer data to and from different platforms to better manage company records in QuickBooks.
Importing and exporting.IIF files in QuickBooks Desktop is easy because SaasAnt Transactions (Desktop) formats the file for you. However, creating .iif files from scratch or adapting data from another program is technically complex and may be difficult if you don't have experience formatting delimited text files. This makes it faster and easier to enter the information directly into QuickBooks Desktop.
Please follow the below instructions in SaasAnt Transactions (Desktop) to import .iif files into QuickBooks Desktop,
Steps to Import IIF File data into QuickBooks Desktop.
Step 1: Download and install SaasAnt Transactions from here.
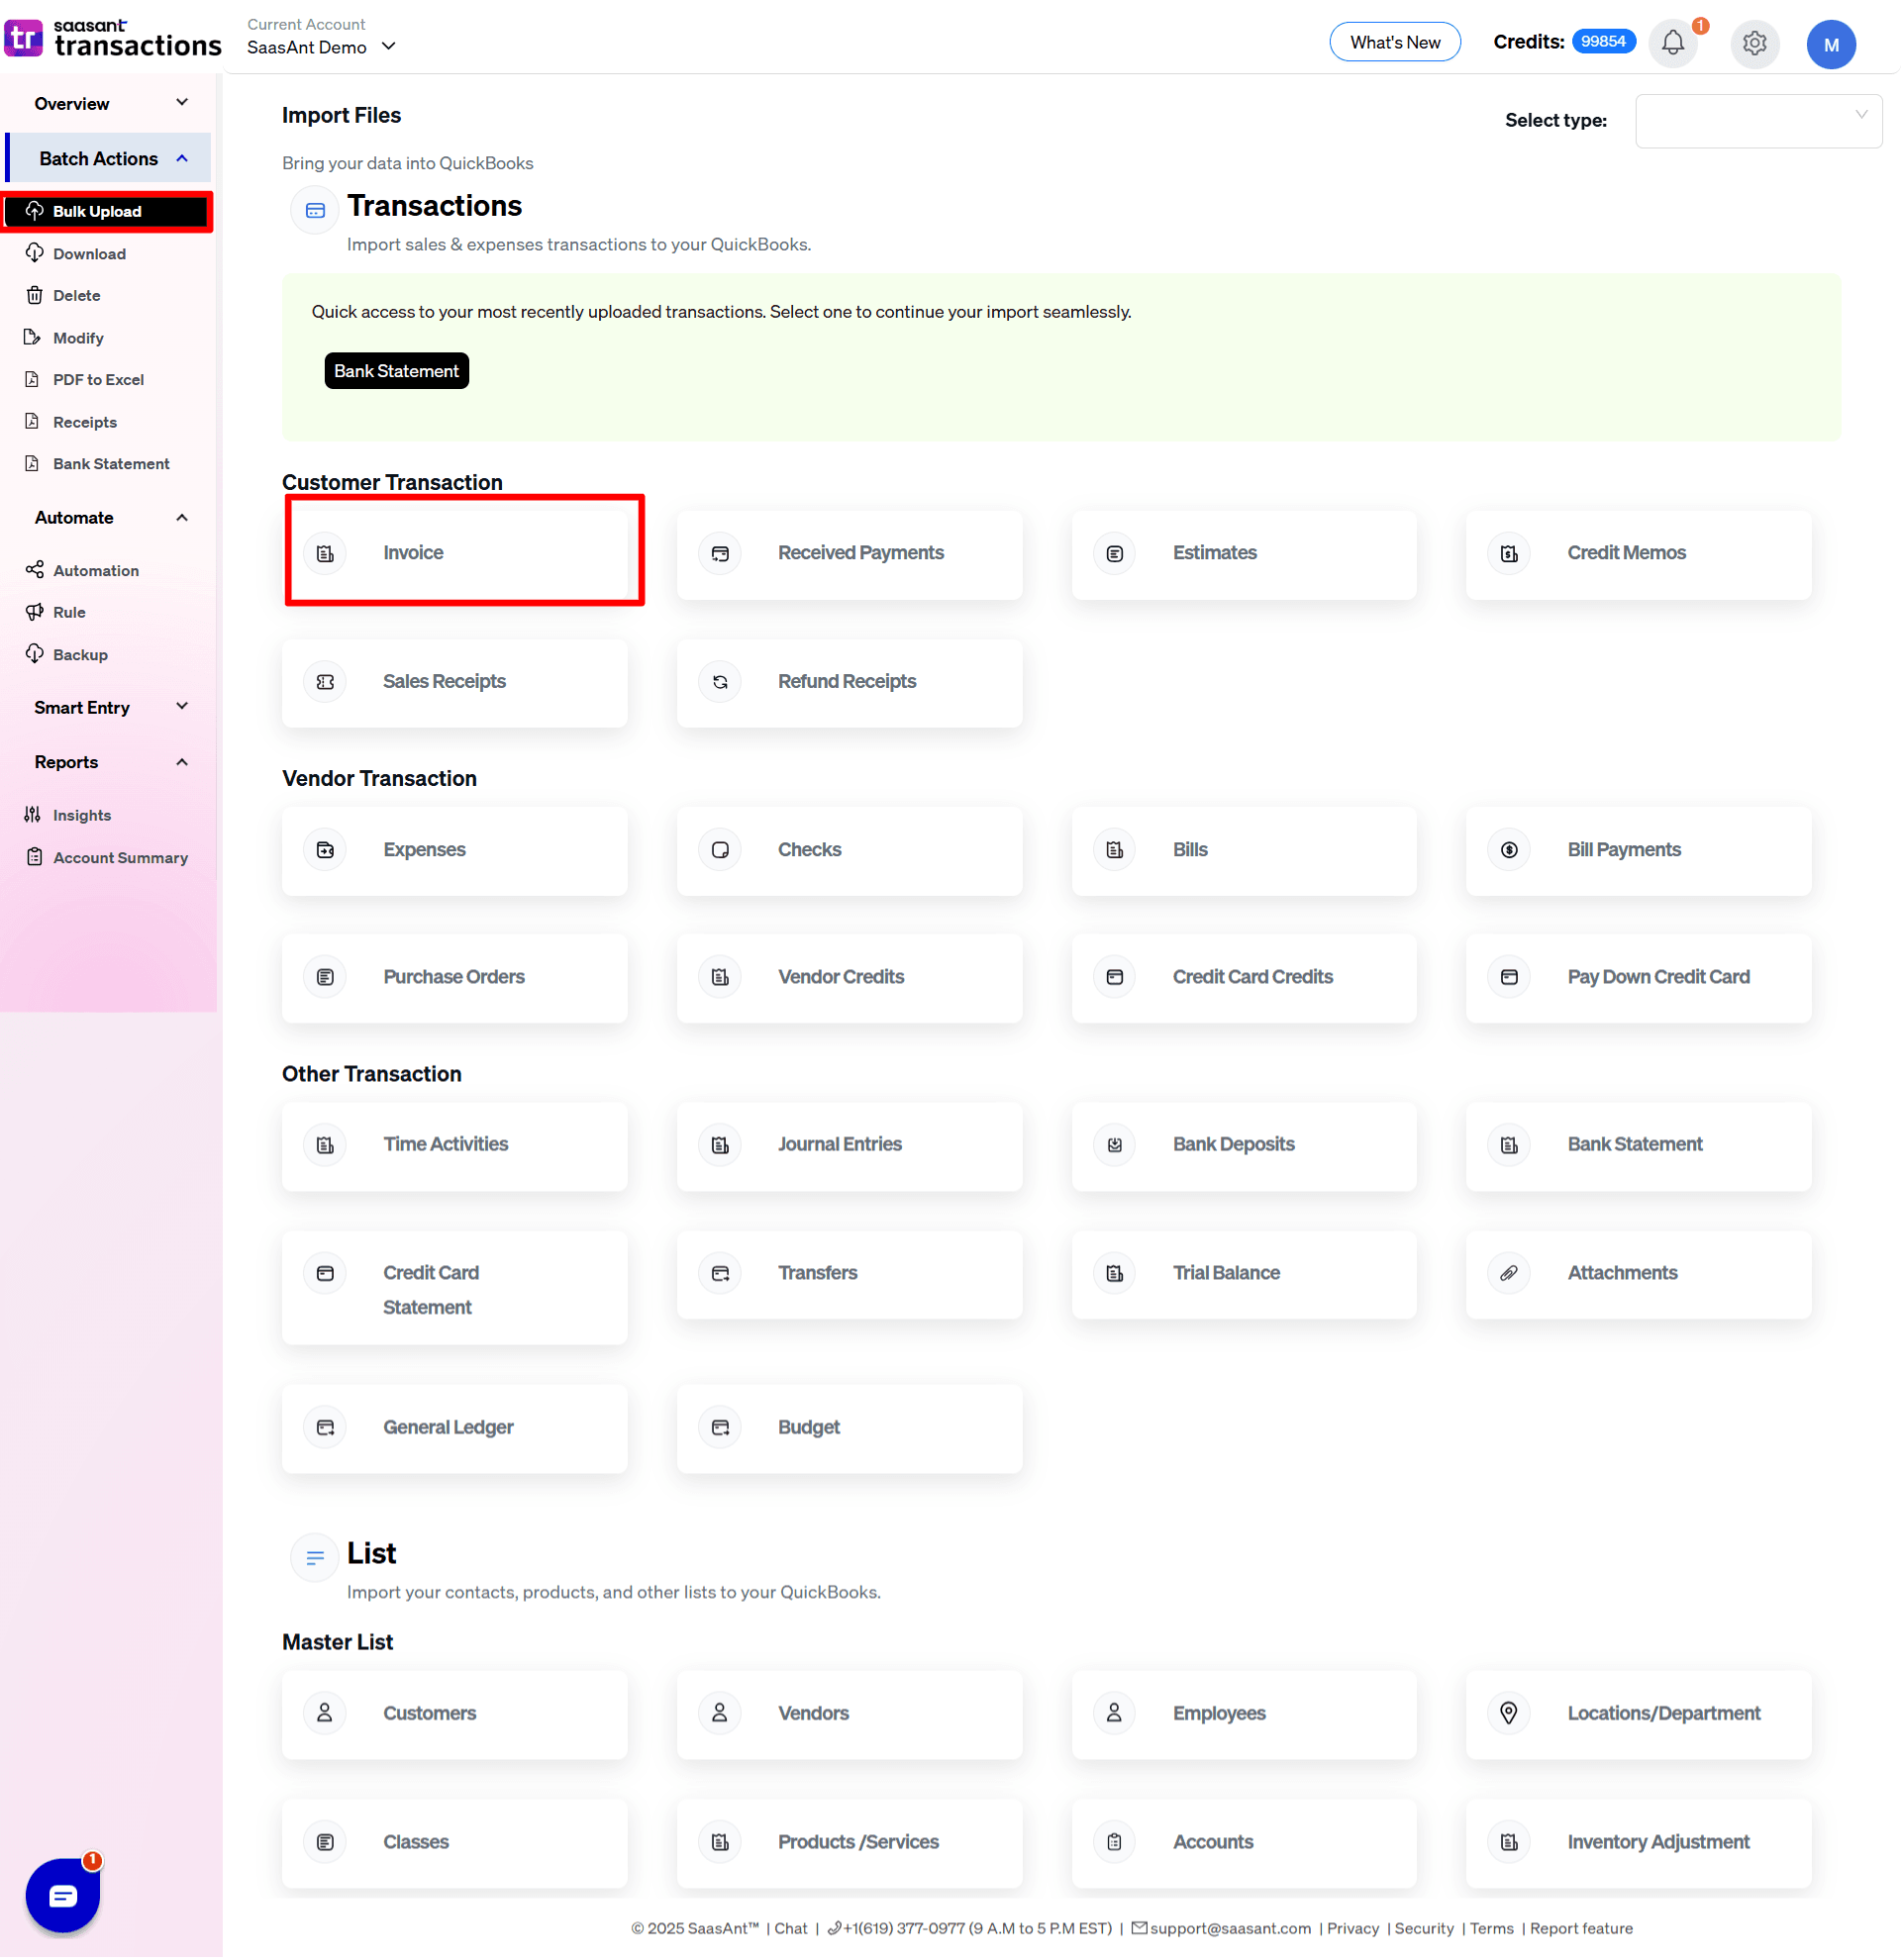
Step 2: Please select the Bulk Import Tab in the SaasAnt Transactions (Desktop) Application.
By selecting New Import App will allow making new transactions import into QuickBooks Desktop, on the next screen select the Entity/List which is the type of transaction like Invoice or Journal Entry and select the template from the drop-down menu.
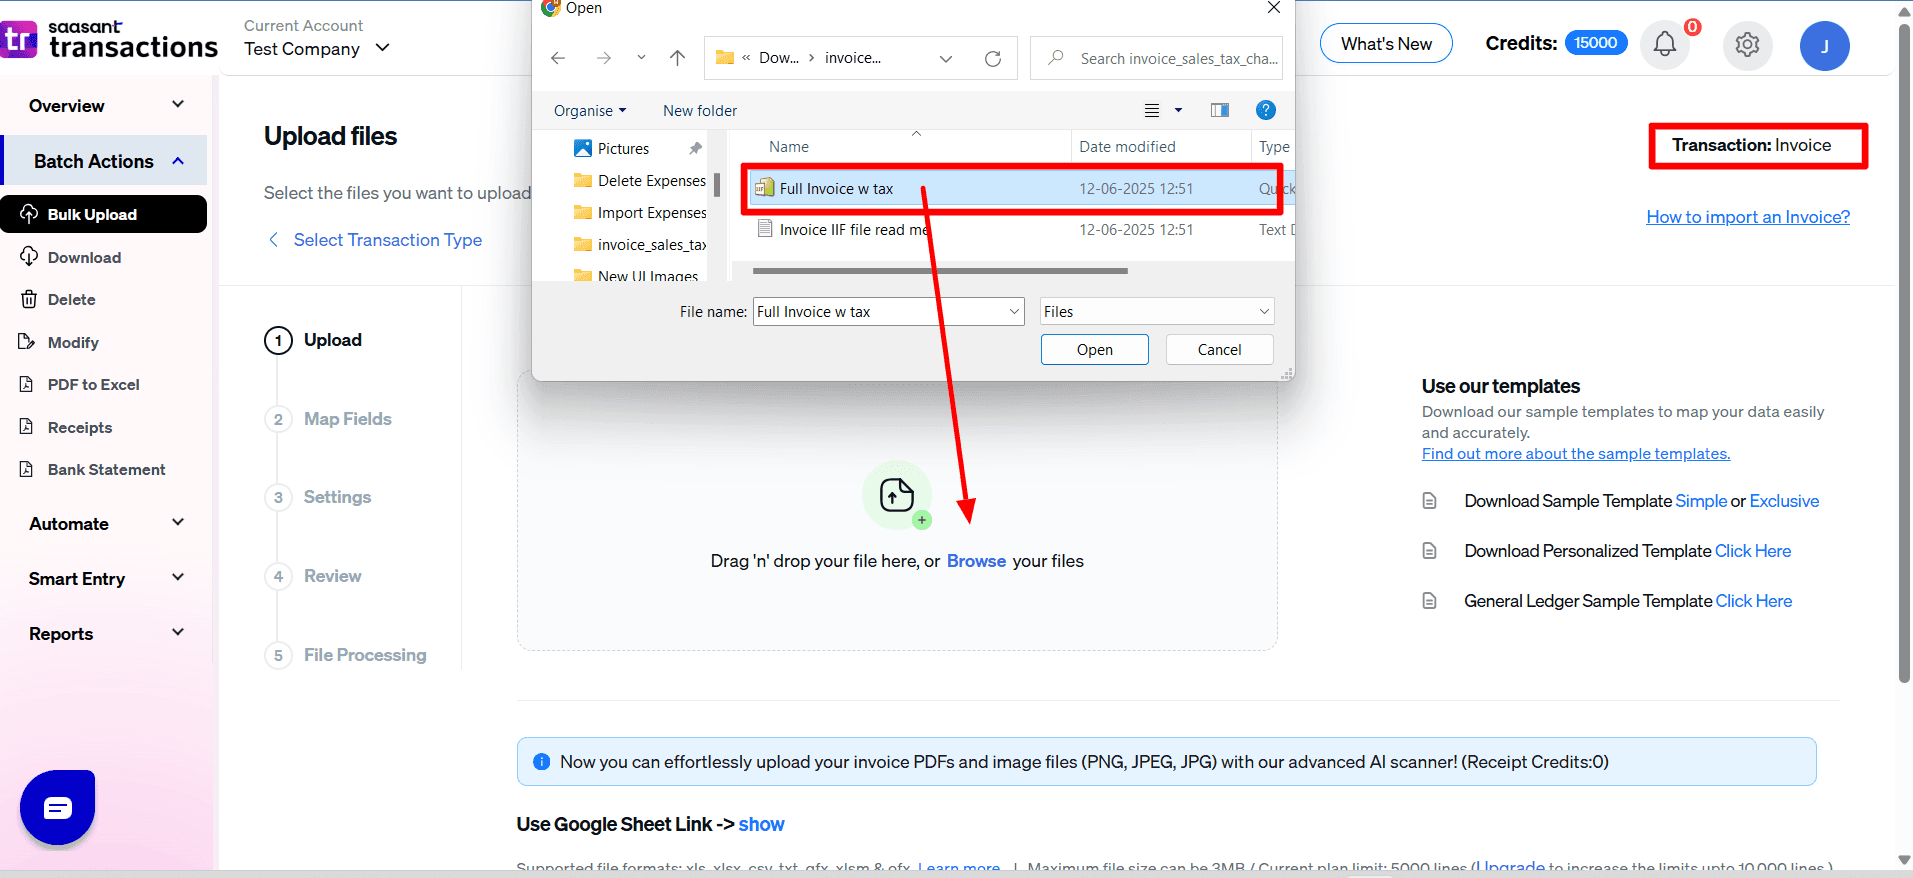
Step 3: Selecting the file for Import.
Choose your .iif file by clicking on browse file you can select the file from your computer location (Saved location) select your .iif file and click on Next.
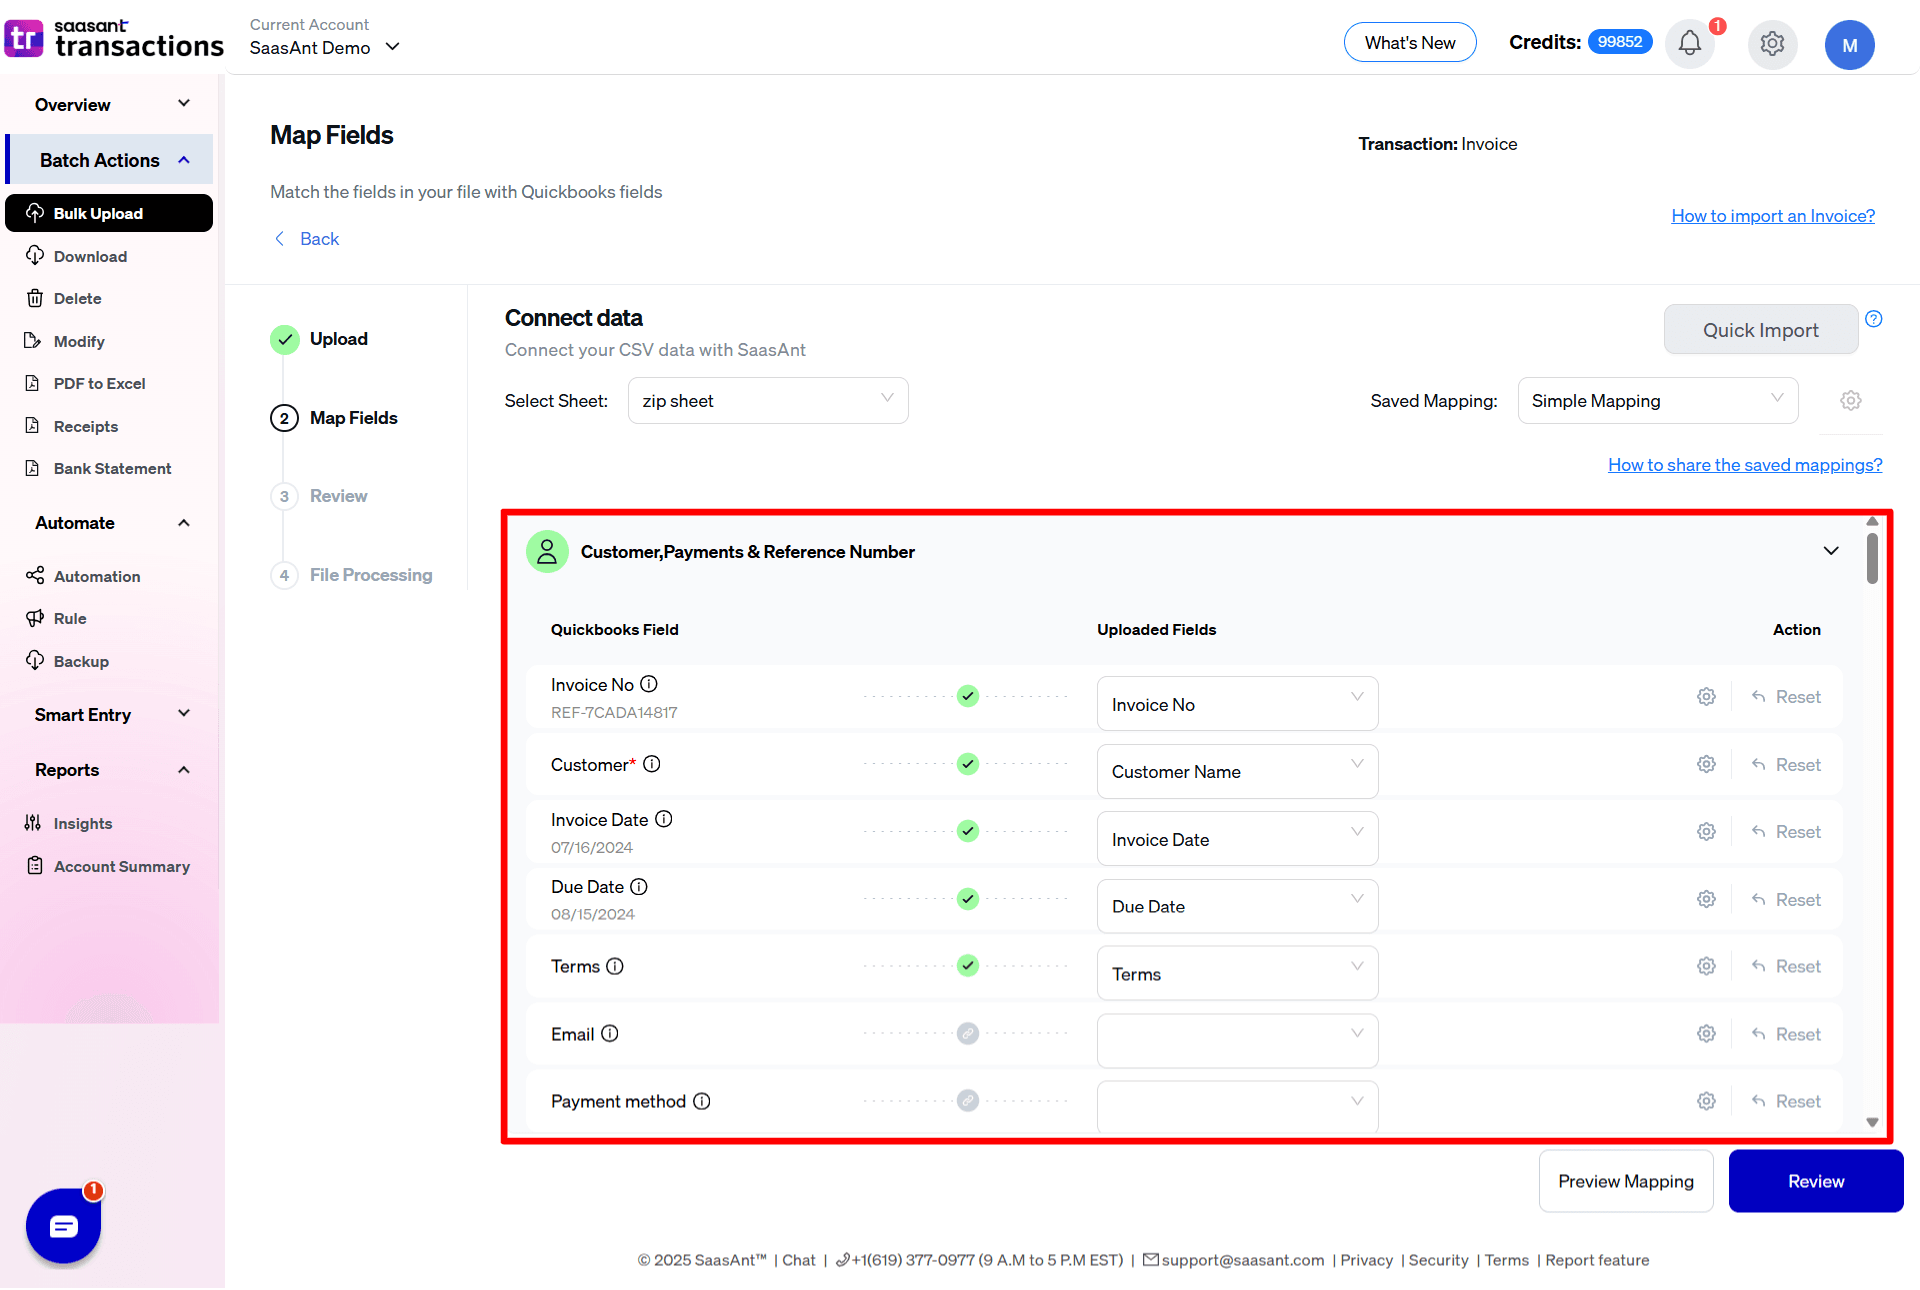
Step 4: Mapping Screen
On the Mapping Screen make sure to select appropriate file headers according to QuickBooks fields, Once the Mapping is set for the first time you can save that Mapping by clicking on Add/Save Mapping and can also name the Mapping for future import purpose and the same Mapping can be used for next Import if using the same kind of file again and click Next.
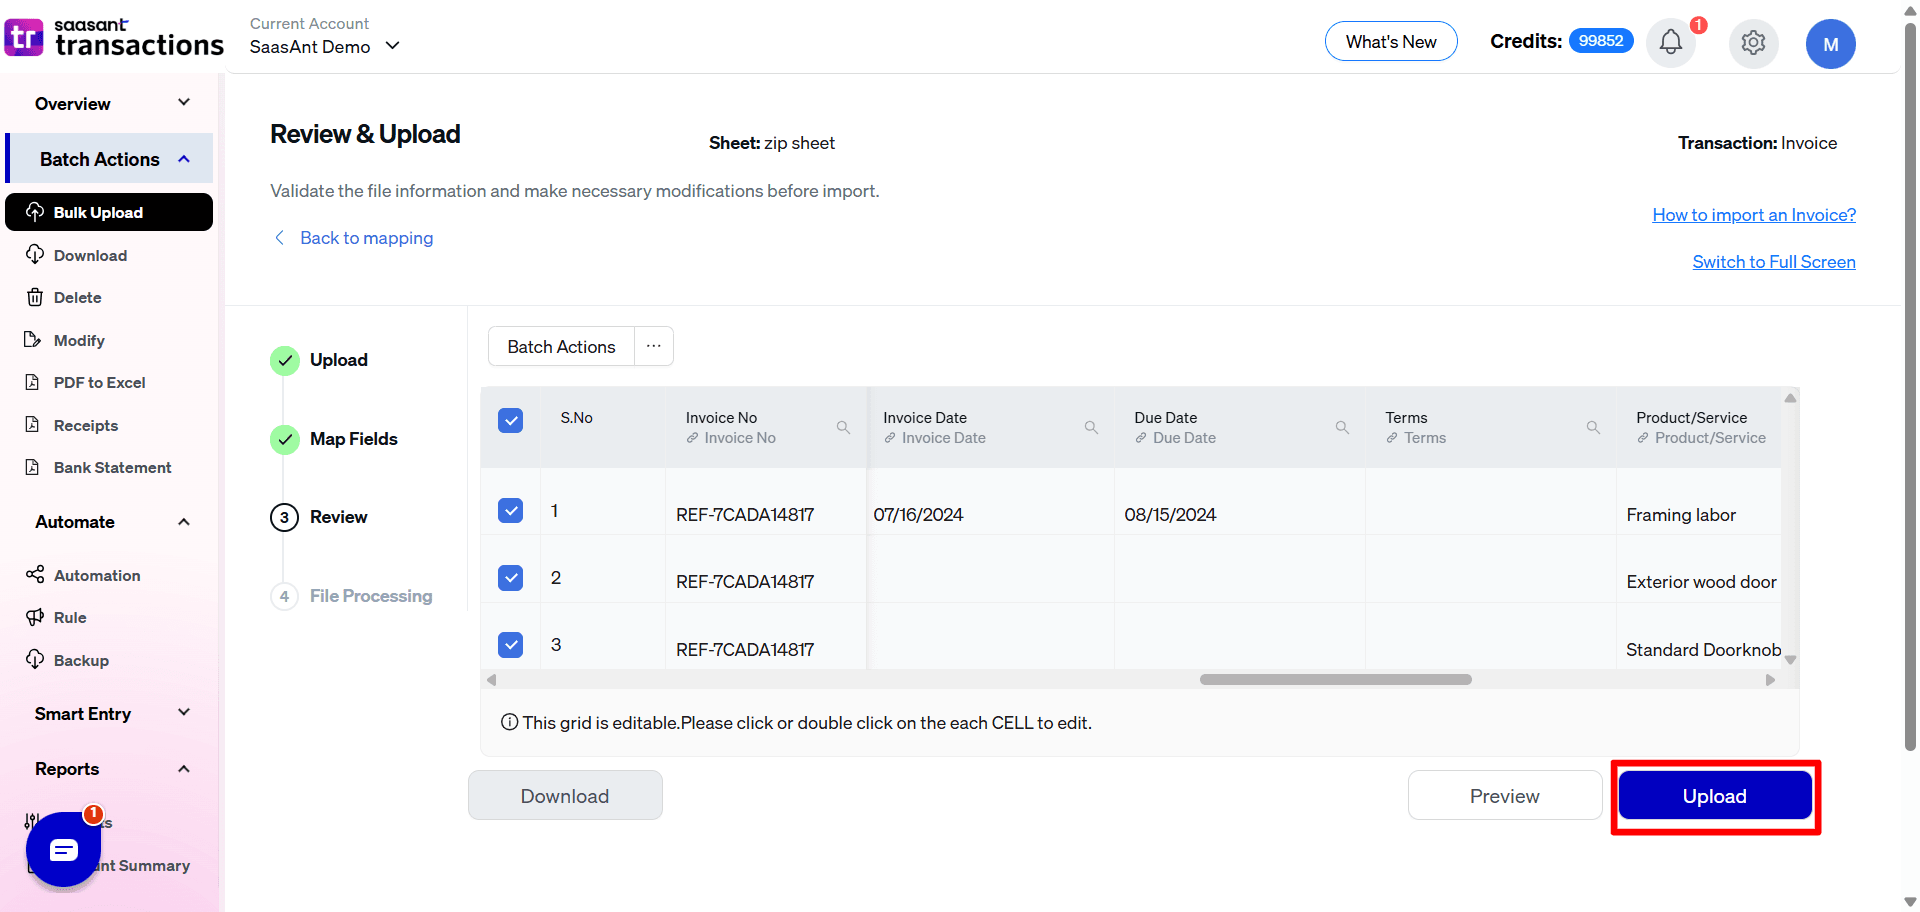
Step 5: Review Screen
From the Review screen, you can preview the Import to check if all the Data given in the file is displayed appropriately, if found any corrections this can be edited as the grid is editable instead of changing the file, and also by clicking on Import Settings it will give you the option to change settings in SaasAnt Transactions (Desktop) App after Review is completed click on Send to QuickBooks to complete the Import.
FAQs
What file types does SaasAnt Transactions Desktop support for importing into QuickBooks Desktop?
SaasAnt Transactions Desktop supports XLS, XLSX, XLSM, CSV, TXT, and IIF.