PayTraQer - Expenses Settings Configuration for QuickBooks Online
November 17, 2025
PayTraQer - Expenses Settings
Use the Expense settings to control how PayTraQer syncs money out transactions from your payment systems and e-commerce channels into QuickBooks Online as Expense transactions.
These settings are common across all payment channels.
Screenshots usually show PayPal, but the same options apply for Stripe, Square, Braintree, Shopify, WooCommerce, and other supported connectors.
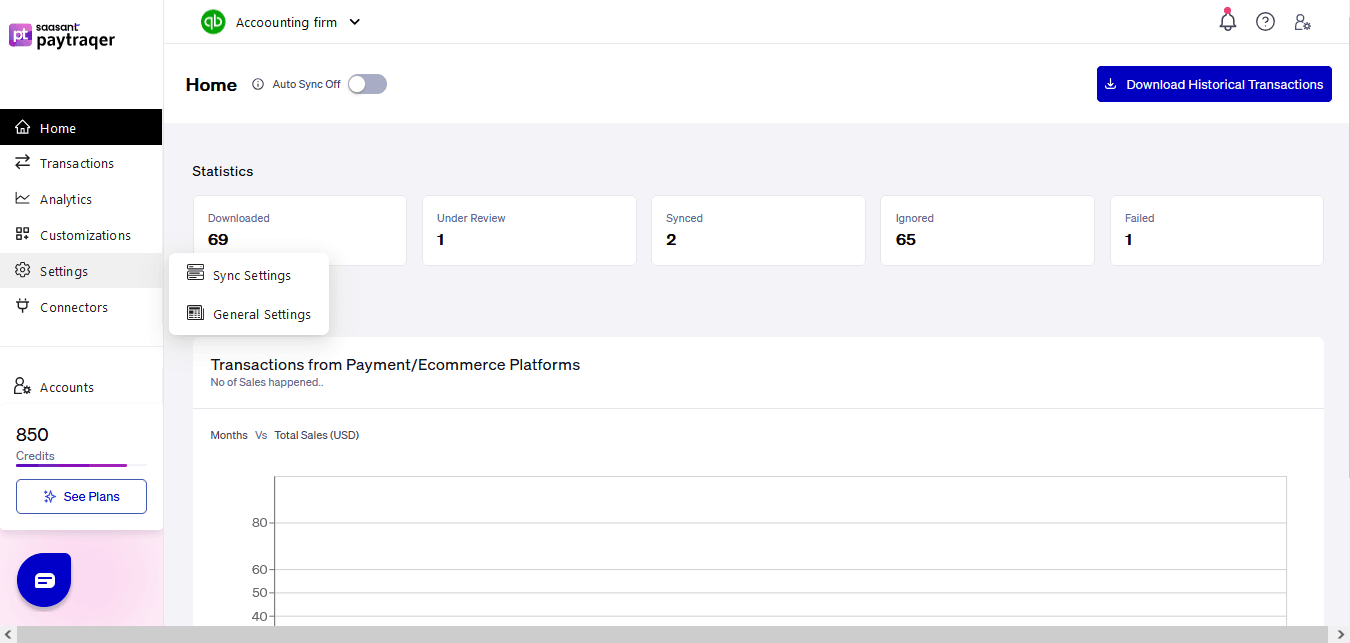
How to open Expense settings
Sign in to PayTraQer.
Click the Settings in the left sidebar.
Go to Sync settings.
Choose your connector (for example PayPal, Stripe, Square, Braintree, Shopify).
Open the Expense tab.
What PayTraQer treats as “Expenses”
PayTraQer syncs money out transactions made through your payment systems and records them as Expense transactions in QuickBooks Online.
Typical use cases:
Vendor payments made from PayPal, Stripe, or other gateways
Subscription charges or platform service fees that are not recorded under the Fees tab
Other standalone outgoing payments from your connected accounts
Processor fees that are attached to each sale are usually handled in the Fees tab.
The Expense tab is for other vendor or platform charges that should post as separate Expense entries.
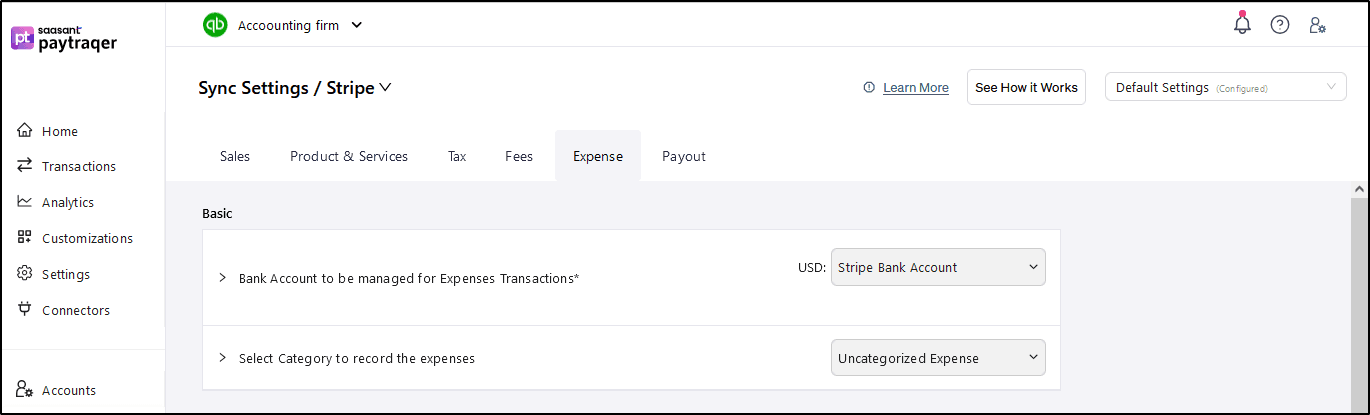
Expense settings fields
1. Bank Account
Field: Bank Account to be managed for Expense transactions
Select the bank account that should be used for these expenses in QuickBooks Online.
This is usually the same clearing bank account you use in Sales and Fees settings for that connector.
For example: PayPal Bank Account, Stripe Bank Account, Braintree Bank Account.
Recommendation:
Use the same bank account you selected in Sales Settings so that all money in and money out for that connector flows through one clearing account.
2. Category Account
Field: Select Category to record the expenses
Choose the expense category account that should be used for these transactions.
Examples:
Uncategorized Expense (for initial setup or testing)
Platform Fees
Subscriptions
Merchant Service Charges
This account will appear as the Category on the Expense in QuickBooks Online.
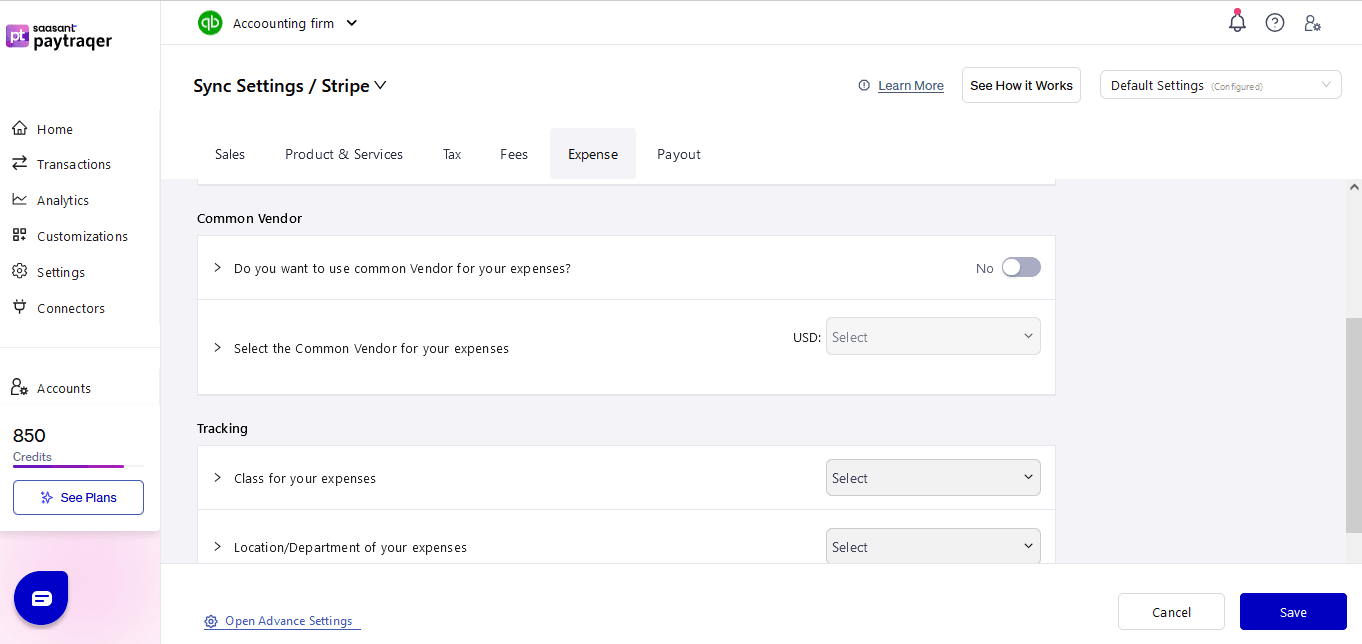
3. Enable Common Vendor
Field: Do you want to use common Vendor for your expenses
Turn this on when you want all expenses synced from this connector to use a single vendor.
Use this if:
You do not want every payee from the payment system to become a separate Vendor in QuickBooks.
You prefer to group all such expenses under one vendor name.
If this is off, PayTraQer will either:
Use the payee name from the payment system, or
Require that vendors already exist in QuickBooks and match those names.
4. Common Payee/Vendor
Field: Select the Common Vendor for your expenses
When Enable Common Vendor is turned on, select the vendor that should be used on all Expense transactions from this connector.
Recommendation:
Use clear vendor names such as:
“PayPal”
“Stripe”
“Square”
“Braintree”
This keeps your expense reports easy to read and fi
5. Class
Field: Class for your expenses
If you track Class in QuickBooks:
Choose a class to apply to all Expense transactions synced from this connector.
All expenses from this payment channel will carry that class.
If you do not use the Class feature in QuickBooks, you can leave this blank.
Location / Department (if available)
Field: Location/Department of your expenses
In some QuickBooks regions you can also assign a Location or Department:
Set a fixed location for all expenses from this connector.
Useful when you track expenses by store, branch, or cost center.
If you do not use Location or Department tracking, leave this blank.
6. The Inclusive Tax for Expenses
Field: The Inclusive Tax for Expenses / Tax Code
This setting is used when your expense amounts include tax and you want PayTraQer to apply the correct tax code automatically.
Choose the Tax Code that should be used for these expenses.
PayTraQer will mark the tax as inclusive and apply this code when creating Expense transactions.
Important
This option is only available for Global QuickBooks Online versions where tax codes are enabled.
It does not change your tax setup in QuickBooks, it only controls how tax is applied on the Expense transactions PayTraQer creates.
Related Articles - PayTraQer Settings:
Sales Settings: Configure Sales related fields like a bank account, customer, etc.
Products Settings: Create/sync the products/services automatically without any manual effort in QuickBooks Online.
Tax Settings: Record tax information from Payment transactions (Paypal, Stripe & Square) accurately into QuickBooks Online.
Fees Settings: Record fee information from Payment transactions into QuickBooks Online.
Payout Settings: Never miss the consolidated payouts/deposits from Payment Systems (Paypal, Stripe & Square).
Automation Settings: Automate and fine-tune the sync processes in PayTraQer.