PayTraQer Transactions Dashboard - Introduction
November 13, 2025
Introduction
The PayTraQer Transactions Dashboard gives you a clear view of all your synced, pending, and ignored transactions. It acts as the hub where you can review downloaded data, manage errors, and confirm successful syncs with QuickBooks. Understanding the dashboard ensures that every transaction is tracked, accurate, and up to date.
PayTraQer Transactions Dashboard
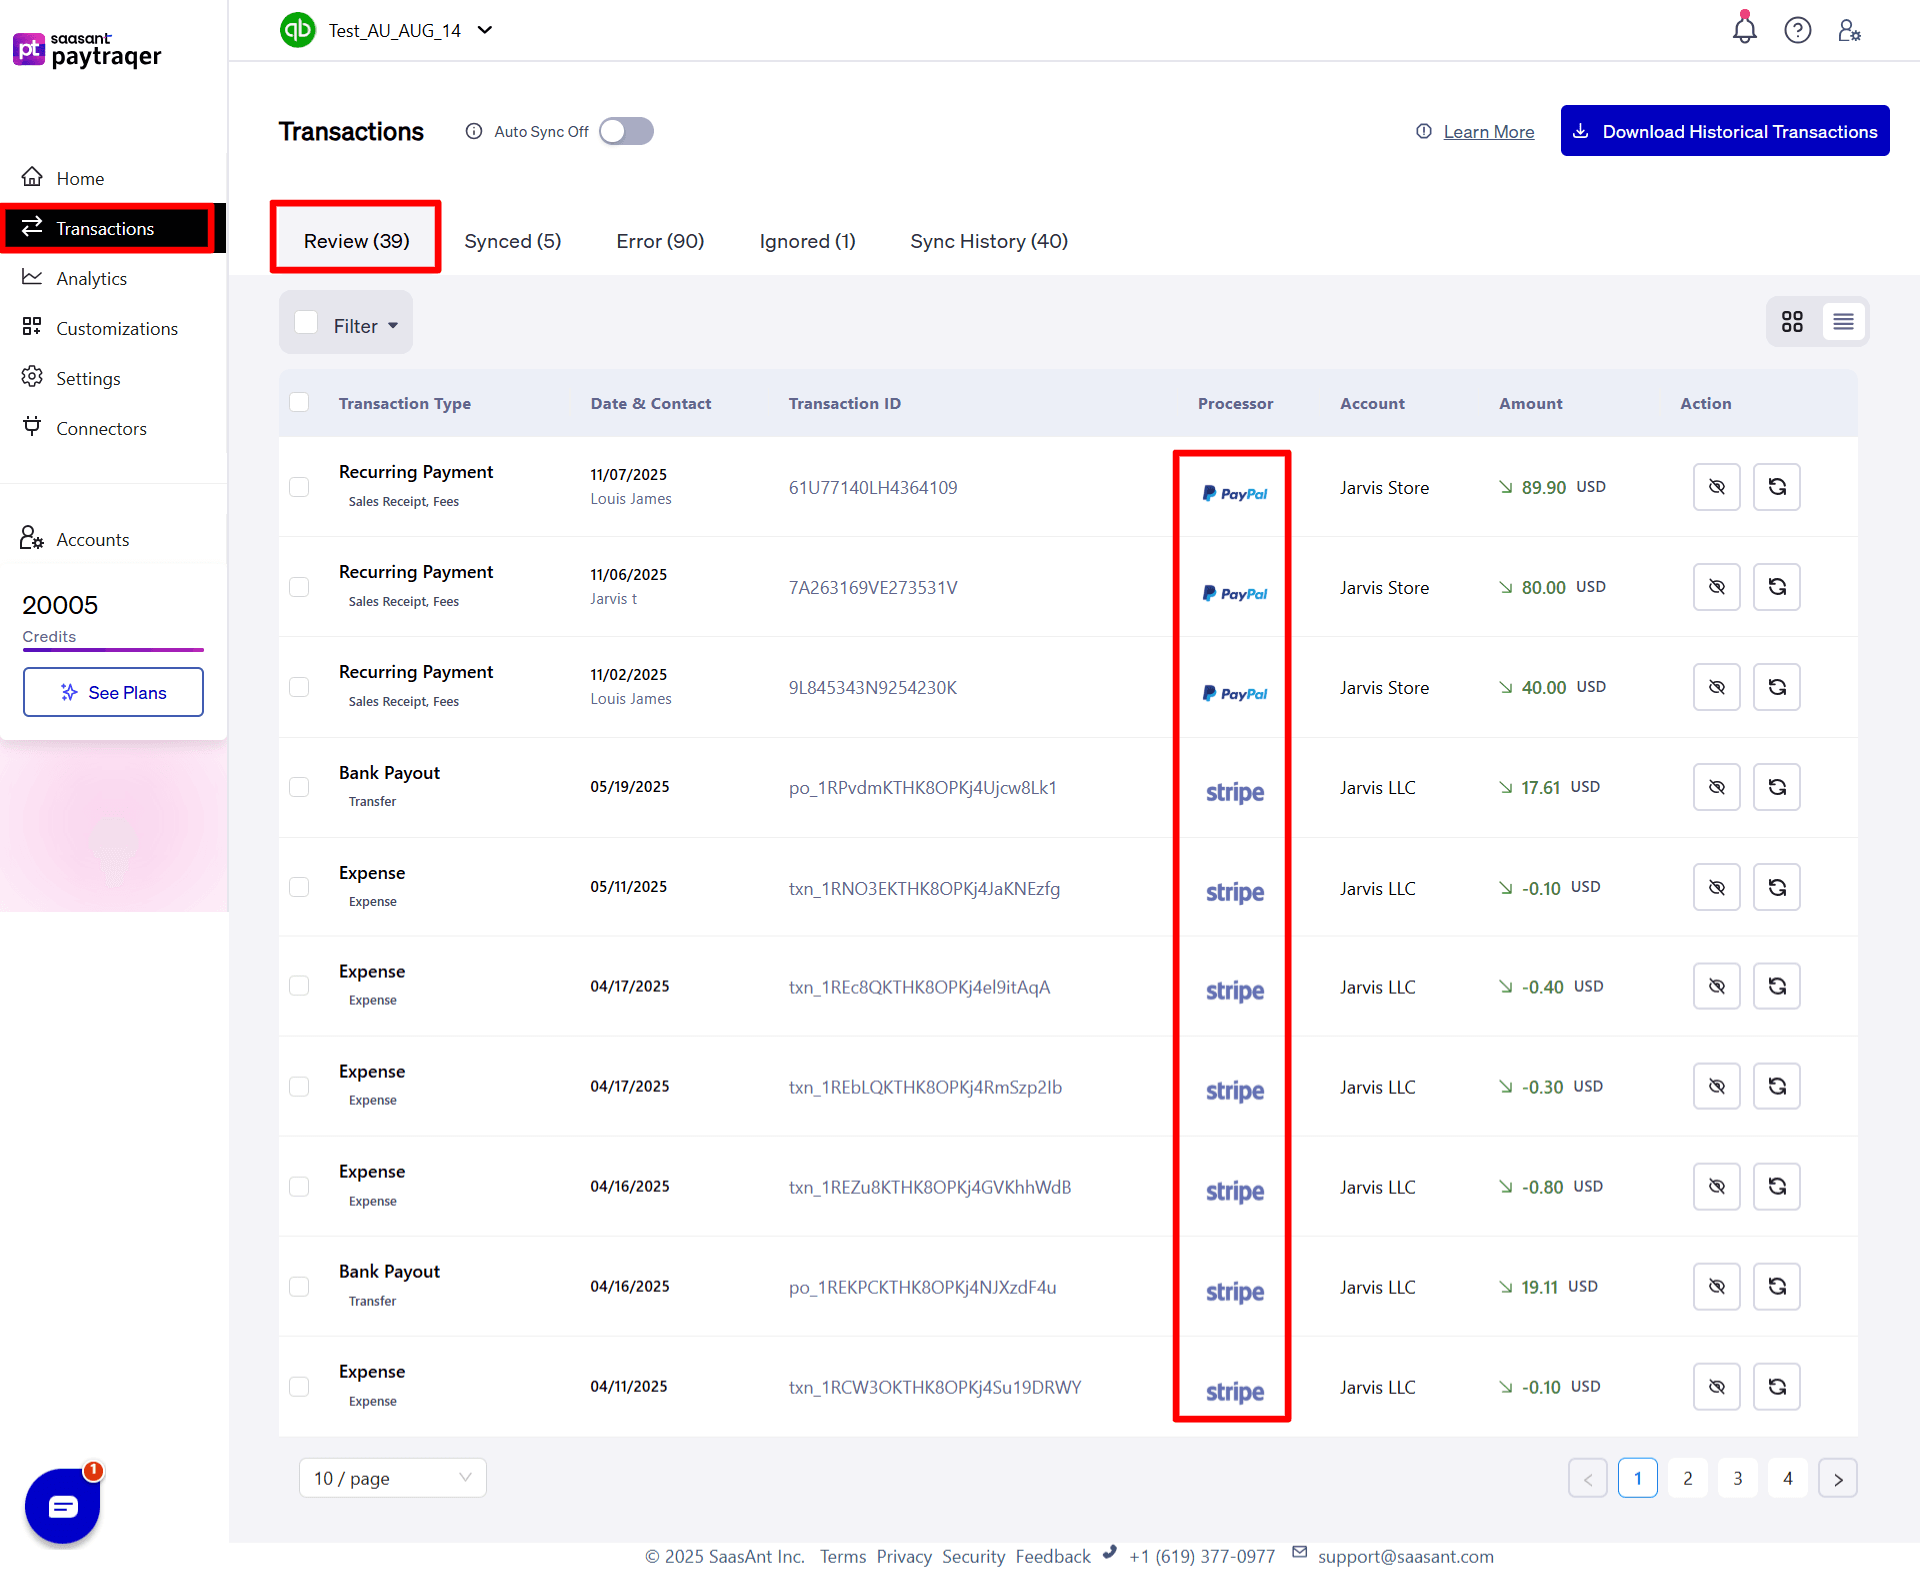
To access the dashboard, open the Transactions tab in PayTraQer. This is where you can review downloaded transactions and decide what to sync. The dashboard is divided into five key views:
Review
The Review tab lists all downloaded transactions that are ready to post to QuickBooks. You can click each row to verify details such as the customer, accounts, items, and tax. Make edits as needed, then click Sync to push the transaction to QuickBooks. Every new transaction first appears here for your review before syncing.
Synced
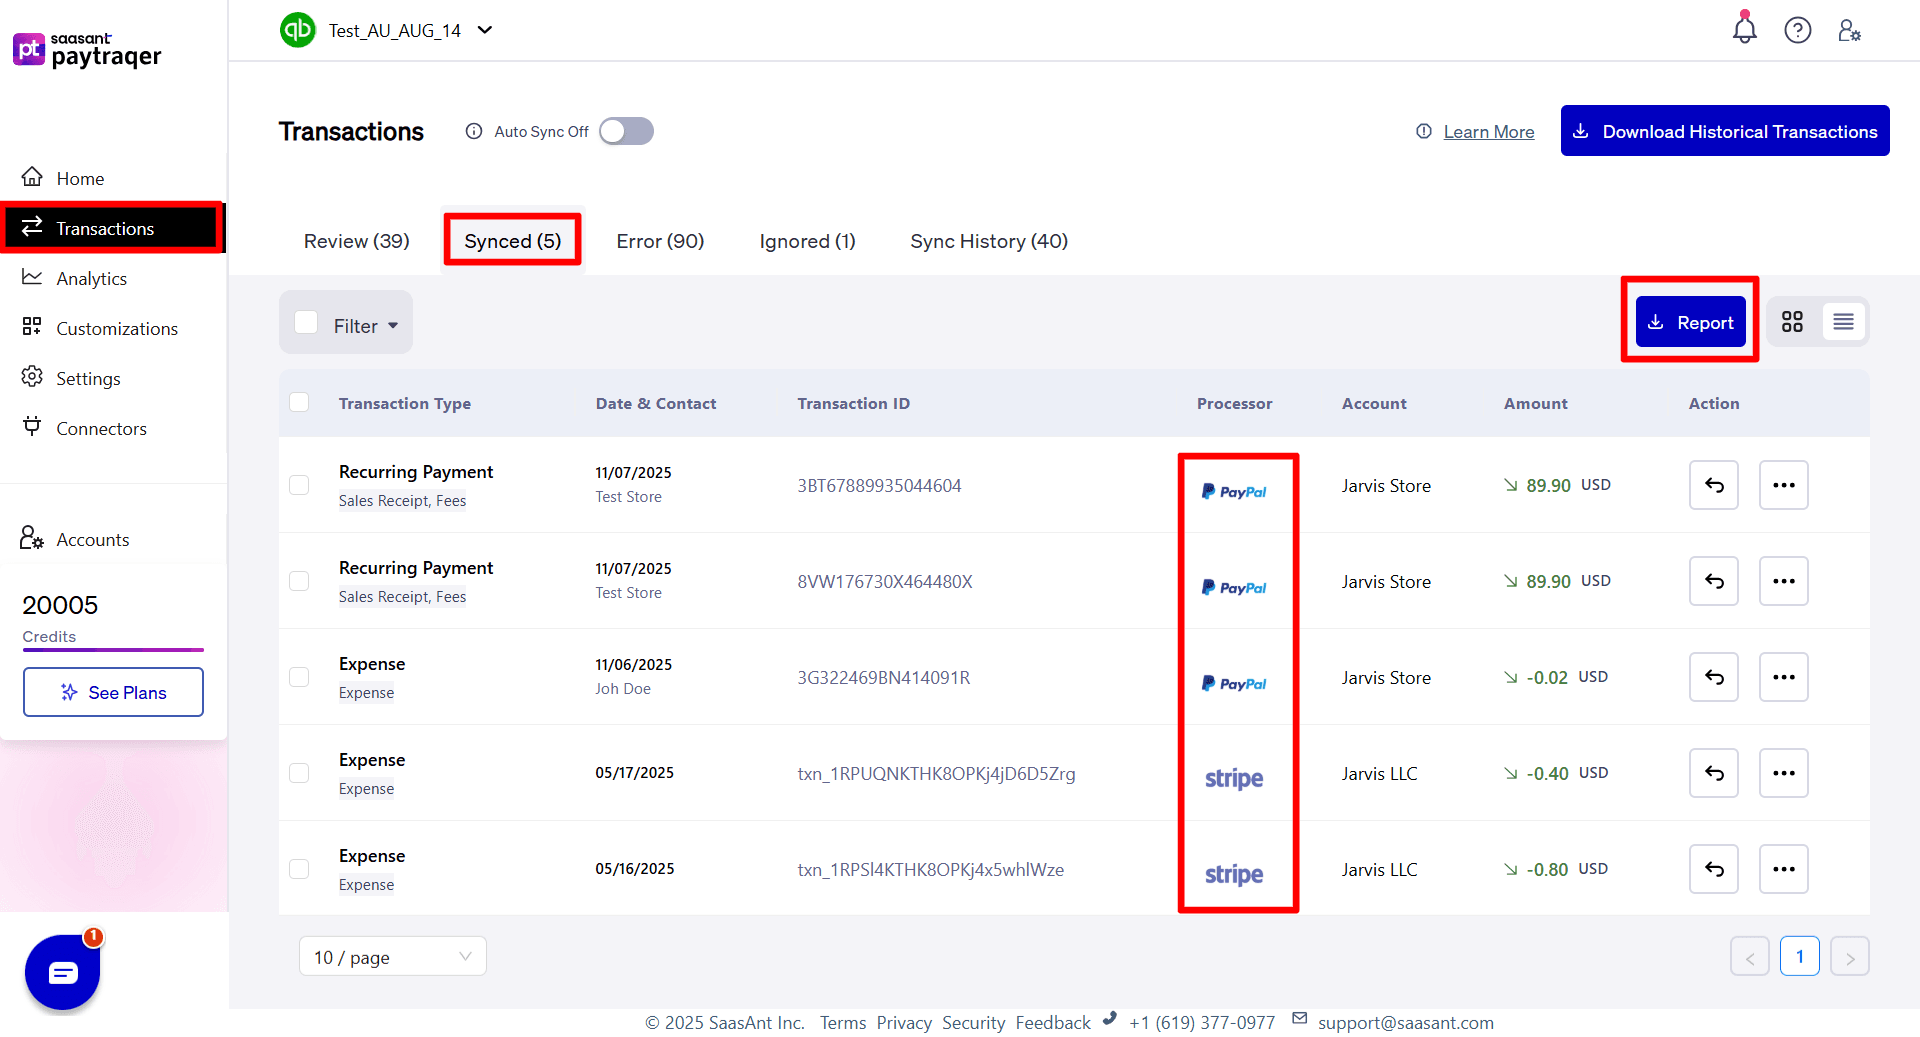
The Synced tab displays all transactions that have been successfully posted to QuickBooks. This view helps you easily confirm what has already synced, ensuring no duplicates or missed entries. You can also download a report of synced transactions from this screen.
Error
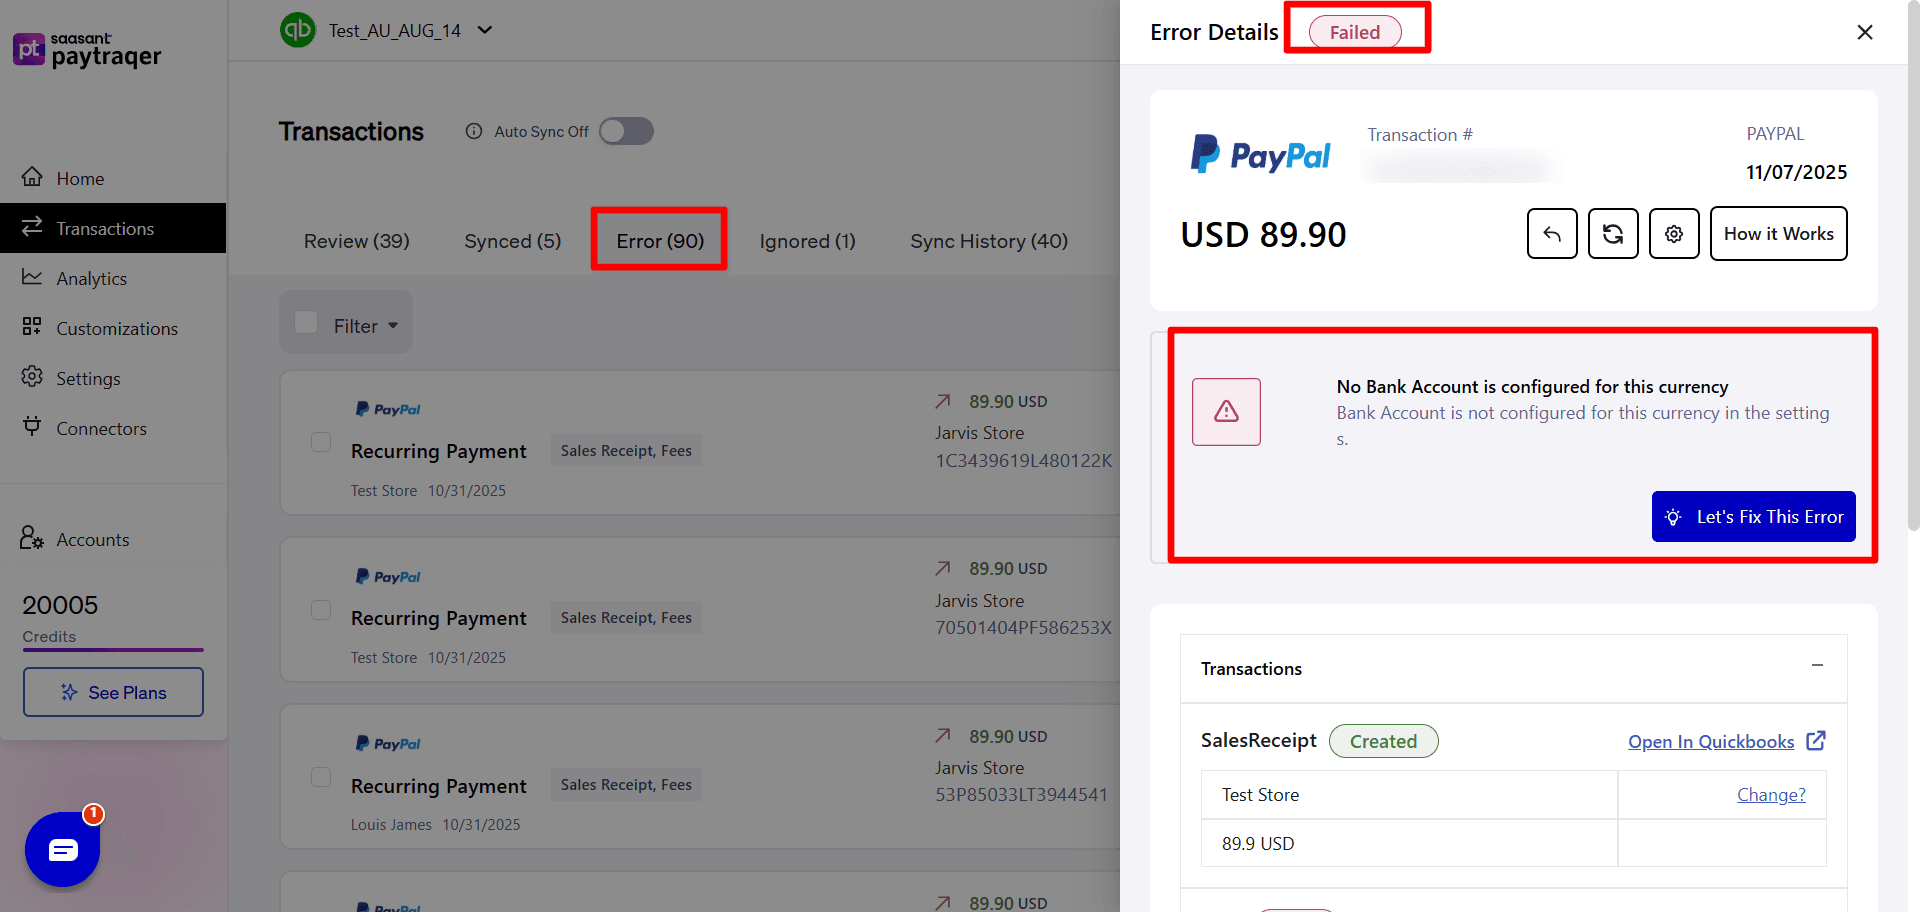
The Error tab shows transactions that failed to sync. Selecting a transaction here reveals the reason for failure so you can correct it and attempt to sync again. This section helps you troubleshoot quickly and keep your records consistent.
Ignored
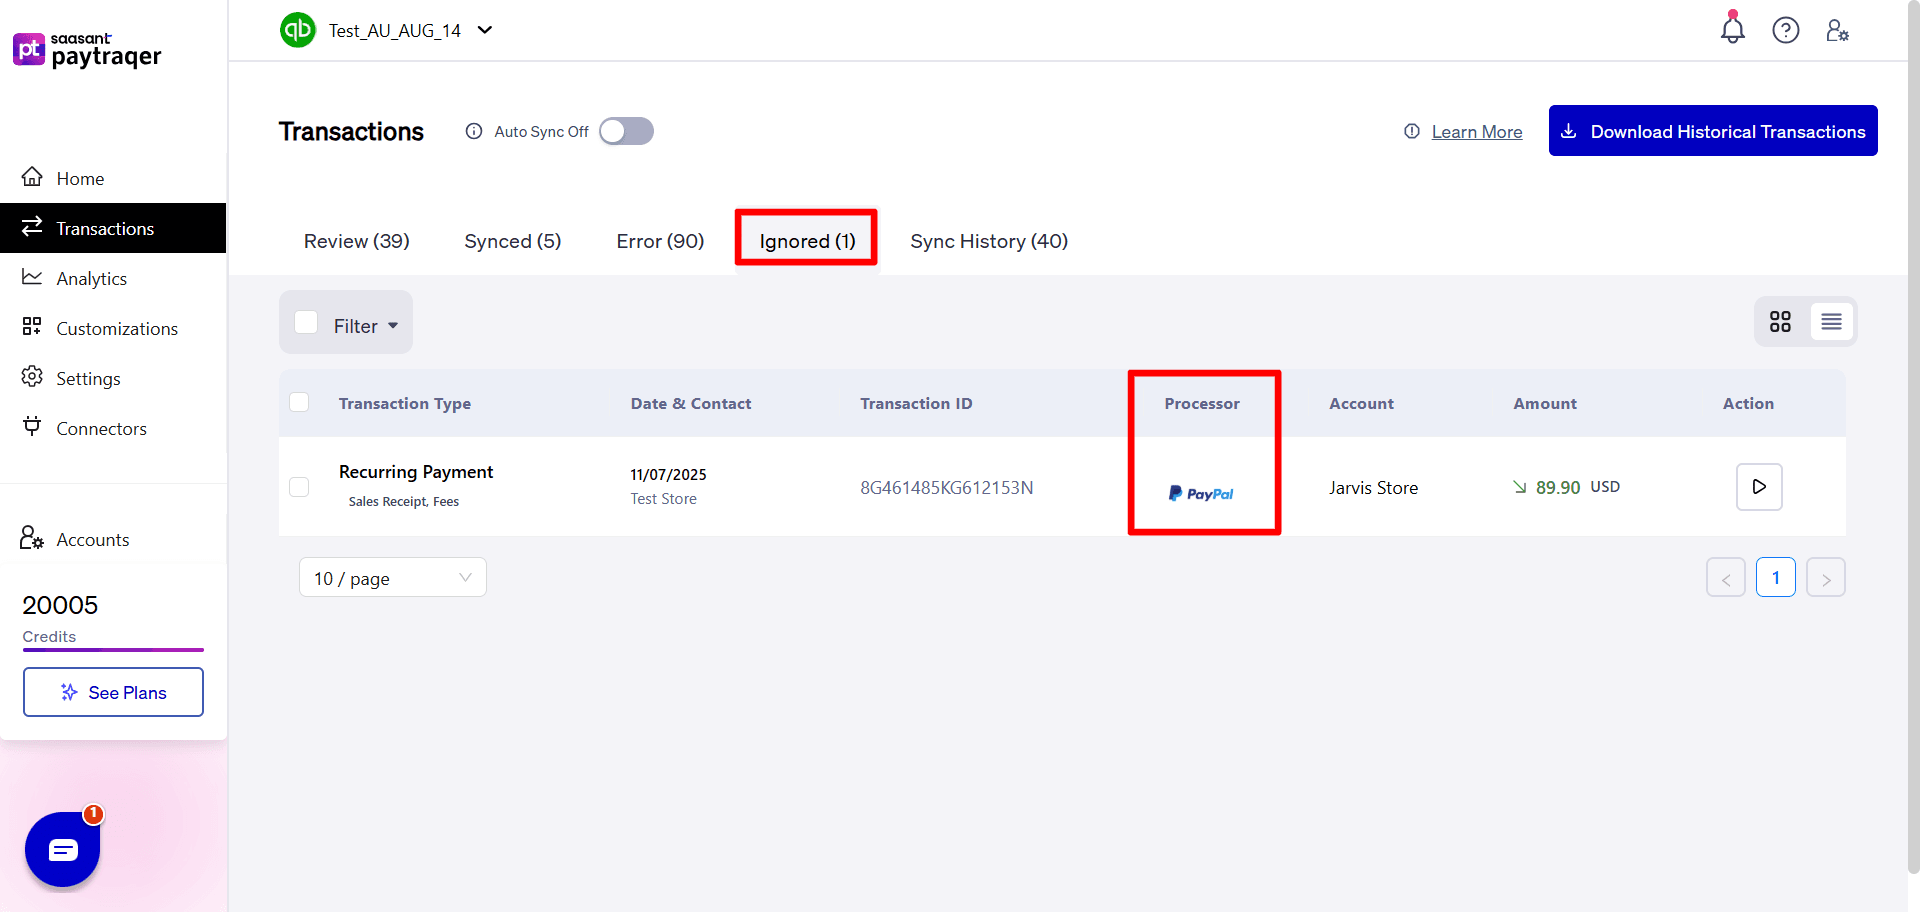
The Ignored tab contains transactions you chose to skip during review. If you decide to include any of these later, you can restore and sync them from this tab. It provides flexibility to manage exceptions as you go.
Sync History
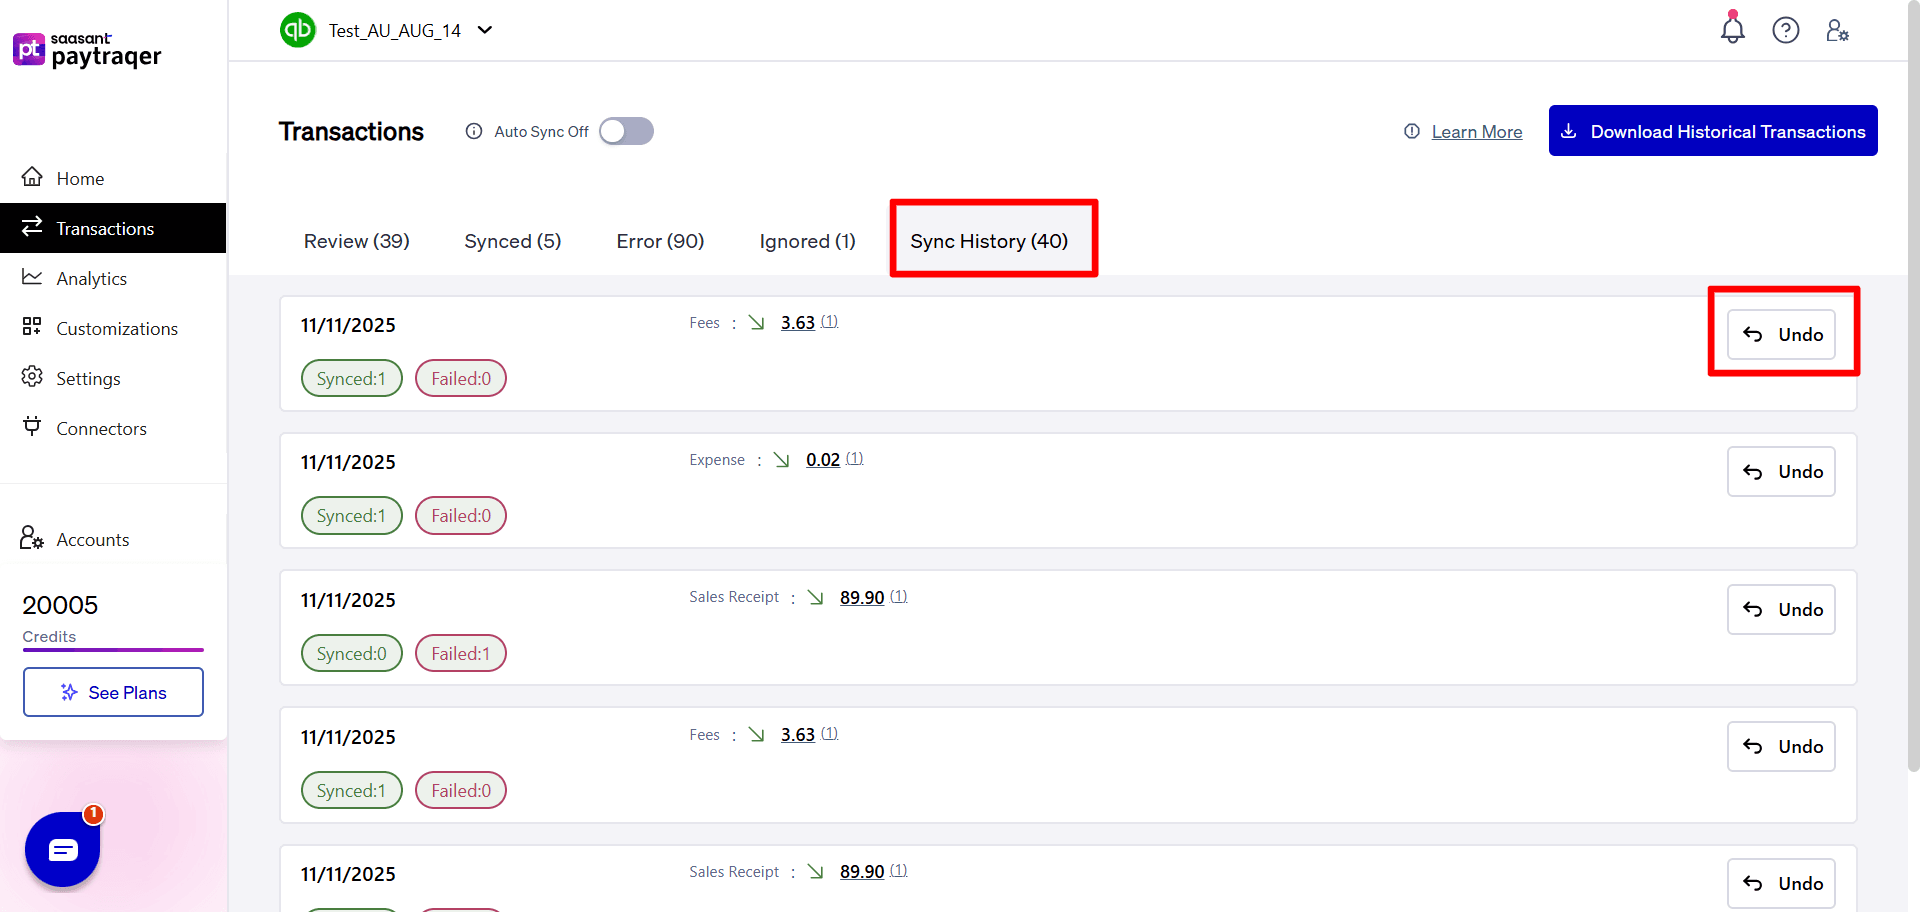
The Sync History tab maintains a complete log of all synced transactions along with their timestamps. This record helps you track every sync activity for reference or auditing purposes.
You can also undo the synced entry and remove it from QuickBooks with just a click if you need.
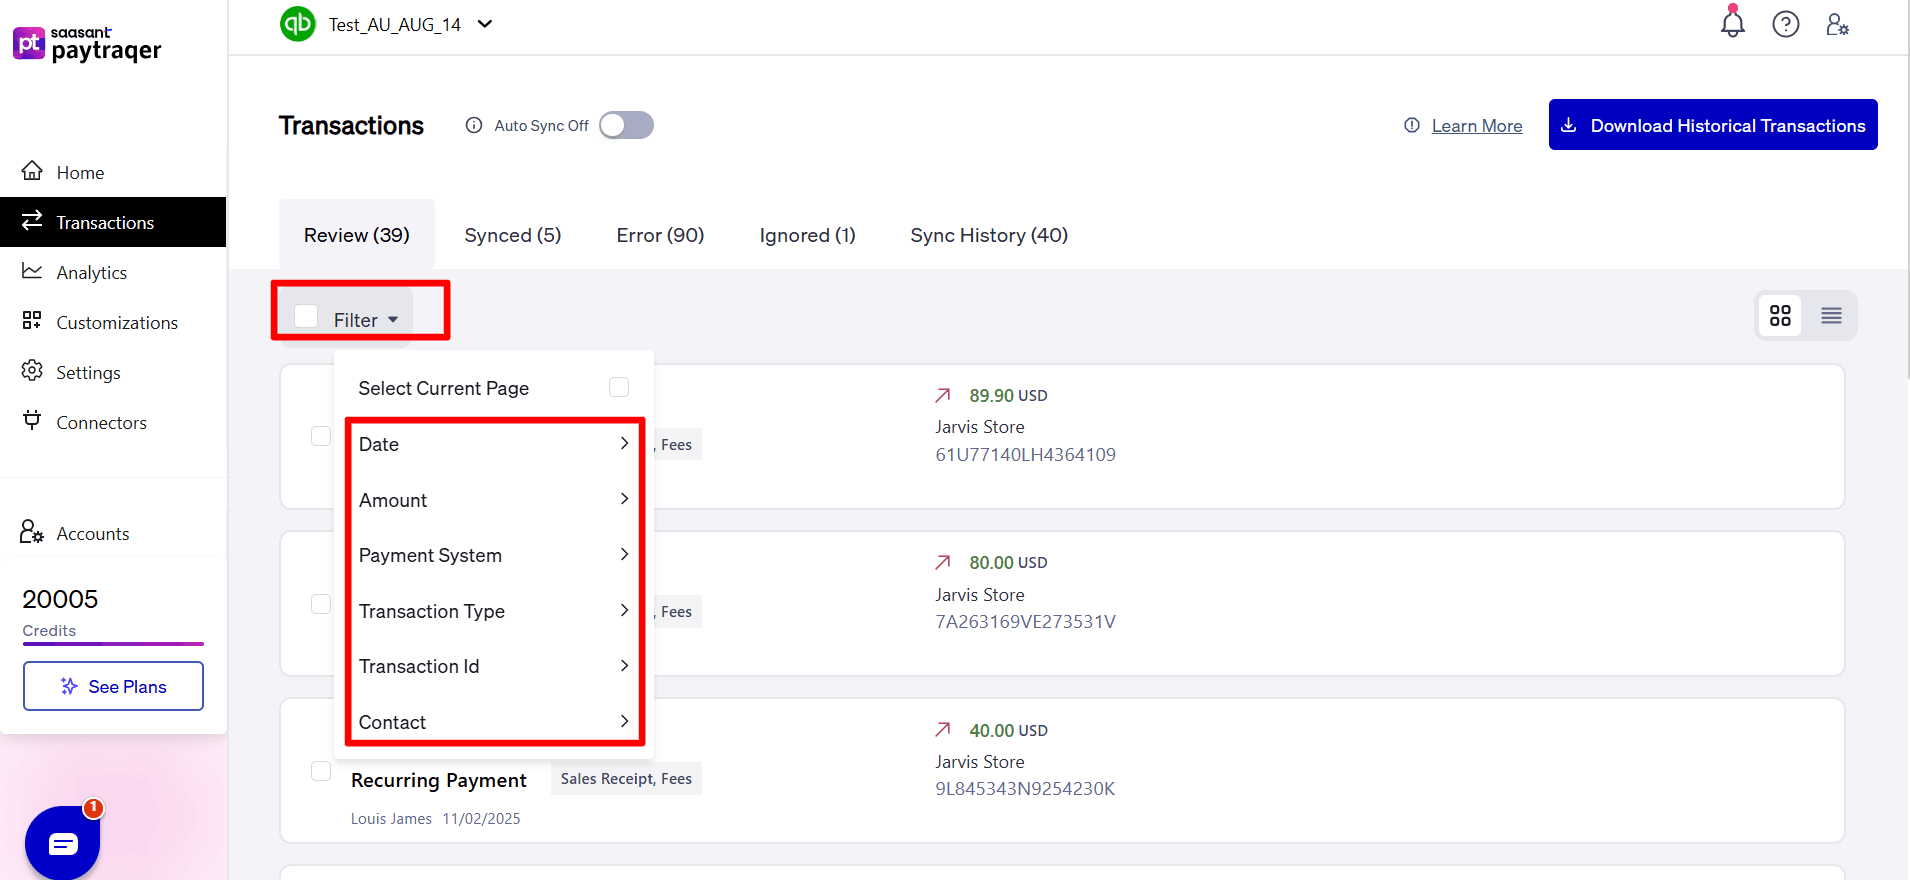
In the Review, Synced, Error, and Ignored tabs, you can filter transactions based on:
Date Range
Amount
Payment System
Transaction Type
Transaction ID
These filters help you quickly find specific transactions and focus on the ones you need to review or manage.
Conclusion
The PayTraQer Transactions Dashboard simplifies your data management workflow by organizing every stage of the sync process—from review to history. By using each tab efficiently, you can ensure accurate financial records and gain full control over your transaction syncs between PayTraQer and QuickBooks.