How to Export Transactions and Lists from QuickBooks Desktop using SaasAnt Transactions Desktop
July 8, 2026
The SaasAnt Transactions Desktop application allows you to extract transactions and lists directly from your QuickBooks file. Follow the steps below to connect your company file, run custom searches, apply filters, and schedule automated exports.
Video Tutorial for How to Export Data from QuickBooks Desktop using SaasAnt Transactions Desktop:
Phase 1: Connect to Your QuickBooks Company File
Before pulling any reports, ensure the application is actively linked to your QuickBooks Desktop software.
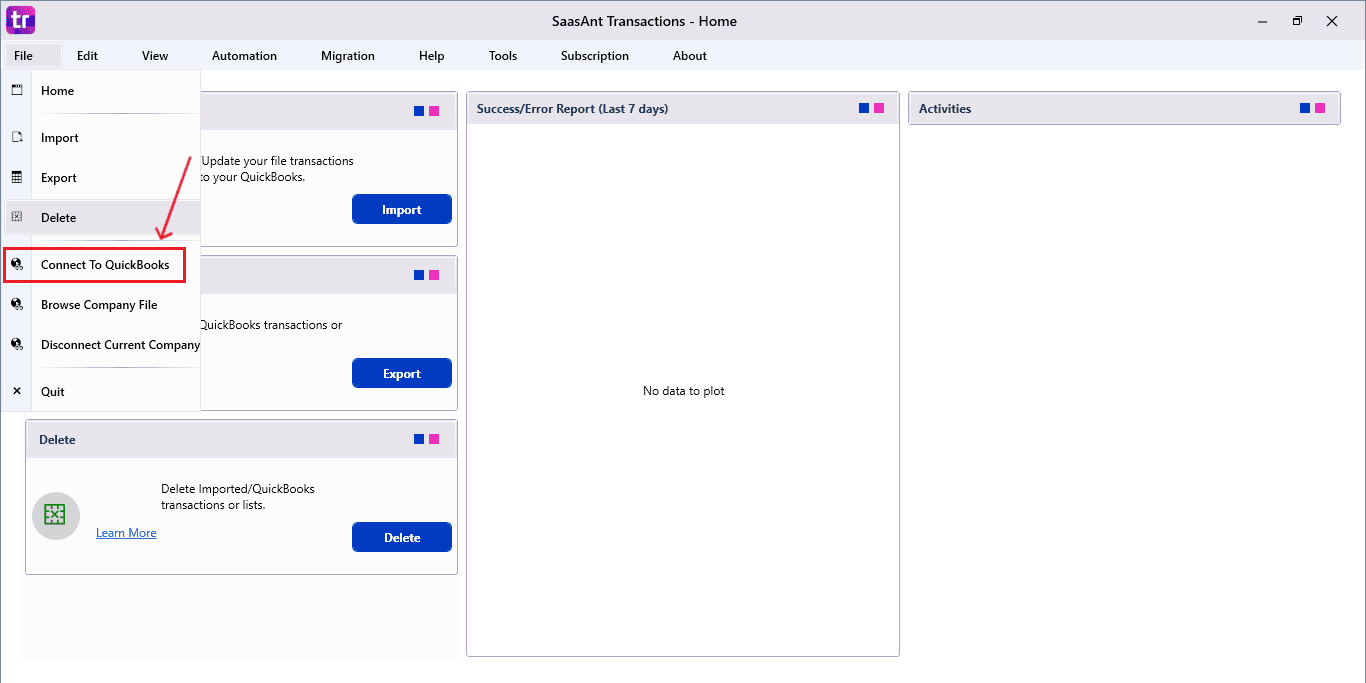
Navigate to the top menu bar, click File, and select Connect To QuickBooks from the dropdown menu.
A success message bearing a green checkmark, such as "Company connected successfully," will appear on the Home screen to confirm the connection is active.
Phase 2: Configure the Export Search
Once connected, you can define exactly what data you want to extract.
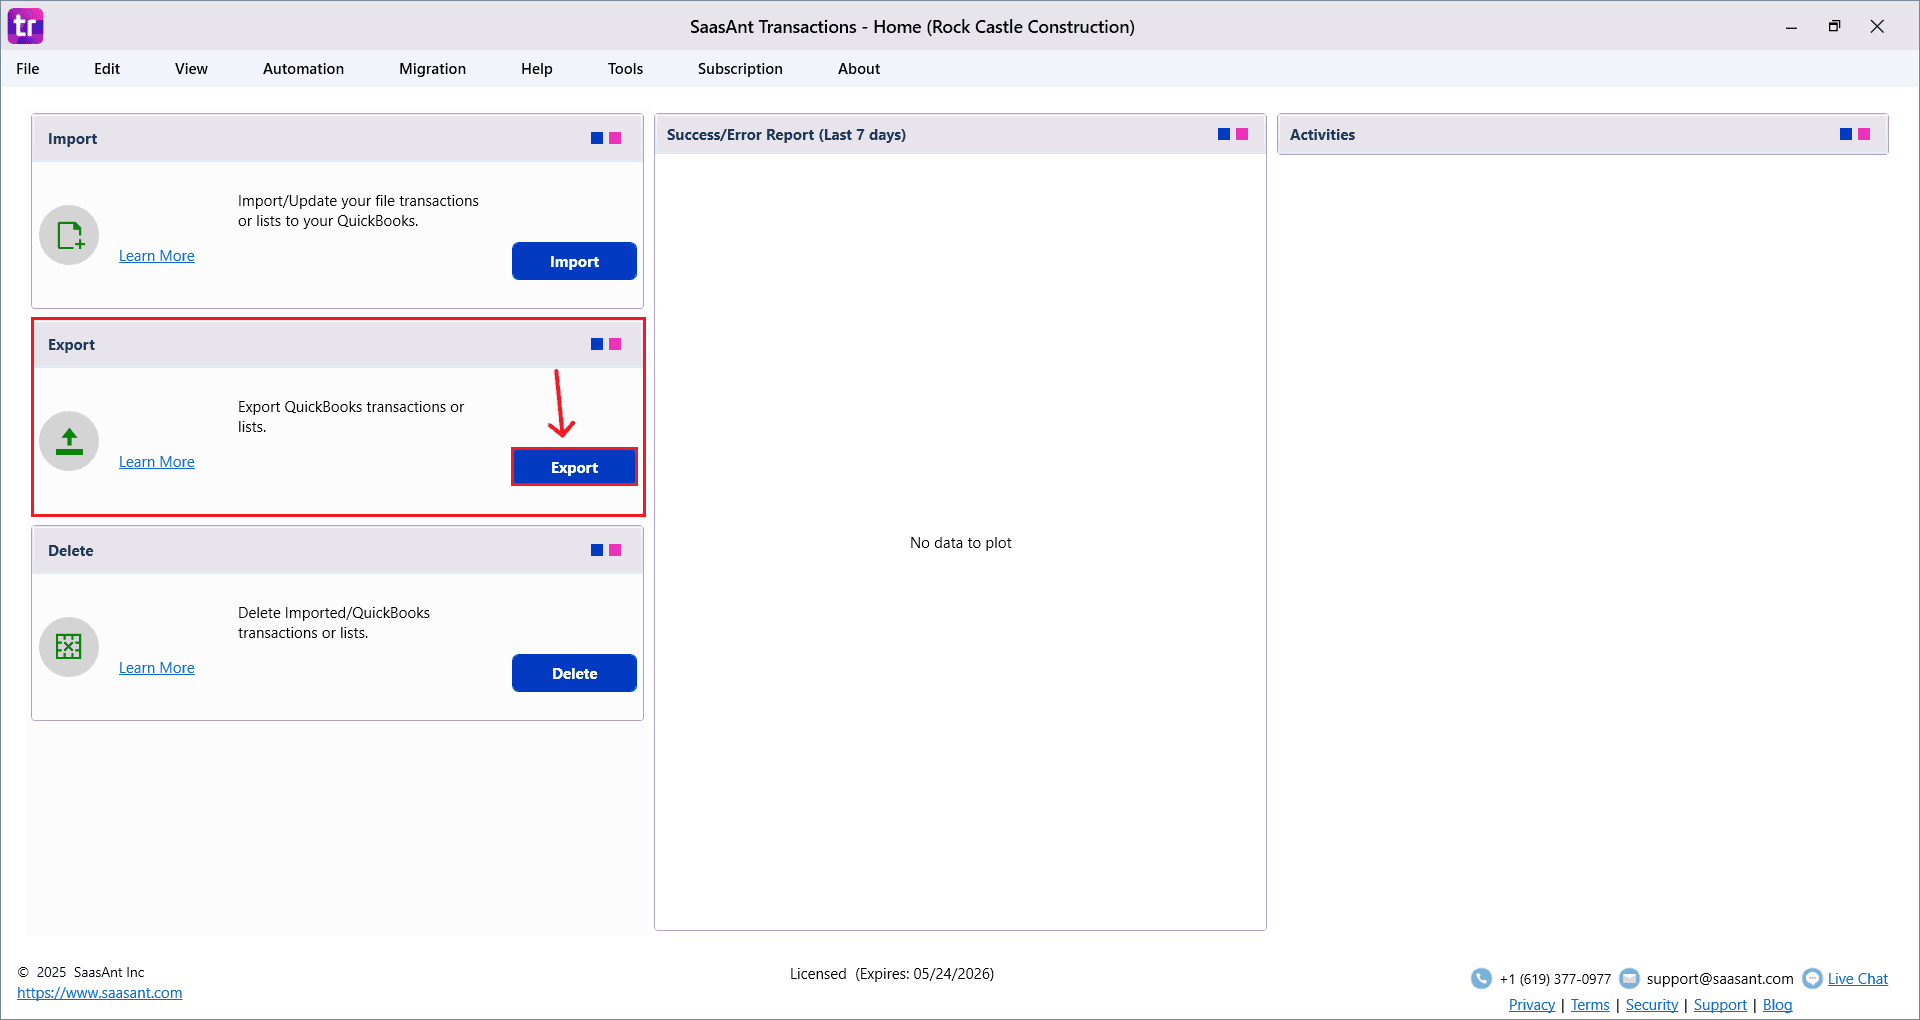
From the Home screen, click the Export button located under the section labeled "Export QuickBooks transactions or lists".
Navigate to the Search tab.
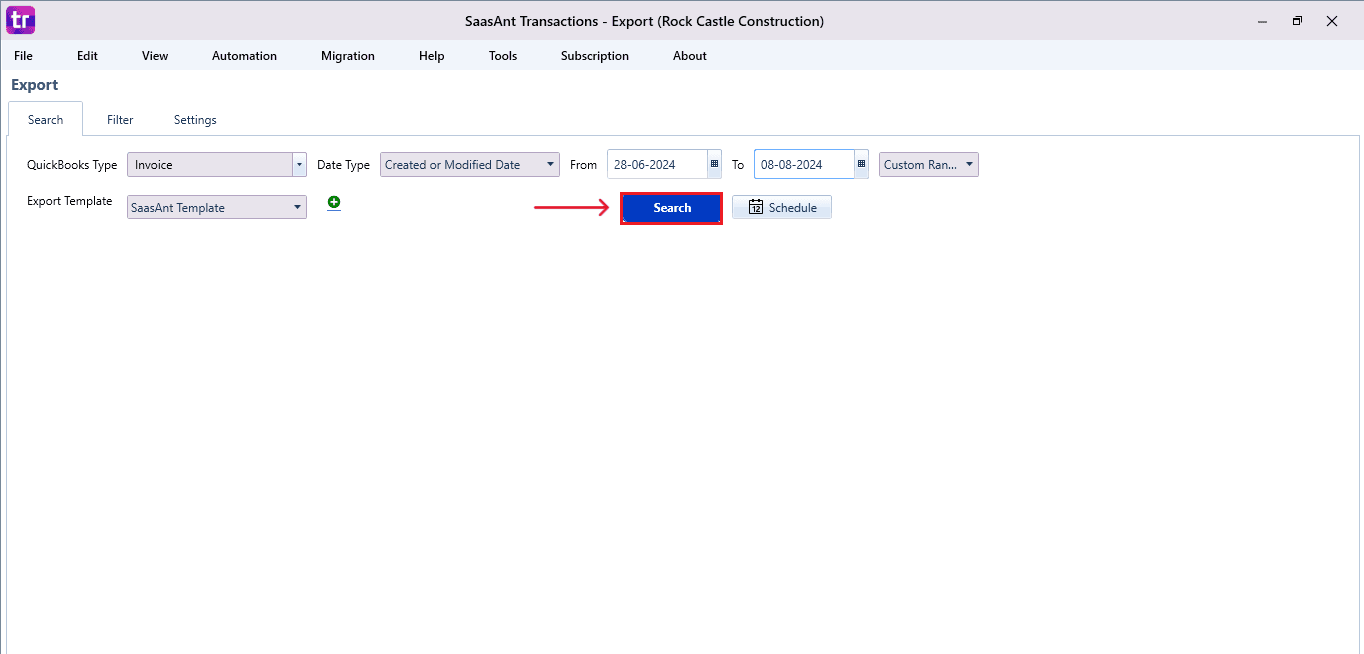
Select your desired data category from the QuickBooks Type dropdown menu, such as "Invoice".
Choose a Date Type to base your query on. You can select options like "Created or Modified Date" or "Transaction Date".
Specify the timeline by entering dates in the From and To fields.
Choose a format from the Export Template dropdown, such as "SaasAnt Template". You can also click the green + icon to manage templates.
Click the blue Search button to pull the data from QuickBooks. The interface will populate a data grid displaying columns like S.No, QuickBooks Link, Invoice No, Customer, and Invoice Date.
Phase 3: Apply Advanced Filters (Optional)
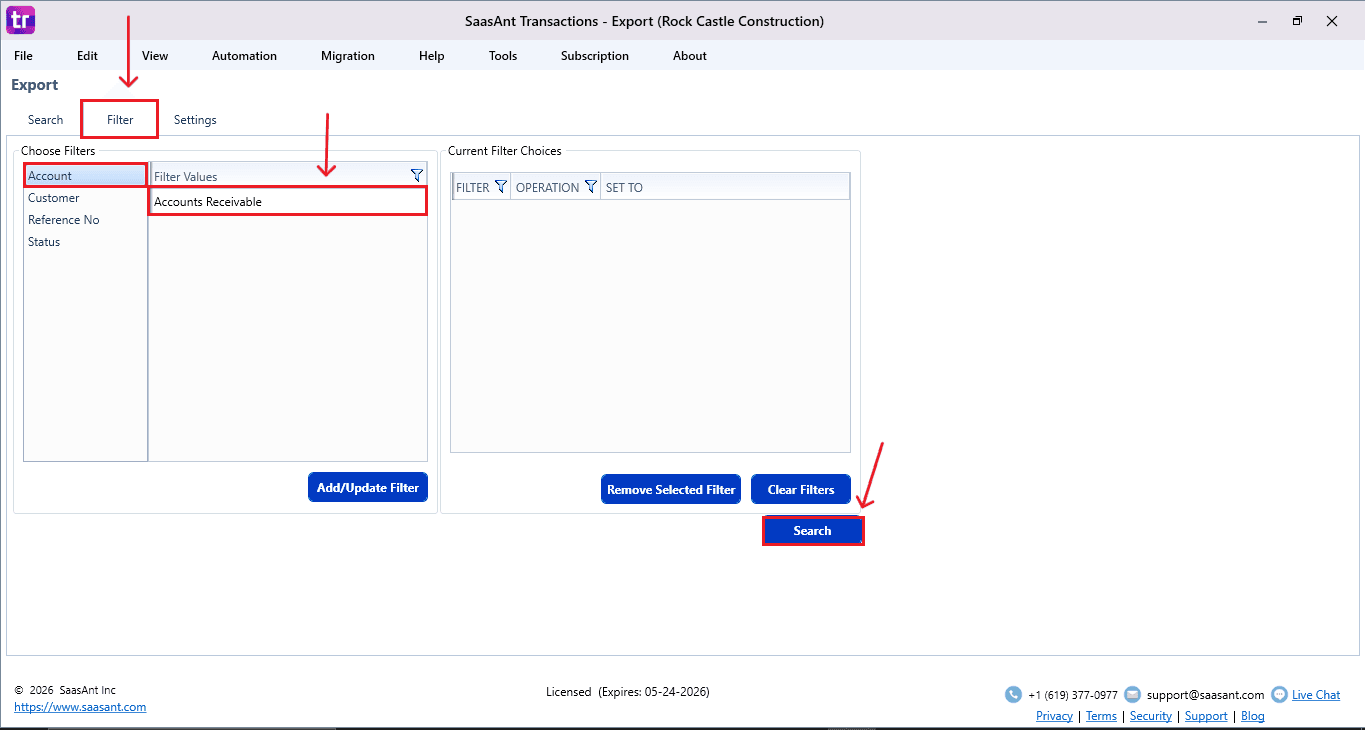
To narrow down your search results further, use the application's filtering tools.
Navigate to the Filter tab.
Under the "Choose Filters" panel, click a category, such as Account.
In the adjacent "Filter Values" panel, select the specific parameter you need, such as Accounts Receivable.
Click the blue Search button at the bottom of the screen to refresh your data grid with the active filters.
Phase 4: Customize Export Settings
You can adjust how the final spreadsheet will be formatted before downloading the file.
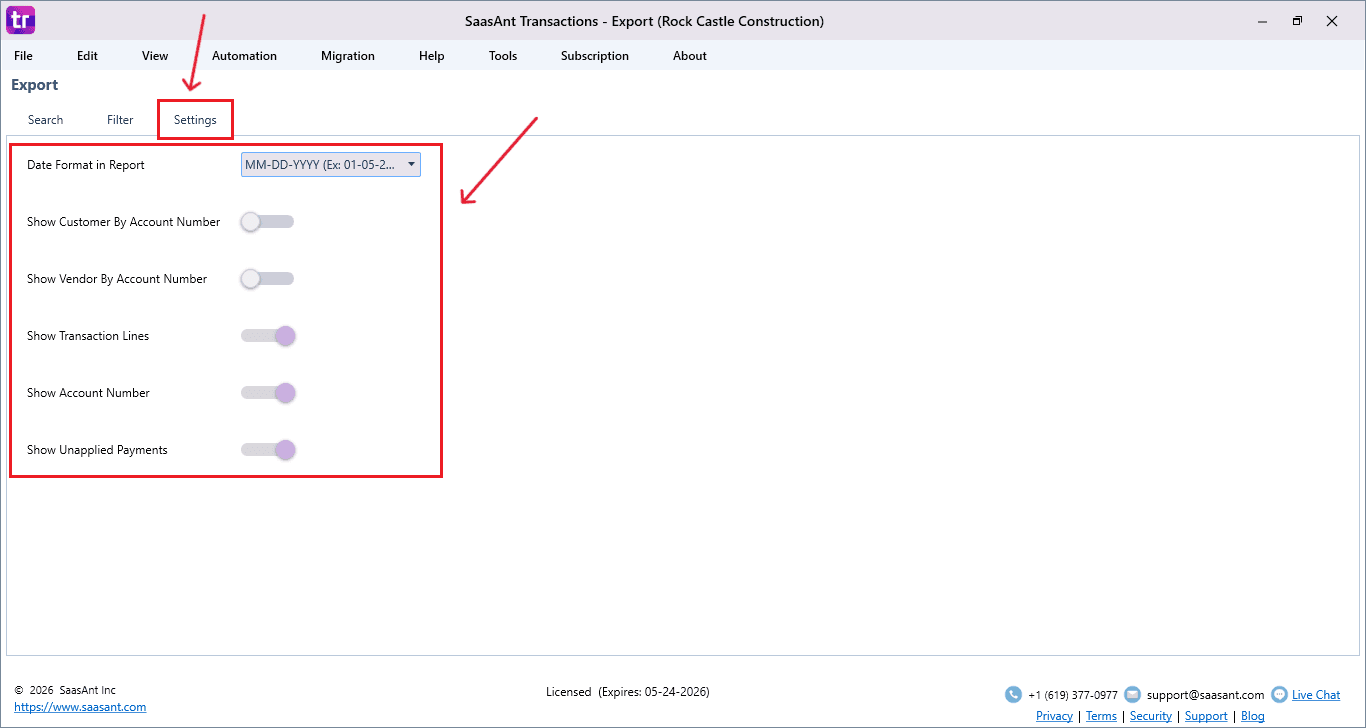
Navigate to the Settings tab.
Use the Date Format in Report dropdown menu to select a standard formatting structure, such as "MM-DD-YYYY".
Use the toggle switches provided to enable or disable specific column behaviors:
Toggle Show Customer By Account Number to replace customer names with account numbers.
Toggle Show Vendor By Account Number to replace vendor names with account numbers.
Toggle Show Transaction Lines to include detailed item lines in the export.
Toggle Show Account Number to display general account numbers.
Toggle Show Unapplied Payments to include pending payment data.
Phase 5: Download or Schedule the Export
Once your data grid is populated and formatted, you can extract it immediately or set up a recurring schedule.
Option A: Manual Download
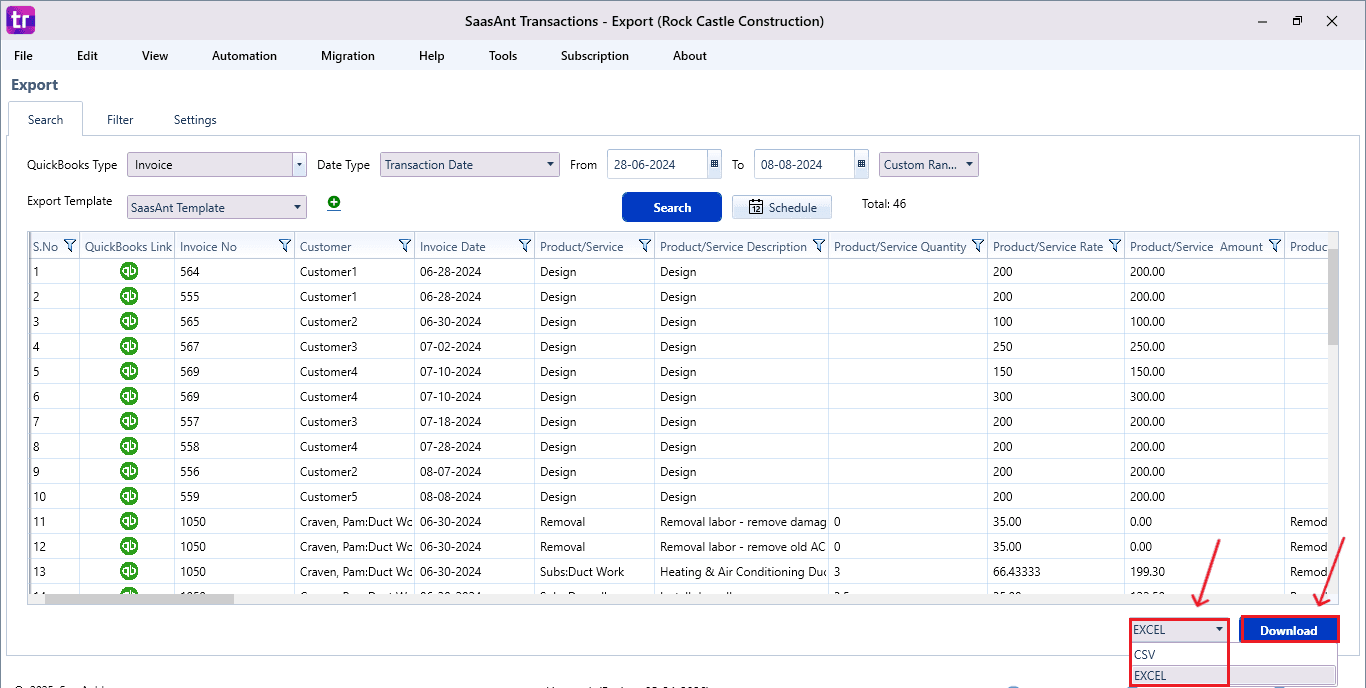
In the bottom-right corner of the screen, select your preferred file format from the dropdown menu, choosing either EXCEL or CSV.
Click the blue Download button to save the file locally.
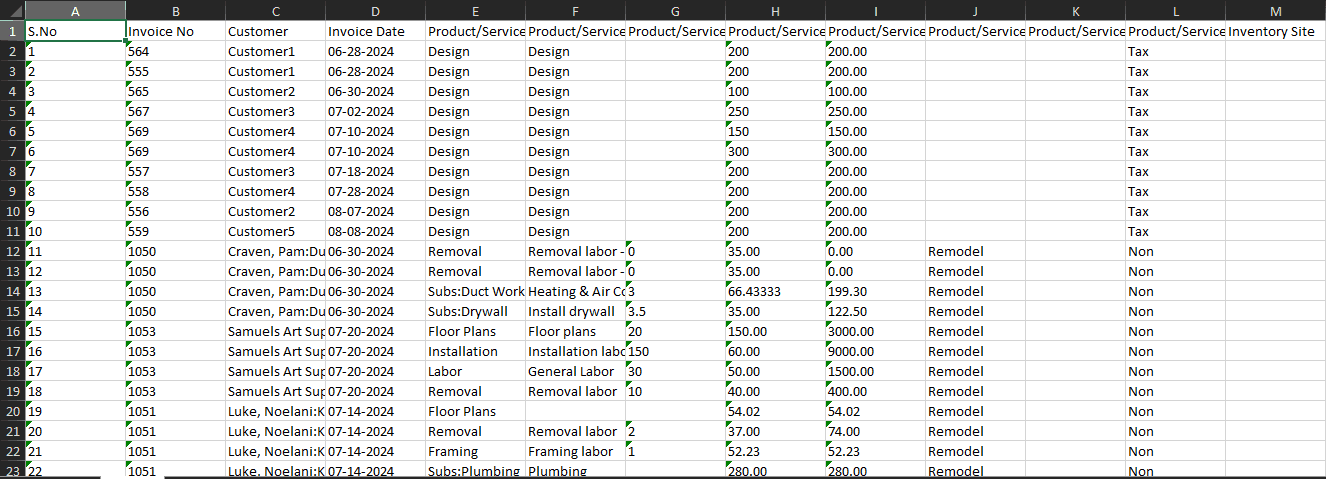
You can then open the file in a spreadsheet application to view the neatly formatted columns containing your Invoice No, Customer, Invoice Date, Product/Service, and other parameters.
Option B: Automate via Scheduling
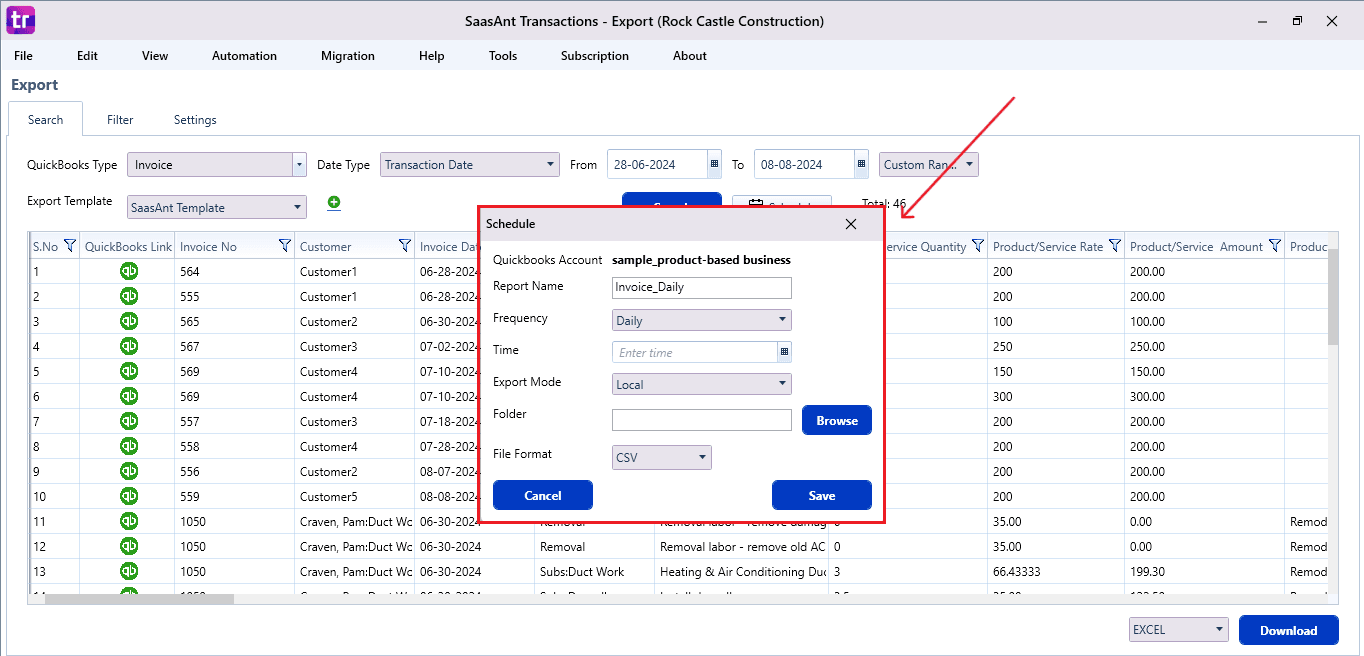
Returning to the Search tab, click the Schedule button located to the right of the Search button.
In the "Schedule" pop-up window, type a title into the Report Name field, such as "Invoice_Daily".
Select your desired interval from the Frequency dropdown menu, such as "Daily".
Enter the time you want the export to run automatically in the Time field.
Select an Export Mode, such as "Local".
Click the blue Browse button next to the Folder field to select a destination path on your computer.
Choose your desired output format from the File Format dropdown menu.
Click Save to finalize your automated export schedule.