How to Use SaasAnt Transaction Software to Import File Transactions/ Lists?
January 1, 2025
Users can import the file transactions or lists to the QuickBooks on SaasAnt Transactions (Desktop) by undergoing three simple steps via a simple import wizard.
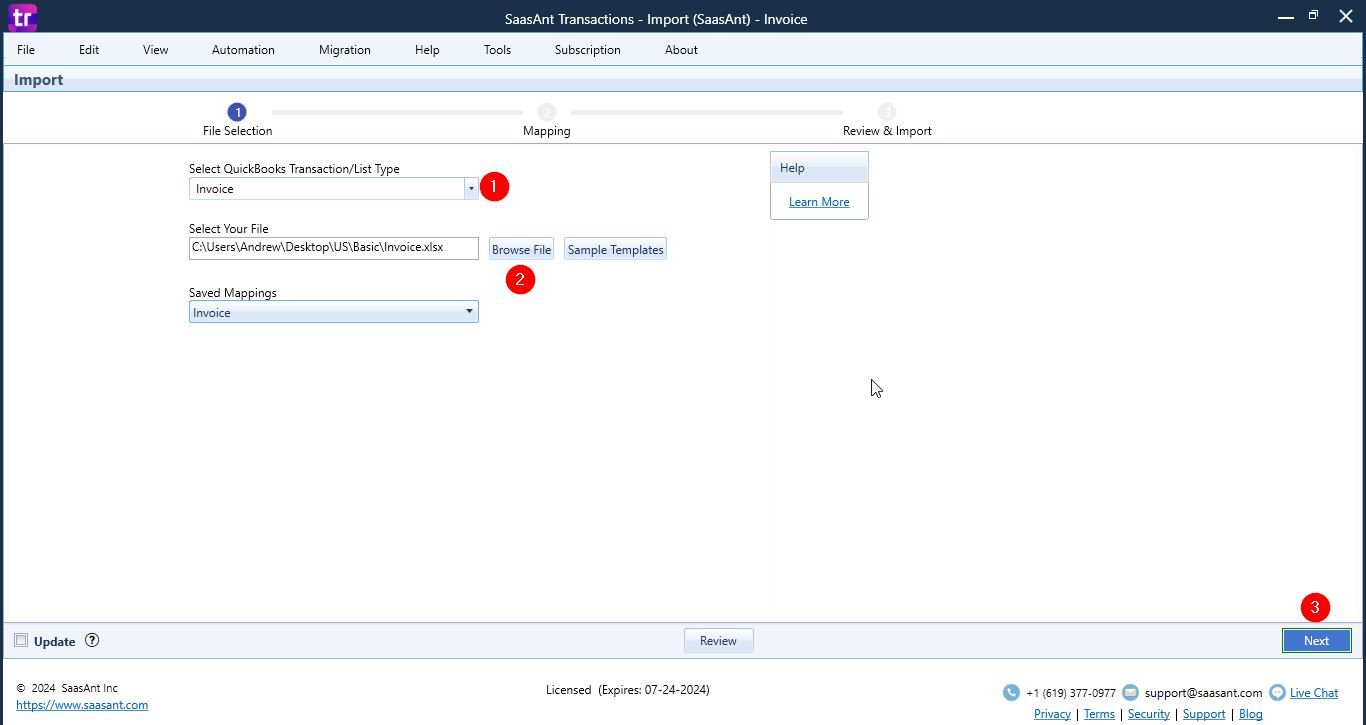
Step-1: File Selection
Firstly select the desired QuickBooks transaction or list type (supported types).
Then select the file that you need to import by browsing it (supported file formats).
Proceed and select the desired sheet for the chosen file ( applicable only for Excel files)
Now press the next button.
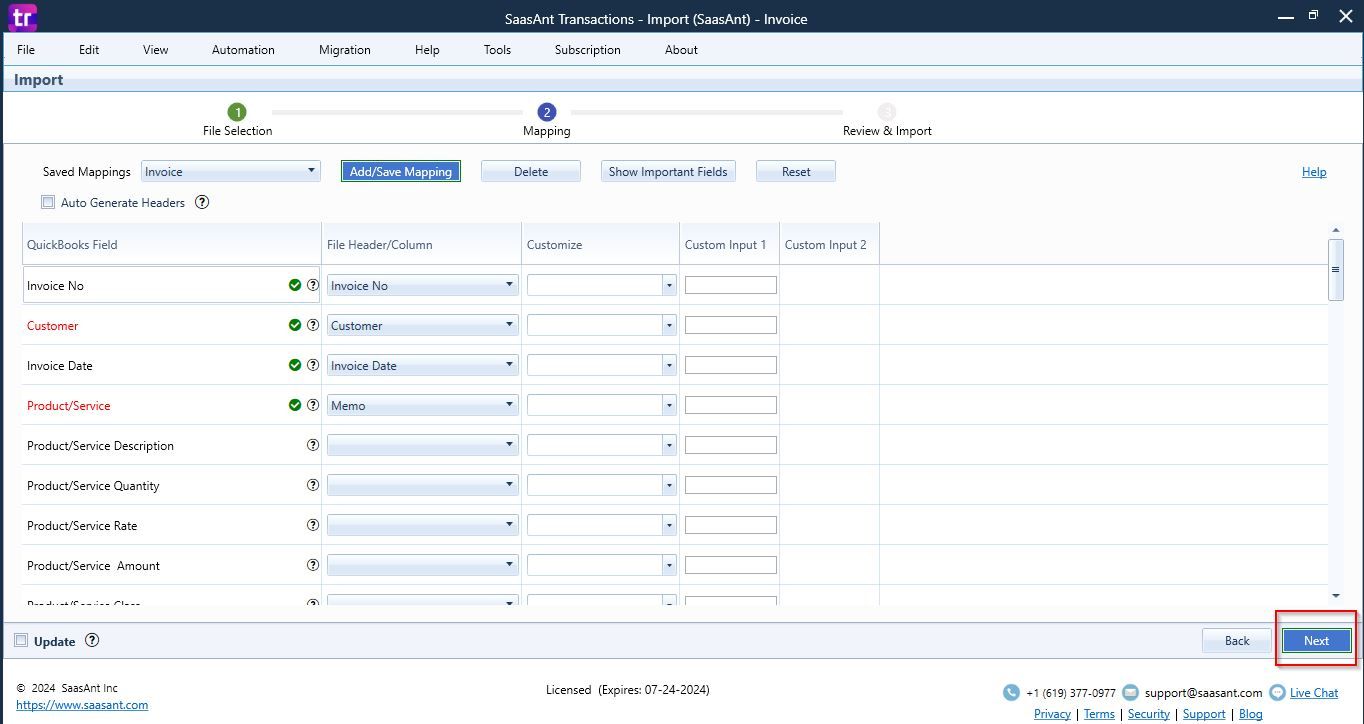
Step-2: Mapping
Once your file is uploaded, the field mapping screen will appear on your screen.
After this, you will be required to select the File Header against respective QuickBooks Fields if needed. This step can be eliminated if you use the "SaasAnt Template" file.
Save the mappings if you want by clicking Add/Save Mapping.
Click on "Show Important Fields" button if you want to see only minimal required fields.
Data in the file can be customized or converted for your special needs using Mapping Formulas like "Override", "Replace If matches", "Skip If Matches" etc.
Then proceed by clicking the next button.
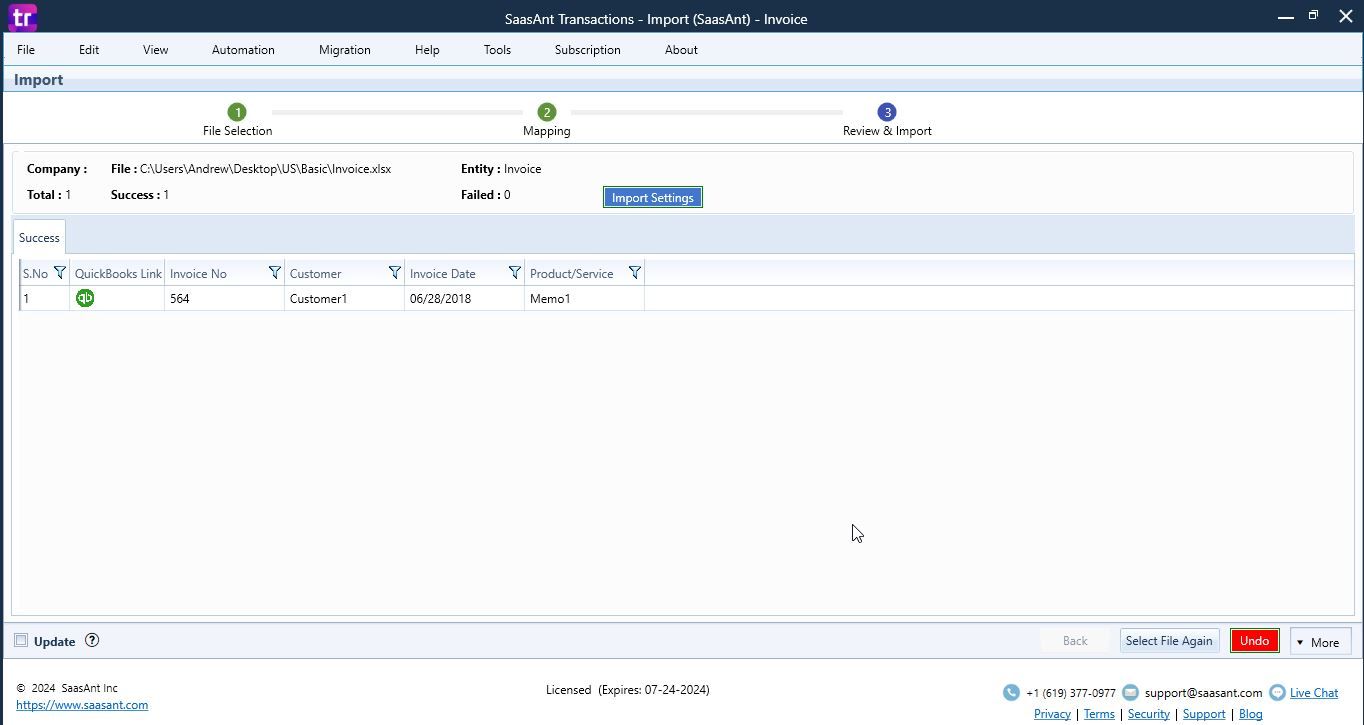
Step-3: Review & Import
After completing mapping, you will reach the Review & Import screen.
Here you can review your excel file data before it is imported to your QuickBooks company
You can even customize the data settings according to your requirements by clicking the Import Setting button.
Once the file is successfully imported, a “QB link” will appear in the list. You can click this link to open the imported transaction/ list in QuickBooks.