How to Import Employees into QuickBooks Desktop?
August 25, 2025
Import Employee List into QuickBooks Desktop
Import Employees from Supported File Formats directly into QuickBooks Desktop using SaasAnt Transactions (Desktop) - #1 user rated and Intuit trusted bulk data automation tool built exclusively for QuickBooks.
SaasAnt Transactions (Desktop) supports QuickBooks Pro, Premier, Enterprise, and Accountant Editions.
You can download the free trial of the software directly from the SaasAnt Website. Follow this article for detailed installation instruction.
Steps to Import Employees List into QuickBooks
This guide outlines the complete process of importing data into QuickBooks Desktop, from downloading the application to reviewing the final results.
Step 1: Download, Install, and Connect Saasant
Before you can import, you need to set up the Saasant Transactions application.
Download: Go to the Saasant.com website and download the Saasant Transactions Desktop application.
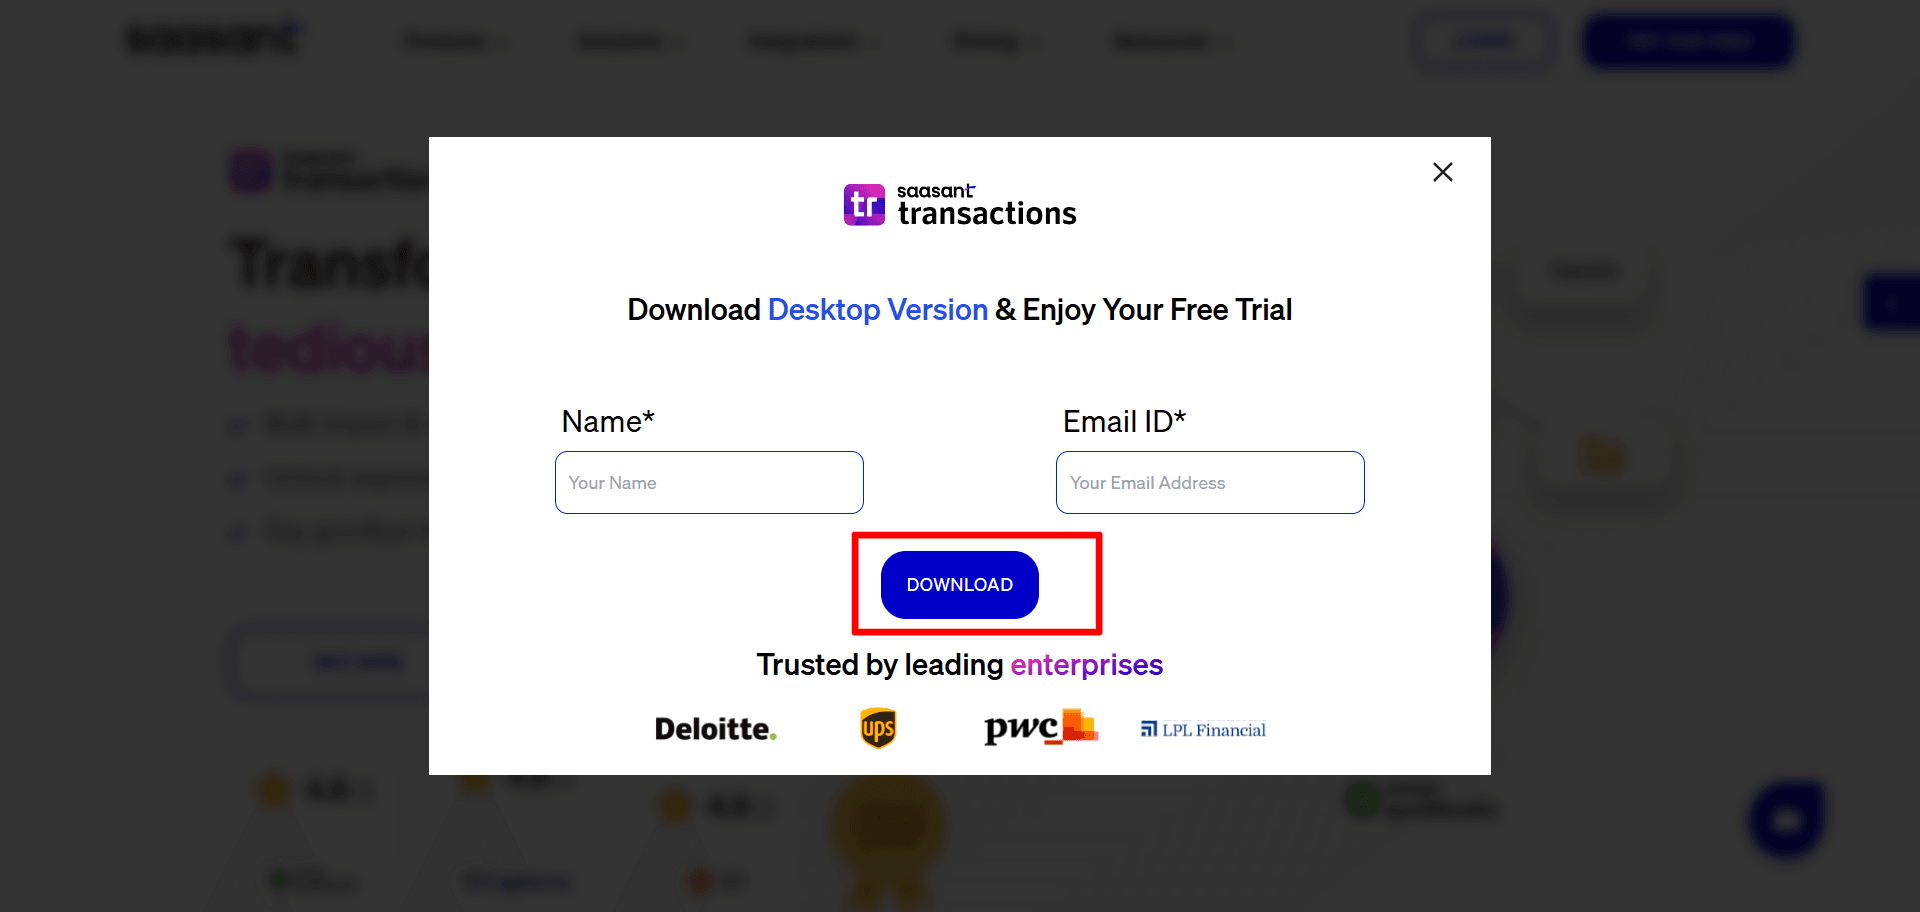
Install: Run the installer and complete the installation on your computer.
Connect: Open the Saasant application and connect it to your QuickBooks Desktop company file by following the on-screen instructions. This will authorize Saasant to access and import data into your file.
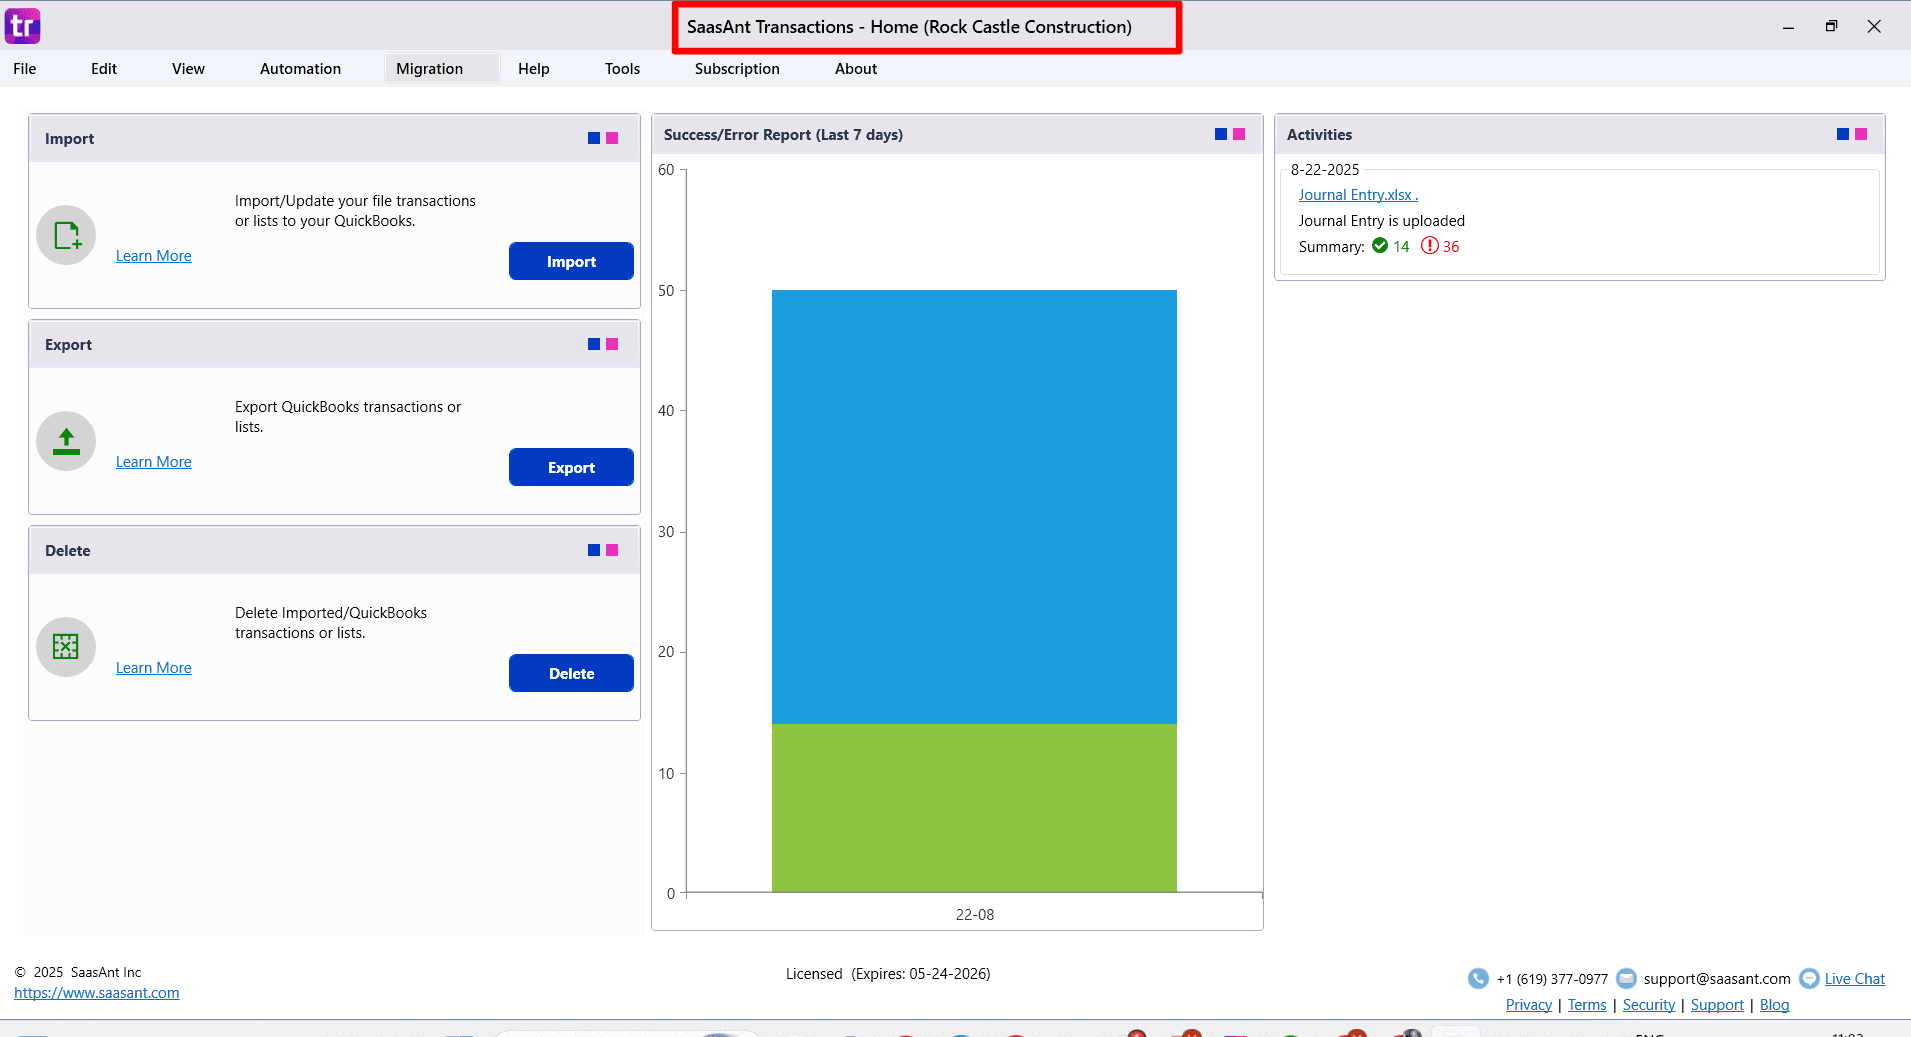
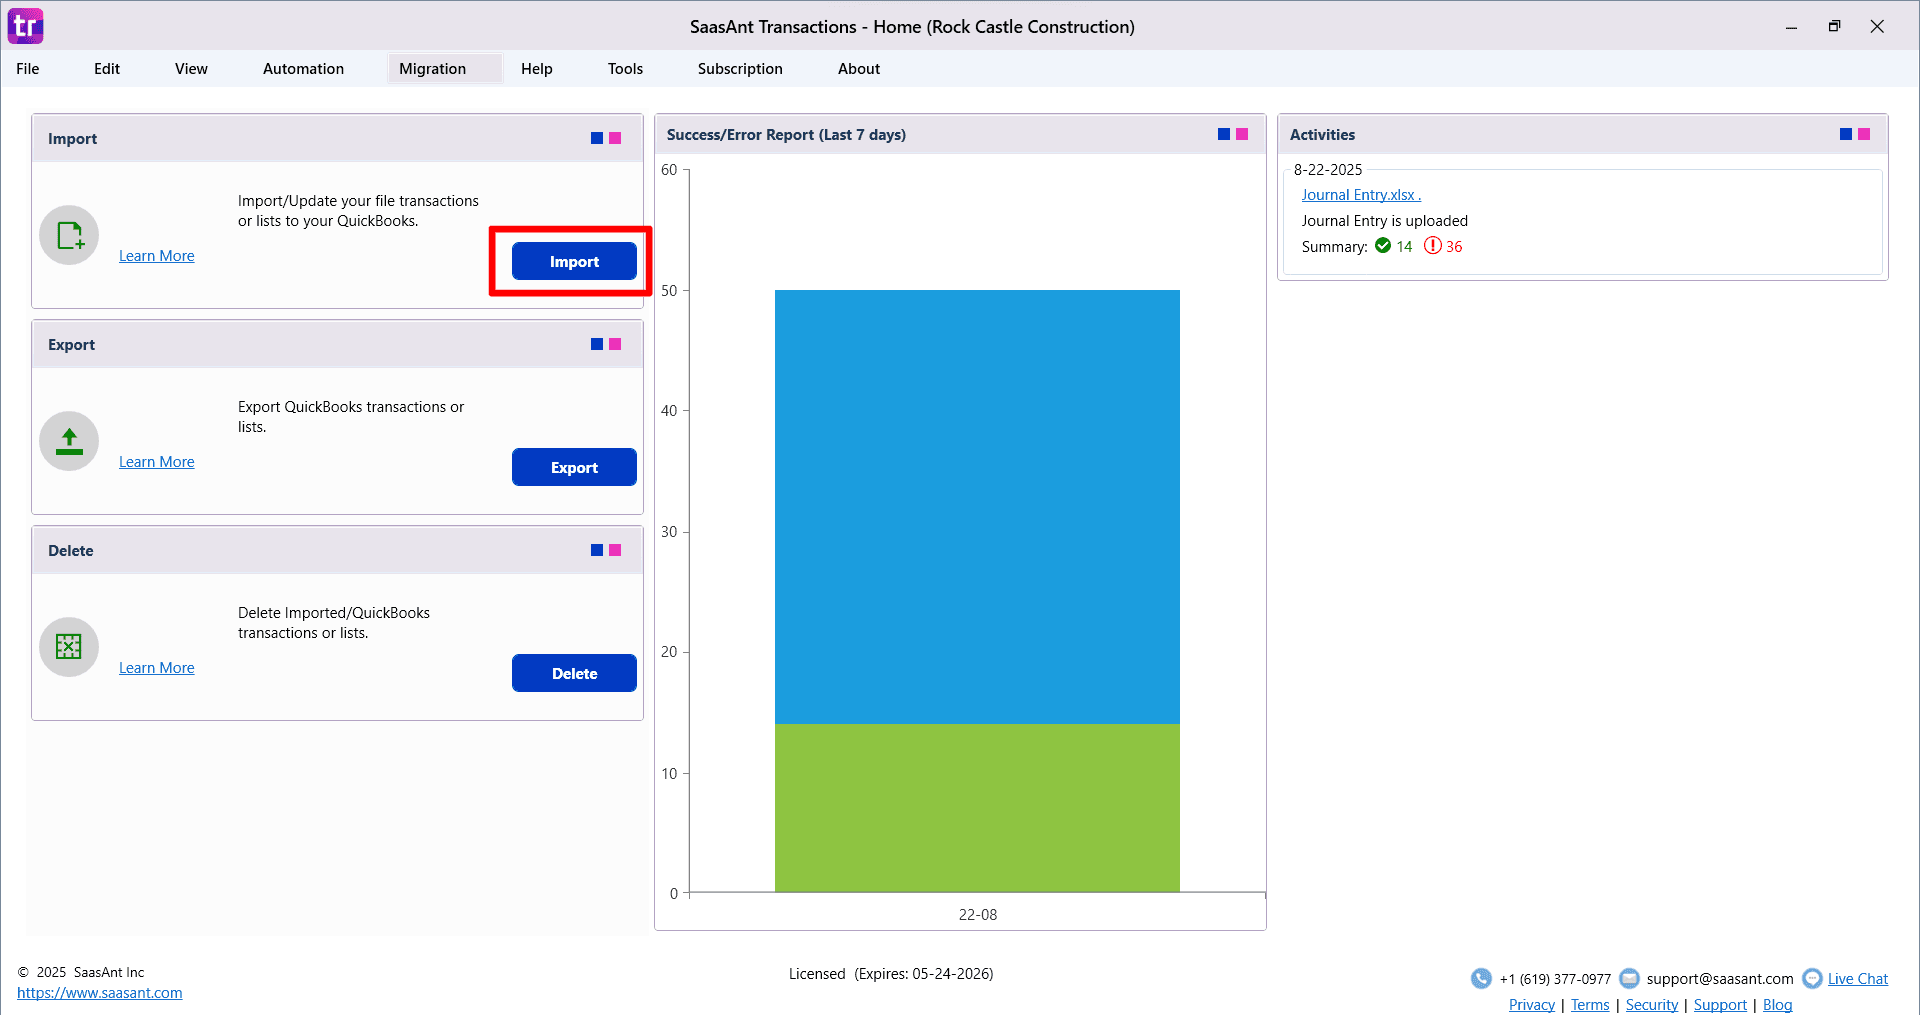
Step 2: Start the Import Process
From the Saasant home screen, you have two options to begin:
Click the Import button.
Go to the File menu and select Import.
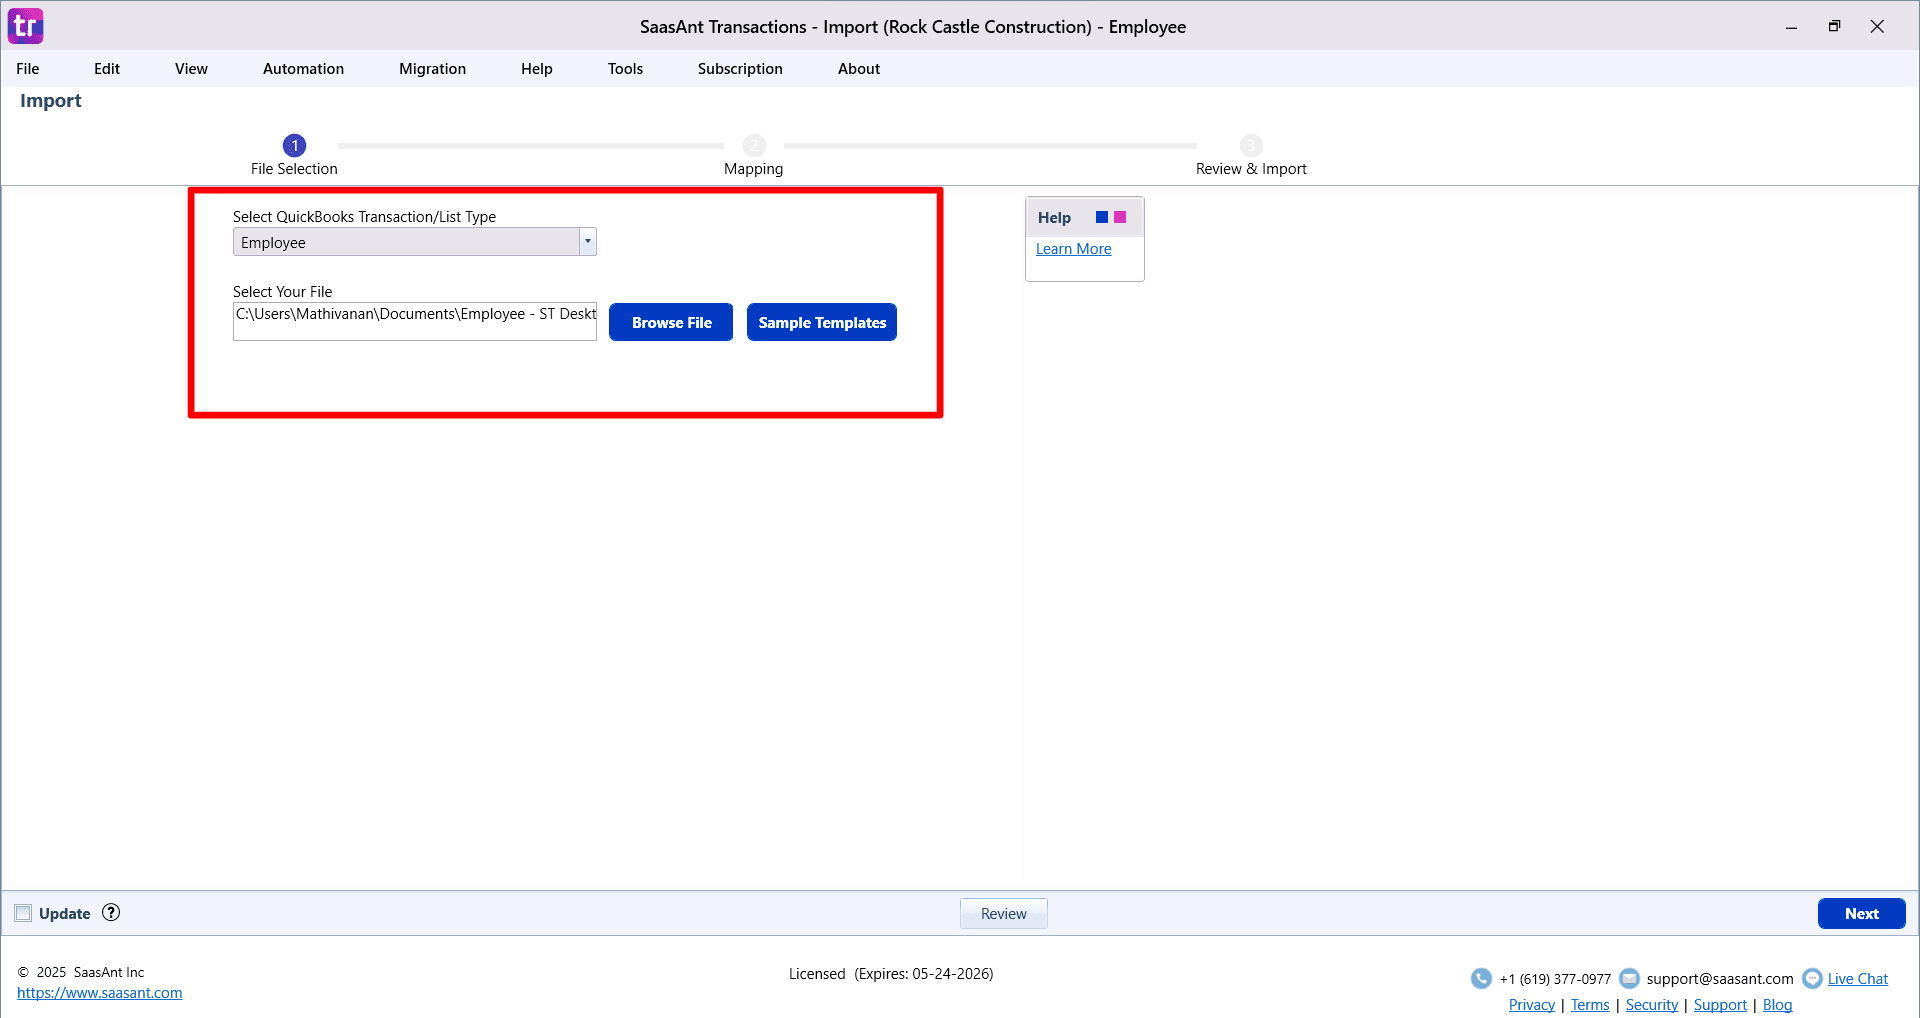
Step 3: Select Your Transaction Type and File
On the first screen, you will need to define what you are importing.
Choose Transaction/List Type: Use the dropdown menu to select the type of data you want to import here “Employee List”
Download a Sample Template (Optional): You can download a sample CSV/spreadsheet file. This template shows you the correct column structure and formatting for a successful import.
Select Your File: Click Browse File to locate and select the CSV or spreadsheet file you want to import from your computer.
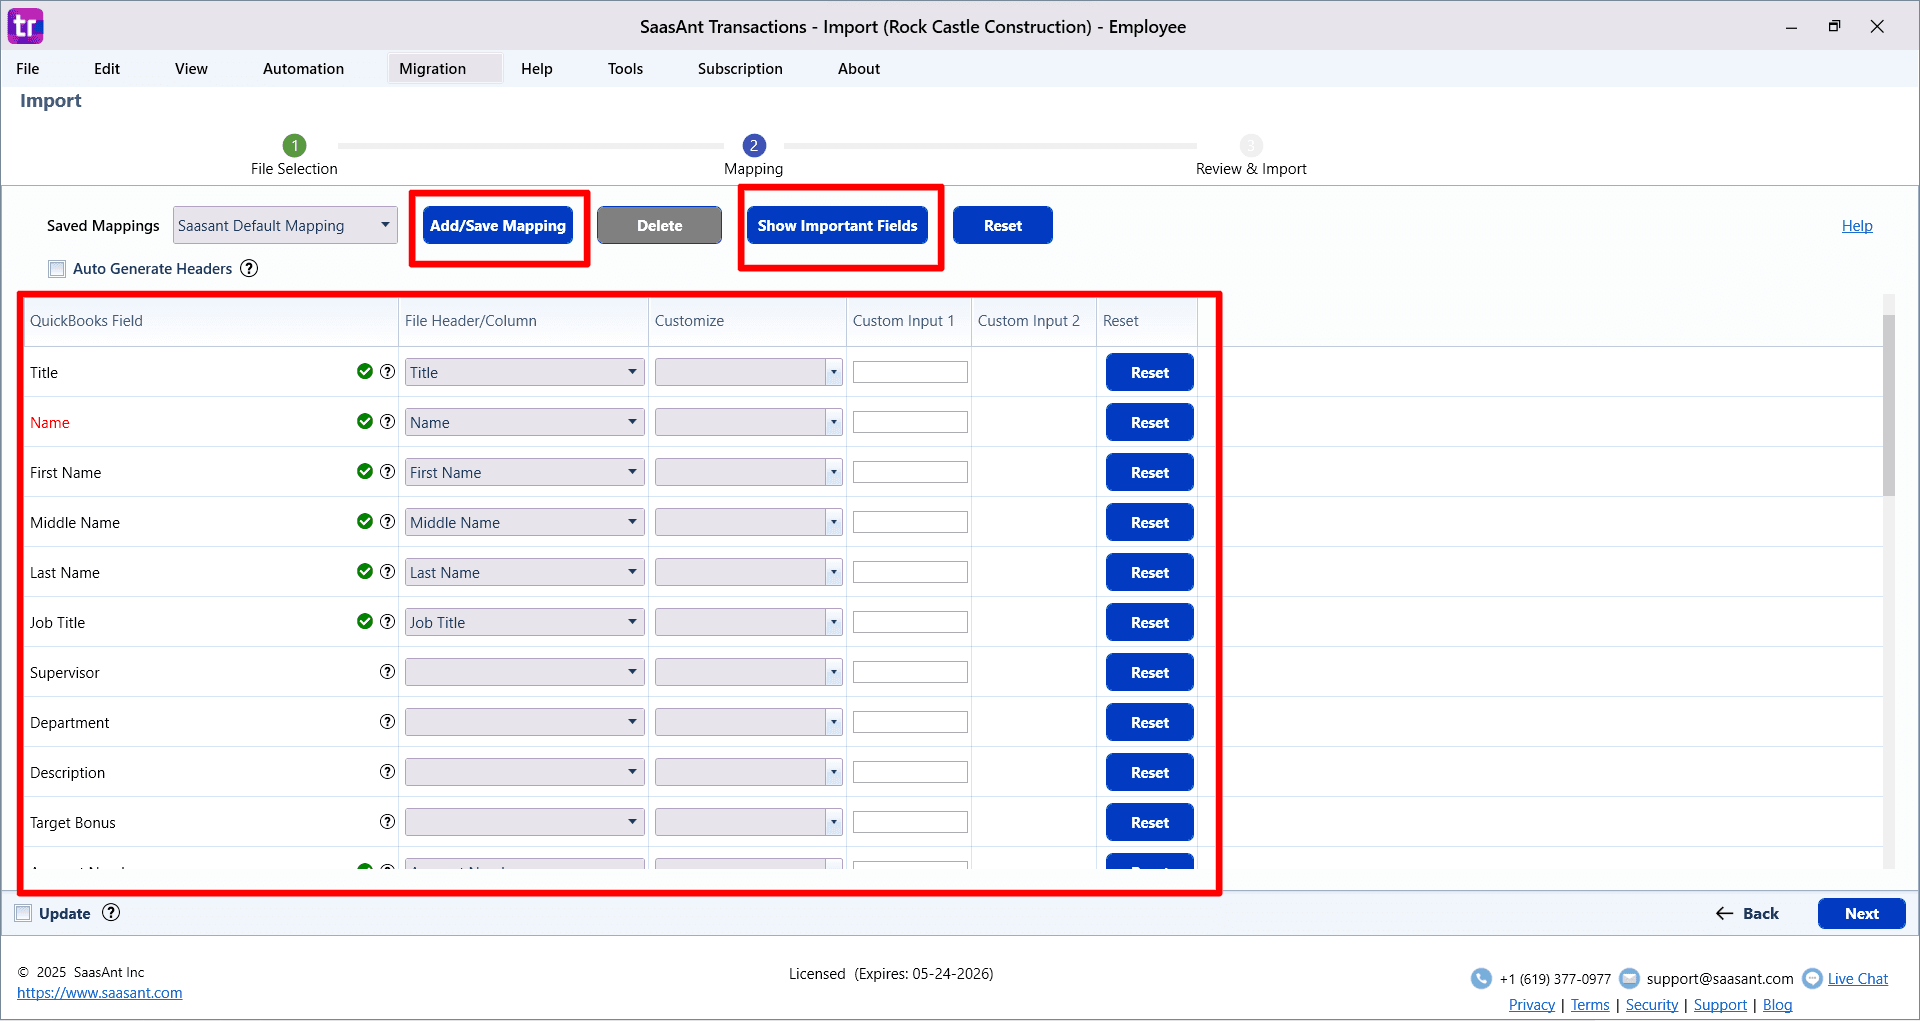
Step 4: Map Your File to QuickBooks Fields
This is a critical step where you tell Saasant how the columns in your file correspond to the fields in QuickBooks.
Automatic Mapping: Saasant will automatically map columns from your file if their headers match the QuickBooks field names.
Manual Mapping: If your column names are different, you can manually select the correct QuickBooks field from the dropdown list for each of your columns.
Customization Options: Use advanced options to manipulate your data during the import:
Set value if empty: Fill in a default value if a cell in your file is blank.
Merge: Combine data from multiple columns into a single QuickBooks field.
Override: Replace existing data with new information.
View Mandatory Fields: Click the Show Important Fields button to see which fields are required by QuickBooks for the transaction type you are importing.
Save Your Mapping: You can save your mapping configuration. This creates an efficient workflow for future imports, as you won't have to map the same file format again.
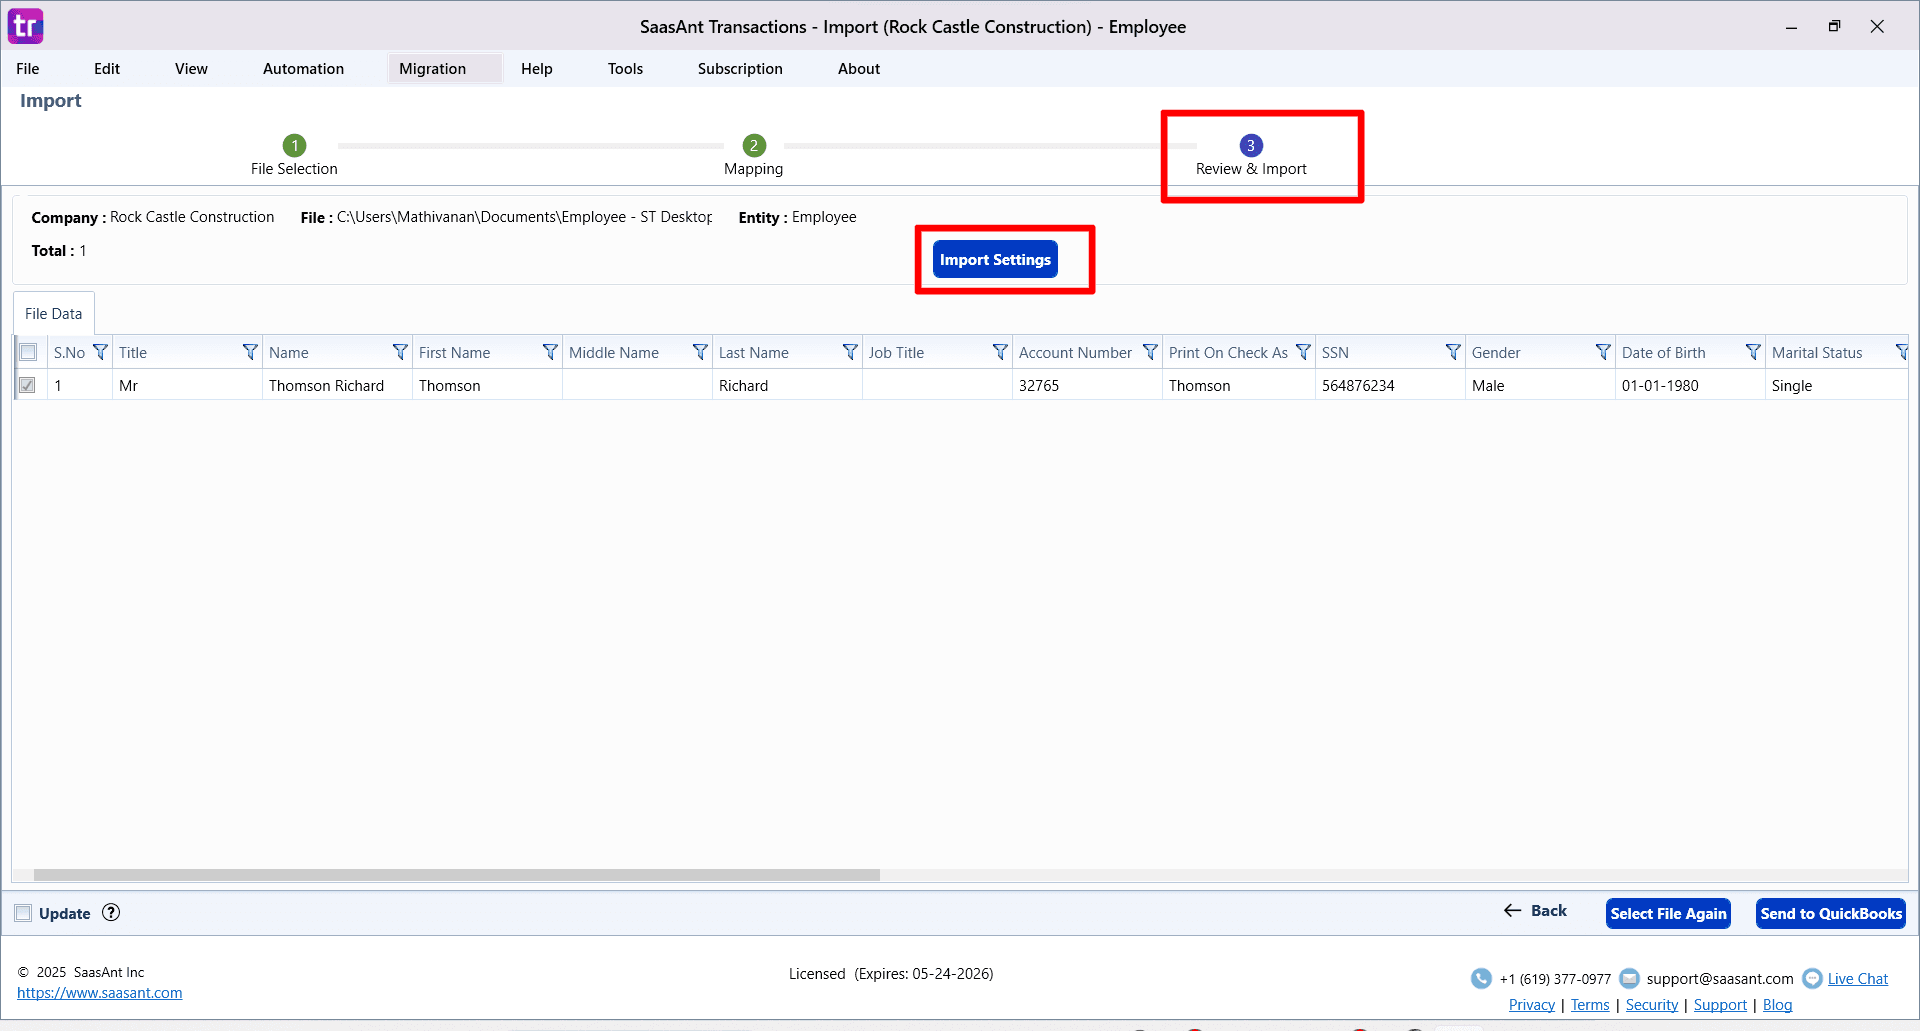
Step 5: Review, Edit, and Configure Settings
The final screen, "Review and Import," gives you a last chance to check and modify your data before it goes into QuickBooks.
Review Your Data: Your data is displayed in a spreadsheet-like grid. You can review all entries for accuracy.
Make Final Edits: The fields in the grid are editable, allowing you to make last-minute corrections directly within Saasant.
Filter Data: If you have a large file, use the filter options to find and review specific lines or make bulk changes.
Selective Import: Use the checkboxes next to each row to select or deselect specific lines you want to import or skip.
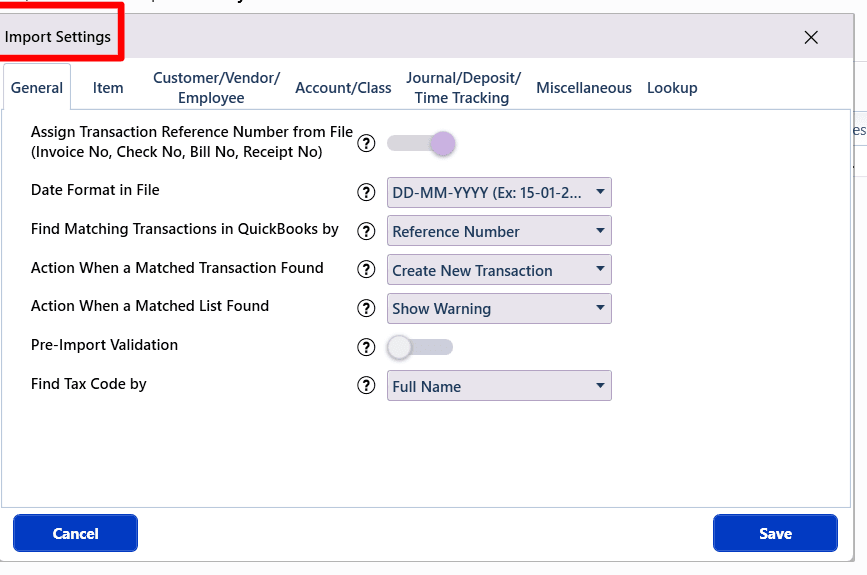
Configure Import Settings: Click Import Settings to access powerful automation features:
Assign transaction numbers (e.g., Invoice No, Check No) from your file.
Specify the date format used in your file.
Set rules for finding and handling matching transactions already in QuickBooks.
Automatically create new Customers, Vendors, Products/Services, or Accounts if they don't already exist.
Step 6: Send to QuickBooks and Monitor Results
Once you are satisfied with the review and settings:
Click the Send to QuickBooks button to start the validation and import process.
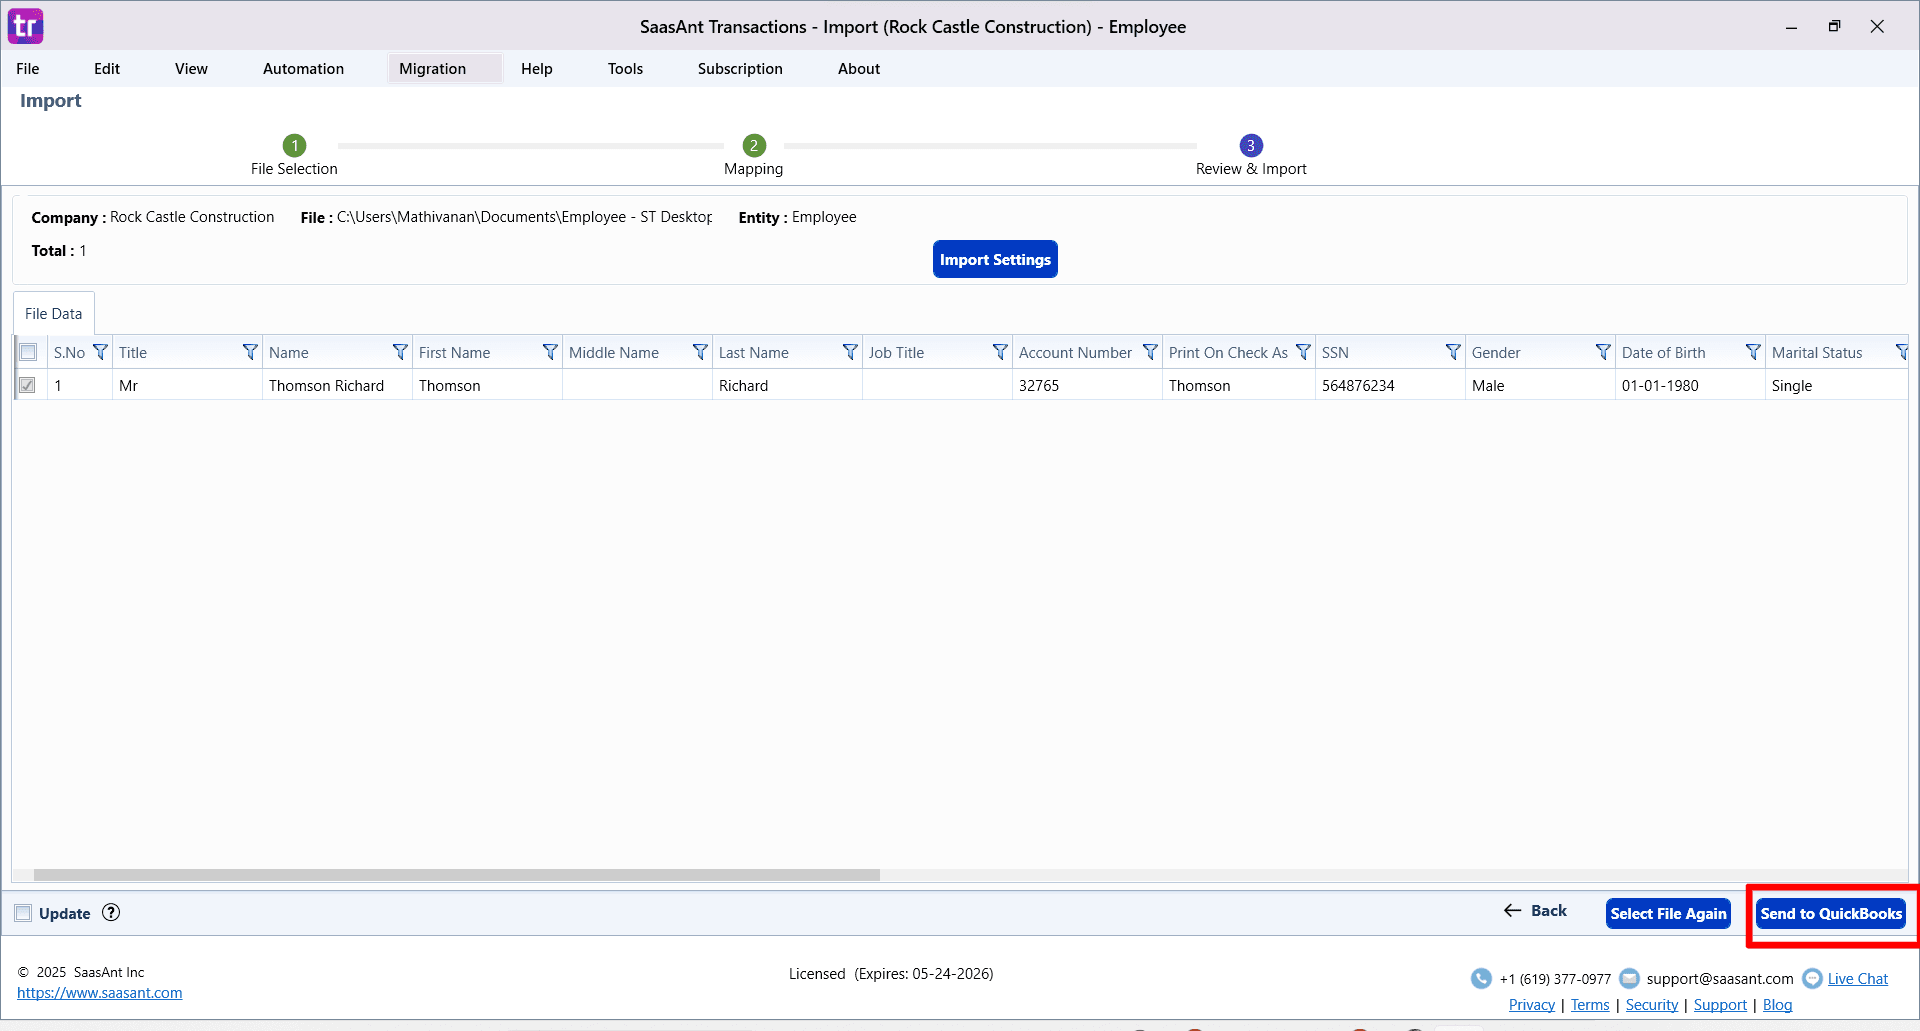
If you need to start over, click Select file again.
After the import, a results screen will appear, clearly showing which lines were successful and which failed with errors.
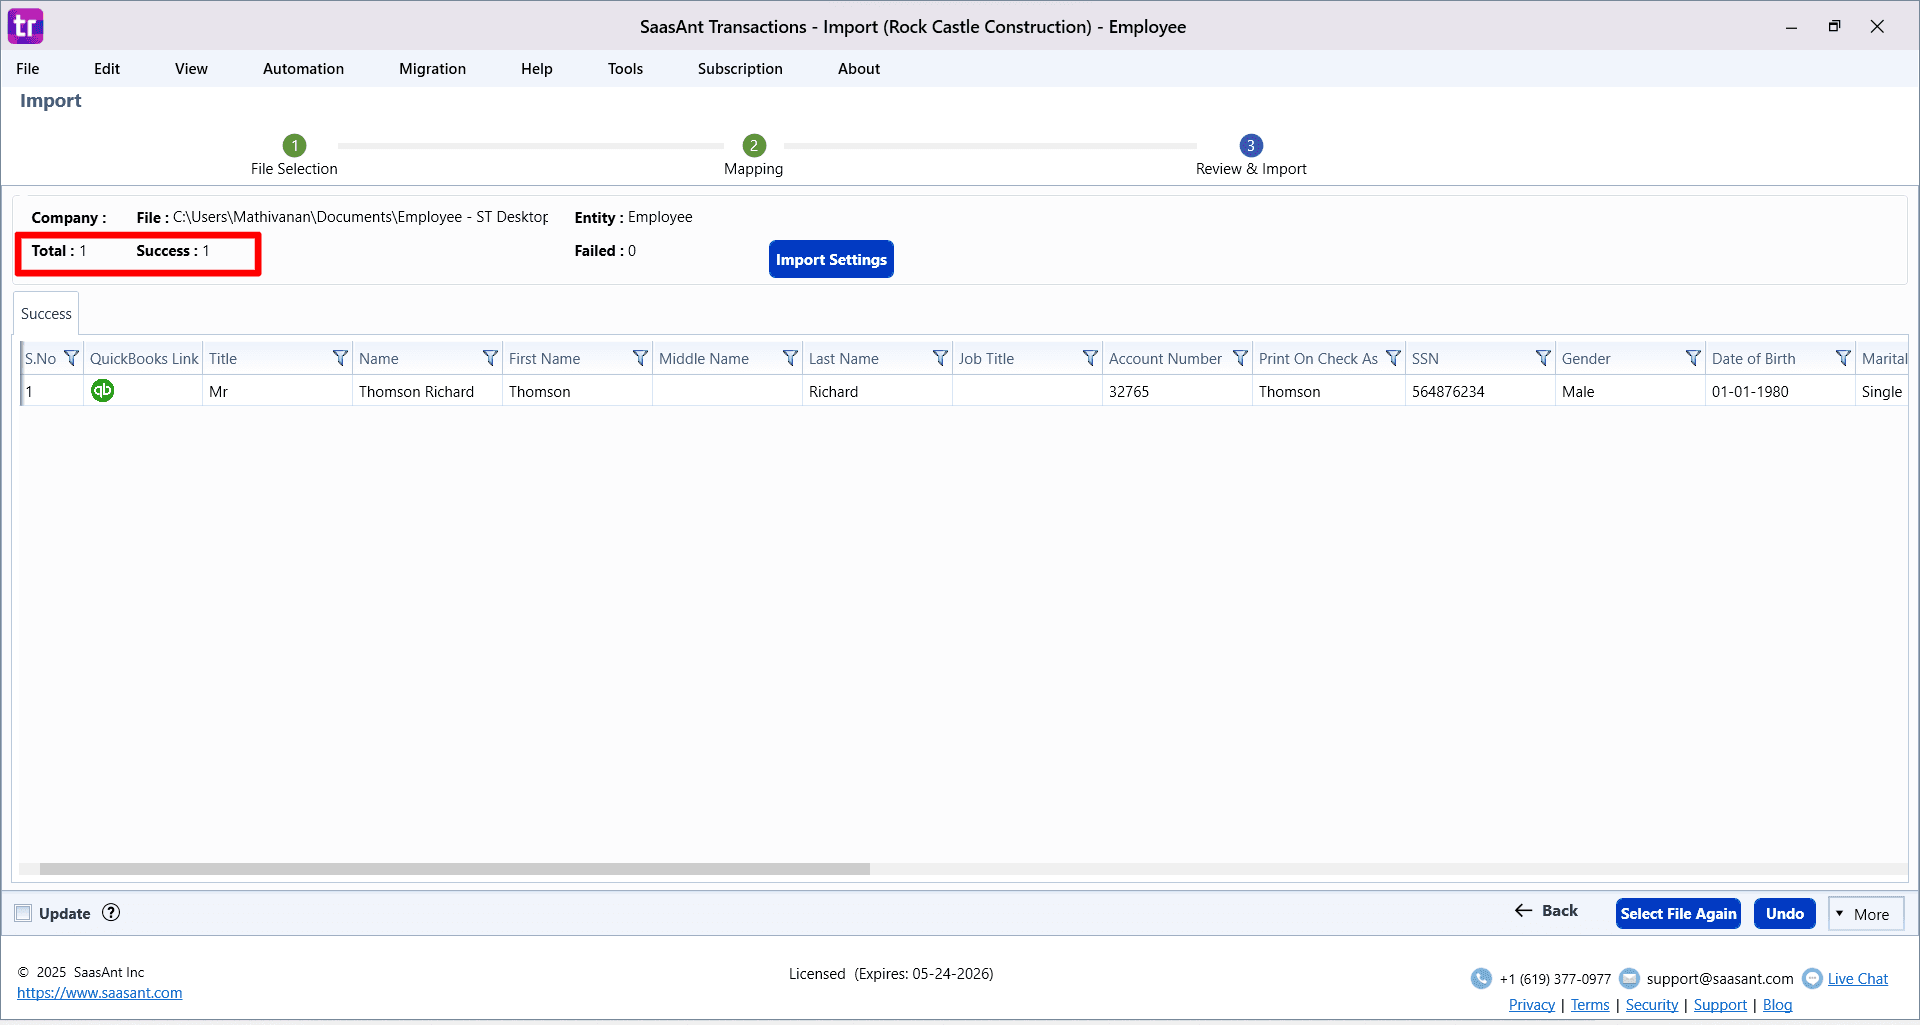
Step 7: Handle Errors and Finalize
The import results screen provides tools for troubleshooting and finalizing the process.
Fix Errors: For each failed line, an error message will explain the problem (e.g., "No account found in the specified name").
Click the Fix button next to the error to correct the data in the table directly.
After making corrections, you can attempt to re-import only the failed lines.
Undo Import: If there are major issues with the entire import, click the Undo button. This will safely delete all records created in QuickBooks during this specific import session.
View Logs: You can access detailed Warning and Error Logs for further analysis.
Mapping QuickBooks Fields
Field Name | Format | Description |
|---|---|---|
Title | Characters | Title of the Employee |
Name | Characters | Name of the Employee |
First Name | Characters | First Name of the Employee |
Middle Name | Characters | Middle Name of the Employee |
Last Name | Characters | Last Name of the Employee |
Account Number | Characters | Account Number |
Print On Check As | Characters | Name of the Employee as printed on a check |
SSN | Characters | Social security number (SSN) of the employee. |
Gender | Characters | Gender of the employee. |
Date of Birth | Date | Birth date of the employee. |
Marital Status | Characters | Marital Status of the Employee |
US Citizen | Characters | |
Ethnicity | Characters | |
Address Line 1 | Characters | Address Line 1 of the Employee |
Address Line 2 | Characters | Address Line 2 of the Employee |
Address City | Characters | City of the Employee |
Address Postal Code | Characters | Postal Code of the Employee |
Address Country | Characters | Country of the Employee |
Address State | Characters | State of the Employee |
Main Phone | Characters | Phone Number of the Employee |
Main Email | Characters | Email of the Employee |
Alt. Phone | Characters | Alternate Phone Number of the Employee |
Work Phone | Characters | Work Phone Number of the Employee |
CC Email | Characters | CC Email address of the Employee |
Mobile | Characters | Mobile Number of the Employee |
Website | Characters | Website address |
Fax | Characters | Fax Number |
Other1 | Characters | Other contact information |
Hire Date | Date | Hire date of the Employee |
Original Hire Date | Date | Original Hire date of the Employee |
Adjusted Service Date | Date | Adjusted Service date of the Employee |
Release Date | Date | Release date of the Employee |
Job Title | Characters | Job Title of the Employee |
Supervisor | Characters | Supervisor Name of the Employee |
Department | Characters | Department of the Employee |
Description | Characters | Description |
Target Bonus | Characters | Target Bonus of the Employee |
Employment Type | Characters | Employment Type of the Employee |
Full/ Part Time | Characters | Full/Part Time |
Exempt | Characters | Exempt |
Key Employee | Characters | Key Employee |
US Veteran | Characters | |
Military Status | Characters | |
Notes | Characters |
All (*) marked fields are mandatory.
Import Settings
A host of powerful customizations for your file data is available with Import Settings. This is available in Step 3: Review & Import screen or directly under the "Edit" menu in the menubar. Some of the very useful settings for lists include:
Action When a Matched List Found: If an existing list entity is found with the given name then the corresponding action to be taken. You can choose to Show Warning/ Update existing transactions in your QuickBooks.
Pre-Import Validation: Validate the complete file before importing it to QuickBooks. By turning this setting ON, file rows will be imported only after cleaning up all the issues in the file. This option however will delay the import.
More details about the settings related to managing list import are available in this article.
FAQ's
Most of us would have some questions while moving data to your QuickBooks Online. Some of them for your reference below:
I made some mistakes in the Import and my QuickBooks reports got corrupted. Is there any way to undo or revert my Import?
It is possible to undo the import completely/ partially with the Delete feature.
Does your app support taxes?
Yes. It does..
My file has some specific date format. I don't want to change the file. Will your product support all date formats?
Yes. You can select the specific date format as per your requirement in the import settings.
Do you have any sample templates?
Yes. We do have. Sample Template
What file types does SaasAnt Transactions Desktop support for importing into QuickBooks Desktop?
SaasAnt Transactions Desktop supports XLS, XLSX, XLSM, CSV, TXT, and IIF.
How do I report the issues if I am stuck?
Feel free to drop an email to support@saasant.com