How to Connect or Authorise SaasAnt Transactions (Desktop) to QuickBooks Desktop?
January 3, 2025
After successfully installing SaasAnt Transactions (Desktop), you must authorize the SaasAnt Transactions (Desktop) application to communicate with your QuickBooks Desktop.
To Import / Export / Delete any QuickBooks Transactions, it is mandatory to have a successful authorization between "SaasAnt Transactions (Desktop)" and QuickBooks Desktop (Enterprise / Accountant).
Step 1: Open "QuickBooks" and wait for the complete initialization. It is advised to close any open Windows in QuickBooks Desktop. "SaasAnt Transactions (Desktop)" can work with one QuickBooks Company file anytime.
Close other company files if you have opened multiple company files. You should have ADMIN privileges in QuickBooks to authorize "SaasAnt Transactions (Desktop)." However, you don't need ADMIN privileges to run "SaasAnt Transactions (Desktop)."
Step 2: Open "SaasAnt Transactions (Desktop)" and click on the IMPORT or, EXPORT or DELETE buttons available on Home Screen. This will open a window in QuickBooks. You need to select either.
"Yes. Whenever this Company file is Open" or "Yes. always allow access even if QuickBooks is not running".
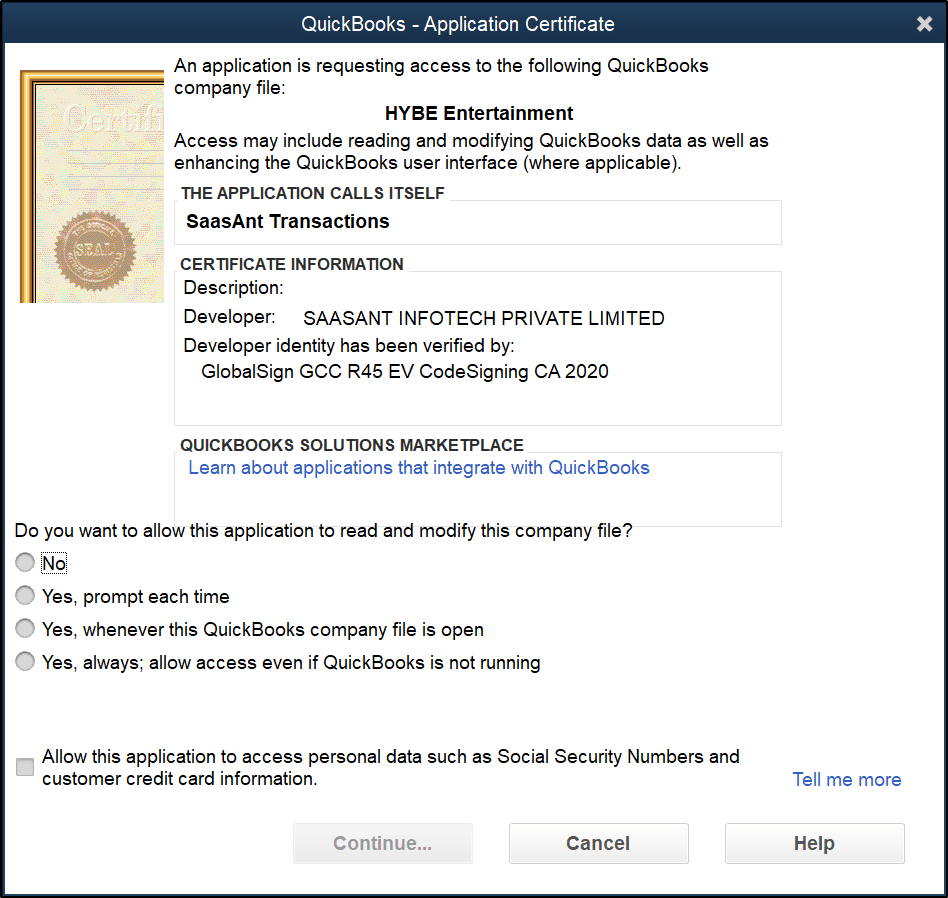
Step 3: (Optional) If you want to import credit card information to QuickBooks, select "Allow this application to access personal data such as Social Security Numbers and customer credit card information."
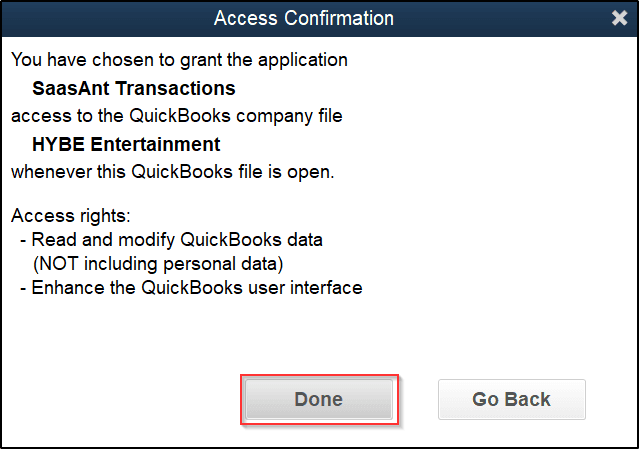
Step 4: Then click the "Continue" button. In the confirmation window, click "Done." You need to repeat this procedure (ONE TIME) for each QuickBooks Company file to work with "SaasAnt Transactions (Desktop)."