How to Import Bank Statements into QuickBooks Online (UK, AU, CA, IN, FR & Other Regions)?
August 28, 2025
You can import bank statements from Excel spreadsheets or text files directly into QuickBooks Online using the SaasAnt Transactions (Online) application.
Pre-Requisites:
Connect your QuickBooks Online to the SaasAnt Transactions (Online) App from the QuickBooks AppStore by clicking the "Get App Now" button. You can get a free trial of the product in the QuickBooks AppStore.
How does Bank Statement Import into QuickBooks work?
Let's assume that we have a file that contains the following bank statement.
Date | Description | Check No | Amount |
23/12/18 | Subscription payment | 12123733 | 100 |
23/12/18 | Telephone Bill Payment | 2121221 1 | -900 |
Bank statement has deposits and Expenses. To import Deposits and Expenses (Checks), we need to mention
1. Income Accounts
2.Expense Accounts
3.Customer or Vendor Names
Let's modify the file to add the above details.
Date | Description | Check No | Amount | Account | Payee |
23/12/18 | Subscription payment | 12123733 | 100 | Uncatergorized Income Account | John |
23/12/18 | Telephone Bill Payment | 2121221 1 | -900 | Telephone Expense Account | Telephone Company 1 |
Now we can import this file using SaasAnt Transactions (Online).
If the transaction has a POSITIVE Amount, it will be considered as Deposit.
If the transaction has a NEGATIVE Amount, it will be considered as an Expense/ Check.
If you want to change the Transaction Type, then you can add one more column Transaction Type and mention one of the below value
Check
Expense
Deposit
How to Import Bank Transactions into QuickBooks Online using SaasAnt Transactions Online
To import bulk/batch bank transactions into QuickBooks Online using the SaasAnt Transactions (Online) application, follow the steps below,
1) Login into SaasAnt Transaction Online
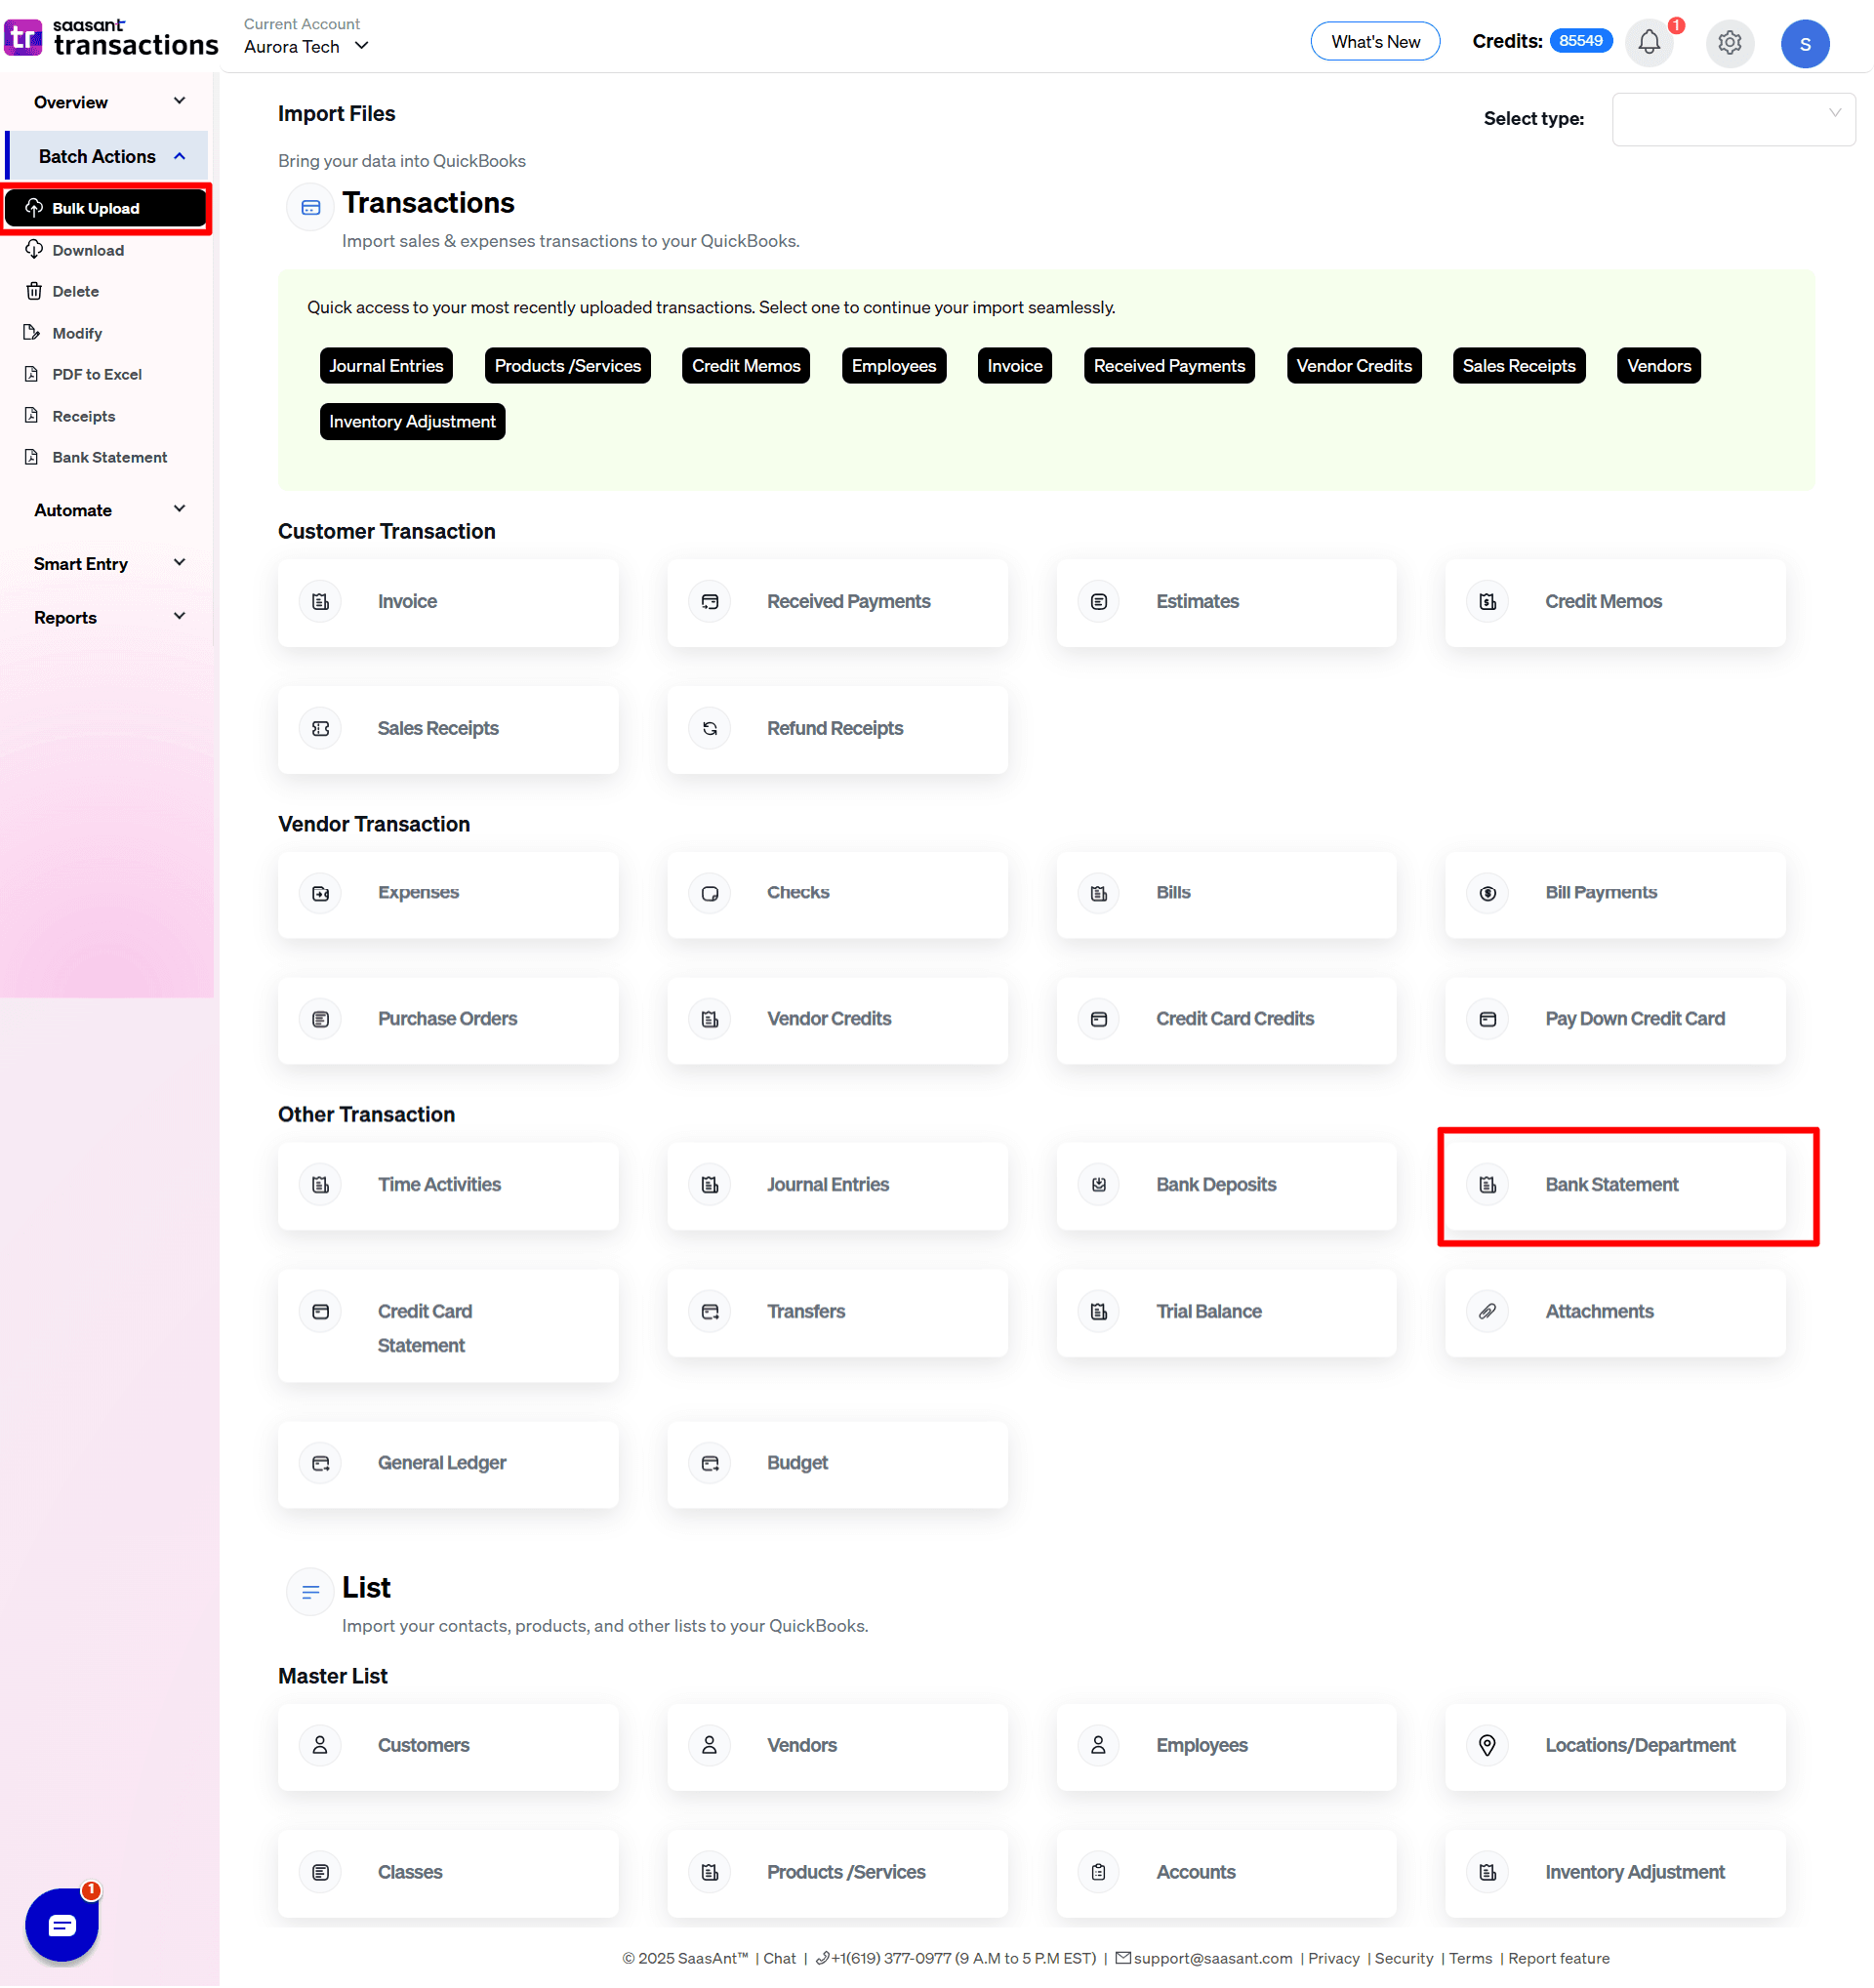
2) Select the Bulk Upload Tab.
3) Select Let's import
4) Select the QuickBooks entity as Bank Statements

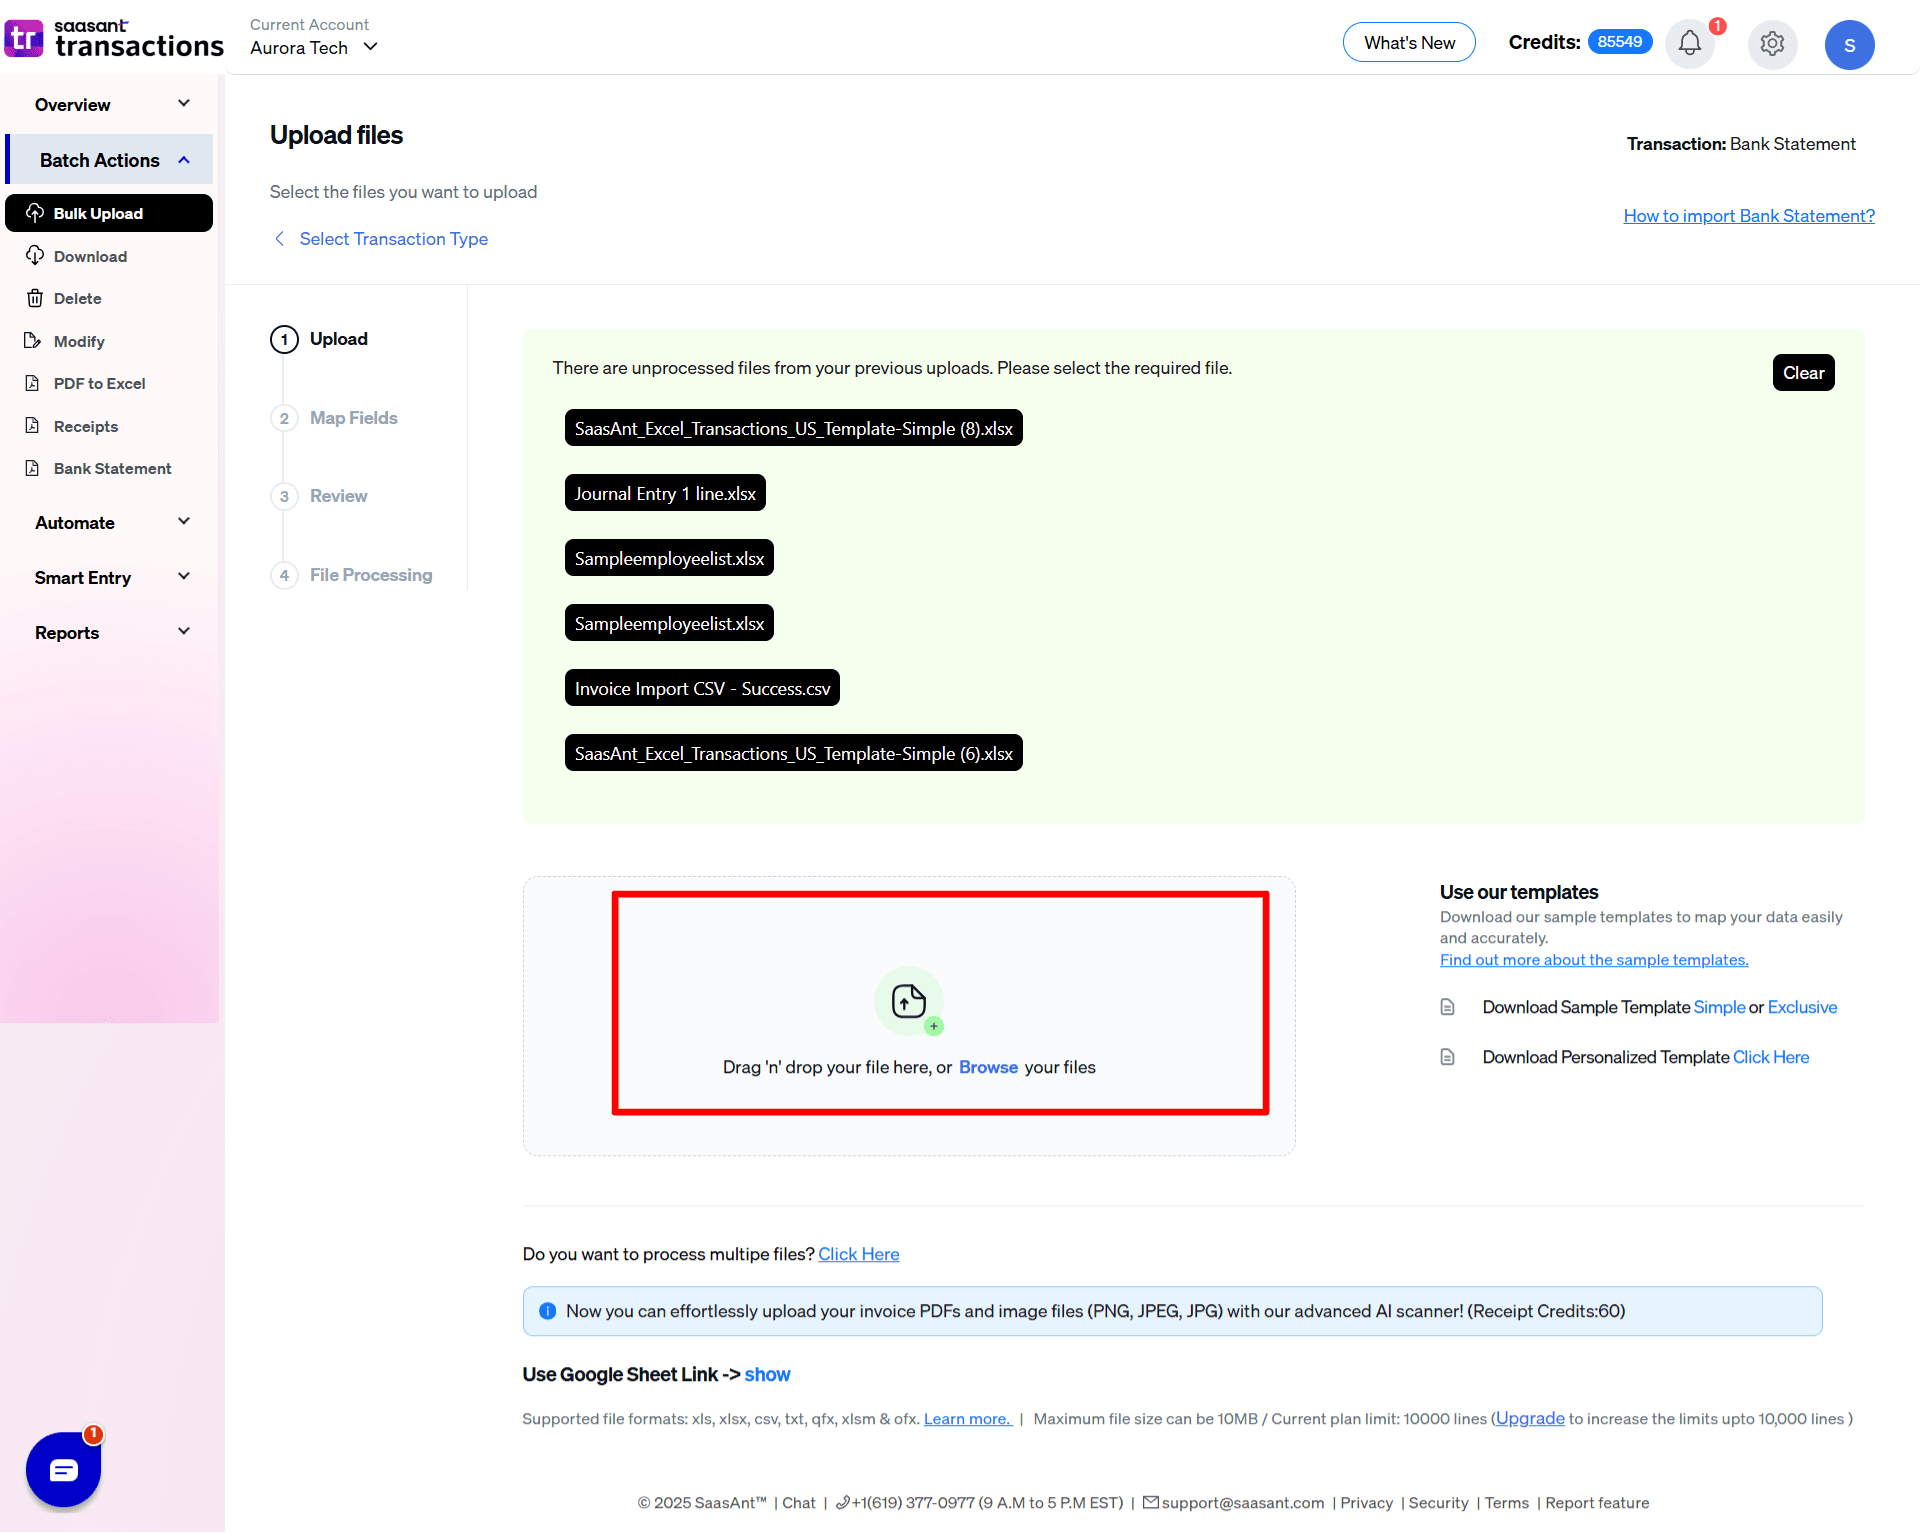
6) Select the files you want to upload

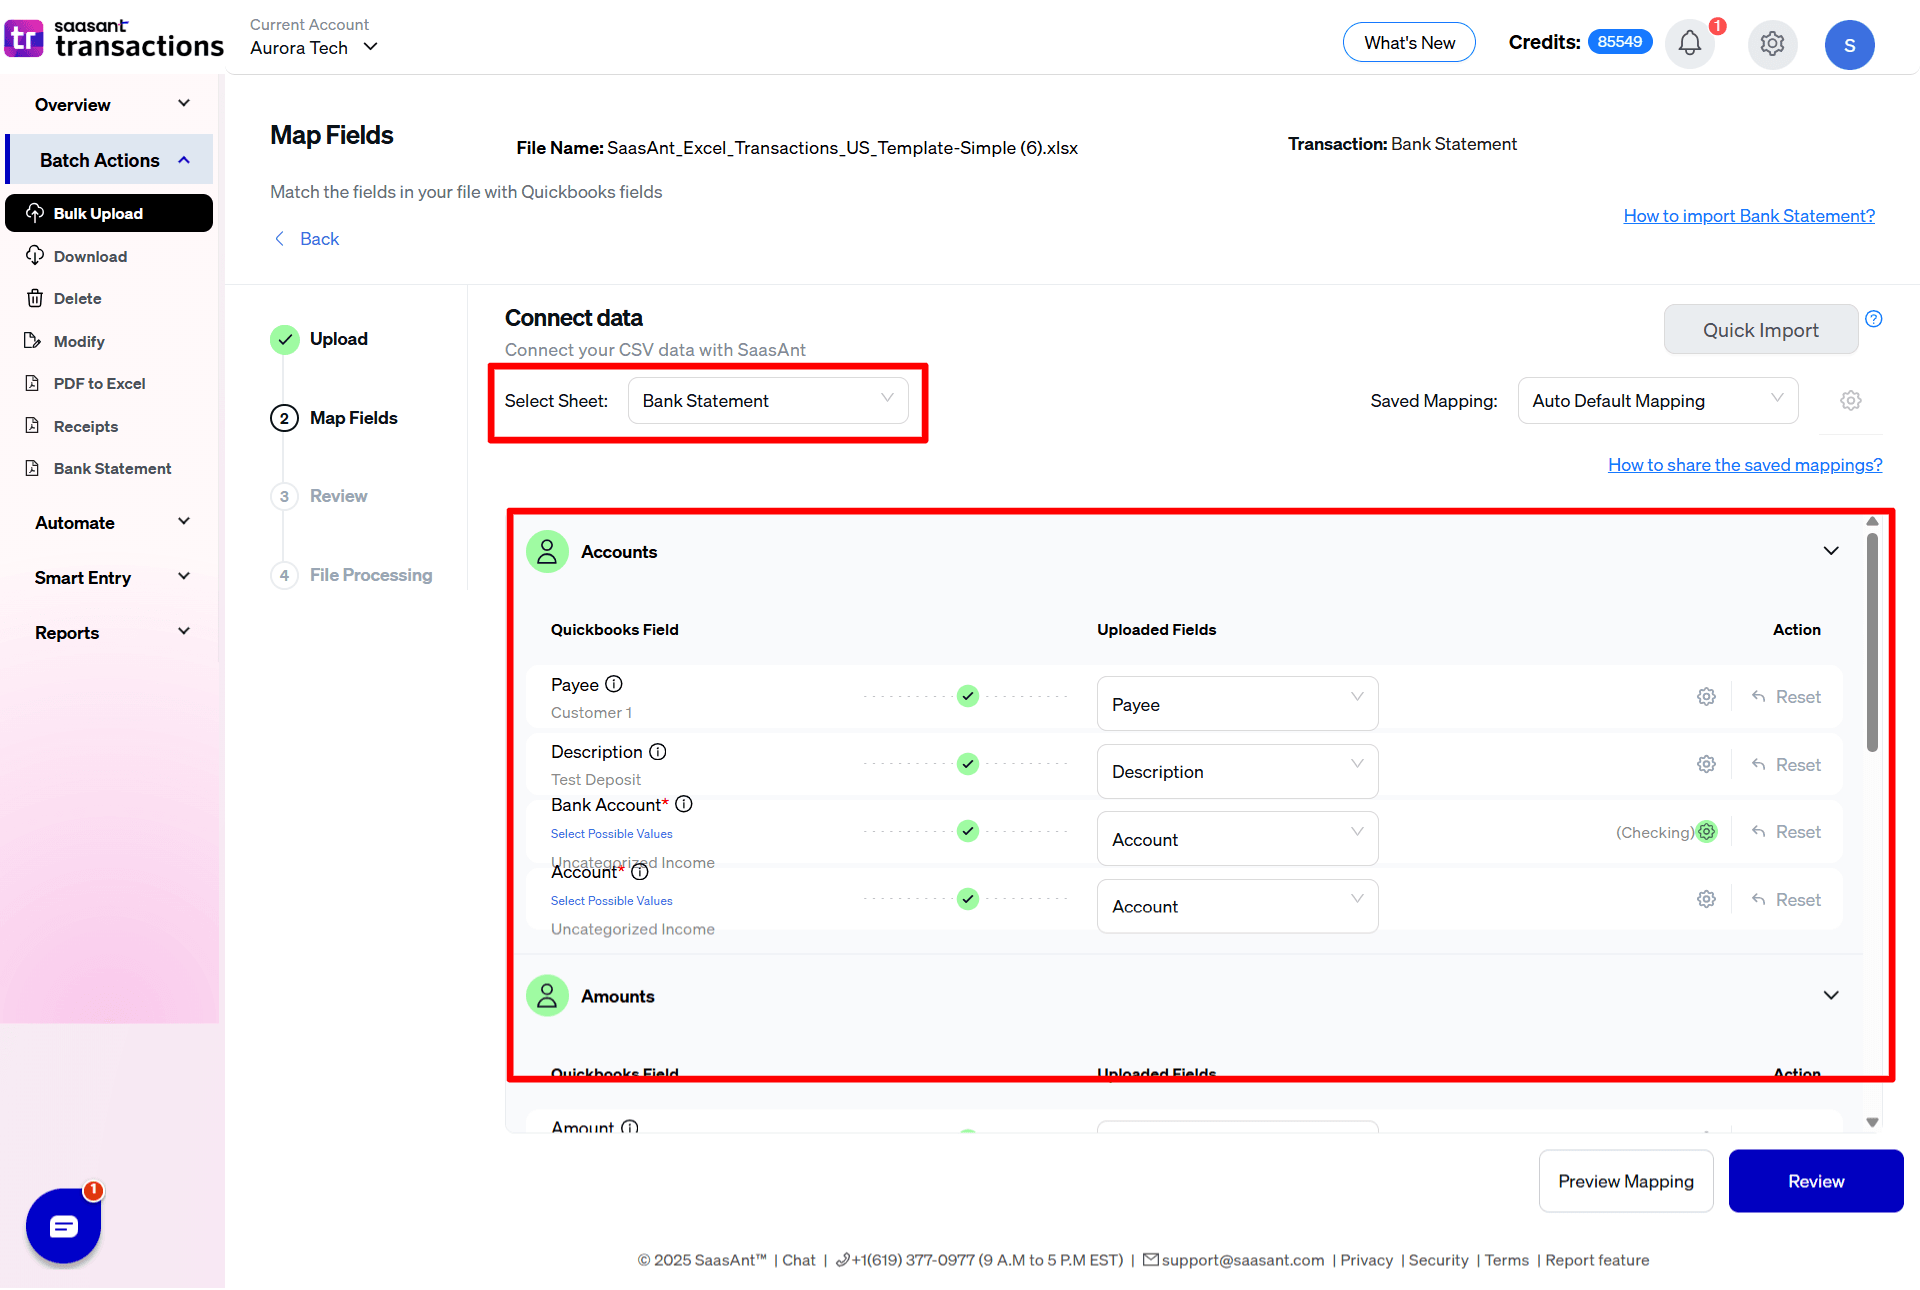
7) Set up the Mapping of the columns in your Bank statement

8) Select the "Preview Mapping" button to visualize current mapping based on QuickBooks
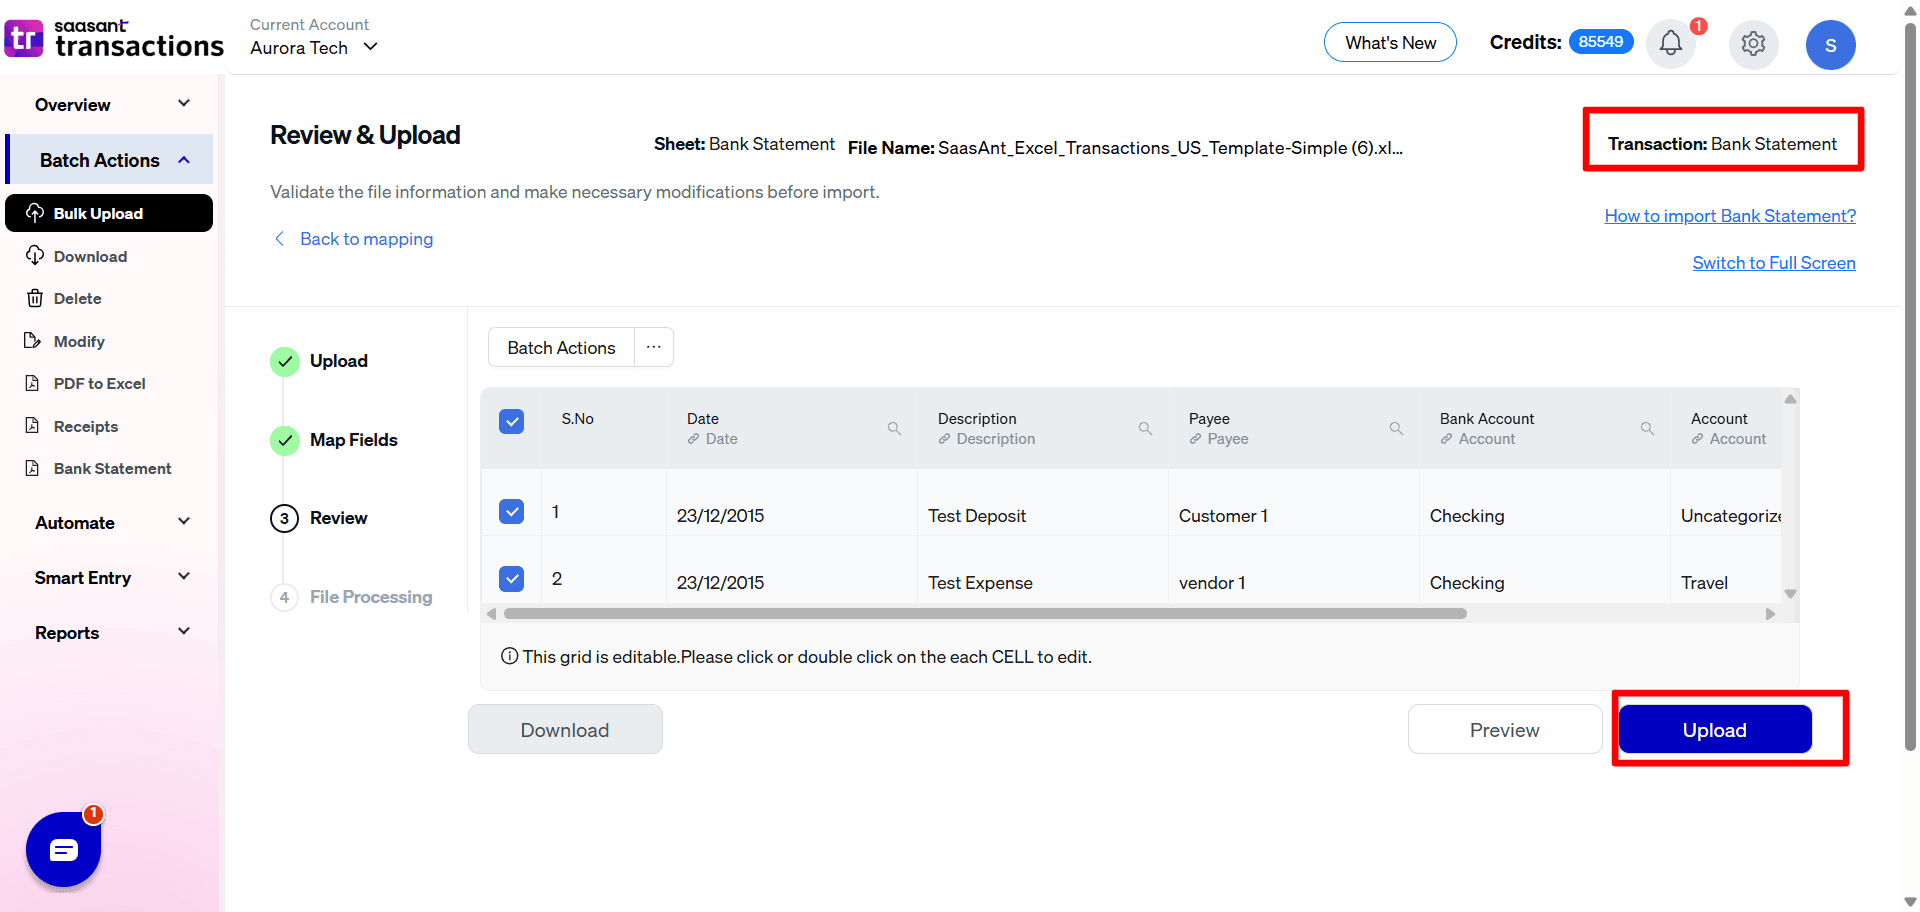
9) Select the Upload Tab

10) The data was imported successfully into QuickBooks.
SaasAnt Transactions (Online) Fields
Field Name | Format | Description |
|---|---|---|
Check No | 21 Characters | Check Number or Reference number for the transaction. |
Payee | Characters | Name of the vendor / Customer / Employee for this transaction. |
Bank Account | Characters | Name of the Bank / Credit Card / Cash Account for this transaction. |
Date | Date | The date entered by the user when this transaction occurred. |
Description | 4000 Characters | The Description of the Expense or Deposit Transaction. |
Account | Characters | Reference to the Expense Account Name or Income Account Name associated with the transaction. |
Amount | Decimal | The amount of the transaction. |
Credit Amount | Decimal | Deposit Amount |
Debit Amount | Decimal | Expense/ Check Amount of the transaction |
Transaction Type | Characters | Type of the transaction. |
Tax Code | Characters | Tax Code associated with this transaction Ex: GST 5% |
Global tax Calculation | Characters | Tax calculation model or logic for this transaction. |
FAQs
What file types does SaasAnt Transactions Online support for QuickBooks Online imports?
For almost all entities in QuickBooks Online, SaasAnt Transactions Online supports XLS, XLSX, XLSM, CSV, TXT, Google Sheets, and IIF. Additionally, PDF, PNG, and JPEG are supported only for Receipts, Invoices, Bank Statements, Checks, and Expenses.