How to Import Vendors List into QuickBooks Online (U.S)?
August 20, 2025
Pre Requisites:
Connect your QuickBooks Online account to SaasAnt Transactions (Online) App from QuickBooks AppStore by clicking the "Get App Now" button and get the 30 days free trial [No credit card required].
Please refer basics of field mappings for more info. If you have any confusion or doubts, feel free to drop an email to support@saasant.com.
How to Import Vendors List into QuickBooks Online using SaasAnt Transactions Online
1) Login into SaasAnt Transaction Online
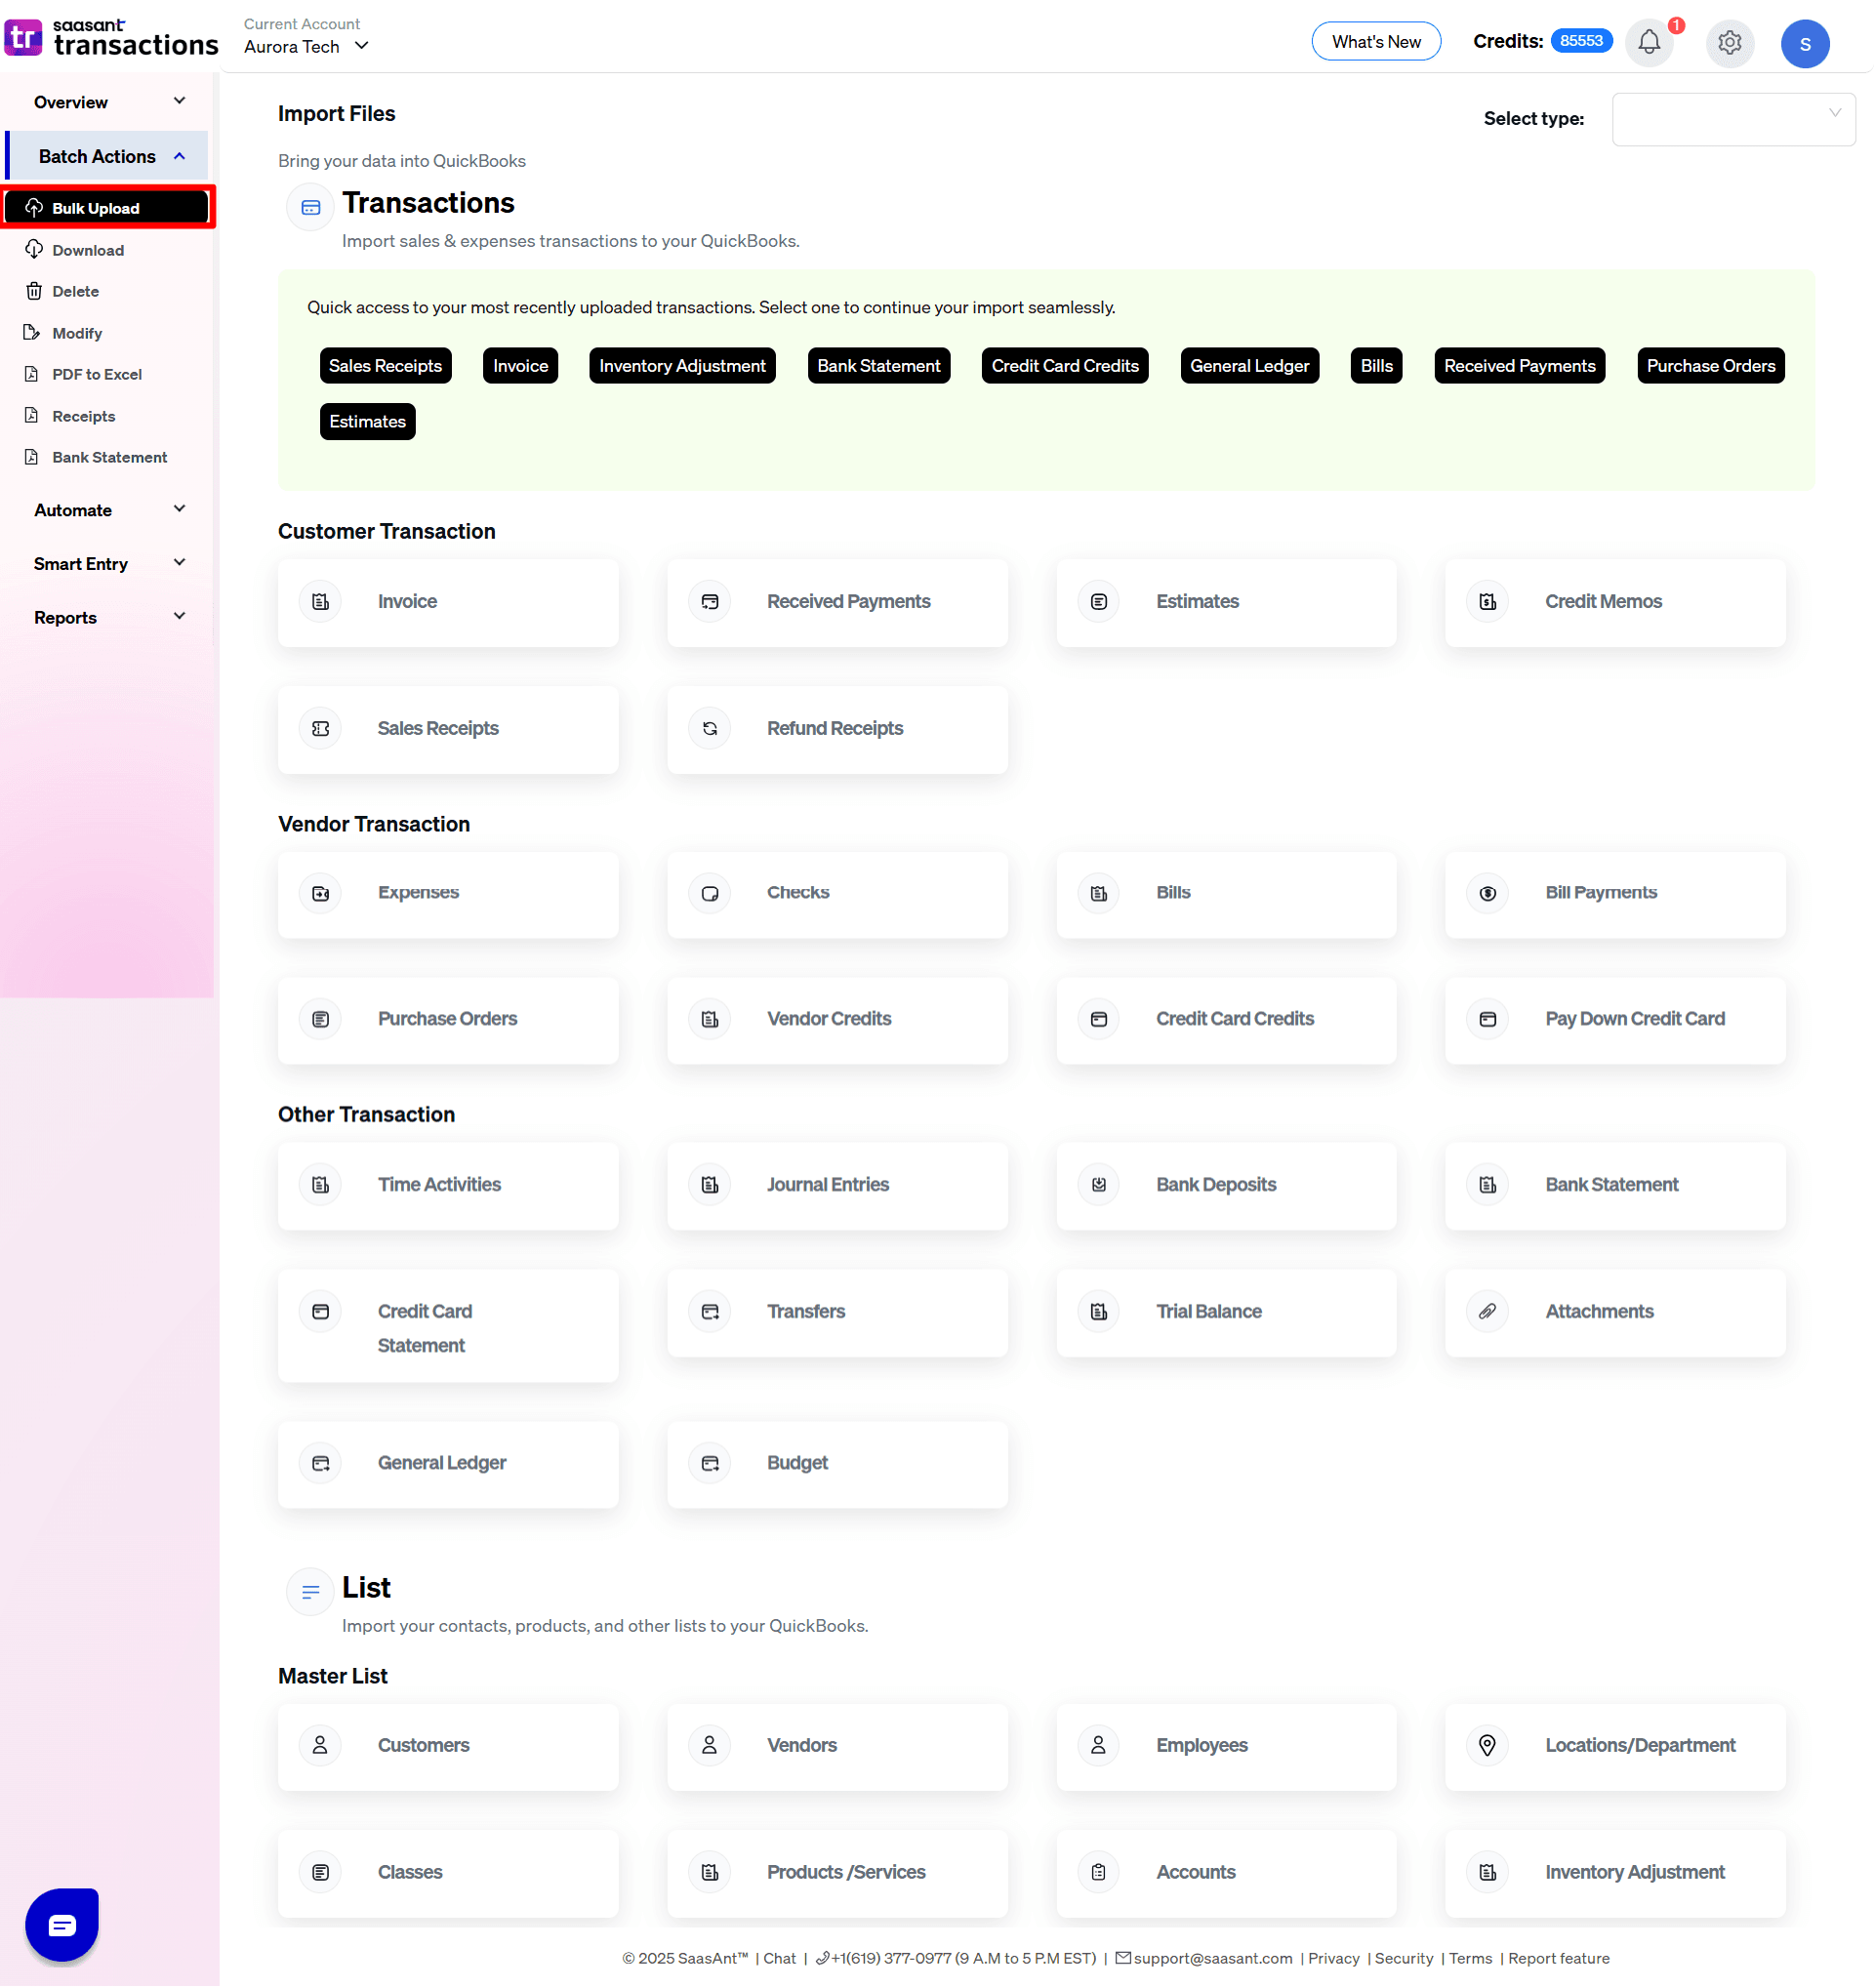
2) Select the Bulk Upload Tab.
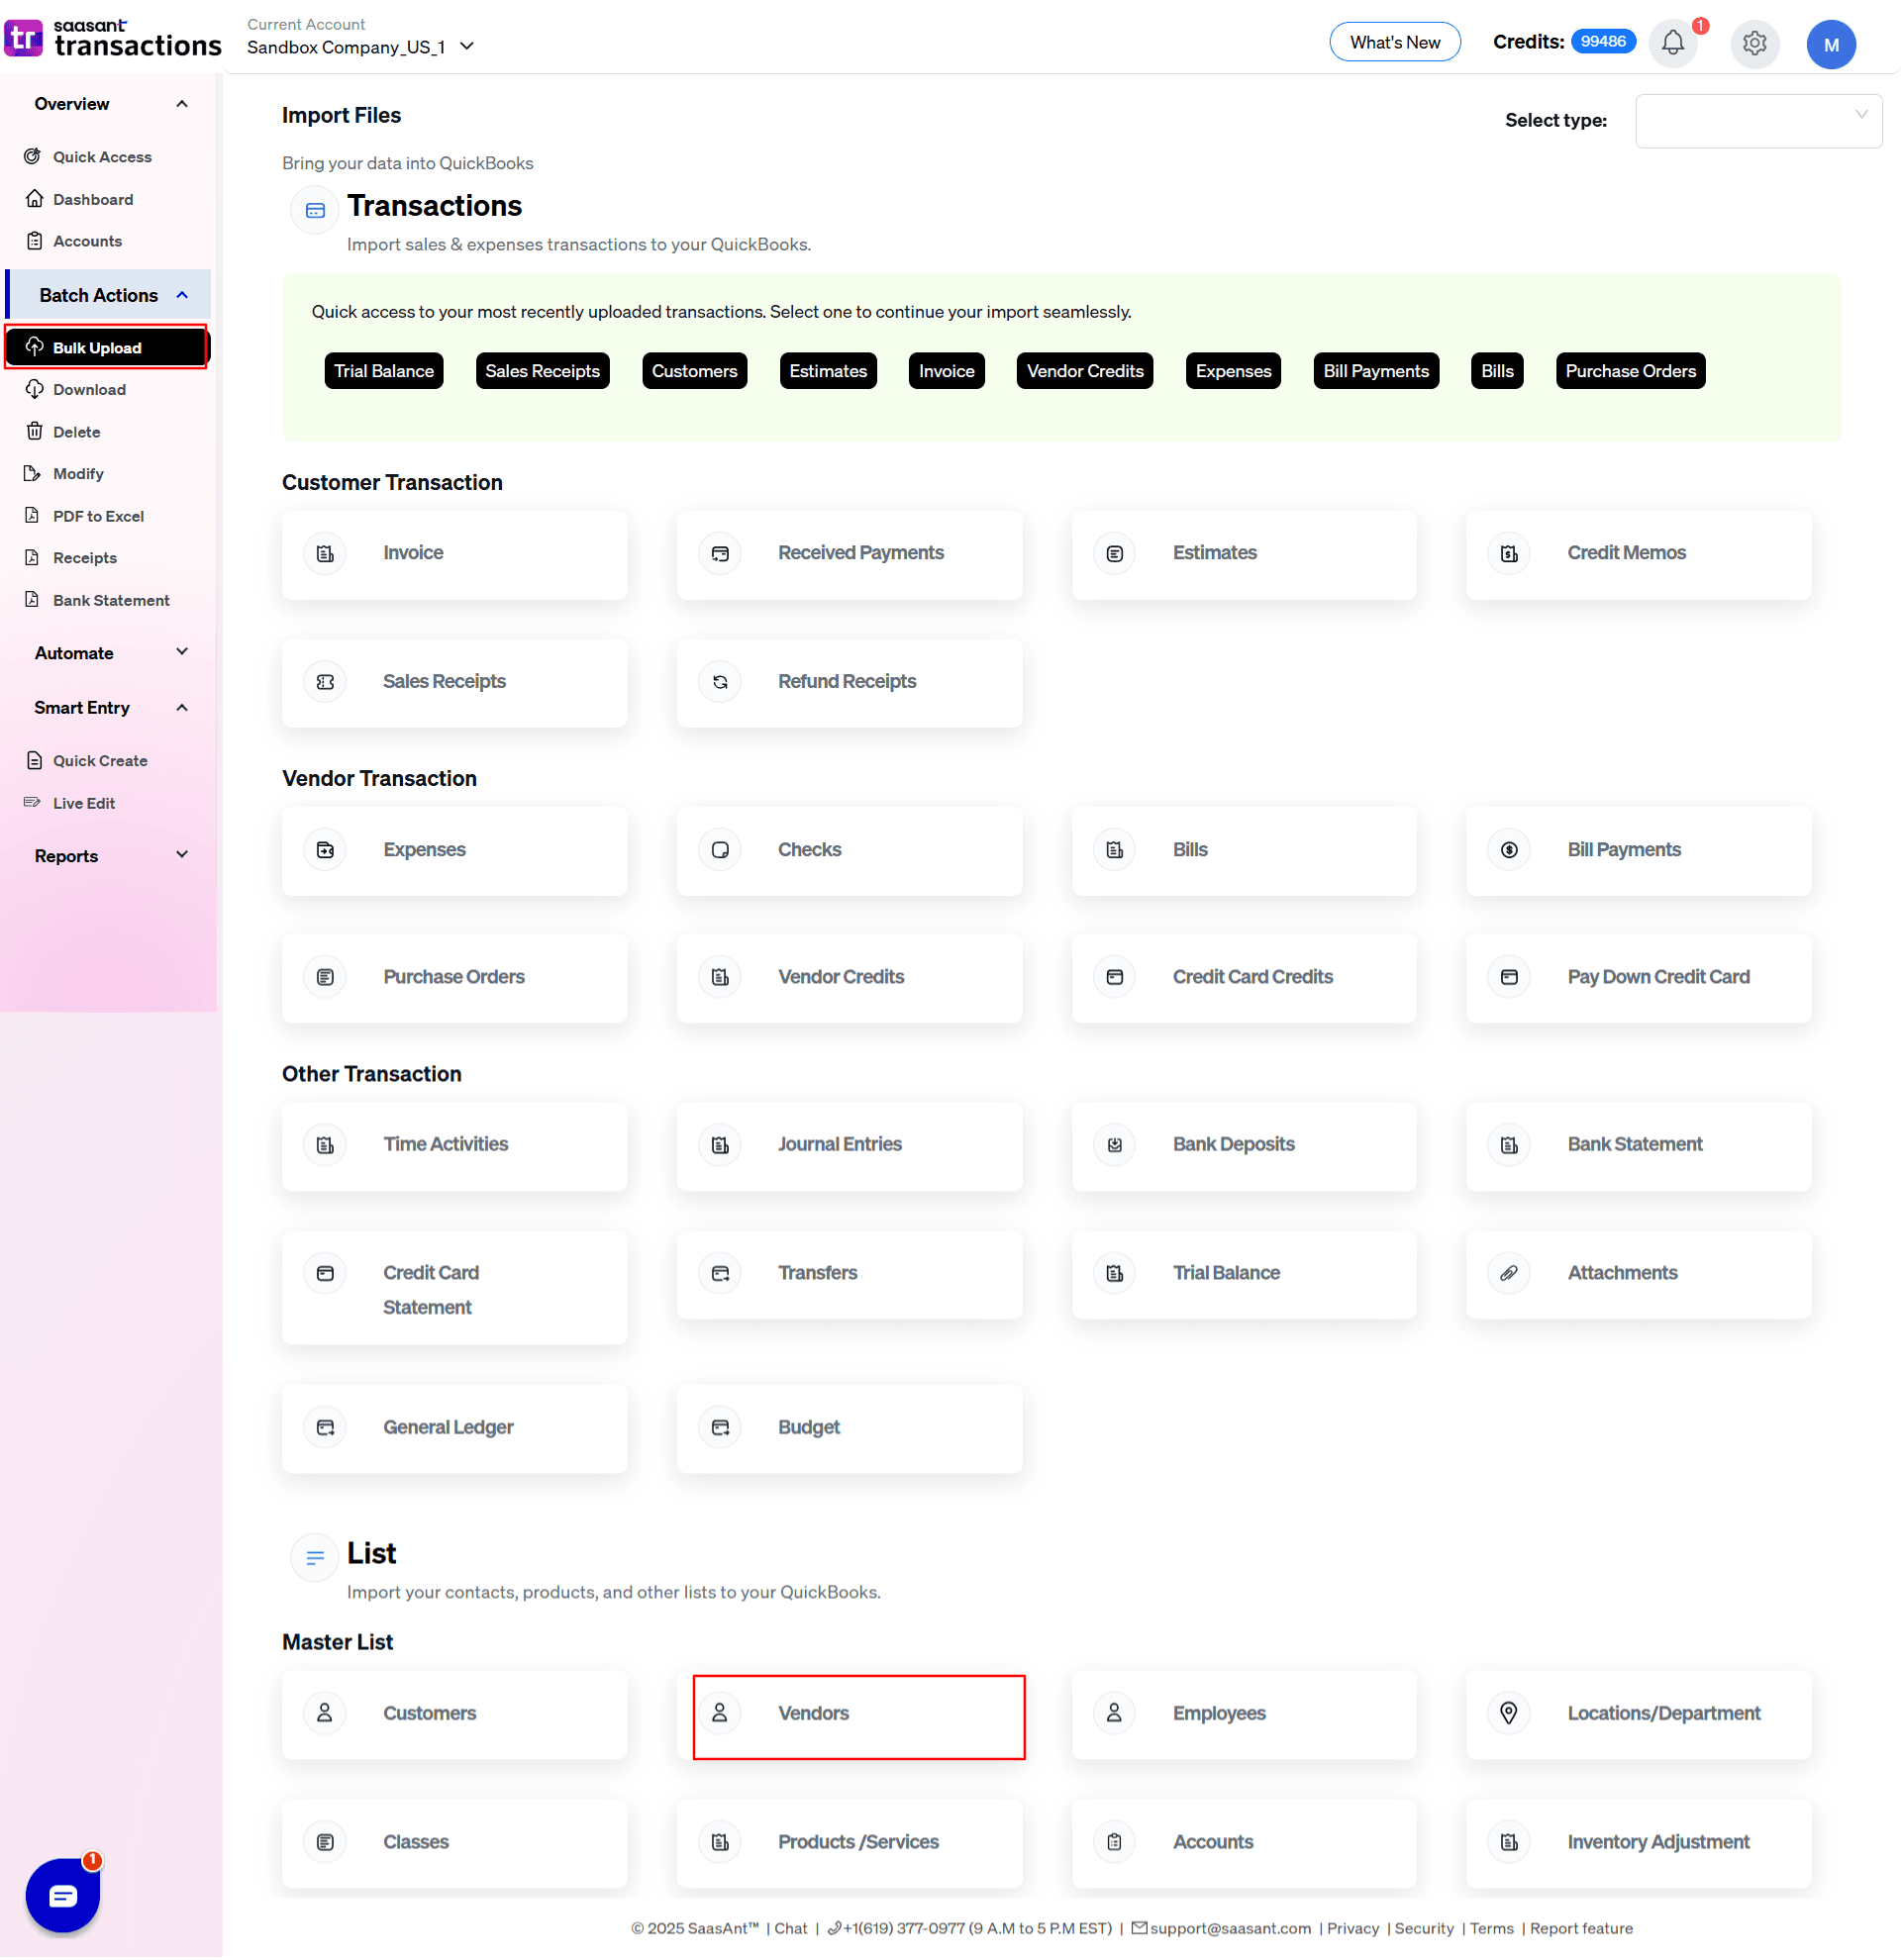
3) Select the QuickBooks entity as "Vendor".
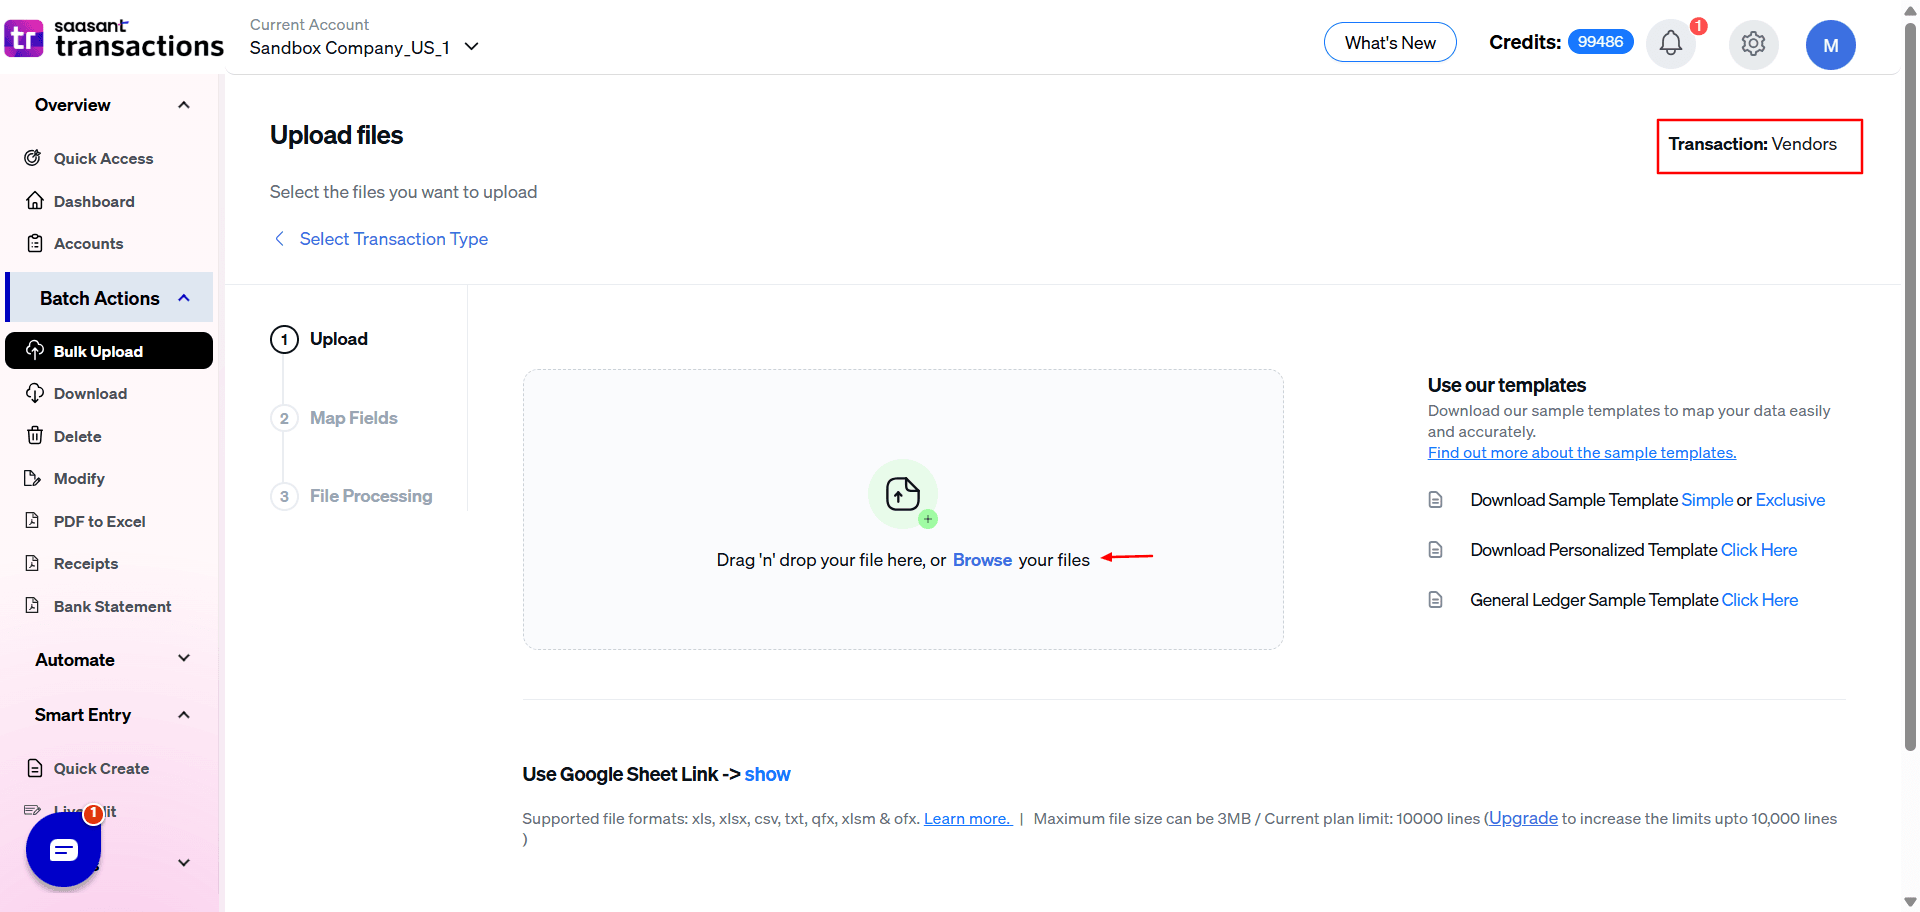
4) Select the files you want to upload.
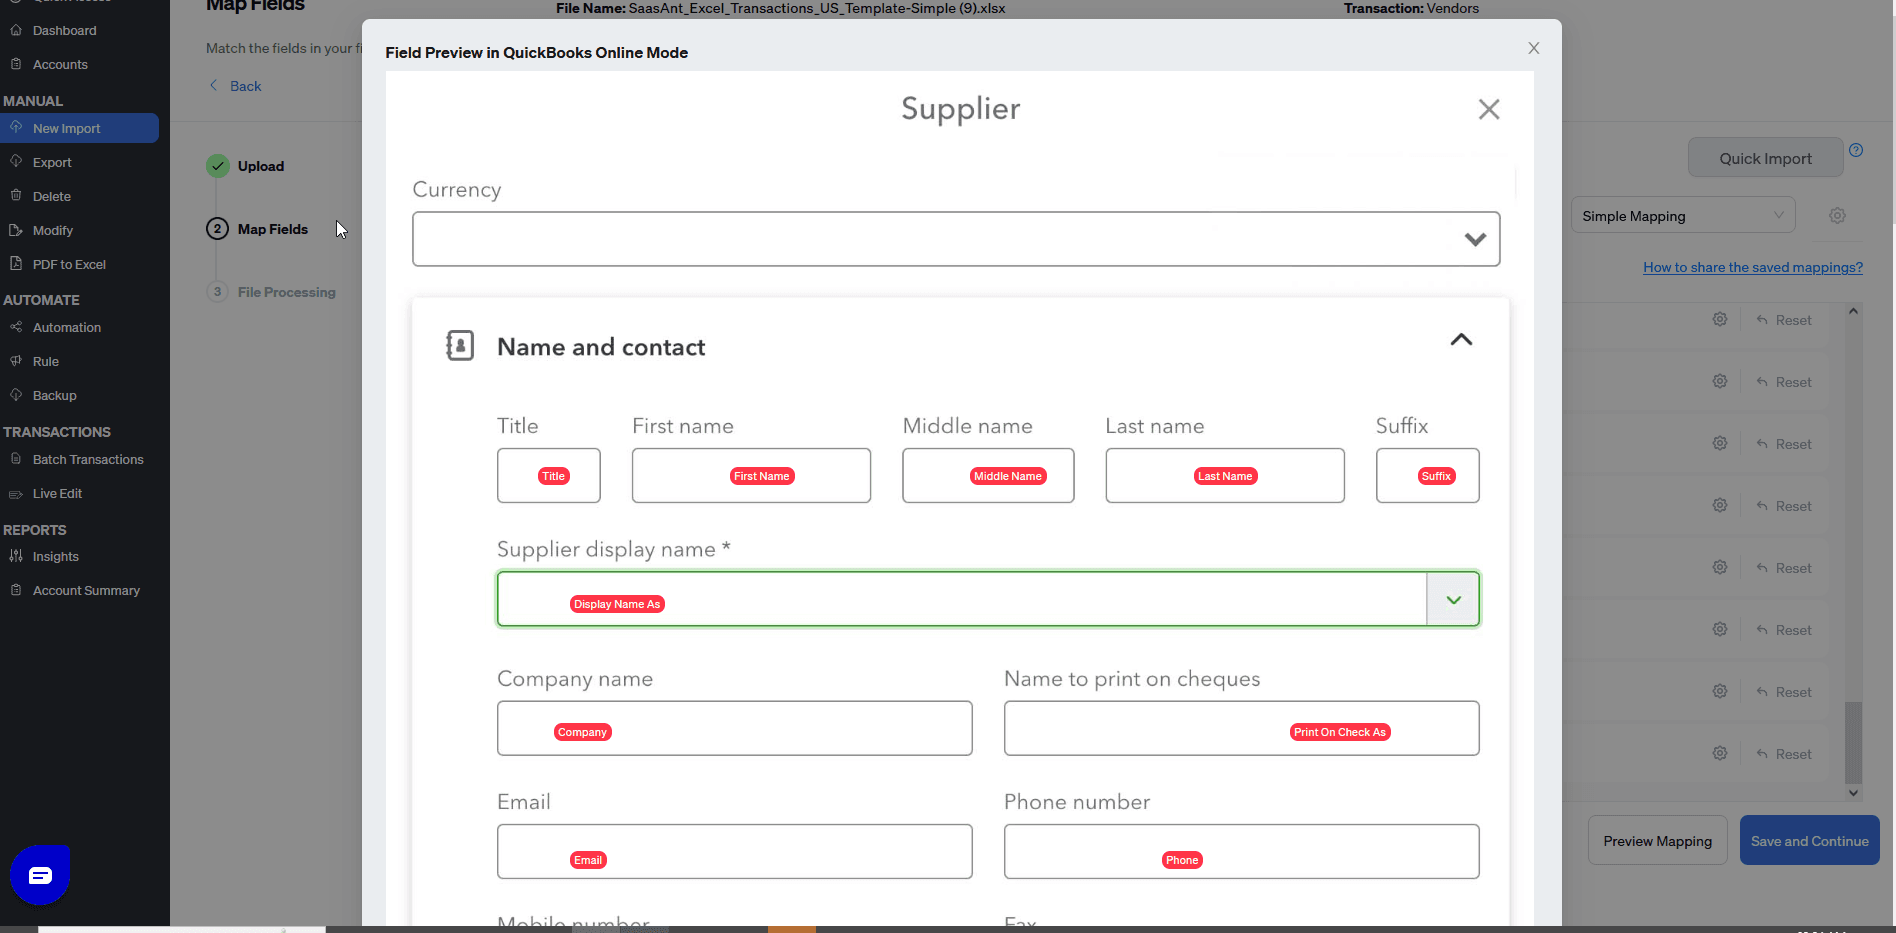
5) Set up the Mapping of the columns in your Vendors List.
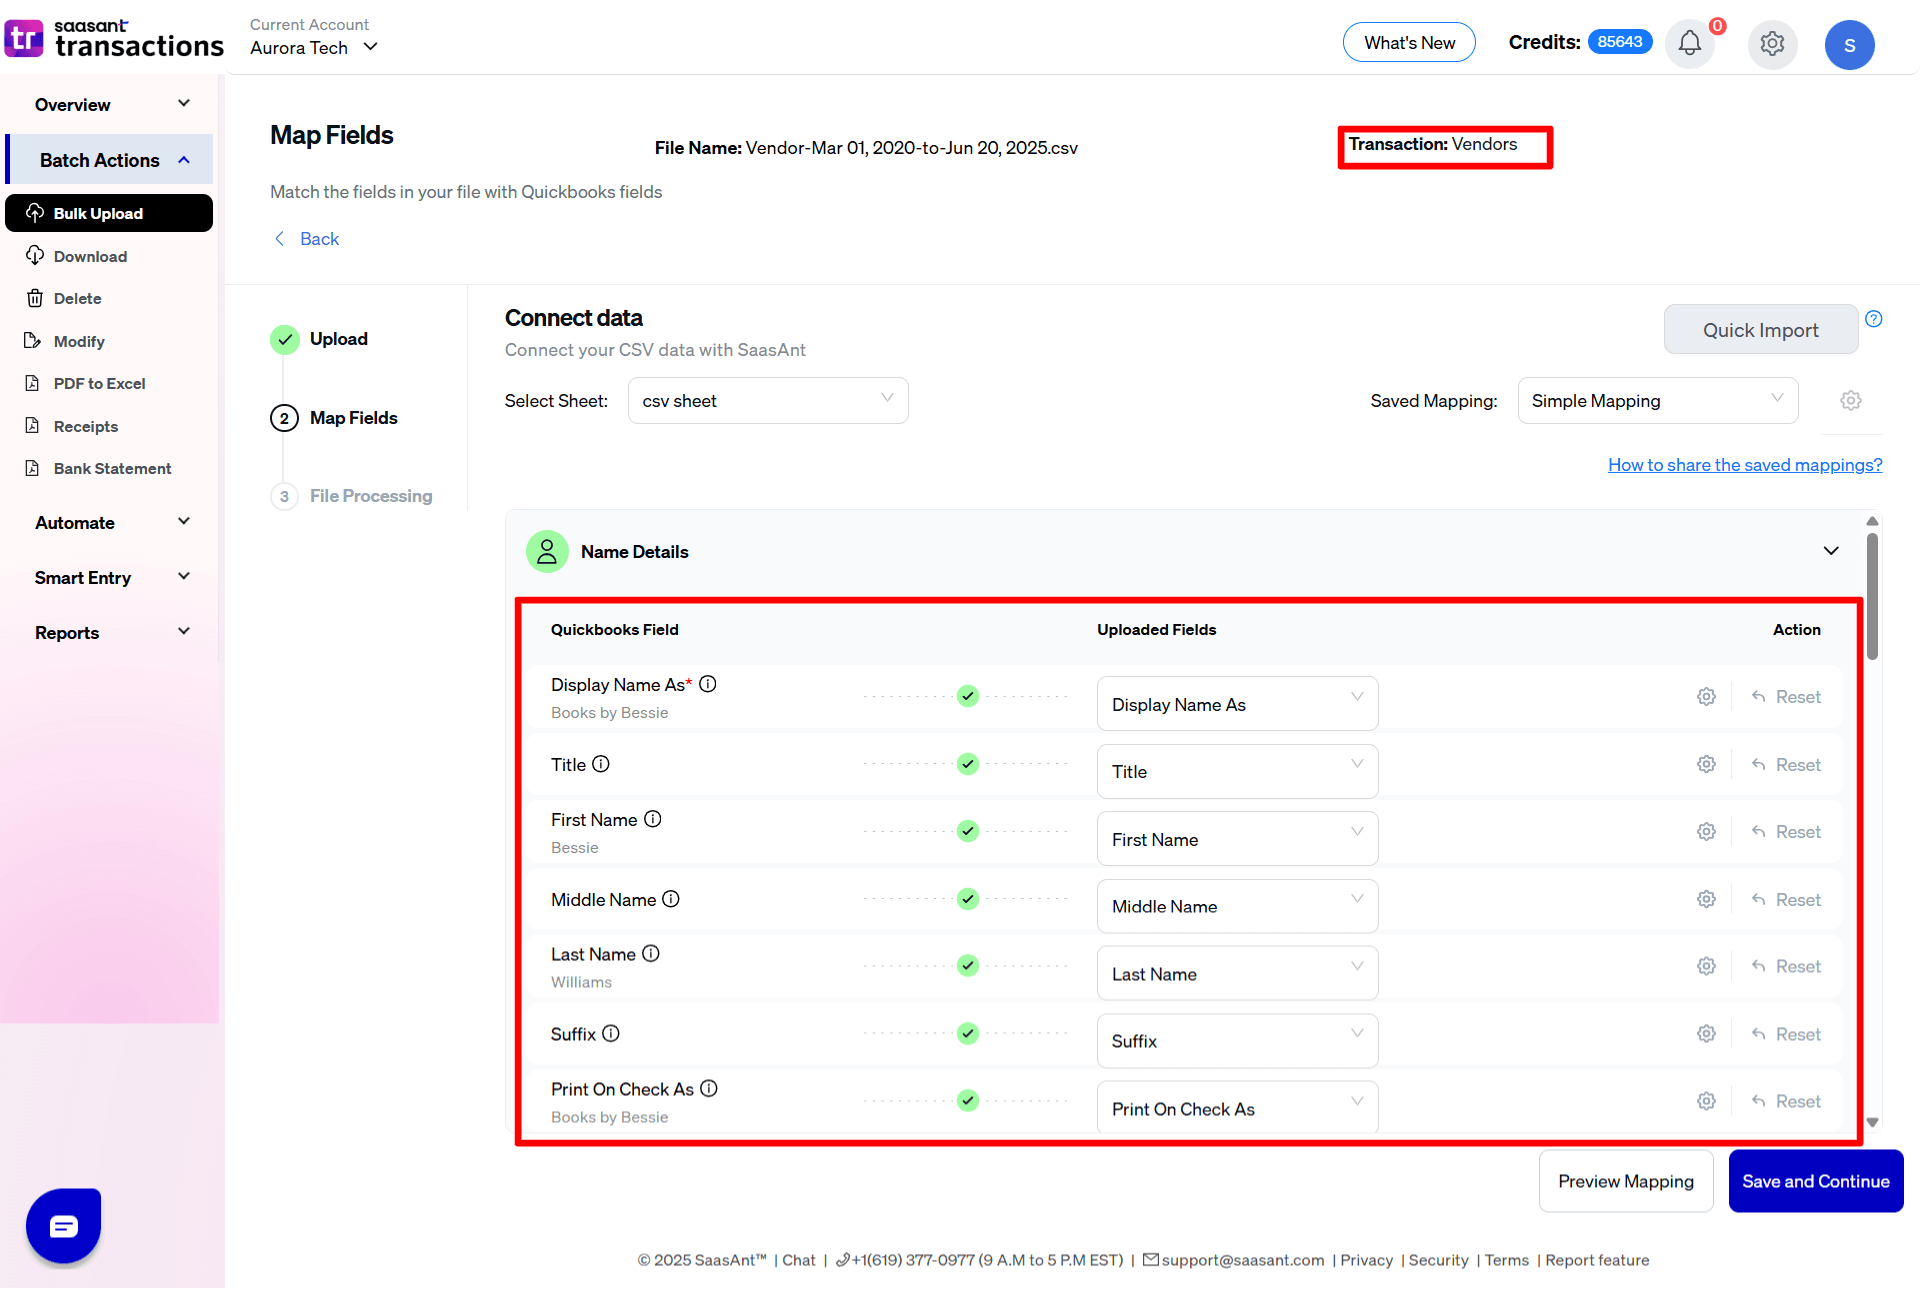
6) Select the "Preview Mapping" button to visualize current mapping based on QuickBooks.
7) Select the Upload tab.
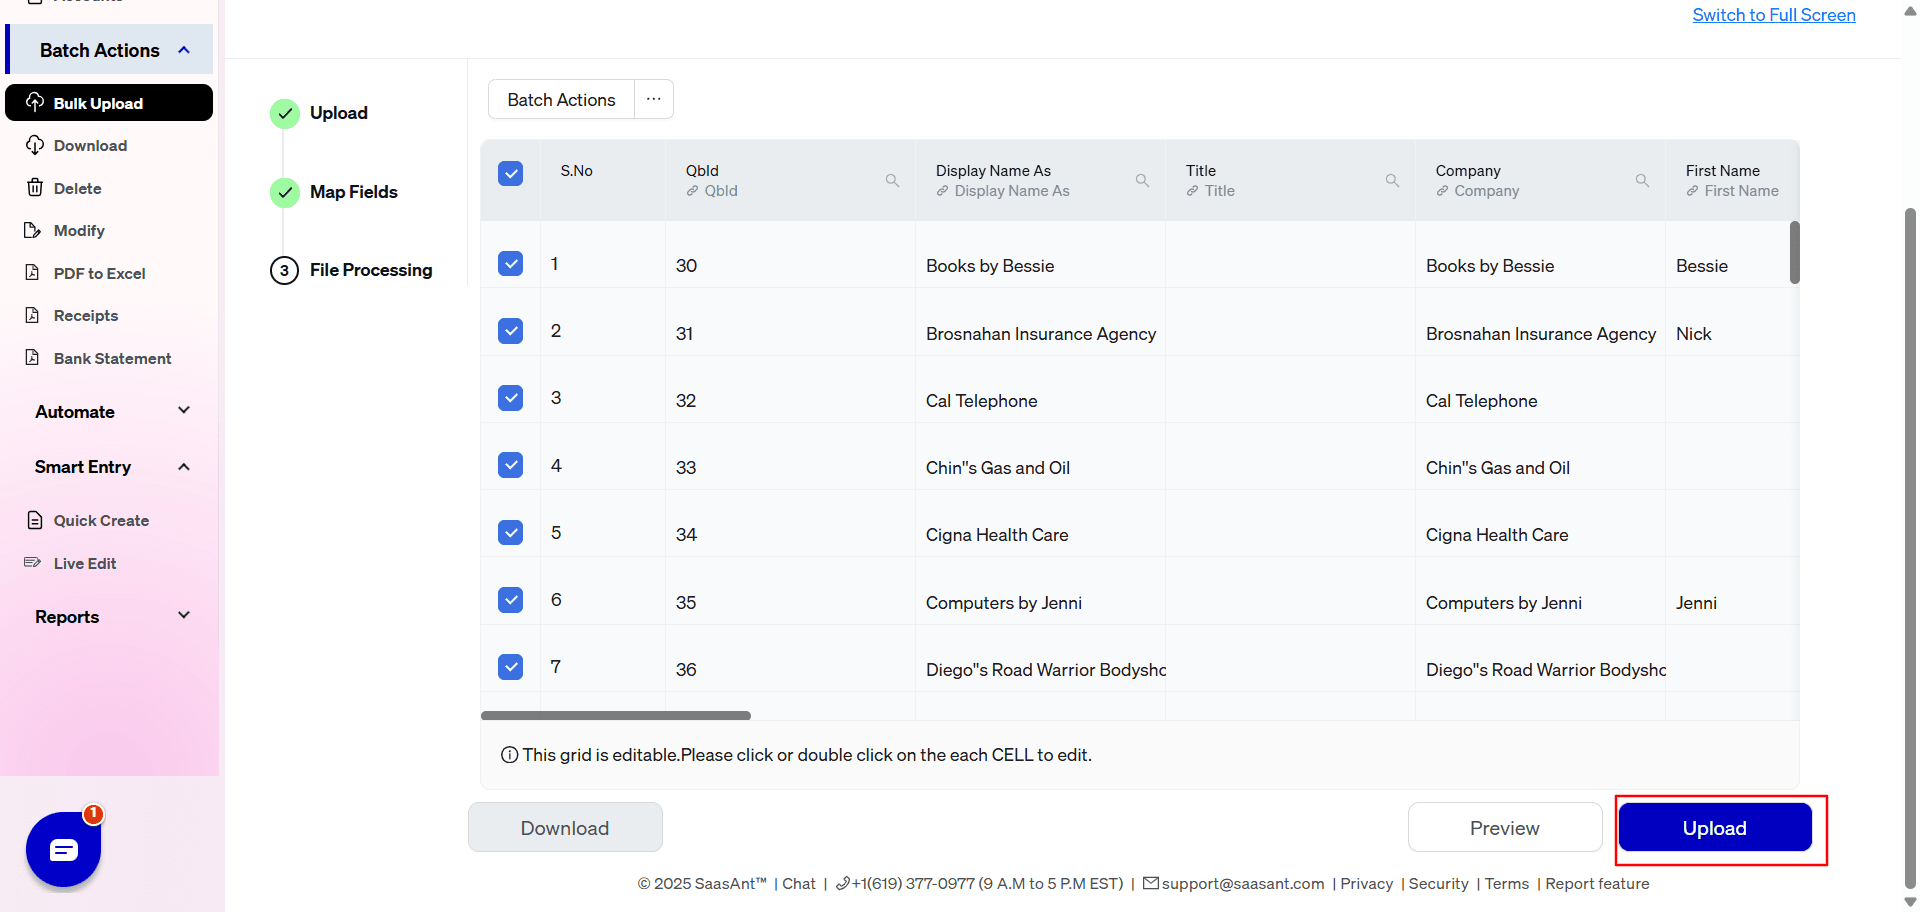
The data was imported successfully into QuickBooks.
Let’s have a look at the SaasAnt Transactions Online Fields.
SaasAnt Transactions (Online) Fields
Field Name | Format | Description |
|---|---|---|
Title | Characters | Title of the Vendor. |
Company | 50 Characters | The name of the company associated with the Vendor or organization. |
First Name | 25 Characters | Given name or first name of the Vendor. |
Middle Name | 25 Characters | Middle name of the Vendor. |
Last Name | 25 Characters | Family name or the last name of the Vendor. |
Suffix | 10 Characters | Suffix of the name. |
Display Name As | 100 Characters | The name of the Vendor or organization as displayed in QuickBooks Online. This must be unique across all other customers, employees, vendors, and other names. |
Print On Check As | 100 Characters | Name of the Vendor or organization as printed on a check. If it not provided, this is populated from Display Name. |
Billing Address Line 1 | 500 Characters | First line of the Billing Address. |
Billing Address Line 2 | 500 Characters | Second line of the Billing Address. |
Billing Address Line 3 | 500 Characters | Third line of the Billing Address. |
Billing Address City | 255 Characters | City Name. |
Billing Address Postal Code | 31 Characters | Postal code (Zip code for USA and Canada). |
Billing Address Country | 255 Characters | Name of the country. |
Billing Address State | 255 Characters | Region within a country. Ex: State Name for USA, Province name for Canada. |
Shipping Address Line 1 | 500 Characters | First line of the Shipping Address. |
Shipping Address Line 2 | 500 Characters | Second line of the Shipping Address. |
Shipping Address Line 3 | 500 Characters | Third line of the Shipping Address. |
Shipping Address City | 255 Characters | City Name for Shipping Address. |
Shipping Address Postal Code | 31 Characters | Postal code (Zip code for USA and Canada) for Shipping Address. |
Shipping Address Country | 255 Characters | Name of the country for Shipping Address. |
Shipping Address State | 255 Characters | Region within a country. Ex: State Name for USA, Province name for Canada. |
Phone | 21 Characters | The telephone number in free form. |
Mobile | 21 Characters | The Mobile number in free form. |
Fax | 21 Characters | The fax machine number in free form. |
Other | 21 Characters | Other contact information. |
Website | 1000 Characters | Web Site URL. |
100 Characters | Email address. | |
Account No | 99 Characters | Name or number of the account associated with this vendor. |
Tax ID | Characters | The Tax ID of the Vendor or the Organization. |
Terms | Characters | Reference to a term associated with the Vendor. |
Opening Balance | Decimal | The open balance amount or the amount unpaid by the Vendor. |
Open Balance Date | Date | Date of the Open Balance. |
Notes | 2000 Characters | Free form text describing the Vendor. |
Track payments for 1099 | Boolean | This vendor is an independent contractor; someone who is given a 1099-MISC form at the end of the year. |
Currency Code | Characters | Currency Code. |
Possible Failures & Troubleshooting Tips

Please update the currency field with allowed values.
Kindly refer this link to know more about the allowed currencies.
This Vendor is already available in QuickBooks with given "Display Name". If you want to continue with the same vendor, please change the "Display Name".