How to Import Locations/Departments List into QuickBooks Online (U.S)?
August 20, 2025
You can import Locations/Departments from text files or Excel spreadsheets directly into QuickBooks Online using SaasAnt Transactions (Online) software.
Pre Requisites:
Connect your QuickBooks Online account to SaasAnt Transactions (Online) App from QuickBooks AppStore by clicking the "Get App Now" button and get the 30 days free trial [No credit card required].
Please refer basics of field mappings for more info. If you have any confusion or doubts, feel free to drop an email to support@saasant.com.
How to Import Locations/Departments List into QuickBooks Online using SaasAnt Transactions Online
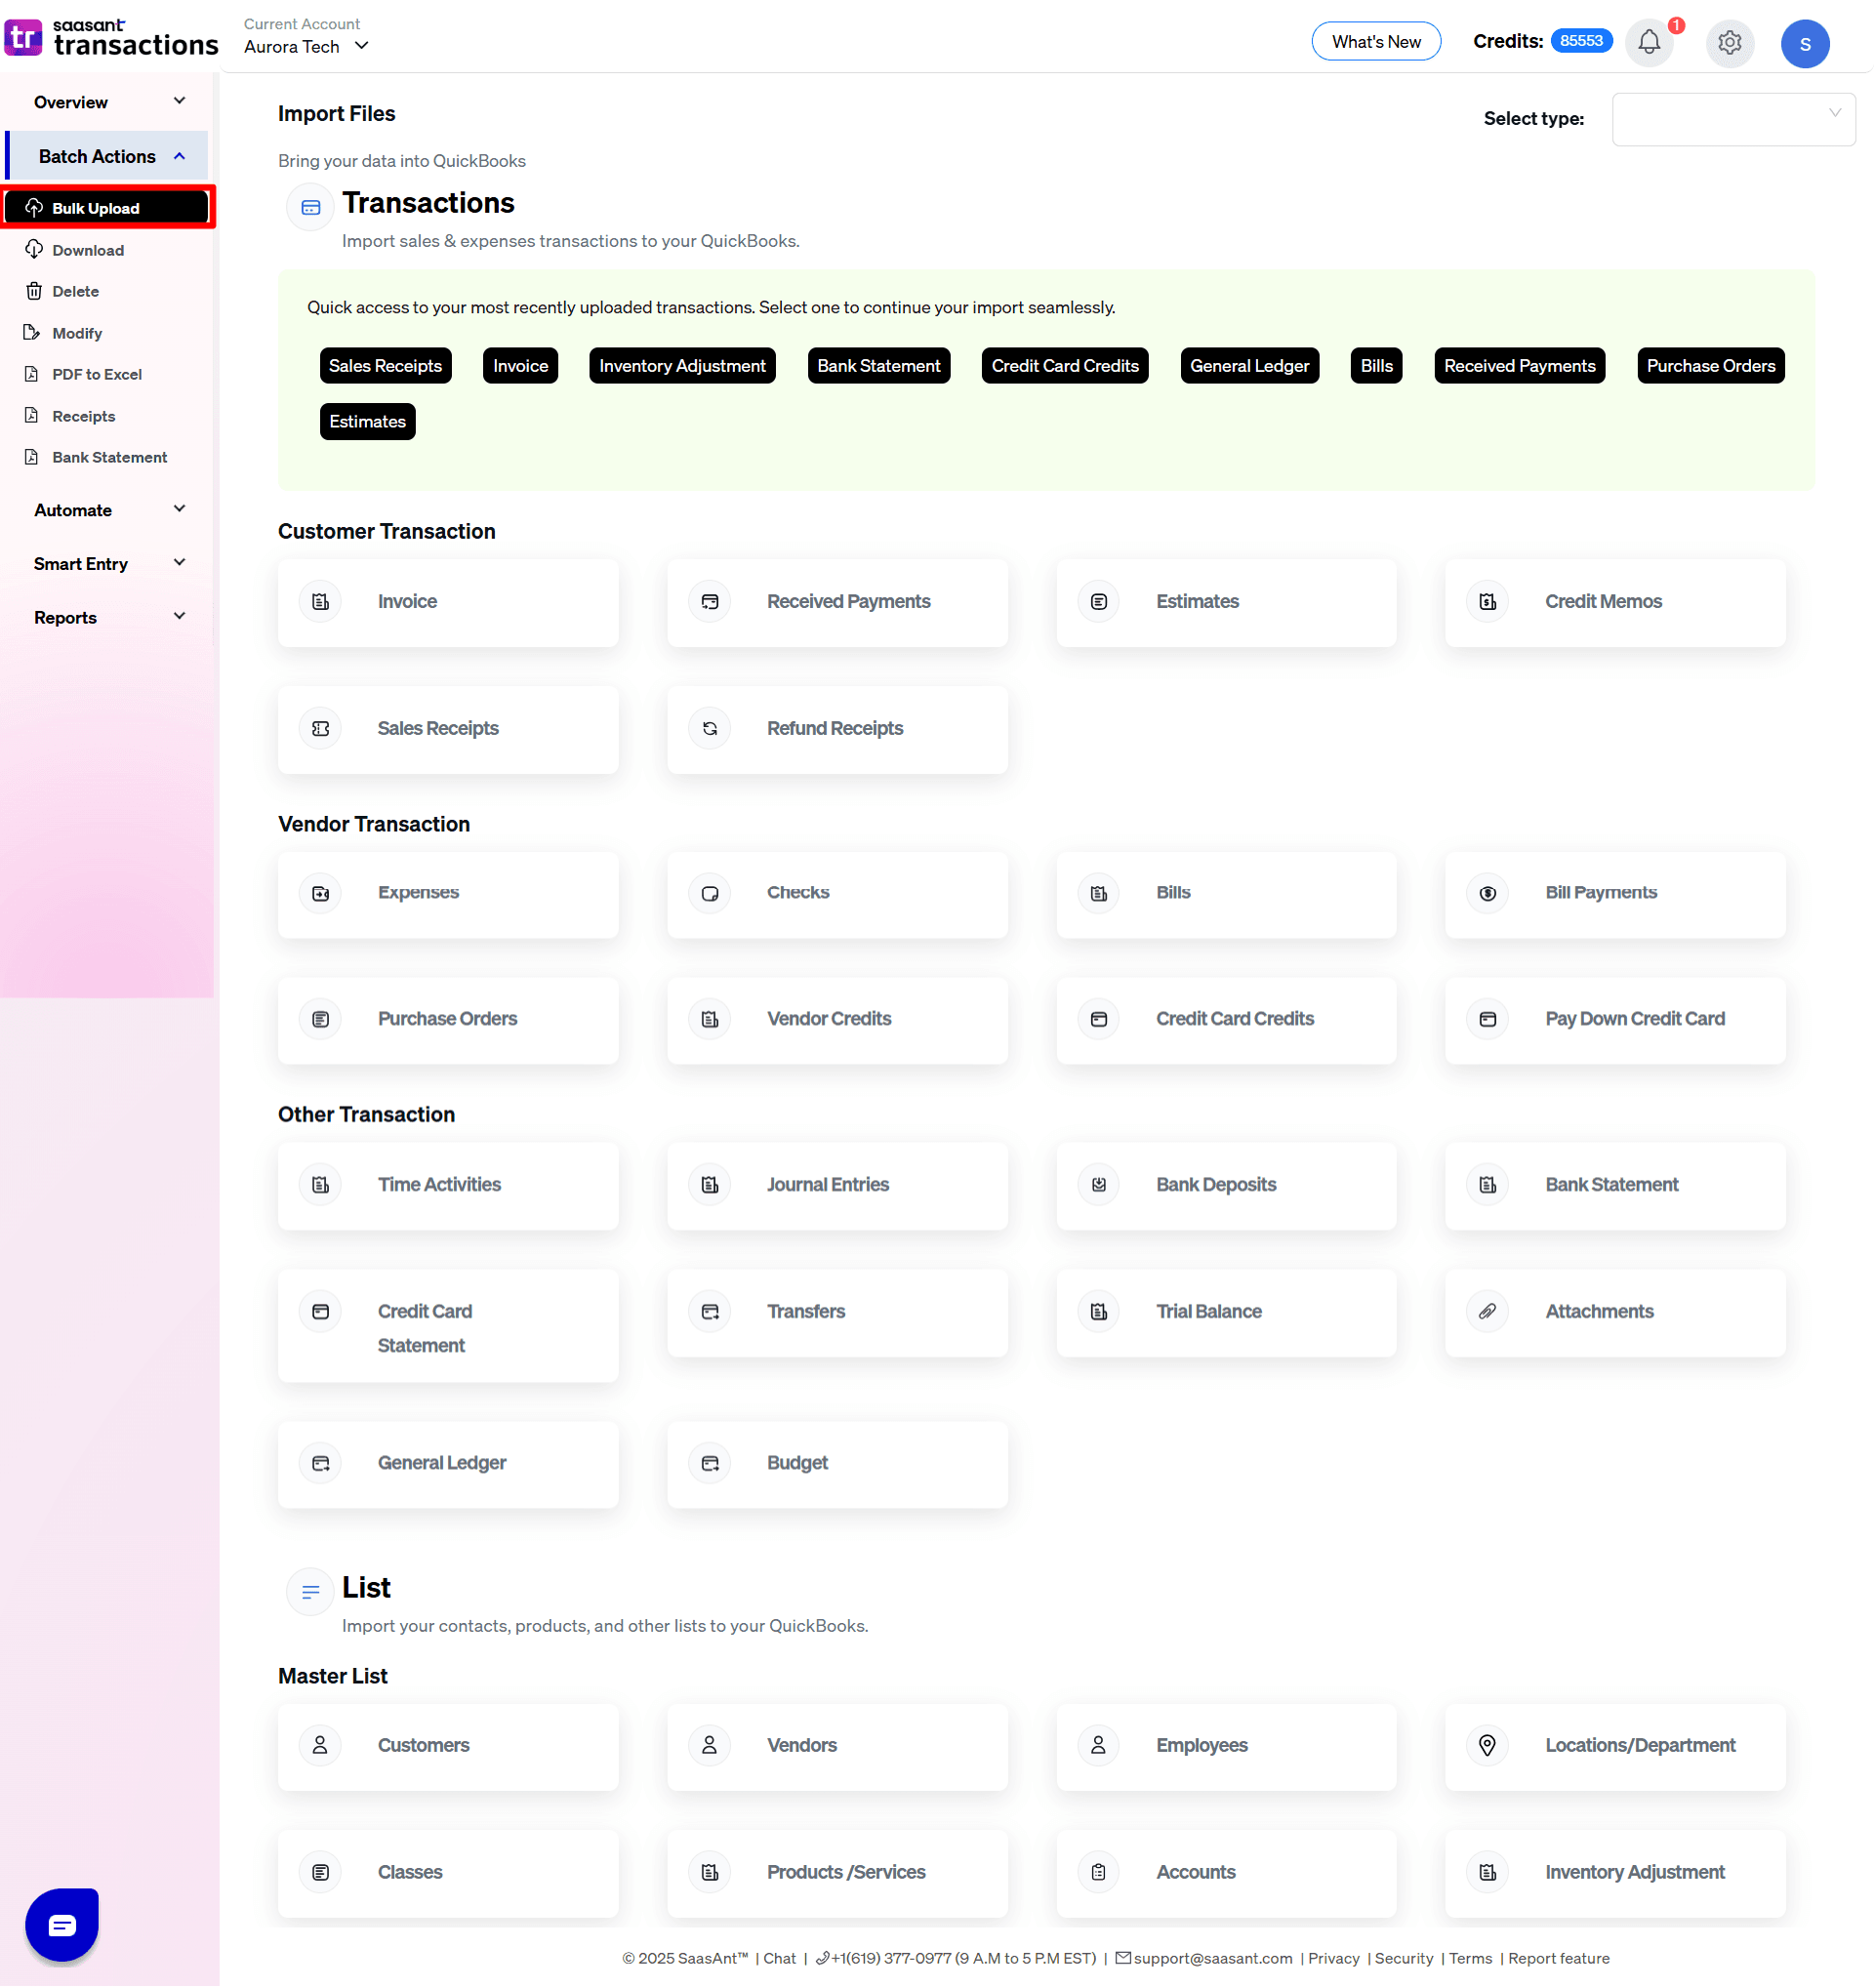
1) Login into SaasAnt Transaction Online
2) Select the Bulk Upload Tab.
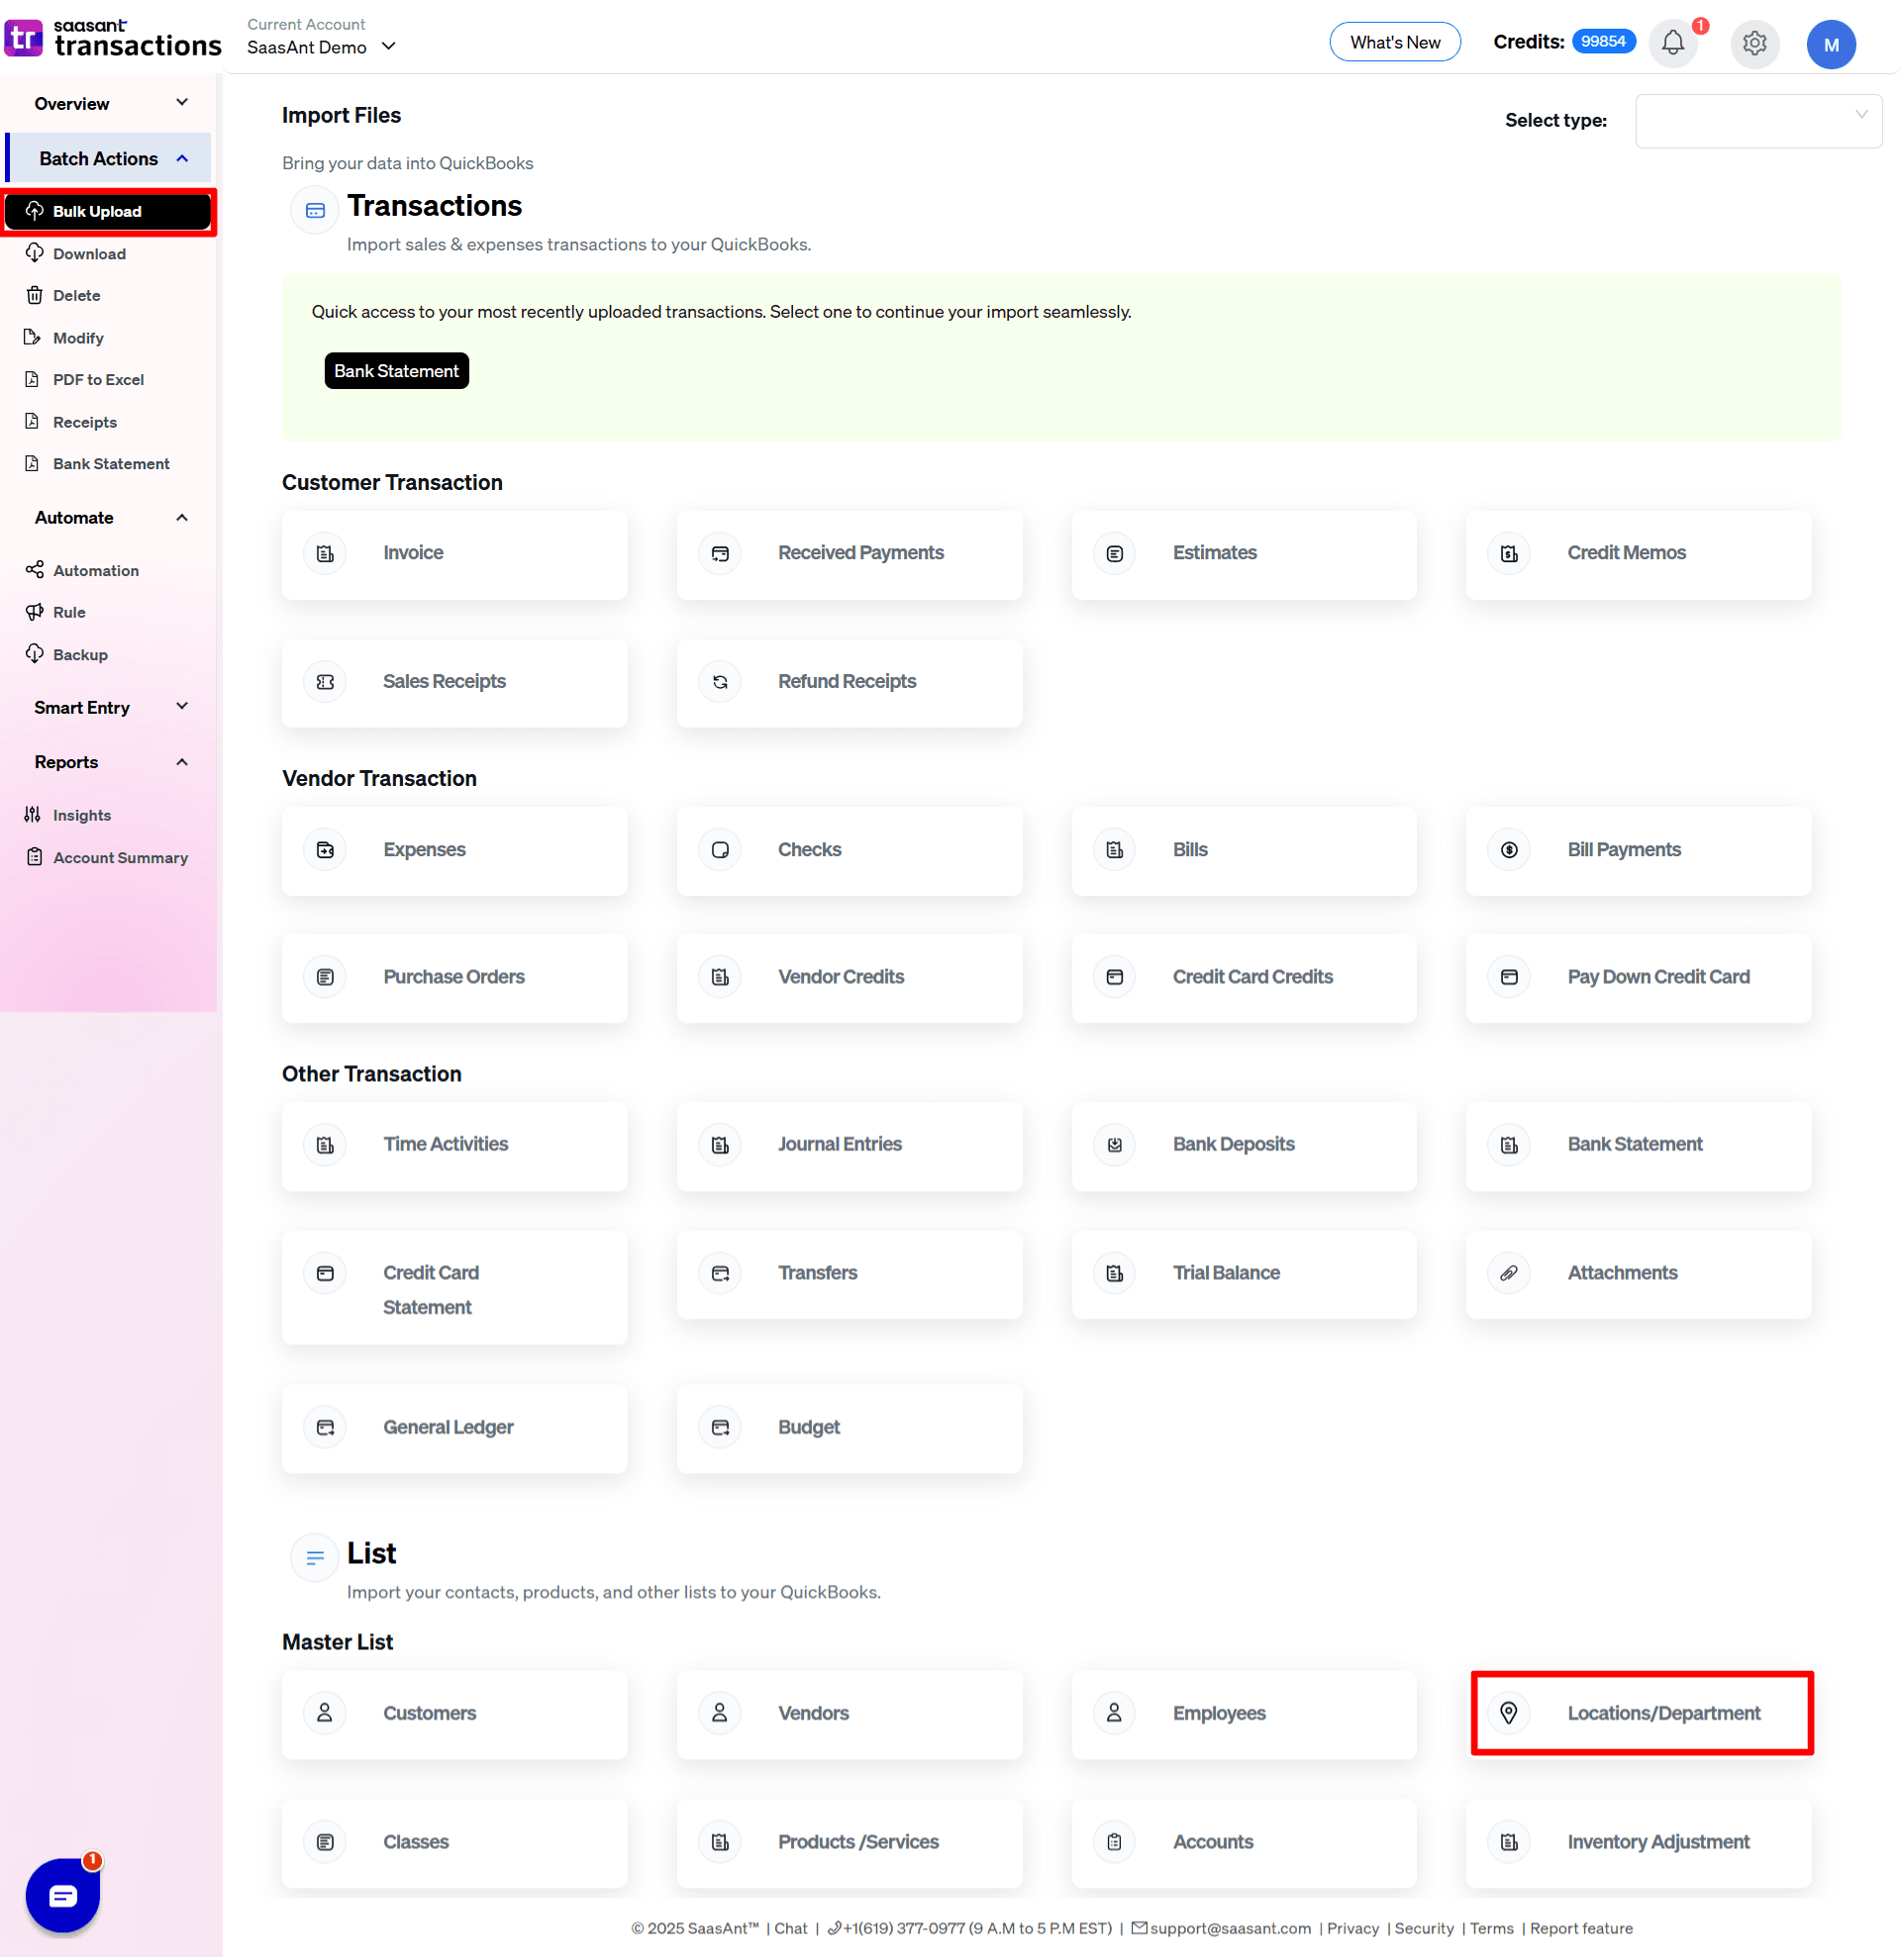
3) Select the QuickBooks entity as "Locations/Department".
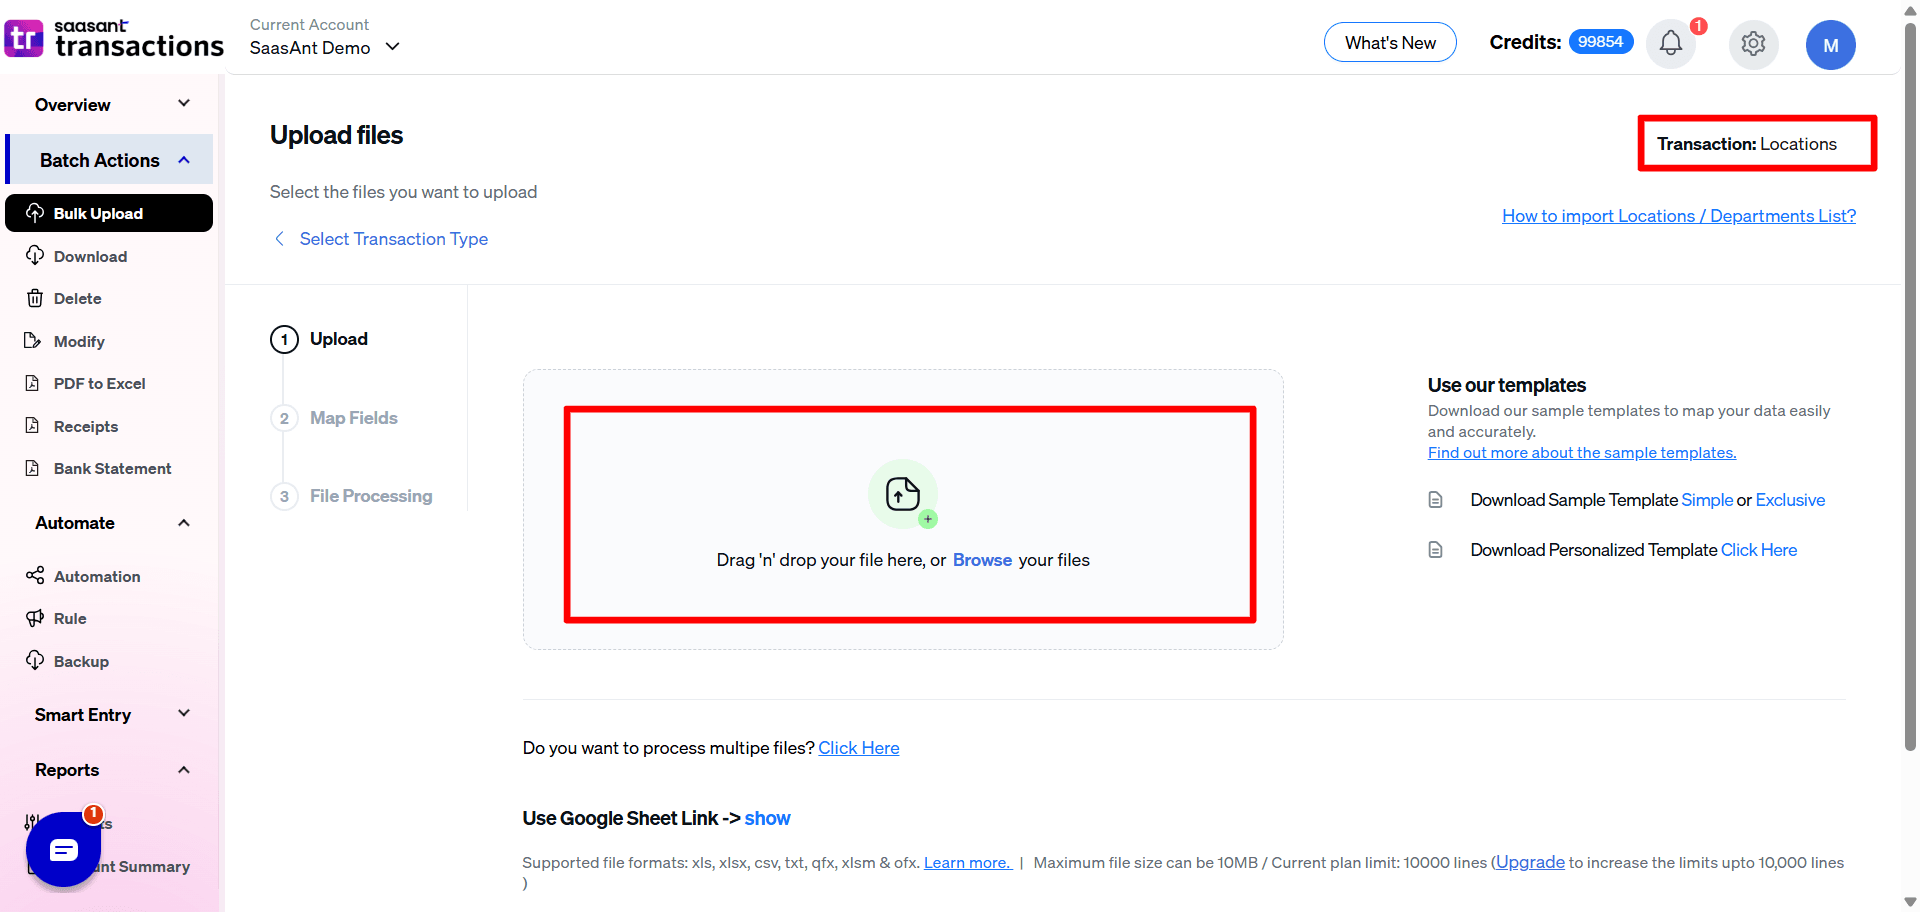
4) Select the files you want to upload.
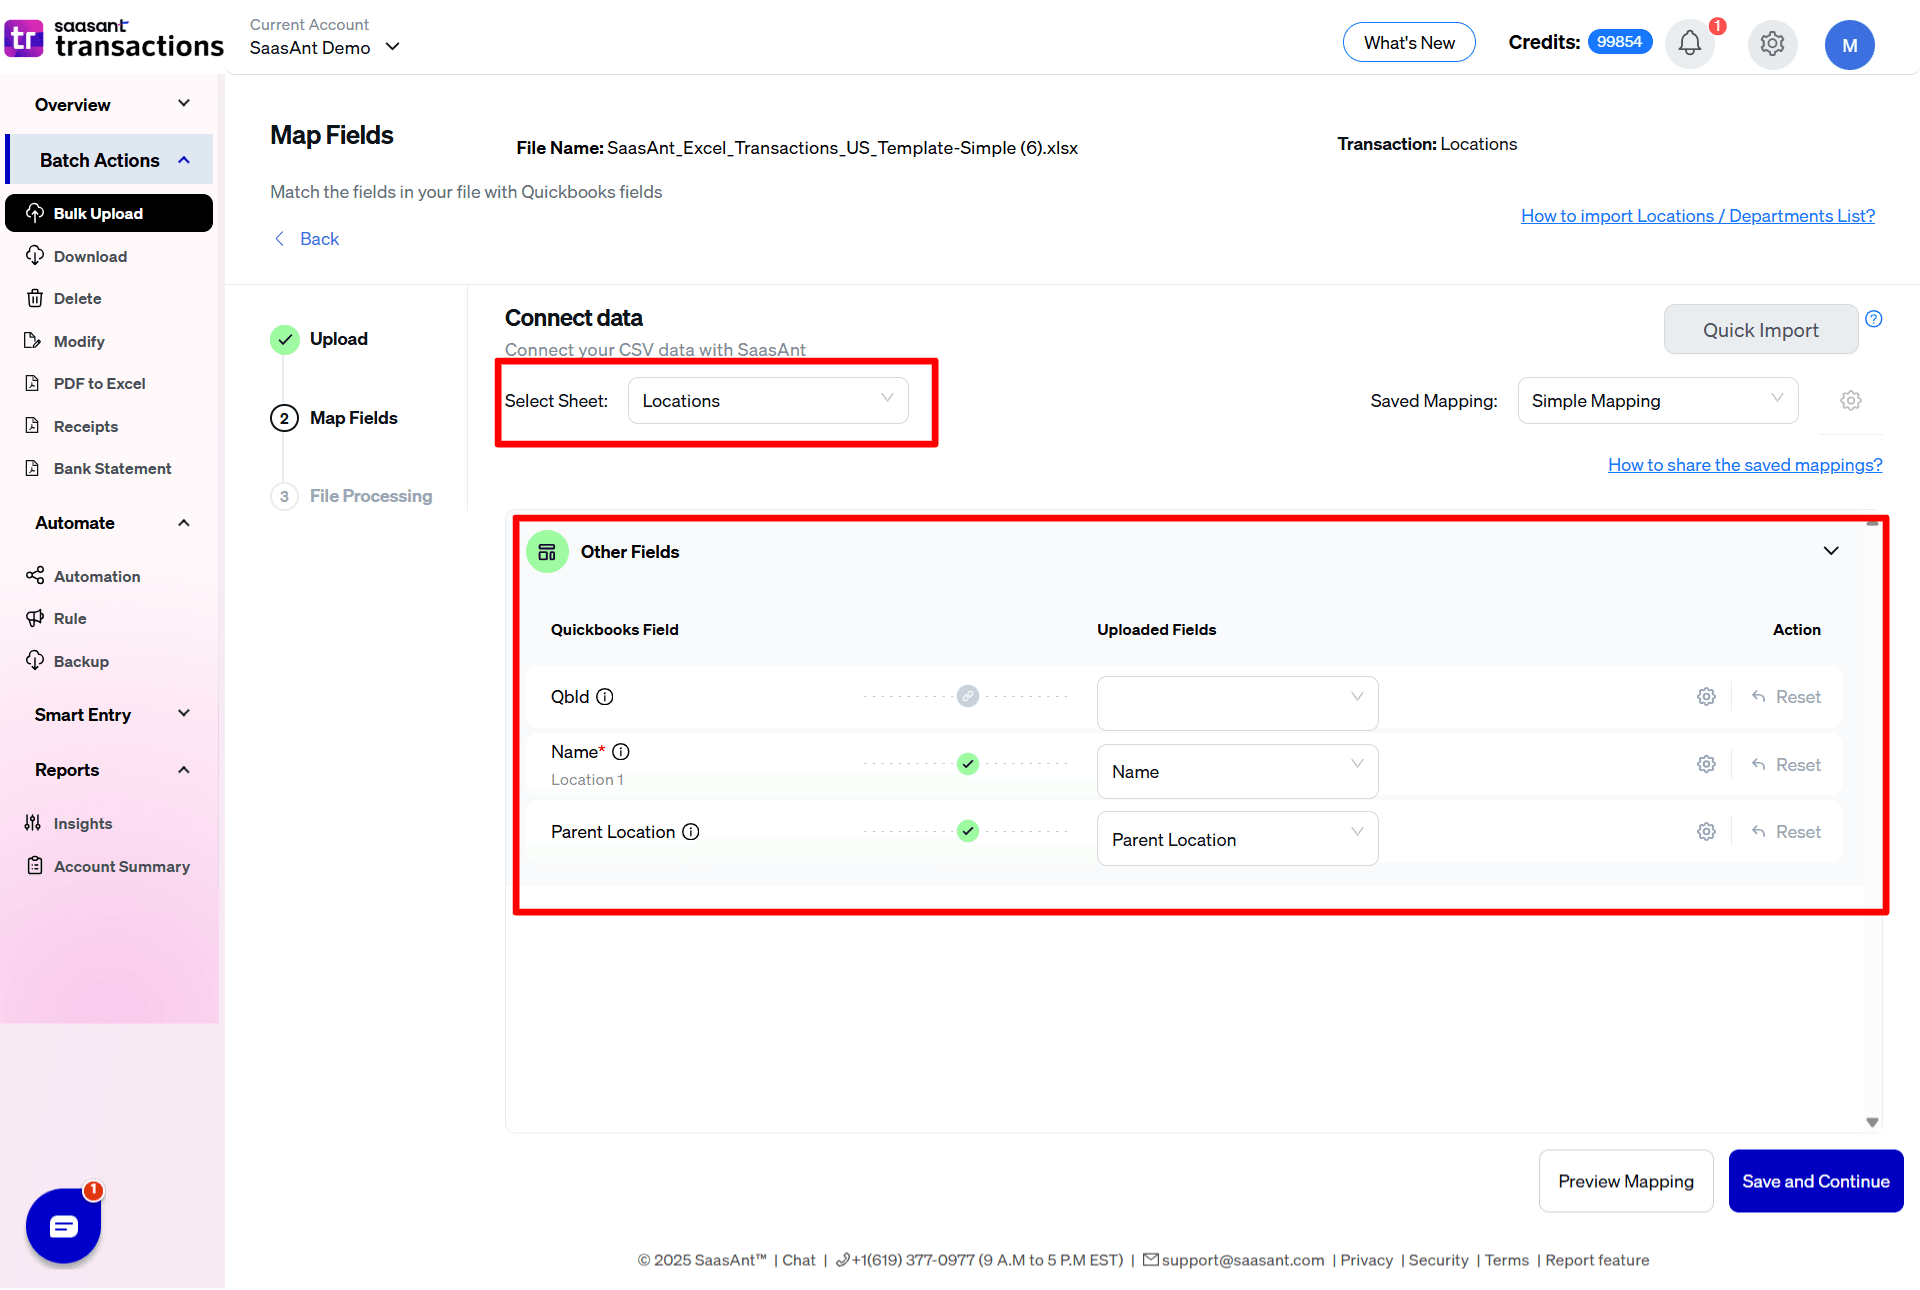
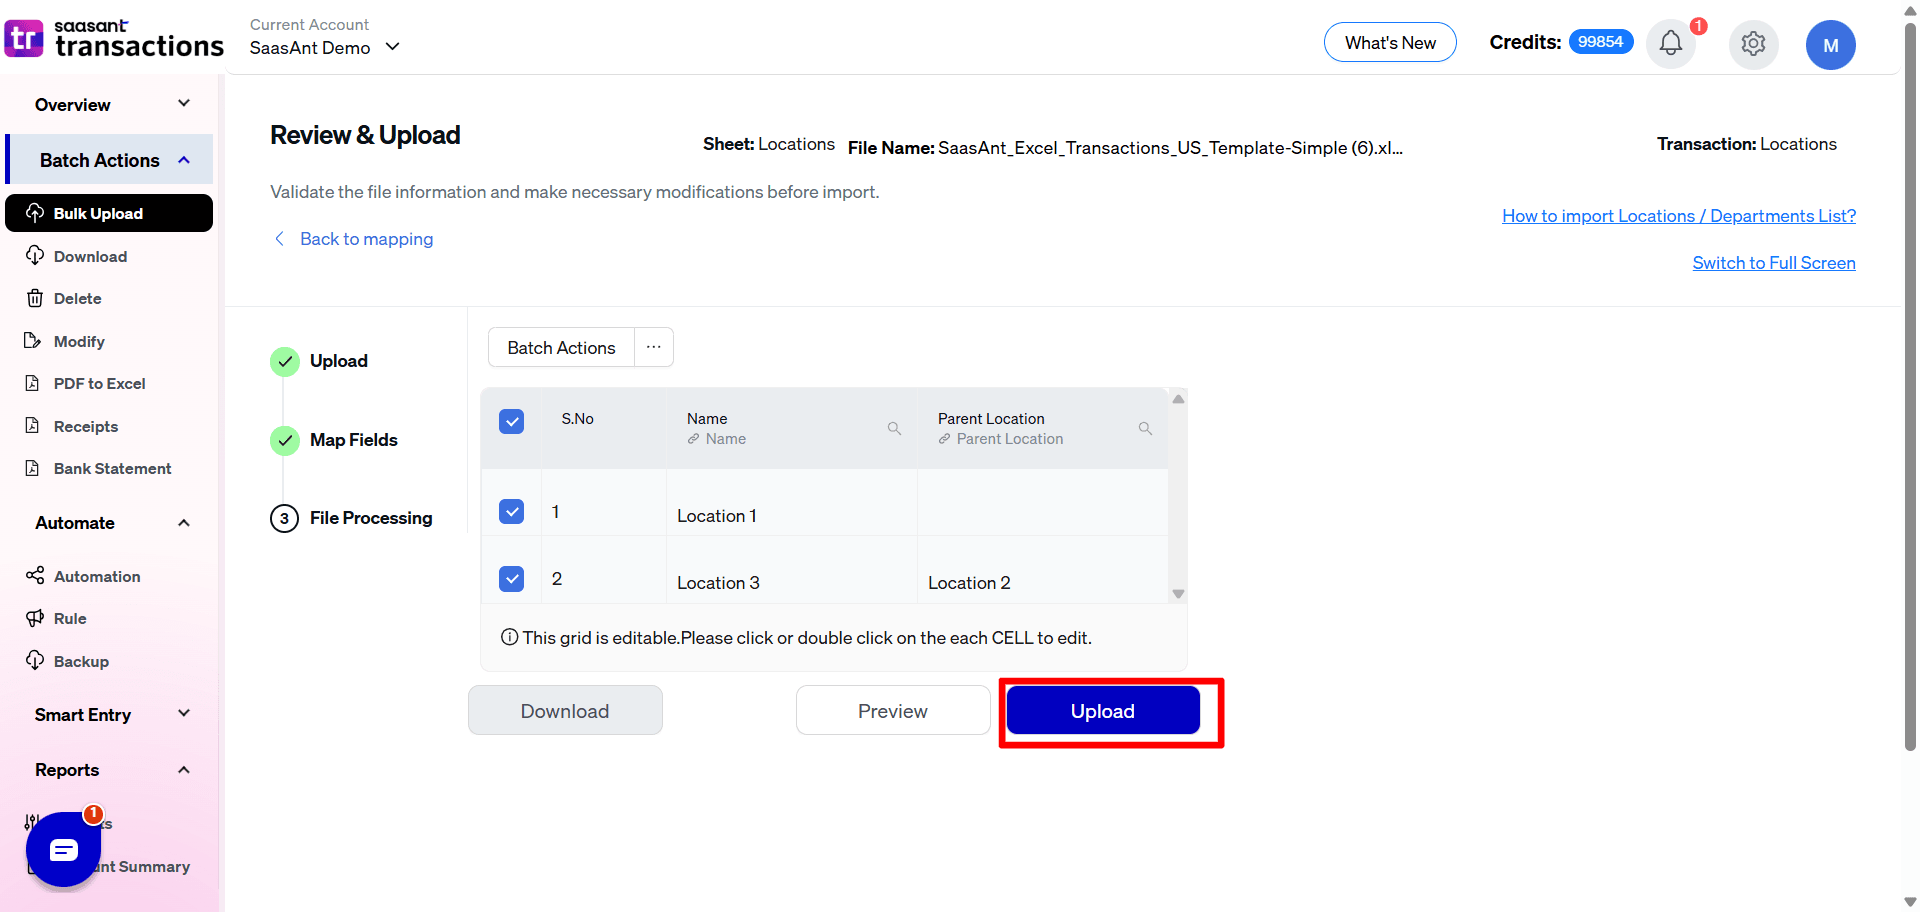
5) Set up the Mapping of the columns in your Locations/Department.
6) Select the "Preview Mapping" button to visualize current mapping based on QuickBooks.
7) Select the Upload tab.
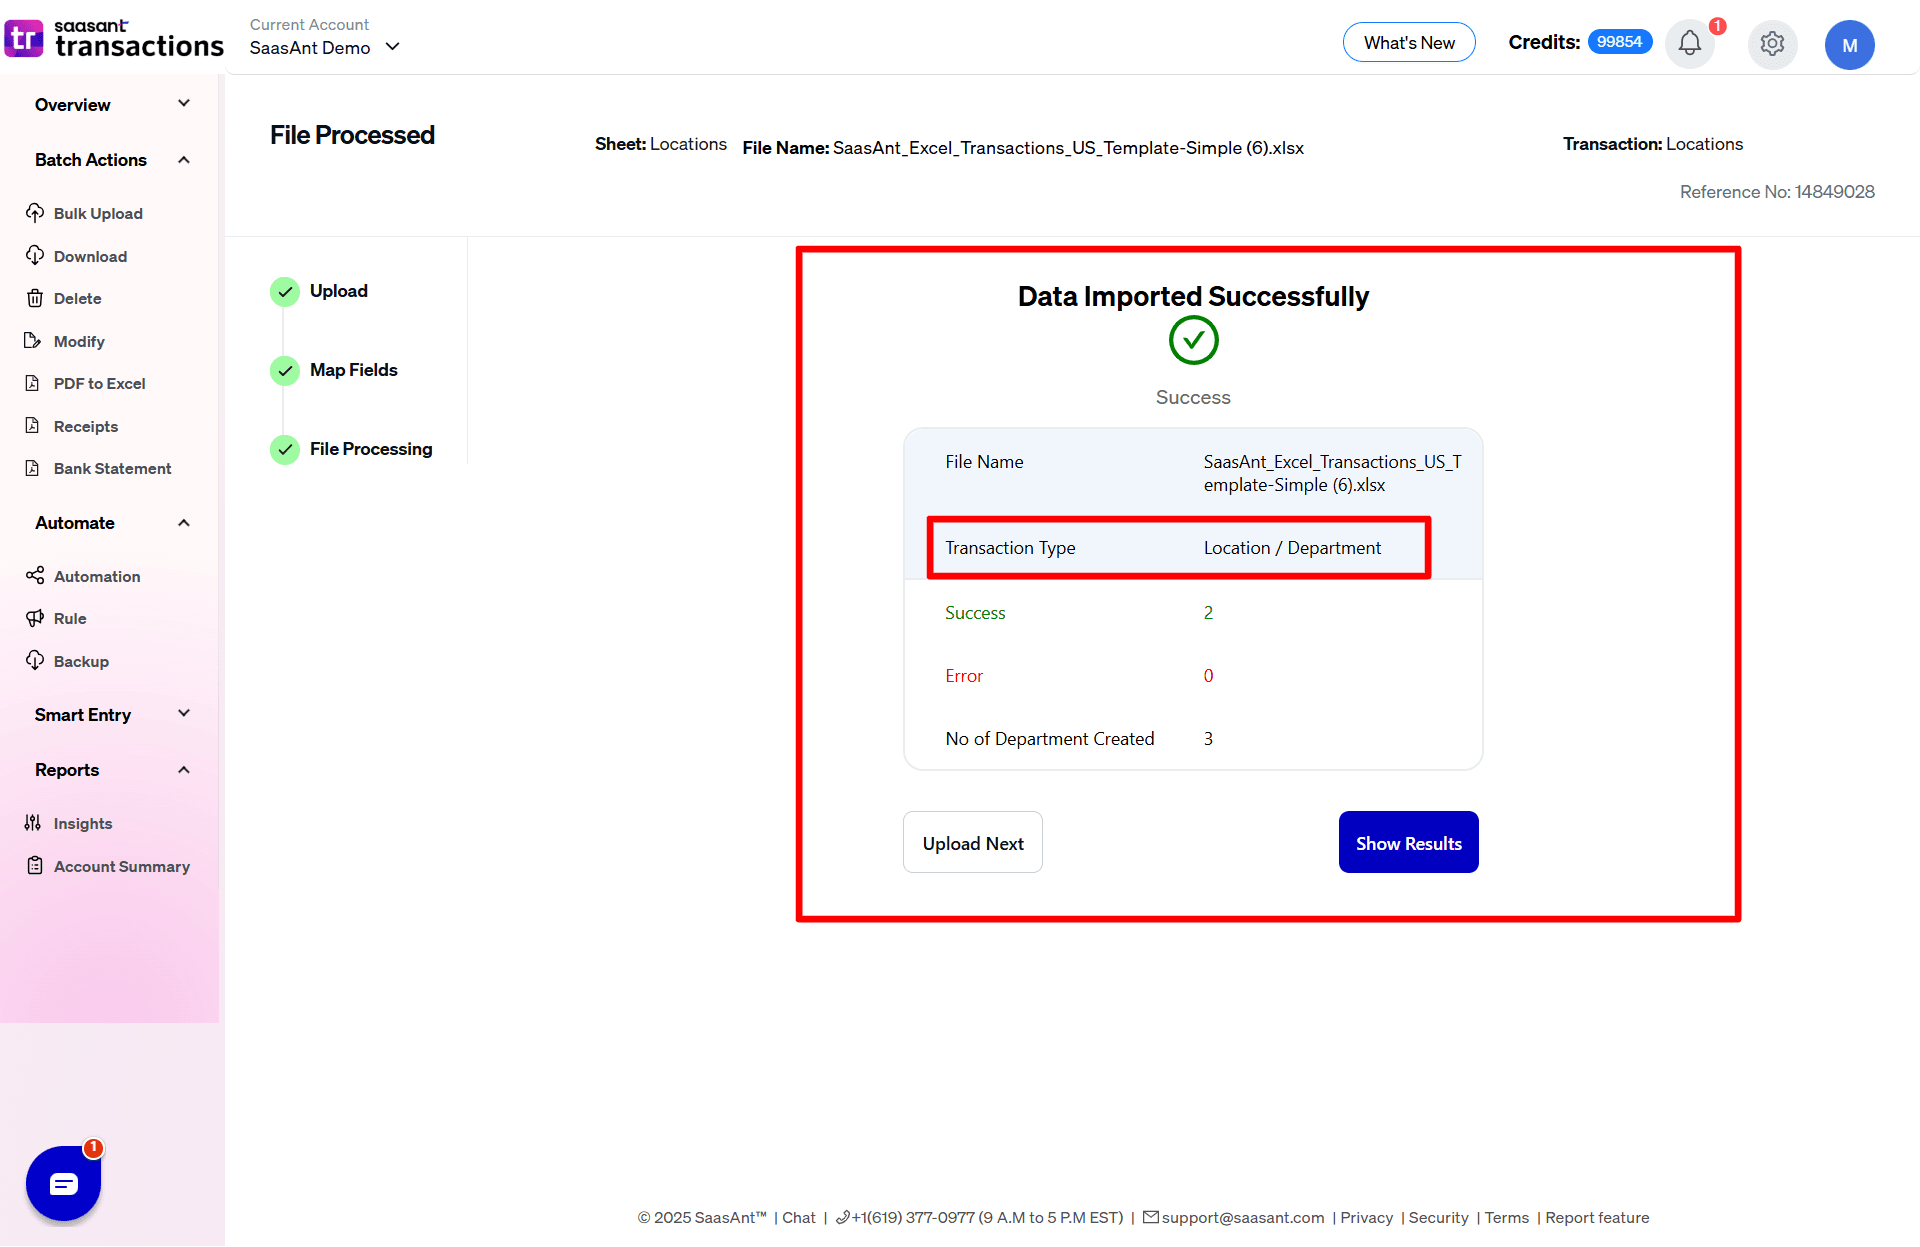
9) The data was imported successfully into QuickBooks.
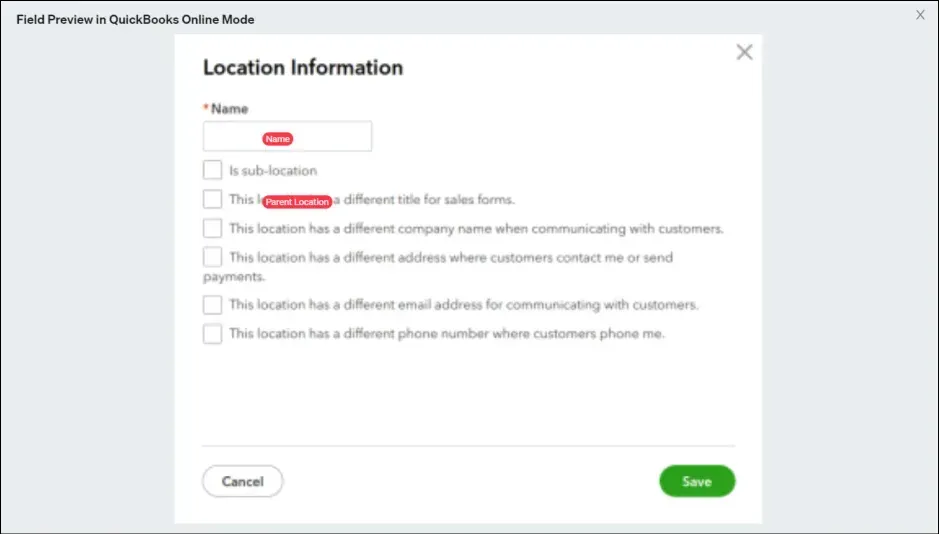
Let’s have a look at the SaasAnt Transactions Online Fields.
SaasAnt Transactions (Online) Fields
Field Name | Format | Description |
|---|---|---|
Name | Characters | Name of the Location. |
Parent Location | Characters | Name of the Parent Location. |
FAQ's
Most of us would have some questions while moving data to your QuickBooks Online. Some of them for your reference below:
Will your application support Multi-Line Transactions?
Yes. It will. More Info...
I made some mistakes in the mapping. Your application imported wrongly. So my QuickBooks file got corrupted. Is there any way to undo or revert?
Sometimes it happens due to the wrong mapping. It is possible to delete the entire transactions which went wrong. Our DELETE feature is the rescue. More Info...
I want to get an email for each upload. Is it possible?
Yes. It is. You need to enable a couple of settings while importing. More Info...
Does your app support taxes?
Yes. It does.
My file has some specific date format. I don't want to change the file. Will your product support all date formats?
Yes. You can select the specific date format as per your requirement. More Info...
Do you have any sample templates?
Yes. We do have. Sample template for Imports.
What file types does SaasAnt Transactions Online support for QuickBooks Online imports?
For almost all entities in QuickBooks Online, SaasAnt Transactions Online supports XLS, XLSX, XLSM, CSV, TXT, Google Sheets, and IIF. Additionally, PDF, PNG, and JPEG are supported only for Receipts, Invoices, Bank Statements, Checks, and Expenses.
How do I report the issues if I stuck?
Feel free to drop an email to support@saasant.com